15 Brilliant Small Bathroom DIY Ideas for Stunning Makeovers
- Bathroom Design
 Ben
Ben- 0
- 31 minutes read
You know that feeling when you walk into your tiny bathroom and think, “How the heck am I supposed to fit my life in here?” Yeah, me too. My first apartment bathroom was so small, I could literally touch both walls while sitting on the toilet. Not exactly the spa retreat I’d dreamed about!
But here’s the thing – small bathrooms don’t have to suck. After years of wrestling with cramped spaces and testing every Pinterest hack known to humanity, I’ve discovered some seriously game-changing DIY projects that actually work. And the best part? You don’t need a contractor’s license or a trust fund to pull these off.
So grab your drill (or borrow your neighbor’s), and let’s transform that shoebox bathroom into something you’ll actually want to show off. Trust me, if I can do these projects without flooding my apartment, you definitely can too.
Floating Shelves Storage Hack

Remember when everyone said floating shelves were just for Instagram? Well, they were wrong. These bad boys are absolute lifesavers in small bathrooms. I installed three above my toilet last year, and suddenly I had room for all those random bottles I’d been hoarding under the sink.
Here’s what makes floating shelves so genius: they use vertical space that’s literally just sitting there doing nothing. You know that awkward wall space above your toilet? Or that weird corner by the mirror? Perfect shelf territory. I picked up some basic wood planks from Home Depot, stained them to match my vanity, and boom – instant storage that looks like I actually planned it.
The trick is placement. Mount them at different heights to create visual interest and maximize storage. My bottom shelf holds everyday items (within arm’s reach), the middle one gets decorative baskets with backup supplies, and the top shelf? That’s where I hide the ugly stuff in pretty containers. Nobody needs to see my bulk-buy toilet paper collection, right?
Quick Installation Tips:
- Use a stud finder (seriously, don’t skip this)
- Level everything twice before drilling
- Weight-test with books before loading up with products
- Consider corner shelves for awkward spaces
Peel-and-Stick Tile Makeover
Okay, can we talk about how peel-and-stick tiles are basically magic? I was skeptical at first – I mean, stickers for your wall? But after transforming my rental bathroom’s tragic beige tiles into a subway tile dream, I’m officially converted.
The beauty of these tiles is that they’re completely renter-friendly. No grout, no mess, no angry landlord. Just clean your existing tiles really well (and I mean REALLY well), plan your pattern, and start sticking. It took me about four hours to do my entire shower surround, including a coffee break and several “measure twice, stick once” moments.
Pro tip: Start from the center and work outward. I learned this the hard way when my first attempt left me with wonky edges that haunted me every morning. Also, invest in a good cutting tool – kitchen scissors won’t cut it (pun intended). The foam-backed versions are way easier to work with than the thin vinyl ones, FYI.
Over-the-Toilet Organizer DIY
That space over your toilet is prime real estate, and if you’re not using it, you’re basically throwing away square footage. I built my own organizer using a ladder-style shelf system, and it changed everything. No more toiletries scattered across every surface!
You can go two routes here: buy a pre-made unit or build your own. I went DIY because I wanted something that fit my exact space. Using some basic lumber and pipe fittings (industrial chic, anyone?), I created a three-tier system that holds towels, extra TP, and even some cute plants. Total cost? About $40.
The key is making sure it’s sturdy enough to hold weight but not so bulky that you bang your head every time you stand up. Been there, done that, have the bruise to prove it. Measure your toilet tank clearance before you build anything – trust me on this one.
What to Store Up There:
- Rolled towels (they look fancy and save space)
- Decorative baskets with toiletries
- Extra toilet paper in a stylish holder
- Small plants that like humidity
- Backup supplies in matching containers
Also Read: 15 Chic Small Green Bathroom Ideas for a Calm Retreat
Compact Vanity Upgrade
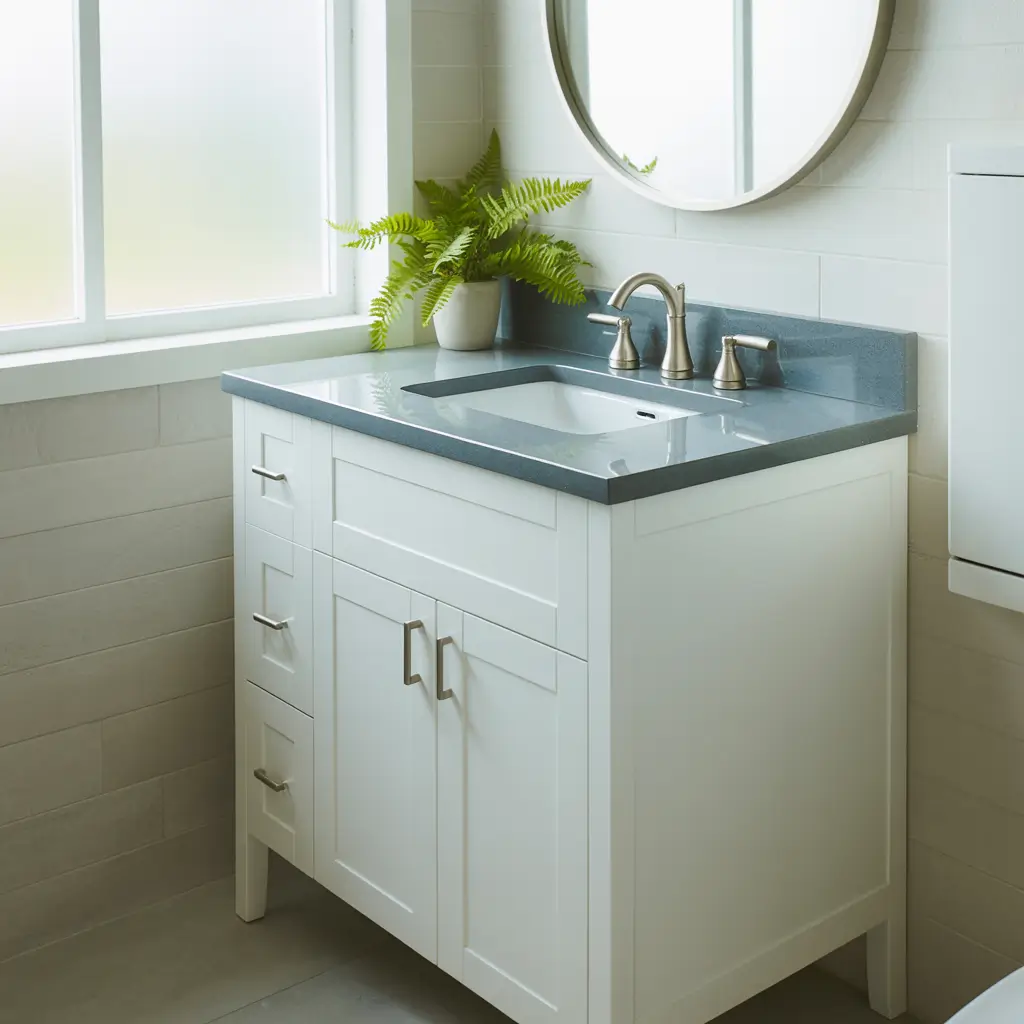
Ever look at your vanity and think it’s eating up half your bathroom? Same. But replacing it doesn’t mean you need to gut the whole room. A compact vanity upgrade can free up floor space while actually giving you better storage.
I swapped my old pedestal sink for a wall-mounted vanity with drawers, and suddenly I could see my bathroom floor again! The floating design makes the room feel bigger, and those drawers? They swallow up so much clutter it’s ridiculous. Plus, being able to clean under it without doing gymnastics is a game-changer.
If you’re not ready to replace the whole thing, try updating the hardware and adding organizer inserts to your existing drawers. Sometimes just switching to soft-close hinges makes your bathroom feel 10x fancier. And don’t forget about the inside of cabinet doors – adhesive organizers turn dead space into storage gold.
Mirror with Hidden Storage

This might be my favorite hack because it’s so sneaky. Nobody expects your mirror to be hiding their secrets! Medicine cabinet mirrors are making a comeback, and for good reason – they’re basically a storage unit disguised as decor.
I found a gorgeous recessed medicine cabinet on sale and installed it myself (okay, with some help from YouTube). Behind that mirror lives my entire morning routine, plus medications, first aid supplies, and that expensive face cream I don’t want guests using. The best part? My counter stays completely clear.
Can’t install a recessed cabinet? No problem. Shadow box mirrors mount on the wall and still give you hidden storage. I’ve even seen people DIY these using picture frames and small cabinets. Just make sure your mirror is secured properly – nobody wants seven years of bad luck because they cheaped out on wall anchors.
Creative Wall-Mounted Hooks
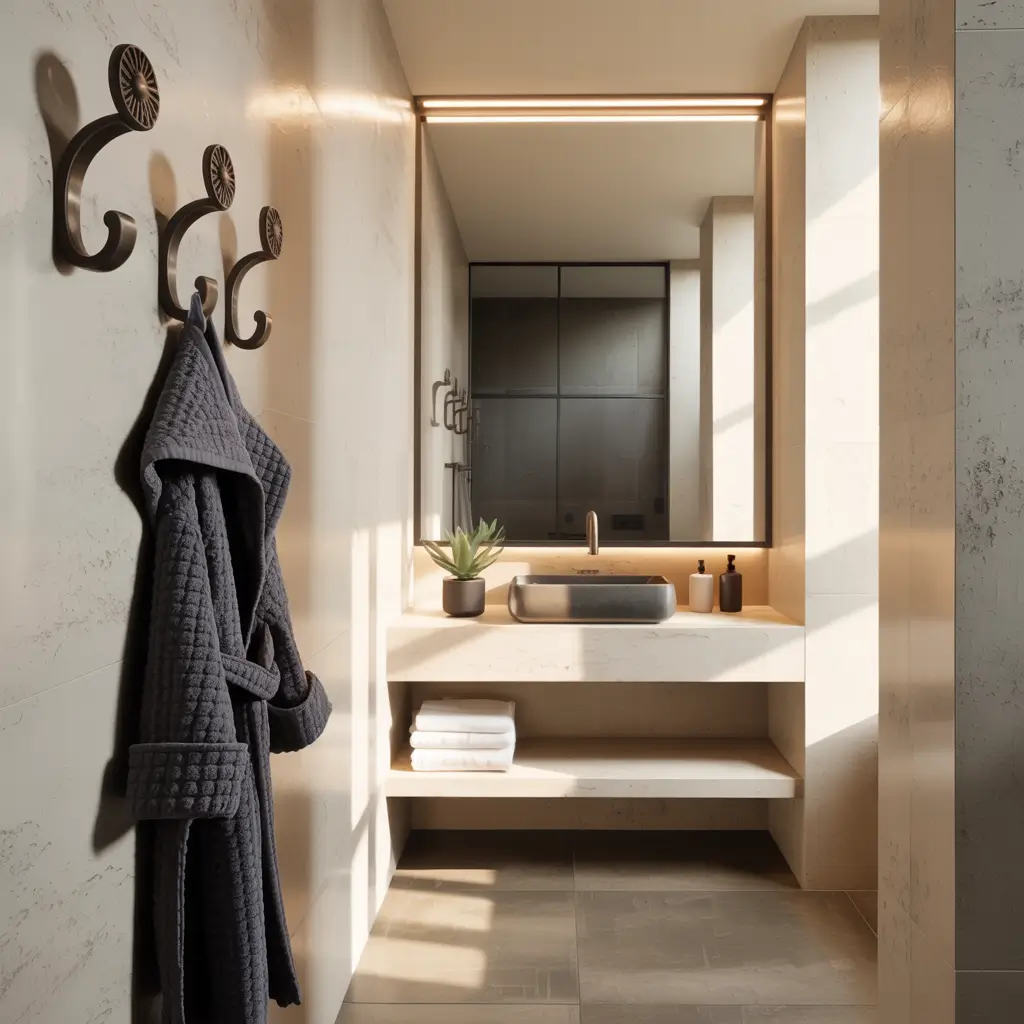
Hooks might seem basic, but hear me out – the right hooks in the right places can eliminate 90% of your bathroom chaos. I’m talking about Command hooks inside cabinets, decorative hooks for robes, tiny hooks for loofahs in the shower… hooks everywhere!
My game-changer was installing a row of vintage brass hooks I found at a flea market. They hold towels, robes, and even my hair dryer (in a cute canvas bag). The trick is mixing functional with decorative. Those plain plastic hooks from the dollar store? Hide them inside cabinets. The pretty ones? Show them off!
Ever thought about using unusual items as hooks? I’ve seen people use vintage door knobs, bent spoons (seriously!), and even small branches for a rustic vibe. Get creative with placement too – the back of the door, sides of cabinets, even the ceiling for hanging plants.
Unexpected Hook Locations:
- Inside shower for squeegees and brushes
- Under sink for hair tools
- Behind door for multiple towels
- Side of vanity for hand towels
- Inside medicine cabinet for small items
Also Read: 15 Chic Small Bathroom Sink Ideas for Compact Homes
DIY Shower Caddy Solutions
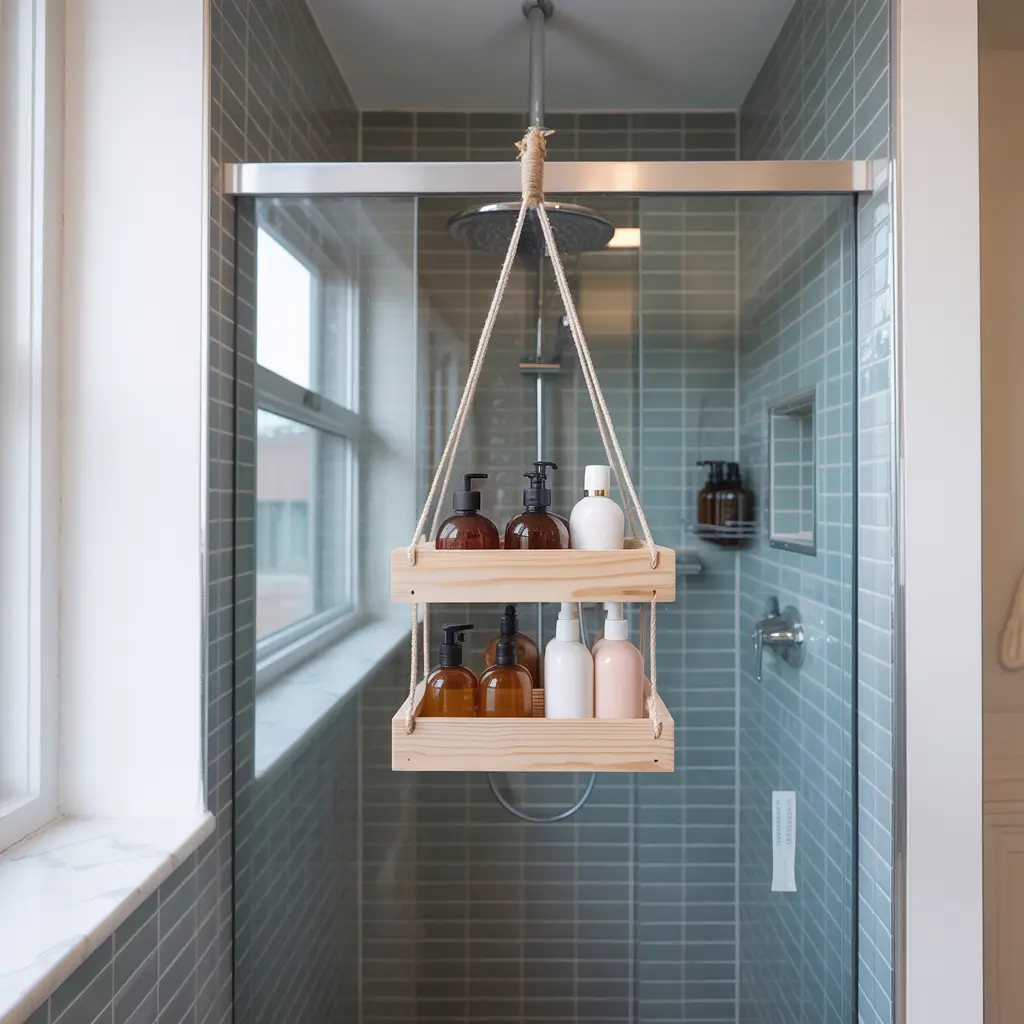
Store-bought shower caddies are fine, but they never fit quite right, do they? Either they’re too small, too flimsy, or they rust after three months. Building your own means getting exactly what you need where you need it.
I created a corner shelf system using tension rods and wire baskets. Sounds janky? It’s actually brilliant. The tension rods adjust to any shower width, and the baskets hang at whatever height works for you. Plus, everything drains properly so you don’t get that gross soap scum buildup.
Another option that blew my mind: magnetic caddies. If your shower walls are metal (test with a magnet first), you can use magnetic containers and move them around as needed. I have magnetic cups holding razors and small magnetic shelves for soap. It’s like having customizable storage that changes with your needs.
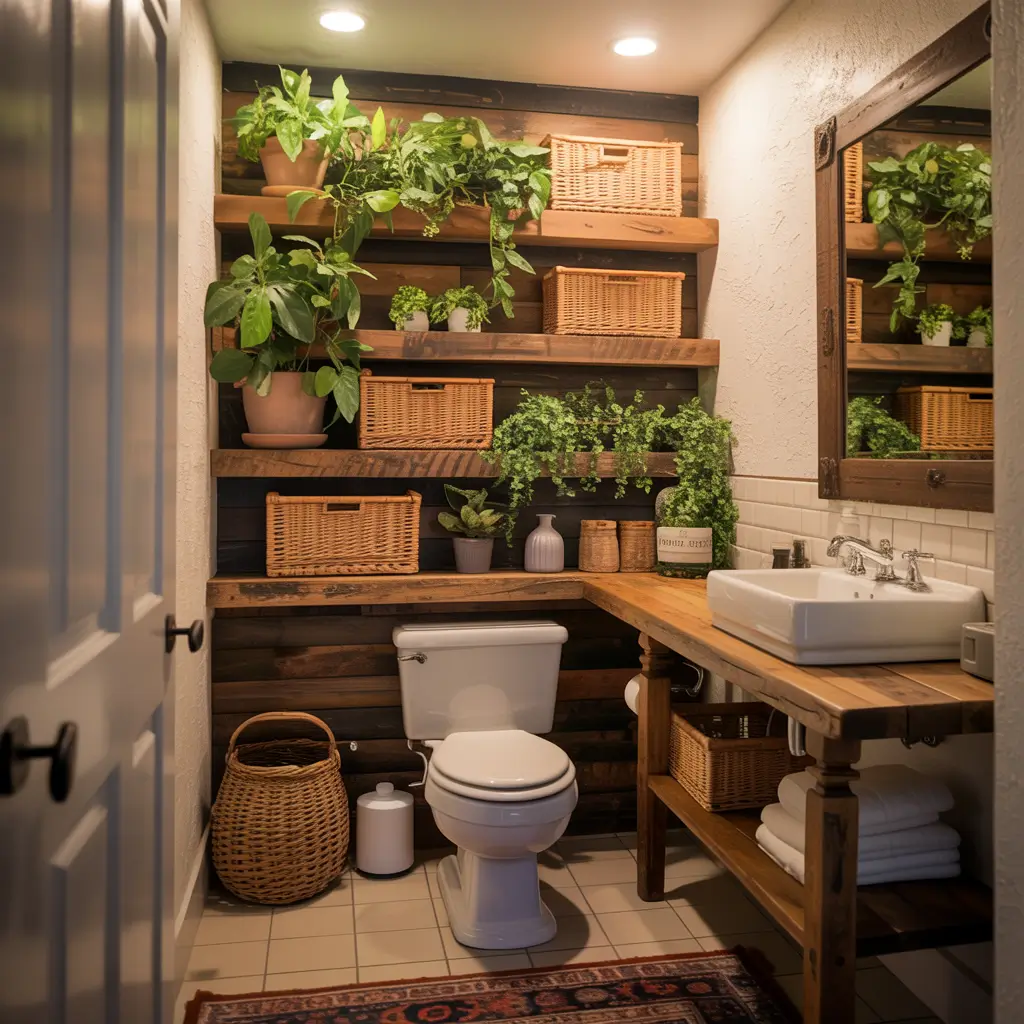
Bathroom Plant Corner Makeover
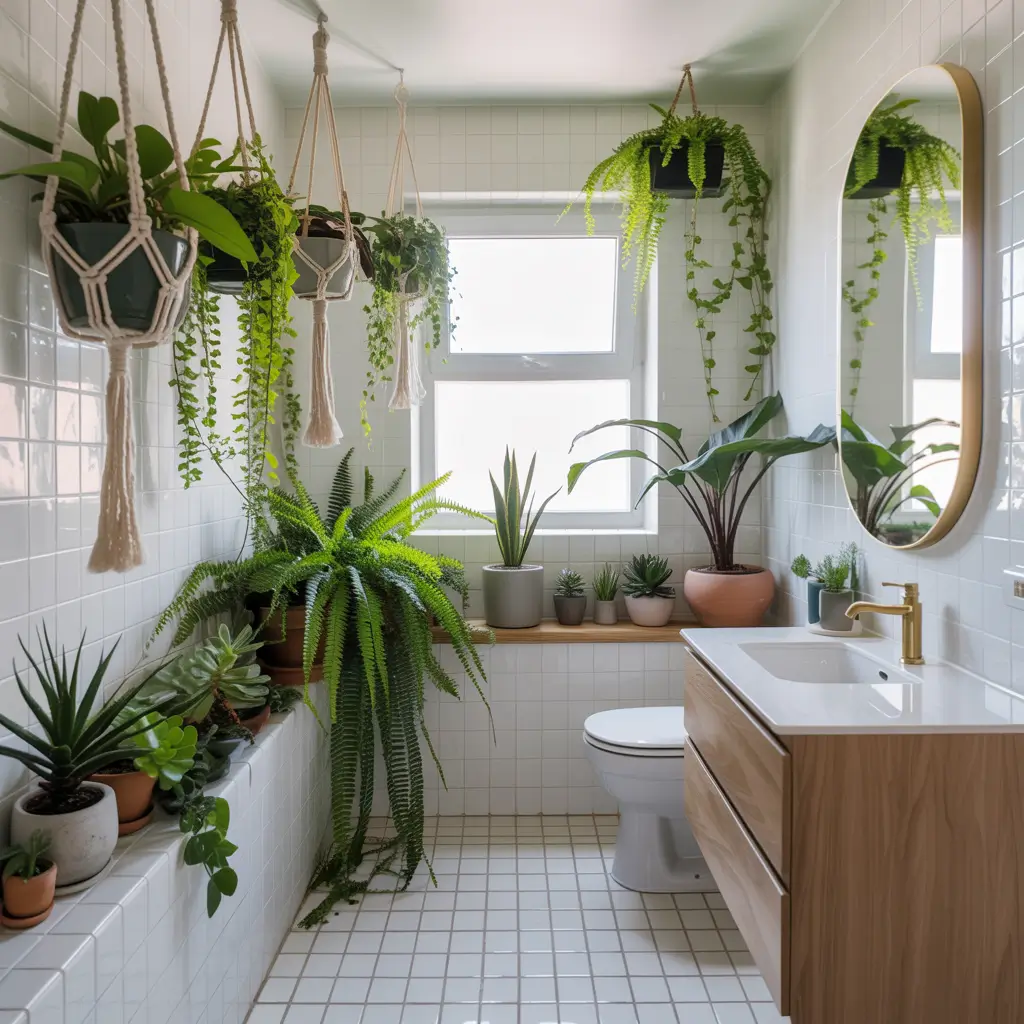
Plants in the bathroom aren’t just trendy – they actually thrive in the humidity and can make your tiny space feel like a mini spa. The trick is choosing the right plants and displaying them creatively when floor space is non-existent.
I turned my dead corner into a plant paradise using a tension rod shower caddy (repurposed!) and some macrame hangers. Pothos, spider plants, and air plants love bathroom humidity and don’t need tons of light. My Boston fern literally doubled in size after I moved it from my bedroom to the bathroom.
Vertical gardens are where it’s at for small spaces. I mounted a small trellis on the wall and hung little pots from it. You can also use suction cup planters on windows or mirrors – just make sure they’re secure. Nothing ruins a relaxing shower like a succulent falling on your head 🙂
Best Bathroom Plants for Small Spaces:
- Pothos (impossible to kill)
- Air plants (no soil needed!)
- Spider plants (they love humidity)
- Lucky bamboo (grows in just water)
- Small ferns (humidity lovers)
Colorful Accent Wall Painting
Who says small bathrooms have to be boring white boxes? A bold accent wall can actually make your space feel bigger if you do it right. I painted one wall navy blue, and suddenly my bathroom looked intentional instead of just small.
The key is choosing the right wall. Usually, it’s the wall behind the vanity or toilet – somewhere that naturally draws the eye. Dark colors can add depth, while bright colors energize the space. I went with a semi-gloss finish because it’s moisture-resistant and reflects light, making the room feel larger.
Don’t want to commit to a whole wall? Try painting just the upper half and adding molding for a faux wainscoting effect. Or get really creative with geometric patterns using painter’s tape. My friend did triangles in three shades of green, and it looks like expensive wallpaper.
Also Read: 15 Inspiring Small Attic Bathroom Ideas for Tiny Homes
Repurposed Furniture Vanity
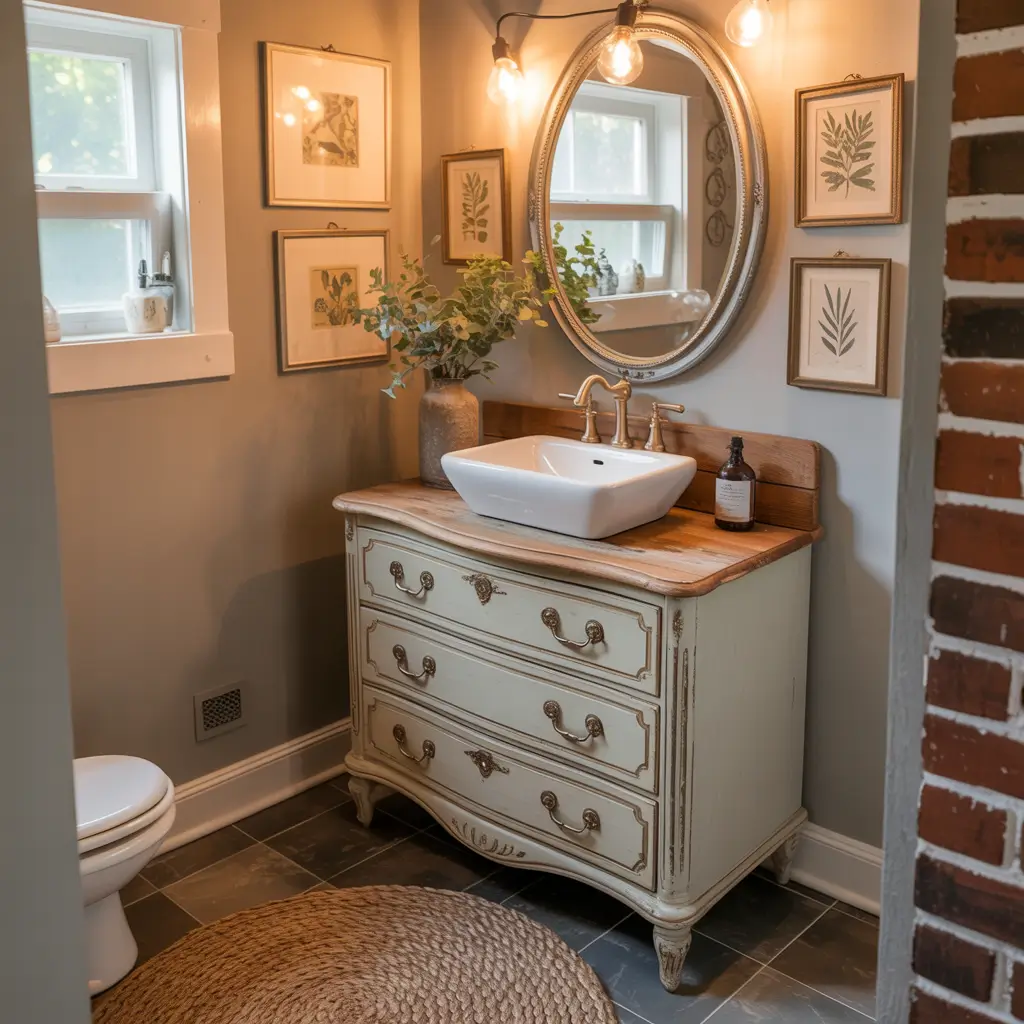
This is where you can really let your personality shine. Turning vintage furniture into a vanity gives you unique storage and serious style points. I converted an old dresser into a vanity, and everyone who sees it asks where I bought it.
The process is easier than you’d think. Find a piece that fits your space (thrift stores and Facebook Marketplace are goldmines), cut holes for plumbing, add a vessel sink on top, and seal everything with waterproof finish. The drawers give you way more storage than traditional vanities, and you get bragging rights for being eco-friendly.
Pro tip: Look for pieces with interesting details like carved legs or unique hardware. These become focal points that distract from the small space. Just make sure to properly seal the wood – bathroom humidity is no joke, and you don’t want your beautiful vanity warping after six months.
Hanging Baskets for Towels

Wall-mounted baskets are having a moment, and honestly, they deserve it. These versatile storage solutions look way better than traditional towel bars and hold more stuff too.
I installed three wire baskets on my wall in a vertical line. The top one holds fresh towels, middle gets washcloths and hand towels, bottom catches dirty towels heading to the laundry. It’s functional art, basically. Plus, rolled towels in baskets look like you hired a professional organizer.
You can find baskets in every style imaginable – industrial wire, woven rattan, colorful plastic. Mix and match sizes for visual interest, or keep them uniform for a cleaner look. Mount them at different heights to create a gallery wall effect that happens to be insanely practical.
Basket Storage Ideas:
- Rolled towels (looks spa-like)
- Toilet paper storage (no more tower on the tank)
- Bath toys for kids
- Extra toiletries
- Hair tools and accessories
Minimalist Floating Sink Idea
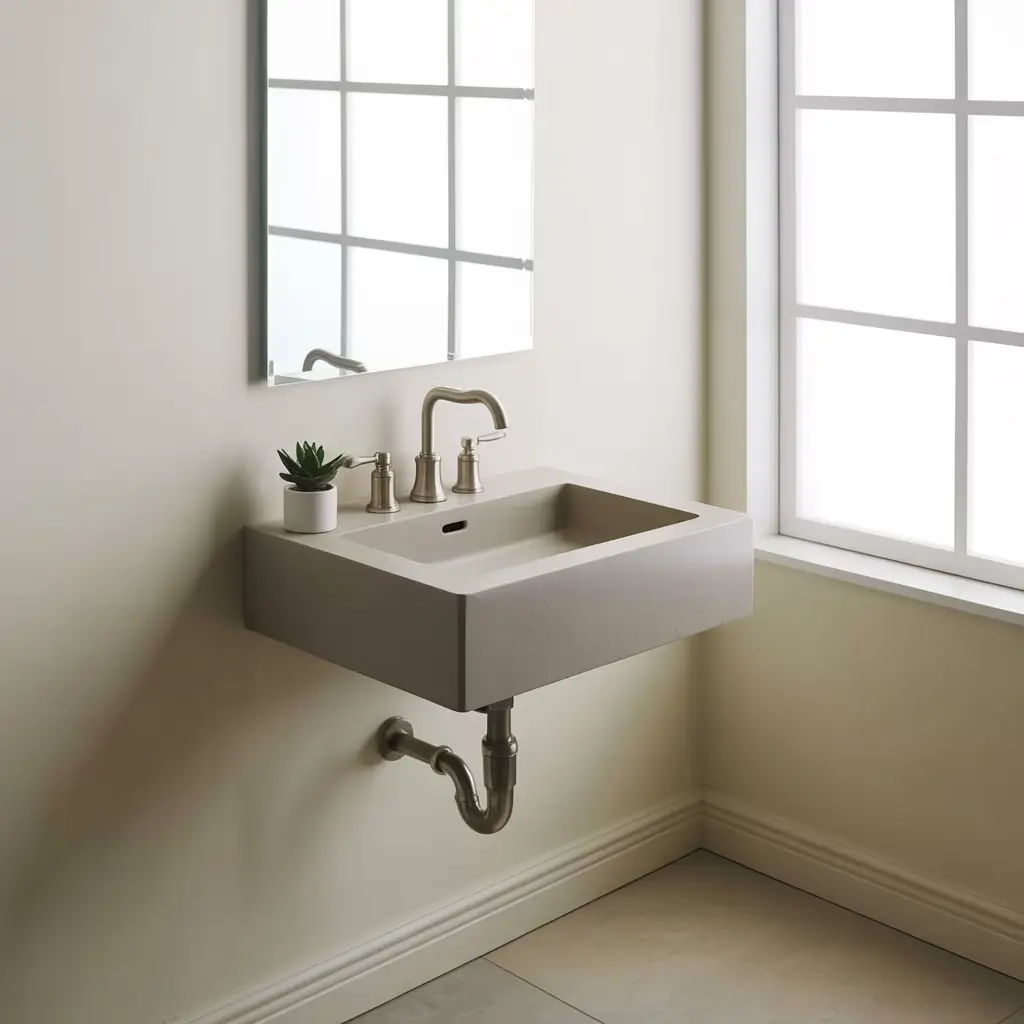
If you really want to maximize floor space, a wall-mounted sink is your best friend. I installed one in my powder room, and the difference is shocking. Suddenly the room feels twice as big because you can see all the floor.
The installation is trickier than a regular vanity (you need solid wall mounting), but the payoff is worth it. Pair it with a wall-mounted faucet for an ultra-clean look. Just remember – you’re sacrificing under-sink storage, so plan accordingly.
Combat the storage loss with a small floating shelf underneath or a narrow rolling cart that tucks beside the toilet. Some people install a narrow ledge behind the sink for essentials. IMO, the visual space you gain makes up for the storage trade-off.
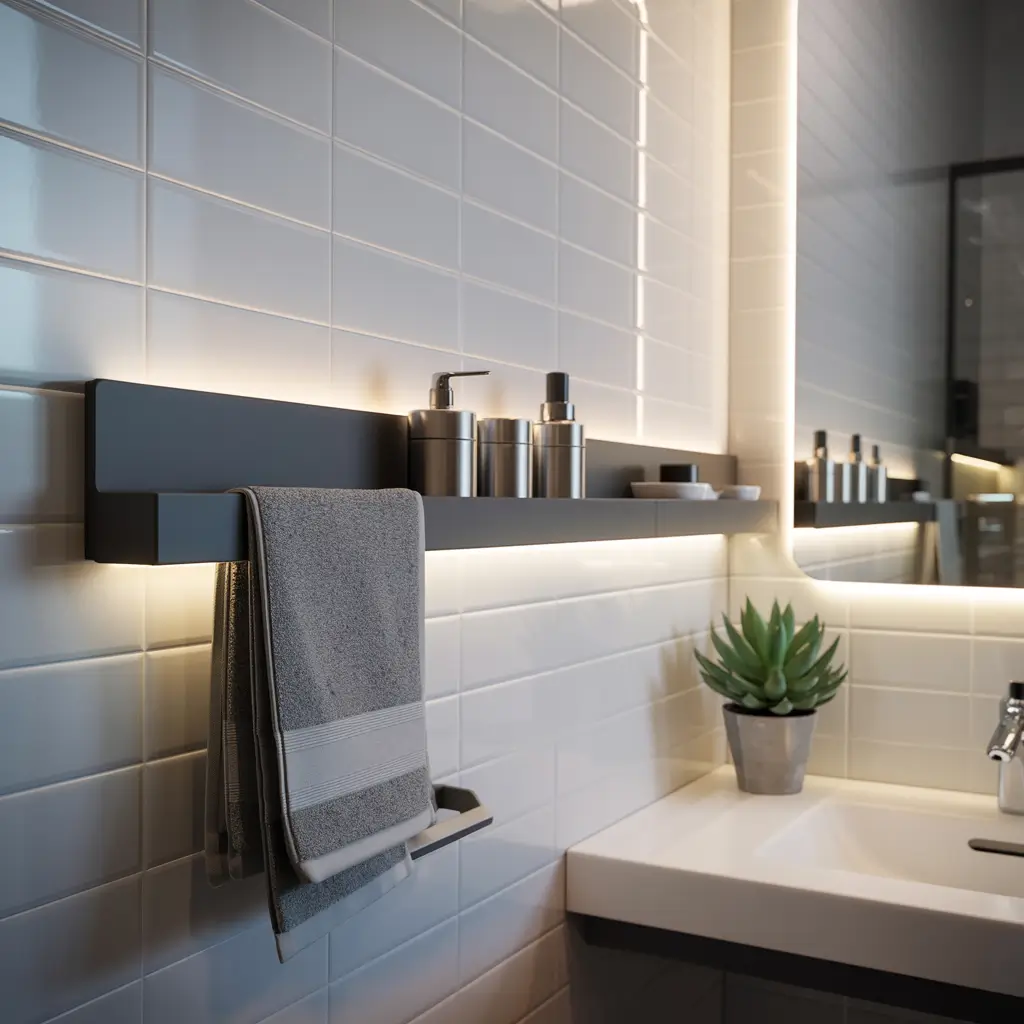
LED Strip Lighting Installation

Good lighting can make or break a small bathroom. LED strips are an affordable way to add ambiance and make your space feel larger. I installed them under my floating vanity and behind my mirror, and now my bathroom looks like a boutique hotel.
The installation is stupidly easy – most strips are adhesive-backed and plug into regular outlets. You can even get battery-powered ones if electrical access is tricky. The key is placement: under cabinets for task lighting, behind mirrors for ambiance, or along the ceiling for an infinity effect.
Don’t go overboard with color-changing strips unless you want your bathroom to look like a nightclub. Warm white or daylight LEDs are your best bet for everyday use. Save the party colors for when you want a relaxing bath vibe.
Magnetic Strip for Small Accessories
This hack literally changed my morning routine. A magnetic strip on the wall holds all those tiny metal things that usually clutter your counter – tweezers, nail clippers, bobby pins, scissors.
I mounted a knife magnet strip (yes, from the kitchen section) inside my medicine cabinet door. Everything stays organized and easy to grab. No more digging through drawers looking for that one bobby pin that actually works. You can also use magnetic strips on the wall as a modern, minimalist storage solution.
The trick is getting strong magnets – those weak ones won’t hold anything heavier than a bobby pin. Also, place them strategically where you actually use the items. Mine’s right at eye level beside my mirror because that’s where I need tweezers most.
DIY Bathroom Art Display
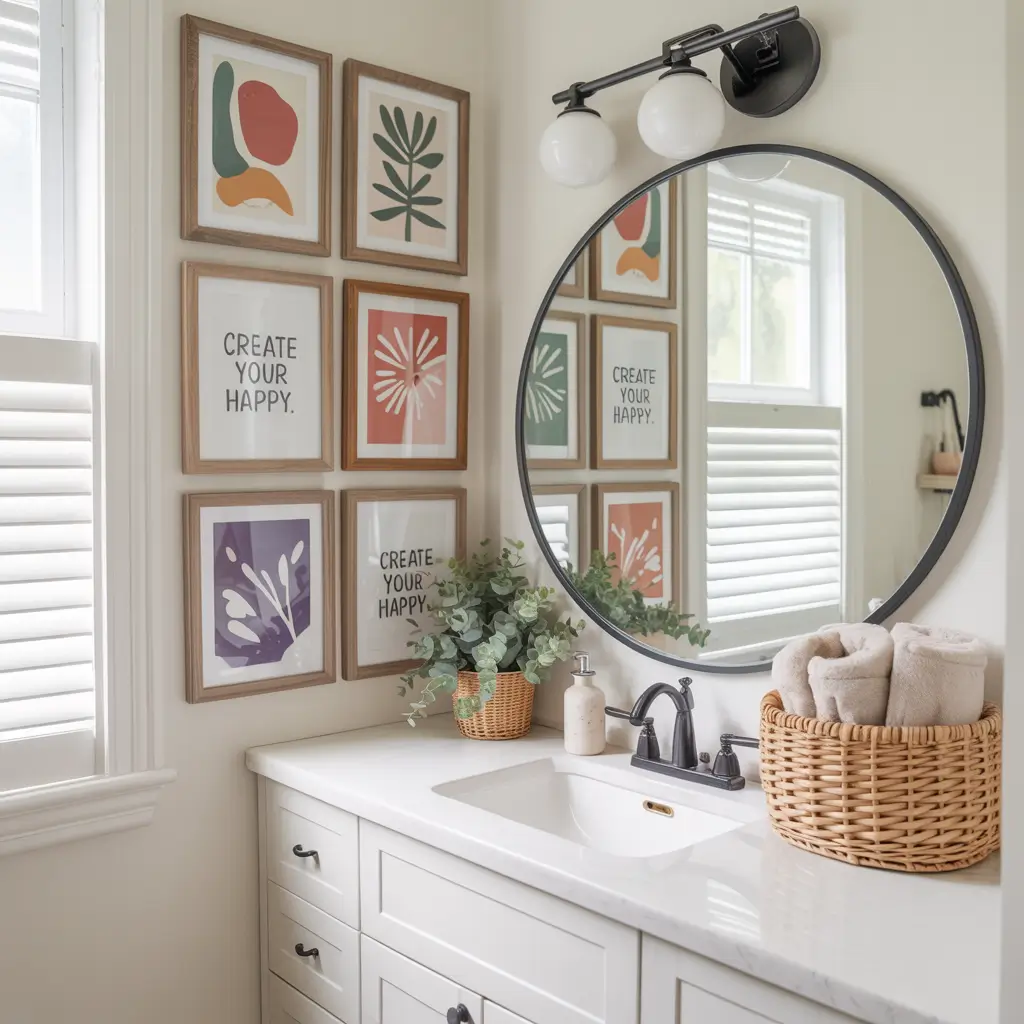
Art in the bathroom? Absolutely! The right artwork can distract from the size and add personality to an otherwise utilitarian space. But we’re not talking about expensive pieces here – this is DIY territory.
I created a gallery wall using printables I found online, thrifted frames, and some of my own photos printed on waterproof paper. The key is using moisture-resistant materials or sealing everything properly. Nobody wants warped art after a few steamy showers.
Float shelves make great display ledges where you can rotate art without committing to nail holes. I change mine seasonally – beach prints in summer, cozy botanicals in winter. You can even frame pretty wallpaper samples or fabric scraps for texture.
Bathroom Art Ideas:
- Framed wallpaper or fabric samples
- Watercolor prints (sealed properly)
- Vintage botanical illustrations
- Typography quotes
- Small mirrors as art pieces
- DIY canvas paintings
Wrapping It Up
Look, transforming a small bathroom doesn’t require a massive renovation or a second mortgage. These DIY projects prove that creativity beats cash every time. Start with one or two projects that address your biggest pain points, then build from there.
My bathroom went from cramped disaster to organized oasis over the course of a year, one project at a time. Some worked perfectly (hello, floating shelves!), others needed tweaking (RIP, first attempt at peel-and-stick tiles), but each one taught me something about making small spaces work harder.
The real secret? Stop fighting your small bathroom and start working with it. Embrace the cozy vibe, maximize every inch, and remember – at least you don’t have to clean a massive space! Now grab that drill and show that tiny bathroom who’s boss. You’ve got this!