15 Easy DIY Outdoor Christmas Decorations Ideas for Beautiful Homes
- Christmas Ideas
 Ben
Ben- 0
- 40 minutes read

Remember that moment when you see your neighbor’s professional Christmas display and your bank account starts crying? Yeah, me too.
Three years ago, I got a quote for outdoor Christmas decorations that cost more than my mortgage payment. That’s when I decided to channel my inner craft warrior and create my own outdoor wonderland for a fraction of the price.
Turns out, making your own outdoor Christmas decorations isn’t just cheaper – it’s actually way more fun and personal.
My DIY candy canes survived a windstorm that knocked over my neighbor’s store-bought ones, and I still get asked every year where I “bought” my wooden pallet tree.
The answer always makes people’s jaws drop when they realize I made it for under $20.
Here are 15 DIY outdoor Christmas decoration ideas that’ll transform your yard from bland to grand.
These projects range from super simple to slightly ambitious, but every single one costs less than buying the equivalent decoration, and most use materials you probably already have lying around.
Wooden Pallet Christmas Tree
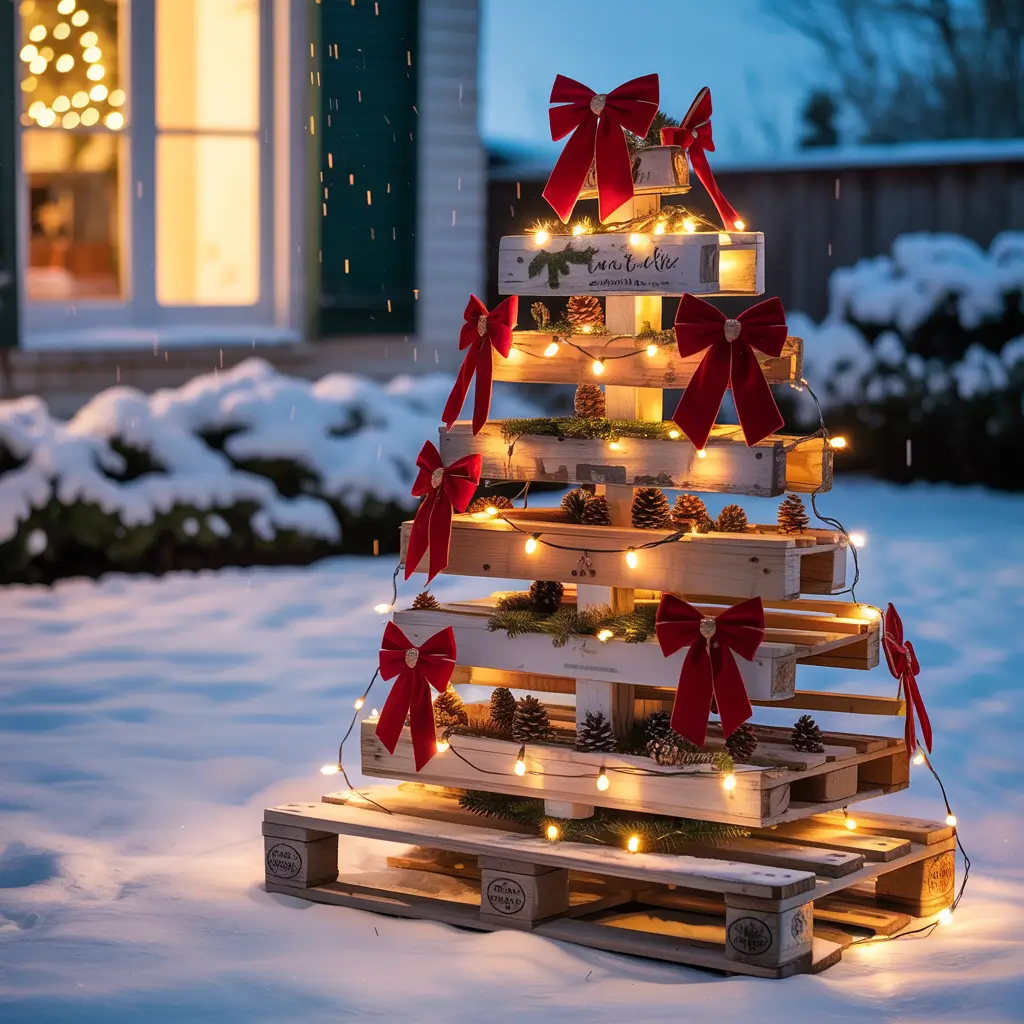
This project single-handedly changed my DIY game. A discarded wooden pallet becomes a rustic Christmas tree that looks like you paid hundreds at a boutique shop.
I found my pallet behind a grocery store (asked first, of course), spent an afternoon cutting it into graduated lengths, and nailed them to a center post. The whole thing took maybe three hours, including the time I spent arguing with my saw about who was boss. String some lights through it, maybe add a star on top, and suddenly you’ve got a showstopper.
Building Your Pallet Tree
Start by dismantling the pallet carefully – those nails are sneaky and love fingers. Cut your boards into decreasing lengths, starting with about 4 feet at the bottom and ending with 6 inches at top.
Materials and steps:
- Free or cheap pallet from local businesses
- Center support post (2×4 works great)
- Weather-resistant screws (not nails)
- Outdoor string lights weaving through gaps
- Star or topper for finishing touch
Mason Jar Snow Lanterns
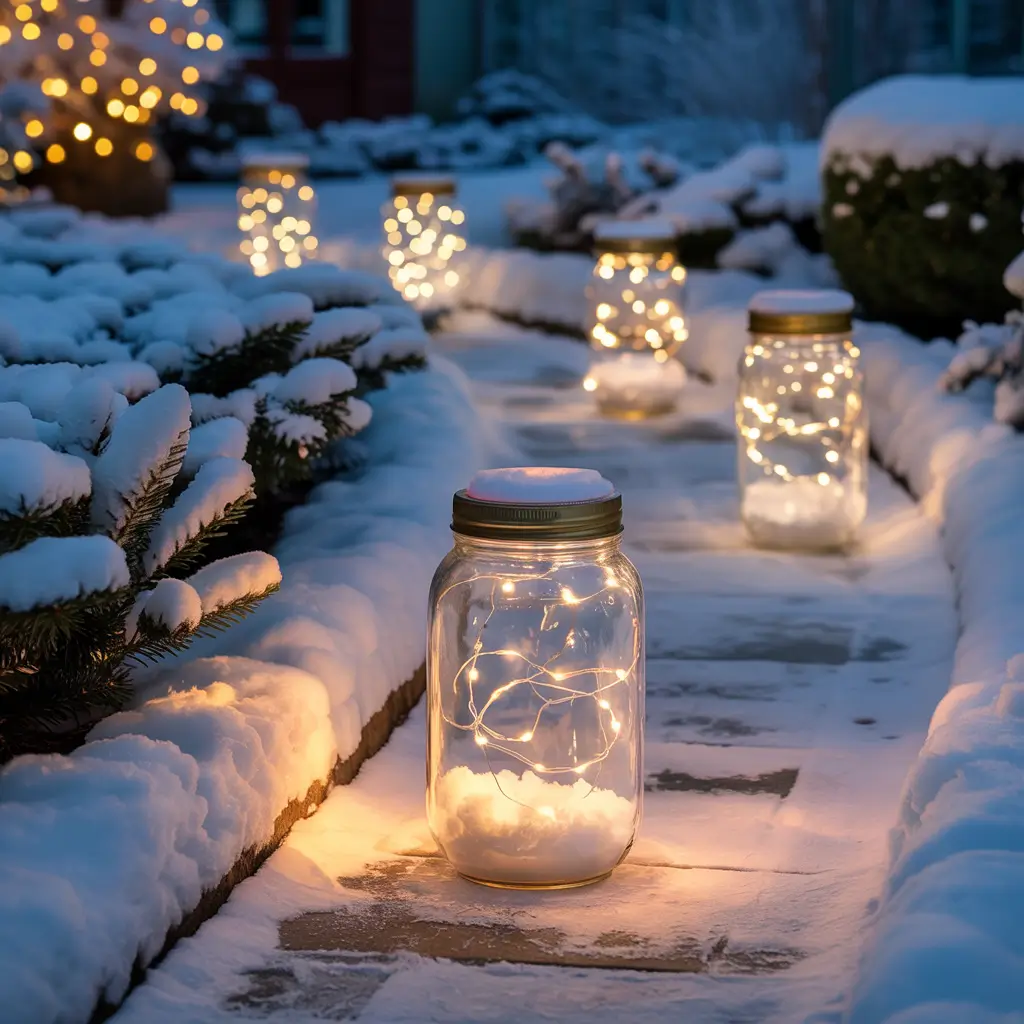
Mason jars multiply in everyone’s cabinets, right? Transform them into magical snow lanterns that look expensive but cost practically nothing.
Mix Epsom salt with white glue, coat the inside of jars, and watch them frost up like magic. Add battery-operated tea lights, and you’ve got lanterns that survive weather and look incredible lining walkways. I made 20 of these last year for less than what two store-bought lanterns would cost.
Creating the Perfect Frost Effect
The secret is the Epsom salt to glue ratio – too much salt and it flakes off, too little and it looks painted. I learned this after my first batch looked like jars with dandruff.
Lantern creation tips:
- 1 part white glue to 2 parts Epsom salt
- Roll jar to coat evenly while mixture is wet
- Let dry completely before adding lights
- Wire handles for hanging options
- Group in odd numbers for best visual impact
Reindeer Made from Twigs
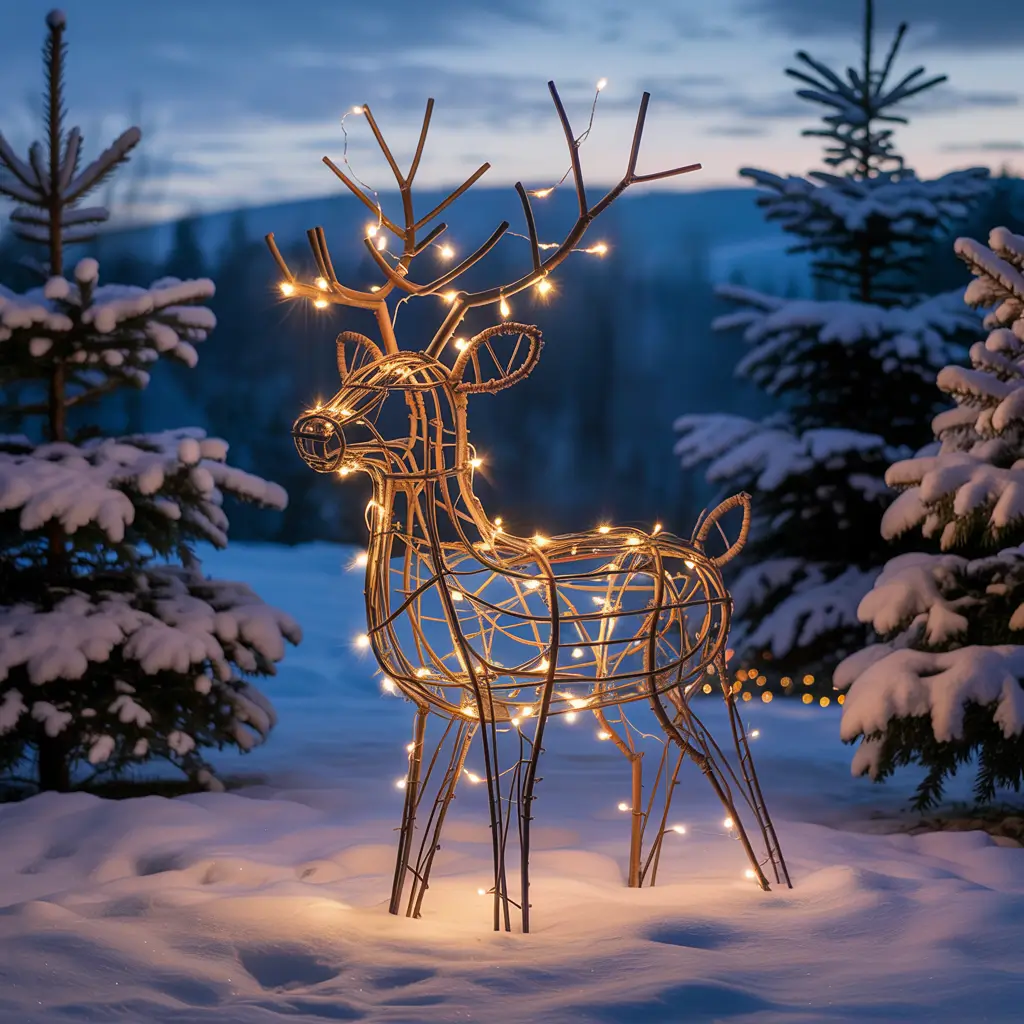
Who needs those wire-frame reindeer when you can create rustic versions from branches that actually look like they belong in nature?
After a windstorm, I gathered fallen branches and assembled them into reindeer shapes using hot glue and wire. Add a red pom-pom nose, and suddenly you’ve got Rudolph’s country cousin. My kids named all eight of them, and now it’s tradition to set up the “twig herd” every year.
Branch Selection and Assembly
Choose branches with natural Y-shapes for bodies – they provide built-in stability. Straight branches work for legs and necks.
Reindeer construction guide:
- Main body branch with natural fork
- Four similar legs for balance
- Smaller twigs for antlers
- Hot glue and wire for securing
- Red ornament or pom-pom for Rudolph
Also Read: 15 Magical Front Porch Christmas Decor Ideas for Holidays
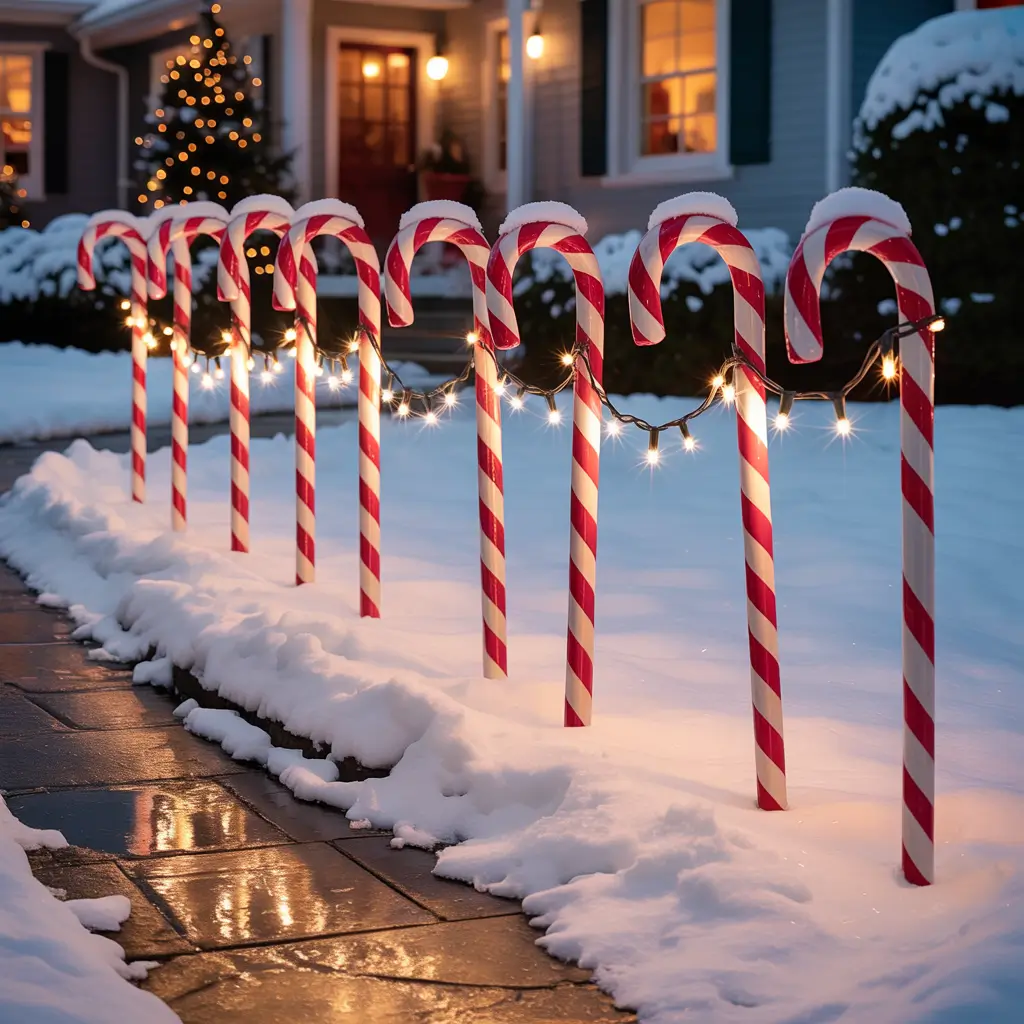
Outdoor Candy Cane Pathway
Store-bought pathway candy canes cost a fortune and break if you look at them wrong. DIY versions using PVC pipe cost pennies and last forever.
Cut PVC pipe into cane shapes, wrap with red duct tape in a spiral pattern, and boom – professional-looking candy canes. I made 24 of them for what two store-bought ones cost. Plus, they store flat and haven’t broken despite my dog’s best efforts.
Perfect Stripe Technique
Getting even stripes seems impossible until you learn the secret: mark your spacing first. Use a ruler and marker before you start taping.
Candy cane pathway steps:
- 1/2 inch PVC pipe bent with heat gun
- Red duct tape or electrical tape
- Clear sealant spray for weather protection
- Solar stake lights inserted in top
- Rebar or stakes for ground anchoring
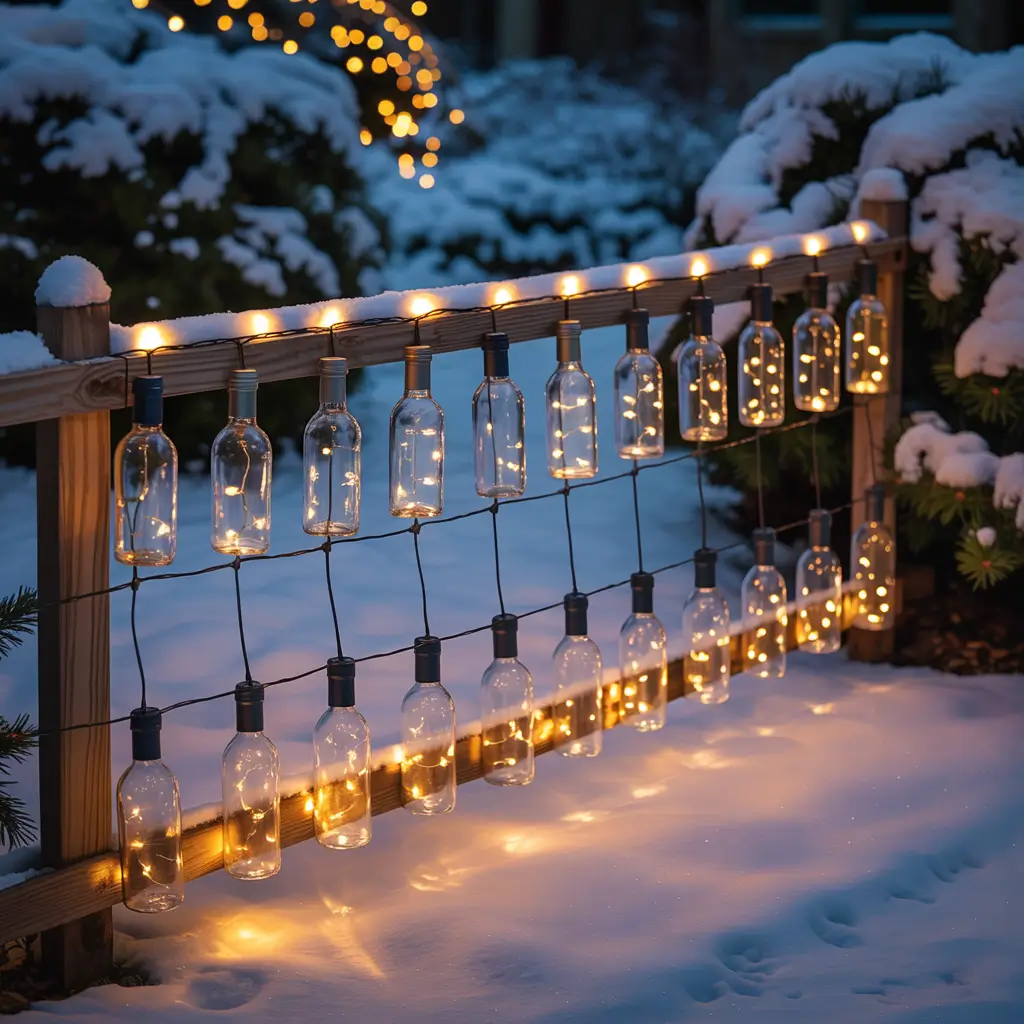
Upcycled Wine Bottle Lights
Finally, a use for all those wine bottles that isn’t just recycling! Create elegant outdoor lighting that looks professionally designed.
Drill a hole in the bottom (easier than it sounds with the right bit), thread outdoor lights through, and you’ve got gorgeous ambient lighting. I hung mine from shepherd’s hooks around the yard, and everyone thinks they’re expensive designer lights. FYI, different colored bottles create amazing effects 🙂
Bottle Drilling Without Drama
The key to drilling glass? Go slow and keep it wet. I learned this after cracking three bottles trying to rush. Now I can drill a bottle in under two minutes.
Wine bottle light essentials:
- Diamond drill bit (worth the investment)
- Running water while drilling
- LED string lights for safety
- Wire or rope for hanging
- Various bottle colors for interest
DIY Evergreen Wreath with Berries
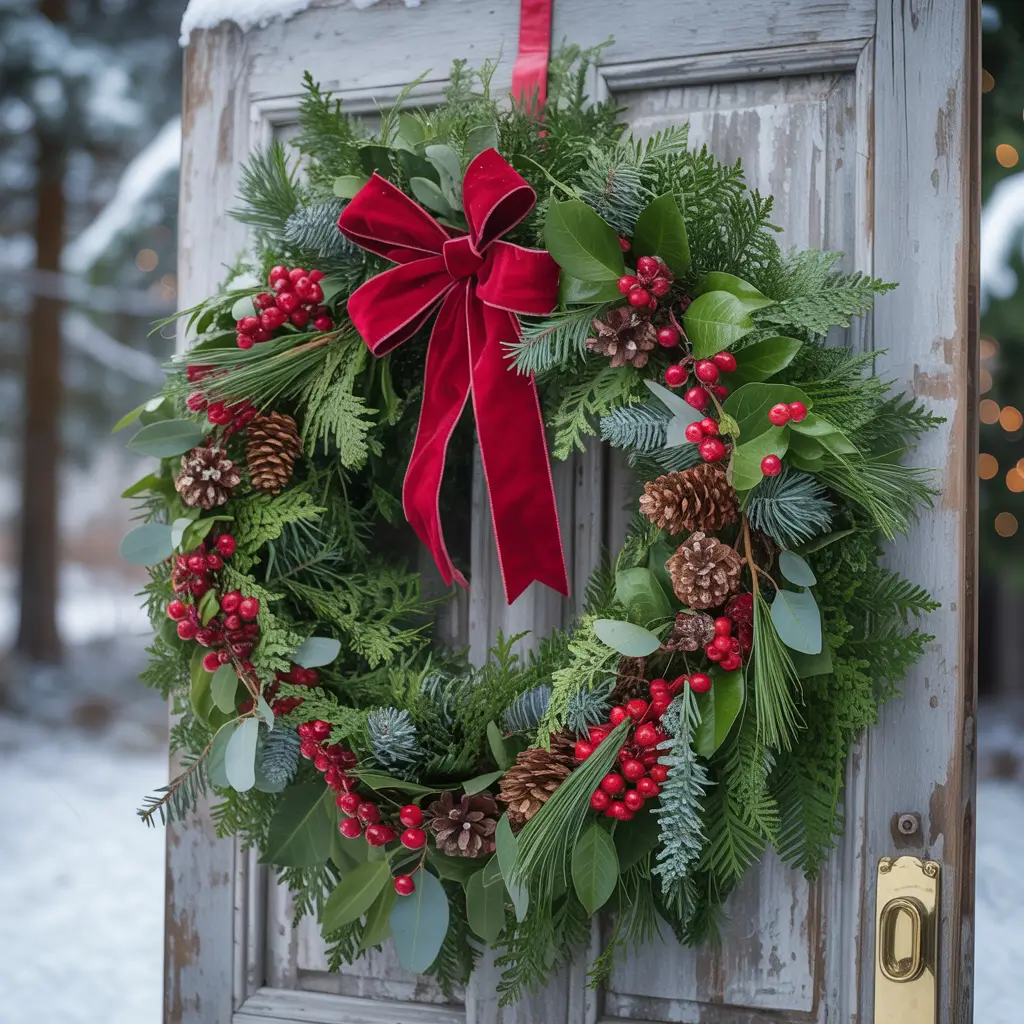
Store-bought wreaths are highway robbery. Making your own costs almost nothing if you have access to evergreens.
I trim branches from my backyard pine and cedar (they need pruning anyway), wire them to a coat hanger frame, and add holly berries from the neighbor’s bush. Takes an hour, costs zero dollars, smells amazing, and looks better than anything from a store.
Wreath Construction That Lasts
Layer your greenery in one direction for professional results. Random placement looks messy, not rustic.
Wreath-making process:
- Wire coat hanger bent into circle
- Fresh greenery cut in 6-inch pieces
- Floral wire for securing
- Natural berries or red ornaments
- Weather-resistant bow as focal point
Also Read: 15 Cozy Christmas Decor Ideas Bedroom Ideas for Your Space
Hanging Snowflake Lanterns
Transform dollar store paper lanterns into stunning snowflake lights that survive winter weather.
Spray white paper lanterns with adhesive, roll in glitter, add snowflake cutouts, and insert battery-operated lights. Hang them at varying heights from tree branches or porch ceilings. Mine survived a literal ice storm last year and still looked perfect.
Weatherproofing Paper Decorations
The secret is clear acrylic spray after decorating. Multiple thin coats beat one thick coat that drips and ruins everything.
Snowflake lantern supplies:
- White paper lanterns in various sizes
- Spray adhesive for glitter application
- Iridescent glitter for snow effect
- Clear sealant for weatherproofing
- Battery LED lights with timers
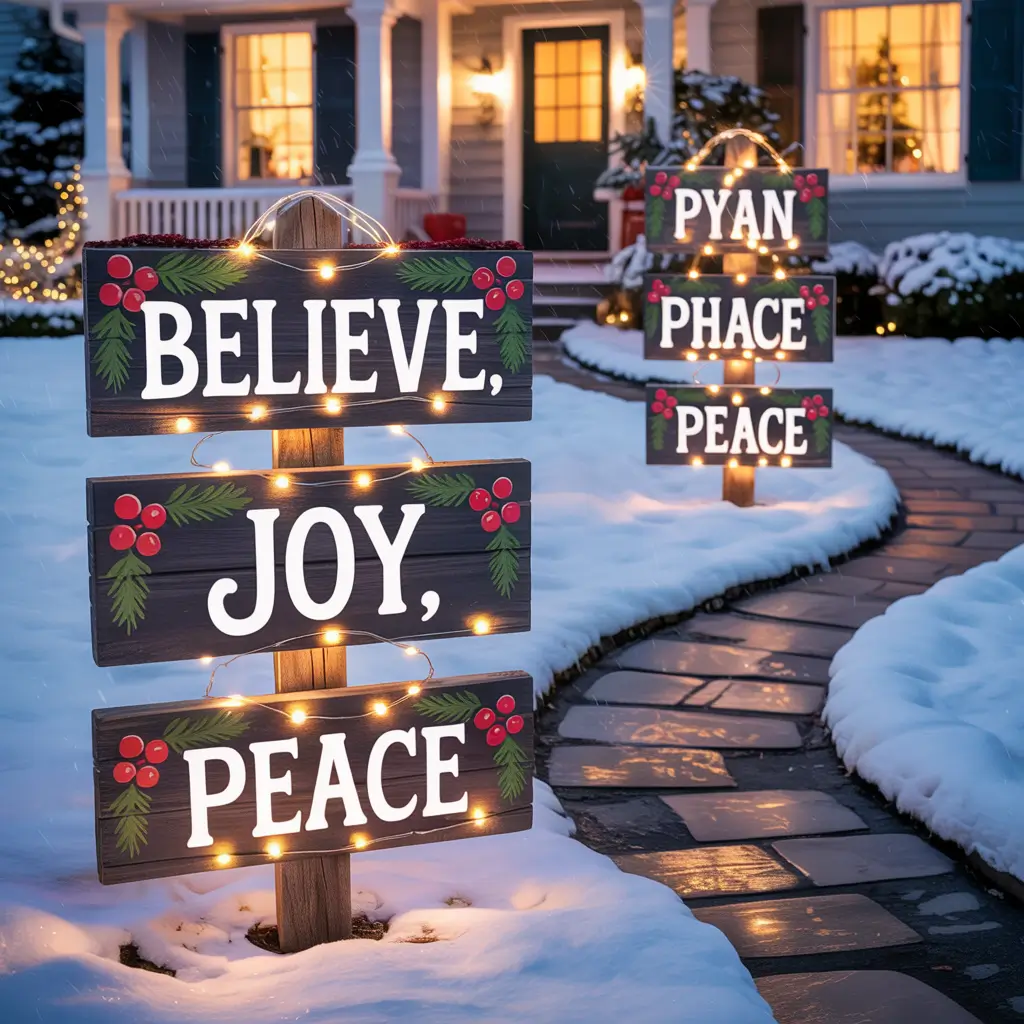
Painted Wooden Christmas Signs

Custom signs from Etsy cost serious money. Make your own for the price of scrap wood and paint.
I use old fence boards, sand them slightly, paint Christmas messages, and distress edges for that farmhouse look everyone loves. “Let it Snow” above the door, “Santa Stop Here” by the driveway – each sign costs maybe $5 to make versus $50 to buy.
Sign Painting for Non-Artists
Can’t freehand? Print letters, trace with carbon paper. I’m terrible at lettering, but this method makes me look like a calligraphy master.
Sign-making basics:
- Reclaimed wood or cheap boards
- Acrylic paint in festive colors
- Carbon paper for letter transfer
- Sandpaper for distressing
- Outdoor sealant for protection
Lighted PVC Pipe Candy Canes
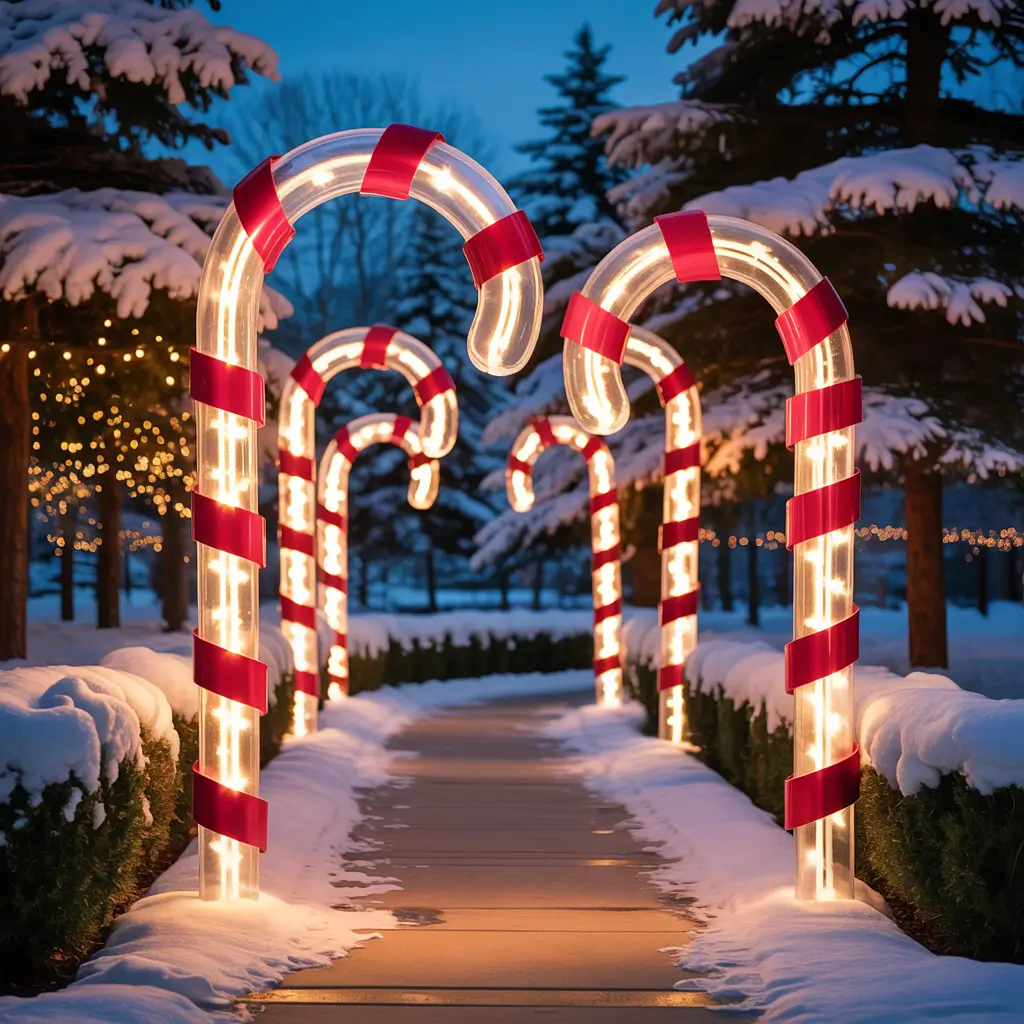
Level up from pathway markers with giant lighted candy canes that make serious impact.
Use larger PVC pipe, drill holes for lights to poke through, and create 4-foot tall candy canes that glow from within. I made six of these bad boys, and they literally stop traffic. The mailman asked if I sell them. Maybe I should?
Internal Lighting Method
Drill holes slightly smaller than your light bulbs so lights stay secure but removable. Learned this after my first attempt had lights falling inside the pipe :/
Giant candy cane construction:
- 1-inch PVC pipe for structure
- Drill holes every 6 inches
- C9 Christmas lights threaded through
- Red vinyl tape for stripes
- End caps to seal pipes
Also Read: 15 Simple Christmas Porch Decorating Ideas on a Budget
Jar Lid Snowman Garland
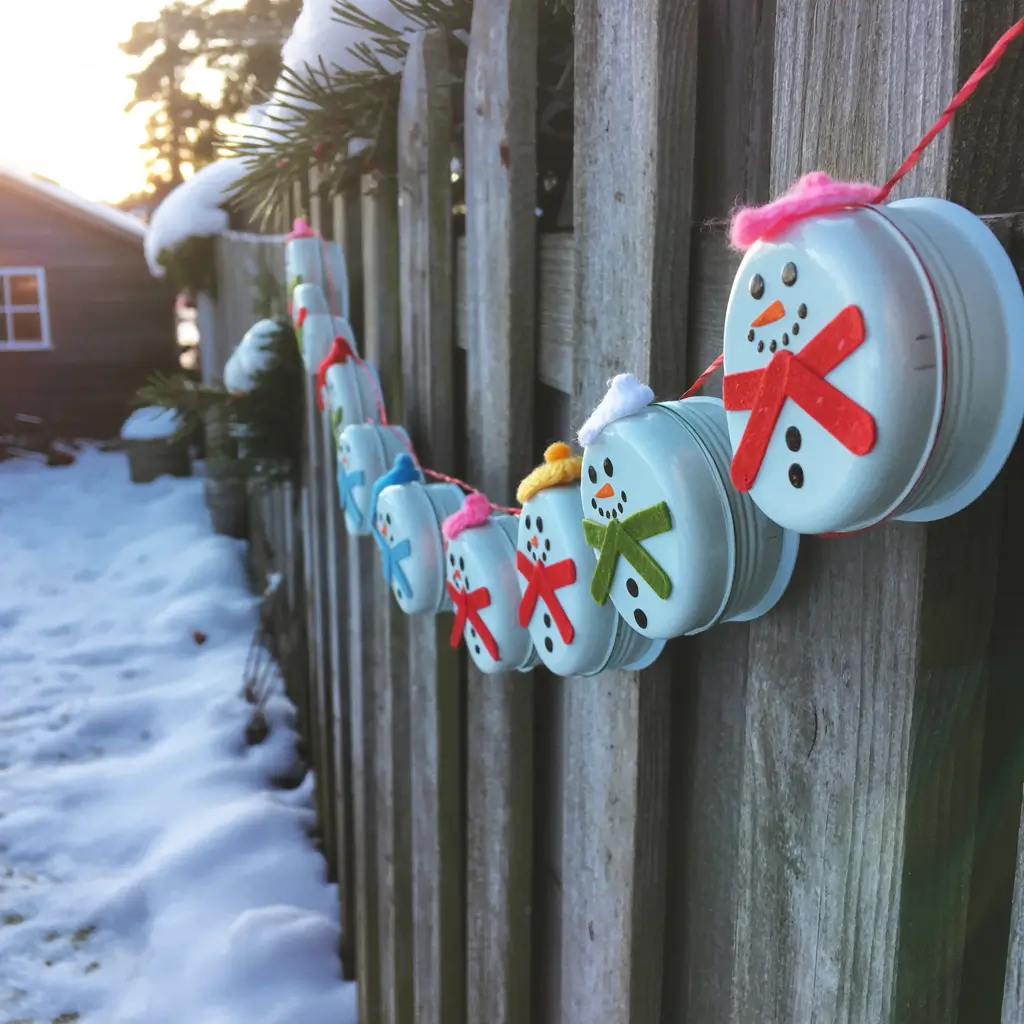
Those spare canning jar lids finally have a purpose! Create adorable snowman faces that string into weatherproof garland.
Paint lids white, add faces with permanent marker, string together with wire, and you’ve got garland that works anywhere outdoors. My sister saw mine and immediately raided her canning supplies to make her own.
Face Painting Tips
Use permanent markers or outdoor paint only. Regular markers run at the first sign of moisture, creating horror-movie snowmen.
Snowman garland steps:
- Various sized jar lids for variety
- White spray paint as base
- Permanent markers for faces
- Orange foam for carrot noses
- Strong wire for stringing
DIY Giant Ornament Balls
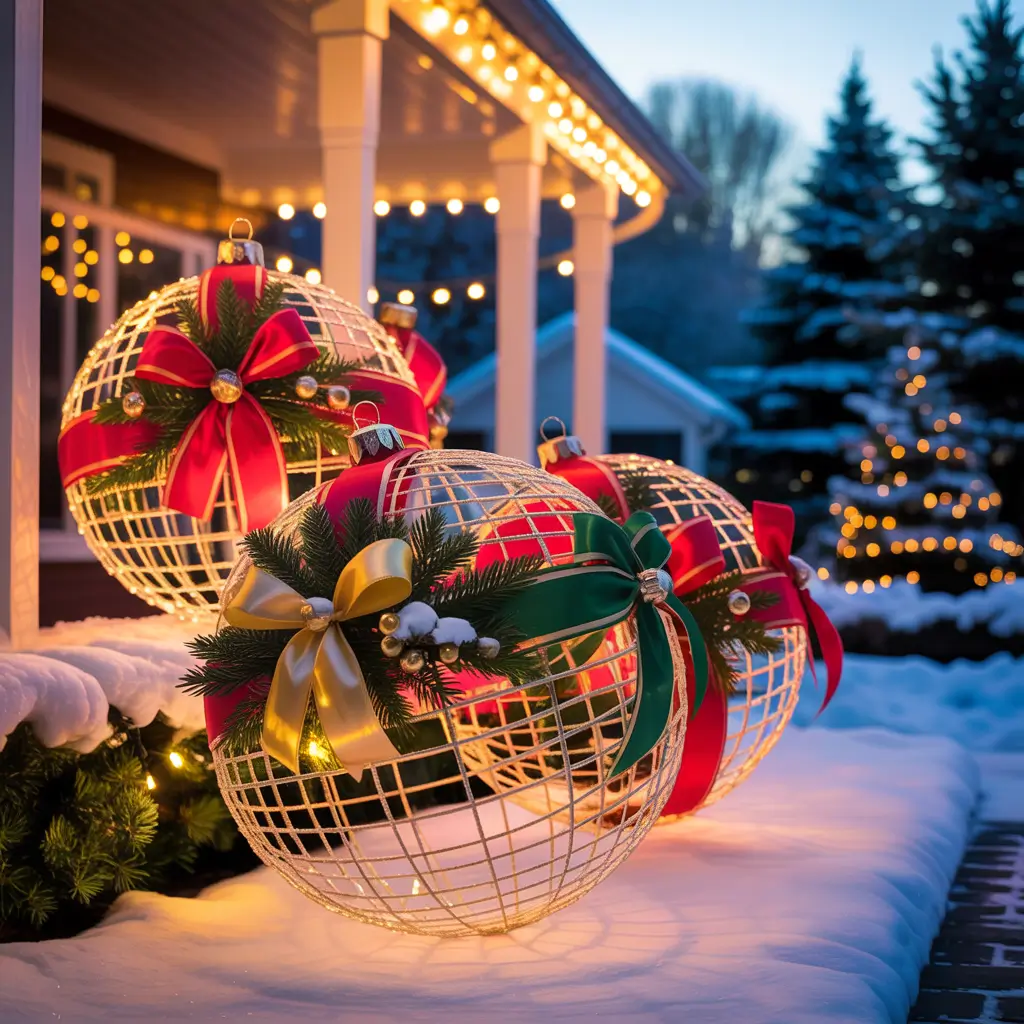
Those massive ornaments in store displays? Make them from beach balls for a fraction of the cost.
Inflate beach balls partially (fully inflated = too round), spray paint metallic colors, add glitter while wet, and create ornaments that look like they cost hundreds. Hang from trees or stack in corners for instant impact.
Creating Realistic Ornament Tops
The cap sells the illusion. Use plastic cups spray-painted silver attached with hot glue. Nobody notices they’re not real ornament caps.
Giant ornament materials:
- Beach balls in various sizes
- Metallic spray paint
- Glitter for sparkle
- Plastic cups for tops
- Fishing line for hanging
Pinecone Pathway Markers
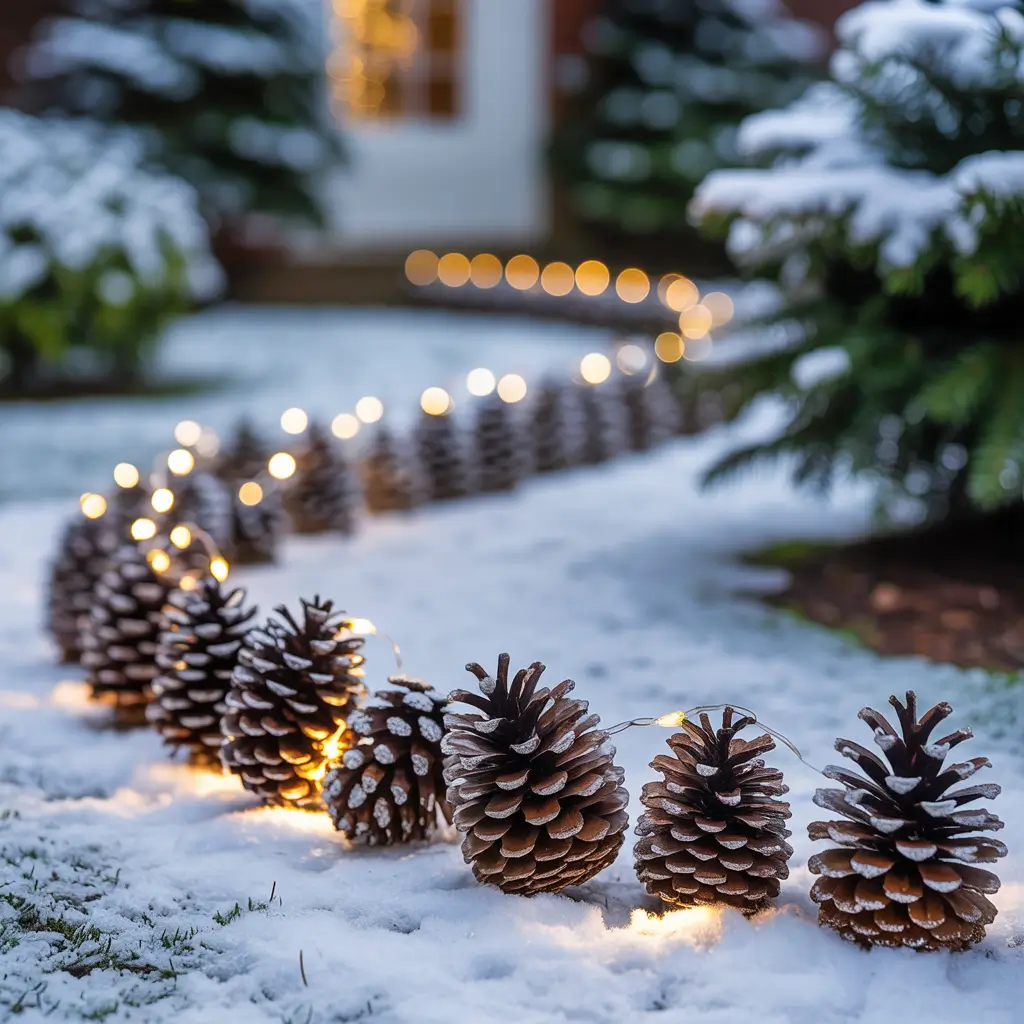
Nature provides free decorations if you know where to look. Pinecones become elegant markers with minimal effort.
Collect pinecones, spray tips with white paint or glitter, attach to stakes, and line pathways. They’re free, natural, and somehow look both rustic and elegant simultaneously. Plus, squirrels leave them alone after the paint treatment.
Pinecone Preparation
Bake pinecones at 200°F for 30 minutes first. This kills bugs and makes them open fully. Skip this step and enjoy surprise visitors in your house.
Pathway marker assembly:
- Large pinecones cleaned and baked
- Spray paint for tips only
- Wooden stakes or dowels
- Hot glue for attachment
- Clear sealant for longevity
Outdoor Sock Snowmen
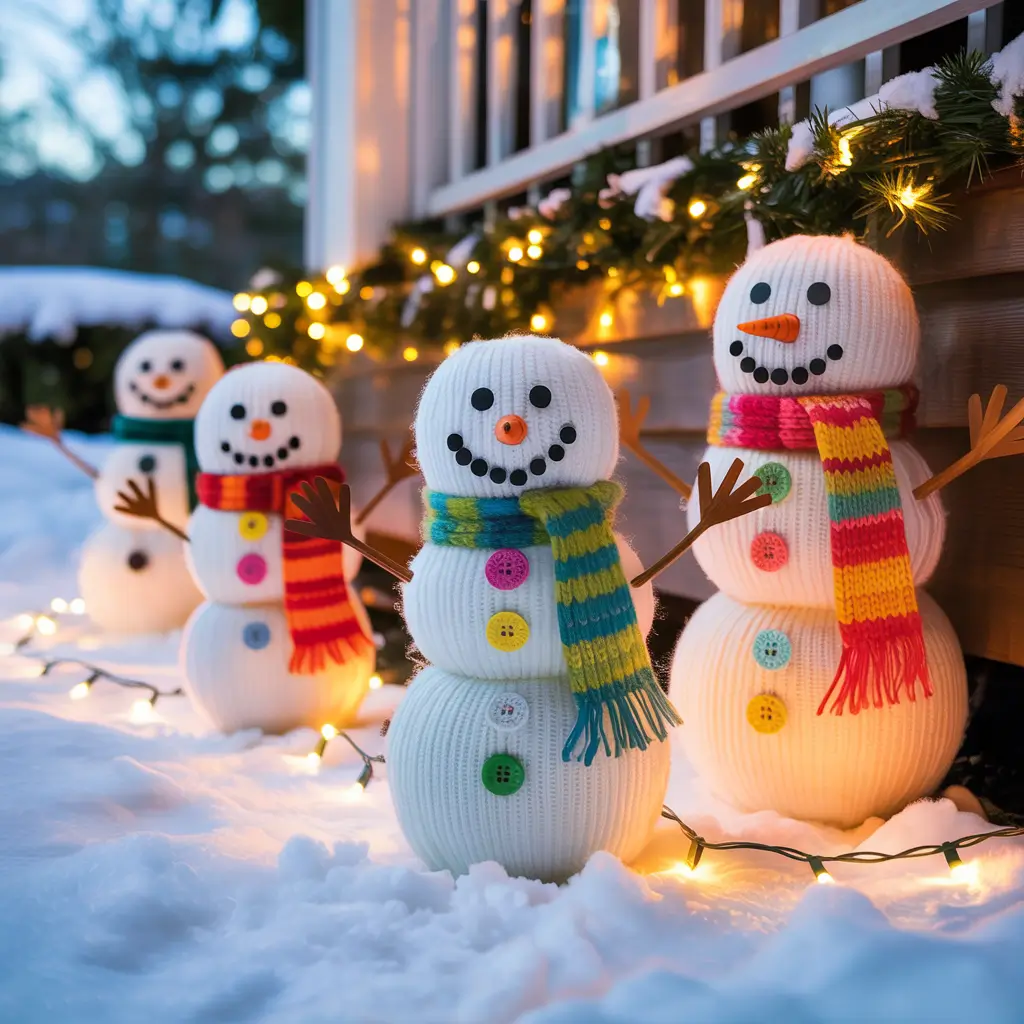
Lost socks finally serve a purpose! Transform them into weatherproof snowmen that survive winter.
Fill white socks with sand (not rice – learned that lesson the hard way), tie off sections for body segments, add button and fabric scrap details. These weighted snowmen stay put in wind and look adorable on steps or ledges.
Weatherproofing Fabric Outdoors
Spray finished snowmen with fabric protector meant for outdoor furniture. They’ll survive rain, snow, and everything else winter throws at them.
Sock snowman essentials:
- White tube socks (bigger is better)
- Sand or pea gravel for weight
- Rubber bands for segments
- Waterproof fabric for accessories
- Fabric protector spray
Holiday-Themed Planter Boxes
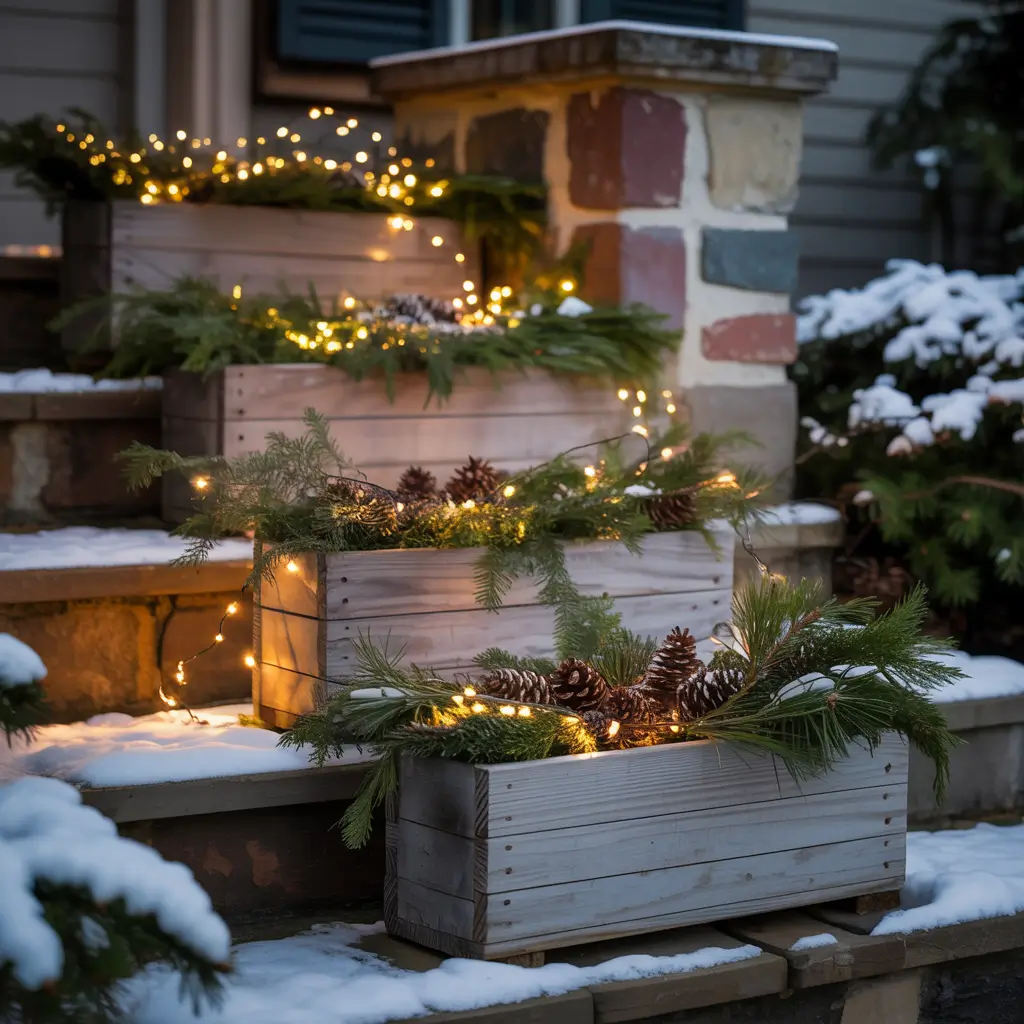
Your summer planters don’t need to look sad all winter. Transform them into festive displays that require zero plant care.
Fill planters with evergreen branches, add battery-operated lights, throw in some ornaments, and create mini Christmas scenes. I converted six planters this way, and they look better than when they had actual flowers.
Planter Arrangement Strategy
Start with tallest elements in back, cascade forward. This creates depth and looks intentional rather than stuffed.
Planter transformation ideas:
- Evergreen branches as base
- Battery lights woven throughout
- Weather-resistant ornaments
- Natural elements like pinecones
- Protective spray for longevity
Glittered Branch Centerpiece
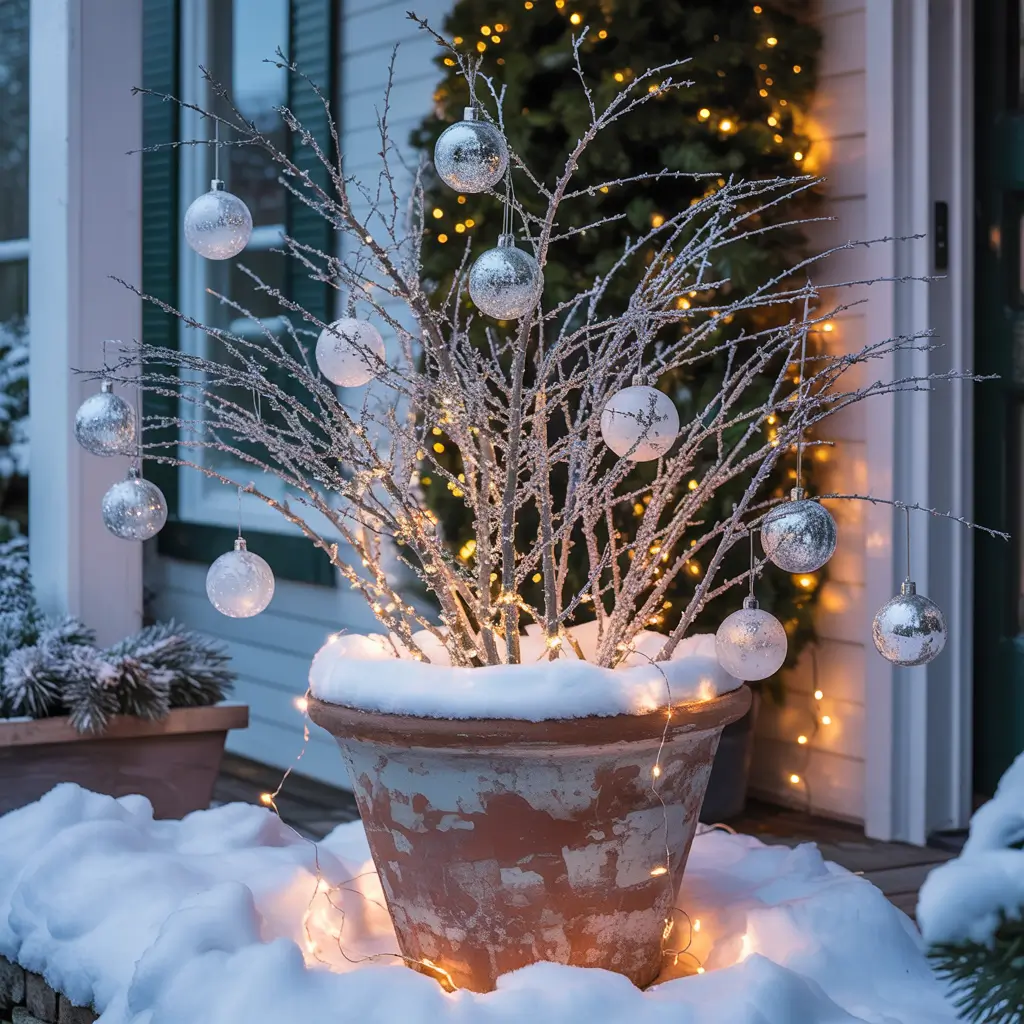
Dead branches become sparkly statement pieces with strategic glitter application.
Collect interesting branches, spray with adhesive, roll in glitter, and arrange in outdoor containers. They catch light beautifully and add glamour to porches or patios. IMO, these look way better than store-bought glittered decorations that shed everywhere.
Glitter That Actually Sticks
Use spray adhesive, not white glue. Glue takes forever to dry outdoors and creates uneven coverage. Spray adhesive dries fast and holds glitter permanently.
Branch centerpiece creation:
- Interesting branch shapes
- Spray adhesive in thin coats
- Fine glitter for best coverage
- Heavy containers for stability
- Clear sealant to lock glitter
Making DIY Magic Happen
Creating your own outdoor Christmas decorations transforms generic store-bought displays into personal winter wonderlands.
Start with one or two projects that excite you most, then build your collection each year.
The beauty of DIY decorations lies in their imperfection and character. That slightly crooked candy cane? It has personality.
The snowman with the weird smile? He’s unique. These handmade touches create memories and conversations that perfect store decorations never could.
Remember to weatherproof everything, secure decorations against wind, and use timers for any lights.
Work during daylight when possible – trying to hang things in the dark while wearing gloves is nobody’s idea of holiday cheer.
Most importantly, enjoy the process. Yes, you’ll probably burn yourself with the hot glue gun at least once. Yes, something will turn out completely different than Pinterest promised.
But when neighbors slow down to admire your handiwork, when kids point excitedly at your creations, when you save hundreds of dollars while creating something uniquely yours – that’s when the DIY magic really shines.
Now grab those craft supplies and show those store-bought decorations how it’s really done!


