10 Inspiring Room Decor Bedroom DIY Ideas to Try Today
- Bedroom Design
 Ben
Ben- 0
- 63 minutes read

Your bedroom looks like it hasn’t been updated since 2010, and that motivational poster from your college days isn’t fooling anyone.
I get it—we’ve all been stuck in that decorating rut where our bedrooms feel more like storage units with a bed than the cozy sanctuaries they should be.
After spending way too many nights staring at my boring beige walls and wondering why my room felt more like a waiting room than a retreat, I decided enough was enough.
Three months and several Pinterest fails later, I discovered that transforming your bedroom doesn’t require a massive budget or professional design skills—just some creativity and the willingness to get your hands a little dirty.
Whether you’re dealing with a tiny bedroom that feels claustrophobic or a larger space that just lacks personality, these 10 room decor bedroom DIY ideas will help you create a space that actually makes you excited to retreat to at the end of the day.
No contractor required, no trust fund needed—just you, some basic supplies, and maybe a friend to help hold things while you figure out if that shelf is actually level.
1. Floating Shelf Display Wall
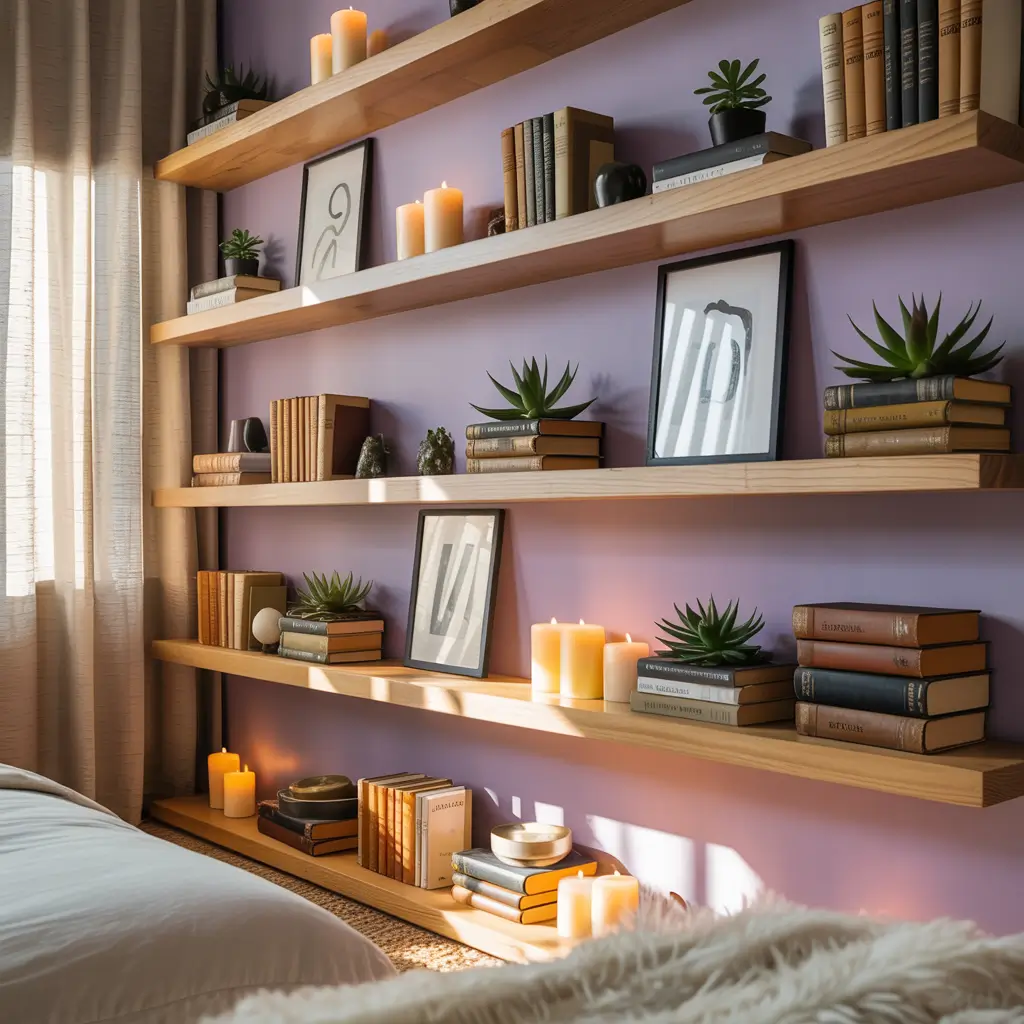
Let’s start with something that’ll make your walls work harder than your Monday morning coffee. Floating shelves aren’t just storage—they’re an opportunity to showcase your personality while keeping your surfaces clutter-free.
Why Floating Shelves Change Everything
Floating shelves create vertical interest while giving you space to display the things that make you, well, you. Books, plants, that ceramic owl your grandma gave you that’s actually kind of cool—everything gets its moment to shine.
I installed my first set of floating shelves after realizing my dresser had become a graveyard for random objects. Now, instead of a cluttered surface, I have a curated display wall that looks intentional. The best part? The whole project cost less than $50 and took one Saturday afternoon.
Planning Your Shelf Layout
Before you start drilling holes:
- Measure your wall space and mark with painter’s tape
- Consider weight distribution (heavy items need sturdy brackets)
- Think about visual balance (mix heights and sizes)
- Plan around existing furniture placement
- Check for studs or use appropriate anchors
Installation Tips That Actually Work
Here’s what I learned the hard way:
- Use a level (crooked shelves scream amateur hour)
- Start with the middle shelf and work outward
- Leave enough space between shelves for tall items
- Consider LED strip lights underneath for ambiance
- Paint shelves to match or contrast your walls
Styling Your Floating Shelves
The key to making them look magazine-worthy:
- Follow the rule of thirds for object placement
- Mix horizontal and vertical elements
- Include plants for life and color
- Vary textures (smooth ceramics, rough baskets, soft fabrics)
- Leave some breathing room—don’t overcrowd
- Rotate displays seasonally to keep things fresh
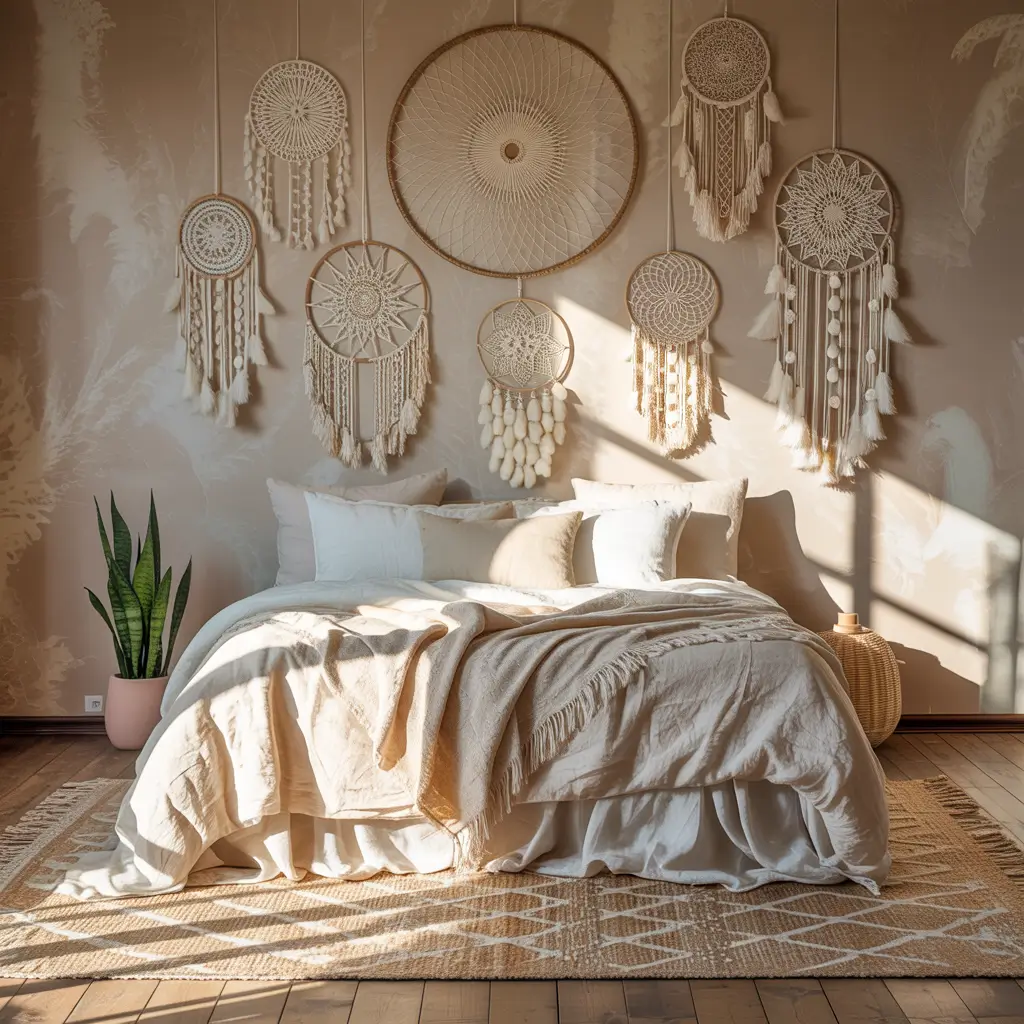
2. DIY Macrame Wall Hanging
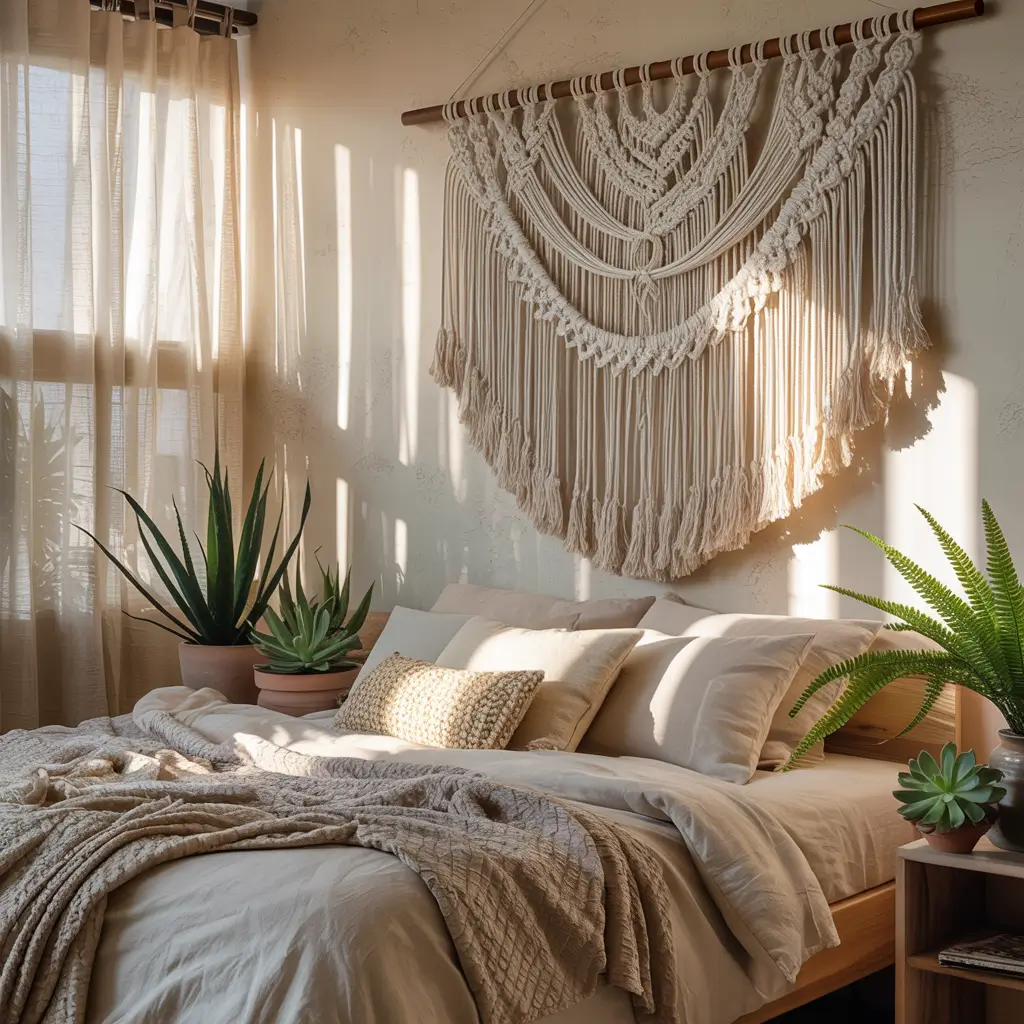
Macrame is having its moment, and honestly, it’s about time. This textile art adds warmth, texture, and that handmade charm that makes bedrooms feel less like hotels and more like homes.
The Therapeutic Art of Knotting
Making macrame is surprisingly meditative once you get past the initial “what am I doing with all this rope?” phase. Plus, there’s something deeply satisfying about creating something beautiful with just your hands and some cord.
My first macrame attempt looked like a cat had a fight with a ball of yarn. But here’s the secret: even imperfect macrame looks intentionally artistic. After watching approximately 47 YouTube tutorials, I finally created something that didn’t look like abstract chaos. Now I’m slightly obsessed and have made pieces for every room.
Getting Started with Macrame
Essential supplies:
- Cotton macrame cord (3-5mm for beginners)
- Wooden dowel or branch for hanging
- Scissors (sharp ones make life easier)
- Measuring tape or ruler
- S-hook for hanging while working
Basic Knots You Need to Know
Master these three and you’re golden:
- Square knot: The foundation of most patterns
- Half hitch: Creates diagonal and horizontal lines
- Gathering knot: Finishes pieces cleanly
Design Ideas for Beginners
Start simple and work your way up:
- Basic wall hanging with fringe
- Plant hanger (functional and cute)
- Small tapestry with geometric patterns
- Headboard alternative
- Dream catcher-inspired piece
Personalizing Your Macrame
Make it uniquely yours:
- Dip-dye the bottom for an ombre effect
- Add wooden beads or rings
- Incorporate dried flowers or feathers
- Mix natural and colored cords
- Create asymmetrical designs for modern appeal
Ever notice how macrame instantly makes a room feel more expensive? It’s like the textile equivalent of good lighting—transformative and worth every knot.
3. String Light Canopy
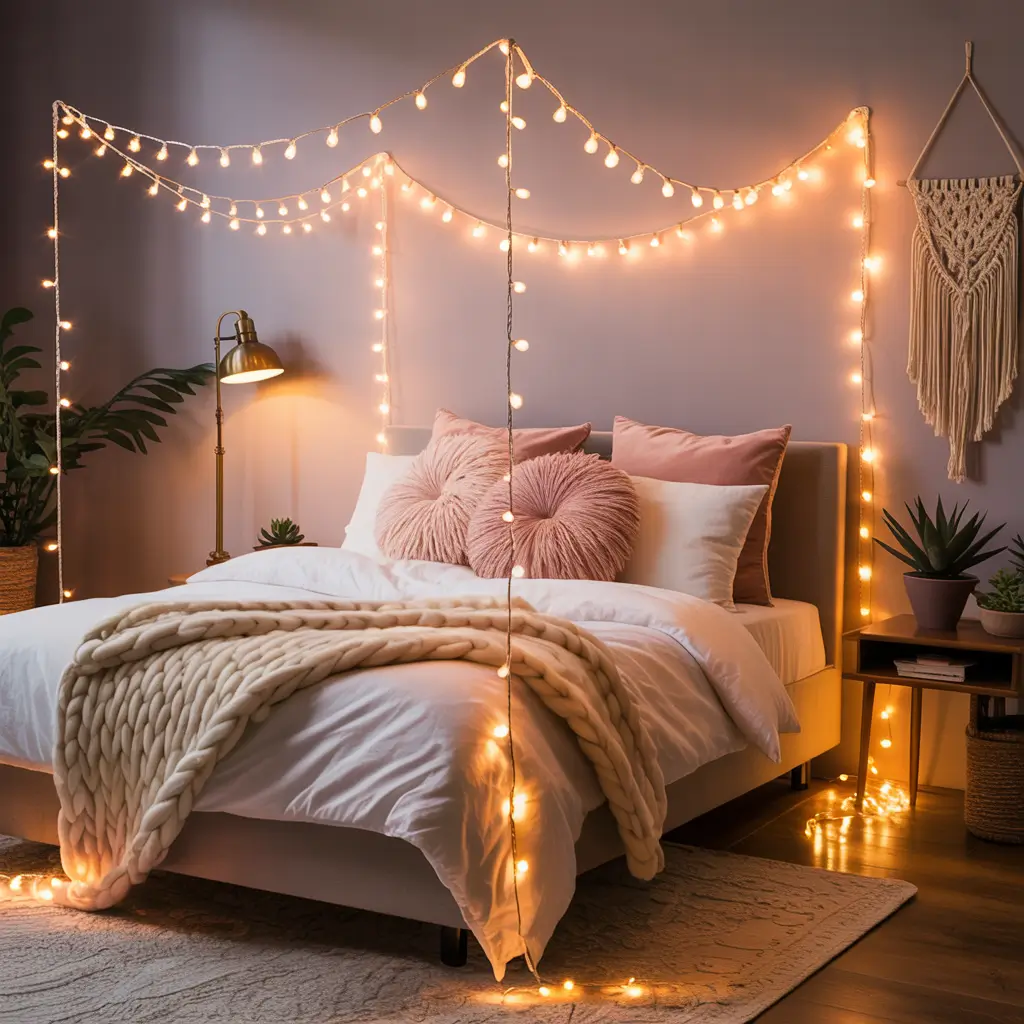
Nothing transforms a bedroom faster than the right lighting, and a string light canopy creates that dreamy, ethereal atmosphere that makes you feel like you’re sleeping in a fairy tale (or at least a really nice Airbnb).
Why String Lights Hit Different
String lights soften harsh overhead lighting and create ambiance that makes everything look better—including you during those late-night FaceTime calls. They’re the ultimate mood setter without the fire hazard of actual candles everywhere.
I was skeptical about the string light trend until I installed them above my bed. Now I rarely use my overhead light, and my bedroom feels like a cozy retreat instead of just where I crash at night. My electricity bill is happier too, since LED string lights use practically no energy.
Creating Your Light Canopy
Materials you’ll need:
- LED string lights (warm white is universally flattering)
- Ceiling hooks (Command hooks for renters)
- Extension cord if needed
- Timer outlet (for automatic ambiance)
- Sheer fabric (optional, for extra dreaminess)
Installation Techniques
Different canopy styles:
- Classic drape: Center point spreading to corners
- Parallel lines: Modern and clean
- Crisscross pattern: Maximum coverage
- Perimeter outline: Subtle glow
- Focal point: Concentrated over bed area
Safety First
Keep it safe and functional:
- Use LED lights only (they don’t heat up)
- Secure cords properly to prevent tangling
- Keep lights away from fabrics that could snag
- Use battery-operated options if outlets are scarce
- Consider smart plugs for voice control
Enhancing the Effect
Take it to the next level:
- Layer with sheer curtains for ethereal vibes
- Add dimmers for adjustable mood lighting
- Combine with fairy lights in jars
- Use color-changing bulbs for variety
- Create zones with different string sections
Also Read: 10 Creative DIY Aesthetic Room Decor Ideas for Cozy Vibes
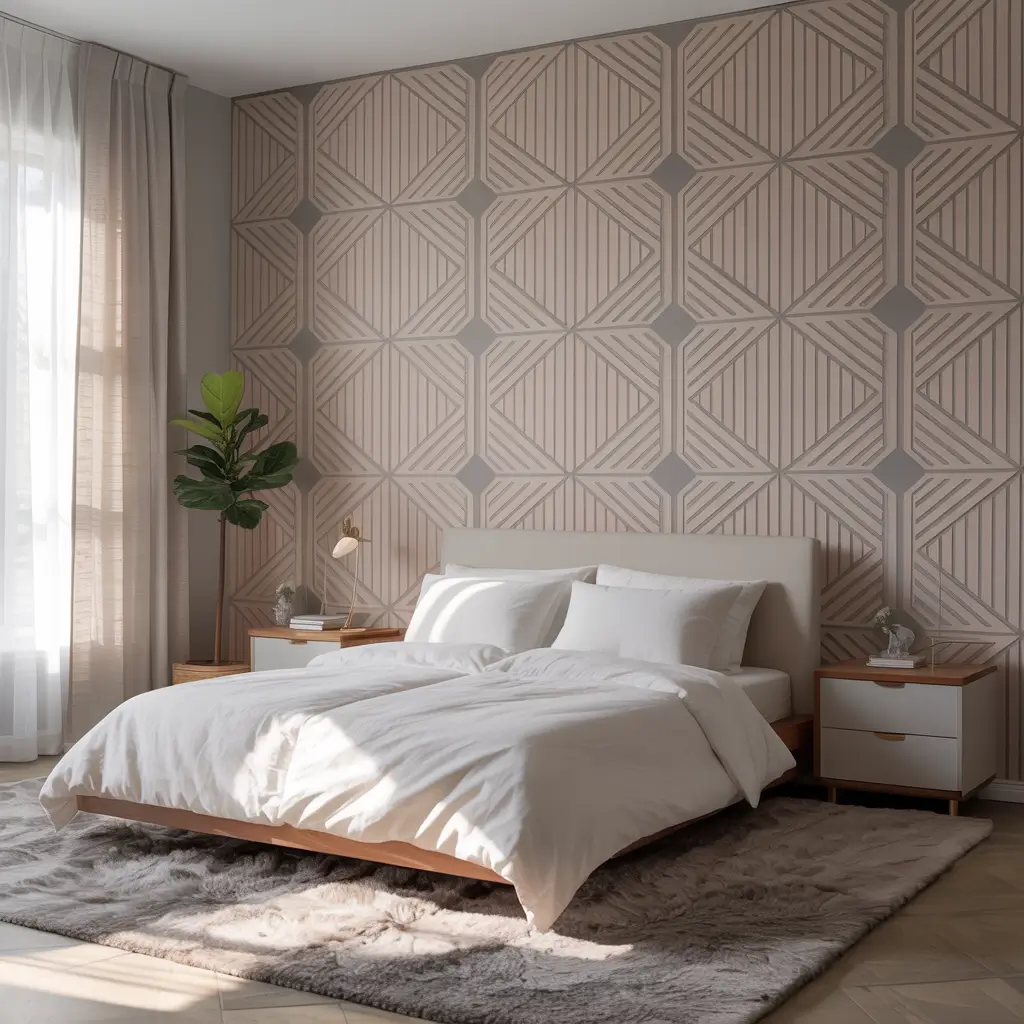
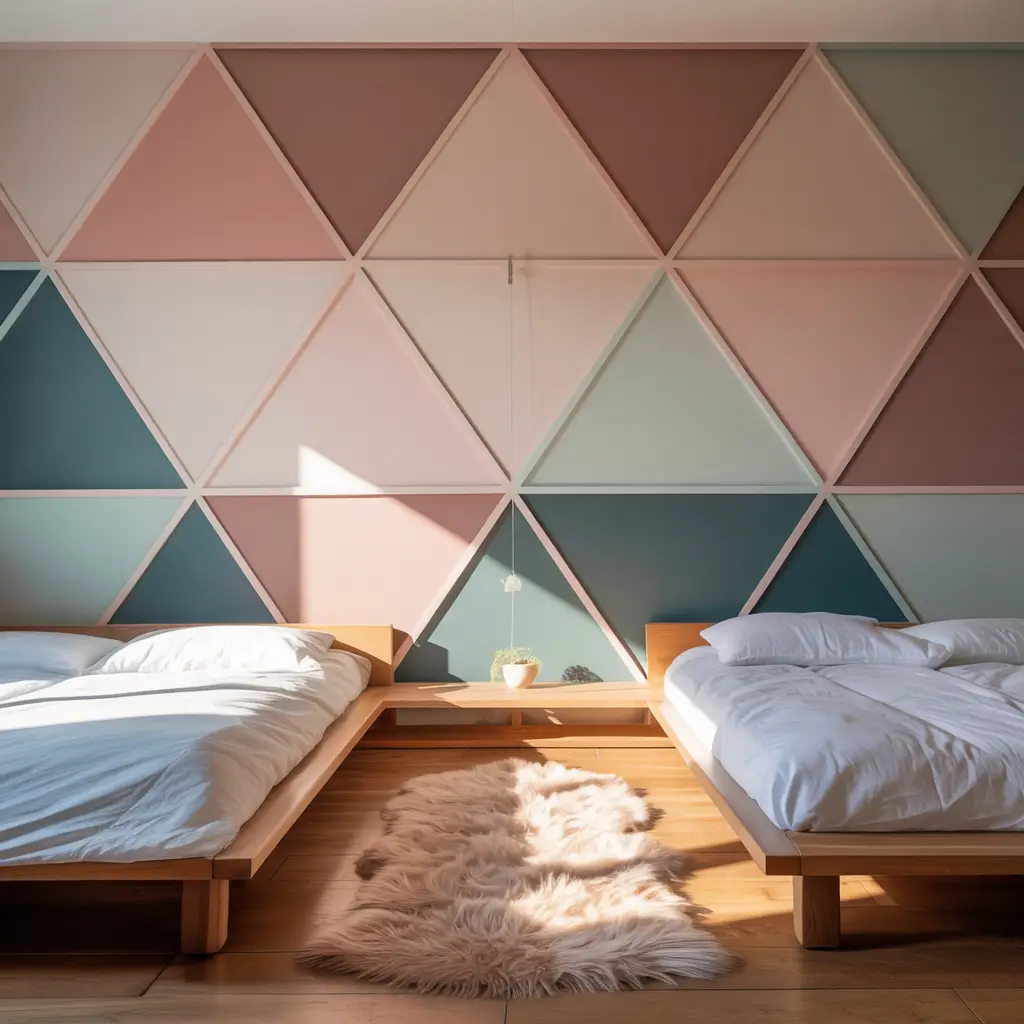
4. Painted Accent Wall with Stencils
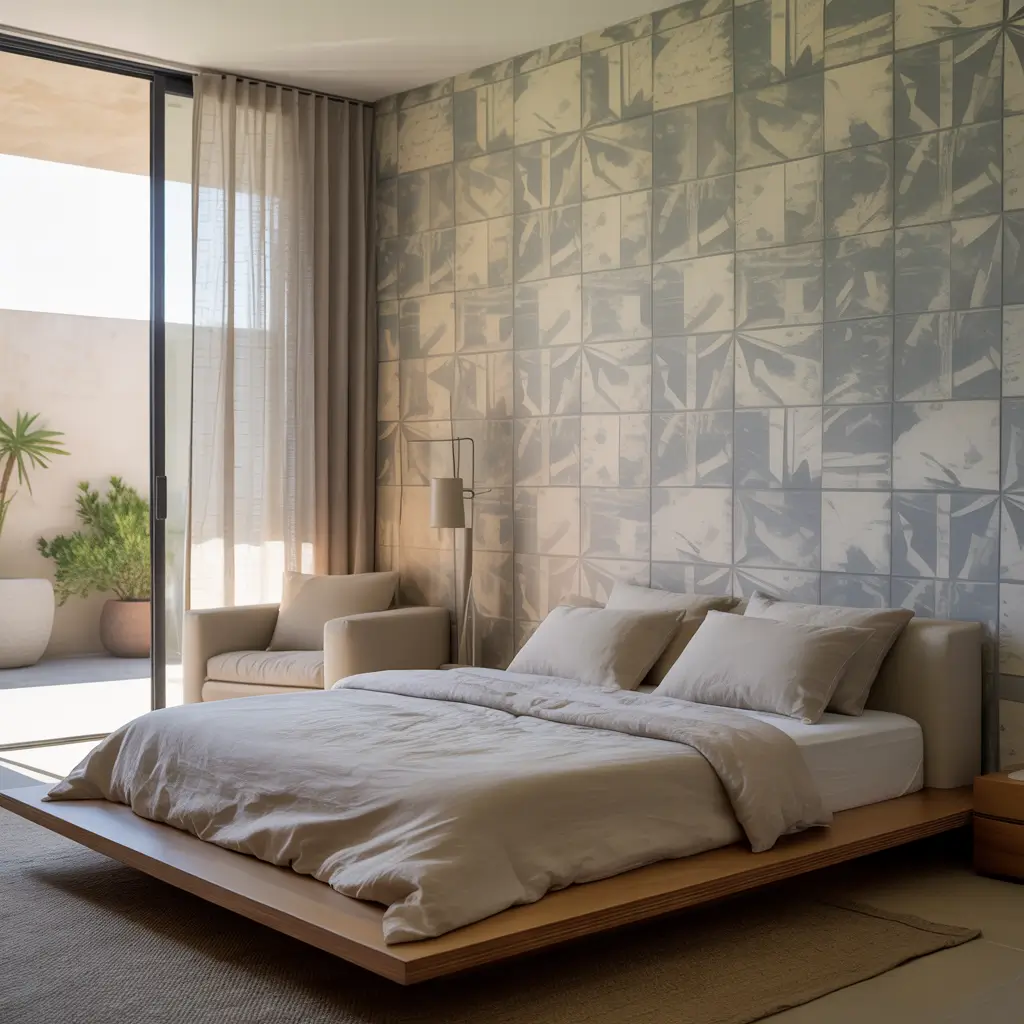
An accent wall is like the statement necklace of room decor—it pulls everything together and gives your space a focal point. Add stencils, and suddenly you’ve got custom wallpaper vibes without the commitment or cost.
The Power of One Wall
A single painted wall transforms your entire room’s energy without overwhelming the space or your budget. Stencils add that extra layer of interest that makes people ask, “Is that wallpaper?”
I procrastinated on my accent wall for months because painting seemed so permanent. Finally bit the bullet and spent a weekend creating a geometric stenciled wall behind my bed. Total cost: $60. Number of compliments received: countless. Regrets: zero.
Choosing Your Wall and Color
Strategic selection tips:
- Pick the wall you see first when entering
- Consider the wall behind your bed
- Choose colors that complement your bedding
- Test paint samples in different lighting
- Go 2-3 shades darker than you think
Stenciling Like a Pro
Essential supplies:
- Quality stencils (invest in reusable ones)
- Painter’s tape (FrogTape is worth the extra cost)
- Foam rollers or brushes
- Paint tray and liners
- Level and measuring tape
Stenciling Techniques
Avoid amateur mistakes:
- Use very little paint (dry brush technique)
- Secure stencil completely before painting
- Work in sections for large patterns
- Clean stencil frequently
- Touch up bleeds immediately
Pattern Ideas That Work
Popular bedroom stencil designs:
- Moroccan trellis for exotic vibes
- Geometric patterns for modern appeal
- Botanical designs for nature lovers
- Damask for traditional elegance
- Abstract shapes for artistic flair
- Ombre effects with gradient colors
FYI, the slight imperfections in hand-stenciled walls add character. It’s not a bug, it’s a feature! 🙂
5. Upcycled Furniture Makeover
That hand-me-down dresser doesn’t have to look like it came from your grandmother’s estate sale. With some paint and creativity, old furniture becomes custom pieces that look like expensive vintage finds.
The Transformation Magic
Upcycling furniture gives you designer looks on a thrift store budget. Plus, there’s something deeply satisfying about taking something destined for the dump and turning it into a showpiece.
My proudest upcycle was a $20 yard sale nightstand that looked like it had survived a frat house. After stripping, sanding, and painting it sage green with gold hardware, it now looks like something from West Elm. People literally don’t believe me when I tell them where it came from.
Finding Furniture Worth Saving
What to look for:
- Solid wood construction (not particle board)
- Good bones despite ugly finish
- Interesting details or shapes
- Stable structure (wobbly = headache)
- Size that fits your space
Prep Work That Matters
The boring but crucial steps:
- Clean thoroughly with degreaser
- Sand lightly (just enough for paint to grip)
- Fill holes with wood filler
- Prime if going from dark to light
- Remove hardware for painting
Paint Techniques for Different Looks
Style options:
- Chalk paint: No prep, vintage finish
- Milk paint: Authentic distressed look
- High-gloss: Modern and sleek
- Two-tone: Drawers different from frame
- Distressed: Sand edges after painting
- Ombre: Gradient effect on drawers
Hardware Makes the Difference
Finishing touches:
- Replace dated hardware with modern options
- Mix metals for eclectic appeal
- Consider leather pulls for Scandinavian vibes
- Add decorative corners for vintage charm
- Paint existing hardware for budget option
6. Personalized Photo Collage
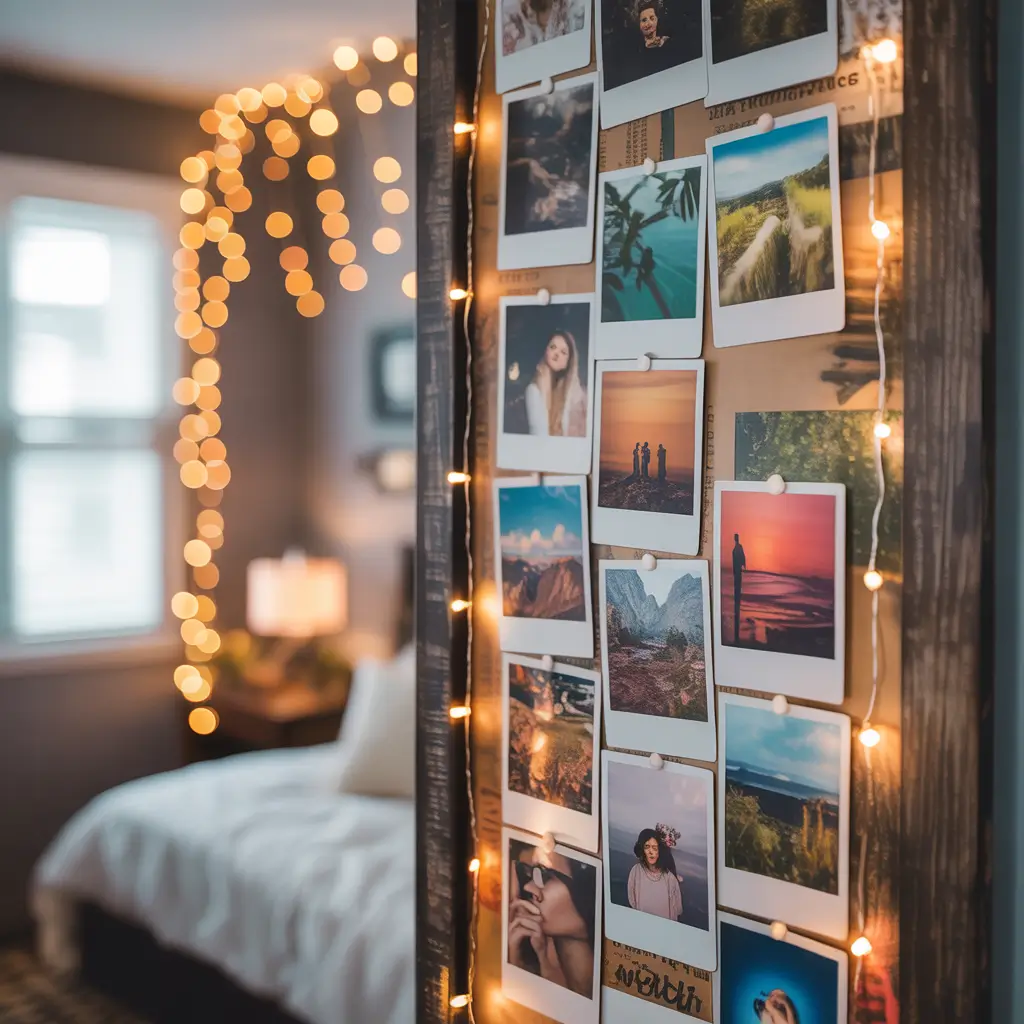
Your phone has 10,000 photos that no one ever sees. A personalized photo collage brings those memories into your daily life while creating art that’s uniquely yours.
Why Physical Photos Matter
Printed photos create emotional connections that scrolling through your camera roll can’t match. There’s something about seeing your favorite memories every day that makes a space feel genuinely personal.
I finally printed photos after realizing I had three years of adventures trapped in my phone. Created a massive collage wall next to my bed, and now I fall asleep looking at reminders of good times instead of scrolling through social media. Mental health win? Absolutely.
Planning Your Collage Layout
Design approaches:
- Grid pattern: Organized and clean
- Organic scatter: Natural and relaxed
- Shape formation: Heart, initials, etc.
- Timeline: Chronological journey
- Theme clusters: Travel, friends, family
- Mixed media: Photos plus tickets, notes
Printing on a Budget
Cost-saving strategies:
- Print at home on photo paper
- Use drugstore photo apps for deals
- Order during sales (holiday promotions)
- Stick to standard sizes (4×6 is cheapest)
- Try mini prints for larger collages
- Consider black and white for cohesion
Display Methods
How to hang them:
- Washi tape for damage-free mounting
- Clothespins on string with fairy lights
- Mix frames for collected-over-time look
- Clipboard gallery for easy swapping
- Cork board sections for flexibility
- Magnetic board for metal frames
Keeping It Fresh
Maintain the magic:
- Rotate photos seasonally
- Add new memories regularly
- Include non-photo elements (concert tickets, pressed flowers)
- Leave space for growth
- Create themed sections you can update
Also Read: 12 Stylish DIY Room Decor for Teens Ideas and Cozy
7. Hanging Plant Corner
Plants breathe life into bedrooms—literally. A hanging plant corner maximizes your green game without sacrificing floor space, creating a living art installation that improves air quality and your mood.
The Living Decor Revolution
Hanging plants add dimension and movement that static decor can’t match. Plus, taking care of plants gives you something to nurture, which is surprisingly therapeutic when life feels chaotic.
My hanging plant corner started with one pothos (the gateway plant for black thumbs). Now I have six plants at varying heights creating this cascading green waterfall effect. My bedroom feels like a boutique hotel, and I swear I sleep better surrounded by all that oxygen-producing greenery.
Choosing the Right Plants
Bedroom-friendly options:
- Pothos: Impossible to kill, air-purifying
- Spider plants: Make adorable babies
- String of hearts: Romantic trailing effect
- English ivy: Classic and hardy
- Air plants: No soil needed
- Snake plants: Release oxygen at night
Creating Hanging Displays
Installation ideas:
- Ceiling hooks at different heights
- Macrame plant hangers (double DIY!)
- Wall-mounted brackets with hooks
- Curtain rod plant hangers
- Tension rod between walls
- S-hooks from existing fixtures
Plant Care in Bedrooms
Keep them thriving:
- Consider light exposure from windows
- Choose low-light plants for darker rooms
- Water regularly but don’t overdo it
- Rotate plants for even growth
- Mist for humidity if needed
- Check for pests regularly
Styling Your Plant Corner
Design principles:
- Vary plant types and pot styles
- Mix trailing and upright plants
- Coordinate pot colors with room palette
- Add fairy lights for evening ambiance
- Include a small shelf for plant care supplies
- Create levels with different hanging lengths
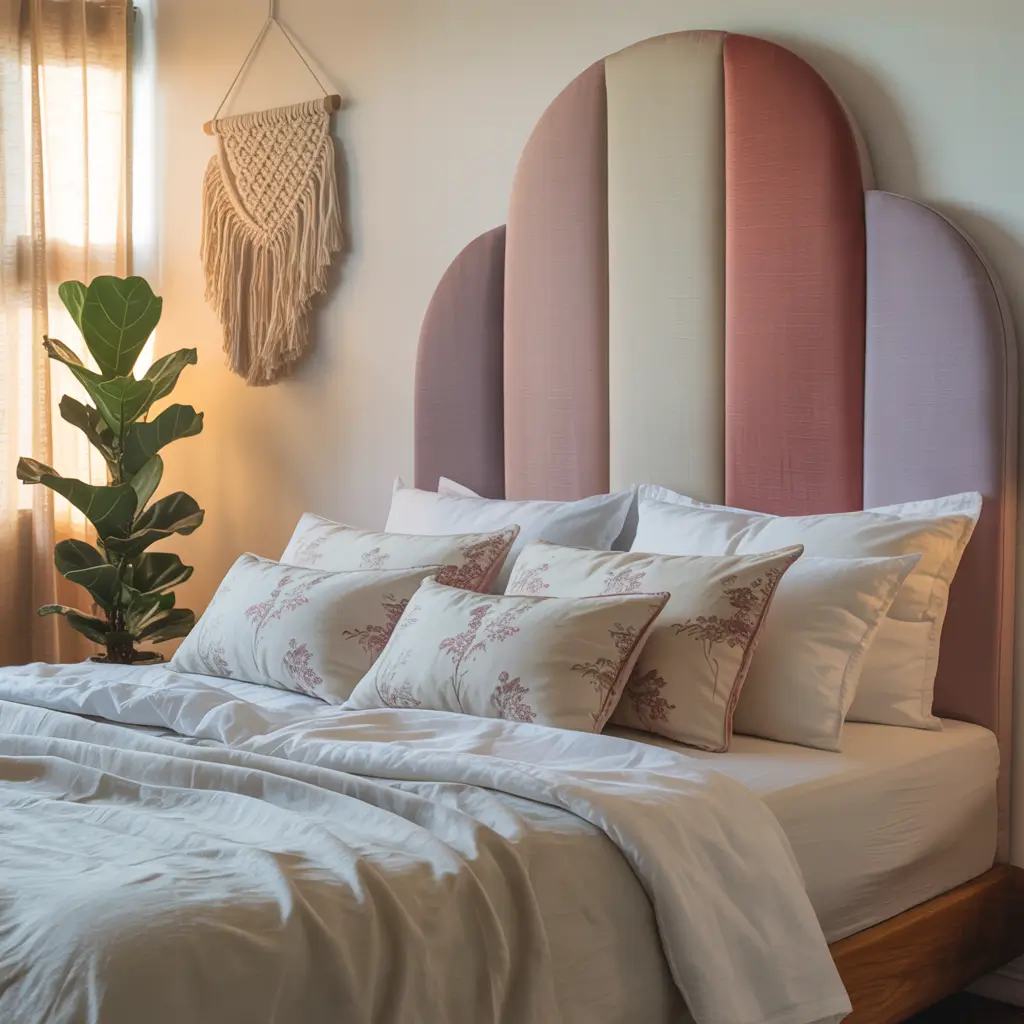
8. Fabric Headboard DIY
A headboard anchors your bedroom design, but they’re ridiculously expensive for what amounts to decorated plywood. Making your own fabric headboard gives you custom style for a fraction of the cost.
The Focal Point Factor
A fabric headboard softens your bedroom and creates a cozy backdrop for your bed. It’s functional (no more hitting your head on the wall) and transforms your sleeping area into a designed space.
I lived without a headboard for years because I couldn’t justify spending $400 on one. Finally made my own for $75, and it completely changed how finished my bedroom looks. The best part? I can change the fabric if I get bored or redecorate.
Materials You’ll Need
Shopping list:
- Plywood cut to desired size
- Foam padding (2-3 inches thick)
- Batting for smooth finish
- Fabric (upholstery weight works best)
- Staple gun and staples
- Mounting hardware
Building Your Headboard
Step-by-step process:
- Cut plywood to width of bed plus 2-4 inches
- Glue foam to plywood
- Wrap batting over foam
- Stretch fabric taut over batting
- Staple fabric to back, starting at center
- Create neat corners like wrapping a gift
- Mount securely to wall
Fabric Selection Tips
Choosing the right material:
- Consider durability (you’ll lean against it)
- Match or complement bedding colors
- Patterns hide imperfections
- Velvet adds luxury feels
- Linen gives relaxed vibes
- Avoid super stretchy fabrics
Customization Options
Make it unique:
- Add nail head trim for traditional look
- Create tufted effect with buttons
- Use multiple fabrics for color blocking
- Add LED backlighting for ambiance
- Incorporate shelving on sides
- Make it extra tall for dramatic effect
9. Geometric Wall Art
Geometric art is having a major moment, and creating your own means custom pieces that perfectly match your space. No more settling for whatever Target has in stock this season.
The Modern Art Movement
Geometric designs add contemporary flair without overwhelming your space. They’re bold enough to make a statement but versatile enough to work with changing decor.
I created a series of three geometric paintings after being quoted $200 for similar pieces at a local art fair. Armed with canvas, tape, and craft paint, I spent one evening creating art that honestly looks better than what I was going to buy. Total cost: $30. Satisfaction level: through the roof.
Supplies for Geometric Art
Basic materials:
- Canvas or wood panels
- Painter’s tape (various widths)
- Acrylic paint in your color scheme
- Brushes or foam rollers
- Pencil and ruler for planning
- Level for hanging
Design Techniques
Creating different effects:
- Color blocking: Bold sections of color
- Gradient: Ombre effects within shapes
- Metallic accents: Gold or copper details
- Negative space: Let canvas show through
- Overlapping shapes: Create depth
- Monochromatic: Shades of one color
Pattern Inspiration
Popular geometric designs:
- Triangular mountain ranges
- Hexagon honeycomb patterns
- Abstract circles and curves
- Diamond/argyle patterns
- Minimalist line art
- Color wheel-inspired layouts
Creating Cohesive Sets
Gallery wall strategies:
- Use consistent color palette across pieces
- Vary sizes but keep proportions balanced
- Mix patterns with solid blocks
- Maintain similar frame styles
- Plan layout on floor first
- Leave equal spacing between pieces
IMO, the beauty of DIY geometric art is that “mistakes” often look intentional. Embrace the imperfect lines—they add character.
Also Read: 10 Easy Cute DIY Room Decor Ideas and Space-Saving Solutions
10. Mason Jar Organizer Wall

Mason jars aren’t just for Pinterest-perfect pantries. A mason jar organizer wall turns cluttered surfaces into organized, accessible storage that actually looks good.
The Functional Decor Solution
Mason jar walls combine storage with style, keeping your essentials visible and accessible while adding rustic charm to your bedroom walls.
I created my mason jar wall out of desperation when my makeup brushes took over my dresser. Now everything has a designated jar, my surfaces stay clear, and finding what I need takes seconds instead of digging through drawers. Plus, it looks intentional rather than cluttered.
Building Your Jar Wall
Materials needed:
- Mason jars (various sizes)
- Hose clamps or jar hangers
- Wood board for mounting
- Screws and anchors
- Paint or stain for board
- Level and measuring tape
Installation Process
Making it sturdy:
- Cut and finish wood board
- Mark jar placement evenly
- Attach hose clamps to board
- Mount board securely to wall
- Slide jars into clamps
- Adjust tightness as needed
What to Store
Organization possibilities:
- Makeup brushes and tools
- Hair accessories
- Jewelry (hang necklaces from jar tops)
- Office supplies for bedside
- Crafting supplies
- Small plants or flowers
- String lights (in jars!)
Styling Tips
Making it look intentional:
- Use consistent jar sizes or graduate them
- Paint jar lids to match decor
- Add labels for clean look
- Mix storage with decorative jars
- Include battery fairy lights in some
- Coordinate contents by color
Alternative Mounting Methods
Different approaches:
- Individual wall hooks for each jar
- Pipe strapping for industrial look
- Magnetic strips for lid attachment
- Floating shelf with jar storage
- Wire basket system
Bringing It All Together
Here’s what I’ve learned after transforming my bedroom from “place where I sleep” to “favorite room in the house”: the best DIY projects are the ones that solve problems while adding personality.
Every single one of these ideas came from a real need—whether it was storage, ambiance, or just wanting to wake up somewhere beautiful.
Start with one project that addresses your biggest bedroom pain point. Cluttered surfaces? Try the mason jar wall or floating shelves. Boring walls? Go for the accent wall or geometric art.
Need ambiance? String lights or macrame will transform the vibe instantly.
The magic happens when these elements work together.
My bedroom now has floating shelves displaying plants and books, a geometric accent wall behind my fabric headboard, string lights creating soft ambiance, and mason jars keeping my bedside organized.
Each project built on the last, creating a cohesive space that feels designed rather than decorated.
Remember, DIY doesn’t mean settling for less—it means getting exactly what you want while developing skills and saving money.
Plus, there’s something deeply satisfying about lying in bed surrounded by things you created with your own hands.
Your bedroom should be your sanctuary, not just your sleeping quarters. These projects will help you create a space that nurtures rest, inspires creativity, and makes you genuinely happy to be home.
So pick a project, grab your supplies, and start transforming your bedroom one DIY at a time. Sweet dreams are made of these (and by these, I mean rooms that actually reflect who you are).
Now excuse me while I go rearrange my floating shelves for the third time this month. Once you start DIYing, it becomes slightly addictive. But hey, worse hobbies exist, right? :/