10 Space-Saving Bathroom Built In Cabinet Wall Storage Ideas for Homes
- Bathroom Design
 Ben
Ben- 0
- 45 minutes read
Remember that moment when you opened your bathroom cabinet and everything avalanched out like some kind of domestic disaster movie? Yeah, me too. Last week, actually.
A bottle of expired sunscreen literally bounced off my sink and landed in the toilet. That was my breaking point—the moment I realized my bathroom storage situation needed a complete revolution.
Built-in cabinet wall storage changed my bathroom game entirely. After installing built-ins in three different bathrooms (and making plenty of mistakes along the way), I’ve learned what actually works versus what just looks good in those impossibly perfect magazine photos.
Ready to transform your bathroom walls from boring barriers into storage goldmines? Let’s explore ten built-in cabinet ideas that’ll make you wonder why you ever settled for those wobbly over-the-toilet shelves.
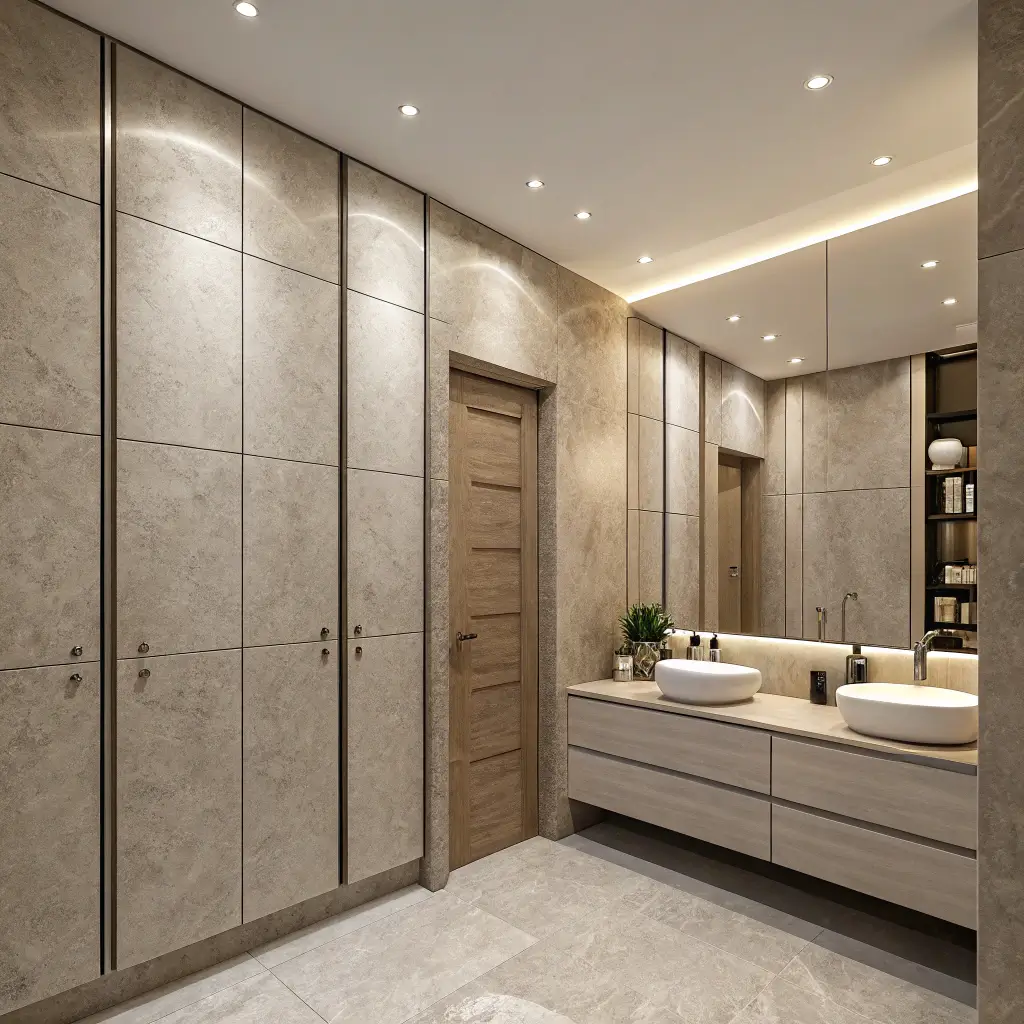
1. Recessed Wall Cabinet with Flush Doors
Recessed cabinets are like the ninjas of bathroom storage—they hide in your walls, completely invisible until you need them. I installed my first recessed cabinet five years ago, and guests still don’t realize it’s there until I open it. The flush doors blend seamlessly with the wall, creating this clean, minimalist look that makes small bathrooms feel infinitely larger.
Why Recessed Cabinets Win Every Time
The genius of recessed storage lies in what you don’t see. Unlike traditional cabinets that stick out and eat up precious bathroom real estate, recessed units live inside your walls. My bathroom is barely 5×8 feet, but with recessed storage, I don’t bump into cabinet corners during my morning zombie shuffle to the shower.
These cabinets work because they utilize the dead space between your wall studs. You’re literally creating storage from nothing—well, from the empty cavity that’s already there. It’s like finding free square footage you didn’t know you had.
The Installation Reality Check
Let me be brutally honest about installation. Cutting into walls terrified me initially. What if I hit plumbing? Electrical wires? A family of possums? (Okay, that last one was unlikely, but anxiety doesn’t follow logic.) I hired a contractor for my first recessed cabinet, watched carefully, then tackled the second one myself.
Here’s what you actually need to know:
- Find studs with a quality stud finder (not the cheap one that lies)
- Check for plumbing and electrical before cutting anything
- Standard wall cavities are about 3.5 inches deep
- You’ll need proper framing around the opening
- Drywall repair skills come in handy
Making Flush Doors Actually Flush
The trickiest part? Getting those doors perfectly flush with your wall. I spent three hours adjusting my first set of hinges, and they still weren’t quite right. The secret I discovered? European-style concealed hinges with micro-adjustments. They cost more but save your sanity.
Pro tips for flush perfection:
- Use a level obsessively
- Install magnetic catches for clean closure
- Choose soft-close hinges (morning door slams are the worst)
- Paint doors the same color as walls for true invisibility
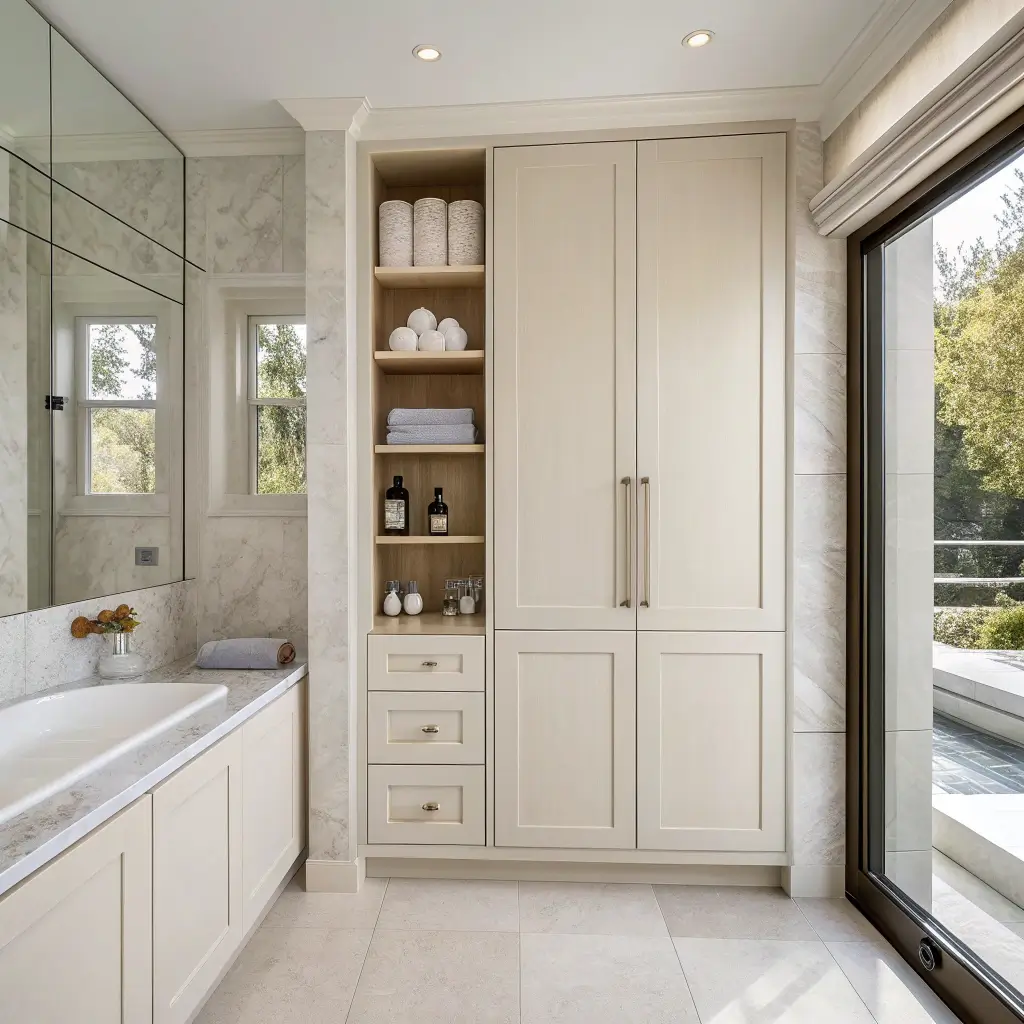
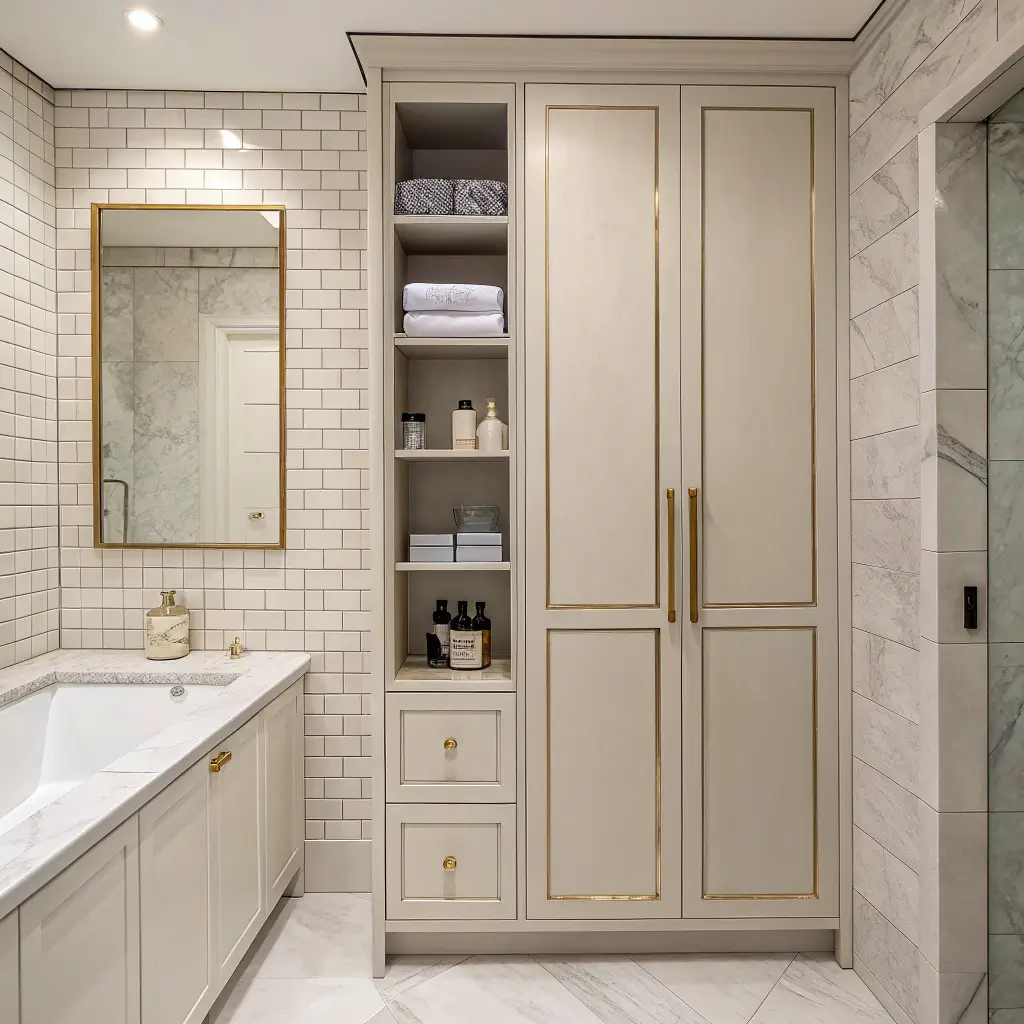
2. Floor-to-Ceiling Built-In Storage Wall
Want to know what transformed my master bathroom from cluttered chaos to organized oasis? A full floor-to-ceiling storage wall. I’m talking eight feet of vertical storage glory that holds everything from towels to toilet paper to that embarrassing collection of hotel shampoos I’ll never use but can’t throw away.
Maximizing Every Vertical Inch
Most bathrooms waste the space above eye level. We install a medicine cabinet and call it a day, leaving four feet of wall doing absolutely nothing. My floor-to-ceiling unit uses every inch, with different zones for different needs.
I organize mine strategically:
- Lower cabinets: Heavy items and daily essentials
- Middle section: Frequently used products at arm’s reach
- Upper cabinets: Seasonal items and bulk storage
- Very top: Things I need a step stool for (holiday decorations, mostly)
Custom vs. Modular Systems
I’ll admit I initially wanted completely custom built-ins. Then I saw the quote and nearly fainted. Custom built-ins cost more than my car payment for six months. Instead, I discovered modular systems that look custom but cost half as much.
The modular route worked because:
- Units stack and connect seamlessly
- I could add sections over time as budget allowed
- Standard sizes fit standard studs
- Returns were possible if something didn’t work
- Installation was manageable as a weekend project
The Visual Weight Problem
Here’s something nobody tells you—floor-to-ceiling storage can make your bathroom feel like a closet if you’re not careful. I learned this after installing dark wood cabinets that made my bathroom feel like a cave. The solution? I repainted everything white and added glass doors to some sections. Instant breathing room.
3. Floating Built-In Cabinet Above Toilet
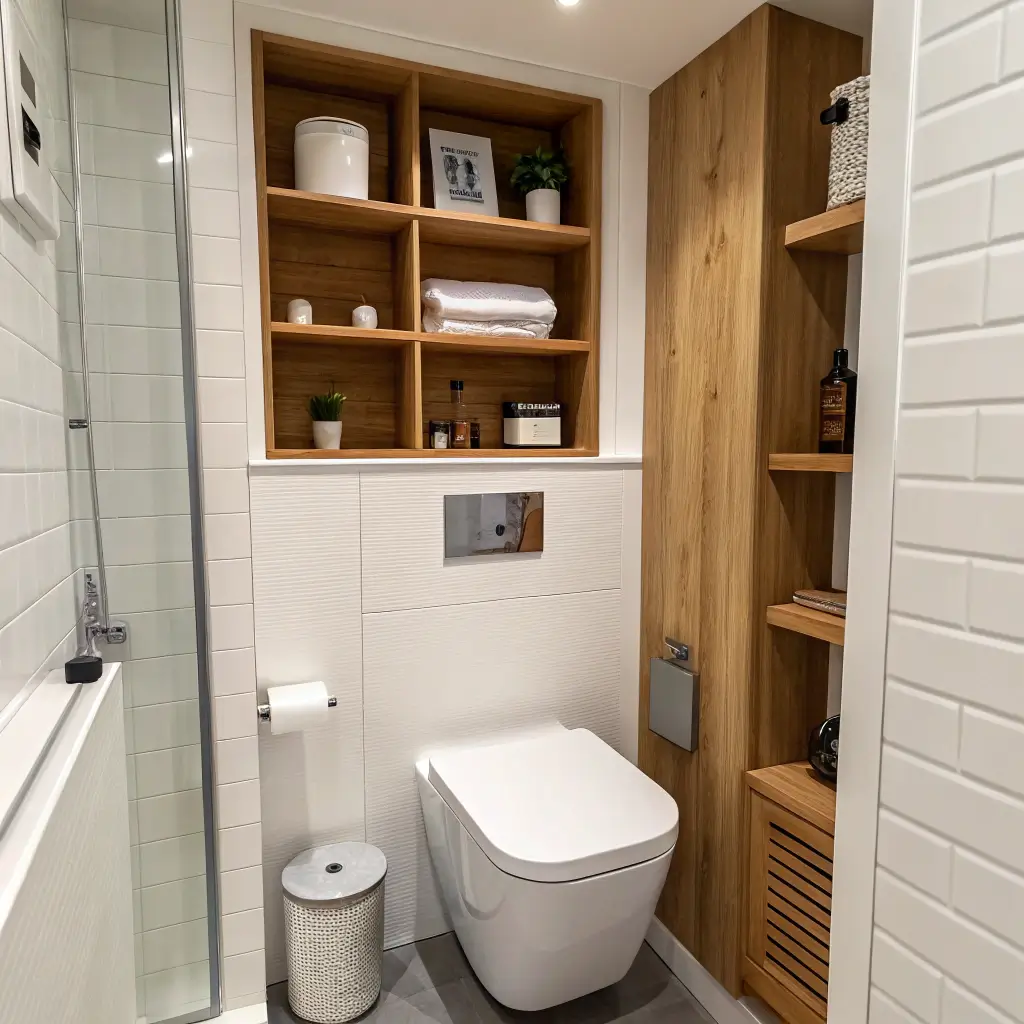
That space above your toilet is begging to be used, yet most of us ignore it completely. I installed a floating built-in cabinet there last year, and it’s become the MVP of my bathroom storage game. No more precarious over-the-toilet racks that wobble every time you close the door.
Engineering the Perfect Height
Placement matters more than you’d think. Install too low, and you’ll smack your head standing up. Too high, and you need a ladder for your toilet paper. I learned this through painful trial and error—literally painful in the case of the head-smacking incident.
The sweet spot I’ve found:
- Bottom of cabinet: 6-8 inches above tank top
- Depth: 8-12 inches (deeper interferes with standing)
- Width: Match toilet width or slightly wider
- Height: 24-30 inches for proportional look
The Floating Illusion
Creating that floating effect requires solid wall mounting. My first attempt using basic drywall anchors resulted in a 3 AM crash that woke the entire house. Now I use a French cleat system that could probably hold a small car.
What makes floating cabinets work:
- Hidden mounting hardware
- Proper weight distribution
- Studs or blocking for support
- Quality construction materials
- LED strip lighting underneath (game-changer for midnight bathroom trips)
Storage That Makes Sense
Above-toilet storage works best for specific items. I keep mine organized by frequency of use and weight. Nothing heavy goes up there—learned that lesson when a bulk shampoo bottle nearly gave me a concussion.
My above-toilet inventory:
- Extra toilet paper (obviously)
- Light towels and washcloths
- Guest toiletries in pretty containers
- Air fresheners and candles
- First aid supplies in a designated bin
Also Read: 10 Elegant Bathroom Storage Cabinet Ideas with Hidden Storage
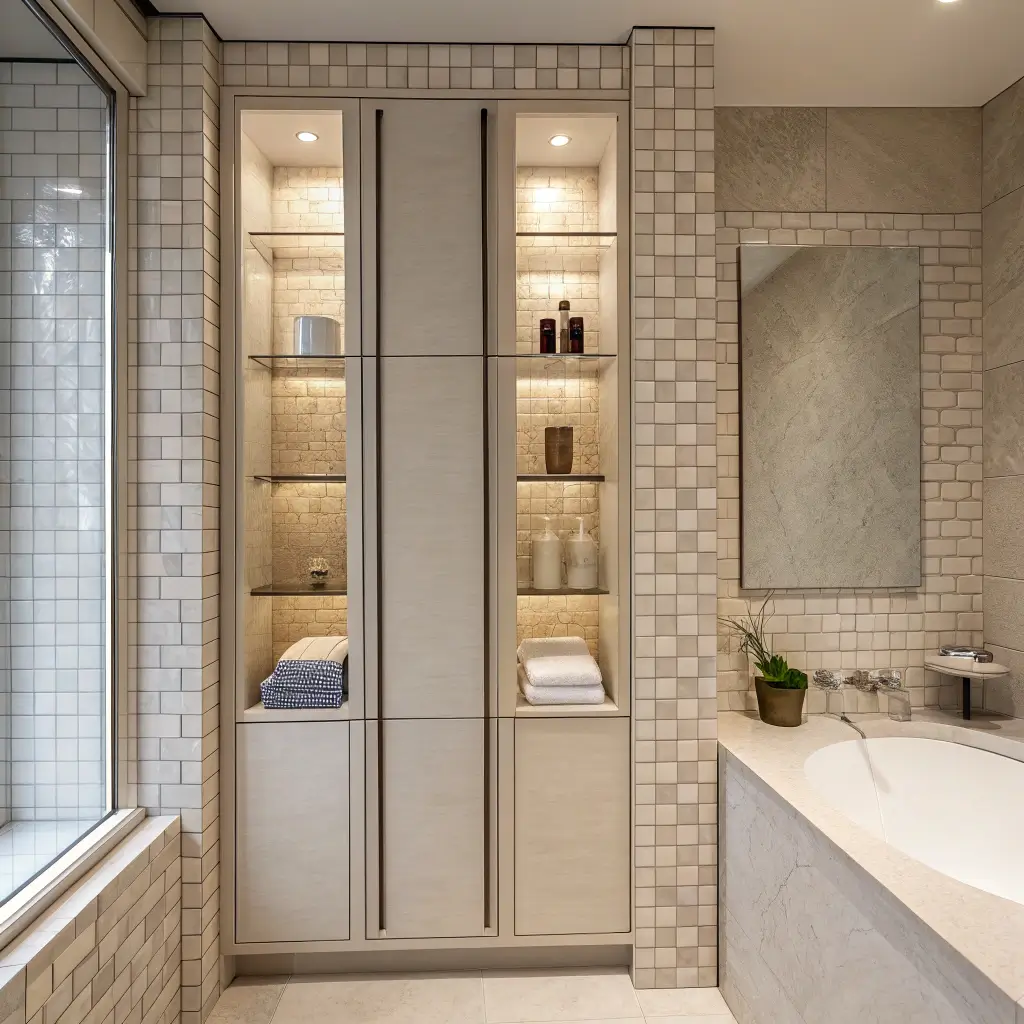
4. Full-Wall Hidden Storage Behind Panels
Imagine pushing on your bathroom wall and having it open to reveal massive storage. Sounds like something from a spy movie, right? I installed hidden storage behind wall panels in my powder room, and every guest thinks I’m some kind of design genius. (I don’t correct them.)
The Secret Storage Revolution
Traditional cabinets announce themselves. Hidden panel storage whispers. The entire wall looks like simple wainscoting or decorative paneling until you press the right spot. Then—surprise!—storage appears like magic.
I discovered this option while trying to add storage to my tiny powder room without making it feel smaller. Visible cabinets would have cramped the space, but hidden storage maintains the clean lines while hiding my cleaning supplies, backup toiletries, and emergency chocolate stash. Don’t judge.
Creating the Hidden Magic
Installing hidden panel storage requires planning and precision. You need to build a frame, add the storage components, then cover everything with panels that look decorative but function as doors. I hired a carpenter for the framework but did the finishing myself.
Key components for success:
- Sturdy frame construction attached to studs
- Touch-latch hardware (no visible handles)
- Soft-close mechanisms (maintains the illusion)
- Consistent panel spacing (irregularity reveals the secret)
- Quality hinges rated for panel weight
What Goes Behind the Panels
Hidden storage works best for items you don’t need constantly but want easily accessible. My hidden compartments are basically my bathroom’s backstage area—all the stuff that makes the show run but doesn’t need to be seen.
Perfect for hiding:
- Cleaning supplies and tools
- Bulk paper products
- Medical supplies and medications
- Personal care stockpiles
- Seasonal items
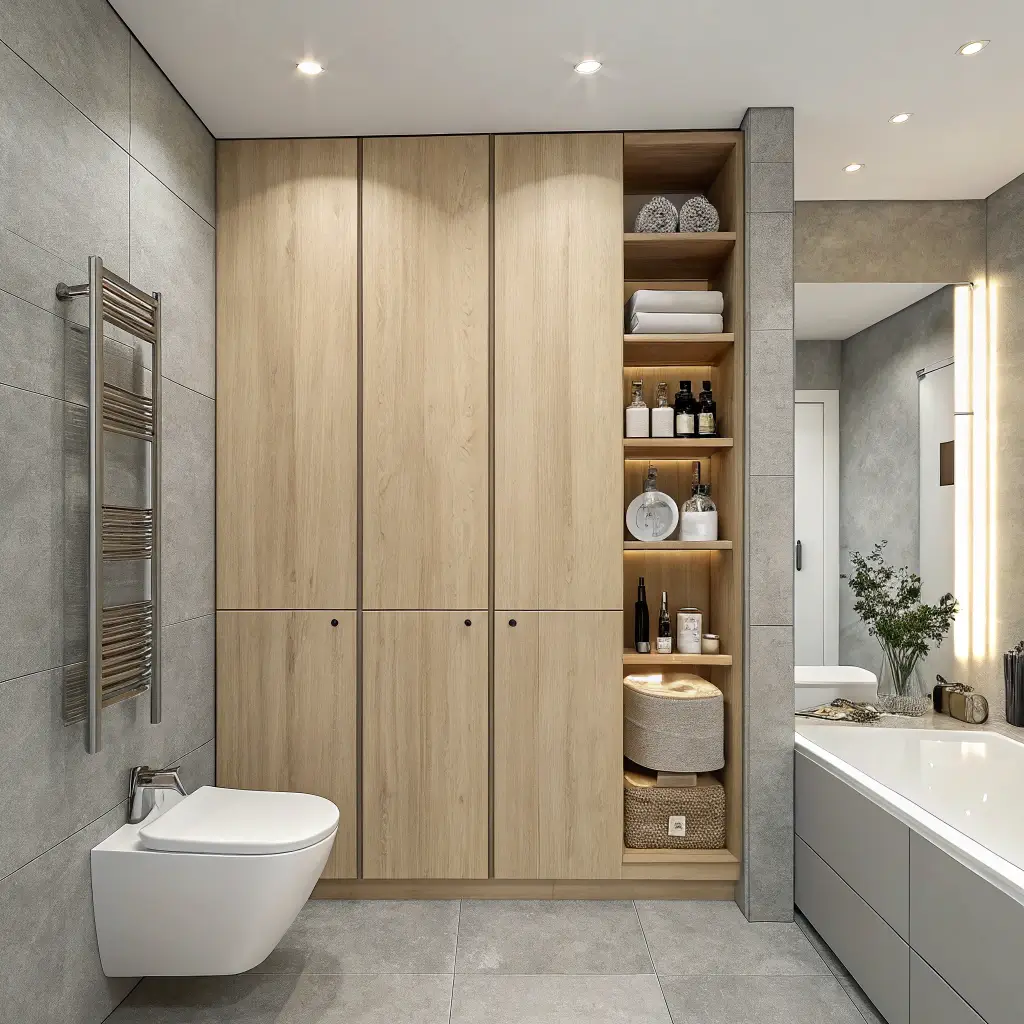
5. Built-In Cabinet with Open and Closed Mix
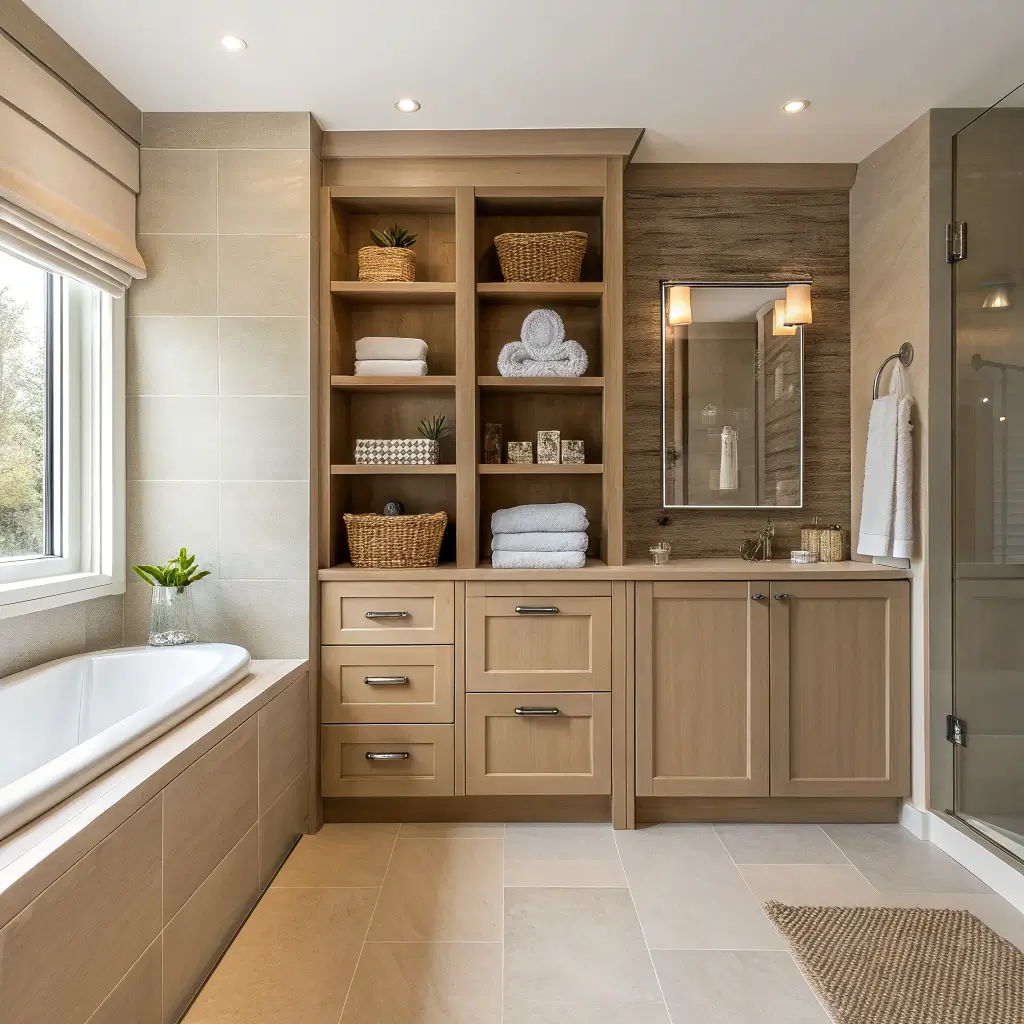
Why choose between open shelving and closed cabinets when you can have both? My mixed storage built-in combines the best of both worlds—display space for pretty things and hidden storage for everything else. It’s like having your cake and eating it too, but with bathroom storage.
Finding the Perfect Balance
The ratio of open to closed storage makes or breaks this design. Too much open shelving, and your bathroom looks cluttered. Too many closed cabinets, and you lose that airy, designed feel. I’ve found the golden ratio is about 30% open to 70% closed.
My current setup features:
- Closed lower cabinets (hiding the ugly necessities)
- Open middle shelves (displaying nice towels and plants)
- Closed upper cabinet (storing medications and personal items)
- Open cubbies (holding decorative baskets)
Styling Open Shelves Without the Mess
Open shelves in bathrooms get dusty and cluttered fast if you’re not strategic. I learned this after my open shelves turned into a graveyard for half-empty bottles within a month. Now I follow strict rules that keep them photo-ready.
Open shelf success strategies:
- Use matching containers for small items
- Roll towels uniformly (spa-style)
- Limit color palette to 2-3 colors
- Include one plant (real or very realistic fake)
- Leave 30% empty space for breathing room
- Rotate displays seasonally
The Closed Cabinet Advantage
While open shelves get all the Instagram love, closed cabinets do the real work. They hide the reality of bathroom life—the economy-size mouthwash, the embarrassing number of face masks, the prescriptions you don’t want on display.
I organize closed sections by category:
- Daily essentials at eye level
- Backup supplies on bottom shelves
- Medications in a locked section
- Cleaning supplies in one designated area
- Personal items in discrete containers
6. Slim Vertical Wall Storage Cabinet
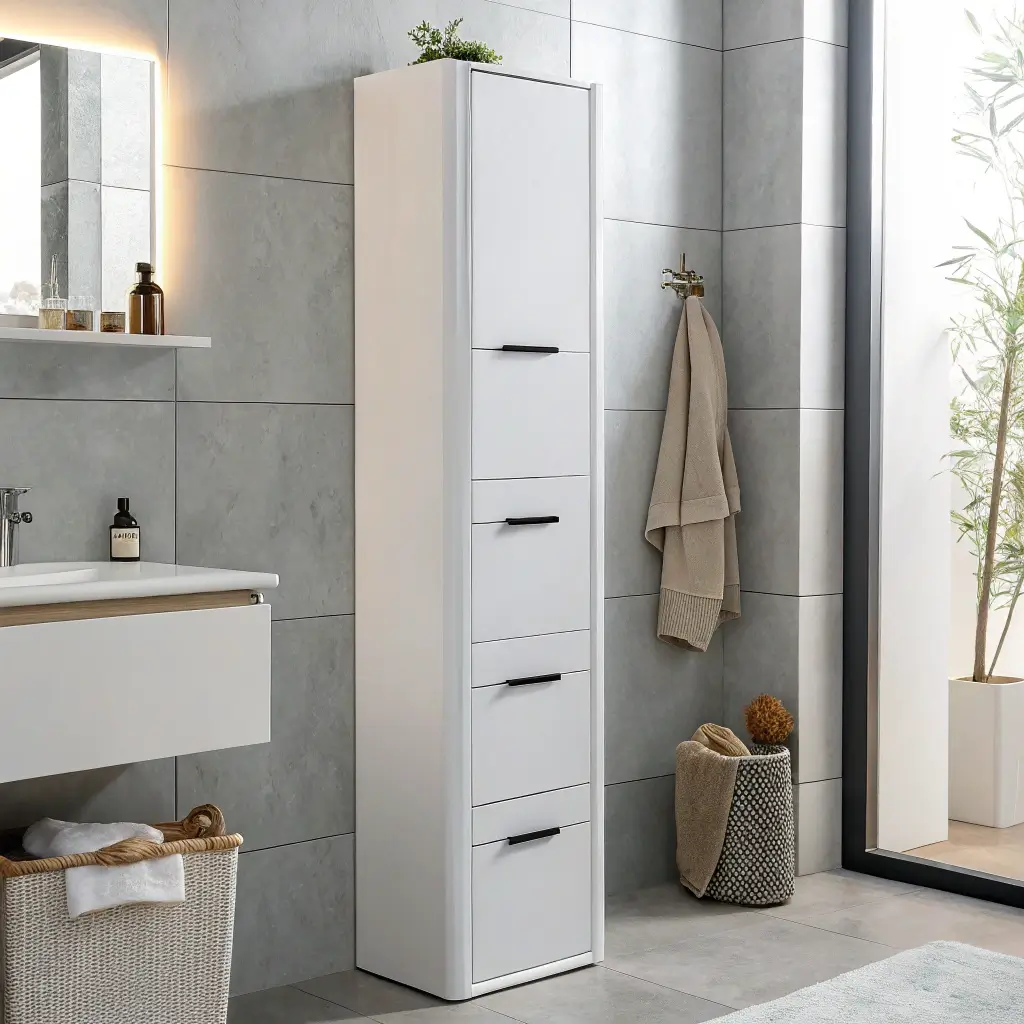
Not every bathroom has expansive walls begging for storage. Sometimes you’re working with a sliver of space between the door and toilet. That’s where slim vertical cabinets shine. I squeezed one into a 10-inch gap in my guest bathroom, and that narrow tower now holds more than my previous bulky vanity.
Working with Minimal Width
Slim cabinets maximize height when width isn’t an option. My 10-inch wide, 6-foot tall cabinet provides five shelves of storage in less than a square foot of floor space. It’s basically the supermodel of bathroom storage—tall, slim, and surprisingly capable.
The key to slim storage success:
- Go as tall as your ceiling allows
- Use adjustable shelves for flexibility
- Choose pull-out mechanisms when possible
- Install good lighting inside (deep = dark)
- Secure to wall properly (tall = tippy)
Custom Sizing for Weird Spaces
Standard cabinets rarely fit those awkward gaps perfectly. I had a 11.5-inch space that standard 12-inch cabinets couldn’t fit. Custom seemed expensive until I discovered I could modify stock cabinets myself. A little creative carpentry, and suddenly my weird gap had perfect storage.
FYI, modifying cabinets isn’t as hard as it seems:
- Measure seventeen times (seriously)
- Use a quality saw guide for straight cuts
- Sand edges smooth
- Touch up with matching paint or stain
- Add trim to hide imperfections
Organizing Narrow Spaces
Slim cabinets require different organization than standard units. You can’t just throw things in and hope for the best. Everything needs a specific spot, or you’ll spend forever digging through layers.
My vertical organization system:
- Small bins that fit the narrow depth
- Labels facing forward
- Most-used items between waist and eye level
- Light items up high
- Heavier items down low
Also Read: 12 Elegant Bathroom Cabinet Colors Ideas and Chic Combos
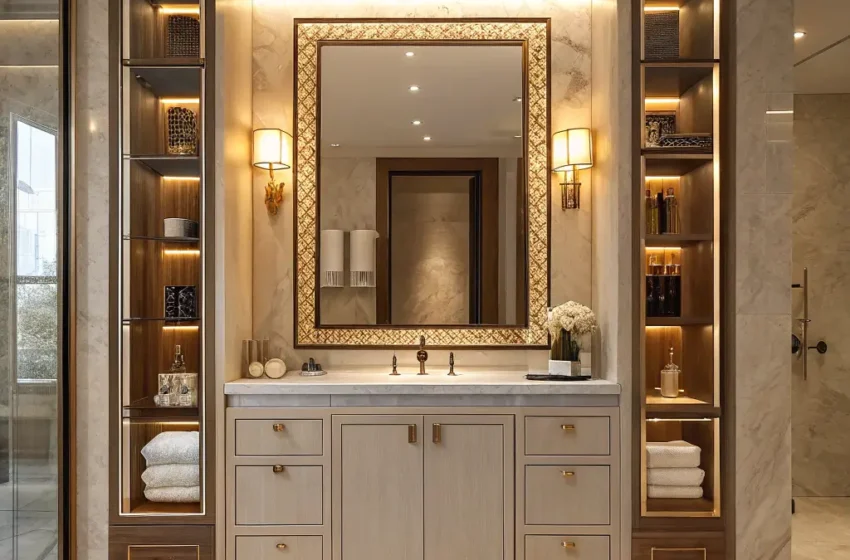
7. Built-In Cabinet Framed Around Mirror
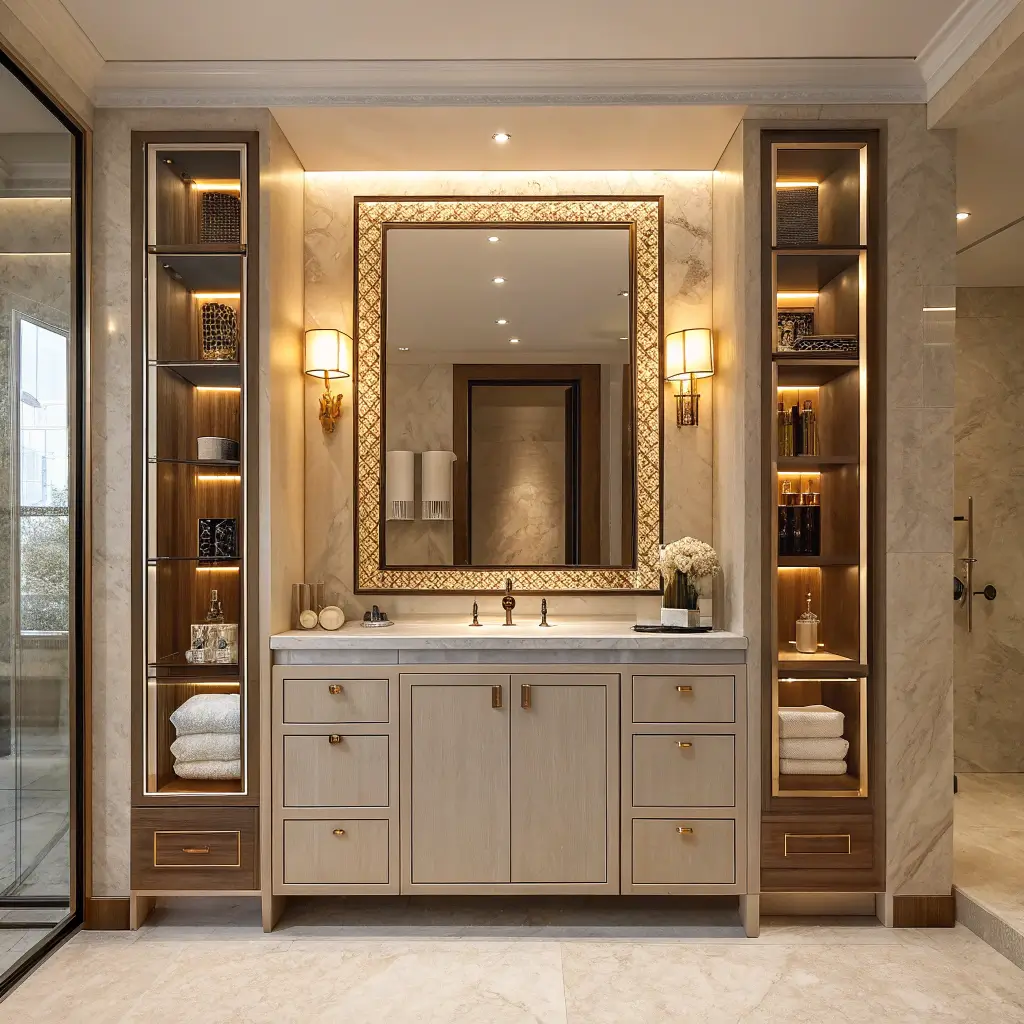
Want to make your mirror multitask? Build storage around it! I framed my bathroom mirror with built-in cabinets, creating a storage solution that looks intentional rather than added on. Plus, I finally have somewhere to store my contact lenses that isn’t balanced precariously on the sink edge.
The Frame Design Strategy
Building cabinets around a mirror requires planning the entire wall as one cohesive unit. The mirror becomes the centerpiece, with storage supporting rather than competing. My setup features narrow cabinets on both sides and a shallow unit across the top.
Design considerations that work:
- Keep side cabinets same width for symmetry
- Depth shouldn’t exceed 4-6 inches (or you’ll bonk your head)
- Leave adequate mirror space for actual use
- Include lighting integration
- Match cabinet height to room proportions
Installation Around Existing Mirrors
Already have a mirror you love? You can still add surrounding storage. I built my frame cabinets around an existing mirror, which saved money and prevented the seven years of bad luck I was definitely going to get from removing it.
Working around existing elements:
- Measure mirror precisely including frame
- Build cabinets to fit snugly but not pressure mirror
- Use separate mounting points (don’t hang off mirror)
- Include spacers if needed for even gaps
- Paint or stain before installing
Mirror Cabinet Lighting Magic
The best part about framing your mirror with cabinets? You can integrate lighting that makes everyone look amazing. I installed LED strips inside my side cabinets that shine toward the mirror. It’s like having a Hollywood vanity without the Hollywood price tag.
8. Corner-Integrated Wall Storage Cabinet
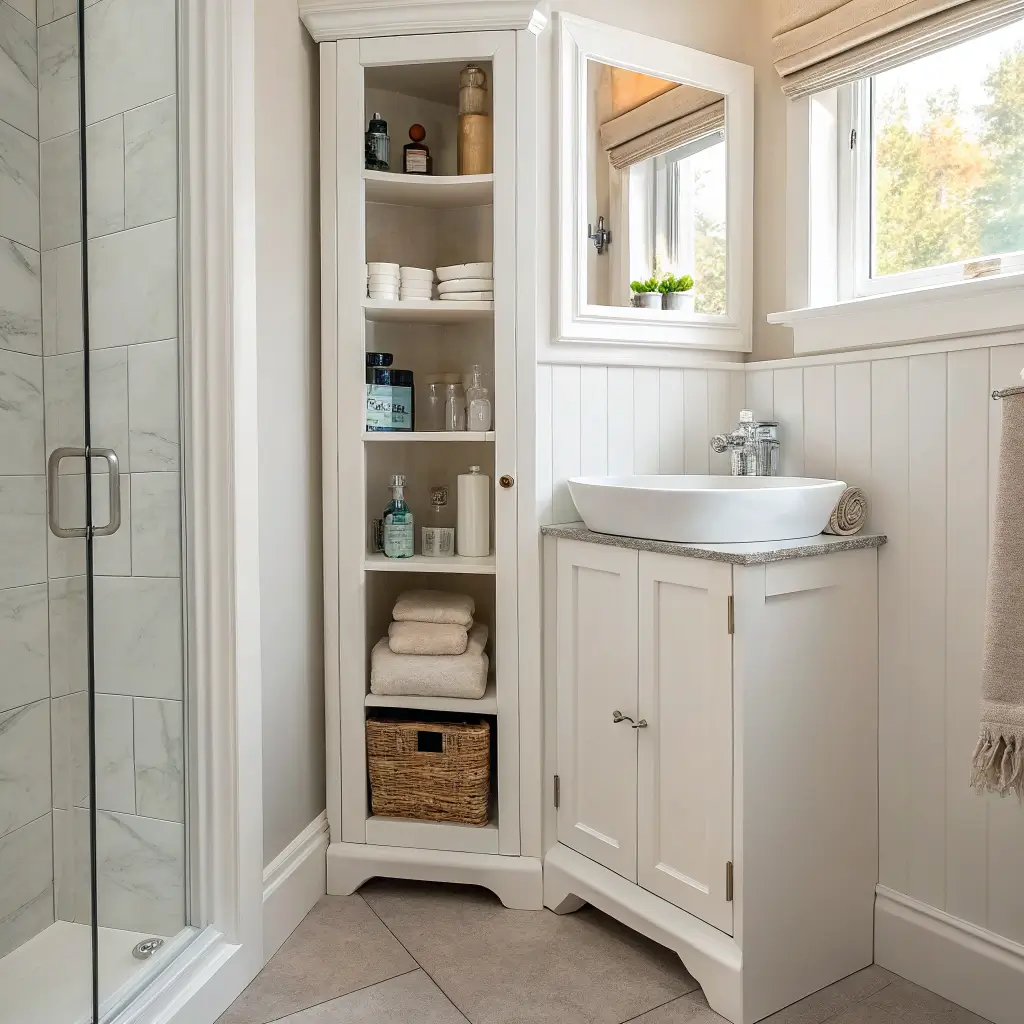
Corners are the Bermuda Triangle of bathrooms—stuff goes in and never comes back out. My corner-integrated cabinet changed that dead zone into my most efficient storage space. No more lost products in the corner vortex!
Conquering Corner Challenges
Corner cabinets fail when they don’t account for accessibility. My first corner unit was so deep I needed a headlamp and determination to find anything. Now I use a diagonal-front design that makes everything reachable without spelunking equipment.
Smart corner solutions:
- Diagonal fronts maximize access
- Lazy Susans for deep corners
- Pull-out drawers eliminate dead zones
- Angled shelves improve visibility
- Proper lighting is non-negotiable
Custom Corner Construction
Building corner storage requires understanding angles and geometry (who knew I’d actually use high school math?). Standard 90-degree corners are rare—most are slightly off. I learned this after confidently cutting everything at perfect right angles only to discover my corner was 91.5 degrees :/
Corner construction tips:
- Measure angles with a proper angle finder
- Create cardboard templates first
- Account for wall irregularities
- Use adjustable shelf pins for flexibility
- Consider modular units that adjust
Making Corners Work Harder
My corner cabinet doesn’t just store—it commands that corner like it owns the place. By extending slightly along both walls, it creates a focal point instead of an awkward junction.
9. Tile-Matched Seamless Built-In Cabinet
Imagine cabinets so well integrated they practically disappear into your tile. I achieved this with tile-matched built-ins, and the seamless look makes my bathroom appear larger and infinitely more expensive than it actually is.
The Art of Tile Integration
Matching cabinets to existing tile requires patience and precision. I spent two weeks finding the perfect tiles to cover my cabinet doors. The result? Storage that looks like it was always part of the original design.
Achieving seamless integration:
- Source matching or complementary tiles
- Plan grout lines to align perfectly
- Use thin tiles to avoid door weight issues
- Consider tile weight in hinge selection
- Seal everything properly for moisture protection
Installation Without Destroying Your Tile
Adding built-ins to a tiled wall sounds destructive, but it doesn’t have to be. I managed to install mine with minimal tile damage by careful planning and strategic cutting.
Tile-friendly installation:
- Use oscillating tools for precise cuts
- Work with existing grout lines when possible
- Have extra tiles ready for repairs
- Consider removable panels for future access
- Protect surrounding tiles during work
When Seamless Makes Sense
Tile-matched cabinets work best in certain situations. They’re perfect for small bathrooms where visual continuity matters, or when you want storage without sacrificing your beautiful tile work.
IMO, this approach excels when:
- Your tile is the star of the room
- Space is limited
- Clean, minimalist aesthetic is the goal
- Budget allows for custom work
- Long-term residence is planned
Also Read: 10 Trendy Bathroom Sink Cabinet Ideas and Minimalist Design Tips
10. Handle-Less Push-to-Open Wall Cabinet
Handles are so last year. My push-to-open cabinets create clean lines that make my bathroom look like it belongs in a design magazine. Plus, no more catching towels on protruding handles or cleaning gunk from handle crevices.
The Magic of Invisible Hardware
Push-to-open mechanisms seem like magic but are surprisingly simple. A gentle push releases the catch, and the door pops open. Another push, and it closes securely. My kids think it’s the coolest thing ever, and honestly, I still get a little thrill every time I use them.
Why handle-less wins:
- Cleaner visual lines
- Easier to clean cabinet faces
- No handles to loosen or break
- Safer (no protruding hardware)
- Modern, minimalist aesthetic
Choosing Quality Push Mechanisms
Not all push-to-open hardware is created equal. I learned this after installing cheap mechanisms that stopped working within months. Quality hardware costs more initially but saves headaches later.
What to look for:
- Soft-close integration
- Adjustable opening force
- Durability ratings
- Smooth operation
- Good warranty coverage
Living Without Handles
The transition to handle-less took adjustment. I initially kept pushing in the wrong spots, and guests needed instructions. Now, small dots of nearly invisible tape mark push points—temporary training wheels that I’ll probably never remove because they work perfectly.
Making Your Built-In Dreams Reality
Creating the perfect built-in bathroom storage isn’t about copying someone else’s design—it’s about solving your specific storage challenges while making your bathroom more beautiful and functional.
I’ve installed built-ins in three bathrooms now, each completely different because each space had unique needs.
Start by honestly assessing your bathroom’s problems. Where does clutter accumulate? What’s always in the way? What do you wish you had more of? Your answers should drive your built-in choices, not what’s trending on Pinterest.
Consider your DIY abilities realistically. Some built-ins are definitely achievable as weekend projects (I’m looking at you, floating cabinets). Others require professional help unless you’re seriously skilled (recessed cabinets involving plumbing, anyone?).
There’s no shame in hiring pros for complex installations—better to pay for expertise than repair expensive mistakes.
Budget matters too, but remember that built-ins are investments in your home’s value and your daily satisfaction. I’ve never regretted money spent on quality storage that I use every single day.
That said, you can achieve amazing results without breaking the bank by mixing DIY efforts with strategic professional help.


