10 Beautiful Staggered Floating Shelves Ideas for Modern Walls
- Floating Shelves
 Ben
Ben- 0
- 29 minutes read

Let me guess—you’re staring at that blank wall in your living room, wondering what on earth to do with it. You’ve considered artwork, maybe a gallery wall, but something about those options feels… predictable?
Been there, done that, bought the overpriced frame.
Here’s the thing: staggered floating shelves are having a major moment, and for good reason. They’re like the Swiss Army knife of wall decor—functional, stylish, and infinitely customizable.
I discovered this magical solution after moving into my apartment and realizing I had more wall space than floor space (city living, am I right?). Those staggered shelves literally saved my sanity and my security deposit.
Whether you’re dealing with an awkward narrow wall, trying to display your ever-growing plant collection, or just want something that screams “I have my life together,” these ten staggered floating shelf ideas will give you exactly what you need.
Let’s dive into the wonderful world of asymmetrical organization that somehow makes perfect sense.
1. Minimalist Asymmetrical Wall Shelf Layout
Sometimes less really is more, especially when you’re going for that clean, sophisticated look that makes people think you hired an interior designer (but really, you just watched a lot of YouTube tutorials).
The Art of Strategic Placement
The minimalist asymmetrical approach is all about intentional spacing and careful curation. You’re not just slapping shelves on a wall willy-nilly—you’re creating a composition. Start with three to five shelves of varying lengths, and arrange them at different heights and horizontal positions. The key is maintaining enough negative space between each shelf to let them breathe.
I learned this the hard way when I first installed floating shelves in my bedroom. I got excited and crammed seven shelves onto one wall, thinking more storage equals better. Wrong. It looked like a discount store exploded on my wall. After removing half of them and spacing out the remaining ones asymmetrically, the whole room suddenly felt twice as large.
What to Display
With minimalist layouts, every item counts. Think quality over quantity—a single sculptural vase, a small succulent in a geometric planter, or a carefully chosen stack of books with coordinating spines. The beauty of this approach is that it forces you to be selective, which automatically elevates the look of whatever you display.
Keep your color palette tight. Stick to two or three colors maximum, including the shelf color. Black shelves with white and natural wood accents? Chef’s kiss. White shelves with black and gold accessories? Absolutely stunning. The restraint is what makes it sophisticated.
2. Staggered Floating Shelves for Small Living Rooms
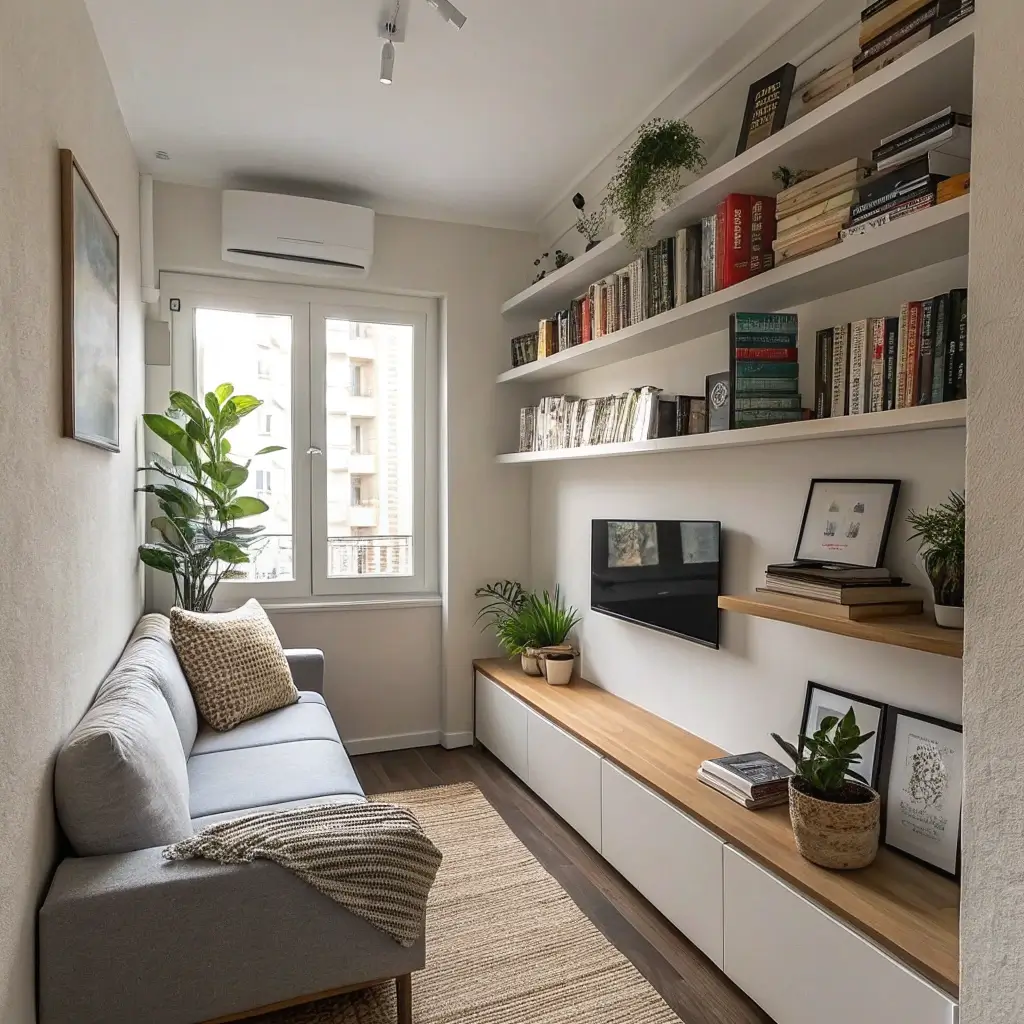
Small living rooms require big thinking, and staggered floating shelves are basically spatial magic tricks that make your room feel larger while adding tons of storage.
Vertical Victory
When floor space is at a premium, you’ve got to think up, not out. Staggered shelves draw the eye upward, creating the illusion of height and making your ceilings appear taller. Install your highest shelf closer to the ceiling than you think you should—leave just enough room to place and remove items comfortably.
The staggering effect prevents the shelves from creating a heavy horizontal line that can make rooms feel boxed in. By varying the heights and positions, you create movement and flow that keeps the eye traveling around the room rather than getting stuck in one spot.
Smart Storage Solutions
In small living rooms, every shelf needs to earn its keep. Use deeper shelves (8-10 inches) on the bottom for books and storage baskets, then gradually decrease depth as you go up. Those narrow 4-inch shelves at the top? Perfect for small decorative items that don’t need daily access.
Mix open and hidden storage by incorporating some attractive boxes or baskets on your shelves. This way, you can hide the not-so-pretty necessities (remote controls, charging cables, that collection of takeout menus you swear you’ll use someday) while keeping the overall look clean and intentional.
3. Modern Stair-Step Shelf Arrangement
The stair-step arrangement is exactly what it sounds like—shelves arranged in a diagonal pattern that mimics a staircase. It’s geometric, it’s modern, and it’s surprisingly easy to pull off.
Creating the Pattern
Start with shelves of the same length (this is important for the stair-step effect to work properly). Install your first shelf, then place the next one slightly higher and to the right (or left—dealer’s choice). Continue this pattern, maintaining consistent spacing both vertically and horizontally between shelves.
The magic number seems to be 6-8 inches of vertical spacing and 4-6 inches of horizontal offset between each shelf. This creates a clear stair-step pattern without looking too spread out or too cramped. I’ve found that five to seven shelves work best for this arrangement—fewer looks incomplete, more starts to look busy.
Styling Your Steps
The stair-step pattern creates natural visual flow, so use it to your advantage. Place taller items on the lower shelves and gradually decrease height as you go up. This reinforces the ascending pattern and creates a sense of balance.
Color gradients work beautifully with this arrangement. Try organizing books by spine color from dark to light, or display a collection of vases that gradually change in shade. The diagonal line naturally guides the eye, so why not give it something interesting to follow?
Also Read: 10 Cozy Coffee Bar with Floating Shelves Ideas for Your
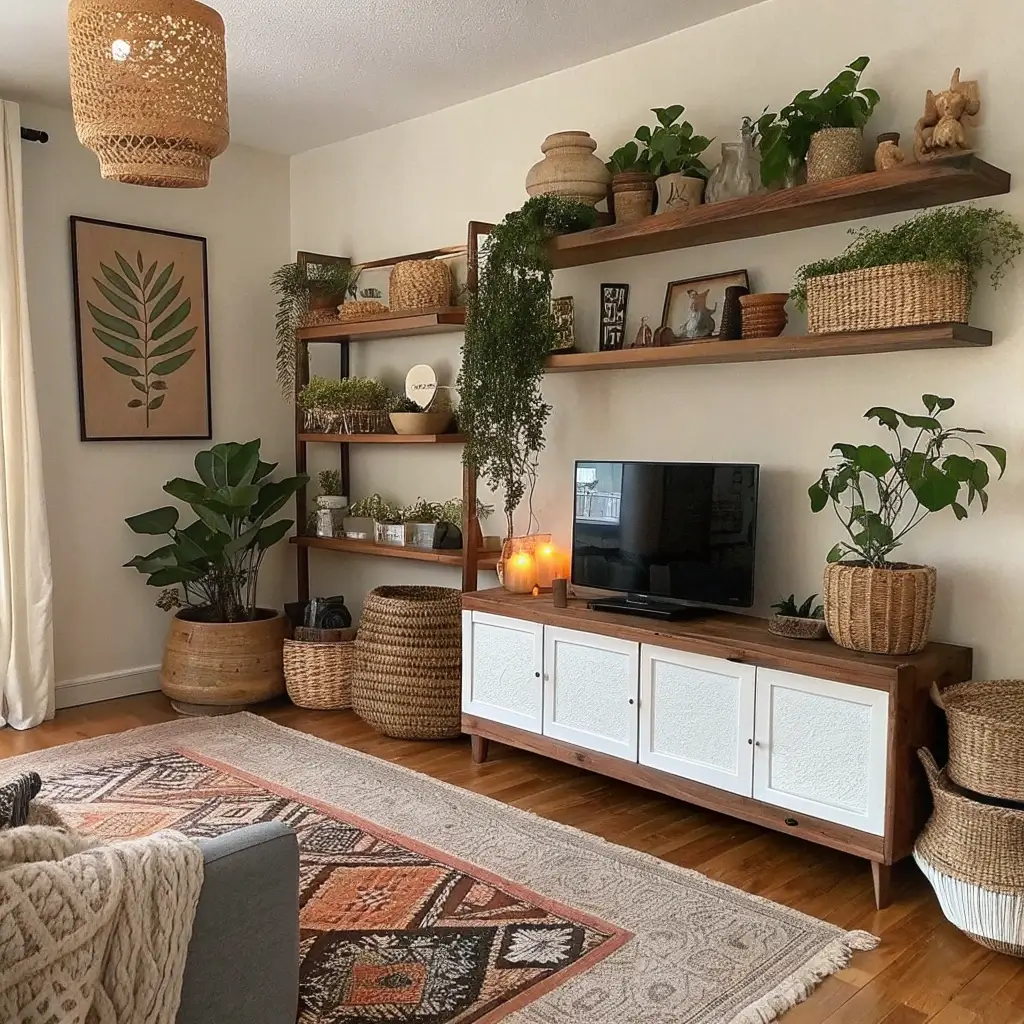
4. Cozy Boho Staggered Shelf Styling

Boho style and staggered shelves are a match made in eclectic heaven. This is where you can let your free spirit flag fly while still maintaining some semblance of organization.
Embracing Organized Chaos
Boho staggered shelves thrive on variety—different shelf lengths, varying heights, and seemingly random placement that somehow comes together perfectly. The trick is creating cohesion through repetition of elements rather than strict symmetry.
Use natural wood shelves in different finishes, or paint some shelves and leave others natural. The mixed materials add to the collected-over-time vibe that makes boho style so appealing. Just make sure there’s some connecting element—maybe all the shelves have rounded edges, or they’re all from the same wood family.
Boho Display Essentials
This is where you can finally display all those treasures from your travels (or Target, no judgment). Macramé plant hangers dangling from shelves, vintage books with worn covers, ceramic pieces in earthy tones, and plants, plants, plants. Did I mention plants?
Layer different textures—smooth ceramics next to rough baskets, soft textiles beside hard wood. The key to boho styling is making it look effortless while actually being quite intentional. Group items in odd numbers, vary heights within each shelf, and don’t be afraid to let some items overlap shelf edges for that lived-in look.
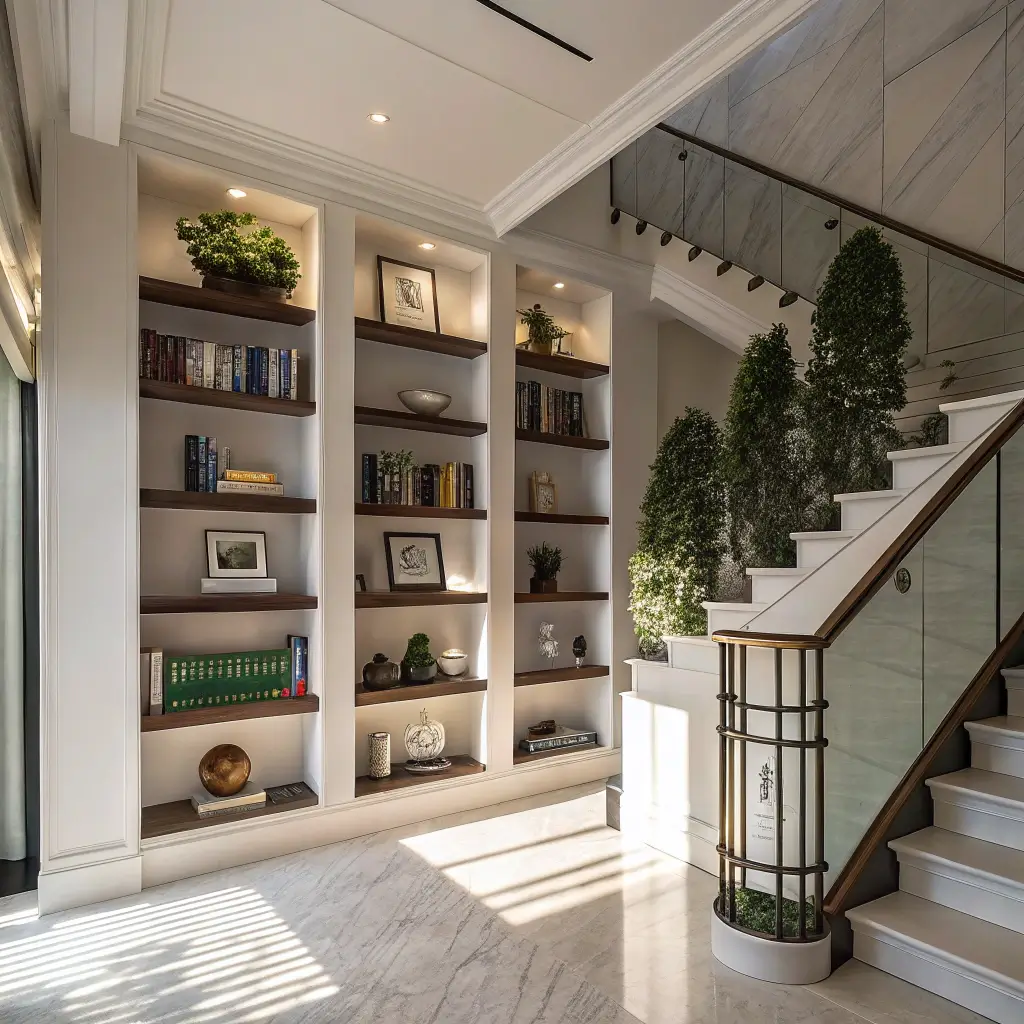
5. Floor-to-Ceiling Floating Shelf Design

Go big or go home, right? Floor-to-ceiling staggered shelves make a serious statement and provide an insane amount of storage and display space.
Planning Your Vertical Library
This isn’t a weekend warrior project—floor-to-ceiling installations require careful planning. Start by mapping out your design on paper, considering electrical outlets, light switches, and any architectural features you need to work around. You’ll want a mix of shelf lengths and spacing to avoid the ladder effect.
Install your shelves in sections, starting from the middle and working outward. This helps maintain balance and makes it easier to adjust as you go. FYI, you’ll definitely need a friend for this project, unless you’ve secretly developed octopus arms.
Styling the Full Height
The beauty of floor-to-ceiling shelves is the opportunity to create different zones. Lower shelves can hold heavier items and frequently used books. Middle shelves are prime real estate for your favorite decorative pieces. Upper shelves are perfect for items you love but don’t need to access often.
Create visual breaks by leaving some shelves partially empty or styling them minimally. This prevents the wall from feeling overwhelming and gives your eye places to rest. Think of it as punctuation in a very long sentence—necessary for comprehension and sanity.
6. Staggered Shelves for Narrow Wall Spaces
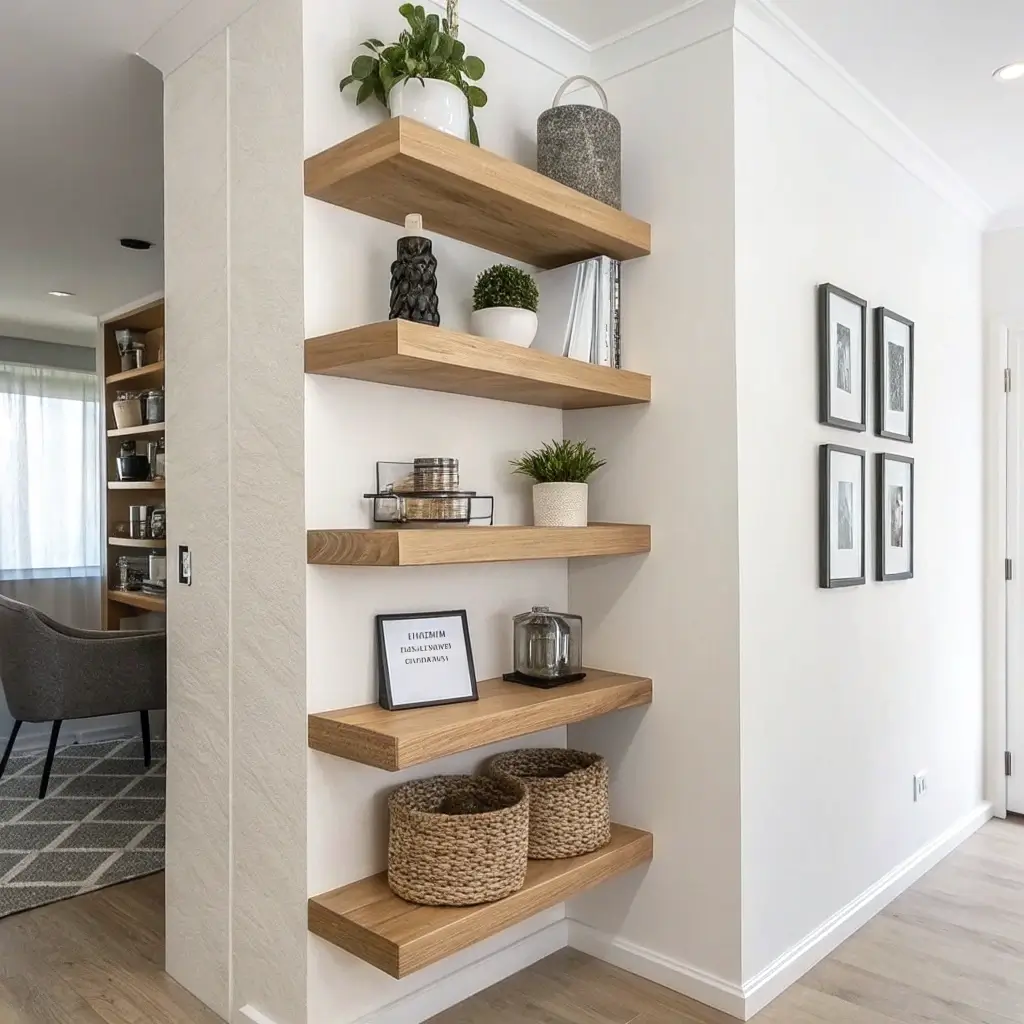
That awkward narrow wall between your window and corner? The weird strip next to your doorway? These are actually golden opportunities for staggered floating shelves.
Making the Most of Tight Spaces
Narrow walls call for narrow shelves—think 4-6 inches deep maximum. Any deeper and they’ll stick out awkwardly and probably become a hip-bruising hazard (speaking from painful experience). The beauty of narrow shelves is that they force you to be creative with what you display.
Stagger them more dramatically on narrow walls to create visual interest. Since you’re working with limited horizontal space, play up the vertical arrangement. Alternate shelves from left to right alignment, creating a zigzag pattern that makes the narrow space feel intentional rather than forgotten.
Narrow Shelf Styling
Think vertical with your displays—tall, slim vases, small potted plants that grow upward rather than outward, or a collection of vintage bottles. Books can work if you display them spine-out in small groups, or even better, show off beautiful covers face-forward as art pieces.
These narrow spaces are perfect for creating mini galleries. Use the shelves to display small framed photos, postcards, or tiny art pieces. The staggered arrangement prevents it from feeling too rigid or gallery-wall-predictable.
Also Read: 12 Elegant Corner Floating Shelves Ideas and Home Styling
7. Scandinavian-Inspired Floating Shelf Wall

Scandinavian design and staggered shelves are like peanut butter and jelly—they just work. The clean lines and functional beauty of Scandi style perfectly complement the organized chaos of staggered shelving.
Achieving Scandi Simplicity
Start with light-colored wood shelves—birch, ash, or white-washed pine are your best friends here. The staggering should feel intentional but not overly geometric. Think of it as organized randomness, if that makes sense (it will once you see it).
Keep the spacing generous between shelves. Scandinavian design loves negative space almost as much as it loves functionality. This breathing room prevents the shelves from feeling cluttered, even when they’re holding plenty of items.
The Art of Hygge Display
Display items that serve both form and function—beautiful ceramic bowls that you actually use, well-designed storage boxes that hide clutter, and books you genuinely read (or at least intend to). Add warmth with natural elements like wooden sculptures, stone accessories, or that one perfect plant.
Stick to a neutral color palette with maybe one accent color used sparingly. Think whites, creams, soft grays, and natural wood tones with perhaps a touch of soft blue or sage green. The restraint is what makes it feel expensive and intentional, even if half your stuff came from IKEA (no shame in that game).
8. Rustic Wood Staggered Shelf Display
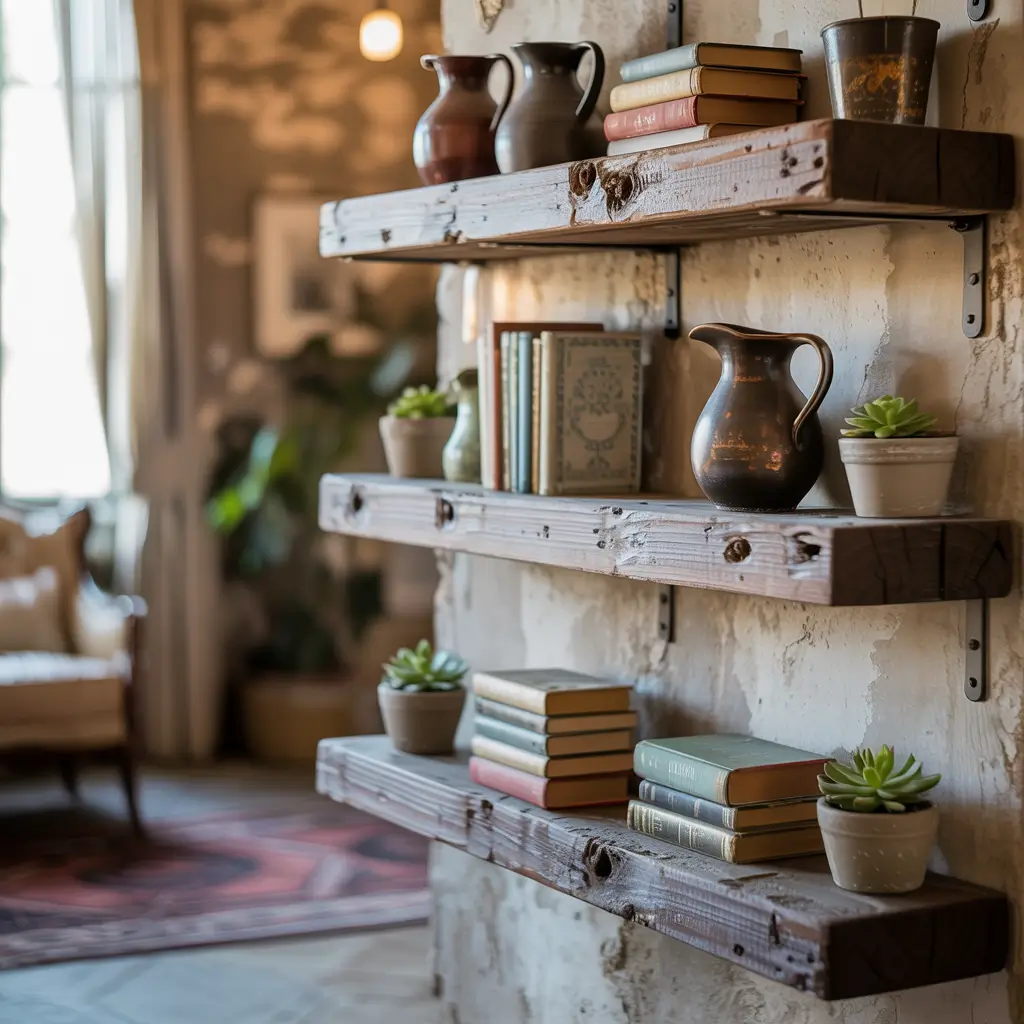
There’s something about rustic wood shelves that makes any space feel instantly cozier. Maybe it’s the natural imperfections, or the way they make everything displayed on them look more interesting.
Choosing Your Wood
Reclaimed wood is the holy grail of rustic shelving—each piece tells a story with its unique grain patterns, nail holes, and weathering. If reclaimed isn’t in your budget, you can achieve a similar look with new wood using staining and distressing techniques (YouTube University has entered the chat).
Mix different wood tones for authentic rustic charm. A dark walnut shelf next to honey-colored pine, with maybe a gray-washed piece thrown in? That’s the kind of collected-over-time look that makes rustic style so appealing. Just make sure your mounting hardware can handle the weight—rustic wood tends to be heavier than manufactured shelves.
Rustic Styling Rules
Embrace imperfection in your displays too. Vintage mason jars, antique books with worn spines, galvanized metal containers, and anything with a patina belongs here. The staggered arrangement should feel organic, like the shelves grew there naturally rather than being precisely measured and installed.
Don’t over-style rustic shelves. Leave some breathing room, let the wood grain be part of the display, and resist the urge to make everything perfectly aligned. The beauty is in the imperfection—that slightly crooked stack of books, the plant that’s growing a bit wild, the vintage sign that’s leaning rather than hanging straight.
9. Staggered Shelves Above Sofa Styling Idea
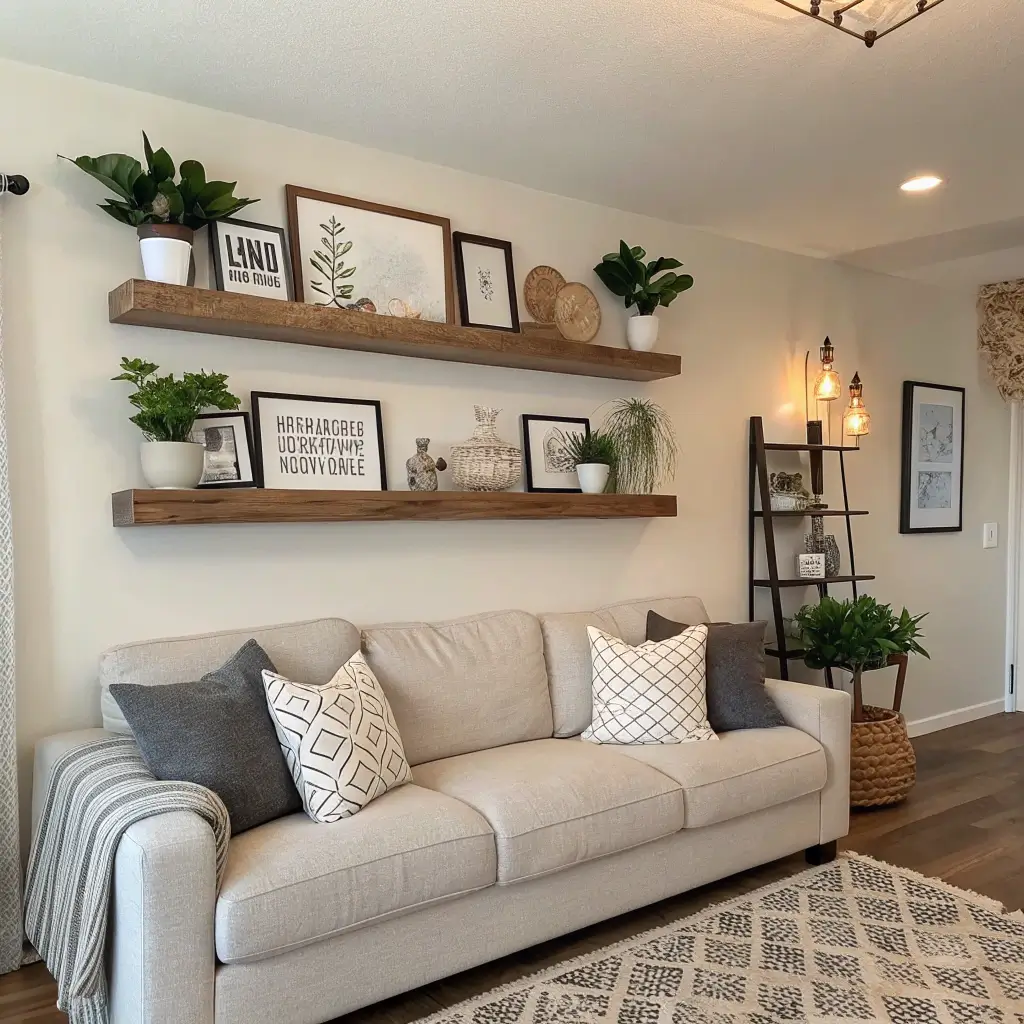
The wall above your sofa is prime real estate, and staggered floating shelves are a way more interesting solution than the predictable large artwork or mirror.
Proportions and Placement
The key to above-sofa shelving is getting the proportions right. Your shelf arrangement should span about 2/3 to 3/4 the width of your sofa—any wider looks disconnected, any narrower looks dinky. Start your lowest shelf about 8-10 inches above the sofa back to avoid head bumps and make cleaning easier.
Create a loose triangle or diamond shape with your staggered arrangement. This gives the eye a natural focal point and prevents the shelves from competing with your sofa for attention. The arrangement should enhance your seating area, not overwhelm it.
Living Room Worthy Displays
Since these shelves are in a high-traffic, high-visibility area, they need to look good from multiple angles. Mix books (horizontal and vertical placement), plants, and decorative objects. Include some personal items—framed photos, travel souvenirs, or collections—to make the space feel lived-in and personal.
Lighting can make or break above-sofa shelves. If possible, add small LED strip lights under some shelves, or position table lamps to uplight your displays. The added illumination creates ambiance and highlights your styling efforts when the sun goes down.
Also Read: 10 Inspiring Floating Shelves Decor Ideas and Plant Styling Tips
10. Floating Shelf Gallery Wall Layout
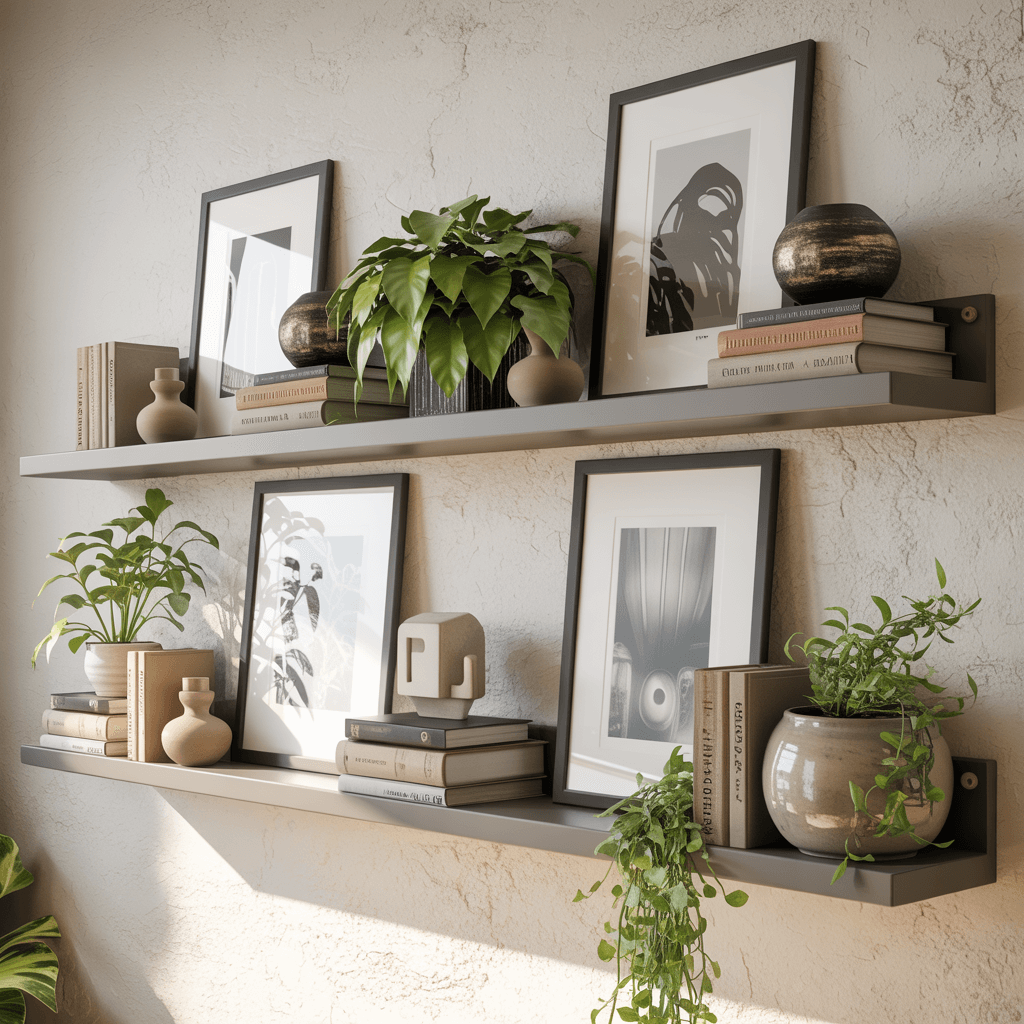
Why choose between a gallery wall and floating shelves when you can have both? This hybrid approach gives you the best of both worlds—functional storage and artistic display.
Creating the Hybrid Layout
Start by planning your gallery wall elements—artwork, mirrors, maybe some decorative objects. Then, integrate floating shelves at various heights and positions within this arrangement. The shelves become part of the gallery while adding dimensional interest and functionality.
The trick is balancing the visual weight. If you have a large piece of artwork on one side, balance it with a longer shelf or multiple shorter shelves on the other. Think of it as creating a visual conversation between the flat gallery elements and the dimensional shelves.
Styling Your Gallery Shelves
These shelves should hold items that could theoretically hang on the wall but look better displayed on a surface. Small framed photos leaning against the wall, miniature sculptures, or art books that complement your gallery theme work perfectly.
Keep the styling minimal on these shelves—they’re supporting players, not the stars. A single beautiful object on a shelf can have more impact than a crowded display. The interplay between the hung artwork and the shelf displays creates layers of interest that make people want to look closer.
Making It Happen: Installation Tips and Tricks
Now that you’re probably itching to start drilling holes in your walls, let’s talk about making these ideas reality without destroying your security deposit or your sanity.
Finding Your Studs (The Wall Kind)
Staggered shelves mean multiple mounting points, which means you really need to know where your studs are. Invest in a good stud finder—the electronic ones are worth the extra money. Mark your studs with painter’s tape before you start planning your layout.
If you can’t hit studs where you want shelves, use appropriate wall anchors rated for the weight you’ll be placing on them. Don’t cheap out on anchors—the last thing you want is your beautiful shelf arrangement crashing down at 3 AM.
The Magic of Templates
Before you drill a single hole, create paper templates of your shelves and tape them to the wall. Live with the arrangement for a day or two. You’ll be amazed how often you’ll want to adjust things once you see them in place. This saves you from the heartbreak of unnecessary holes and misaligned shelves.
Use a level religiously. Even slightly crooked shelves will haunt you forever, especially in staggered arrangements where the angles create visual relationships. Take your time with installation—rushing leads to mistakes and regret.
Final Thoughts: Your Wall, Your Rules
Here’s the thing about staggered floating shelves there’s no one right way to do them. The best arrangement is the one that works for your space, your stuff, and your style.
Maybe you’ll combine elements from several of these ideas, or maybe you’ll come up with something entirely new.
Start small if you’re feeling overwhelmed. Three shelves arranged asymmetrically can have just as much impact as an entire wall installation. You can always add more later (trust me, you probably will—floating shelves are addictive).
Remember, the beauty of floating shelves is their flexibility. Unlike built-ins or heavy furniture, you can rearrange, restyle, or completely change them whenever the mood strikes.
So go ahead, grab your drill, channel your inner interior designer, and transform that blank wall into something amazing.
Your walls are waiting, and honestly, they’re probably tired of being boring. Time to give them the glow-up they deserve! 🙂


