10 Stylish DIY Shelves Ideas and Unique Storage Solutions
- Floating Shelves
 Ben
Ben- 0
- 25 minutes read
DIY shelves changed my life, and I’m not even being dramatic. I went from spending hundreds on basic store-bought shelving to creating custom pieces for under $50 that actually look better than the expensive stuff.
The best part? That smug feeling when someone asks where you bought them and you get to say, “Oh, I made these myself.”
Let me share the DIY shelf projects that actually work – not those Pinterest fails that look easy until you’re three hours deep, covered in sawdust, questioning your life choices. These are the real deal, tested by someone who once thought a level was optional (spoiler: it’s not).
Whether you’re a complete beginner or someone who owns more than one type of saw, I’ve got projects that’ll transform your walls without transforming your bank account into a sad, empty void.
Floating Wooden Ledge Shelves: The Gateway Drug of DIY
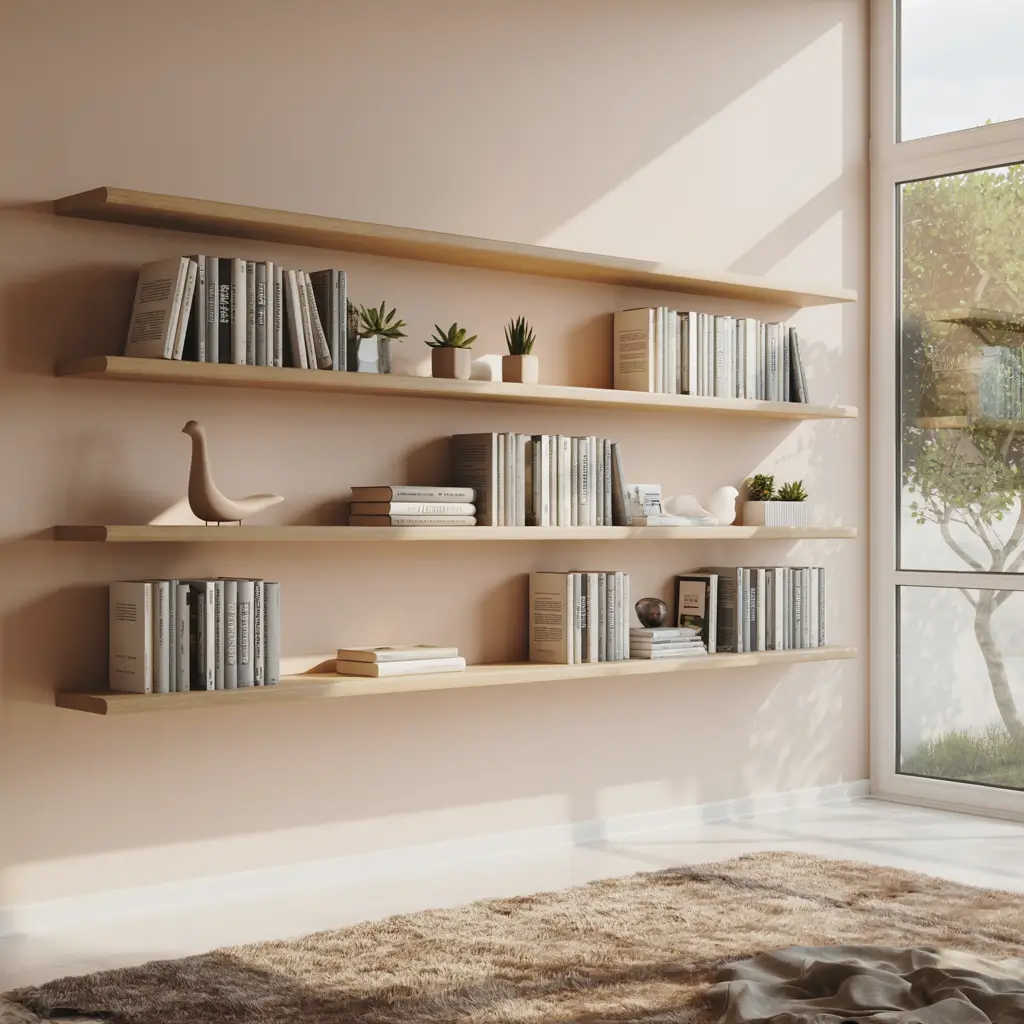
Floating wooden ledge shelves are where everyone should start their DIY journey. They’re forgiving, cheap, and impossible to mess up badly enough that you can’t fix it. I made my first set five years ago with a piece of wood, some brackets, and misplaced confidence.
The magic happens when you realize you can make these for about $15 instead of paying $60 for the same thing at a furniture store. I use simple pine boards from the hardware store, sand them smooth, and stain them whatever color matches my mood that week. Currently rocking a walnut stain that makes my $8 pine look like expensive hardwood.
Building Your First Floating Ledge
Start with a straight board – and I mean actually straight. I learned this after my first shelf looked like a skateboard ramp. Hold boards at eye level at the store and sight down them like you’re aiming a rifle. The employees might look at you funny, but your shelves will be level.
Hidden brackets are the secret to that floating look. I drill recessed holes in the back of the shelf to hide the mounting hardware completely. It takes an extra 20 minutes but makes the difference between “nice shelf” and “wait, how is that staying up?”
The finish makes or breaks these shelves. I tried leaving one au naturel thinking it looked “rustic.” It just looked unfinished. Now I always use at least two coats of polyurethane. Your shelves will thank you by not warping or water-staining the first time someone puts a sweaty glass on them.
Rustic Ladder Shelf Display: The Leaning Tower of Storage
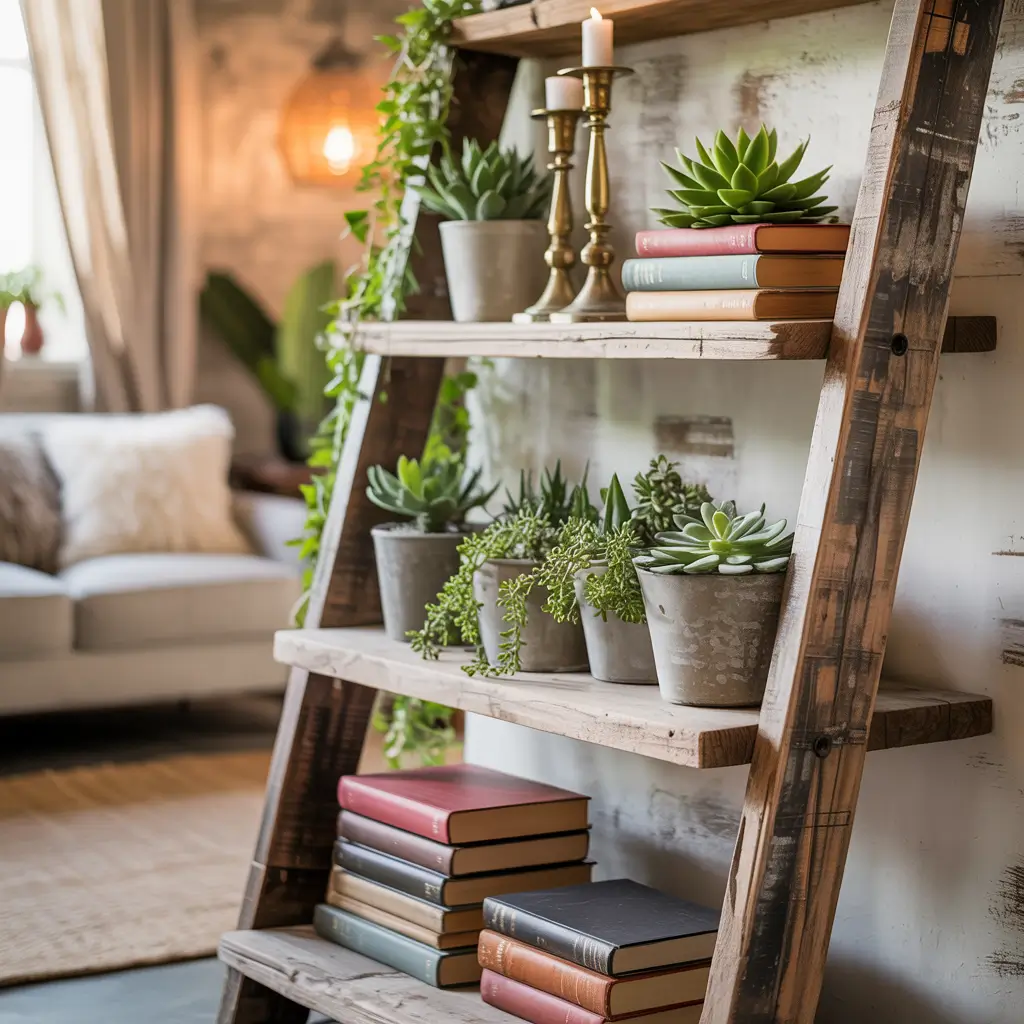
Building a ladder shelf is like assembling furniture from that Swedish store, except you actually understand the instructions because you wrote them. My first ladder shelf started as two 2x4s and some scrap wood. It now holds my entire vinyl collection and hasn’t collapsed yet.
The beauty of ladder shelves lies in their simplicity. Two rails, some rungs, and you’ve got storage that looks intentionally casual. I made mine from reclaimed fence posts, which gave it instant character without the “trying too hard to be rustic” vibe.
Creating Your Ladder Masterpiece
The angle is everything with ladder shelves. Too upright and stuff slides off. Too leaning and you waste space. I found 15 degrees from vertical is the sweet spot – stable enough for books, angled enough to look relaxed.
Don’t skimp on the wood screws. I initially used nails because I was impatient. The whole thing started coming apart after a month. Now I use 3-inch wood screws and wood glue at every joint. This ladder could probably support me climbing it (not that I’ve tested this theory).
Spacing between rungs needs actual thought. I made mine equal distances apart, which looks neat but doesn’t accommodate different sized items well. Version 2.0 has varied spacing – wider at the bottom for storage boxes, narrower up top for books and decor.
Corner Triangle Shelves: The Geometry Lesson That Pays Off
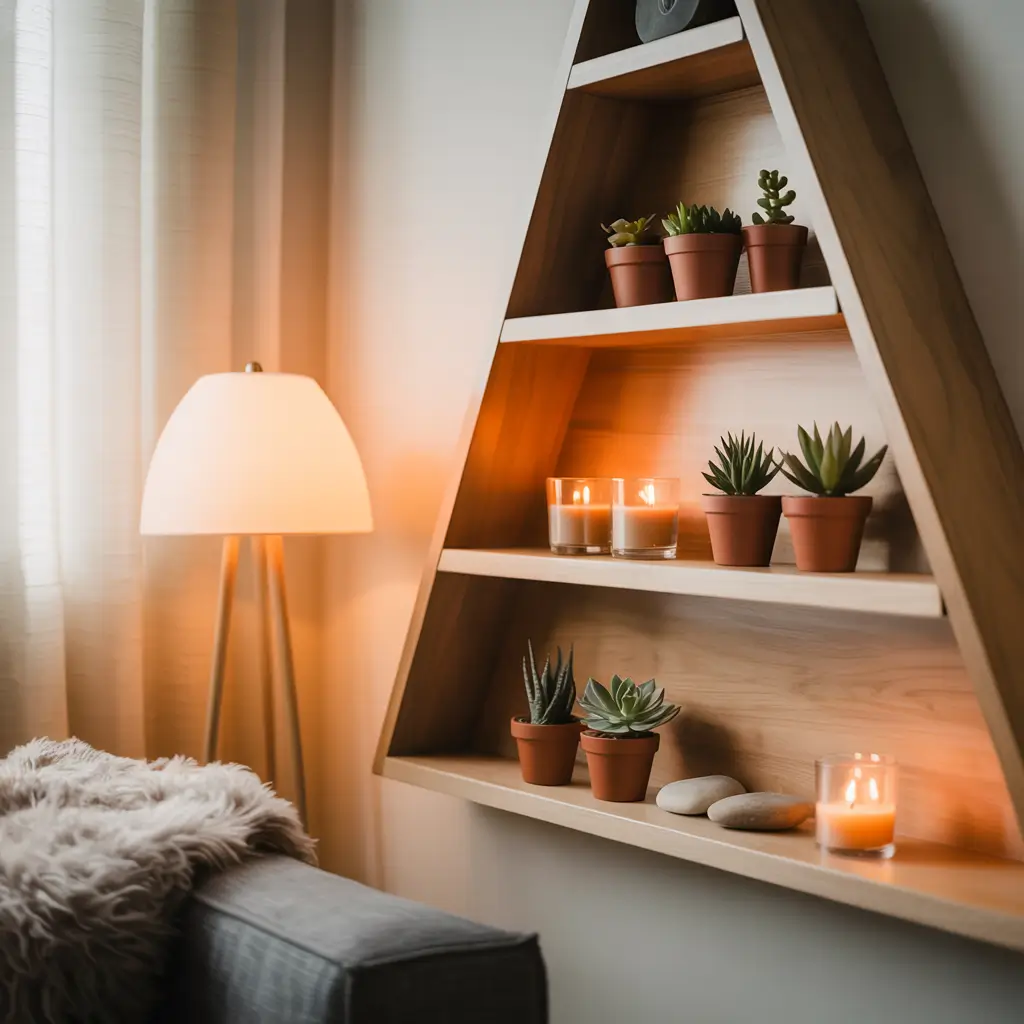
Corner triangle shelves solve that awkward corner problem while making you look like you understand advanced geometry. Plot twist: you don’t need to. I failed geometry twice and still managed to build these.
The triangular shape naturally fits corners while creating interesting visual lines. My bathroom corner shelves turned dead space into the perfect spot for all those products I swear I need. The geometric shape adds modern flair without trying too hard.
Triangulating Your Success
Measure your corner angle before assuming it’s 90 degrees. I discovered my “square” corner was actually 88 degrees after cutting perfect right triangles. Now those shelves have custom shims behind them that nobody knows about.
Support these shelves from two walls for maximum stability. Single-wall mounting works but creates stress on the outer point. I learned this when my first attempt started drooping like a sad pizza slice after a few weeks.
Cut your triangles slightly smaller than the corner space. A too-tight fit looks good initially but causes problems when your house settles or humidity changes. I leave about 1/8 inch gap on each wall – invisible but prevents future headaches.
Also Read: 12 Inspiring Wall Shelves Design Ideas and Functional Layouts
Hanging Rope Shelves: The Nautical Solution Nobody Saw Coming

Rope shelves bring beach house vibes even if you’re landlocked in Nebraska. They’re ridiculously easy to make and add movement to your walls that static shelves can’t match. My kitchen rope shelves sway slightly when I grab items, which felt weird at first but now feels oddly satisfying.
The materials cost almost nothing – some boards, rope, and ceiling hooks. I spent $30 total and got shelving that would cost $200+ in a boutique store. Plus, the installation is so simple that I actually got it right on the first try (a personal record).
Roping Yourself Into Great Storage
Choose your rope based on aesthetics AND function. Natural jute looks amazing but sheds fibers and can stretch. I switched to synthetic rope that looks natural but doesn’t leave little rope bits everywhere. Your black shirts will appreciate this choice.
Drill the holes for rope slightly larger than the rope diameter. Too tight and threading becomes a nightmare. Too loose and your shelves slide around. I use a drill bit that’s 1/8 inch larger than my rope – perfect for threading but tight enough for stability.
The knots matter more than you think. My first attempt used basic overhand knots that slowly loosened. YouTube taught me the bowline knot, and now my shelves stay exactly where I want them. Who knew Boy Scout skills would finally prove useful?
Geometric Hexagon Wall Shelves: The Honeycomb Haven
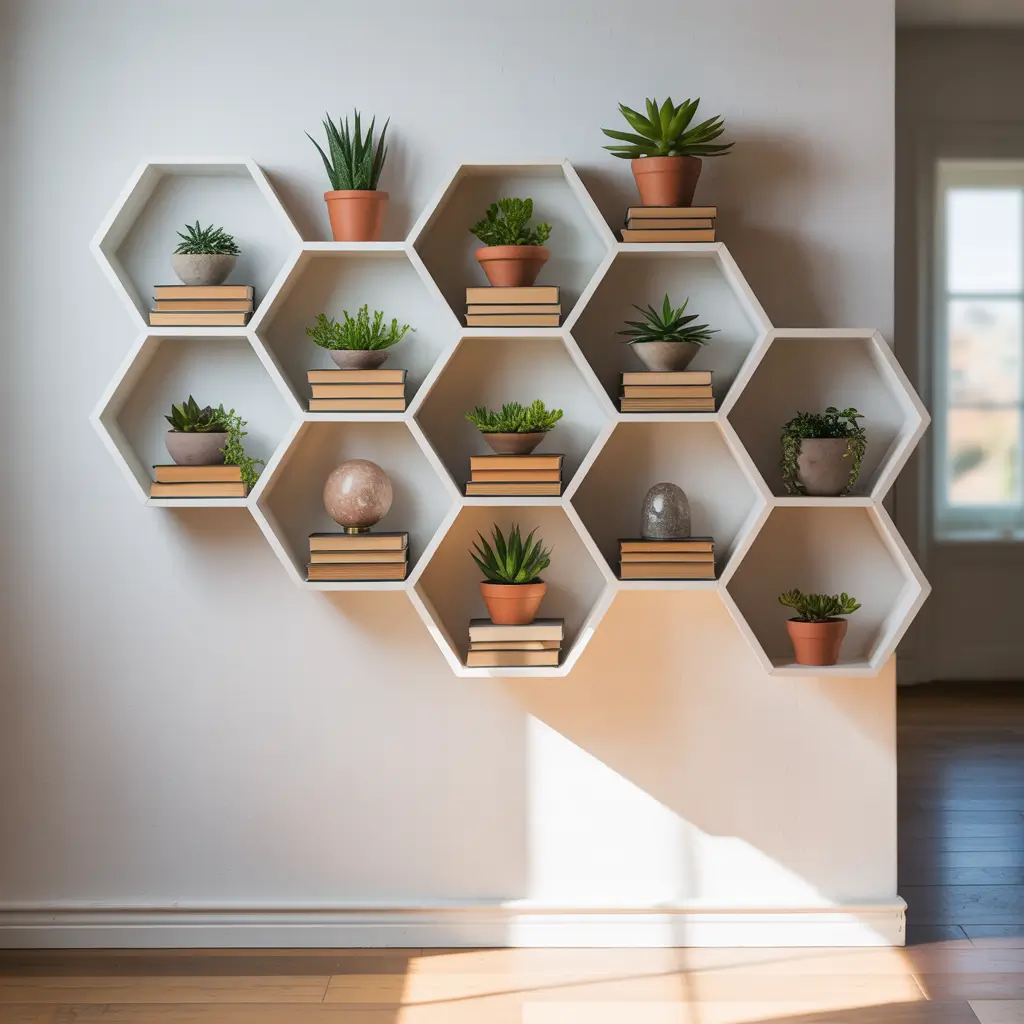
Hexagon shelves make your wall look like modern art that happens to store things. Building them requires patience and a miter saw (or a very understanding friend who owns one). I made seven hexagons for my office wall, and now everyone thinks I hired a designer.
The trick is getting those 30-degree angles perfect. One degree off and your hexagon becomes a sad polygon that doesn’t quite close. I made a jig from scrap wood to ensure consistent cuts. Game changer.
Hexagon Hacks for Beginners
Create a template before cutting good wood. I used cardboard to make a perfect hexagon template, then traced it onto my boards. This saved me from wasting expensive wood on geometric experiments.
Pre-drill everything to prevent splitting. Those sharp angles create weak points where wood loves to crack. I drill pilot holes for every screw and haven’t had a split since my first disaster hexagon (RIP).
Start with one hexagon and test your process. I got ambitious and cut all seven at once, then discovered my angles were slightly off. Seven slightly-wrong hexagons later, I learned to test first, mass-produce second.
Industrial Pipe Shelves: The Plumbing Section’s Greatest Hits

Industrial pipe shelves make you look like you converted a factory into your living space. The irony? They’re easier to build than traditional shelves. No cutting wood at weird angles, just screwing pipes together like expensive Tinkertoys.
I built my first set for my garage, thinking they’d look appropriate there. They looked so good I immediately built another set for my living room. Now I have pipe shelves in three rooms and a concerning familiarity with the plumbing aisle.
Piping Hot DIY Tips
Plan your pipe configuration completely before buying anything. I sketched mine out, made a list, and still forgot the crucial connecting pieces. Three hardware store trips later, I had everything. Learn from my gas-wasting mistakes.
Black iron pipes look coolest but cost more than galvanized. The price difference is significant – we’re talking double for black. I mix them strategically: black pipes where visible, galvanized where hidden. Nobody’s noticed yet 🙂
Thread tape is your friend for tight connections. Nothing ruins the industrial vibe like wobbly pipes. I use thread tape on every connection, even if it seems unnecessary. Rock-solid shelves are worth the extra effort.
Also Read: 10 Charming Shelves in Bedroom Ideas and Elegant Decor Tips
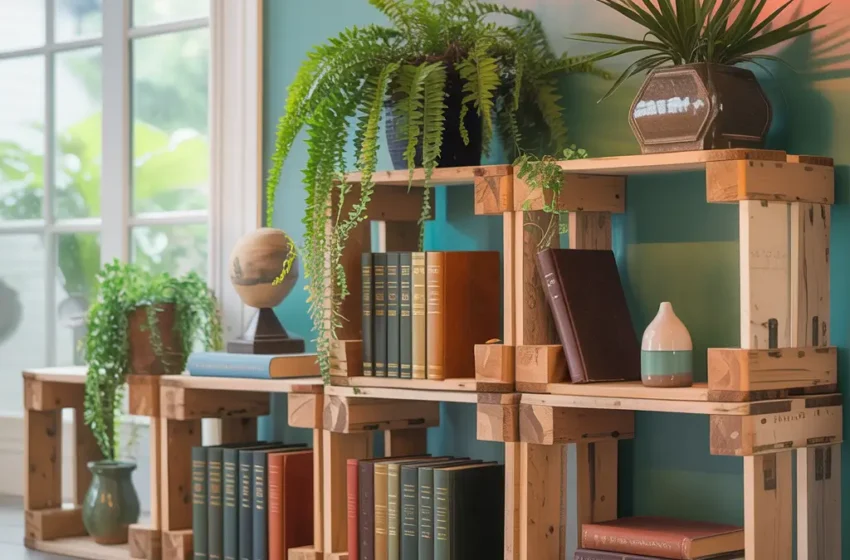
Pallet Wood Modular Shelves: The Free Wood Goldmine
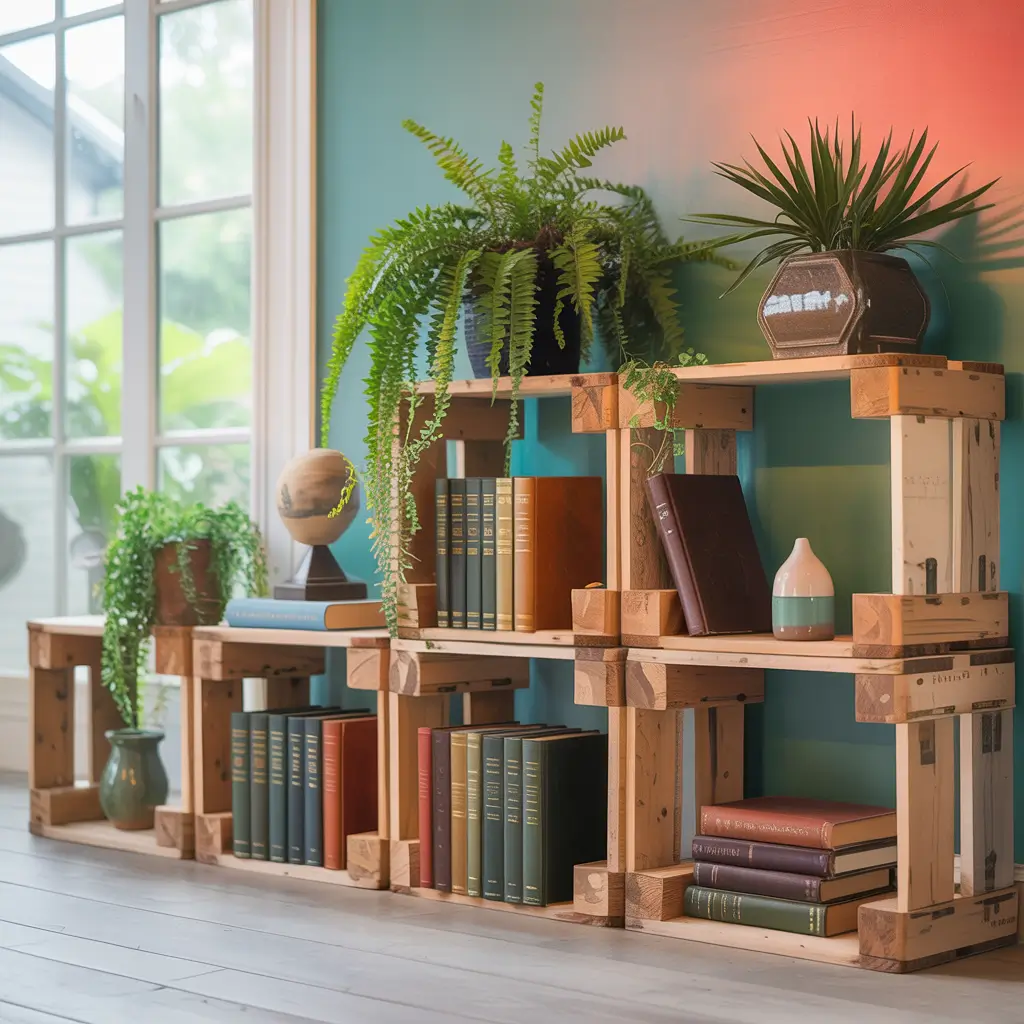
Pallet shelves are basically free furniture if you’re willing to put in some work. Companies literally pay to get rid of pallets, and you can turn them into shelving that looks like it came from a high-end rustic furniture store.
My pallet shelf journey started when I saw a “Free Pallets” sign. Six months later, I’ve built enough pallet furniture to furnish a small apartment. The wood has character you can’t buy – nail holes, weathering, and stamps that tell stories.
Pallet Perfection Process
Not all pallets are safe for indoor use. Look for heat-treated (HT) stamps and avoid anything marked MB (methyl bromide). I learned this after bringing home pallets that smelled weird. Quick research revealed I’d almost poisoned myself. Always check the stamps!
Dismantling pallets requires patience and the right tools. A pry bar and hammer work but take forever. I bought a reciprocating saw and cut through the nails. Ten minutes per pallet versus an hour of prying. Time is money, even in DIY.
Sand more than you think necessary. Pallet wood is rough, splintery, and sometimes has mysterious stains. I sand with 80-grit, then 120, then 220 for pieces people will touch. Yes, it takes forever. No, you can’t skip it unless you enjoy splinters.
Minimalist Floating Glass Shelves: The Invisible Storage
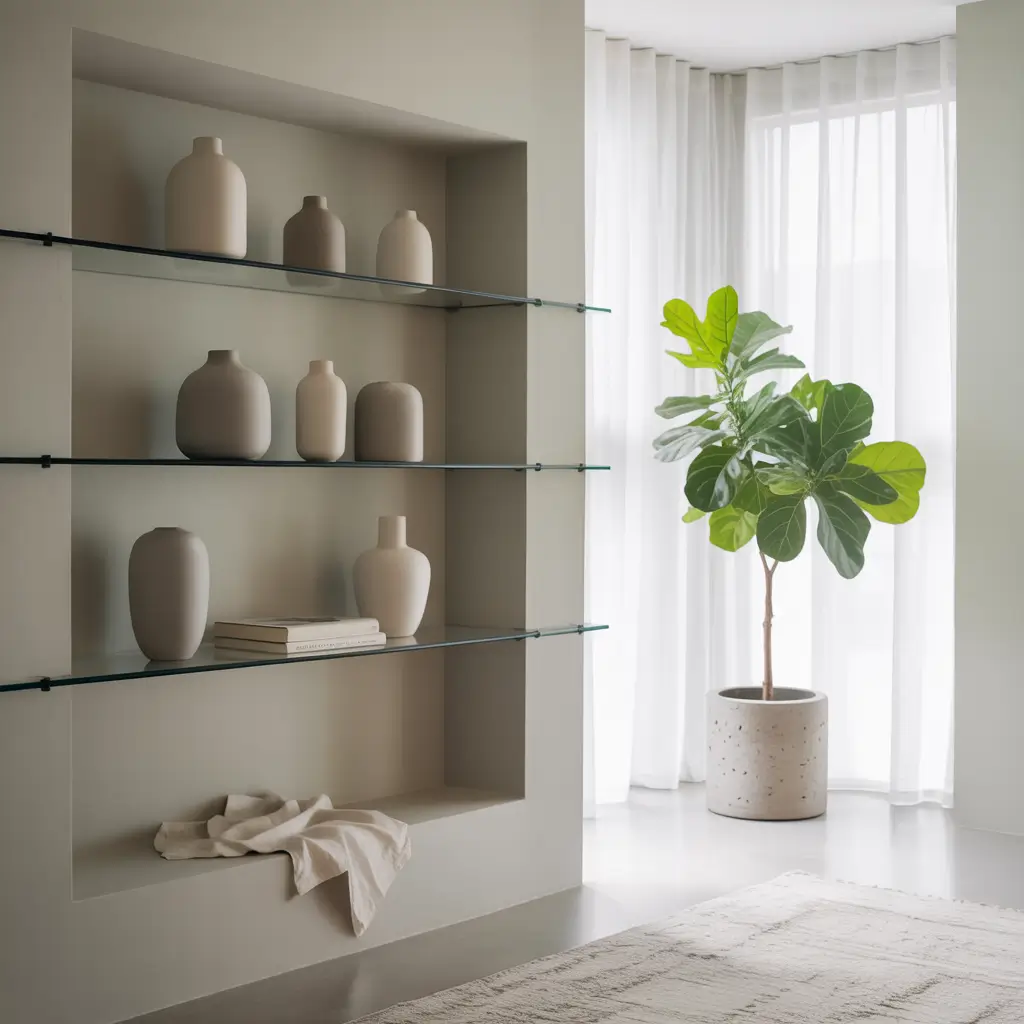
Glass shelves make small spaces feel bigger and display items like they’re floating in air. Building them yourself means getting exact sizes and saving hundreds. My bathroom glass shelves cost $40 to DIY versus the $200 quote from a glass company.
The secret is finding a local glass cutter who sells to the public. Most cities have one, usually hidden in an industrial area. They’ll cut tempered glass to your exact specifications for a fraction of retail prices.
Crystal Clear DIY Success
Always use tempered glass for shelves. Regular glass is cheaper but shatters into deadly shards. I pay extra for tempered because I value my security deposit and my skin. The peace of mind alone is worth the cost.
The brackets matter more with glass than wood. Cheap brackets will flex under weight, creating stress points in the glass. I use brackets rated for twice my expected weight. Overkill prevents literal disaster.
Clean the edges before installation. Even tempered glass can have sharp edges. I use fine-grit sandpaper on the edges – invisible once installed but saves fingers during handling. Blood on your DIY project is never a good look :/
Hidden Bookshelf Nook: The Secret Library Dreams
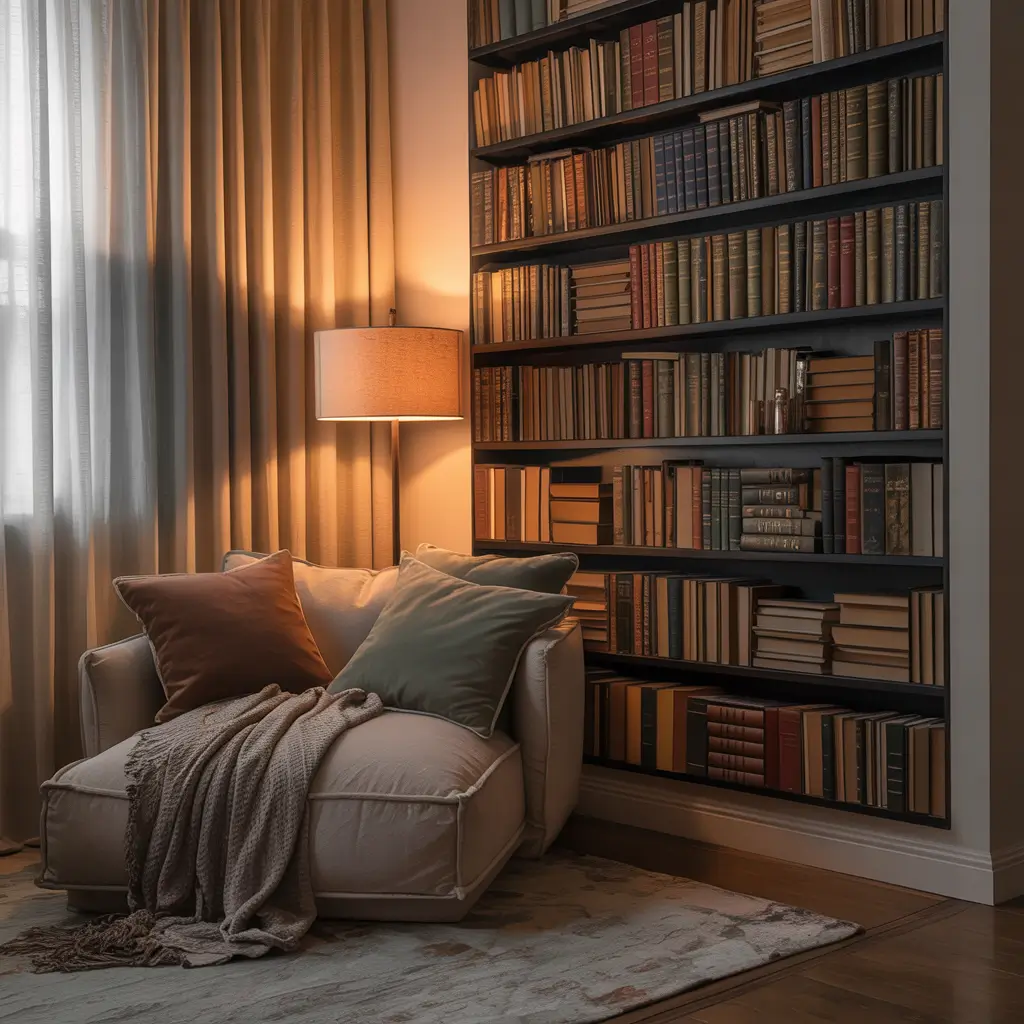
Creating a hidden bookshelf nook transforms wasted space into a reading paradise. That awkward alcove, unused closet, or weird architectural quirk becomes your secret library. I converted a pointless hallway indent into a floor-to-ceiling book nook that makes visitors stop mid-stride.
The transformation requires vision and basic carpentry skills. I framed in my nook with 2x4s, added custom-cut shelves, and suddenly had a built-in library that looked professionally designed. Total cost: under $100. Feeling like a genius: priceless.
Nook and Cranny Navigation
Measure the space obsessively before building anything. Nooks are rarely square or level. I measured my space five times and still had to trim shelves. Now I make cardboard templates first – less satisfying but more accurate.
Consider lighting from the start, not as an afterthought. Dark nooks eat books visually. I installed LED strips during construction. Way easier than trying to add lighting later. My books now glow like they’re in a fancy library.
Build adjustable shelving if possible. Fixed shelves seem easier but limit flexibility. I used shelf pins so I can adjust heights as my collection grows. Future me appreciates current me’s foresight.
Also Read: 12 Unique Wall Shelves Ideas and Chic Wall Displays
Plant & Shelf Combo Wall: The Living Storage Solution
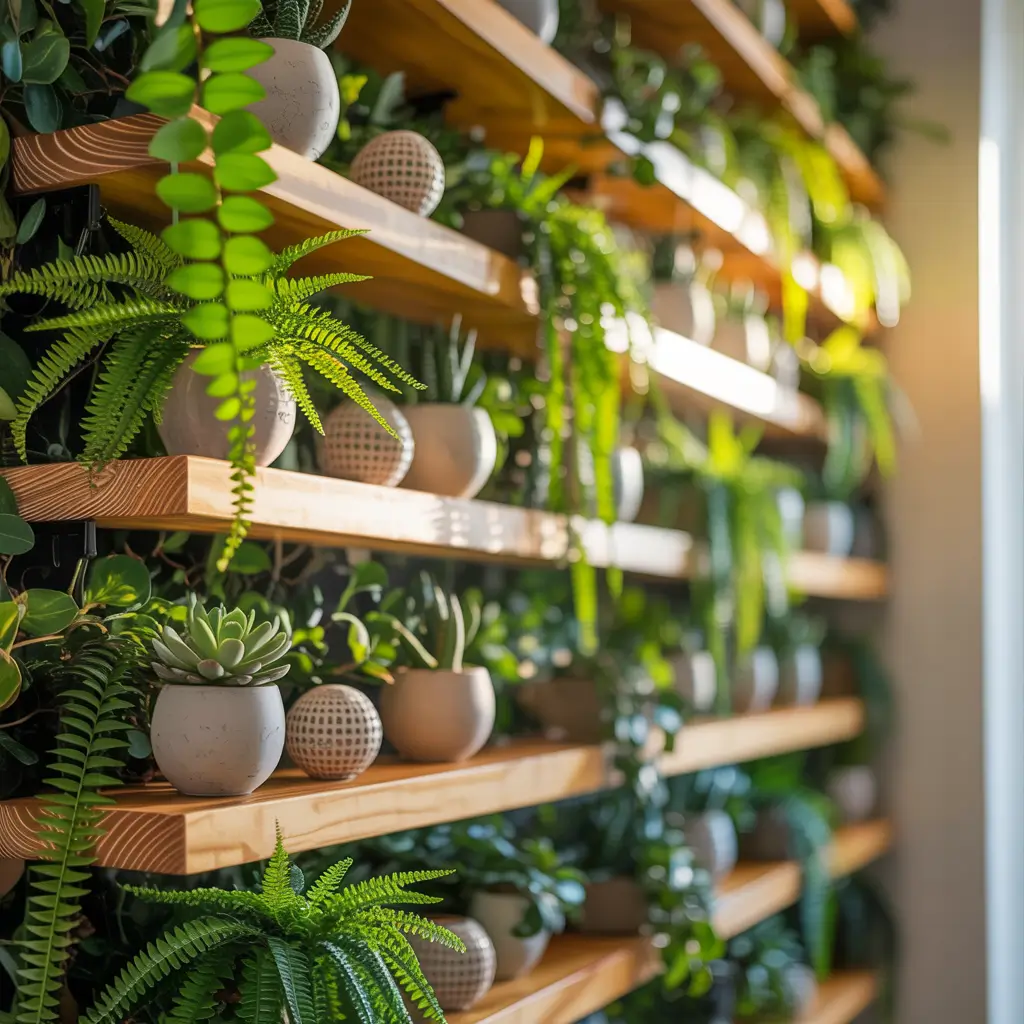
Combining plants with shelving creates a living wall that stores stuff AND produces oxygen. Win-win! My plant shelf wall started as regular shelves, but adding integrated planters transformed it into the focal point everyone photographs.
The key is designing shelves with drainage in mind. Plants need water, water needs somewhere to go. I learned this after my first attempt created a waterfall onto my electronics below. Now all my plant shelves have subtle drainage solutions.
Growing Your Green Wall Dreams
Choose the right wood finish for moisture exposure. Regular polyurethane works, but marine-grade finishes handle plant moisture better. I refinished my shelves with spar urethane after the original finish bubbled. Lesson learned.
Include drip trays in your design from the beginning. Retrofitting drainage is a nightmare. I now route small grooves in shelves that channel water to hidden trays. Looks clean, works perfectly, saves walls.
Plan plant placement based on light requirements. I initially arranged by aesthetics alone and killed three plants. Now sun-lovers get the bright spots, shade-tolerant plants live lower. My plants actually survive now – imagine that!
Your DIY Shelf Journey Starts Now
Here’s the truth about DIY shelves your first one might look rough. Mine did. But you’ll learn something, and the second will be better. By the third, you’ll wonder why anyone buys pre-made shelves.
Start with the project that solves your biggest problem. Need corner storage? Triangle shelves. Want industrial vibes? Pipe shelves. Have free pallets? You know what to do. Don’t overthink it – just pick one and start building.
FYI, every DIY disaster teaches you something valuable. My failures taught me more than my successes. That crooked shelf? Taught me to use a level. The one that fell? Showed me the importance of finding studs. Each mistake makes the next project better.
The satisfaction of building your own shelves goes beyond saving money. You get exactly what you want, sized perfectly for your space, finished how you like.
Plus, that smug feeling when guests compliment your shelves and you casually mention you made them yourself? Priceless.
Now grab some wood, watch a few YouTube tutorials, and start creating storage solutions that’ll make your friends wonder when you became so handy!


