10 Creative Wooden Shelves Ideas and Cozy Room Vibes
- Floating Shelves
 Ben
Ben- 0
- 26 minutes read
Wooden shelves are having a moment, and honestly, they deserve it. I mean, why settle for boring plastic or flimsy metal when you can have gorgeous, warm wood doing the heavy lifting on your walls?
After spending way too much time (and money) experimenting with every shelf style imaginable, I’ve discovered that wooden shelves aren’t just functional – they’re basically the jewelry your walls have been begging for.
Let me share something that changed my relationship with home storage forever: wooden shelves transform spaces in ways that other materials just can’t touch.
They add warmth, character, and that “I definitely have my life together” vibe that we’re all secretly trying to achieve.
Whether you’re working with a shoebox apartment or a spacious home, the right wooden shelves can make your space feel curated instead of cluttered.
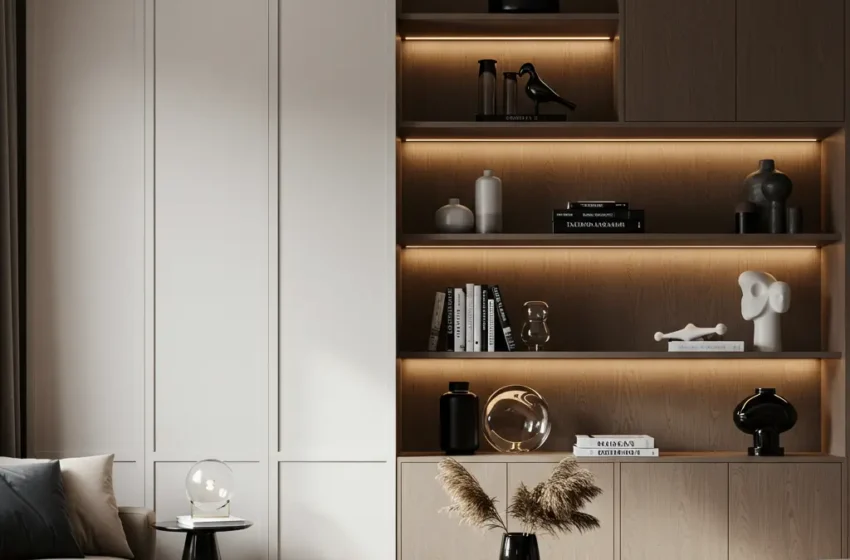
Floating Wooden Shelves for Small Spaces: The Minimalist’s Secret Weapon
Floating wooden shelves are like magic tricks for small spaces – they create storage without eating up precious square footage. I installed three oak floating shelves in my tiny studio apartment last year, and suddenly the place felt twice as big. The secret? They use vertical space while keeping the floor area completely clear.
The invisible mounting system makes these shelves look like they’re defying physics, which adds to the clean, uncluttered aesthetic. Your eye travels right over the mounting hardware and focuses on the beautiful wood grain and whatever treasures you’re displaying.
Making Floating Shelves Work in Tight Quarters
Choose lighter wood colors for small spaces. I learned this after installing dark walnut shelves in my already-dim bedroom – it felt like a cave. Switching to light oak or maple opens up the room and reflects light instead of absorbing it.
Keep the depth between 8-10 inches for floating shelves in small spaces. Anything deeper and you’re creating obstacles that make the room feel cramped. I bumped my head on a too-deep shelf exactly three times before I measured properly and reinstalled it.
Style floating shelves with the “less is more” philosophy. Overcrowding defeats the space-saving purpose. I follow the rule of thirds: fill about two-thirds of the shelf, leaving one-third empty for visual breathing room.
Rustic Farmhouse Wall Shelves: The Cozy Factor
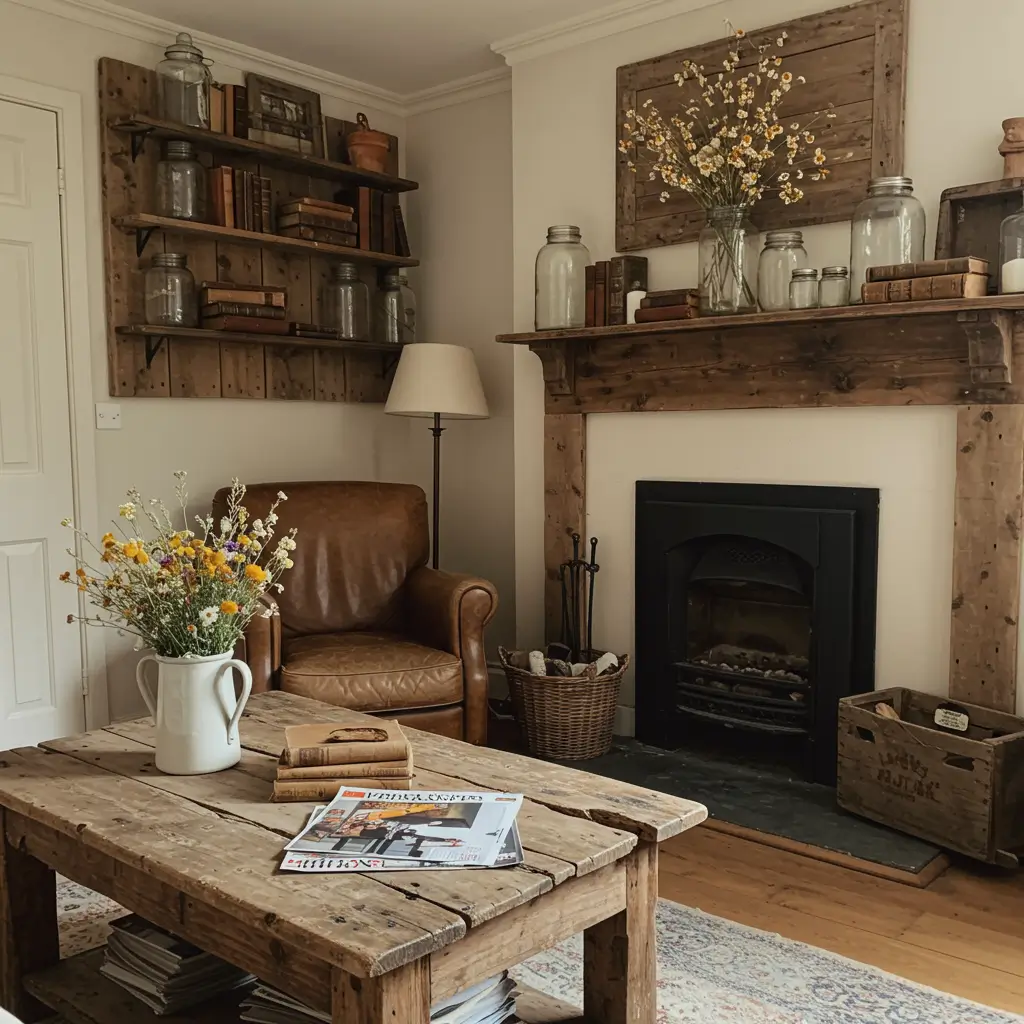
Rustic farmhouse shelves bring that warm, lived-in feeling that makes houses feel like homes. These beauties work in everything from actual farmhouses to modern apartments – the style is that versatile. My kitchen got the farmhouse treatment two years ago, and I still get compliments every time someone visits.
The distressed wood, visible grain, and often chunky dimensions create an anchor point in any room. They say “I’m sturdy, reliable, and I’ve got stories to tell” without being loud about it. Farmhouse shelves are the strong, silent type of the shelf world.
Creating Authentic Farmhouse Vibes
Don’t overthink the finish with farmhouse shelves. I tried to make mine look “perfectly rustic” and ended up with something that looked fake. Now I embrace natural imperfections – knots, grain variations, and slight color differences add authenticity.
Pair farmhouse wooden shelves with vintage or antique brackets. The combination of reclaimed or distressed wood with aged metal creates that collected-over-time feel. I found ornate iron brackets at a flea market for $5 each, and they make my shelves look like family heirlooms.
Layer your styling for the farmhouse effect. Mix practical items with decorative ones – mason jars holding utensils next to vintage cookbooks next to a small plant. The slightly cluttered (but organized!) look is part of the charm. My farmhouse shelves hold everything from everyday dishes to my grandmother’s teapot.
Corner Wooden Shelf Storage Solutions: The Dead Space Destroyer
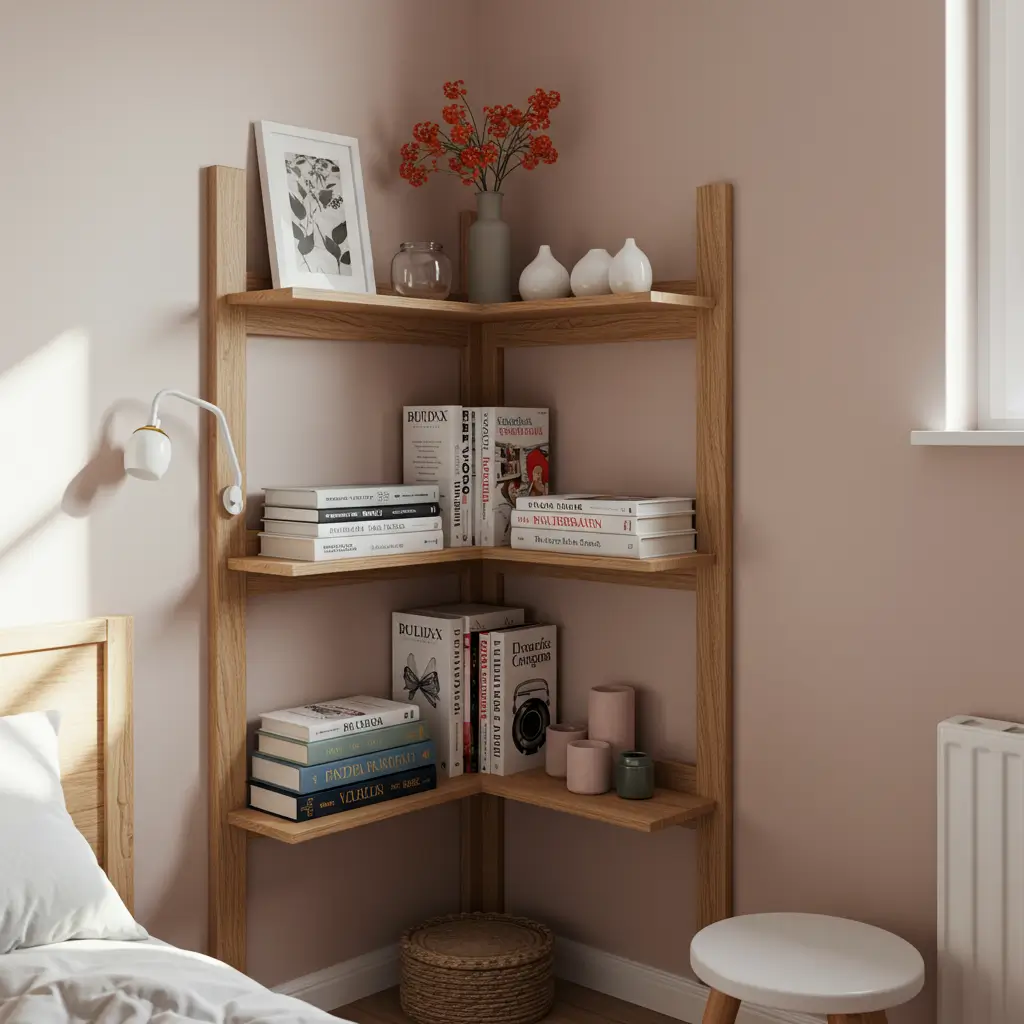
Corners are like that friend who shows up but doesn’t contribute – just standing there, taking up space. Corner wooden shelves turn those useless zones into productive storage that actually makes your room more functional. I transformed three sad corners in my home, and the extra storage saved me from buying another dresser.
The triangular or wraparound design fits snugly into corners while creating surprising amounts of display and storage space. You’re literally using air that was just sitting there doing nothing. Ever wondered why we ignore corners for so long? Yeah, me too.
Maximizing Corner Potential
Choose corner shelves that fit your corner’s actual angle. I assumed all corners were 90 degrees until my “perfect” corner shelf left weird gaps on both walls. Measure your specific corner before buying or building anything.
Install corner shelves at varying heights to create visual interest and functionality. I have one at desk height for my laptop charger and coffee mug, another at eye level for books, and a third up high for decorative items I want to display but never touch.
Consider floating corner shelves for a modern look or bracketed ones for traditional spaces. My living room has floating corner shelves that seem to emerge from the walls, while my bathroom has visible brackets because the vintage vibe works there.
Also Read: 12 Creative DIY Closet Shelves Ideas and Stylish Organization
DIY Ladder Wooden Shelves: The Leaning Tower of Storage
Ladder shelves lean against your wall like they just stopped by to help out and decided to stay. They’re perfect for renters or commitment-phobes who aren’t ready to drill dozens of holes in their walls. I built my first ladder shelf from scratch, and it cost me about $40 and one Saturday afternoon.
The graduated shelf depths create natural organization – wider shelves at the bottom for bigger items, narrower ones up top for display pieces. It’s like the shelf designed itself based on common sense and gravity.
Building Your Ladder Shelf Empire
Start with sturdy wood – 2x4s for the sides and 1x8s or 1x10s for the shelves. I tried using thinner wood to save money and ended up with a wobbly mess. Invest in quality lumber and your ladder shelf will last for years.
The angle matters more than you’d think. Too upright and items slide forward. Too angled and you waste wall space. I found that 10-15 degrees from vertical hits the sweet spot – stable but space-efficient.
Secure ladder shelves to the wall even though they lean. My cat proved that “leaning” isn’t the same as “anchored” when she used it as a climbing structure. Two small wall anchors at the top prevent tipping without requiring major installation.
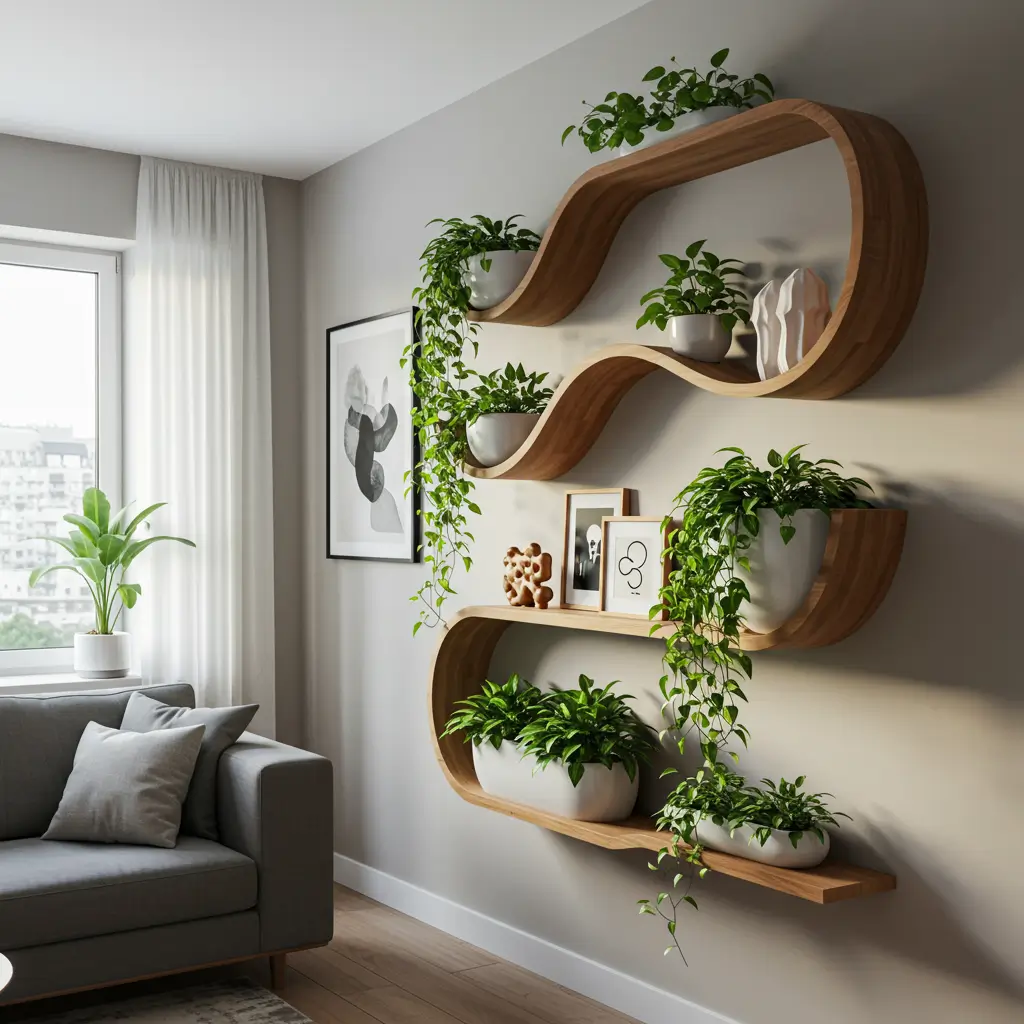
Wooden Shelves with Built-in Planters: The Living Storage

Combining wooden shelves with integrated planters creates a living wall that brings nature indoors. These hybrid wonders hold your stuff AND grow your plant collection. I installed planter shelves in my kitchen for herbs, and now I’m that person who casually snips fresh basil while cooking.
The built-in planters eliminate the need for separate pots and saucers cluttering your shelves. Everything has its designated spot, and the plants become part of the shelf design rather than random additions.
Growing Your Shelf Garden
Ensure proper drainage in planter sections. I learned this after my first planter shelf created a waterfall onto the shelf below during an enthusiastic watering session. Now I line all planter areas with waterproof material and include drainage holes.
Choose wood species that handle moisture well. Cedar and teak naturally resist water damage. I used regular pine on my first attempt and watched it warp within months. Now I either use moisture-resistant wood or seal everything with marine-grade polyurethane.
Position planter shelves based on plant light requirements, not just where they look pretty. My sun-loving succulents suffered on a north-facing planter shelf until I moved the whole unit to a sunny window. Plants don’t care about your design vision if they’re dying :/
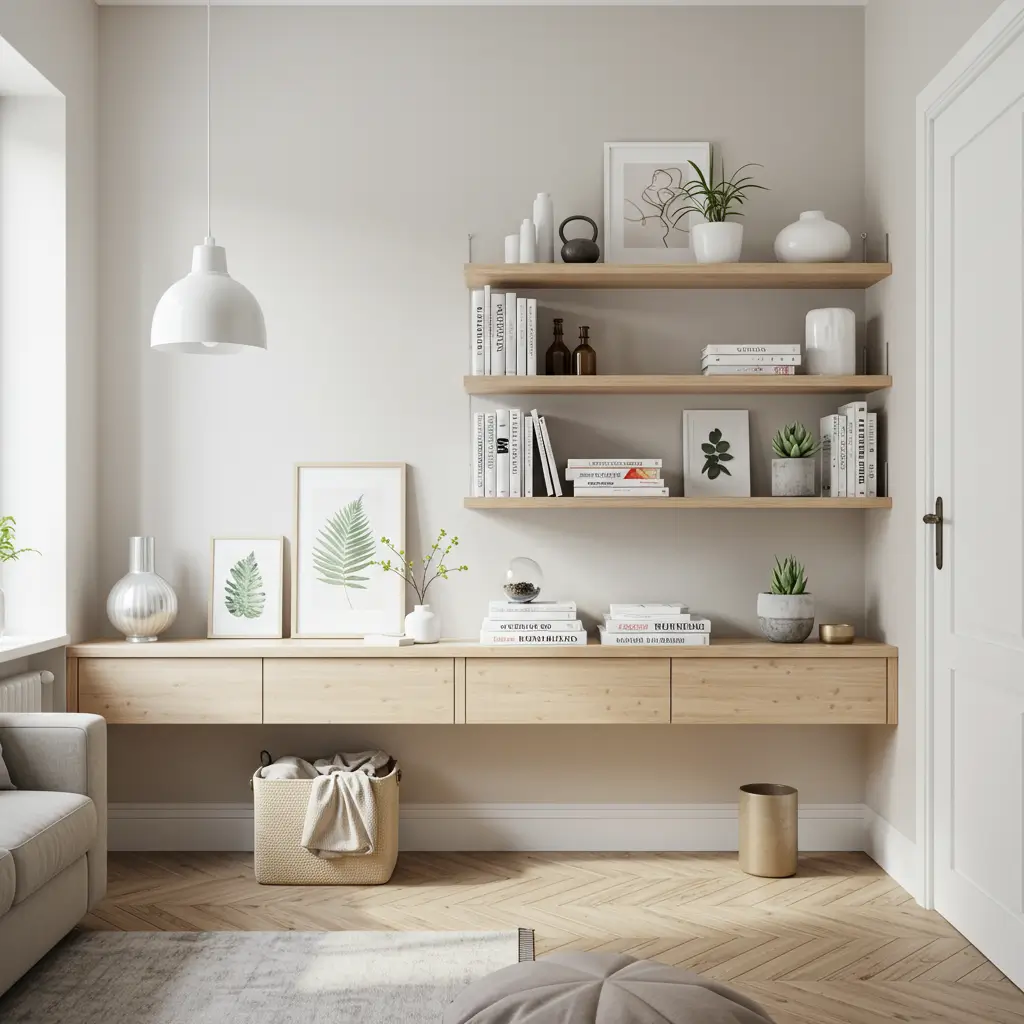
Minimalist Floating Wooden Shelf Set: The Scandinavian Dream
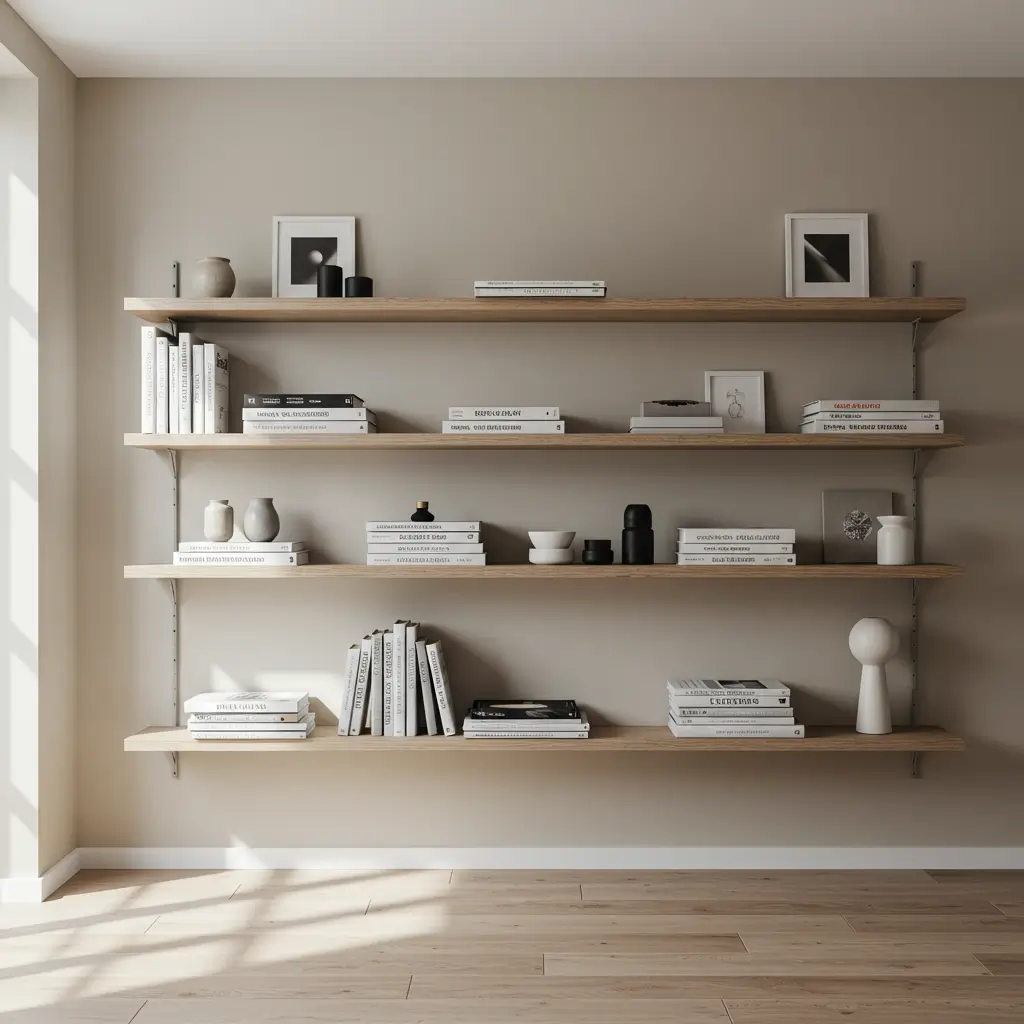
Minimalist wooden shelf sets embrace the “less but better” philosophy that makes spaces feel intentional and calm. These simple, clean-lined shelves let your displayed items become the focal point. My minimalist shelf set transformed my chaotic entryway into something that looks like it belongs in a design magazine.
The beauty lies in restraint – simple wood, minimal hardware, and thoughtful styling. No ornate brackets, no fancy edge treatments, just beautiful wood doing its job quietly and efficiently.
Mastering Minimalist Shelf Style
Choose light-colored woods like birch, maple, or light oak for true minimalism. Dark woods can work but require more careful styling to avoid heaviness. I use white oak for my minimalist shelves, and the pale wood keeps the whole space feeling airy.
Keep all shelves in a set the same thickness and finish. Consistency is key to the minimalist aesthetic. My shelves are all exactly 2 inches thick with the same natural oil finish. The uniformity creates calm rather than visual chaos.
Apply the “one in, one out” rule for styling minimalist shelves. Every item should earn its place. I regularly edit what’s on my shelves, removing anything that doesn’t serve a purpose or bring joy. Sounds extreme until you see how peaceful it makes your space.
Also Read: 10 Beautiful Store Shelves Design Ideas and Eye-Catching Displays
Reclaimed Wood Shelves for Rustic Charm: The Character Collector
Reclaimed wood shelves bring instant history and soul to any space. Each piece tells a story through its weathered grain, nail holes, and patina that new wood simply can’t fake. I scored some barn wood from a demolition site, and my living room shelves now have more character than most people I know.
The imperfections become the main attraction. That old stain? Part of the charm. Those nail holes? Proof of previous lives. The slightly uneven surface? Texture you can’t buy at a big box store.
Working with Reclaimed Wood Successfully
Inspect and treat reclaimed wood before bringing it inside. I once brought home beautiful barn boards that came with bonus wood-boring beetles. Not ideal. Now I inspect thoroughly, treat if necessary, and let wood acclimate outside first.
Embrace the irregularities but fix the hazards. Rough texture adds character, but splinters attacking your favorite sweater don’t. I sand just enough to make surfaces touch-safe while preserving that weathered look.
Mix reclaimed wood shelves with modern elements for balance. All reclaimed everything can look like you’re trying too hard. I pair my reclaimed wood shelves with contemporary brackets and style them with a mix of vintage and modern items.
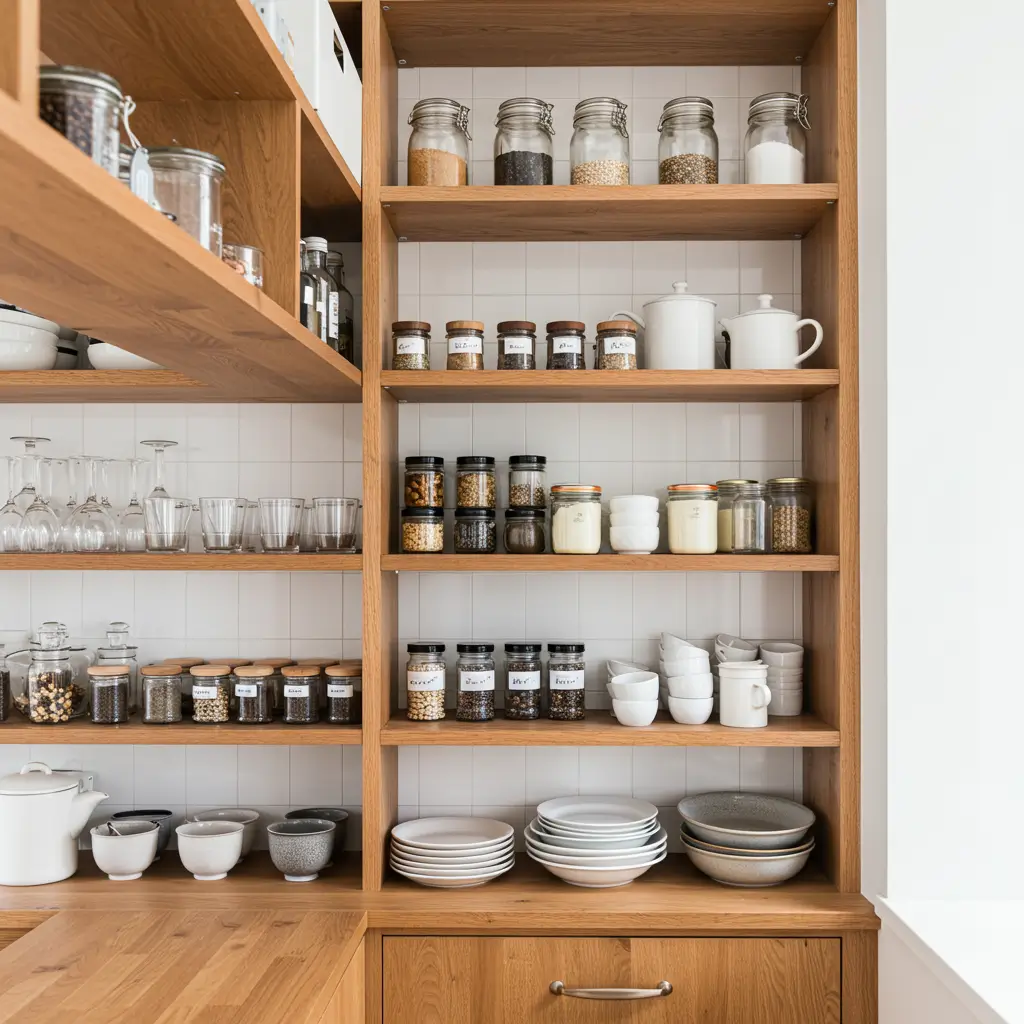
Multi-tiered Wooden Kitchen Shelves: The Culinary Command Center

Multi-tiered wooden shelves in kitchens create that chef-worthy open shelving look everyone’s obsessing over. They turn your dishes and ingredients into a display while keeping everything accessible. My three-tier oak shelves replaced upper cabinets, and cooking became more enjoyable when I can actually see what I have.
The graduated heights maximize vertical space and create natural organization zones. Everyday dishes on the lower tier, serving pieces middle, and decorative or occasional-use items up top. It’s visual logic that makes sense.
Organizing Your Kitchen Shelf Tiers
Group items by frequency of use across tiers. I keep daily coffee mugs on the bottom tier where I can grab them pre-caffeine. Special occasion servingware lives on top where it looks pretty but stays dust-free between uses.
Consider open shelving only for items you don’t mind displaying. Not everything in your kitchen is photogenic. I keep my mismatched Tupperware collection in closed cabinets while my pretty dishes live on the wooden shelves.
Install shelves at practical heights, not just aesthetic ones. I made my bottom shelf too high initially and had to reach awkwardly for everyday plates. Measuring based on actual use rather than what “looks good” saves daily frustration.
Wooden Shelves with Hidden Storage: The Secret Keepers
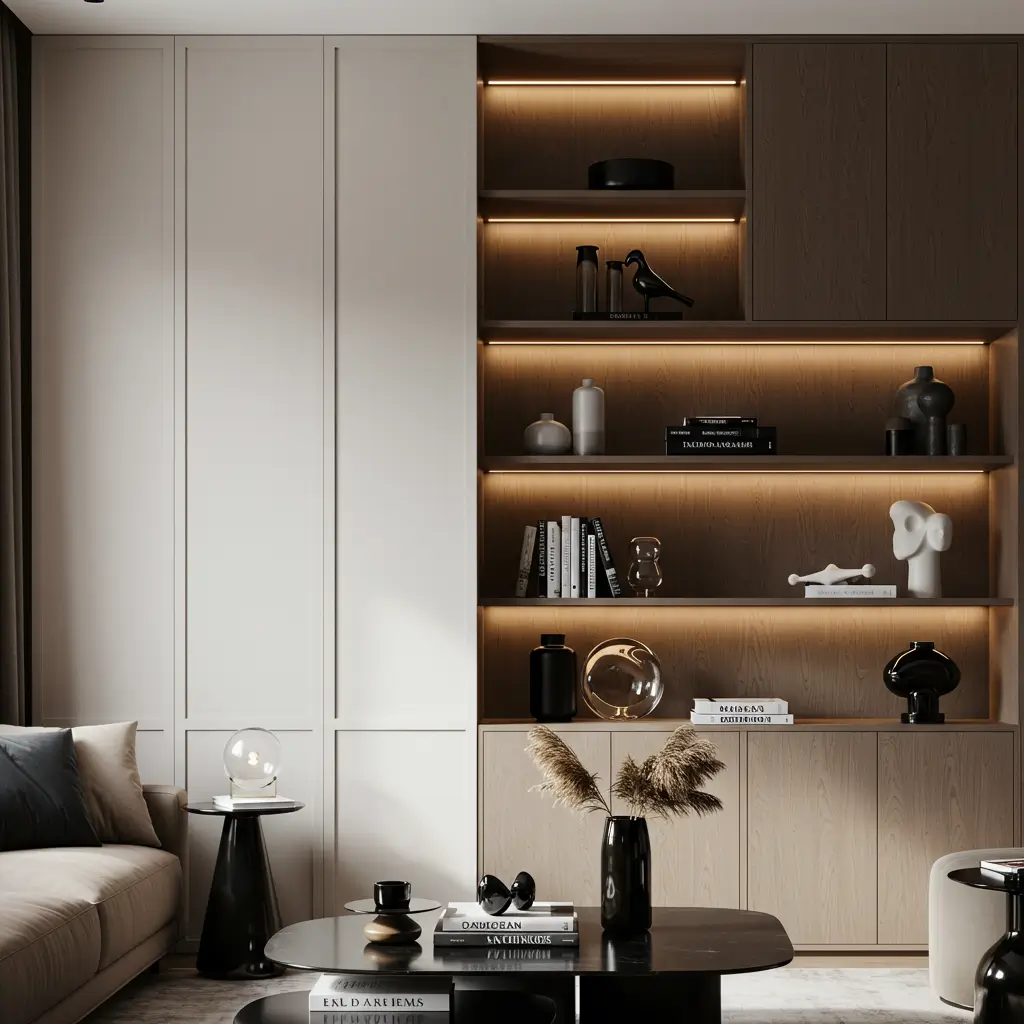
Wooden shelves with hidden compartments give you the best of both worlds – display space on top, secret storage inside. These clever designs let you maintain a minimalist aesthetic while hiding the chaos of real life. My coffee table shelf has a hidden drawer that holds all my remote controls and random stuff that usually clutters surfaces.
The concealed storage turns shelves from simple display units into functional furniture. You get to show off your pretty things while hiding the necessary but ugly ones.
Creating Hidden Storage That Actually Works
Plan your hidden storage based on what you’ll actually hide. I built one hidden drawer too shallow for anything useful. Now it holds paper clips and regret. Measure your items first, then design the secret compartments.
Install quality hardware for hidden compartments. Cheap drawer slides or magnetic latches fail quickly and ruin the “hidden” aspect when they start squeaking or sticking. I invest in soft-close mechanisms for a luxury feel.
Keep the design simple for DIY hidden storage. Overly complicated mechanisms look good in theory but become frustrating in practice. My push-to-open hidden drawer uses simple magnetic catches and works flawlessly after two years.
Also Read: 12 Elegant Plant Shelves Ideas and Minimalist Styling
Geometric Wooden Wall Shelves: The Showstopper Design
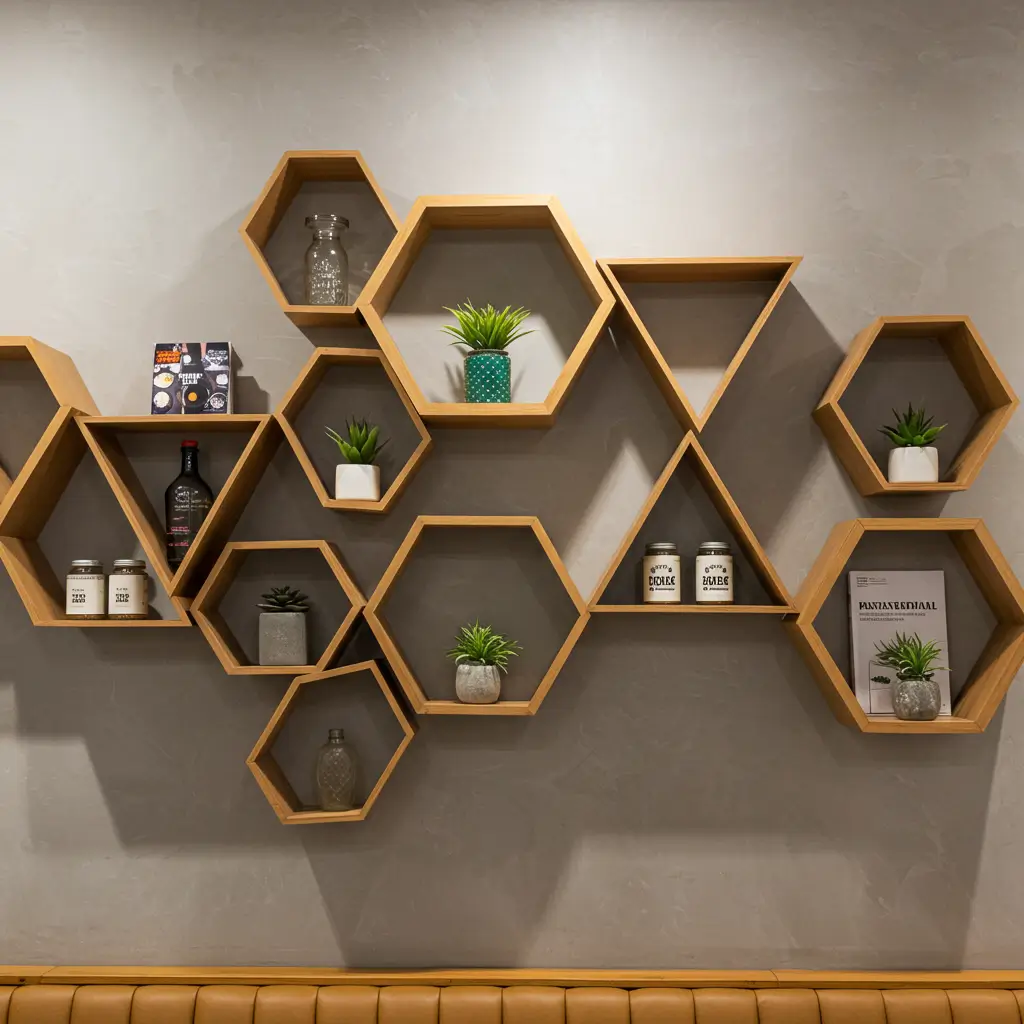
Geometric wooden shelves turn functional storage into wall art. Hexagons, triangles, asymmetric designs – these shelves make a statement while holding your stuff. My hexagon shelf arrangement gets more Instagram likes than my actual art, which says something about either modern design trends or my taste in art.
The bold shapes create visual interest that transforms blank walls into focal points. You’re not just adding storage; you’re adding architectural elements that define the space.
Designing Your Geometric Gallery
Start with one or three geometric shelves, not two. Odd numbers create better visual balance. I learned this after installing two hexagon shelves that looked awkwardly symmetrical. Adding a third one fixed the whole composition.
Mix orientations for dynamic impact. Not all hexagons need to point the same direction. I rotate mine at different angles, creating movement on the wall that draws the eye around the entire arrangement.
Don’t overfill geometric shelves. The shape itself is part of the display. I keep my geometric shelves about 40% filled, letting the interesting silhouette shine. Think of them as frames that happen to hold objects rather than storage that happens to look cool.
Making Wooden Shelves Work for You
Here’s the truth I learned after installing wooden shelves in virtually every room of my house: the best wooden shelf is the one that solves your specific problem while matching your actual style.
I’ve made the mistake of choosing shelves because they looked amazing in someone else’s home, only to realize they didn’t work in mine.
Start with function, then make it beautiful. A gorgeous shelf that doesn’t hold what you need is just expensive wall decor. I now always measure my items first, plan the storage, THEN choose the wood type and style.
Wood selection matters more than you think. Different woods bring different vibes – oak feels sturdy and traditional, walnut screams sophistication, pine says casual and affordable, reclaimed tells stories.
Choose wood that matches both your aesthetic and your budget. IMO, it’s better to do pine shelves now than wait years saving for walnut.
Don’t forget about finishing. Raw wood sounds appealingly natural until it gets water-stained from your coffee mug or develops mysterious stains from unknown sources.
I seal all my wooden shelves with at least two coats of polyurethane. This protects the wood while enhancing the grain – win-win.
The installation quality matters as much as the shelf quality. I’ve seen beautiful custom wooden shelves installed so poorly they sagged within weeks.
Find your studs, use appropriate anchors, and don’t skimp on mounting hardware. Your shelves should outlast your lease, your paint color, and possibly your furniture.


