12 Affordable DIY Shoe Storage Ideas for Any Home
- Shoe Storage
 Ben
Ben- 0
- 42 minutes read
Remember that time you opened your closet and a shoe avalanche nearly knocked you unconscious? Yeah, me too.
Last spring, I counted 37 shoes scattered across my bedroom floor and realized my “organize later” strategy had officially failed. That’s when I discovered that DIY shoe storage doesn’t require a degree in carpentry or a trust fund.
After spending months experimenting with everything from Pinterest fails to surprising successes, I’ve gathered 12 DIY shoe storage ideas that actually work.
These projects range from “I can do this in 20 minutes” to “weekend warrior mode,” but all of them beat paying $200 for store-bought organizers that don’t fit your space anyway.
Let’s build some shoe storage and reclaim your floor space.
1. Floating Wall Shoe Racks
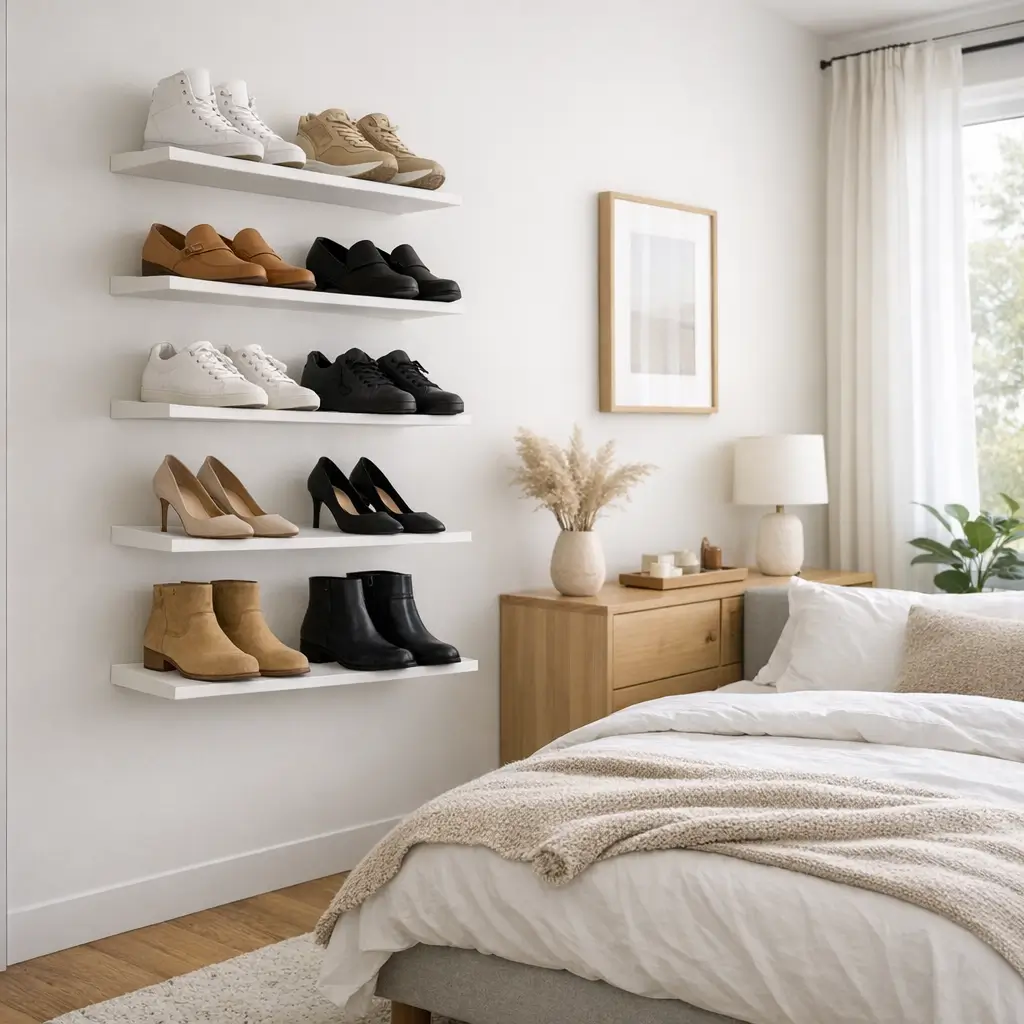
Floating wall shoe racks create a modern display that makes your favorite shoes look like art instead of clutter. This project transforms vertical wall space into functional storage without eating up precious floor real estate.
Building Your Floating Display
I built my first floating rack using simple wooden boards and hidden brackets, and the whole project cost less than $30. The shoes appear to float on the wall, which looks way more expensive than the reality of Home Depot lumber and L-brackets.
Floating racks work because they utilize vertical space most people ignore. Your walls are just sitting there doing nothing — might as well make them earn their keep.
Creating Floating Racks
Materials and steps for floating shoe racks:
- 1×6 or 1×8 pine boards cut to your desired length
- Hidden shelf brackets or L-brackets painted to match
- Wood stain or paint for finishing
- Sandpaper for smooth edges
- Level because crooked shelves look terrible
- Stud finder for secure wall mounting
The key to successful floating racks? Space them 8-10 inches apart vertically so shoes don’t overlap. I learned this the hard way when my first attempt had shelves so close together that only flip-flops fit.
2. Over-the-Door Hanging Organizer
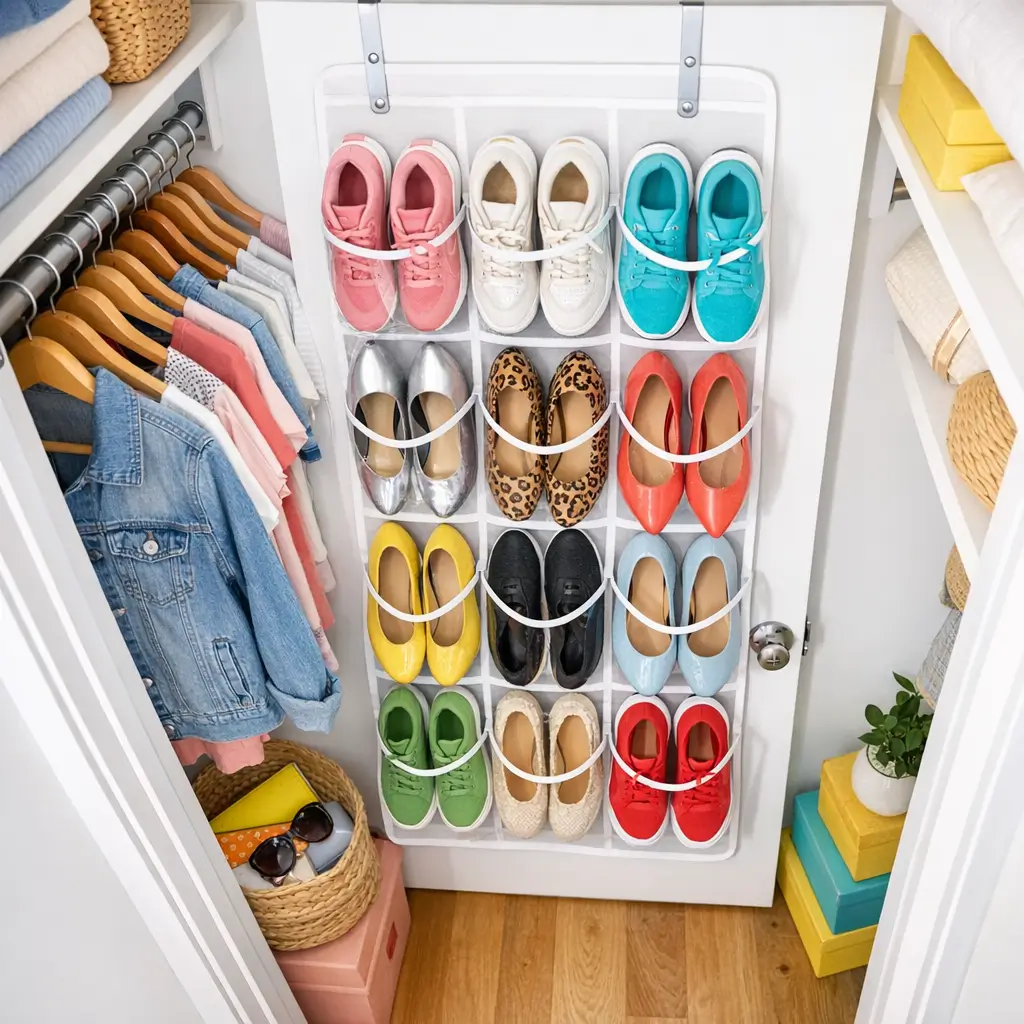
An over-the-door hanging organizer offers instant storage without tools, nails, or any permanent changes to your space. This solution basically saves renters everywhere from shoe-related deposit losses.
The No-Tool Wonder
I hung my first over-the-door organizer in approximately 45 seconds — just hook it over the door and boom, storage for 24 pairs of shoes. The instant gratification was incredibly satisfying after years of shoe chaos.
Over-the-door organizers excel because they require zero installation skills. If you can hang a towel, you can install this storage. The barrier to entry is essentially nonexistent.
Choosing and Using Door Organizers
Making over-the-door storage work:
- Measure door clearance before buying (some doors won’t close with organizers attached)
- Choose clear pockets so you can actually see your shoes
- Consider double-sided organizers for maximum capacity
- Check weight limits on the hooks
- Secure with command strips if the organizer slides around
- Use lower pockets for heavy boots to prevent tipping
FYI, this works on closet doors, bedroom doors, even bathroom doors if you’re really desperate. Any door is a potential shoe storage opportunity.
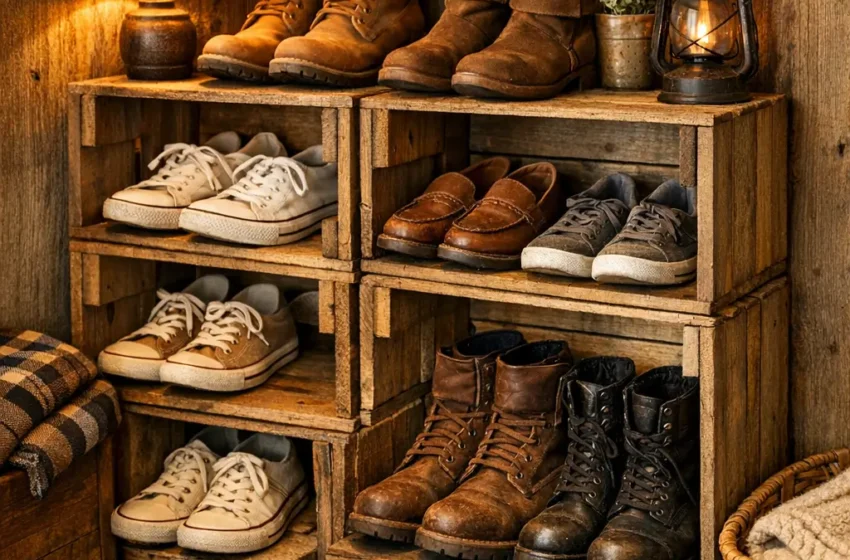
3. DIY Wooden Crate Shoe Shelves

Wooden crate shoe shelves bring rustic charm to shoe storage while costing almost nothing if you know where to find free crates. This project transforms discarded shipping materials into functional furniture.
Crates as Furniture
My wooden crate project started when I spotted free crates behind a grocery store. I snagged four of them, sanded them down, stained them, and stacked them to create this awesome modular shoe shelf that holds 20 pairs of shoes and looks like it came from an expensive boutique.
Crate shelves work because the dimensions naturally fit shoes. Most wooden crates are roughly shoe-box sized, making them perfect for this purpose without any modifications.
Building Crate Storage
Creating your crate shoe shelf:
- Source wooden crates from stores, markets, or online marketplaces
- Sand thoroughly to avoid splinters (trust me on this)
- Stain or paint to match your decor
- Stack and secure with wood glue or L-brackets
- Arrange in various configurations for visual interest
- Add wheels to bottom crates for mobile storage
The beauty of crate storage lies in its flexibility. Stack them vertically, arrange them horizontally, create patterns — the modular nature lets you adapt as your collection changes.
Also Read: 10 Elegant Shoe Storage Cabinet Entryway Ideas for Every Home
4. Under-Bed Pull-Out Shoe Drawers
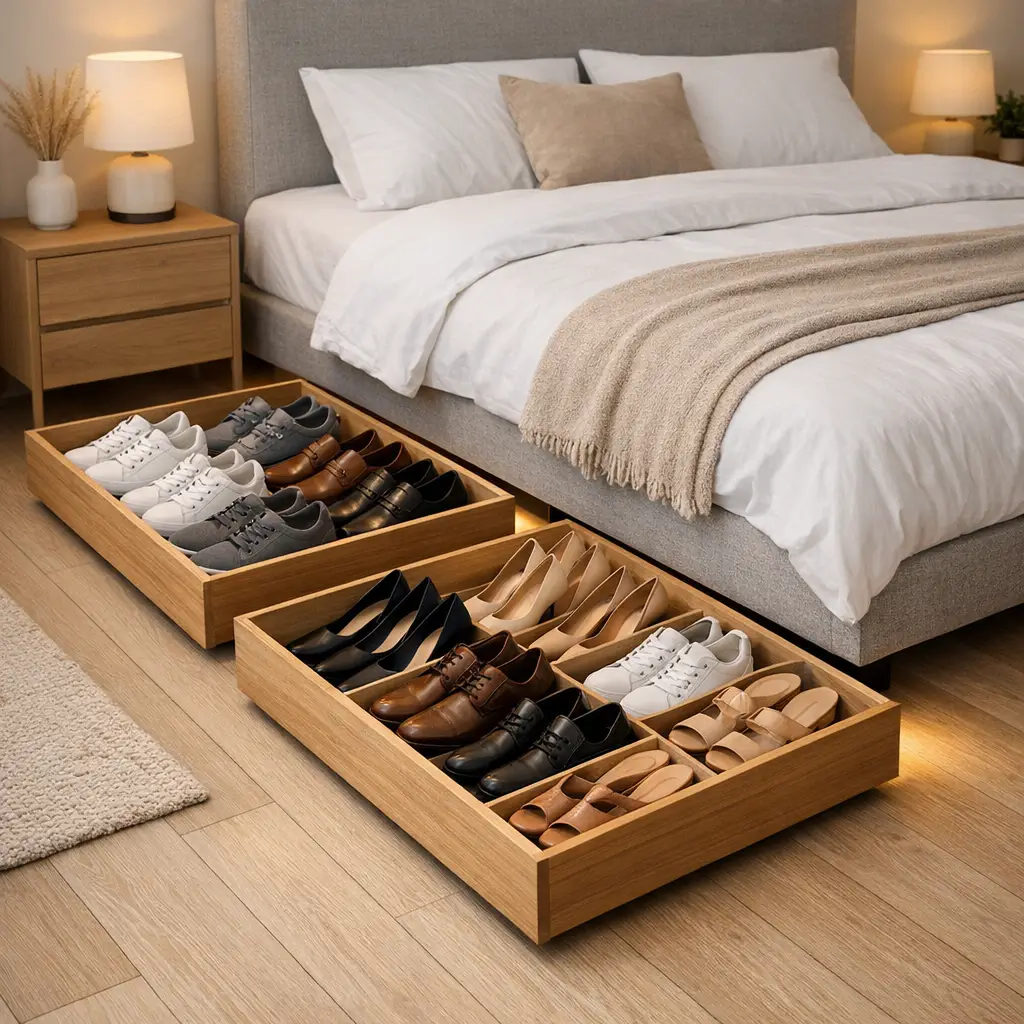
Under-bed pull-out drawers utilize that massive wasted space lurking beneath your mattress. This hidden storage keeps seasonal shoes accessible but invisible.
The Secret Kingdom Under Your Bed
I built rolling drawers from basic plywood and casters, and now my entire winter boot collection disappears under my bed from April to October. Out of sight, completely accessible when needed, and zero floor space used.
Under-bed storage excels because that space exists whether you use it or not. You’re literally sleeping on top of potential storage every single night.
DIY Under-Bed Drawers
Building pull-out shoe storage:
- Measure your under-bed clearance first (don’t build drawers that don’t fit)
- Use plywood cut to fit your bed’s dimensions
- Attach heavy-duty casters for smooth rolling
- Add rope or strap handles for easy pulling
- Create dividers keeping pairs together
- Consider clear plastic tops so you can see contents without pulling out
The DIY approach lets you customize dimensions perfectly for your bed height and shoe collection. Store-bought under-bed containers never quite fit right anyway. 🙂
5. PVC Pipe Boot Holder
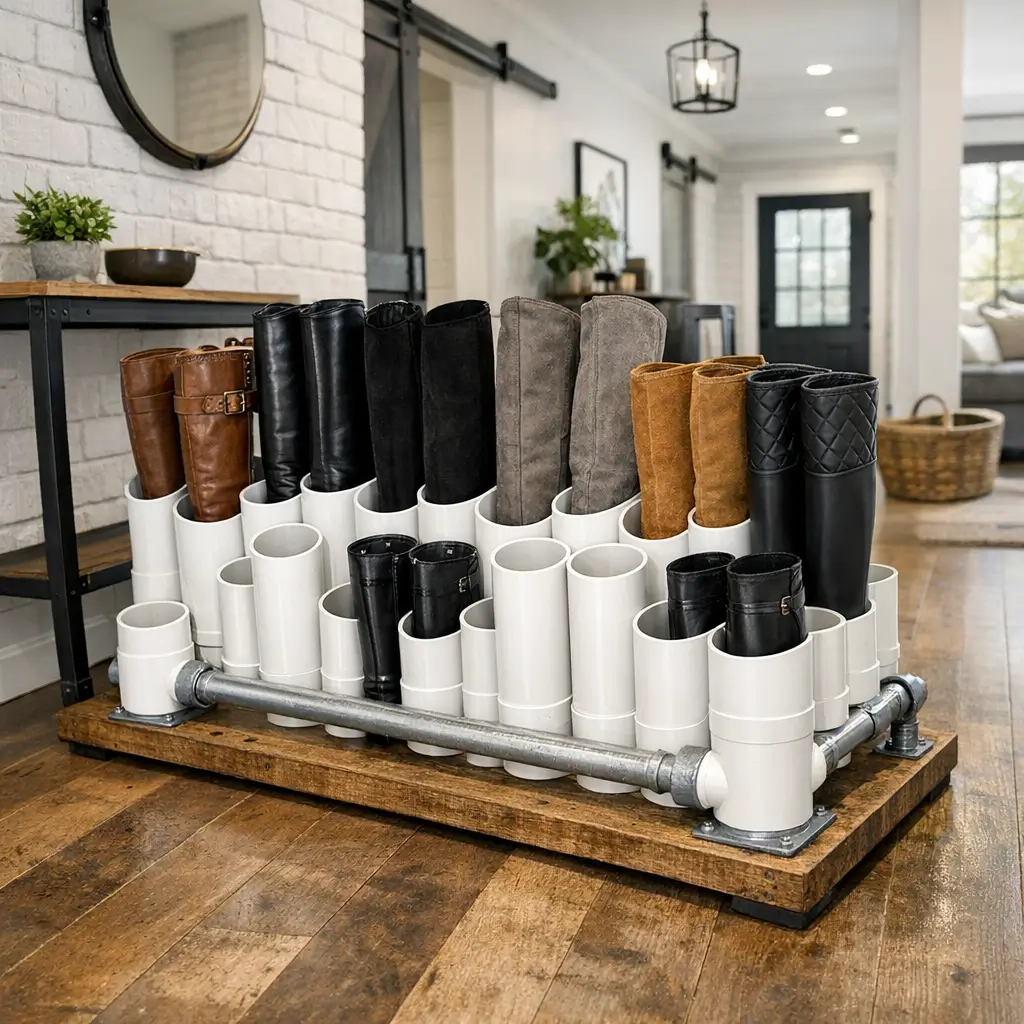
PVC pipe boot holders keep tall boots standing upright instead of flopping over and creating creases. This clever project uses plumbing supplies to solve a specific storage problem.
Pipes as Boot Saviors
I cut PVC pipes to varying heights and created this boot holder that keeps my knee-high boots perfectly shaped. The whole project cost less than $15 and looks surprisingly intentional rather than DIY-obvious.
PVC holders work because boots need internal support to maintain their shape. Without it, they collapse into sad, creased messes that never look good again.
Creating PVC Boot Storage
Building your boot holder:
- Buy 4-inch diameter PVC pipe from hardware stores
- Cut to different heights for various boot styles
- Sand cut edges to prevent snagging
- Spray paint if white PVC doesn’t match your aesthetic
- Arrange in a box or container for organization
- Add decorative fabric around pipes for a finished look
This project takes maybe 30 minutes total but solves a problem that has plagued boot owners since boots were invented.
6. Pegboard Shoe Display Wall
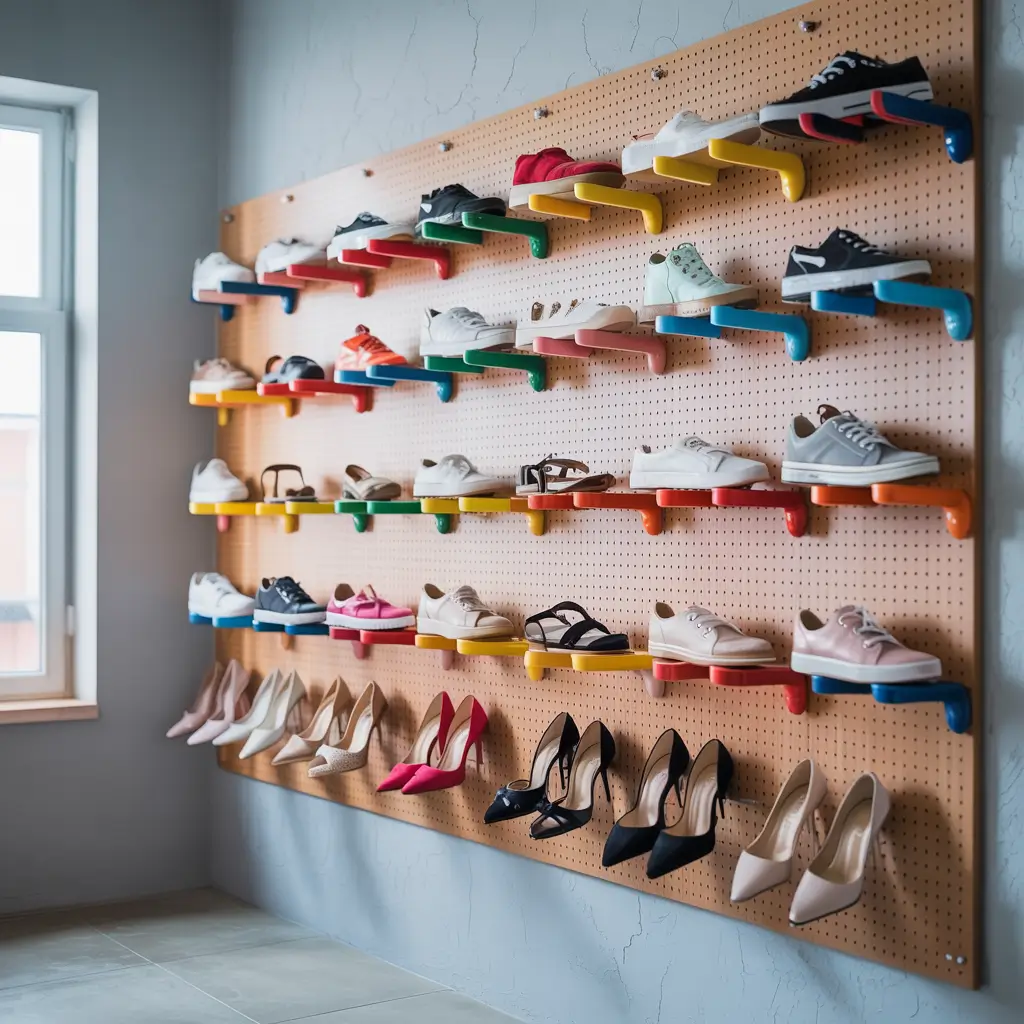
A pegboard shoe display wall creates a customizable system where every shoe has its designated spot. This industrial-chic solution adapts as your collection changes.
The Ultimate Flexible System
My pegboard wall completely transformed my closet organization. I installed a 4×8 pegboard and use various hooks and shelves to create custom spots for each shoe type. When I buy new shoes, I just rearrange the hooks. The flexibility is incredible.
Pegboard systems excel because they’re infinitely adjustable. Your storage evolves with your collection instead of forcing your collection to fit static storage.
Installing Pegboard Storage
Creating your pegboard system:
- Mount pegboard to wall using spacers (airflow behind prevents mold)
- Paint before installation in your preferred color
- Invest in various hook types for different shoes
- Add small shelves for flats and sandals
- Use pegboard bins for accessories like shoe trees
- Outline hook positions with marker for easy reorganization
The pegboard approach works particularly well for sneaker collectors who want to display their collection like the art it is. IMO, if you’re spending $200 on shoes, they deserve better than being shoved in a dark closet.
Also Read: 10 Simple Shoe Storage Ideas That Work
7. Hanging Macramé Shoe Organizer
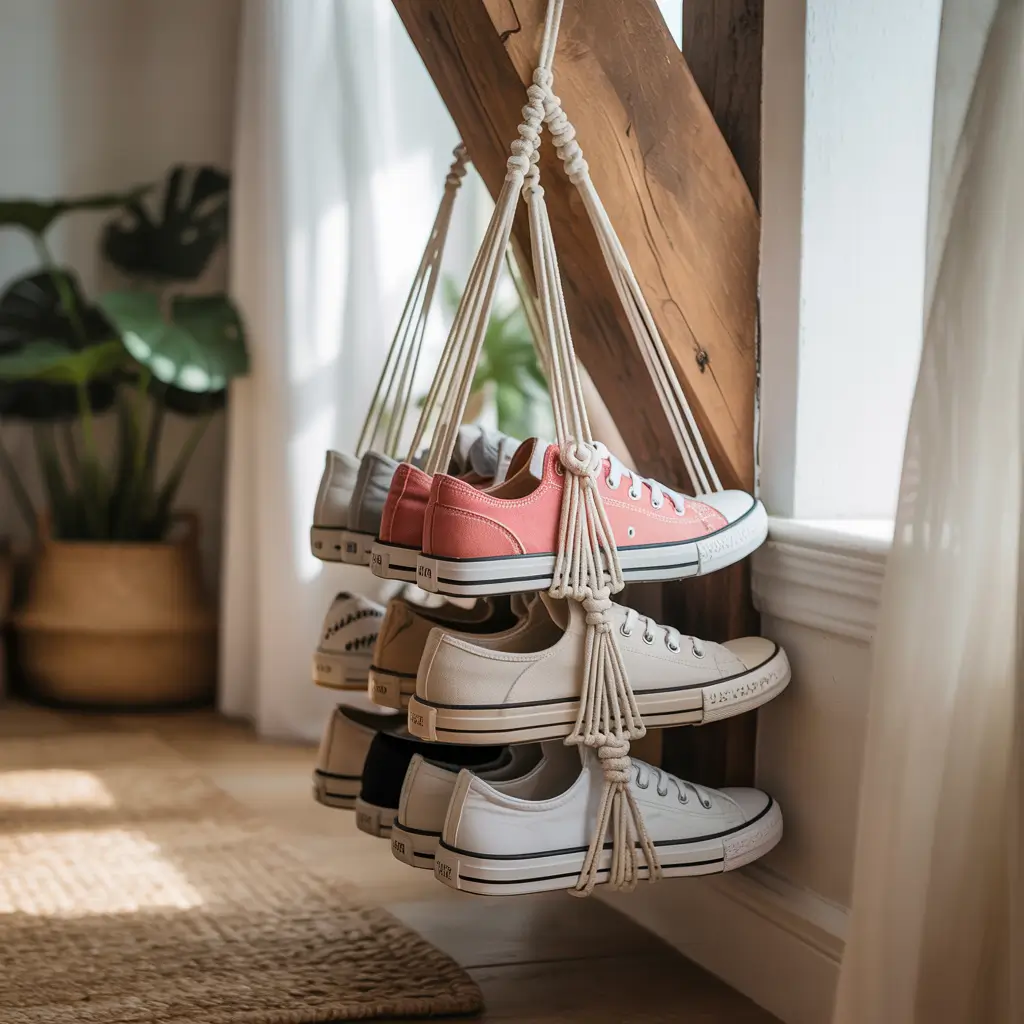
Hanging macramé shoe organizers bring bohemian style to shoe storage while taking up zero floor space. This project combines crafting skills with practical storage needs.
Knots That Hold Shoes
I learned basic macramé specifically to make shoe organizers, and now I have these gorgeous hanging holders that double as wall art. Each one holds 3-4 pairs of shoes and looks intentionally decorative rather than purely functional.
Macramé organizers work because they’re lightweight and can hang from any hook or rod. The woven construction creates sturdy pockets that cradle shoes without adding visual bulk.
Creating Macramé Storage
Making your macramé organizer:
- Learn basic macramé knots (YouTube is your friend here)
- Use thick cotton rope for structural integrity
- Create pocket depths appropriate for your shoe sizes
- Attach to wooden dowels for hanging
- Add decorative elements like beads or dyed sections
- Seal knots with fabric glue for permanence
This project requires patience and some crafting skill, but the result is storage that nobody else has. Plus, you can brag about making it yourself at every opportunity.
8. Ladder-Style Shoe Rack
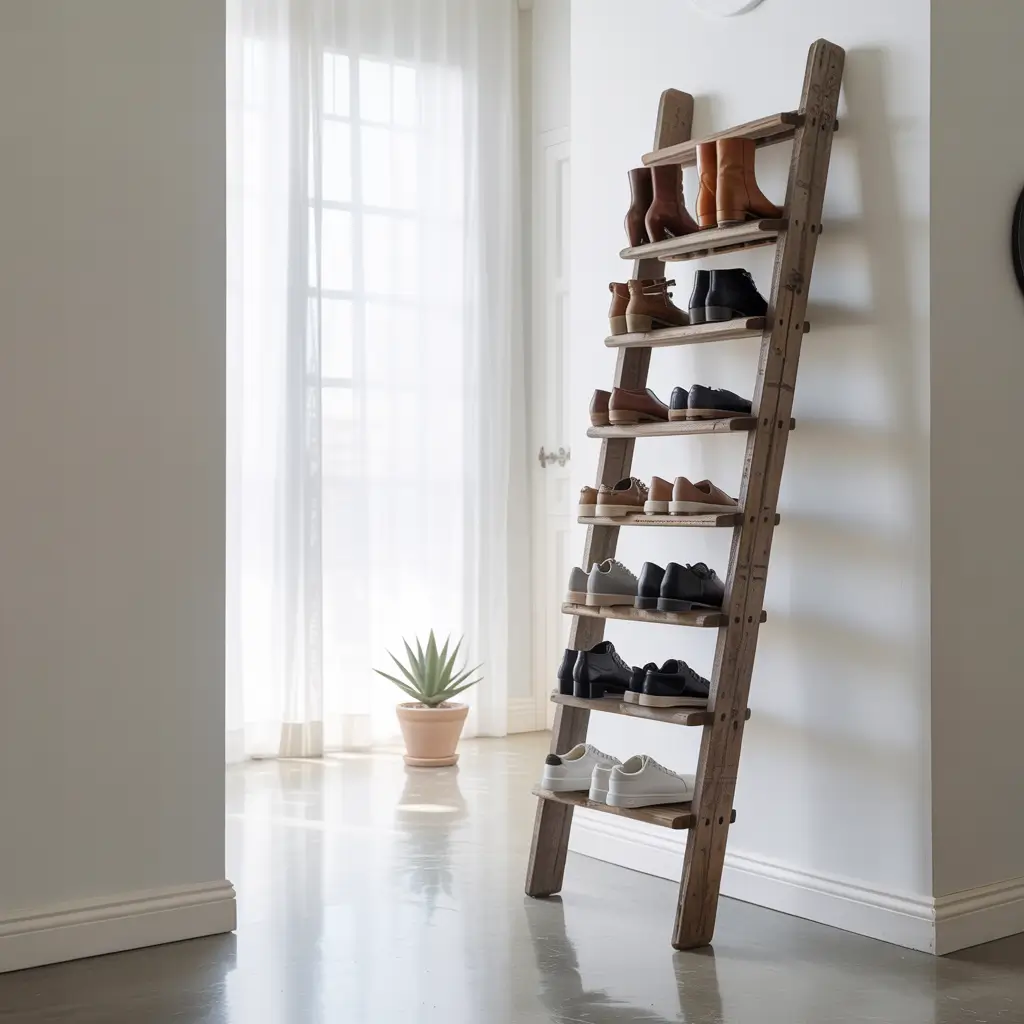
Ladder-style shoe racks lean against walls and create tiered storage with serious style. This simple DIY project delivers visual interest along with functionality.
Leaning Into Organization
I built my ladder rack from 2×4 lumber and basic woodworking — just two side rails with rungs attached at angles. It leans against my bedroom wall and holds 15 pairs of shoes while looking like a deliberate design choice.
Ladder racks work because the angled design creates natural tiers. Each rung sits at a different depth, making all your shoes visible and accessible at once.
Building Your Ladder Rack
Creating a ladder shoe rack:
- Cut two 6-foot lengths for side rails
- Cut 4-5 rungs at increasing lengths for tier effect
- Attach rungs at 12-inch intervals vertically
- Sand everything smooth before finishing
- Stain or paint to match your room
- Add rubber feet preventing floor scratches and wall marks
The ladder rack requires some basic woodworking skills, but it’s essentially just boards attached at angles. If you can measure and drill, you can build this. :/
9. Repurposed Bookshelf Shoe Storage
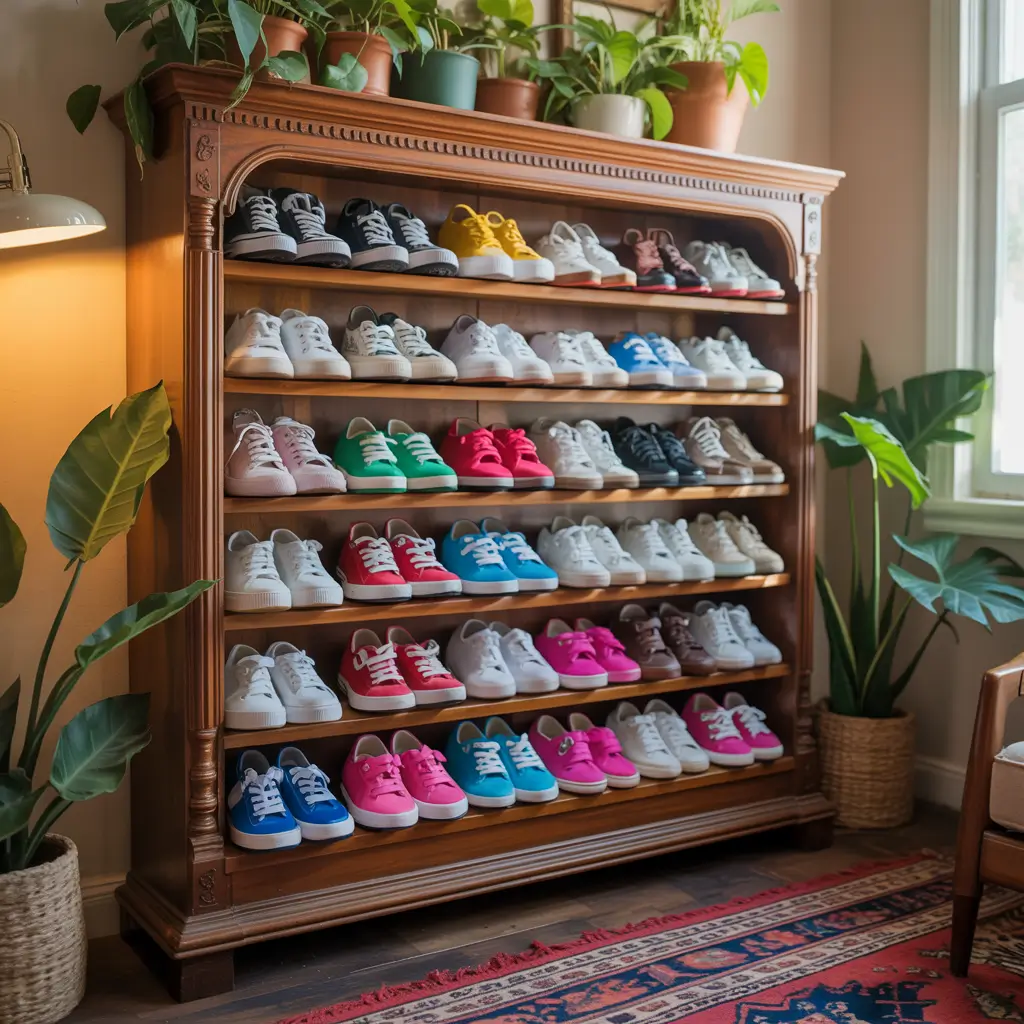
Repurposed bookshelves transform into excellent shoe storage with zero modifications needed. This approach gives new life to furniture you might already own.
From Books to Boots
I converted an old IKEA bookshelf into shoe storage by simply… using it for shoes instead of books. Revolutionary, I know. But the shelf spacing works perfectly for shoes, and what was collecting dust in my garage became useful again.
Repurposed shelves excel because you might already have them. Before buying new storage, look at what you own through a “could this hold shoes?” lens.
Converting Shelves for Shoes
Making bookshelves work for shoes:
- Adjust shelf heights to accommodate your tallest shoes
- Add shelf dividers keeping pairs organized
- Include pull-out baskets on some shelves for small items
- Add doors if you want to hide the shoes
- Paint or refinish to freshen the look
- Add wheels for mobile storage
The repurposing approach saves money and keeps furniture out of landfills. Plus, you can smugly tell people you “upcycled” something.
Also Read: 12 Trendy Shoe Shelves Ideas and Stylish Closet Solutions
10. Shoe Storage Ottoman Bench
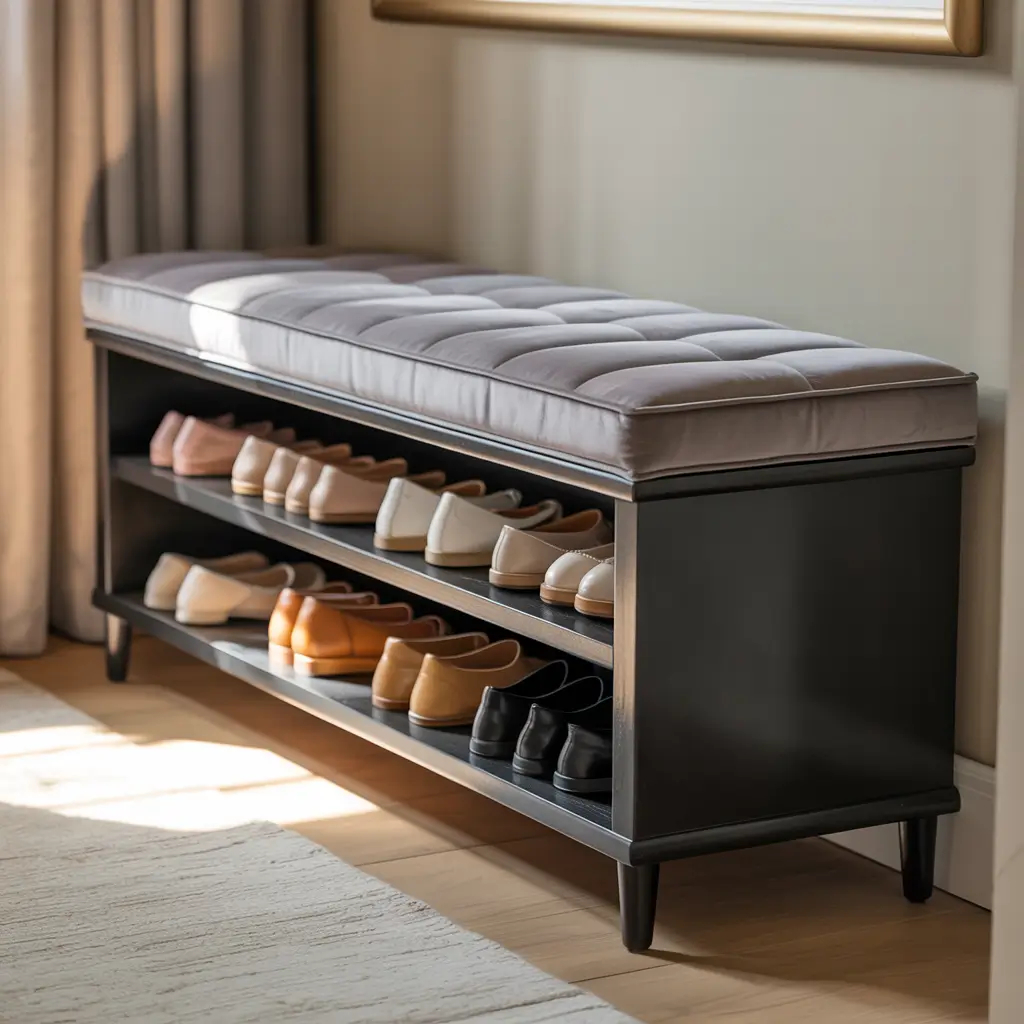
A shoe storage ottoman bench serves triple duty — seating, storage, and a footrest all in one piece. This multi-functional furniture justifies its footprint by working overtime.
The Bench That Does Everything
I built an ottoman bench with lift-top storage for my entryway. People sit on it to put on shoes, then store those shoes inside when they take them off. The circular logic is beautiful — the furniture facilitates the behavior it organizes.
Ottoman benches work because they embrace multi-functionality. In small spaces, every piece of furniture should serve multiple purposes or it doesn’t deserve the real estate.
DIY Ottoman Bench
Building your storage ottoman:
- Create a basic box frame from plywood
- Add hinges to the top for easy access
- Upholster the top with foam and fabric
- Include interior dividers organizing shoes inside
- Add decorative trim for finished appearance
- Install legs or wheels for easier moving
This project requires intermediate DIY skills but delivers furniture that looks professional and functions perfectly for entryway shoe storage.
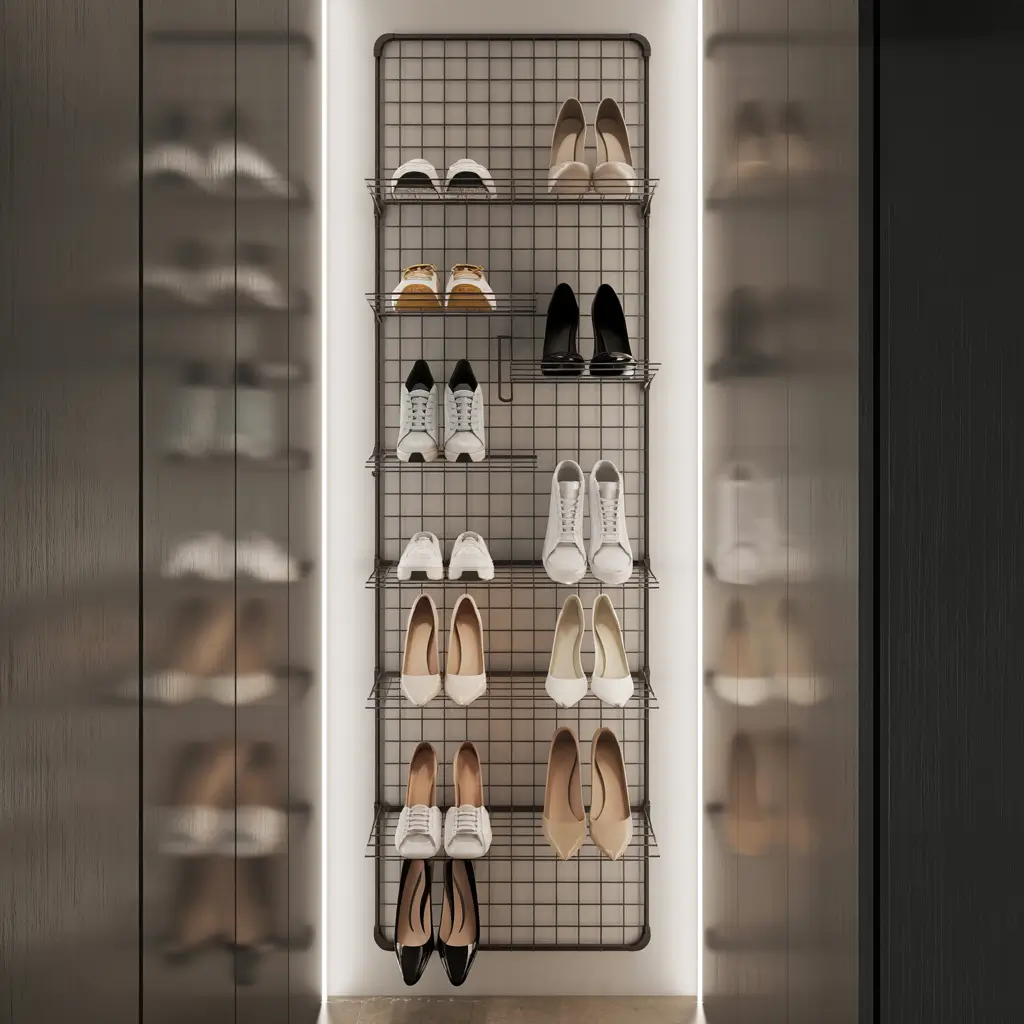
11. Wire Grid Modular Shoe Organizer
Wire grid modular organizers create customizable storage systems that adapt to any space and any shoe collection. These versatile grids snap together in countless configurations.
Building Block Storage
I assembled a wire grid system using those interlocking metal squares, and the customization options are endless. I rearrange it seasonally — tall cubbies for boots in winter, shorter ones for sandals in summer.
Wire grid systems work because they’re infinitely reconfigurable. Your storage grows, shrinks, and reshapes as your needs change without buying new furniture.
Creating Grid Systems
Using wire grids for shoes:
- Buy wire grid panels and connector clips online
- Plan your configuration before assembly
- Use cable ties in addition to clips for stability
- Add shelf liners preventing shoes from falling through
- Attach to walls if freestanding feels unstable
- Expand the system as your collection grows
The modular approach delivers maximum flexibility for minimum investment. The whole system costs maybe $40 and handles collections from 20 to 200 pairs.
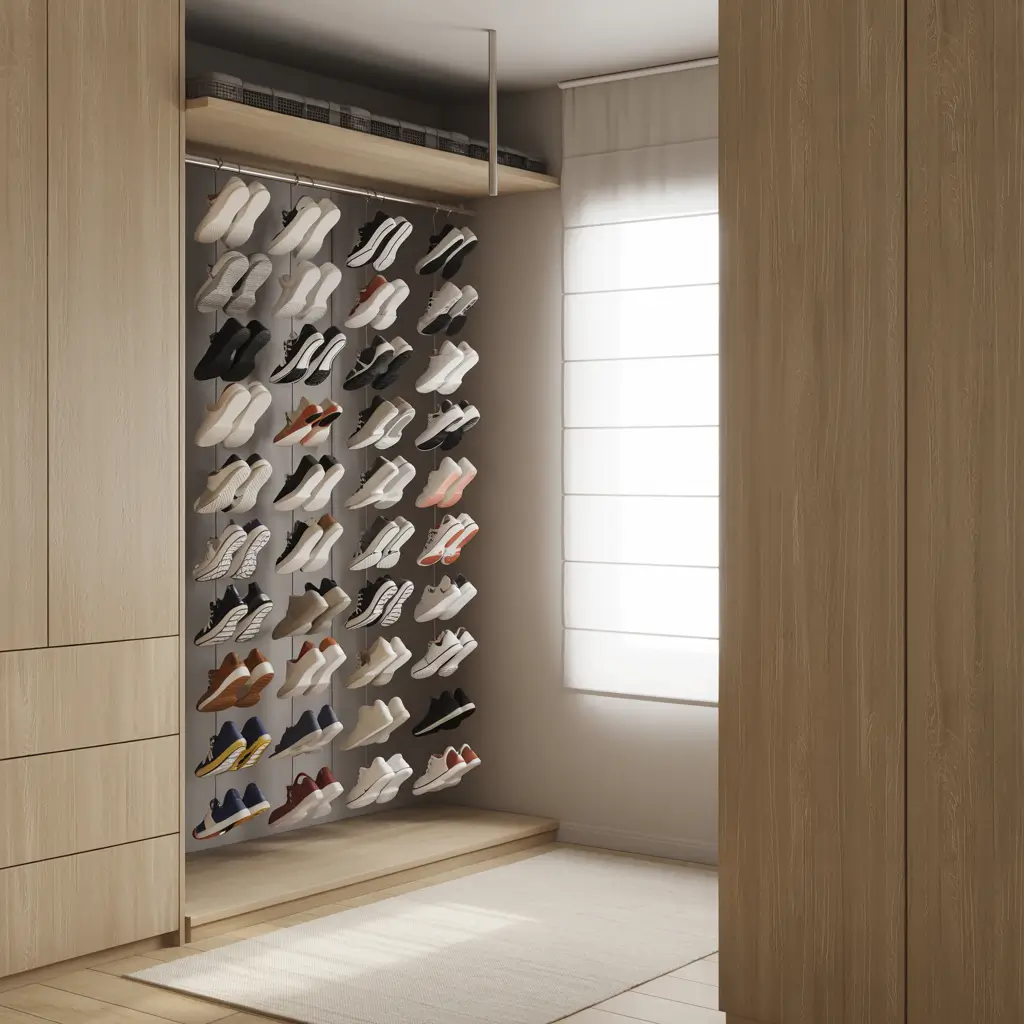
12. Hanging Closet Rod Shoe Storage
Hanging closet rod shoe storage suspends shoes from existing closet rods using clips or hooks. This solution maximizes vertical closet space without installation.
Suspended Storage Solution
I started clipping shoes to my closet rod when I ran out of floor space, and it actually works better than expected. Sandals, flats, and heels hang perfectly from simple binder clips attached to the rod.
Hanging storage works because closet rods typically have unused space on the ends or between clothing sections. That space can hold shoes without interfering with your hanging clothes.
Implementing Hanging Storage
Creating hanging shoe storage:
- Use large binder clips for instant hanging (seriously, it works)
- Buy specialty shoe clips for more elegant appearance
- Install additional tension rods creating more hanging space
- Hang shoe organizers with pockets from rods
- Use S-hooks for shoes with ankle straps
- Create hanging pockets from fabric scraps
The hanging approach works best for lightweight shoes. Don’t try hanging winter boots from a tension rod unless you enjoy the sound of crashing metal and cursing.
Your DIY Shoe Storage Journey Starts Now
There you have it — 12 DIY shoe storage ideas that prove you don’t need expensive custom closets to organize your footwear.
From simple over-the-door organizers to ambitious pegboard walls, these projects offer solutions for every skill level, space size, and budget.
The perfect shoe storage system isn’t about building the most complicated project or copying Pinterest exactly. It’s about finding what actually works for your space, your collection, and your DIY skill level.
Live in a rental? Focus on non-permanent solutions like over-the-door organizers or freestanding racks. Own your home and enjoy woodworking? Build those floating shelves and ladder racks.
Here’s what I learned after completing approximately nine different shoe storage projects: start small and simple. Don’t commit to building a massive pegboard wall system for your first DIY project.
Try something basic like wooden crate shelves or an over-the-door organizer. Build your confidence and skills before attempting more complex builds.
Also, measure everything twice. Or three times. I’ve cut boards wrong so many times that my local hardware store employees recognize me on sight.
Learn from my expensive mistakes and verify your measurements before making any cuts.
The beauty of DIY shoe storage is that you can customize every detail for your exact needs. Your weird corner space? Build storage that fits it perfectly.
Your collection of 40 pairs of sneakers? Create a display wall that shows them off. That awkward closet configuration? Design something that works with it instead of fighting it.
Start with one project this weekend. Grab some basic supplies, watch a YouTube tutorial if needed, and build something that solves your shoe chaos. Your future self (and anyone who visits your home) will thank you for finally addressing the footwear situation.


