10 Amazing DIY Birthday Decor Ideas for a Fun Party Vibe
- Birthday Decor
 Ben
Ben- 0
- 53 minutes read

Planning a birthday party sounds fun until you realize decorations can eat your budget alive. One minute you browse “simple party decor,” and the next minute you stare at a $90 banner made of cardstock and audacity. That’s exactly why I love DIY birthday decor ideas. They save money, add personality, and make the whole party feel way more special.
I’ve put together last-minute setups, over-ambitious Pinterest-inspired disasters, and a few birthday spaces that actually looked amazing. So trust me, you do not need a professional stylist or a massive budget to create a fun party vibe. You just need a few smart ideas, some basic supplies, and the willingness to get a little glue on your fingers.
In this guide, I’ll walk you through 10 amazing DIY birthday decor ideas for a fun party vibe that look impressive without making you lose your mind. Ready to make your party look ridiculously cute without spending a fortune? Let’s get into it.
Why DIY Birthday Decor Works So Well
DIY party decor gives you something store-bought decorations often miss: personality. Anyone can order a generic party pack online, but when you make your own setup, you control the colors, theme, mood, and little details that make guests say, “Okay, this is adorable.”
It also helps you stretch your budget. If you’ve ever looked at event styling prices, you know they can get wild fast. Why pay premium prices for things you can make at home with paper, balloons, lights, and a little patience?
I also think DIY decorations make parties feel warmer. They show effort. They tell people you cared enough to make the space feel festive, not just functional. And honestly, that effort always shows.
1. Balloon Garland Rainbow Arch
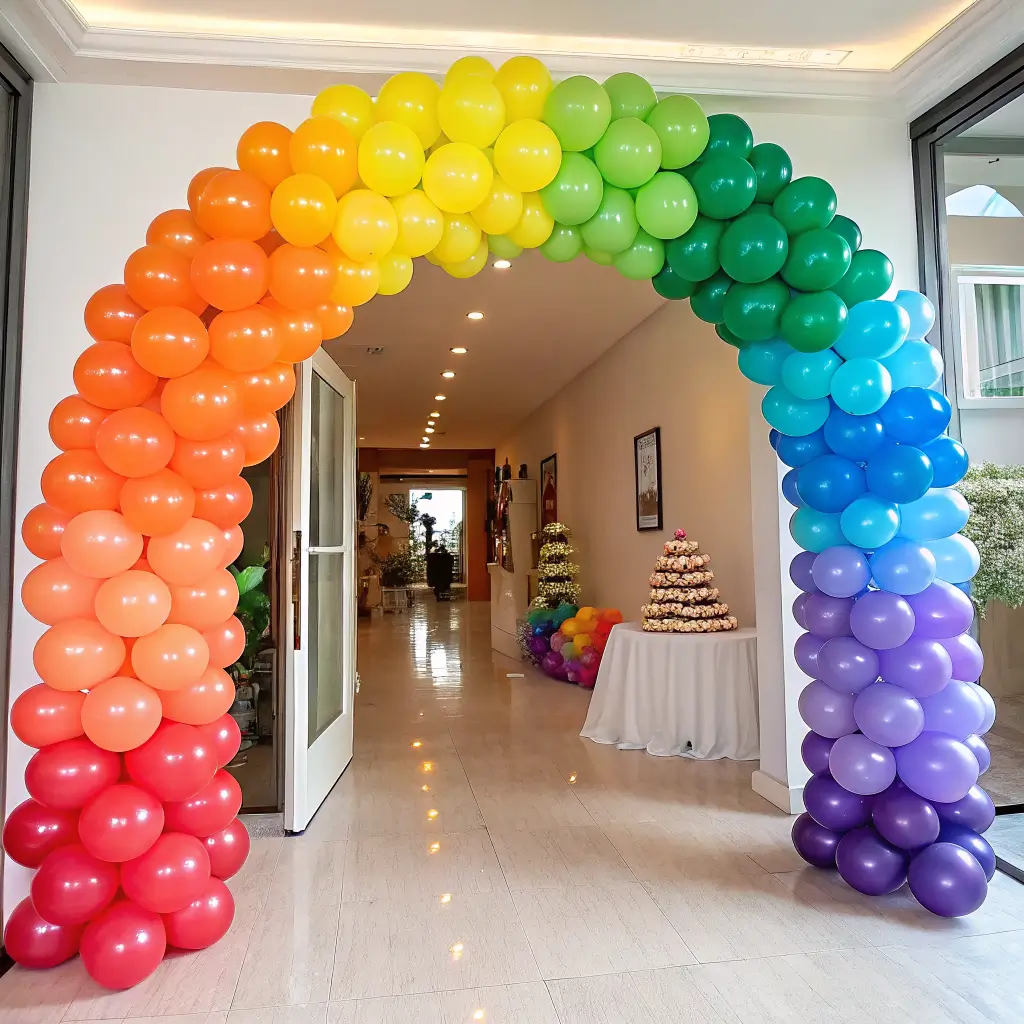
If you want one decoration that screams “party” the second people walk in, choose a balloon garland rainbow arch. It looks cheerful, fills up empty wall space, and works for kids’ birthdays, adult birthdays, and even milestone celebrations. Ever wondered why balloon arches always dominate party photos? They instantly create a focal point.
What You Need
You don’t need fancy event-planner tools for this. You just need a few basic supplies:
- Balloons in multiple sizes
- Balloon strip tape
- Glue dots
- Balloon pump
- Fishing line or command hooks
- Optional faux leaves or streamers for extra texture
I strongly recommend a balloon pump unless you enjoy unnecessary suffering. I tried inflating dozens of balloons by mouth once, and let’s just say I learned my lesson.
How to Make It Look Good
Start by choosing 3 to 5 colors that match your party theme. Mix large, medium, and small balloons so the garland looks full and organic instead of flat and awkward.
Attach inflated balloons to the strip tape, then fill gaps with smaller balloons using glue dots. Shape the garland into an arch and secure it with hooks or string. If you want a rainbow effect, arrange the colors in sections so the transition looks intentional.
Pro Tips for a Better Balloon Arch
- Use different balloon sizes for a more professional look.
- Stick to a consistent color palette.
- Add metallic balloons for a little extra pop.
- Build it a few hours before the party for the freshest look.
- Place it near the cake table, gift table, or entryway.
A balloon garland arch gives you maximum impact for relatively low cost. IMO, this one belongs at the top of every list of DIY birthday party decorations.
2. Personalized Photo Wall Display
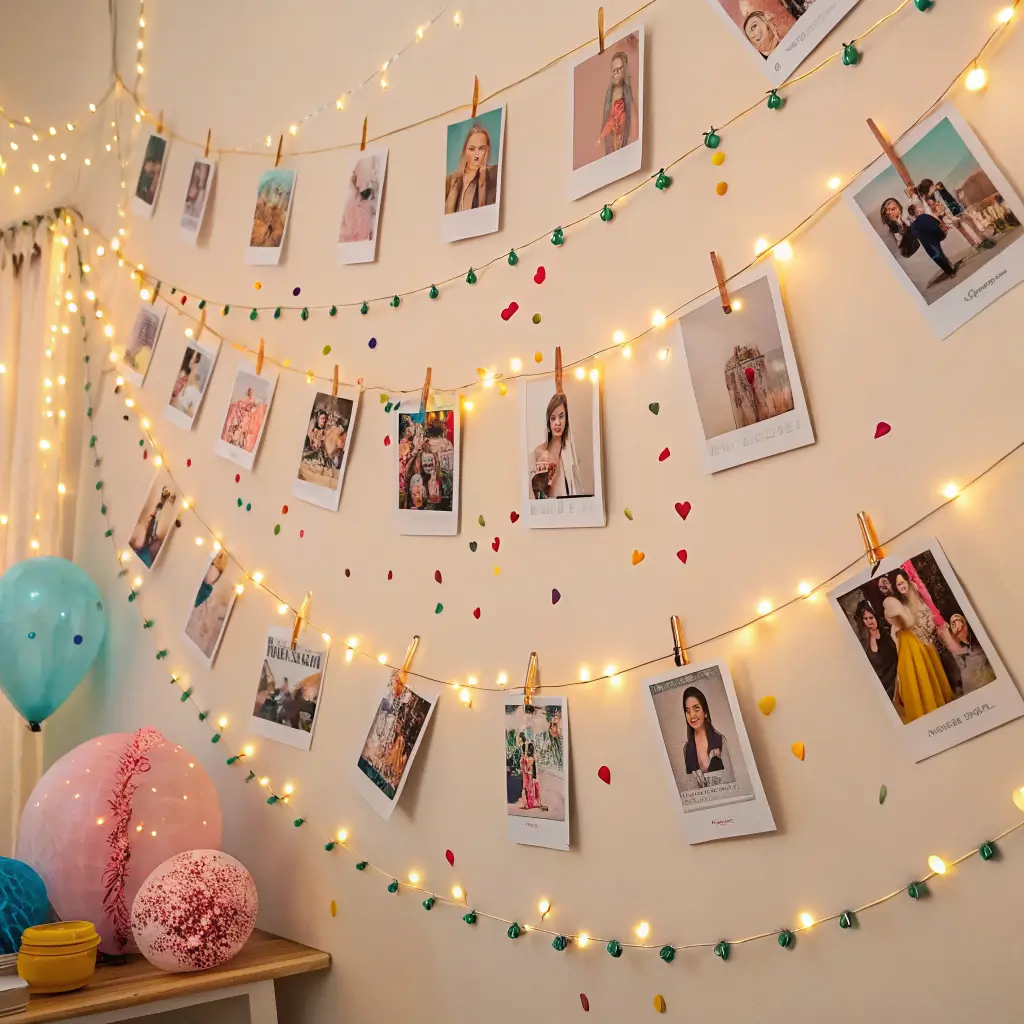
A personalized photo wall display adds heart to the party. It turns your decor into a conversation starter and gives guests something meaningful to look at between snacks and cake. Who doesn’t love spotting old baby photos or hilariously awkward school pictures?
I especially love this idea for milestone birthdays. A 1st, 16th, 21st, 30th, 40th, or 50th birthday feels more special when you highlight memories from different life stages.
Easy Ways to Set Up a Photo Wall
You have a few different options, depending on your space and style:
- Hang photos on string with mini clothespins
- Tape photos into a number shape like the birthday age
- Create a grid wall with matching prints
- Use a foam board collage
- Add fairy lights behind the photos for extra glow
I once made a photo wall for a family birthday using printed photos, gold clips, and string lights. Everyone spent more time at that wall than I expected. People laughed, pointed, and told stories the whole night. That’s the kind of decor I love most.
Tips for Making It Personal
Choose photos from different years so the display feels complete. Mix candid shots with more polished pictures. Add a few handwritten captions or tiny notes if you want to make guests smile.
You can also match the frame or clip color to your party theme. That tiny detail makes the display feel polished rather than random. Personalized birthday decorations always stand out because they feel one-of-a-kind.
3. DIY Paper Flower Backdrop
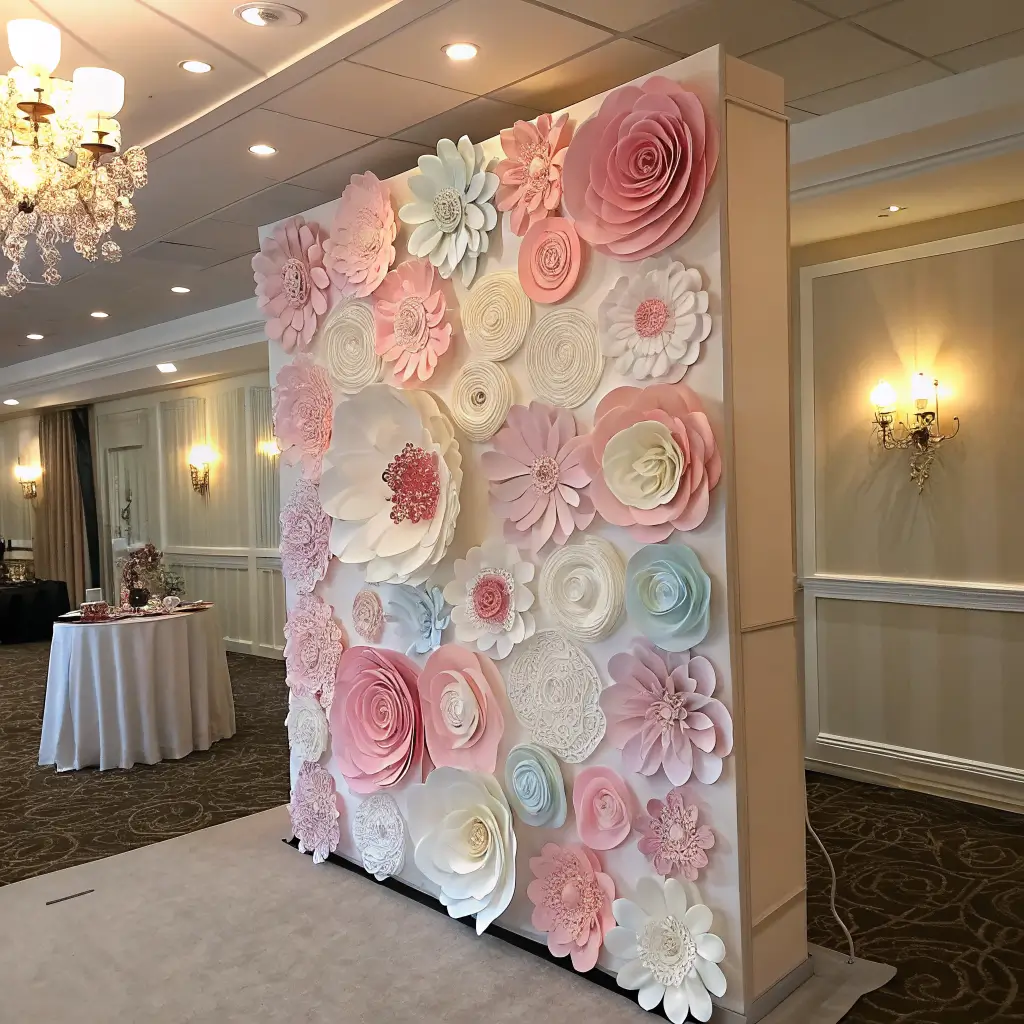
A DIY paper flower backdrop looks gorgeous in photos and works beautifully behind a dessert table, gift table, or photo booth area. It gives the party a soft, creative, handmade vibe without costing a ridiculous amount.
Paper flowers work especially well for garden themes, pastel themes, princess parties, brunch birthdays, and feminine setups. But you can also make them bold and modern with bright colors or oversized shapes.
Supplies You’ll Need
You can create this backdrop with simple craft materials:
- Colored cardstock or crepe paper
- Scissors
- Hot glue gun
- Glue sticks
- Backdrop board or wall-safe tape
- Pencil for tracing petal shapes
How to Assemble It
Cut petal shapes in different sizes, then layer and glue them into flower shapes. Roll a small piece of paper for the center and secure it in place. Make several flowers in different sizes so the backdrop looks dynamic.
Arrange the flowers on a wall or board in a loose cluster. Leave some spacing for a lighter look, or pack them close together if you want more drama. Add paper leaves if you want a fuller design.
Why This Idea Works
This backdrop gives you:
- A strong photo area
- Custom colors for any theme
- Low-cost materials
- A handmade, stylish look
If you ask me, this beats a bland party wall every single time. A blank wall at a birthday party always feels like wasted potential, right?
Also Read: 10 Modern 18th Birthday Decor Ideas for a Cool Celebration
4. Glittery Birthday Banner Letters
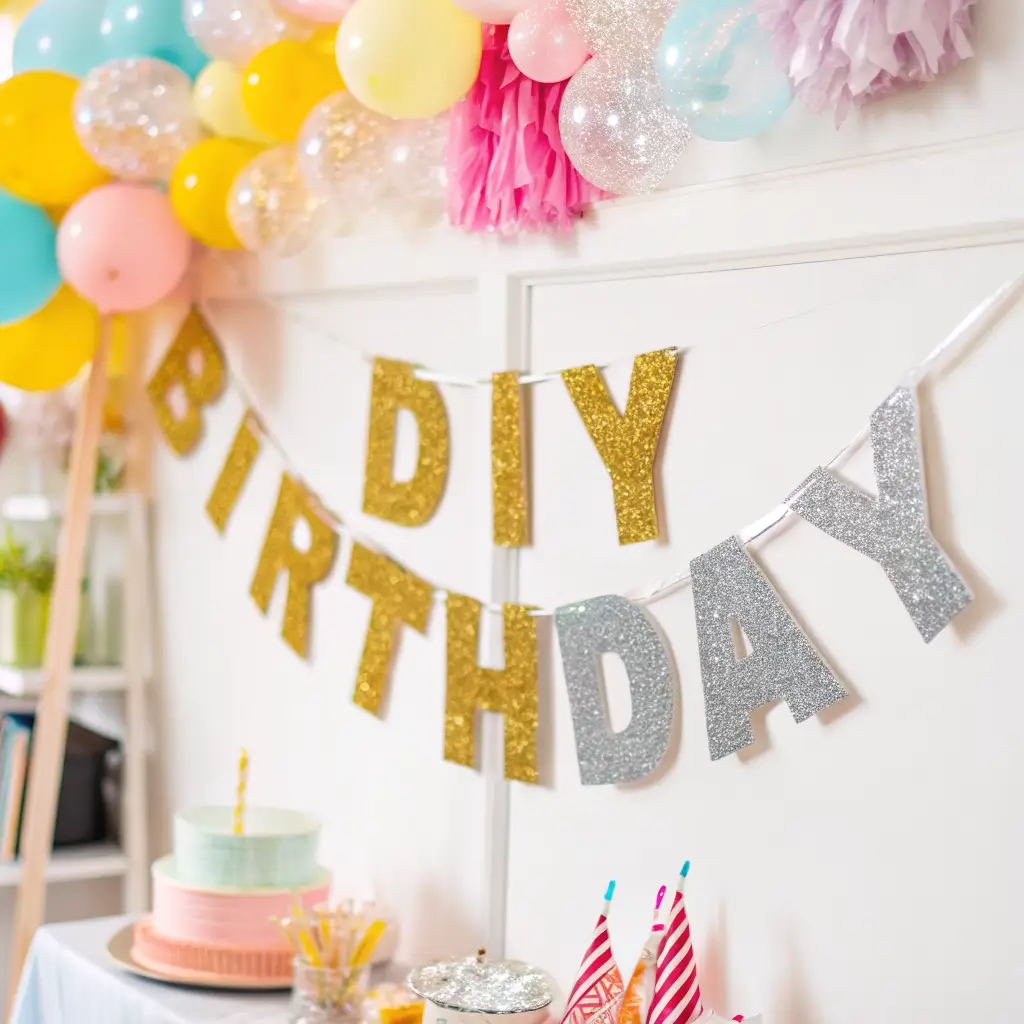
You can never go wrong with a glittery birthday banner. It’s classic, easy to customize, and perfect for filling space above a cake table or along a main wall. Plus, glitter catches light beautifully, which helps even simple party setups feel festive.
Now, yes, glitter can get everywhere. It has the survival instincts of a cockroach. But the final result usually makes the mild chaos worth it.
Best Materials for a DIY Banner
To make your own glitter banner, grab:
- Glitter cardstock or glitter foam sheets
- Letter stencils
- Scissors or a craft knife
- Hole punch
- Ribbon, twine, or string
- Tape or mini clips
Cut each letter carefully and keep the size consistent. Then punch two holes at the top of each letter and string them together. You can write “Happy Birthday,” the guest of honor’s name, or even a custom phrase that fits your theme.
Ways to Customize Your Banner
Try these fun options:
- Use gold or silver glitter for a chic look
- Choose rainbow letters for a playful vibe
- Add stars, hearts, or mini tassels
- Spell out a nickname or age
- Layer glitter letters over plain cardstock for extra dimension
A handmade banner looks way more thoughtful than a basic store-bought sign. And because you choose the colors and wording, it fits the rest of your birthday party decor ideas much better.
5. Handmade Themed Table Centerpieces
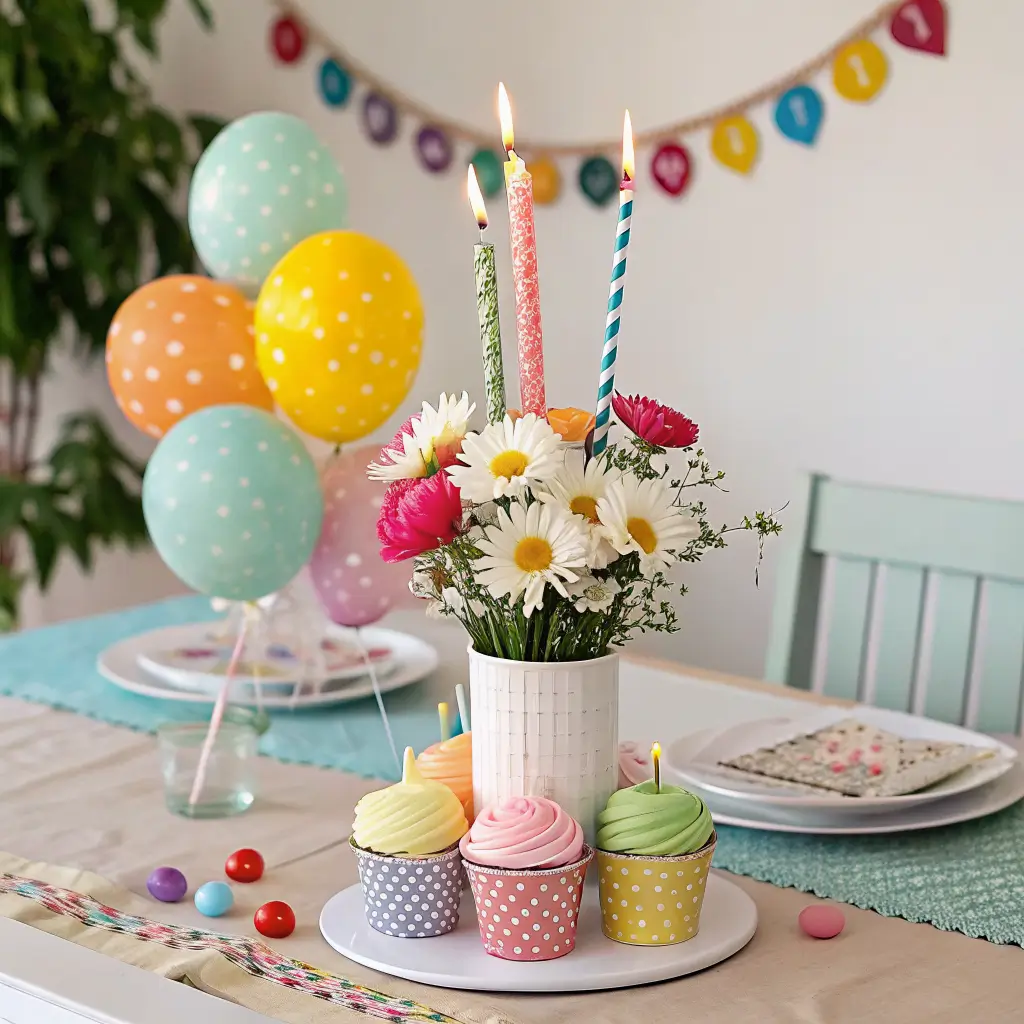
A table without a centerpiece often looks unfinished. Even something small can make the whole setup feel intentional. That’s why handmade themed table centerpieces work so well for birthday parties.
The best part? You can tailor them to literally any theme. Superhero party? Easy. Boho picnic birthday? Done. Disco-themed night? Please do it and invite me.
How to Match Centerpieces to Your Theme
Start with the overall mood of the party. Then build around it with colors, shapes, and small props.
Here are a few examples:
- Princess theme: faux flowers, mini crowns, pastel ribbons
- Jungle theme: toy animals, greenery, kraft paper elements
- Space theme: stars, planets, silver spray-painted pieces
- Vintage theme: lace, candles, old books, muted florals
- Disco theme: mirror balls, metallic paper, bright colors
Budget-Friendly Centerpiece Bases
You don’t need expensive vases. Use what you already have:
- Mason jars
- Tin cans wrapped in paper
- Small baskets
- Wood slices
- Glass bottles
- Cardboard boxes covered in fabric
I usually prefer centerpieces that stay low enough for people to talk across the table. Nobody wants to shout around a giant decorative tower while trying to eat pasta.
What Makes a Great Centerpiece
A strong centerpiece should feel:
- Relevant to the theme
- Easy to assemble
- Stable on the table
- Visible but not annoying
- Affordable to make in multiples
This idea works especially well if you host at home and want every table to feel complete.
6. Mason Jar Fairy Light Decor
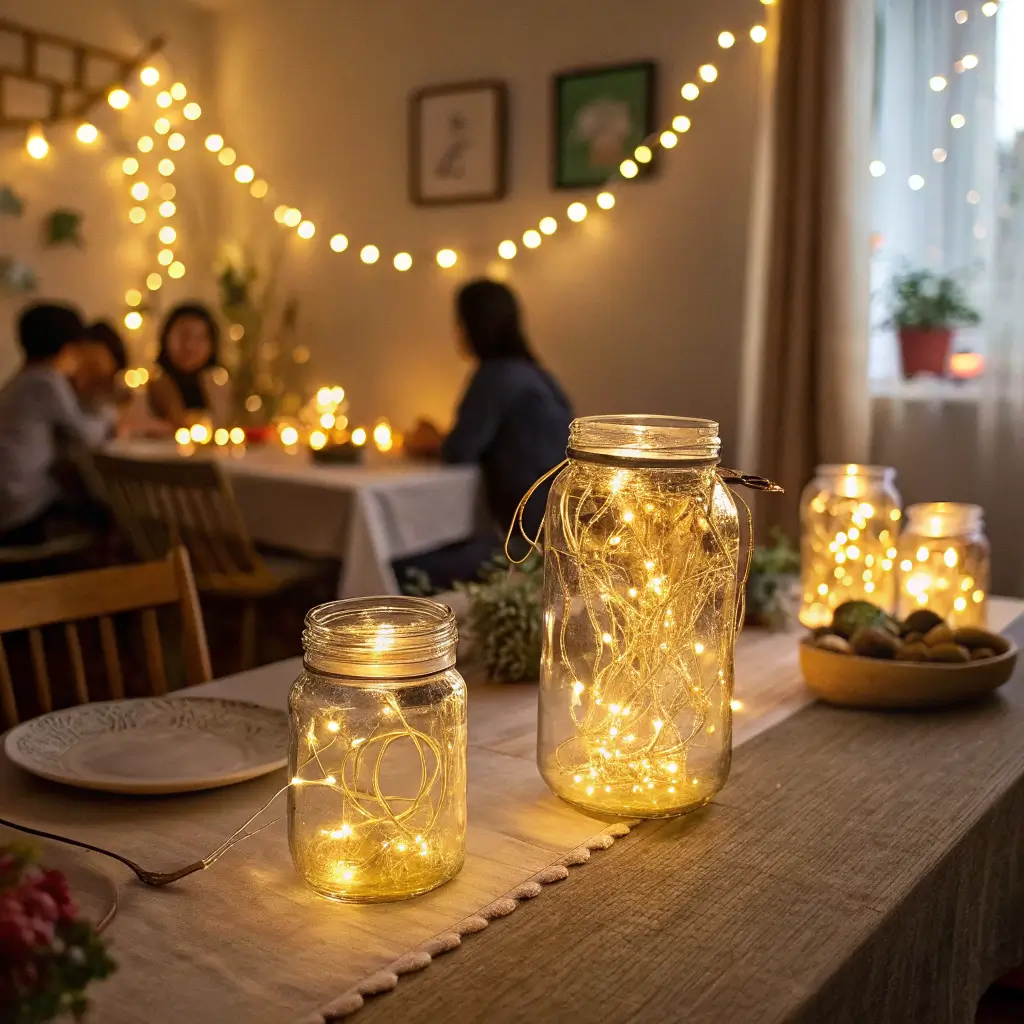
If you want cozy magic without trying too hard, make mason jar fairy light decor. These little glowing jars look charming on tables, shelves, dessert stations, and outdoor patios. They create instant atmosphere, and atmosphere matters more than people think.
Have you ever walked into a party with harsh overhead lighting and felt your soul leave your body a little? Soft lighting fixes that fast.
What You Need for Fairy Light Jars
This project stays super simple:
- Mason jars
- Battery-operated fairy lights
- Optional ribbon, lace, or twine
- Optional glitter, beads, or faux flowers
- Scissors
Place the fairy lights inside the jar and tuck the battery pack out of sight if possible. Then decorate the outside with ribbon or theme-related accents. That’s it. Very low stress, very cute.
Best Places to Use Them
You can place mason jar lights in several spots:
- On the cake table
- As table centerpieces
- Along a walkway
- On a gift table
- Around a photo booth area
These jars work especially well for evening parties. They also pair beautifully with rustic, boho, garden, or backyard birthday themes. FYI, they photograph really well too 🙂
Also Read: 10 Delightful Pink Birthday Decor Ideas for Picture-Perfect Fun
7. Confetti-Filled Hanging Balloons
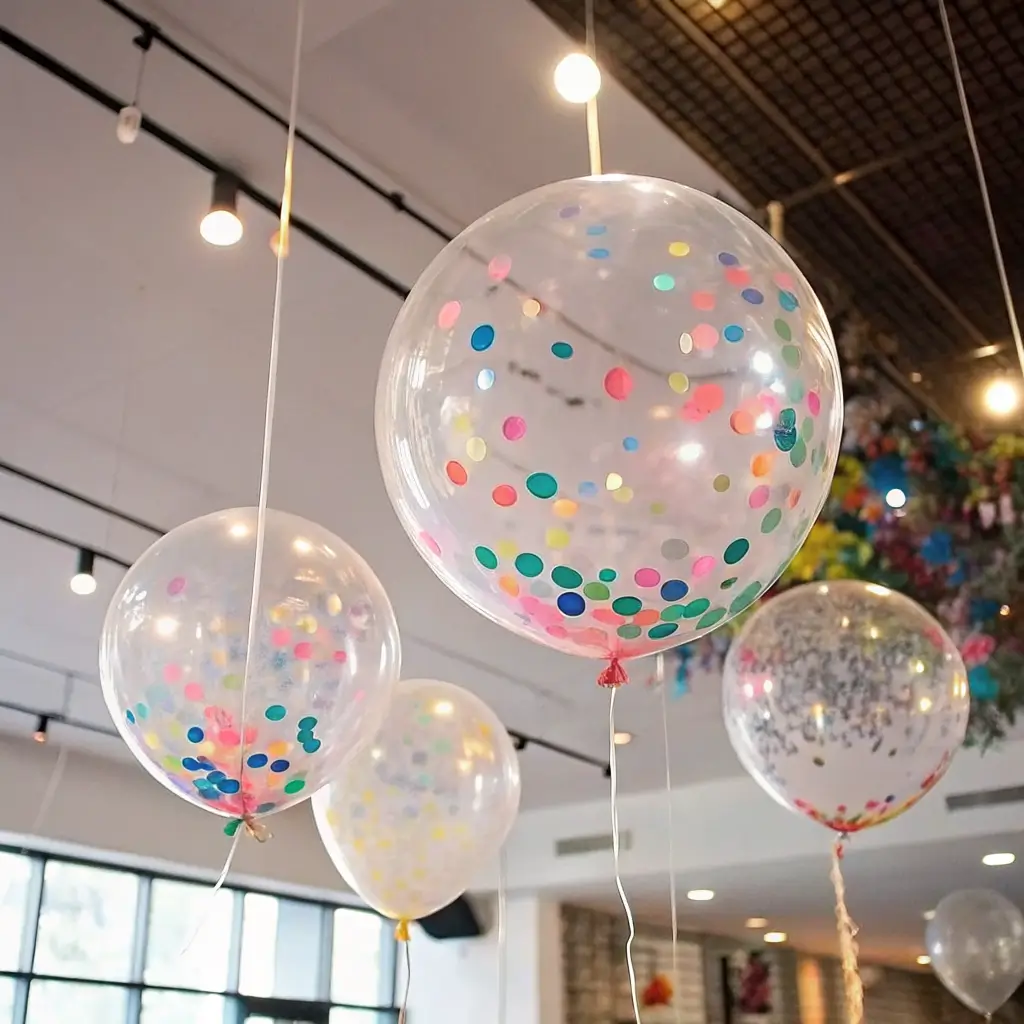
If regular balloons feel too basic, go with confetti-filled hanging balloons. They add movement, sparkle, and a playful vibe without requiring a huge amount of effort.
I love these because they feel festive in a very “Yes, we actually planned this” kind of way. They also work for both kids and adults, which makes them surprisingly versatile.
How to Make Them
You’ll need:
- Clear balloons
- Confetti
- Ribbon or curling ribbon
- Helium or regular air
- String or hooks for hanging
Fill the clear balloons with confetti before inflating them. Then tie them off and hang them at different heights over a table, dance floor, or entry area.
Tips for the Best Look
Use lightweight confetti so it spreads nicely inside the balloon. Rub the balloon gently to help the confetti cling to the sides. Coordinate the confetti colors with the rest of the decor so the whole setup looks cohesive.
For extra flair, try:
- Metallic confetti
- Pastel paper confetti
- Star-shaped confetti
- Biodegradable confetti for eco-friendly parties
This decoration adds visual fun without taking up table space, and that’s always a win.
8. DIY Cupcake Stand Tower
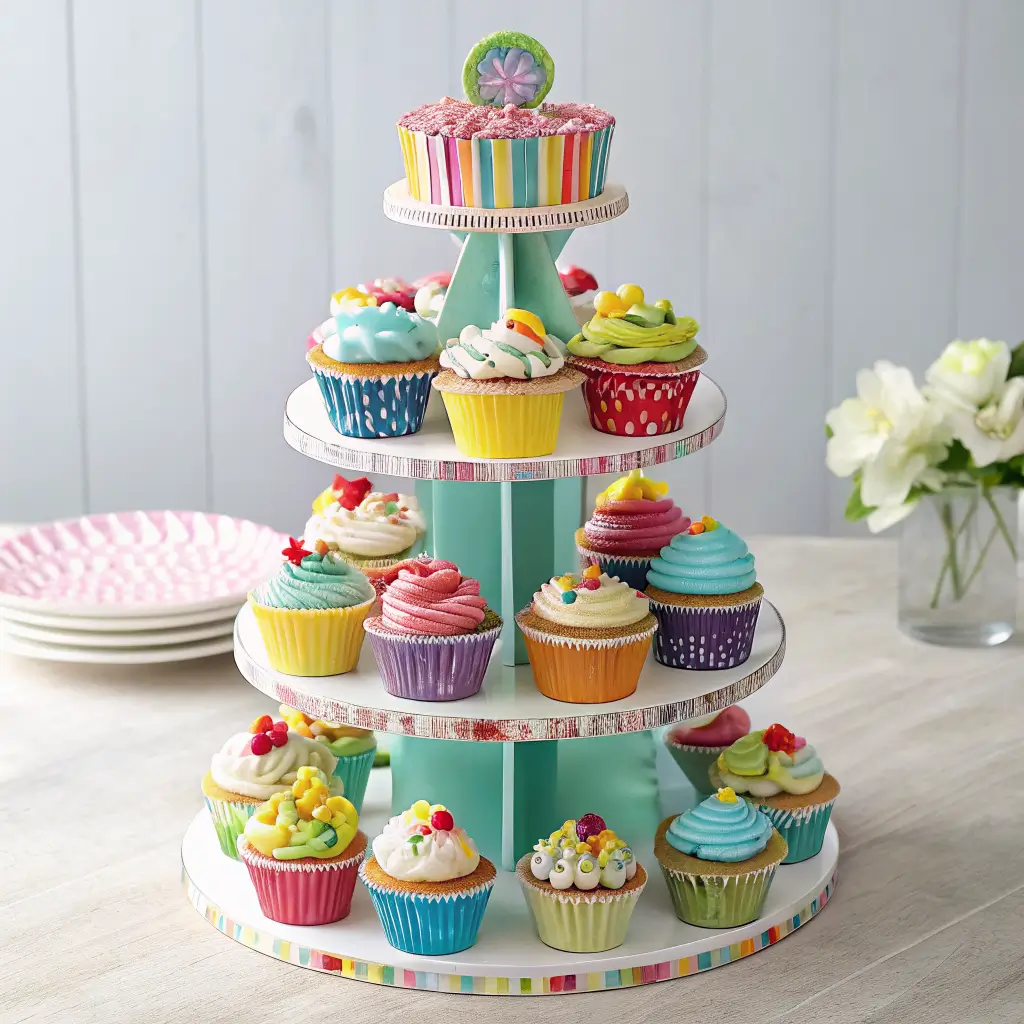
A DIY cupcake stand tower does two jobs at once. It displays dessert beautifully and acts as party decor. I love any decoration that also helps me serve food because multitasking deserves respect.
And let’s be honest, cupcakes already look cute. Give them a proper stand, and suddenly your dessert table looks ten times more polished.
Materials You Can Use
You can make a cupcake tower from:
- Cardboard rounds
- Cake boards
- Paper plates
- Foam discs
- Candlestick holders
- Plastic cups wrapped in decorative paper
Stack the layers from largest to smallest and secure them with strong glue or adhesive. Cover the tiers with wrapping paper, paint, or fabric that matches your theme.
Design Ideas for Different Themes
Here are some easy theme matches:
- Pastel party: soft pink, mint, lavender patterns
- Superhero party: comic prints and bold primary colors
- Elegant birthday: gold accents and neutral tones
- Rainbow party: bright layered colors
- Rustic theme: kraft paper and twine details
Why It’s Worth Making
A cupcake stand tower helps you:
- Save space on the dessert table
- Showcase cupcakes neatly
- Add height to your decor
- Tie desserts into the party theme
Store-bought cupcake stands can look nice, but homemade ones give you more freedom. Plus, you can size them exactly for your table. Why settle for “close enough” when you can customize the whole thing?
9. Custom Chalkboard Signage
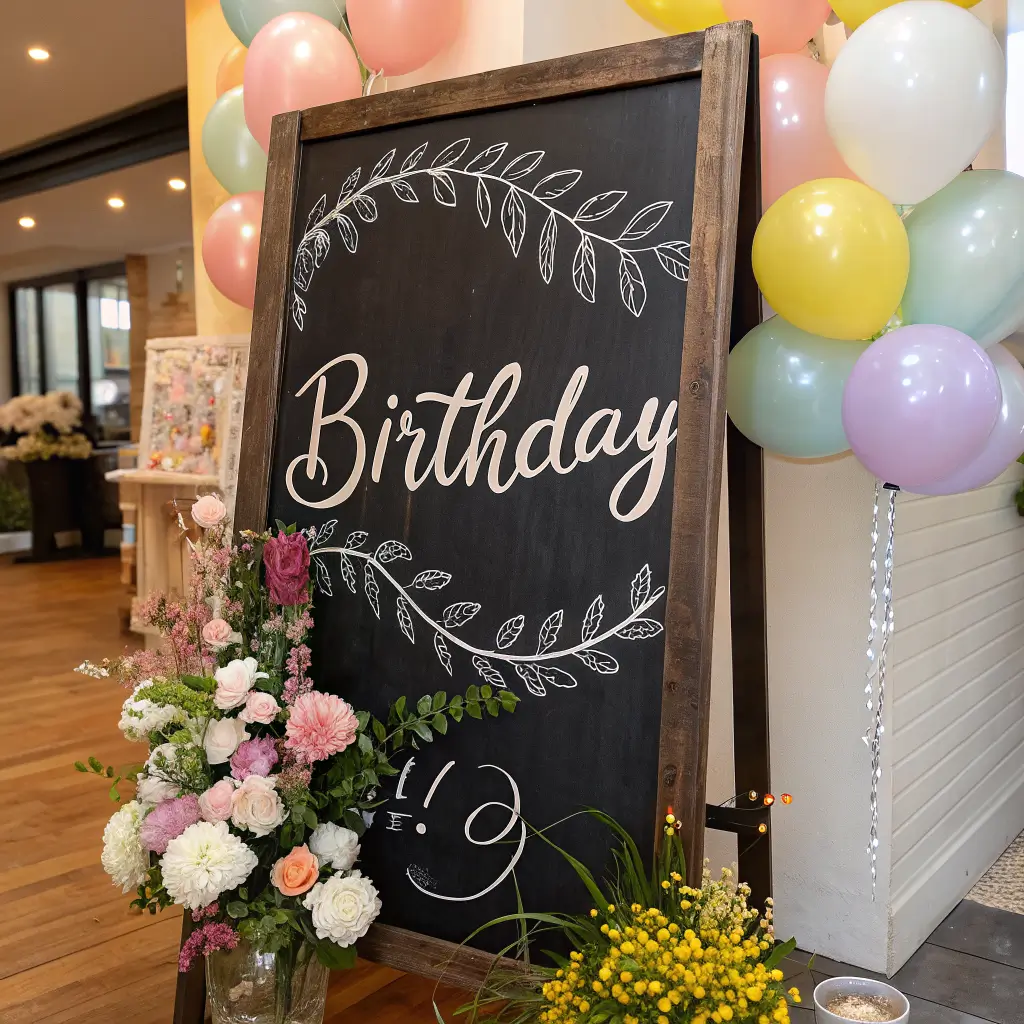
Custom chalkboard signage adds charm, direction, and personality to a birthday party. It helps guests find food, drinks, gifts, seating, or activity areas, and it looks way better than random sticky notes taped to the wall. We can all agree that sticky-note signage does not scream celebration.
You don’t need a giant real chalkboard either. Small framed chalkboards or painted boards work perfectly.
What to Write on Birthday Chalkboard Signs
You can use signs for:
- Welcome messages
- Food and drink labels
- Photo booth instructions
- Gift table markers
- Birthday schedule
- Fun quotes or inside jokes
I love signs that include a little personality. A message like “Grab a cupcake before someone beats you to it” feels more fun than a plain “Desserts.” Tiny wording choices really shape the vibe.
How to Make Them Look Stylish
Use chalk markers for cleaner lettering and stronger contrast. Add doodles, borders, stars, balloons, or floral details around the text. Keep the lettering simple and readable so guests can understand it quickly.
For a polished look:
- Use one or two fonts only
- Center the main message
- Leave enough blank space
- Match the sign frame to your party style
This idea works especially well if you want your DIY birthday party decorations to feel organized and Instagram-friendly without trying too hard.
Also Read: 10 Magical Birthday Table Decor Ideas for Instagram-Worthy Looks
10. Tissue Paper Pom-Pom Garland

A tissue paper pom-pom garland adds softness, color, and texture to your party space. It works over tables, across windows, behind dessert displays, or along stair rails. It also costs very little, which makes it one of my favorite budget-friendly party decorations.
And unlike some “easy” crafts online, this one actually feels easy. Shocking, I know.
Supplies for Pom-Pom Garland
You only need a few items:
- Tissue paper
- Scissors
- Floral wire or twist ties
- String or fishing line
- Tape or hooks
Fold several sheets of tissue paper accordion-style, tie the center, and round the ends. Then gently fluff each layer until you get a full pom-pom. Repeat the process and attach the pom-poms to a string.
Best Color Combinations
Color can completely change the mood of this decor. Try combinations like:
- Pink, peach, and gold for a sweet feminine look
- Blue, white, and silver for a cool-toned setup
- Rainbow shades for playful energy
- Black, gold, and white for a chic adult birthday
- Green, cream, and blush for a boho feel
Where to Hang It
You can place pom-pom garland:
- Above the dessert table
- Around a photo backdrop
- Across a doorway
- Along a fence for outdoor parties
- Behind the gift table
This decoration fills space beautifully and makes the room look more layered. That matters a lot when you want a party setup to feel intentional rather than thrown together at the last second :/
How to Mix These DIY Birthday Decor Ideas Without Overdoing It
Here’s the thing: you do not need to use all ten ideas in one party. You could, technically, but your space might start looking like a craft store exploded. A better approach involves picking 3 to 5 decorations that work well together.
For example, you could combine:
- Balloon garland rainbow arch
- Personalized photo wall display
- Glittery birthday banner letters
- DIY cupcake stand tower
Or try a softer setup with:
- Paper flower backdrop
- Mason jar fairy light decor
- Tissue paper pom-pom garland
- Custom chalkboard signage
Think about your party size, theme, and available space. A smaller apartment party needs a different setup than a backyard birthday bash. When you choose decor with intention, everything looks more stylish.
Quick Tips for Pulling Off DIY Party Decor Successfully
DIY projects look fun online, but execution matters. Here are a few tips that save time and stress.
Plan Your Color Palette First
Pick 3 to 4 main colors before buying anything. This step keeps your decor looking coordinated instead of chaotic. Random color choices can make even good decorations look messy.
Make a Supply List
Write down every item you need before you start. That list saves you from six emergency craft store runs, and nobody enjoys those. Well, maybe a little, but only if snacks are involved.
Test One Decor Piece Early
Try making one sample first. If it takes longer than expected or looks weird, adjust before party week. This step has saved me from several bad decisions.
Decorate in Layers
Use a mix of:
- Large focal decor like arches or backdrops
- Mid-size pieces like banners and signs
- Small accents like lights or centerpieces
Layering gives the space depth and balance. It helps the party feel designed rather than randomly assembled.
Leave Time for Setup
Never assume setup will take “like 20 minutes.” That estimate lies every single time. Give yourself extra time so you can actually enjoy the party instead of panic-taping balloons to the wall while guests arrive.
Budget-Friendly Benefits of DIY Birthday Party Decorations
One huge reason people search for DIY birthday decor ideas for a fun party vibe involves cost. Parties add up fast. Food, cake, drinks, gifts, favors, and entertainment can already stretch the budget before decorations even enter the chat.
DIY decor helps because:
- You control the spending
- You can reuse many materials
- You avoid overpriced custom pieces
- You can make decor that fits your exact theme
- You get a more personal result
In my experience, handmade decor often looks better than cheap store-bought packs because it feels intentional. Even simple crafts can look high-end when you keep the design clean and cohesive.
Final Thoughts on Creating a Fun Birthday Party Vibe
The best birthday decorations don’t just fill space. They create mood, spark conversation, and make the celebration feel memorable. That’s why these 10 amazing DIY birthday decor ideas for a fun party vibe work so well. They help you build a party that looks festive, feels personal, and stays within budget.
If you want the biggest visual impact, start with a balloon garland rainbow arch or DIY paper flower backdrop. If you want warmth and personality, add a personalized photo wall display, mason jar fairy light decor, or custom chalkboard signage. And if you want easy, affordable charm, you really can’t go wrong with tissue paper pom-pom garland or glittery birthday banner letters.
So which idea will you try first? Pick a few, gather your supplies, and make the kind of party setup that makes people pull out their phones for photos before they even find the cake. Honestly, that’s when you know you nailed it.


