10 Modern Game Room Design Ideas for Stylish Gaming Spaces
- Game Room Design
 Ben
Ben- 0
- 36 minutes read
Look, I get it. You’ve been gaming on that same rickety desk your parents gave you in high school, surrounded by a tangle of cables that would make even the most patient person want to rage quit. Your gaming chair? Probably a dining room castoff. But here’s the thing—you deserve better, and your gaming space should actually reflect the passion you pour into those marathon sessions.
I’ve spent years experimenting with different setups, making rookie mistakes (mounting my monitor too high was a neck-pain nightmare), and finally figuring out what actually works. Whether you’re working with a closet-sized corner or have an entire room to transform, I’m about to walk you through ten killer game room designs that’ll make your friends genuinely jealous. No fluff, no unrealistic Pinterest fantasies—just real, actionable ideas you can actually pull off.
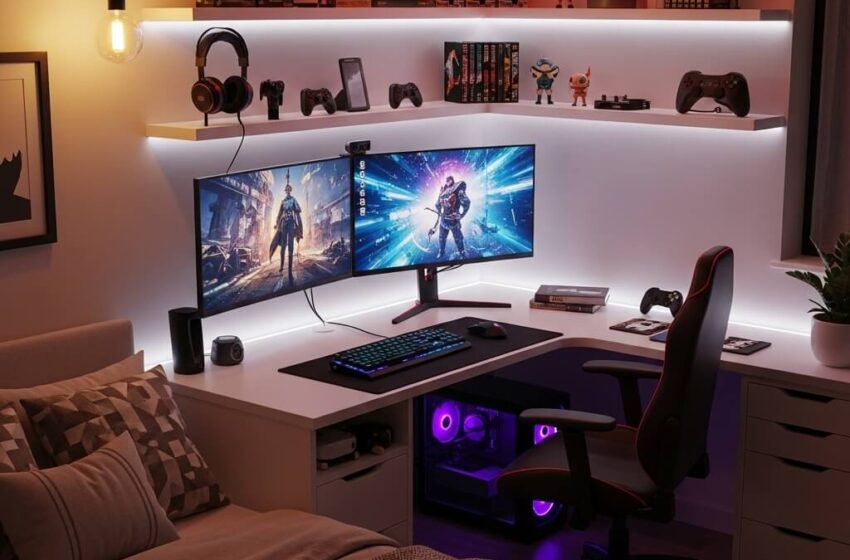
Minimalist RGB Gaming Room Setup
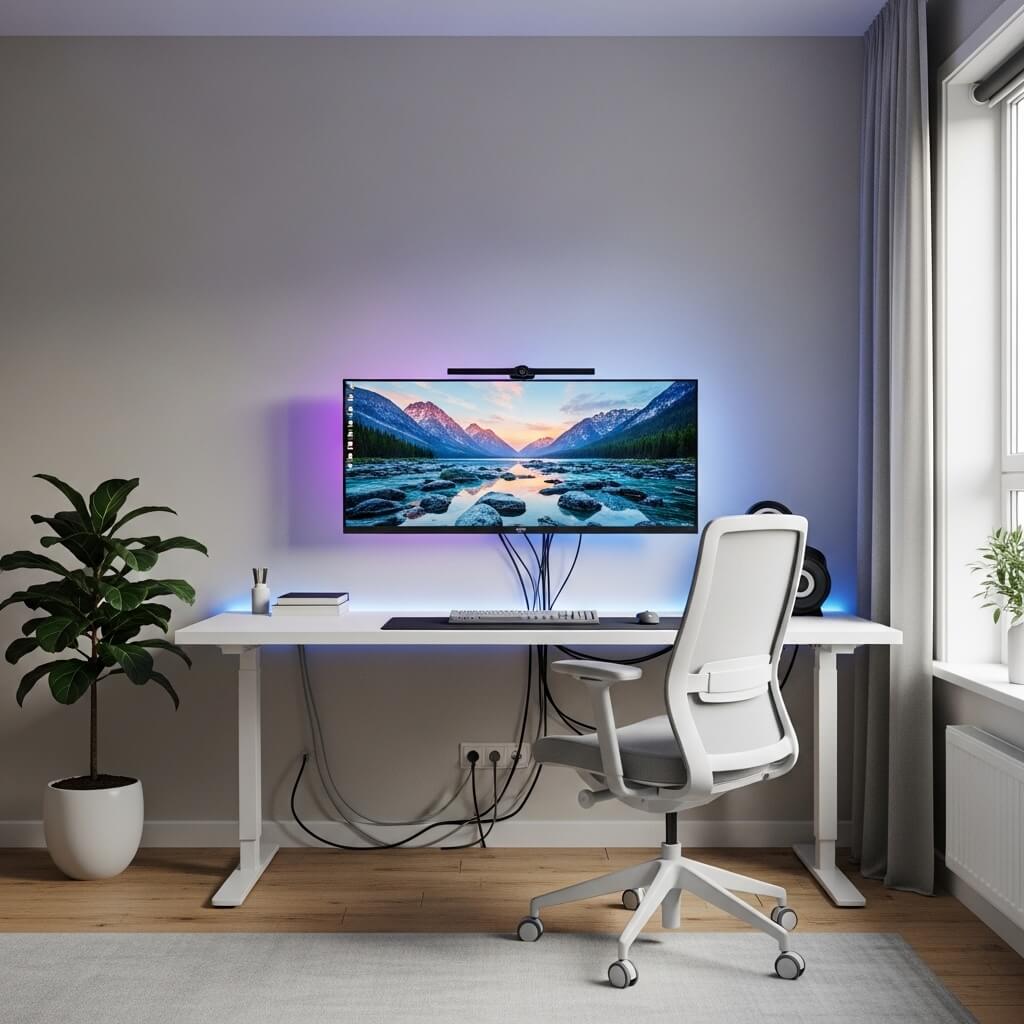
You know what’s funny? The minimalist aesthetic seems contradictory when you slap RGB lighting all over it, but somehow it just works. I stumbled into this design when I got tired of my cluttered mess and decided less is definitely more.
The core concept here revolves around clean lines, limited furniture, and strategic RGB lighting that doesn’t look like a unicorn exploded in your room. Start with a simple white or black desk—IKEA’s Karlby countertop on Alex drawers remains undefeated for this setup, IMO. Mount your monitor on an arm to completely eliminate the stand and create that floating effect.
Here’s what makes this setup shine:
- Single accent color: Choose one primary RGB color and stick with it (I’m partial to purple or cyan)
- Cable management is non-negotiable: Use raceways, sleeves, or under-desk trays
- Minimal peripherals on display: Keep only your keyboard, mouse, and maybe a controller visible
- Floating shelves: Mount one or two for headphones and a small plant
The trick? Your RGB should accentuate the space, not dominate it. Run LED strips behind your desk and monitor, maybe add a bias light, and call it a day. When someone walks in, they should notice the clean aesthetic first and the lighting second.
I went with a monochrome color scheme for everything except the RGB, and honestly? It transformed my space from “gamer cave” to “this person has their life together” vibes. The minimalist approach also makes cleaning stupid easy—no dust collectors masquerading as decorations.
Small Bedroom Gaming Corner Design
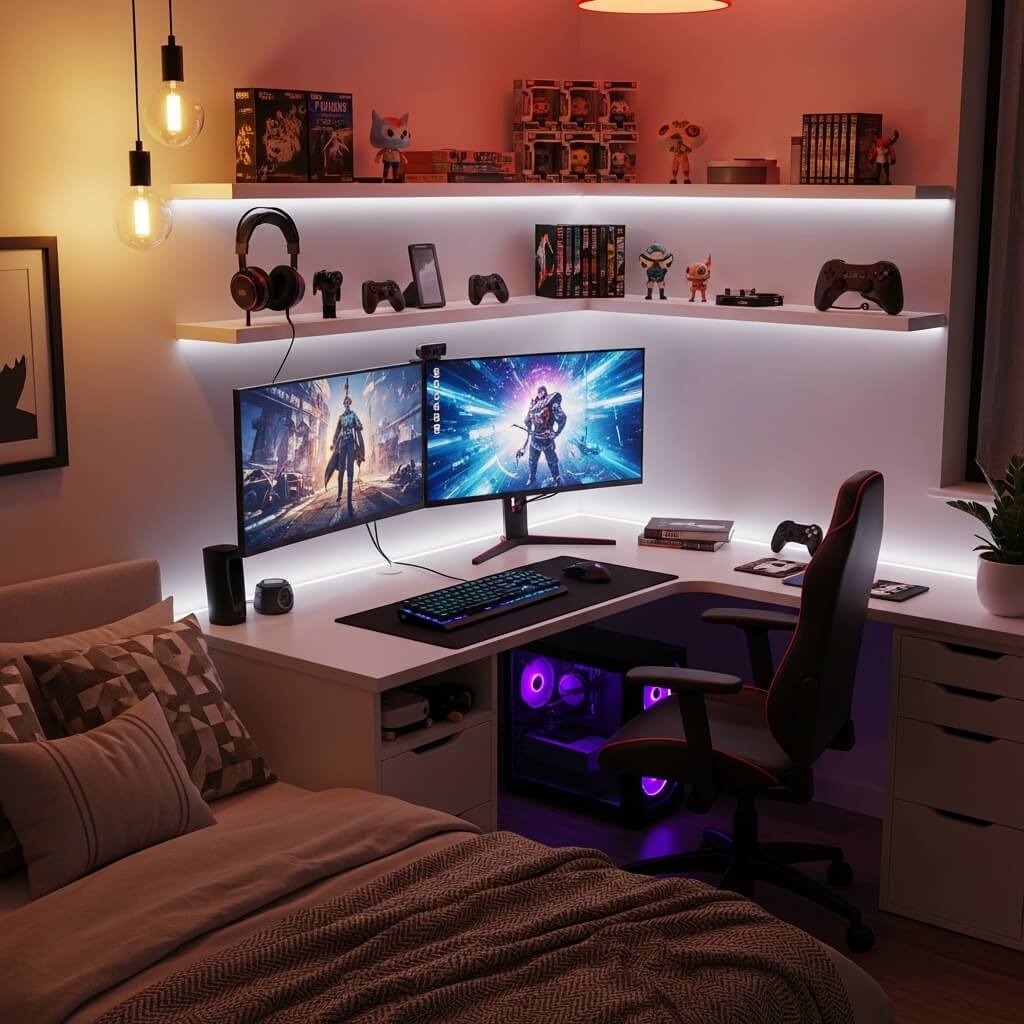
Ever wondered why some people can make a 3×4 foot corner look like a legit gaming paradise while others struggle with an entire room? Space management, my friend. Space management.
When you’re working with limited square footage, every inch counts. I learned this the hard way when I moved to my first apartment and had to cram my entire setup into what was essentially a glorified closet. But you know what? Some of my best gaming memories happened in that tiny corner.
Vertical space becomes your best friend. Wall-mount everything you possibly can—your monitor, shelves, even your console if you’re brave enough. Get a compact desk that fits snugly in your corner, preferably one with built-in storage or drawers underneath.
Essential elements for small gaming corners:
- Corner desk designs: These maximize the L-shape space
- Monitor arms: Free up desk real estate immediately
- Pegboard walls: Hang controllers, headsets, and accessories vertically
- Compact chair: Gaming chairs are great, but a slim office chair might fit better
- Over-desk shelving: Create layers without eating floor space
Lighting matters even more in small spaces. A single LED strip can make your corner feel twice as spacious when positioned correctly—run it along the back edge of your desk or behind your monitor. Avoid overhead lighting that’ll create glare on your screen.
The color scheme should keep things light and airy. Dark colors will make your small corner feel like a cave (and not in a good way). Whites, light grays, or soft blues create the illusion of more space.
Luxury Dark Aesthetic Game Room
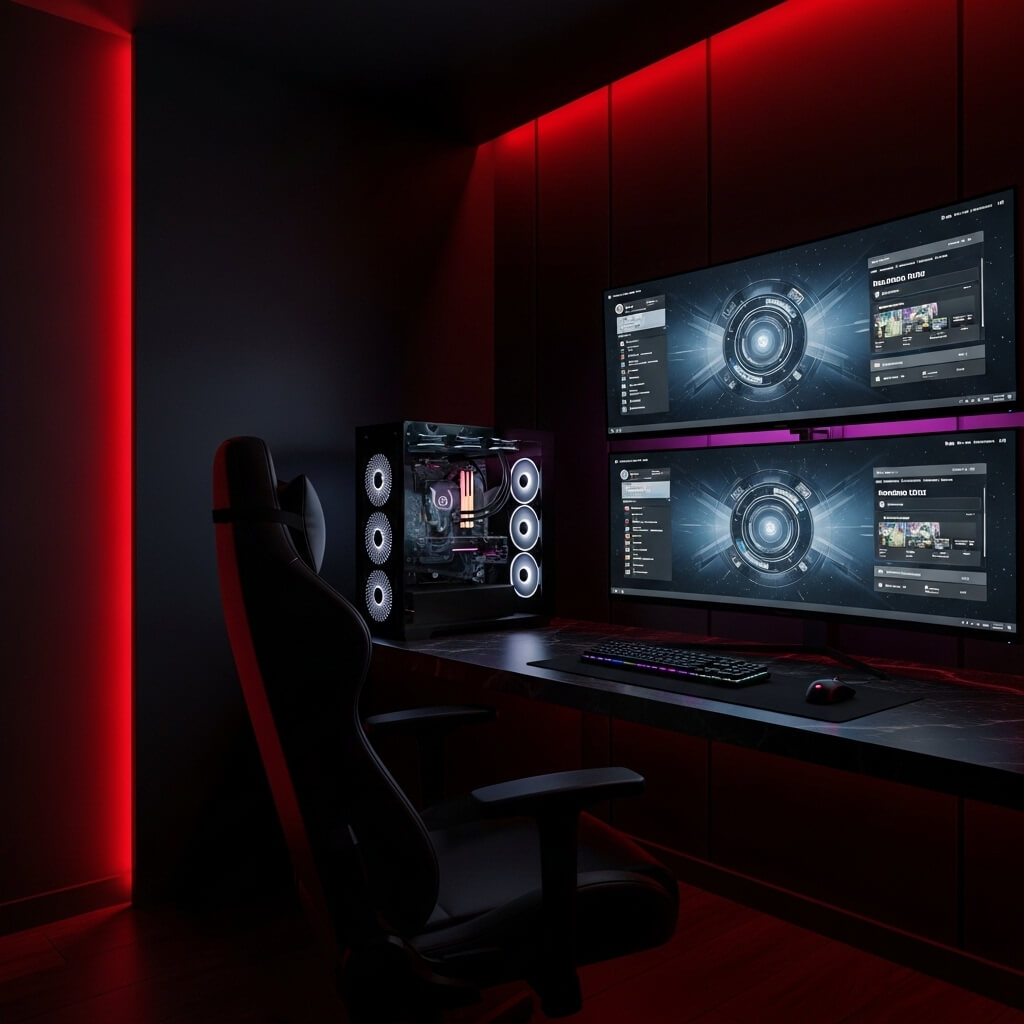
Okay, let’s talk about going full Dark Knight mode with your gaming space. This aesthetic isn’t for everyone, but when you execute it properly? Chef’s kiss. 🙂
The luxury dark aesthetic combines rich, moody colors with premium materials that scream sophistication. Think charcoal walls, black leather seating, dark wood accents, and brass or gold hardware. This isn’t your typical gamer setup—this is what happens when gaming meets gentlemen’s club vibes (the classy kind, obviously).
I helped my buddy design his luxury dark game room last year, and the transformation was insane. We started with deep charcoal paint on three walls and added black shiplap to the accent wall behind his setup. The result? Absolutely stunning.
Key components for nailing this look:
- Premium gaming chair: Black leather or high-quality fabric (no racing stripes here)
- Solid wood desk: Walnut or ebony finishes work beautifully
- Warm accent lighting: Amber or warm white LEDs, skip the rainbow RGB
- Textured materials: Leather, wood, metal—avoid plastic where possible
- Statement pieces: Vintage posters in black frames, whiskey decanter, etc.
The luxury is in the details. Upgrade to a mechanical keyboard with a sleek black case, get a premium mouse pad (leather desk mats look incredible), and invest in cable management solutions that completely hide your wiring. Everything should look intentional and refined.
Lighting becomes crucial with dark walls. You’ll need multiple light sources—a desk lamp with warm light, some ambient wall sconces, and subtle backlighting. The goal is moody but functional, not “can’t see your own keyboard” dark.
Also Read: 10 Magical Halloween Balcony Decor Ideas Spooky Cute Balcony
Budget-Friendly Gamer Setup Ideas
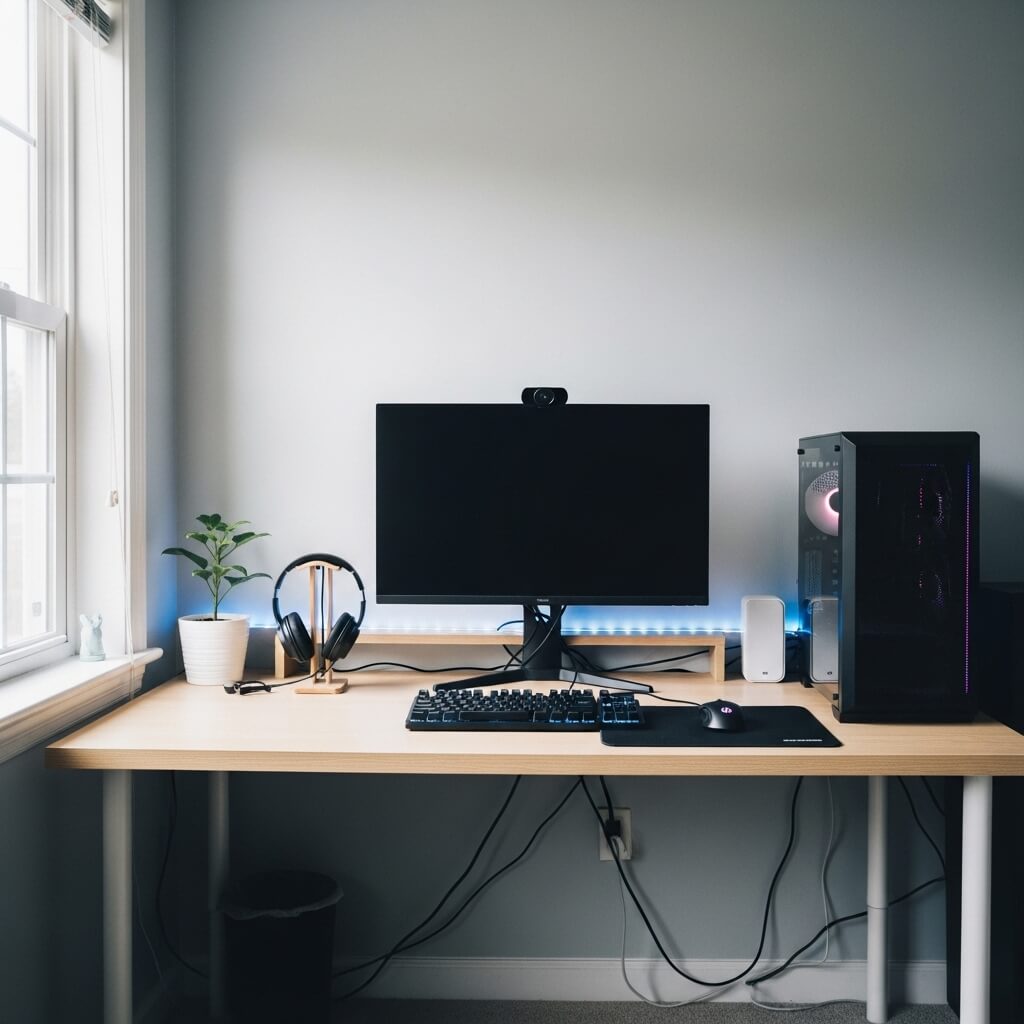
Real talk: You don’t need to drop a month’s rent to create an awesome gaming space. I built my first proper setup with about $300, a lot of patience, and some creative problem-solving.
Budget gaming setups require smart shopping and DIY creativity, not deep pockets. The secret? Prioritize what matters most for your gaming experience and get creative with everything else.
Start with these budget-friendly strategies:
- DIY desk solutions: Hollow core door ($30) + file cabinets ($40) = solid gaming desk
- Secondhand marketplace: Facebook Marketplace and Craigslist are goldmines for cheap desks and chairs
- Basic LED strips: Skip expensive smart lighting; basic strips cost $15 and look great
- Cable ties and clips: Five bucks solves 80% of cable management issues
- Wall shelves from discount stores: Target, Walmart, IKEA—all have cheap floating shelves
FYI, one of my favorite budget hacks is printing your own wall art. Download high-res gaming artwork, print it at a local print shop (way cheaper than you’d think), and frame it in cheap IKEA frames. Boom—custom wall decoration for under $30.
Your monitor and peripherals matter most for actual gaming performance, so allocate more budget there if you can. But for aesthetics? Get creative. Paint old furniture, use LED strips to hide imperfections, and remember that most gaming setups look 10x better with proper cable management—which costs basically nothing.
I’ve seen $200 setups that look better than $2,000 ones simply because the owner took time to organize, clean, and thoughtfully arrange everything. Money helps, but taste is free.
Neon LED Cyberpunk Gaming Room
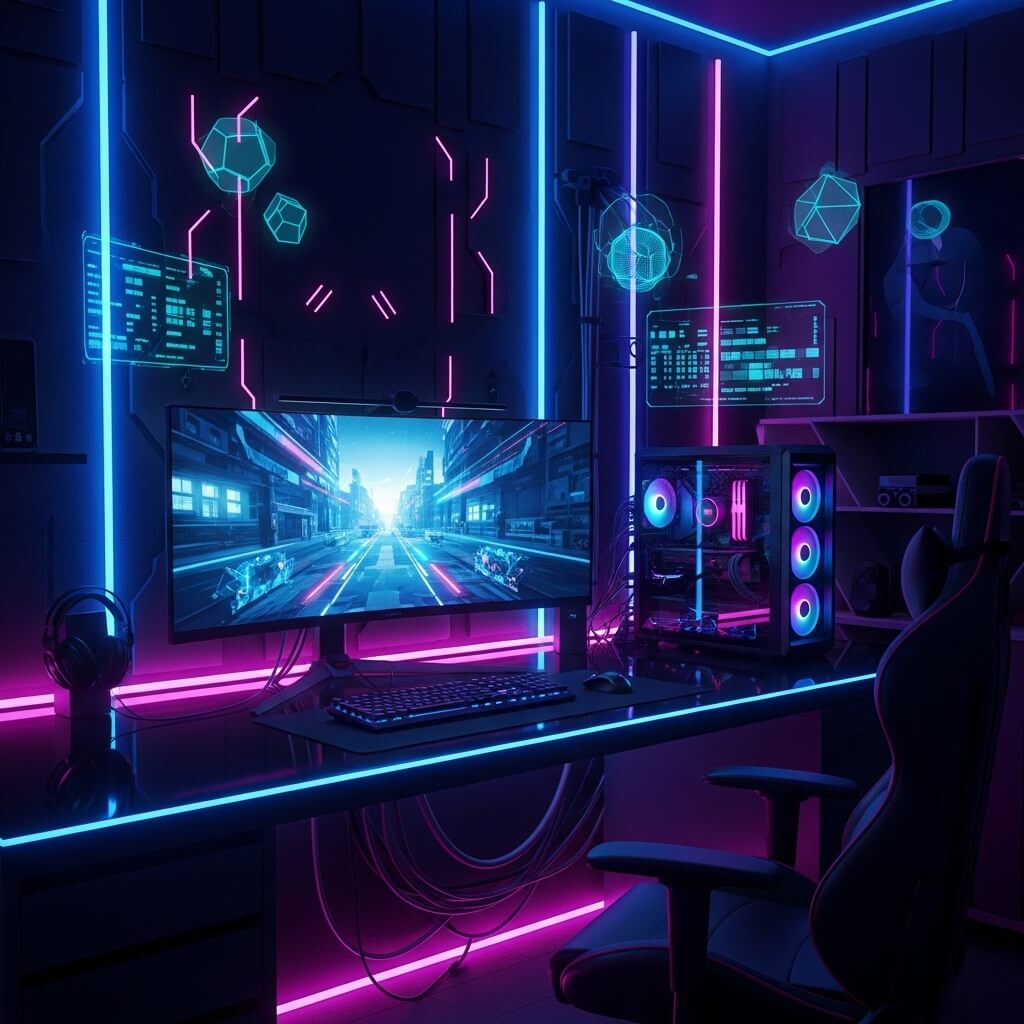
If minimalism is zen, then cyberpunk is pure controlled chaos—and I’m absolutely here for it. This aesthetic embraces the “more is more” philosophy with neon lights, tech-heavy vibes, and enough visual stimulation to make your eyes happy.
Creating a cyberpunk gaming room means channeling Blade Runner, Ghost in the Shell, and every dystopian tech future you’ve ever drooled over. This setup doesn’t whisper—it screams, and that’s exactly the point.
Start with your color palette: neon pink, electric blue, and toxic green are your primary colors. Mix in some purple and orange for depth. Your base should be dark—black walls, dark furniture—to make those neons absolutely pop.
Essential cyberpunk elements:
- Multiple neon signs: Custom LED neon signs are surprisingly affordable now ($40-80)
- Grid walls: Metal grid panels for mounting accessories and creating that industrial-tech look
- Lots of LEDs: Don’t hold back—desk strips, wall panels, floor lighting
- Tech aesthetic: Exposed cables (organized chaos), visible PC components, digital displays
- Asian-inspired signage: Japanese characters, kanji art, Hong Kong-style neon vibes
Here’s where it gets fun—layer your lighting. Run RGB strips in different zones of your room on different channels so you can create depth and movement. Add smart bulbs to create dynamic scenes. Install LED panels on your walls that you can program with different patterns.
I spent weeks getting my cyberpunk corner just right, and the secret was balancing the chaos. Yes, you want lots going on visually, but it still needs focal points. Your main gaming station should be the star, with everything else supporting that focus.
Posters and wall art should lean heavy into retrofuturism, anime, and tech aesthetics. Displate has some incredible cyberpunk metal posters that look amazing under neon lighting.
Dual Monitor Pro Gaming Station

Look, once you go dual monitor, you never go back. Seriously. I resisted for years because I thought it was overkill, and now I feel personally victimized by my past self for waiting so long.
A dual monitor pro gaming station isn’t just about having two screens—it’s about workflow optimization that happens to be perfect for gaming, streaming, productivity, and general digital life management.
Here’s my honest take on setting this up right:
Monitor positioning matters way more than people realize. Your primary gaming monitor should be directly in front of you at eye level. The secondary monitor goes to your left or right at a slight angle—typically the left if you’re right-handed because you’ll glance at it with your peripheral vision while your right hand stays on your mouse.
What you actually need:
- Monitor arms: Individual arms give you way more flexibility than dual mounts
- Matching or complementary monitors: They don’t need to be identical, but wildly different sizes look weird
- Sufficient desk space: Minimum 60 inches wide, ideally 72+ inches
- GPU that can handle it: Make sure your system can actually run dual displays well
- Cable management channels: Twice the monitors means twice the cables :/
I use my primary 144Hz gaming monitor for, well, gaming, and my secondary 60Hz monitor handles Discord, Spotify, browser tabs, streaming software—basically everything else. This separation is genuinely life-changing for gaming sessions.
The desk setup needs to be deep enough too—at least 24 inches, preferably 30. You need distance from dual monitors or you’ll strain your neck constantly trying to see everything. Mount them both on arms so you can adjust angles and height precisely.
For streamers? Dual monitors isn’t just nice to have—it’s practically essential. You can’t monitor your chat, alerts, and stream health on the same screen you’re gaming on without going insane.
Also Read: 10 Beautiful Simple Balcony Decor Ideas for Modern Homes
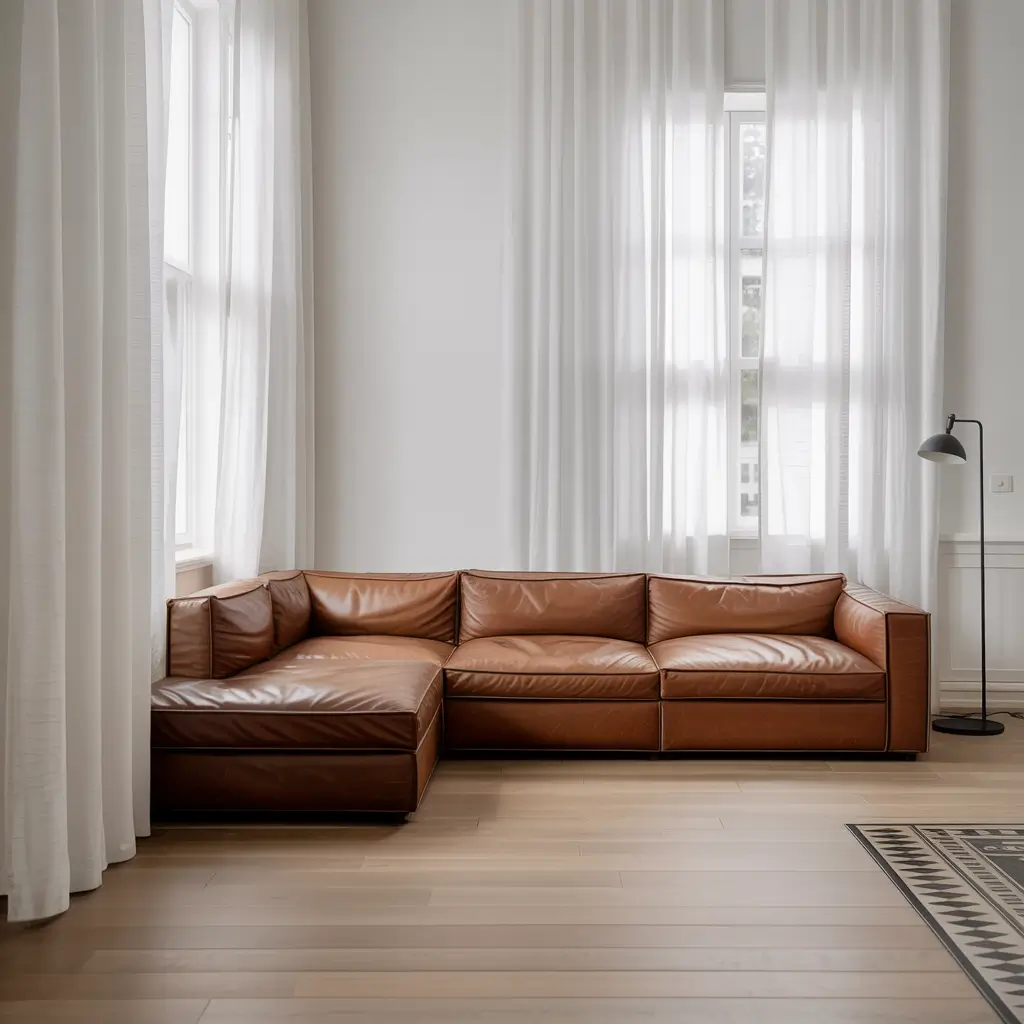
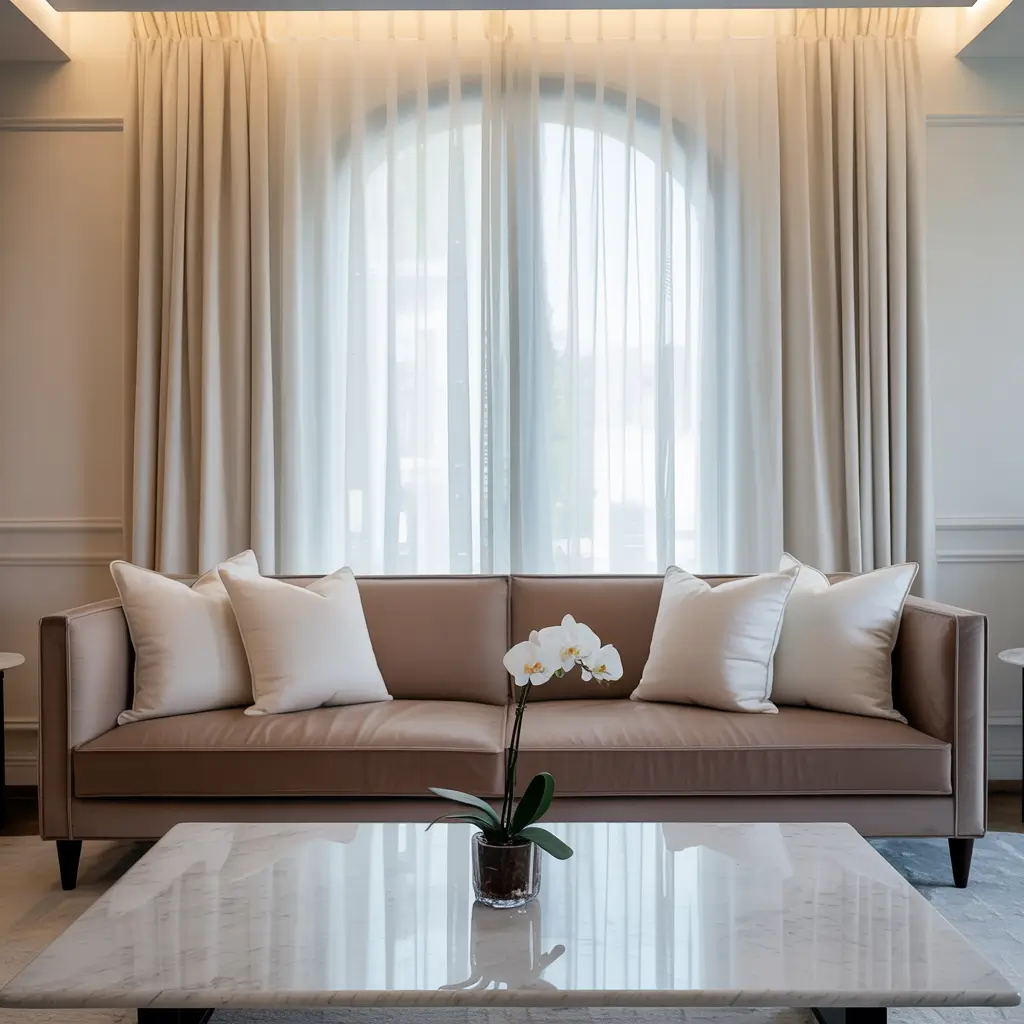
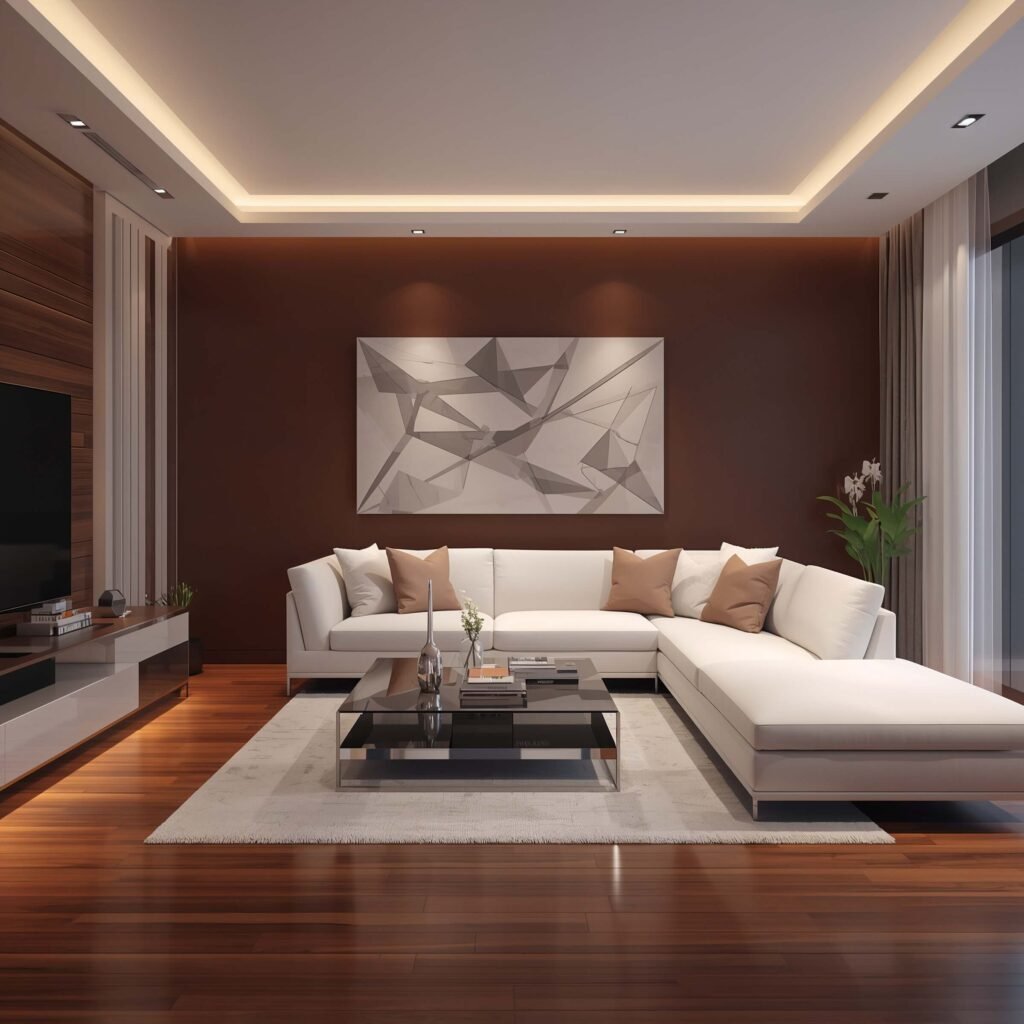
Cozy Couch Console Gaming Room
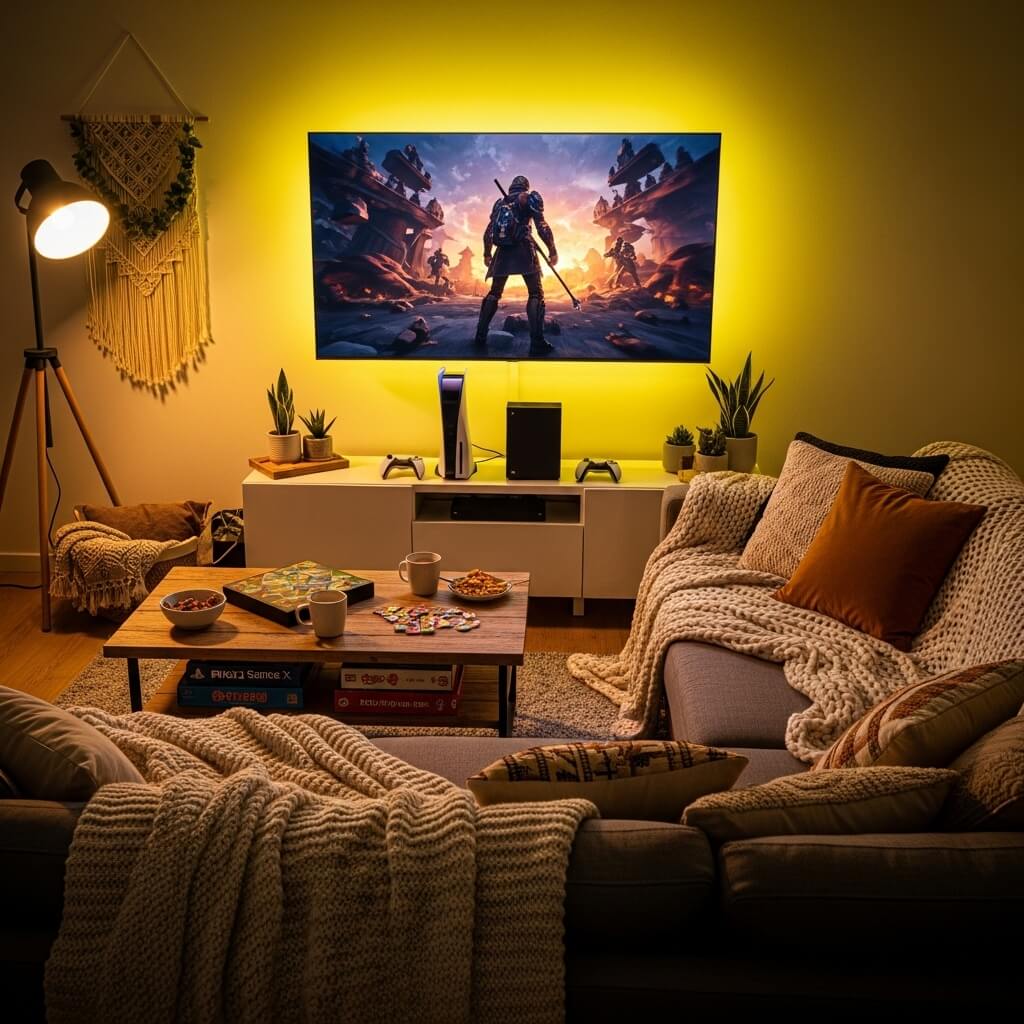
Not everything needs to be a desk setup, right? Sometimes you want to lean back, grab a controller, and game from the comfort of a stupid-comfortable couch. The cozy console gaming room brings living room vibes with gamer intentionality.
This setup focuses on comfort and communal gaming rather than competitive edge. It’s perfect for RPGs, story-driven games, co-op sessions with friends, or just when your back needs a break from your desk chair.
The foundation is obvious—a great couch. But here’s what else makes this work:
- TV positioning and size: 55-65 inches mounted at proper viewing height (center of screen at eye level when seated)
- Optimal viewing distance: Sit about 6-8 feet back for most TV sizes
- Ambient lighting: Bias lighting behind your TV reduces eye strain
- Storage solutions: Media console for organizing consoles, controllers, games
- Cable management: Wall-mounted cable channels keep things clean
- Sound system: Good soundbar or surround sound setup
I converted my living room into a hybrid couch gaming space, and honestly? Some games just hit different from a couch. Red Dead Redemption 2, The Last of Us, any Nintendo game—these experiences feel perfect from a comfortable seated position.
Add a coffee table within easy reach for drinks and snacks (get one with a lower shelf for stashing controllers). Include some throw blankets and pillows because cozy is the whole point here. Install some subtle LED strips behind your entertainment center for ambiance.
The lighting should be soft and adjustable. You want enough light to see but not so much that it creates screen glare. Smart bulbs work great here—dim them during intense gaming sessions, brighten them when you need to see.
Streamer Style Gaming Setup Room
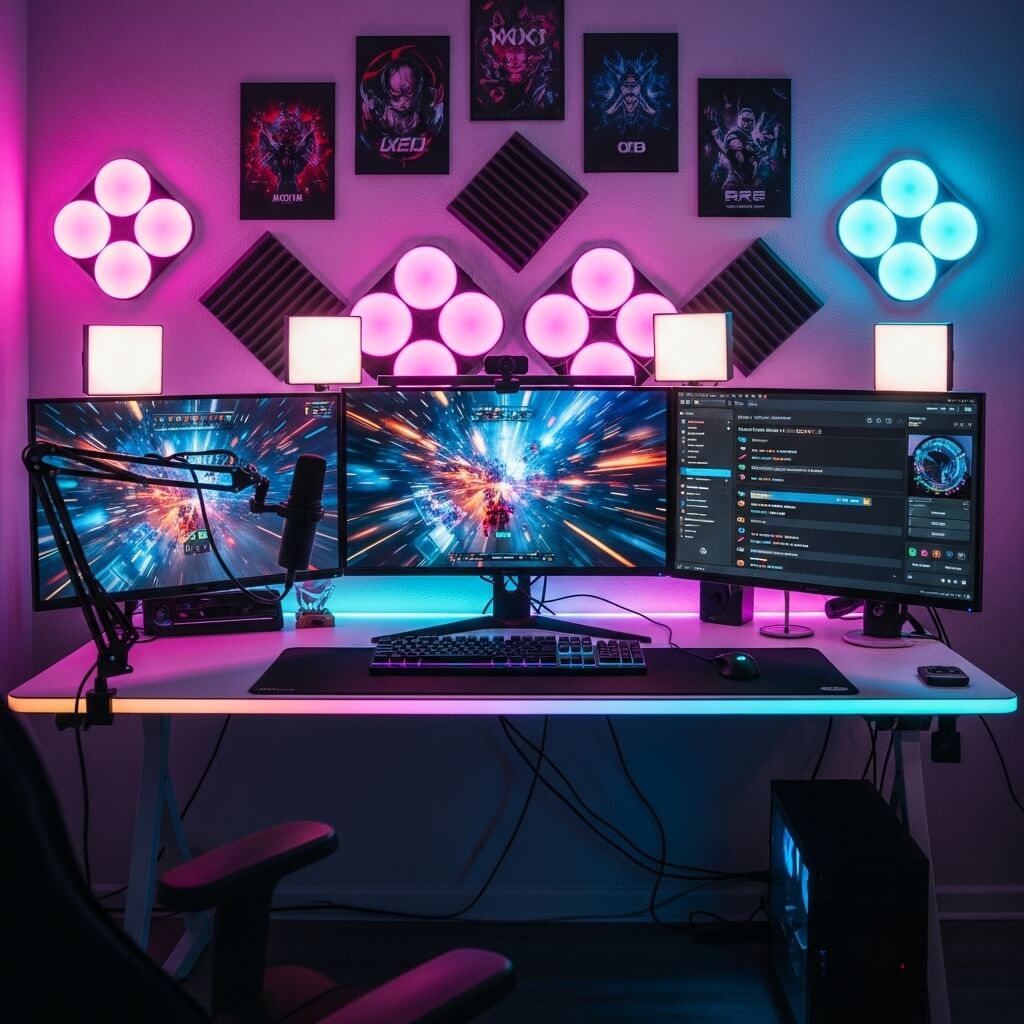
Streaming setups require a completely different approach than regular gaming spaces. You’re not just creating a functional gaming area—you’re building a broadcast studio that needs to look good on camera while still being practical for extended use.
I’ve helped three friends set up their streaming rooms, and the difference between “looks good in person” and “looks good on camera” is wild. What works for one absolutely doesn’t work for the other.
Critical streaming setup elements:
- Camera positioning: Webcam or DSLR at eye level, straight on
- Lighting setup: Key light, fill light, and back light (three-point lighting is essential)
- Green screen or branded background: Whatever’s behind you matters
- Professional microphone: Boom arm mounted or desktop stand
- Stream deck or macro pad: Quick access to scenes, alerts, and controls
- Monitor arrangement: Main gaming monitor plus secondary for stream management
Lighting makes or breaks streaming setups. Natural light is inconsistent, so invest in proper lighting. Ring lights are okay for beginners, but panel lights or softboxes create way more professional results. I use two Elgato Key Lights, and the difference in stream quality was immediately noticeable.
Your background needs personality without being distracting. I’m partial to the “organized shelf” look—some collectibles, some plants, maybe some LED panels or nanoleaf tiles. Keep it clean and purposeful. A messy background makes you look unprofessional, period.
Cable management becomes even more critical because cables in frame look terrible. Route everything behind your desk, use cable sleeves, and hide power strips. If a cable must be visible, make it look intentional—like your microphone cable.
Sound treatment matters too. Add some acoustic panels or foam to reduce echo. Your audio quality needs to be crisp, and treating your room makes a massive difference even with a good microphone.
Industrial Style Gaming Room Design
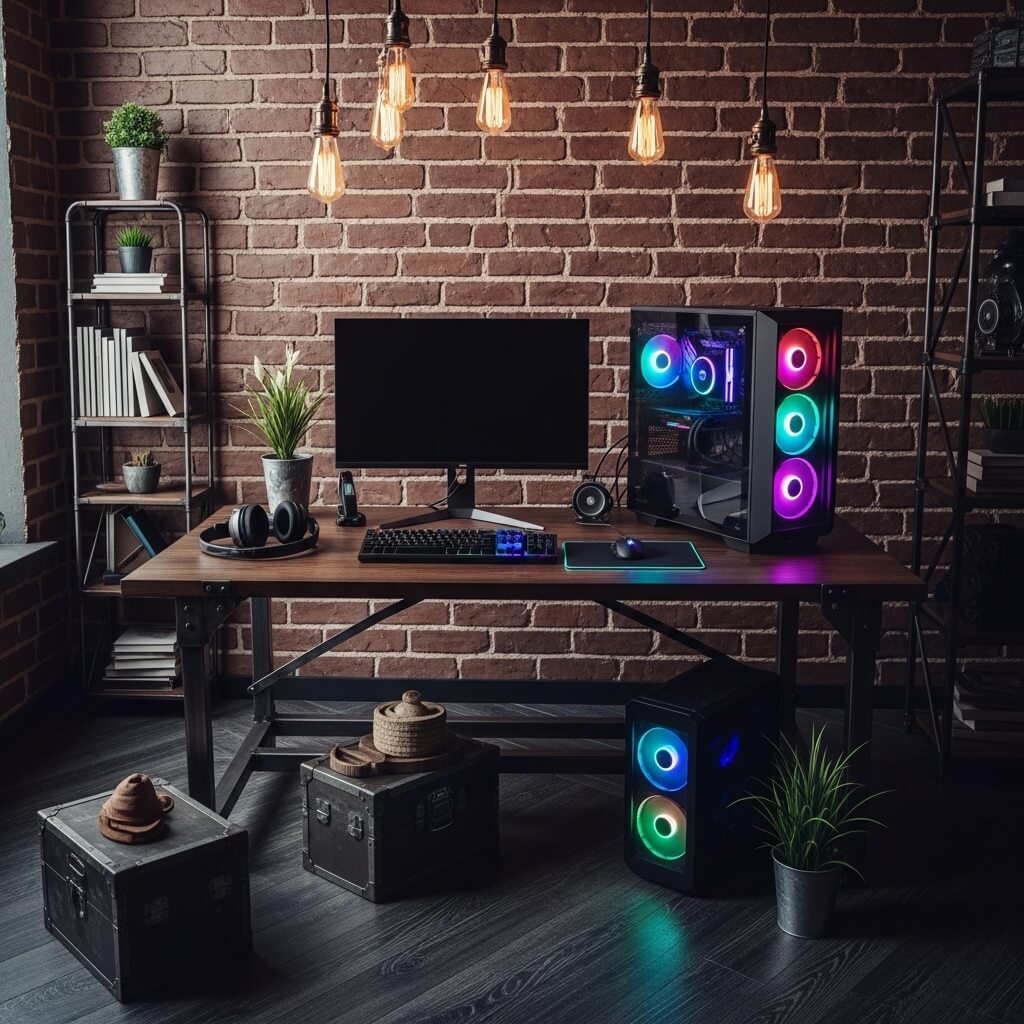
Industrial aesthetic brings that raw, unfinished, warehouse-conversion energy to your gaming space. Think exposed brick, metal fixtures, Edison bulbs, and reclaimed wood. It’s rugged, masculine without being aggressive, and honestly pretty timeless.
This style works incredibly well for gaming rooms because it allows you to embrace the tech and wiring instead of hiding it. Your cables become part of the aesthetic when done right, and the raw materials create a cool contrast with sleek gaming equipment.
I personally love industrial design because it’s forgiving—small imperfections add character rather than looking like mistakes. Scratched metal? Character. Distressed wood? Vintage charm. It’s basically the opposite of pristine minimalism.
Key industrial gaming room components:
- Metal pipe desk legs: DIY or pre-made, these look incredible
- Reclaimed wood desktop: Thick butcher block or barn wood
- Exposed shelving: Metal and wood wall-mounted units
- Edison bulb lighting: Exposed filament bulbs in metal cages
- Concrete or dark flooring: Maintains the industrial warehouse vibe
- Metal grid accessories: For hanging headsets, cables, and peripherals
Color palette sticks to blacks, grays, browns, and metallics. Add warmth with amber lighting and natural wood tones. Your gaming setup’s RGB can provide pops of color against this neutral backdrop.
For wall treatment, exposed brick is ideal but expensive to add if you don’t have it. Brick wallpaper or panels work surprisingly well as alternatives. Alternatively, go with concrete-look paint or leave walls unfinished with visible texture.
Furniture should look heavy and substantial. Metal filing cabinets work great as desk drawer units. Industrial cart shelving holds consoles and equipment perfectly. Everything should feel solid and built to last.
Also Read: 10 Unique Balcony Decor Ideas for Apartments Cozy Escape
Space-Saving Wall Mounted Gaming Setup
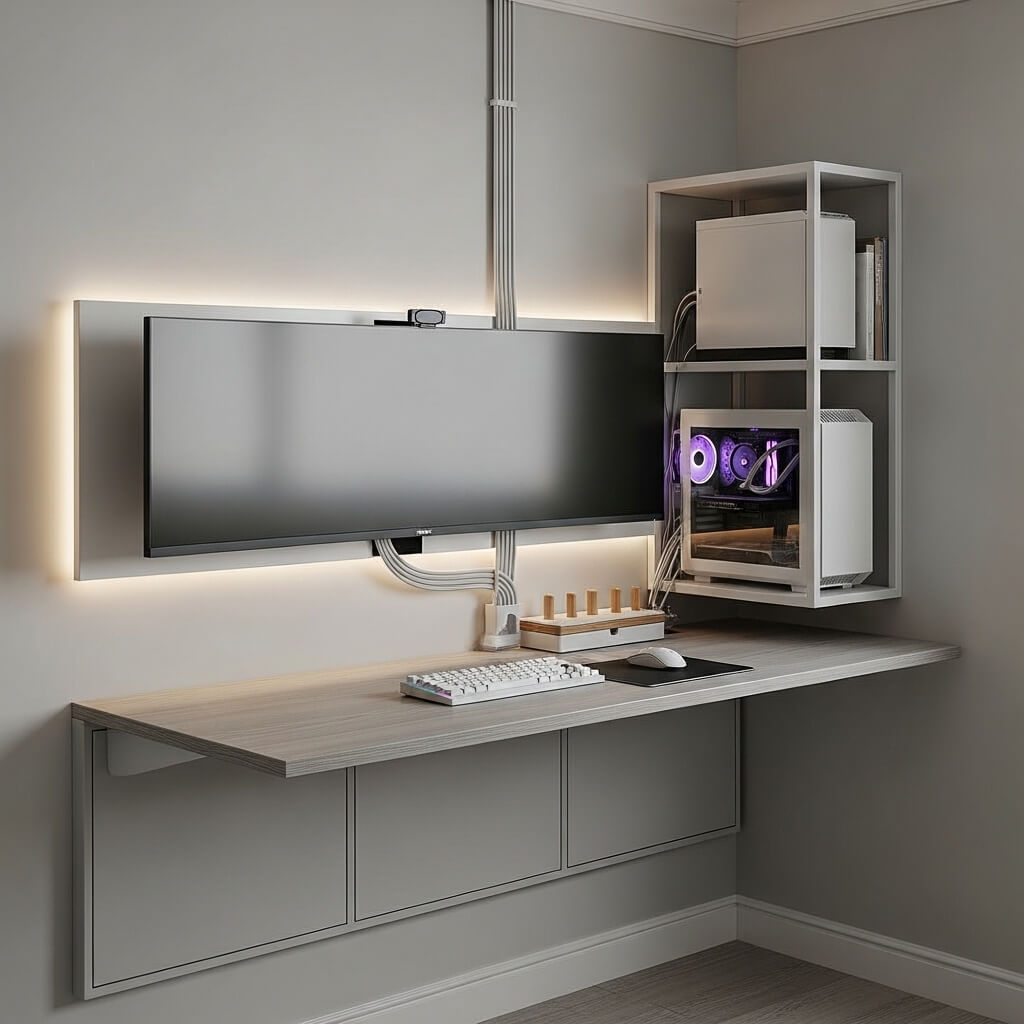
When floor space is at a premium, look up. Wall-mounted gaming setups maximize every vertical inch while keeping your floor clear and your space flexible. This is the ultimate solution for tiny apartments or shared rooms.
I lived in a studio apartment where my “gaming room” was literally one corner of my bedroom-living-kitchen combo space. Wall mounting everything was the only way to maintain sanity and functionality.
The core principle? If it can mount to a wall, mount it to a wall. This includes your monitor, console, PC, controllers, headset, shelves, desk—yes, even your desk can wall-mount as a fold-down design.
Essential wall-mounted components:
- Floating desk or fold-down desk: Mounts flush to wall, some designs fold up when not in use
- Monitor arm: Articulating wall mount instead of desk mount
- Wall-mounted PC: Show off that build while saving floor space
- Floating shelves: Multiple heights for gear storage
- Pegboard or grid wall: Hang everything from controllers to cable management
The biggest advantage? You can completely clear the floor when you’re not gaming. Some fold-down desk designs collapse to just a few inches of wall depth. Your entire gaming station essentially disappears.
Cable management becomes slightly trickier with wall-mounted setups, but cable channels that mount to the wall solve this. Run everything vertically down to your power source at baseboard level, keeping it clean and organized.
One warning: Make sure you’re mounting into studs or using proper anchors. Your expensive gaming equipment hanging from drywall held by cheap plastic anchors? That’s a disaster waiting for the worst possible moment to happen. I speak from experience (RIP to my first monitor—you died too young).
This setup style also makes cleaning ridiculously easy. Vacuum or mop right under your gaming area without navigating around desk legs and cables on the floor.
Wrapping This Up
Look, here’s the bottom line: Your gaming space should make you actually want to spend time there. Whether you’ve got champagne taste with a beer budget or you’re ready to drop serious cash on your dream setup, the principles remain the same—functionality first, aesthetics second, and personality always.
The designs I’ve walked you through range from minimal to maximal, budget to luxury, compact to spacious. Take what resonates with you, ignore what doesn’t, and don’t be afraid to mix elements from different styles. My own setup has evolved probably fifteen times over the years, and I’m still tweaking things. That’s part of the fun, honestly.
Start with one element—maybe it’s finally managing those cables, or adding some decent lighting, or just clearing the clutter. Small improvements compound into major transformations over time. And remember, the “perfect” gaming room is the one that works for you and your gaming style, not what looks coolest on Instagram.
Now stop reading and start building. Your upgraded gaming space is waiting, and you’ve got absolutely zero excuses left. Game on.