10 Stunning Fire Pit Landscaping Ideas for Your Outdoor Space

Picture this: You’re sitting outside on a crisp evening, marshmallow on a stick, friends laughing around you, and the warm glow of your fire pit creating the perfect ambiance. Sounds amazing, right? Well, here’s the thing – a fire pit without proper landscaping is like a pizza without toppings. Sure, it works, but why settle for basic when you can have extraordinary?
I’ve spent years transforming boring backyards into outdoor oases, and let me tell you, the right fire pit landscaping can make or break your entire outdoor space. Whether you’re working with a sprawling backyard or a cozy patio, these ideas will help you create that magazine-worthy setup you’ve been dreaming about.
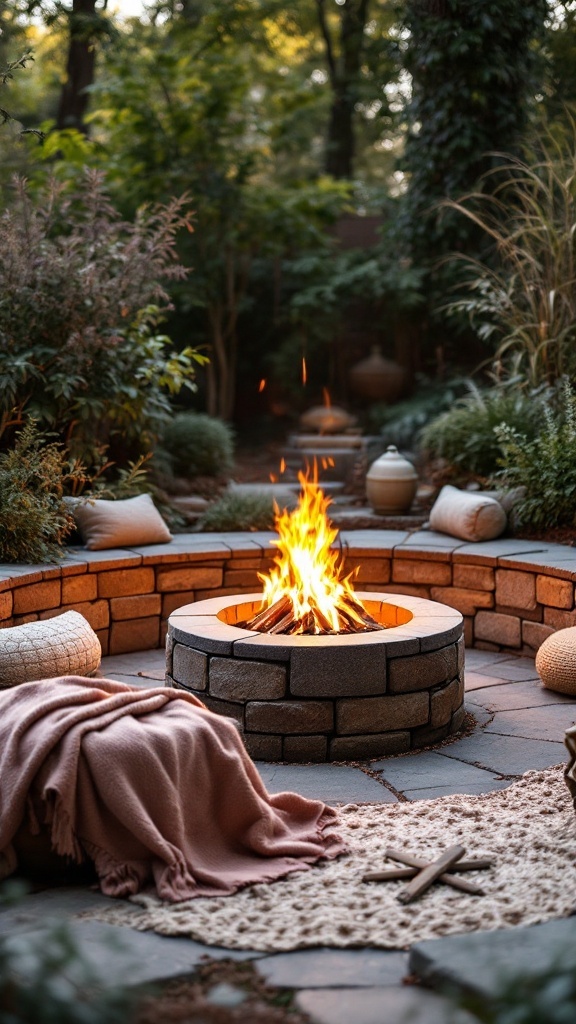
Creating a Cozy Seating Area Around the Fire Pit
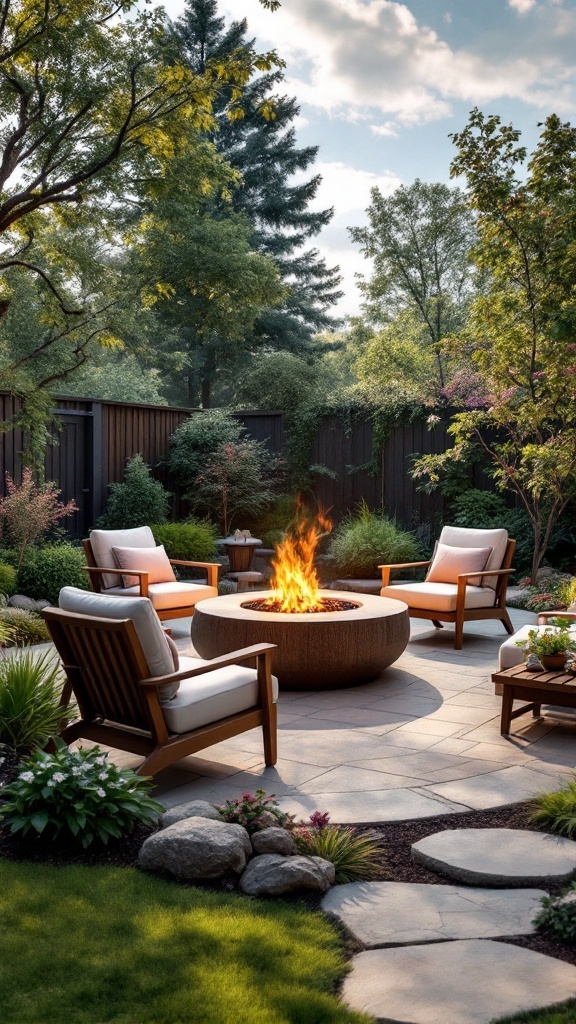
Let’s start with the heart of any great fire pit area – the seating. You know what kills the vibe faster than a wet log? Uncomfortable chairs that have everyone shifting around like they’re sitting on rocks.
The magic distance is 3-4 feet from the fire pit edge. Any closer and you’ll feel like a rotisserie chicken. Any farther and you might as well be sitting indoors. I learned this the hard way after my first setup had everyone practically sitting in the flames – not my finest moment!
Seating Options That Actually Work
Here’s what I’ve found works best:
• Adirondack chairs – Classic, comfortable, and they scream “relaxation”
• Built-in stone benches – Weather-proof and doubles as extra table space
• Outdoor sectionals – Perfect for larger gatherings
• Tree stumps or log seats – Rustic charm that won’t break the bank
Want to know a secret? Mix and match different seating heights. It creates visual interest and lets people choose their comfort level. Plus, those lower seats are perfect for the marshmallow-roasting crowd.
Making It Extra Cozy
Throw pillows and outdoor blankets aren’t just for show – they’re game-changers. I keep a weatherproof storage bench nearby filled with cozy throws. Pro tip: Choose fabrics in earth tones that hide smoke stains. Trust me on this one.
Don’t forget about back support! Those Instagram-worthy floor cushions look great, but after 20 minutes, your back will hate you. Always have at least a few chairs with proper backs for the older crowd (or anyone who values their spine).
Creating a Pathway to the Fire Pit
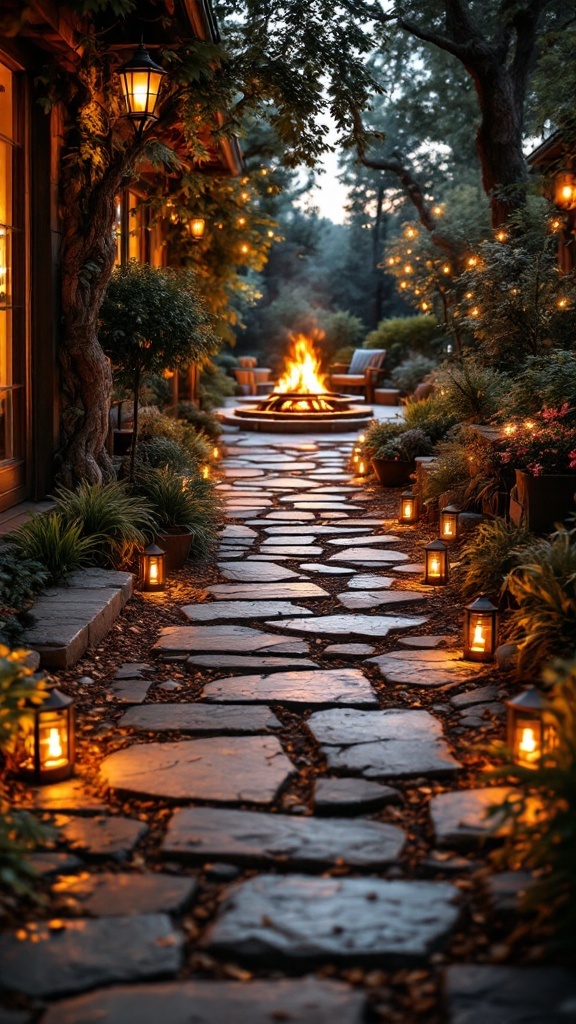
Ever watched someone stumble through your yard in the dark, trying to find the fire pit? Yeah, not exactly the elegant entrance you’re going for. A well-designed pathway doesn’t just look good – it’s essential for safety and flow.
Material Matters
The path to your fire pit sets the tone for the entire experience. Here’s what works:
• Flagstone – Natural, slip-resistant, and ages beautifully
• Decomposed granite – Budget-friendly and gives that casual, beachy vibe
• Brick pavers – Classic and customizable
• Gravel with stepping stones – Perfect for drainage and easy installation
I personally love mixing materials. My current setup has large flagstones with pea gravel filling the gaps. It looks intentional, drains well, and costs about half what a full stone path would.
Lighting the Way
Here’s where people usually mess up – they create this beautiful path and then leave it dark as a cave at night. Solar path lights are your best friend here. Space them every 6-8 feet, and boom – instant ambiance plus safety.
Want to get fancy? Install LED strip lights under the path edges. It creates this floating effect that’ll have your guests thinking you hired a professional designer. (Spoiler: You didn’t, but they don’t need to know that.)
Also Read: 10 Boho Chic Fire Pit Ideas for Your Dream Garden
Adding Ambient Lighting for Evening Gatherings
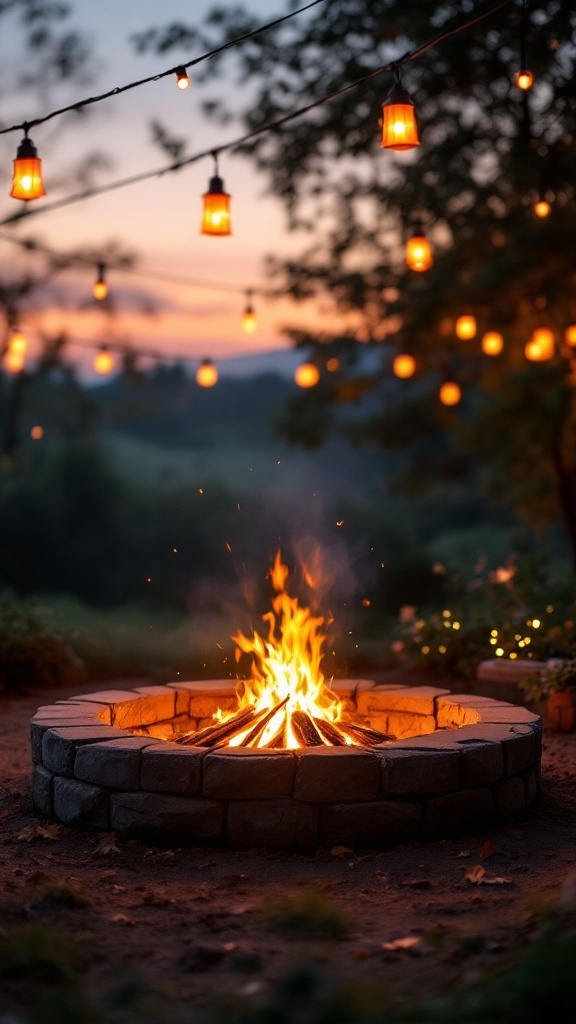
Speaking of lighting, let’s talk about setting the mood. Fire provides great light, sure, but relying on it alone is like trying to read a book by candlelight – romantic in theory, frustrating in practice.
Layer Your Lighting Like a Pro
The key is layers – just like a good outfit. You need:
• Task lighting for safety and functionality
• Ambient lighting for atmosphere
• Accent lighting to highlight features
String lights are the MVP of fire pit areas. Hang them overhead in a canopy pattern or wrap them around nearby trees. Just make sure they’re at least 10 feet above the fire – melted string lights aren’t the vibe we’re going for.
Creative Lighting Ideas That Won’t Break the Bank
Mason jar lanterns? Overdone. Instead, try these:
• Copper torch lights – They complement the fire’s glow perfectly
• Solar-powered orbs scattered around seating areas
• Uplighting on nearby trees – Creates drama without overwhelming
• Floating pool lights in water features (more on that later)
IMO, the best lighting setup is one you can adjust. Install dimmers where possible, and keep some areas intentionally darker. Not everything needs to be lit up like a football stadium.
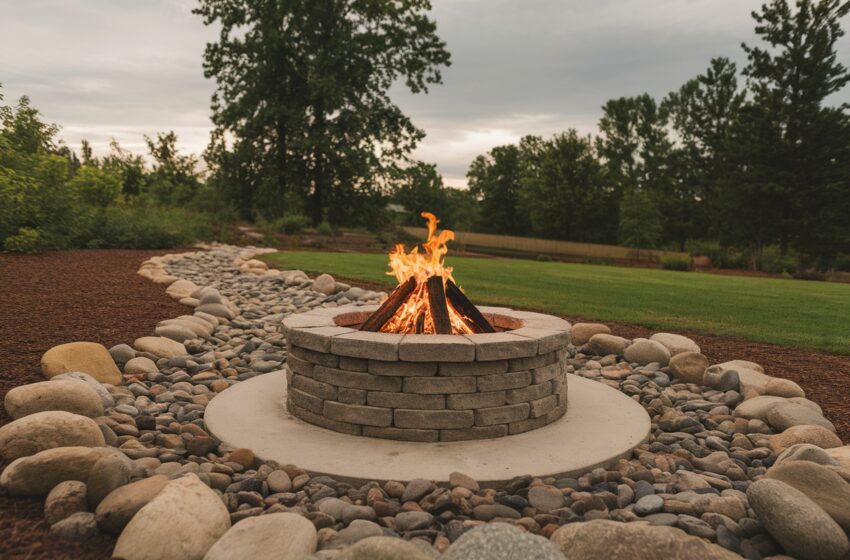
Incorporating Natural Stone Elements
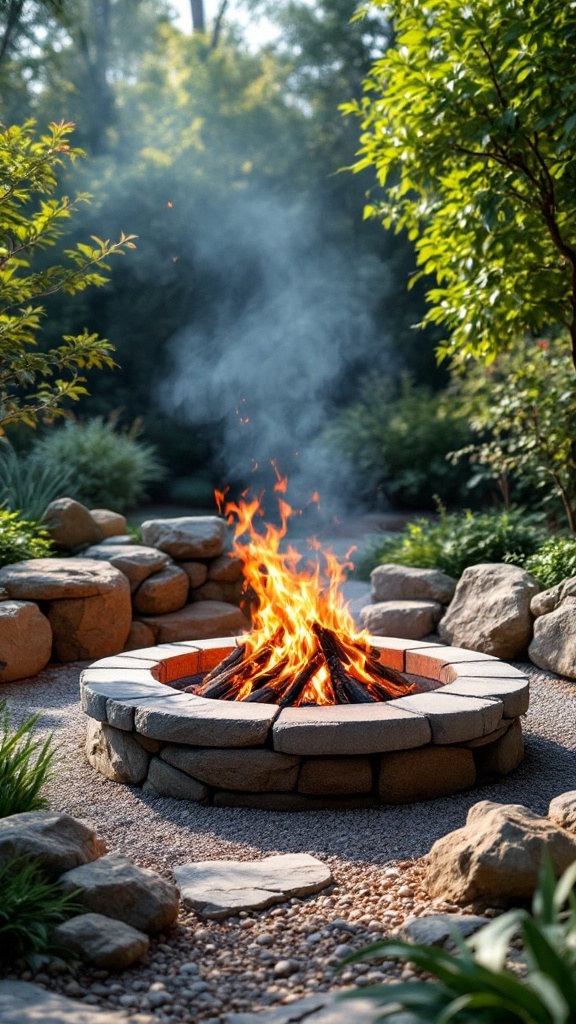
Natural stone and fire pits go together like peanut butter and jelly. But here’s the thing – throwing random rocks around your fire pit doesn’t make it “natural.” It makes it look like a construction site.
Choosing the Right Stone
Different stones create different vibes:
• River rock – Smooth, calming, perfect for modern designs
• Fieldstone – Rustic and irregular for that cabin-in-the-woods feel
• Limestone – Light-colored and heat-resistant
• Granite – Durable and comes in amazing colors
Never use wet river rocks directly in your fire pit. They can explode when heated – learned that one from a friend who ended up with rock shrapnel in his burger. Not ideal.
Strategic Stone Placement
Create a stone “apron” around your fire pit extending 18-24 inches out. This serves as a spark barrier and defines the space beautifully. I like to use larger stones as natural “furniture” – they work as side tables, foot rests, or extra seating in a pinch.
Want to look like a landscaping genius? Create stone groupings at different heights. Stack flat stones to create varying levels, almost like nature’s version of nesting tables. Your guests will think you hired a zen garden designer.
Also Read: 10 Stunning Rooftop Terraces with Glass Fire Pits and Infinity Pools
Designing a Multi-Level Patio Space
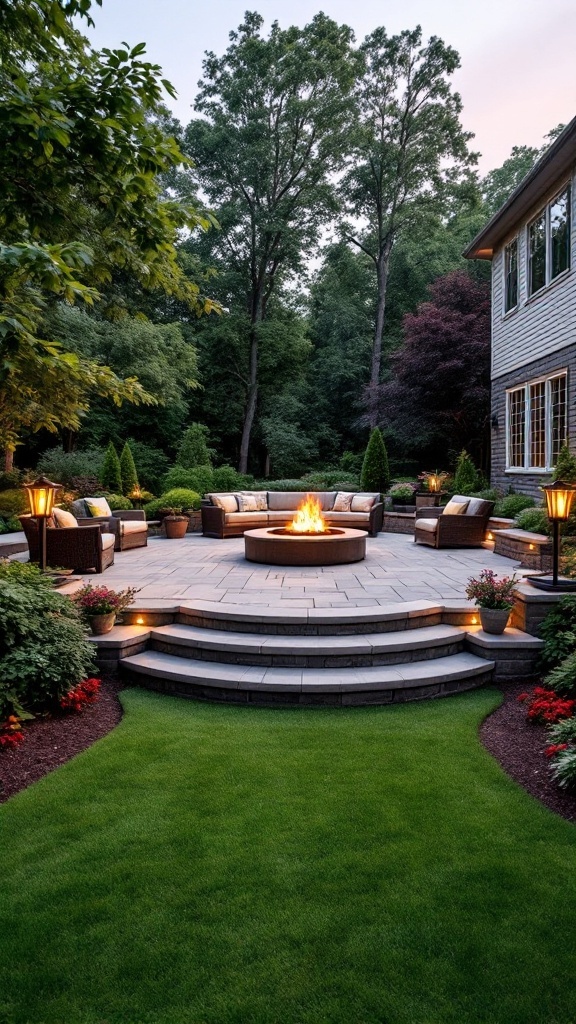
Flat yards are overrated. Creating multiple levels around your fire pit adds visual interest and solves a bunch of practical problems. Plus, it gives everyone a great view of the fire, no matter where they’re sitting.
Planning Your Levels
Think of it like stadium seating for your backyard:
• Lower level – Intimate seating closest to the fire
• Middle level – Main entertaining space with room to move
• Upper level – Dining area or observation deck
Each level should be at least 6 inches different in height to be noticeable but not so high that grandma needs a ladder. Use retaining walls to create clean edges – they double as extra seating during big parties.
Making It Flow
The secret to great multi-level design? Seamless transitions. Wide steps between levels work better than narrow ones. Make them at least 4 feet wide so two people can pass comfortably.
I once built super narrow steps to save money. Big mistake. Watching people navigate them with drinks in hand was like watching a sobriety test. Learn from my fail – go wide or go home.
Using Pavers for a Defined Fire Pit Area
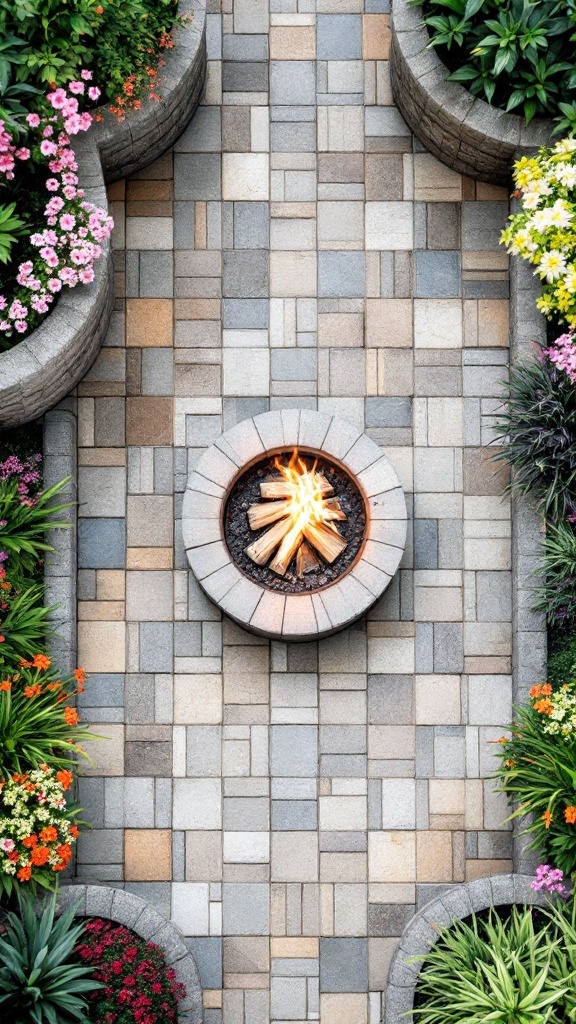
Pavers are the unsung heroes of fire pit landscaping. They’re like the reliable friend who always shows up – not flashy, but they get the job done beautifully.
Paver Patterns That Pop
Forget basic grid patterns. Try these instead:
• Herringbone – Classic and hides imperfections
• Circular patterns radiating from the fire pit
• Random ashlar – Mix of sizes for organic feel
• Basketweave – Vintage charm that never goes out of style
Pro tip: Use contrasting colors to create a “rug” effect around your fire pit. Dark border pavers with lighter centers draw the eye and define the space without walls.
Installation Tips That’ll Save Your Sanity
Level ground is non-negotiable. I spent a whole weekend redoing pavers because I rushed the base prep. One rainfall later, and my “perfect” patio looked like a skateboard park.
Here’s what actually works:
• Excavate 6-8 inches deep
• Add 4 inches of gravel base
• Compact like your life depends on it
• Use polymeric sand in joints (it hardens and prevents weeds)
Also Read: 10 Stunning Ideas for a Minimalist Living Room with a Linear Fireplace
Integrating Water Features for Contrast
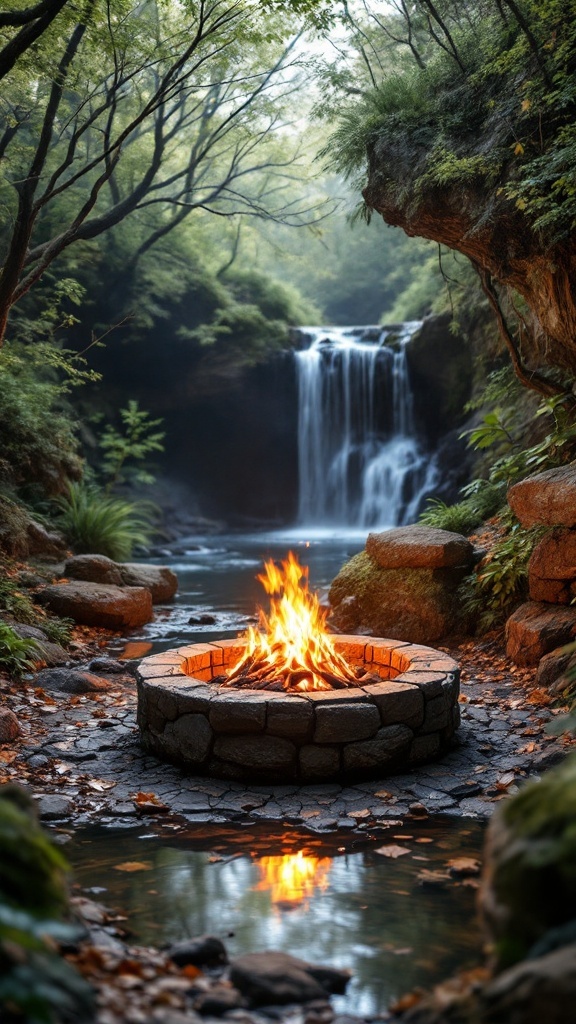
Fire and water together? It’s not just for fancy resorts. Adding a water feature near your fire pit creates this yin-yang effect that’s absolutely mesmerizing.
Water Feature Options That Actually Make Sense
Not everyone has space (or budget) for a full pond. Try these:
• Bubbling boulder – Compact and soothing
• Wall-mounted fountain – Great for small spaces
• Reflecting pool – Doubles the visual impact of your fire
• Rain chain into a basin – Functional and beautiful
Keep water features at least 10 feet from the fire pit. Any closer and you’ll get splash on your fire, plus the constant temperature changes can crack stone surrounds.
Creating the Perfect Balance
The sound is just as important as the look. You want gentle bubbling or trickling – not Niagara Falls. The fire should still be the star; water is the supporting actor.
I installed a too-powerful pump in my first water feature. Conversations became shouting matches over the roar. Now I use adjustable pumps and keep things subtle. Your ears will thank you.
Planting Native Flowers for Seasonal Color

Plants around a fire pit need to be tough cookies. We’re talking heat, smoke, and probably the occasional stray marshmallow. Native plants are your best bet – they’re already adapted to your climate and way less fussy than exotic options.
Smart Plant Placement
Here’s the layout that works:
• 3-5 feet from fire pit – Heat-tolerant groundcovers only
• 5-10 feet – Low shrubs and perennials
• 10+ feet – Larger shrubs and specimen plants
Never plant anything with sappy or oily leaves near the fire. Eucalyptus might smell nice, but it’s basically nature’s fire starter. Save yourself the drama.
Seasonal Stars
Choose plants that shine in different seasons:
• Spring – Native bulbs like camas or trillium
• Summer – Coneflowers, black-eyed Susans
• Fall – Asters and ornamental grasses
• Winter – Evergreen shrubs for structure
Mix in some herbs like lavender or rosemary 🙂 They’re heat-tolerant, smell amazing when brushed against, and you can snip some for dinner. Multi-tasking at its finest!Also Read: 10 Creative Sanhok Inspired Fire Pit Ideas for Outdoor Gatherings
Designing a Fire Pit with a View
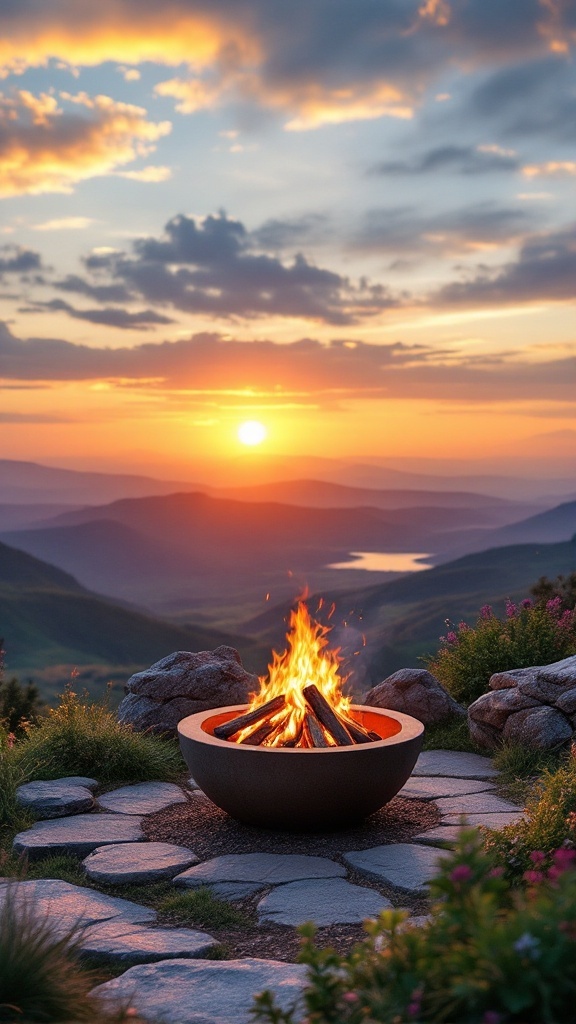
Got a great view? Don’t hide it! Your fire pit should frame the vista, not block it. This is where thoughtful placement pays off big time.
Positioning for Maximum Impact
The fire pit should sit between you and the view, but low enough not to obstruct. Sunken fire pits work brilliantly here – they keep flames below eye level while seated.
Consider these view types:
• Mountain or hill views – Position perpendicular for panoramic viewing
• Water views – Angle slightly to avoid wind off the water
• Garden views – Create layers with the fire pit as foreground
• Sky views – Keep surroundings low for stargazing
Framing the View
Use landscaping to create a natural frame. Tall grasses or columnar trees on the sides direct the eye outward. Just don’t go overboard – you’re framing a view, not building a fortress.
I once planted fast-growing trees to create privacy. Five years later, they’d completely blocked my mountain view. Expensive mistake. Think long-term, people!
Incorporating Built-in Seating Around the Fire Pit
Last but definitely not least, let’s talk built-in seating. This is where you can really customize your space and create something uniquely yours.
Design Options That Work
Built-in seating isn’t just a bench in a circle. Get creative:
• Curved concrete benches – Modern and sculptural
• Stacked stone seats – Rustic and natural
• Wooden benches with stone supports – Best of both worlds
• Cantilever benches – Floating effect that’s pure magic
The ideal height is 16-18 inches with a 15-degree backward angle for comfort. Any lower and people struggle to get up. Any higher and feet dangle awkwardly.
Making Built-ins Comfortable
Hard stone needs softening. Weather-resistant cushions are essential, but here’s a trick: create a slight depression in the seat. It naturally holds cushions in place and prevents the constant readjusting dance.
Add built-in storage underneath for firewood, blankets, or s’mores supplies. Hidden hinged tops keep everything clean and accessible. Your future self will thank you when you’re not hauling wood across the yard in the dark.
Combining with Other Seating
Built-ins shouldn’t be your only seating option. They work best when combined with moveable chairs. This gives you flexibility for different group sizes and lets people choose their preferred distance from the fire.
FYI, built-in seating can actually increase your property value. It shows thoughtful design and permanent improvement – just make sure it’s built to last. No buyer wants to inherit your crumbling DIY disaster.
Wrapping It All Up
Creating the perfect fire pit landscape isn’t about following every trend or spending a fortune. It’s about designing a space that fits your lifestyle, enhances your property, and gives you a reason to spend more time outdoors.
Start with one or two ideas that resonate with you. Maybe it’s adding that pathway this spring and tackling the seating area in fall. Rome wasn’t built in a day, and neither is your dream outdoor space.
Remember, the best fire pit area is one that gets used. Don’t get so caught up in making it perfect that you forget to enjoy it. Some of my favorite memories happened around the most basic fire pit setups – because at the end of the day, it’s about gathering with people you love.
So grab those marshmallows, invite some friends over, and start planning your fire pit transformation. Your backyard is waiting to become the neighborhood’s favorite hangout spot. And trust me, once you nail that perfect setup, you’ll wonder why you waited so long to make it happen.
Now get out there and start creating some fire pit magic! :/