15 Creative Outdoor Kitchen DIY Ideas to Elevate Your Backyard Space

You know that feeling when you’re grilling burgers for the tenth time this summer, and you suddenly realize your backyard setup looks like everyone else’s? Yeah, I’ve been there.
After spending countless weekends staring at my boring concrete patio and basic Weber grill, I decided enough was enough—my outdoor space needed a serious personality injection.
Here’s the thing: creating an outdoor kitchen that actually impresses doesn’t require selling a kidney or hiring some fancy designer who’ll charge you more than your car payment.
Trust me, I’ve transformed my backyard into what my neighbors call “the neighborhood hangout spot” using nothing but weekend projects and a healthy dose of YouTube tutorials.
And yes, occasionally some colorful language when things didn’t go as planned 🙂
1. Repurposed Pallet Grill Station

Let’s kick things off with my personal favorite budget hack—the pallet grill station. Remember those wooden pallets you see behind every grocery store? Those bad boys are goldmines waiting to happen.
I built my first pallet station three summers ago, and it cost me exactly $47 in hardware and stain. The pallets? Free from a local warehouse that practically begged me to take them. You’ll need about 4-5 sturdy pallets, some sandpaper (unless you enjoy splinters), and basic tools you probably already own.
Making It Work
Start by sanding those pallets smooth—seriously, don’t skip this step unless you want your guests playing “extract the splinter” instead of enjoying their steaks. Stack two pallets horizontally for your base, creating instant storage for charcoal bags and grilling tools. Add a vertical pallet as your backing, and boom—you’ve got hooks for your spatulas and a spot to hang that apron your kids got you that says “Grill Master.”
The beauty of this setup? You can customize it based on your grill size. Got a tiny kettle grill? Perfect for a two-pallet station. Running a massive gas monster? Stack those pallets wider and add side wings for prep space.
2. Concrete Countertop with Built-In Sink

Now we’re talking serious upgrade territory. Installing a concrete countertop sounds intimidating, but honestly? If I managed it after watching three YouTube videos and drinking two beers, you definitely can too.
The materials will run you about $200-300, depending on how fancy you want to get with the concrete mix. I went with a basic gray mix my first time, though now I’m kicking myself for not adding some color pigment—live and learn, right?
The Process That Actually Works
First, build your frame using 2x4s and plywood. Make it level—I cannot stress this enough. My first attempt looked like a skateboard ramp because I eyeballed it. Not my proudest moment.
Mix your concrete according to the bag instructions (revolutionary advice, I know), but here’s the trick: add a concrete fortifier to prevent cracking. Pour it, smooth it with a trowel, and let it cure for at least 48 hours. Don’t rush this part, no matter how excited you get.
For the sink, cut your hole before pouring—trust me on this one. Trying to cut cured concrete with a regular saw is about as fun as a root canal. Drop in a bar sink (found mine for $40 at a restaurant supply store), hook up a garden hose with a proper faucet, and you’re golden.
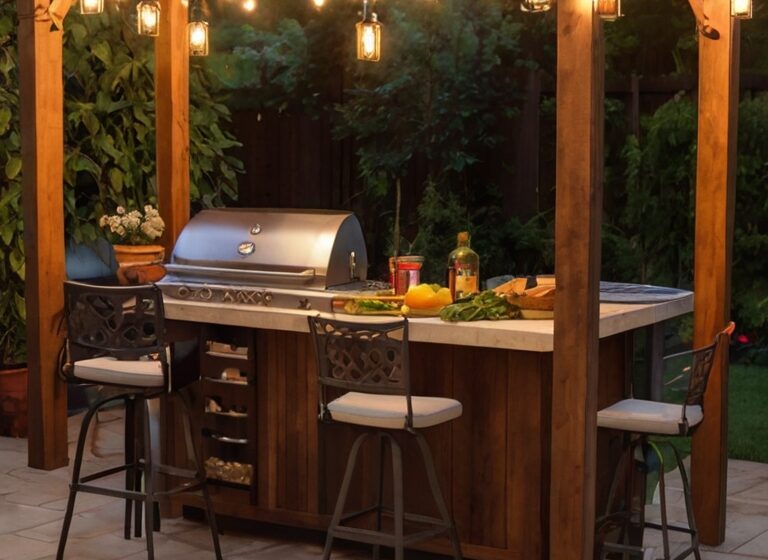
3. Stone BBQ Island
Ever walked into someone’s backyard and immediately felt jealous of their built-in BBQ setup? Yeah, that used to be me until I realized building a stone BBQ island isn’t rocket science—it’s basically adult LEGOs with mortar.
You’re looking at about $500-800 in materials, which sounds steep until you price out what contractors charge for the same thing (spoiler: it’s enough to make you cry). The trick is using concrete blocks for the structure and facing them with stone veneer. Way cheaper than solid stone, and nobody can tell the difference.
Building Your Island Paradise
Start with a concrete pad foundation—don’t even think about building directly on dirt unless you enjoy watching your creation slowly sink and tilt. Layer your concrete blocks, leaving space for your grill insert and any storage doors you want to add.
Here’s where I messed up initially: measure your grill insert BEFORE building the frame. Seems obvious, but apparently not to past-me who had to rebuild an entire wall. FYI, standard drop-in grills usually need about 30-36 inches of width.
Apply the stone veneer with construction adhesive and mortar. Take your time here—rushed stonework looks like, well, rushed stonework. Add a granite or tile countertop (check local countertop shops for remnants—scored mine for $75), and suddenly you’re the person everyone else envies.
4. Compact Trailer Kitchen

This one’s for my fellow small-space warriors or anyone who thinks permanent installations are boring. Converting a small utility trailer into a mobile outdoor kitchen completely changed my tailgating game.
Found my trailer on Craigslist for $300, though you might score one cheaper if you’re patient. The conversion cost me another $400, but now I’ve got a kitchen that goes wherever the party is.
Making It Mobile and Marvelous
Mount a small propane grill directly to the trailer bed using heavy-duty bolts—wobbling grills and highway speeds don’t mix well. Add a folding table on one side for prep space (IKEA has perfect ones for about $40), and install some basic shelving using metal brackets.
The game-changer? Installing a 12-volt cooler that runs off your vehicle’s power. No more soggy sandwiches sitting in melted ice. Add some magnetic hooks for tools, a small propane tank holder, and you’re basically running a food truck minus the health permits.
5. Vertical Herb Garden Wall

Can we talk about how grocery store herbs are basically green gold these days? $4 for three sad basil leaves? I don’t think so. Building a vertical herb garden next to your outdoor kitchen solves this problem while making you look like you’ve got your life together.
Materials cost me under $100, and now I’m that person casually snipping fresh rosemary mid-conversation like it’s no big deal. Is it showing off? Maybe. Do I care? Absolutely not.
Growing Up Instead of Out
Use a wooden pallet (seeing a theme here?) or build a frame with 2x4s. Attach small planters or repurpose rain gutters as long planters—honestly, the gutter option works brilliantly and costs next to nothing.
Plant herbs based on sunlight needs. Basil and oregano love full sun, while parsley and cilantro can handle some shade. Pro tip: plant mint in its own container unless you want it taking over like that friend who crashes for a weekend and stays for a month.
Water these babies regularly, but don’t drown them. Install a simple drip irrigation system if you’re forgetful like me—saved my herbs more times than I can count.
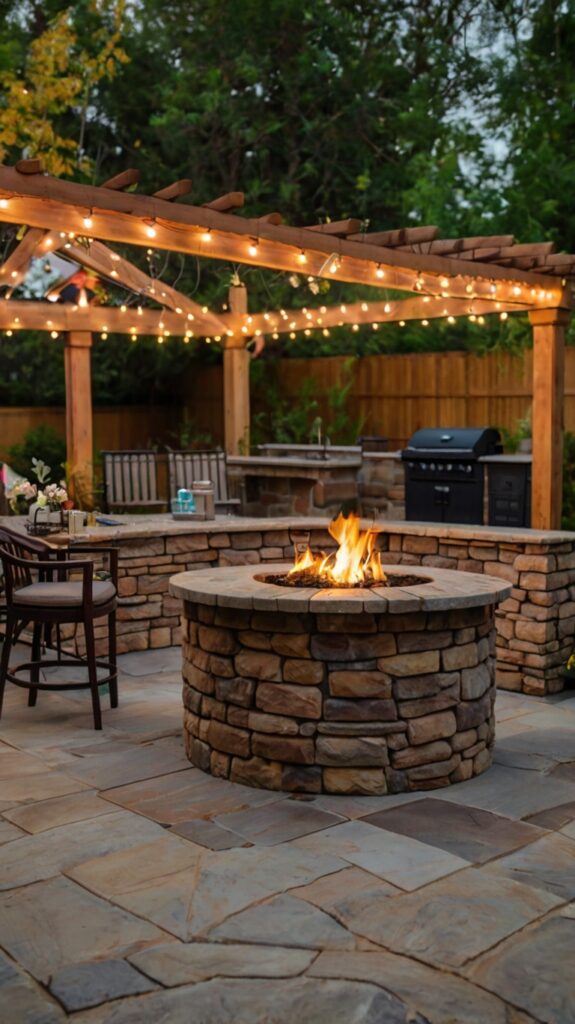
6. Fire Pit with Cooking Grate
Why settle for just a fire pit when you can have a fire pit that doubles as a grill? This combo has saved more camping trips and backyard parties than I can count.
Building one costs about $150-200 if you go the DIY route with retaining wall blocks. Sure, you could buy a pre-made one, but where’s the satisfaction in that?
Building the Perfect Dual-Purpose Pit
Dig down about 6 inches and create a gravel base—drainage matters unless you enjoy cooking over a muddy pond after it rains. Stack your retaining wall blocks in a circle (or square if you’re feeling rebellious), using construction adhesive between layers.
The secret sauce? Buy a adjustable cooking grate that sits over the pit. Mine cost $35 online and has different height settings. High for slow cooking, low for searing steaks that would make a steakhouse jealous.
Add a spark screen for safety (learned this after nearly setting my shed on fire—good times), and keep a bag of sand nearby for emergencies. Nothing kills a party vibe faster than actual flames where they shouldn’t be.
7. Retractable Awning Kitchen
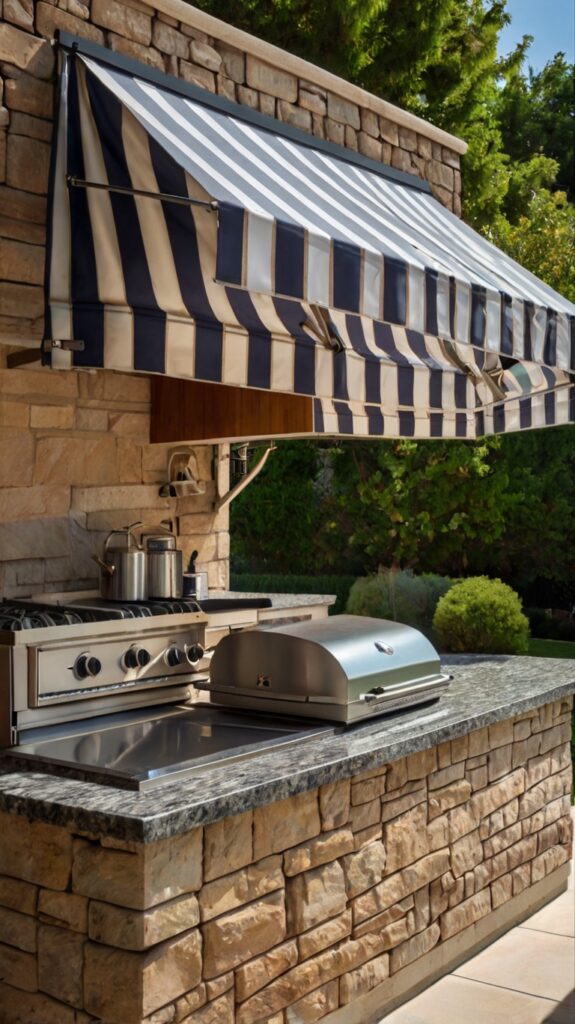
Listen, cooking in the blazing sun isn’t heroic—it’s just sweaty and miserable. Installing a retractable awning over your outdoor kitchen changed everything for me. No more sunburns, no more squinting at the grill, and no more guests huddling in that one shady corner.
Manual awnings run about $300-500, while motorized ones will set you back $800+. I went manual because I’m cheap, and honestly? The arm workout is probably good for me.
Shade Solutions That Actually Work
Mount the awning to your house’s fascia board or rim joist—this needs to be seriously secure. We’re talking lag bolts, not those dinky screws that come in the box. Learned that lesson during a windstorm that turned my first awning into an expensive kite.
Position it to cover your main cooking area plus some seating space. Nobody wants to eat while doing the sunshine shuffle to avoid burning their retinas. And hey, the shade makes your beer stay colder longer—science!
Choose a fabric that’s water-resistant and UV-protected. That beautiful canvas awning might look Pinterest-worthy, but it’ll look like a faded dishrag after one summer. Trust me, spend the extra $50 for quality fabric.
8. Recycled Brick Pizza Oven

Building a brick pizza oven sounds like something only Italian grandmothers and professional chefs do, right? Wrong. I built mine using recycled bricks from a demolished chimney, and now I make pizzas that would make a Neapolitan weep with joy.
Scavenged bricks cost me nothing (check demolition sites or Craigslist), and the other materials ran about $200. Compare that to $3,000+ for a prefab oven, and suddenly my wife stopped complaining about my “another crazy project.”
Oven Building Without the Engineering Degree
Start with a concrete foundation—this thing gets heavy. Build your base with concrete blocks, creating storage space underneath because who doesn’t need more storage?
Form the dome using sand as a mold (yes, really), lay your bricks with refractory mortar, then remove the sand once it’s set. Sounds insane? It works perfectly. Add a chimney for smoke control, insulate with ceramic fiber blanket, and cover with stucco or more bricks.
The first firing should be small—you’re curing it, not cooking. Build up to pizza temperatures (700°F+) gradually over several fires. When you nail that first perfect pizza with the leopard-spotted crust? Pure magic.
9. Foldable Prep Table

Space-challenged folks, this one’s for you. My foldable prep table stays flat against the wall until needed, then BAM—instant workspace that would make any chef jealous.
Built mine for about $75 using pine boards and heavy-duty hinges. Could’ve gone cheaper with plywood, but I wanted something that wouldn’t warp after the first rainstorm.
Maximizing Minimal Space
Mount a 2×4 ledger board to your wall at counter height (usually 36 inches). Attach your tabletop with piano hinges—don’t cheap out here; wimpy hinges equal collapsed table and ruined dinner.
Add folding legs or a cable support system from the wall. I went with cables because they look cooler, and IMO, style points matter even in DIY projects. Install some hooks underneath for tools, and maybe a paper towel holder if you’re feeling fancy.
The best part? When it’s folded up, it takes literally 4 inches of space. Your partner can’t complain about backyard clutter when there isn’t any. Checkmate.
10. Tiki Bar-Inspired Kitchen

Want to feel like you’re on vacation every time you cook outside? A tiki bar kitchen delivers those tropical vibes without the expensive plane tickets.
My setup cost about $400 total, including the bamboo, thatch, and those ridiculous (but essential) tiki torches. Worth every penny for the number of “this is amazing!” comments I get.
Bringing the Beach to Your Backyard
Frame out a basic bar structure using 2x4s—nothing fancy needed since you’re covering it anyway. Wrap it in bamboo fencing (about $30 per roll at home improvement stores), securing with small screws from the inside.
Add a thatch roof or umbrella for authenticity. Real thatch is pricey and high-maintenance, so I used synthetic stuff that looks almost identical. Mount some shelves for your rum collection (essential for the theme), add some rope lighting, and maybe a few fake parrots if you’re committed to the bit.
Install a small refrigerator if your budget allows, or just use a nice cooler disguised with more bamboo. Either way, you’re now making mai tais while grilling, and life doesn’t get much better.
11. Multi-Tiered Serving Cart

Ever tried juggling plates, drinks, and condiments while grilling? It’s like a circus act nobody asked for. Enter the multi-tiered serving cart—your new best friend for outdoor cooking.
Built mine from an old microwave cart ($20 at a thrift store) and some spray paint. Total investment: $35 and one Saturday afternoon.
Rolling in Style
Look for a cart with at least three levels—top for serving, middle for prep, bottom for storage. Add some hooks on the sides for towels and tools. Spray paint it with outdoor-rated paint unless you enjoy the rusty chic look.
Install locking wheels if they’re not already there. Nothing worse than your cart rolling away mid-burger flip. Been there, chased that, won’t repeat it.
The top tier becomes your garnish station, middle holds plates and buns, bottom stores extras. When the party’s over, roll it all inside. Genius? Maybe. Convenient? Absolutely.
12. Solar-Powered Lighting System

Cooking after dark shouldn’t feel like performing surgery with a flashlight. Installing solar-powered lights around your outdoor kitchen costs practically nothing to run and makes everything Instagram-worthy.
My setup cost about $150 for quality lights that actually last. Skip the dollar store versions—they’ll die faster than your phone battery at a music festival.
Bright Ideas That Work
Mount solar spotlights above your grill and prep areas. These need at least 6 hours of direct sunlight to work properly, so position those panels wisely. South-facing is your friend (if you’re in the Northern Hemisphere, anyway).
String solar Edison bulbs for ambiance—they give off that warm, restaurant-patio vibe everyone loves. Add motion sensor lights near pathways because nobody needs a broken ankle ruining taco Tuesday.
Here’s a pro tip: buy lights with separate solar panels. The lights go where you need them; the panels go where the sun actually shines. Revolutionary concept, I know.
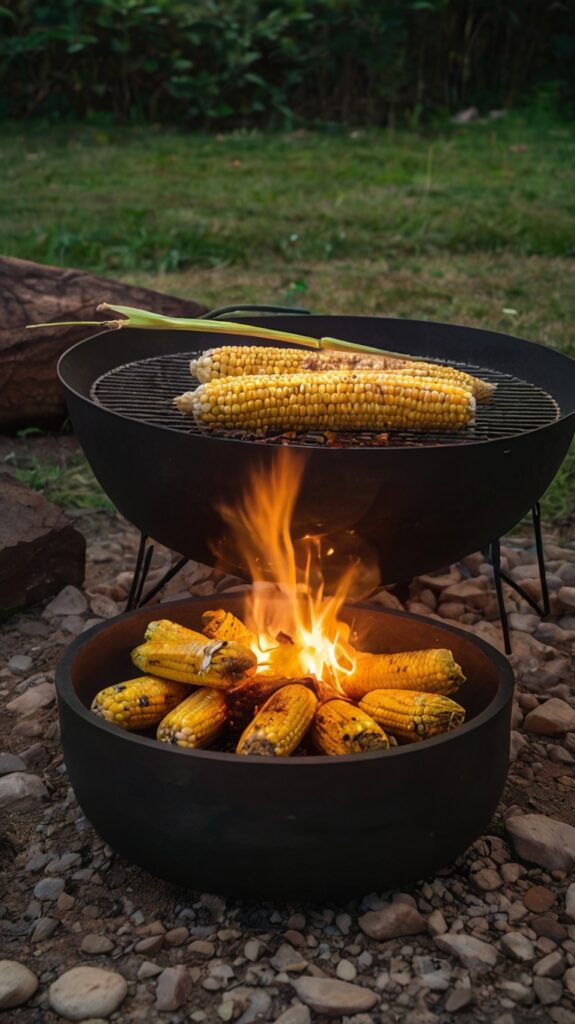
13. In-Ground Charcoal Grill

This one’s a bit unusual, but hear me out. An in-ground charcoal grill gives you that authentic, primitive cooking experience while looking absolutely badass in your backyard.
Digging the pit and lining it cost me about $100, mostly for the fire bricks and grate. The sweat equity? Priceless. Or painful, depending on your fitness level.
Digging Into Greatness
Excavate a pit about 3 feet wide and 2 feet deep. Line it with fire bricks using refractory mortar—regular bricks will crack, so don’t even try. Create air vents at the bottom using steel pipes for better airflow.
Install a removable cooking grate at your desired height using rebar or steel angle iron supports. Make it adjustable if you’re feeling ambitious. Add a cover for when it’s not in use—nobody wants a backyard swimming pool for raccoons.
The flavor from this setup beats any above-ground grill. Something about cooking in the earth makes everything taste better. Maybe it’s psychological, but who cares when the steaks are perfect?
14. Modular Tile Backsplash
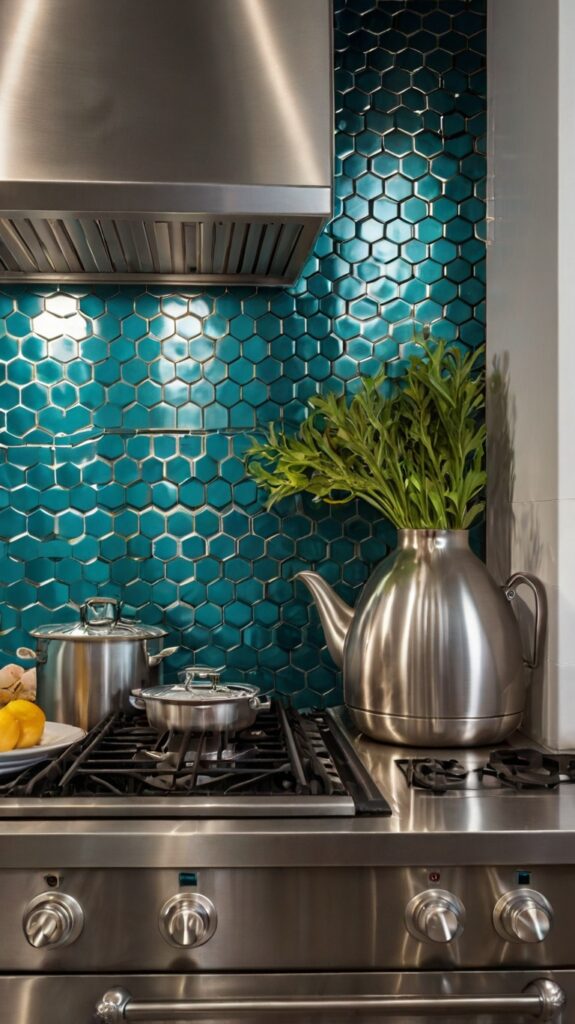
A tile backsplash behind your outdoor kitchen isn’t just pretty—it protects your walls from grease splatters and makes cleaning easier than explaining why you need another grill to your spouse.
Materials cost me $75 for enough tile to cover 20 square feet. Went with subway tile because I’m basic like that, but you do you.
Tiling Without Crying
Use cement board as your backing if you’re mounting to wood—regular drywall outside is asking for mold city. Apply tiles with outdoor-rated adhesive, maintaining consistent spacing with tile spacers (don’t eyeball it; you’re not that good).
Grout with sanded grout for outdoor use, and seal it properly. Skip the sealer, and you’ll be re-grouting next year while questioning your life choices.
Make it modular by creating removable panels. Mount cement board panels to a frame, tile them, then hang the frames. Want a change? Swap panels instead of retiling. Future you will thank present you.
15. Compost Bin Integration

Okay, this might sound weird, but integrating a compost bin into your outdoor kitchen setup is genius-level thinking. Food scraps go straight from prep to compost, and next year’s herbs thank you for it.
A basic tumbler composter runs about $100, or build one from pallets (sensing a pattern?) for $30. Hide it with a nice screen or plants if aesthetics matter to you.
Composting Without the Gross Factor
Position your bin downwind from your cooking area—nobody wants eau de rotting vegetables seasoning their steaks. Install it at counter height if possible; bending over to dump scraps gets old fast.
Keep a small covered container on your prep counter for immediate scraps. Stainless steel looks nicer than plastic and doesn’t hold odors. Empty it into the main bin daily, or whenever you remember—composting isn’t an exact science.
Add browns (dry leaves, paper) with your greens (food scraps) to prevent the slimy, smelly mess that makes people swear off composting. Turn it regularly, and in a few months, you’ve got black gold for that herb garden we talked about earlier.
Bringing It All Together
So there you have it—fifteen ways to transform your backyard from “meh” to “holy cow, can I move in?” The best part about these projects? You can mix and match based on your space, budget, and how much you enjoy confusing your neighbors with power tool noises on Saturday mornings.
Start with one project that excites you most. Maybe it’s that pallet grill station because you’re broke but creative, or perhaps the pizza oven because you’re tired of delivery fees.
Whatever you choose, remember that perfection is overrated—character comes from those slightly crooked tiles and that one weird brick that doesn’t quite match.
Your outdoor kitchen should reflect your style, not some magazine spread. Want a tiki bar next to a pizza oven? Do it. Prefer a minimalist concrete setup with solar lights? Go for it.
The outdoor cooking police aren’t real (I checked), so build what makes you happy.
The real secret? Start building something, anything. Every master outdoor chef started with a wonky first project that their friends politely complimented while secretly wondering what the hell it was supposed to be.
But you know what? Those same friends keep coming back for the food and the good times, crooked tiles and all.
Now get out there and start creating. Your backyard is waiting, your guests are hungry, and those burgers aren’t going to grill themselves in your amazing new outdoor kitchen.
Besides, summer’s coming, and you’ve got some serious showing off—I mean, entertaining—to do.


