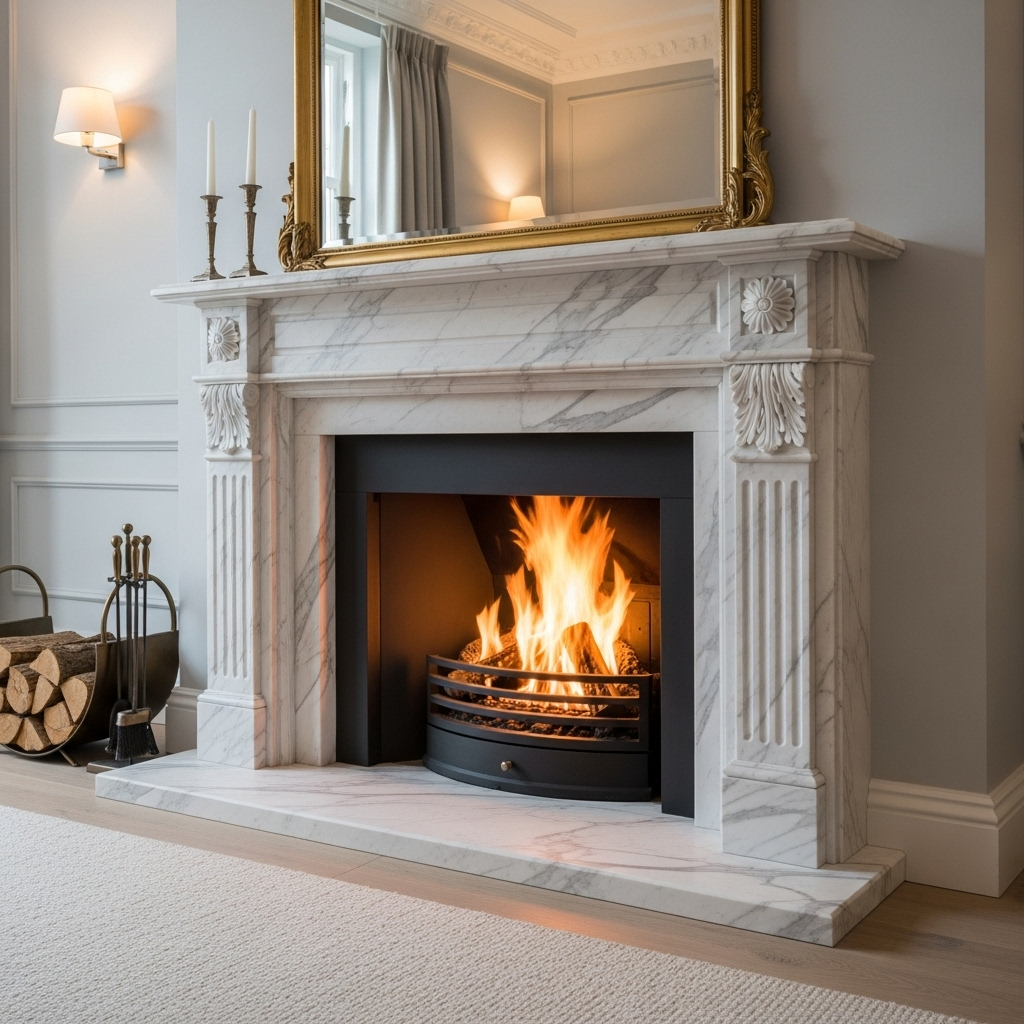
From Stone to Stunning: Guide to Painting a Marble Fireplace


For many homeowners, the marble fireplace is a double-edged sword. It’s a classic architectural feature, but its color or style can become a dated eyesore that clashes with your evolving decor. If you find yourself staring at your hearth with a sense of dissatisfaction, you are not alone.
The good news is that you are not faced with the messy, expensive prospect of a full replacement. The question “can you paint marble fireplace” surfaces in countless home improvement forums and design discussions, and the answer is a resounding, empowering yes.
Painting a marble fireplace is not only possible; it’s one of the most cost-effective and dramatic transformations you can undertake in your living space. This comprehensive guide will walk you through every single step of the process, from the initial preparation to the final protective coat.
We will delve into the science of why specific paints and primers are non-negotiable, provide a clear cost breakdown of DIY versus professional work, and showcase the long-term durability you can expect. Whether your style leans toward a sleek modern black, a crisp white, or a bold color, you hold the power to redefine the heart of your home without breaking the bank.
Why Consider Painting Your Marble Fireplace?
Before diving into the “how,” it’s worth exploring the “why.” The decision to paint a marble fireplace is driven by more than just aesthetics; it’s a practical choice with several compelling benefits.
- Cost-Effective Makeover: A full fireplace replacement or refacing project can be a significant financial undertaking, with refacing costs averaging between $600 and $4,500 . In stark contrast, a DIY paint job can be completed for as little as $50 to $200 in materials, offering a dramatic visual refresh for a fraction of the price .
- Unlimited Design Flexibility: Are you trapped with a 1980s peach marble or a green-toned stone that refuses to harmonize with your neutral palette? Paint offers complete liberation. It allows you to seamlessly integrate the fireplace into your existing decor, choosing a color that acts as a neutral backdrop or a striking focal point.
- Reversibility and Future-Proofing: Unlike other permanent alterations, painting is a relatively reversible option. If you or a future homeowner ever desire to restore the original marble, the paint can be stripped away, unlike a chiseled-out surround.
- Increased Perceived Value: An outdated fireplace can detract from a room’s overall appeal. A freshly painted, modern-looking fireplace elevates the entire space, making it feel more cohesive, intentional, and well-maintained.
The Golden Rule: Preparation is Everything
The single most critical factor determining the success and longevity of your painted marble fireplace is not the paint itself—it’s the preparation. Skipping or rushing these steps is a direct recipe for peeling, chipping, and failure.
Step 1: Deep Cleaning the Surface
Marble, especially on a fireplace, can accumulate invisible layers of dust, wax, polish, and soot. These contaminants will prevent paint from adhering properly.
- Process: Use a degreasing cleaner and a damp cloth to thoroughly scrub the entire surface . Avoid harsh chemicals that could etch the stone. The goal is a completely clean, residue-free surface.
- Verification: After cleaning, wipe the marble with a clean, white cloth. If no grime appears on the cloth, you’re ready for the next step.
Step 2: Sanding for Adhesion
Marble is naturally smooth and non-porous, providing a poor “key” for paint. Sanding is the process of creating microscopic scratches on the surface, which gives the primer something to grip onto mechanically.
- Technique: Use 100-180 grit sandpaper or a sanding pad . You don’t need to remove the finish, just “de-gloss” it until the shiny surface becomes uniformly dull. A palm sander can make this job quicker, but hand-sanding works perfectly for detailed areas.
- Safety: Wear a dust mask and safety glasses during this process.
- Clean-Up: After sanding, it is crucial to remove all dust. Use a vacuum with a brush attachment followed by a wipe-down with a damp cloth or a tack cloth to pick up every speck of dust .
Step 3: Protecting the Area
Paint has a way of traveling where it’s not wanted. Protect your floors, walls, and any parts of the fireplace you don’t wish to paint.
- Materials: Use a high-quality painter’s tape (like FrogTape) to mask off edges where the marble meets the wall or mantel . Use plastic sheeting or drop cloths to cover the floor and any nearby furniture .
Choosing the Right Paint and Materials
Selecting the correct products is not a matter of preference; it’s a matter of performance and safety. Using the wrong type of paint will lead to immediate failure.
Primer: The Unsung Hero
A high-quality primer is your best insurance policy against chipping and peeling. It creates a stable, uniform surface for the topcoat to bond with.
- Recommended Types:
- Acid-Etch Primer: Professional painters often recommend an acid-etch primer (also known as etch primer) for its exceptional ability to bond to slick, non-porous surfaces like marble and glass .
- High-Adhesion Primers: Zinsser Bullseye 123 is a widely recommended water-based primer known for its strong adhesion on difficult surfaces .
- Shellac-Based Primer: Products like Zinsser B-I-N or Smith and Rodgers Blockade are also excellent choices for sealing and providing a solid base, especially if there are any potential stains .
Paint: Heat-Resistance is Key
The most important characteristic of your paint is its ability to withstand heat.
- High-Heat Paint: For any part of the fireplace that gets warm to the touch—including the surround and especially the hearth—you must use high-heat paint. This is a critical safety and durability step. High-heat spray paint is an excellent option for a smooth, even finish and is available in various colors .
- Chalk Paint: A popular choice for furniture, chalk paint is also a viable option for fireplace surrounds. Its thick, matte finish adheres well and requires no primer, though light sanding is still recommended for durability. A major advantage is that many brands, like Rustoleum’s Chalked Paint line, come with a protective topcoat designed to withstand fireplace heat .
- Other Paints: A high-quality acrylic eggshell or satin finish can also be used, provided it is applied over a proper primer and the fireplace does not generate extreme surface heat .
Essential Tools
- Brushes: A variety of synthetic brush sizes for cutting in and detail work.
- Rollers: A high-density foam roller or a soft, medium-pile mini-roller for smooth surfaces to prevent air bubbles .
- Spray Paint Trigger: If using spray paint, a comfort-grip trigger can save your fingers from fatigue and ensure better control .
Table: Paint Type Comparison Guide
| Paint Type | Best For | Key Advantages | Important Considerations |
|---|---|---|---|
| High-Heat Spray Paint | All fireplace surfaces, especially those that get warm | Durable, heat-resistant, smooth factory-like finish, easy application | Requires excellent ventilation, masking is critical to prevent overspray |
| Chalk Paint | Fireplace surrounds that do not get extremely hot | Excellent adhesion, often requires no primer, matte “vintage” finish | Must be properly sealed with a heat-resistant topcoat for durability |
| Acrylic Eggshell | Surrounds on gas or non-working fireplaces | Wide color selection, easy touch-ups, scrubable finish | Must be used with a high-quality primer; not suitable for high-heat areas |
The Step-by-Step Painting Process
With your surface prepped and materials in hand, it’s time for the transformative part.
Step 1: Apply the Primer
- Stir the primer thoroughly. Some professionals recommend using a thinner like D-17 for oil-based primers to improve flow .
- Using a brush for edges and a roller for flat areas, apply a thin, even coat of primer over the entire sanded marble surface.
- Allow the primer to dry completely according to the manufacturer’s instructions. This can take several hours, and it’s best to allow 12 hours for a full cure if possible .
Step 2: Apply the First Coat of Paint
- Stir your paint meticulously. If using spray paint, shake the can for the recommended time.
- Application Technique:
- Brush/Roller: Apply the paint in thin, even coats. Avoid over-brushing, which can create streaks and bubbles. Maintain a “wet edge” to prevent lap marks.
- Spray Paint: Hold the can 8-10 inches from the surface and use a steady back-and-forth motion, applying light “mist coats” first. Several thin coats are infinitely better than one thick, drippy coat .
- Let this first coat dry completely. The drying time will be listed on the can, but high-heat and chalk paints often dry very quickly .
Step 3: Apply the Second Coat and Inspect
- A second coat is almost always necessary for full, rich coverage and to eliminate any thin spots.
- After the second coat has dried, inspect the surface under good light from an angle. Look for any drips, streaks, or missed areas. Lightly sand any imperfections with fine-grit sandpaper (220+ grit), wipe away the dust, and touch up.
Step 4: The Crucial Final Step – Sealing
If you used chalk paint or any paint that does not have a built-in topcoat, sealing is mandatory to protect your work from scratches, scuffs, and heat.
- Product: Use the protective topcoat recommended for your paint type, or a heat-resistant water-based polyurethane.
- Application: Apply 2-3 thin, even coats with a clean brush, allowing full drying time between each coat as per the product instructions . This creates a hard, durable shell.
Cost Analysis: DIY vs. Hiring a Professional
Understanding the financial investment helps you make the right choice for your budget and skill level.
Table: Cost Breakdown for Painting a Marble Fireplace
Long-Term Durability and Maintenance
A common and valid concern is how a painted marble fireplace will hold up over time. Real-world evidence shows that with proper preparation and sealing, the results are remarkably durable.
One homeowner reported on the condition of her chalk-painted marble fireplace after two years of heavy use—approximately five times per week during the winter. The assessment revealed only “a few minor scuffs and two more tiny chips,” which were mostly hidden by a fireplace screen. The sealed surface maintained its finish beautifully, leading her to state she would “definitely recommend” the project .
Maintenance Tips:
- Cleaning: Dust regularly and clean with a soft, damp cloth. Avoid abrasive scrubbers or harsh chemical cleaners that could damage the topcoat.
- Touch-Ups: Keep a small amount of your paint for potential future touch-ups. Small chips can be easily dabbed with a small brush.
- Lifespan: A well-executed paint job can last 5-10 years before potentially needing a fresh coat, depending on wear and tear .
Inspiration: Before and After Transformations
The power of this project is in the visual transformation.
- Outdated Cream to Modern Charcoal: One of the most dramatic changes is from a warm, dated cream marble to a deep, sophisticated charcoal or black. This instantly modernizes the fireplace and allows other design elements in the room to pop .
- Green Marble to Neutral White: A specific problem many face is a green-veined marble that dominates a room. Painting it a crisp white or a warm off-white can neutralize the unwanted tone, creating a classic and clean focal point .
- Using Stencils or Multiple Colors: For the truly adventurous, you can use painter’s tape to create geometric patterns or use two different colors to highlight the architectural details of the surround and the mantel.
Conclusion: Can You Paint a Marble Fireplace?
So, can you paint a marble fireplace? The answer is an unequivocal and empowering yes. It is a project that is well within the reach of a diligent DIY enthusiast, offering a staggering return on investment in terms of visual impact. The formula for success is simple, though non-negotiable: meticulous preparation (cleaning and sanding) + the right materials (primer and heat-resistant paint) + a protective sealant = a beautiful, durable transformation that will last for years.
This project empowers you to take control of your home’s aesthetic without undertaking a costly and disruptive renovation. You have the knowledge. You have the steps. All that remains is to take the leap and transform the heart of your home into a reflection of your personal style.