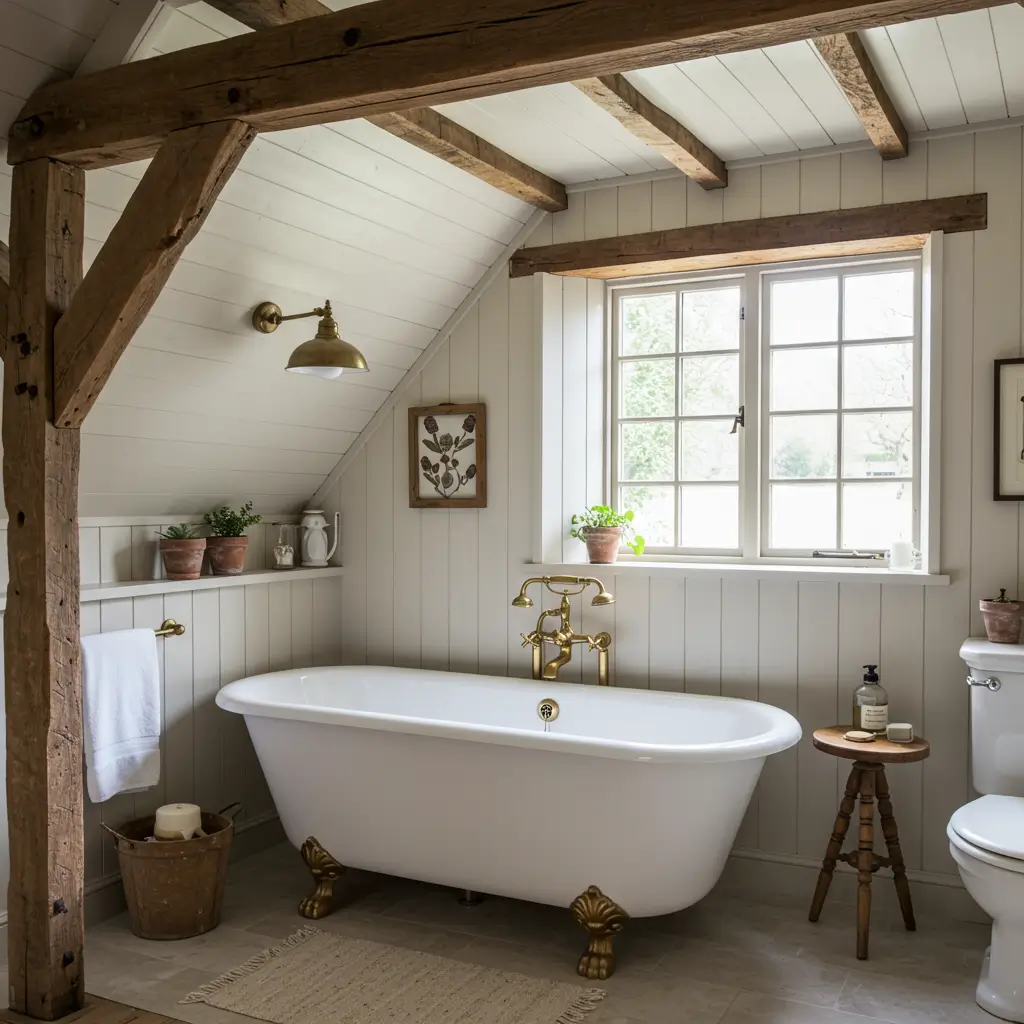
10 Smart Bathroom Basin Cabinet Ideas for Tiny Bathrooms
- Bathroom Design
 Ben
Ben- 0
- 34 minutes read
Let’s talk about that disaster zone under your bathroom sink. You know, that cabinet where hair products go to die and cleaning supplies play an eternal game of hide-and-seek.
I spent years battling with a basin cabinet that seemed determined to eat everything I put in it, until I finally realized the problem wasn’t me—it was the cabinet itself.
After renovating three bathrooms and making every possible mistake along the way (including that time I installed a cabinet backwards—don’t ask), I’ve discovered what actually works.
These ten basin cabinet ideas aren’t just pretty Pinterest fodder; they’re real solutions that’ll transform your daily bathroom shuffle into something that doesn’t make you want to scream into a towel.
Ready to find a basin cabinet that actually makes sense for your life? Let’s dive in.
1. Floating Minimalist Basin Cabinet

Floating basin cabinets are having their moment, and honestly, I totally get why. I installed my first floating cabinet two years ago, and walking into that bathroom still makes me feel like I’m in a fancy hotel. There’s something about that gap between the cabinet and floor that makes even my tiny bathroom feel twice as spacious.
The Magic of Floating Design
The floating effect isn’t just about looks—though it definitely delivers on that front. By mounting the cabinet on the wall, you create visual space that makes your bathroom feel larger. Plus, cleaning underneath becomes a breeze. No more getting on my hands and knees to scrub around cabinet legs while questioning all my life choices.
I mounted mine at 32 inches from the floor, which sounds random but actually resulted from measuring myself brushing my teeth at different heights. Yes, I looked ridiculous. No, I don’t regret it. The perfect height means no more hunching over the sink or standing on tiptoes to reach the faucet.
Installation Tips That’ll Save Your Sanity
Here’s what nobody tells you about floating cabinets: they’re only as good as your wall mounting. I learned this the expensive way when my first attempt started slowly sliding down the wall after a month. Nothing says “DIY fail” quite like a supposedly floating cabinet that’s clearly sinking.
What you actually need:
- Wall studs (find them, mark them, worship them)
- Heavy-duty mounting brackets rated for double the weight
- A level that doesn’t lie (cheap ones do)
- Someone to help hold it while mounting
- More patience than you think you’ll need
Styling Your Minimalist Setup
Minimalist doesn’t mean boring. I keep mine interesting with a few strategic choices. The cabinet itself is pure white with no handles (push-to-open doors are life-changing), but I added warmth with a wooden countertop and a brass faucet. The combination prevents that sterile hospital bathroom vibe nobody wants.
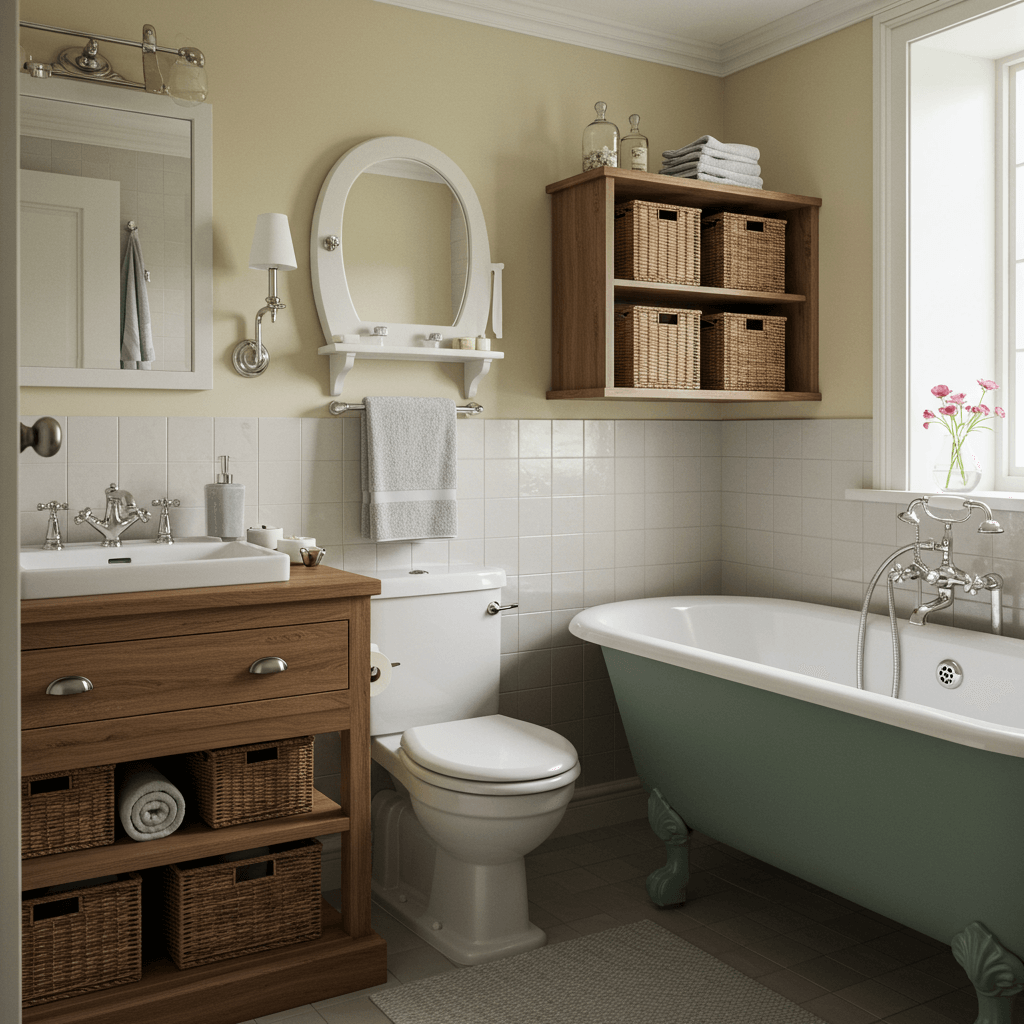
2. Rustic Wooden Vanity with Open Shelves
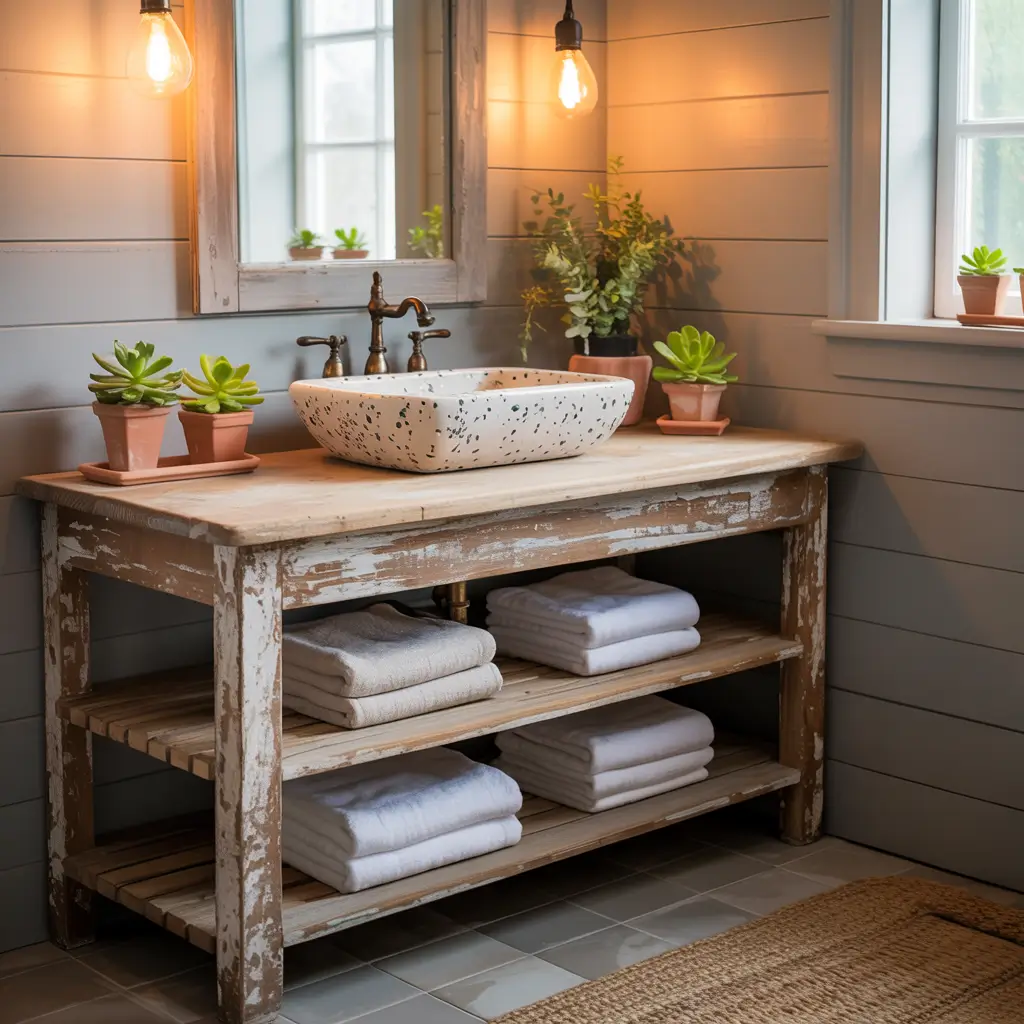
My rustic wooden vanity started as a beat-up dresser from a garage sale. Twenty dollars, some elbow grease, and a few YouTube tutorials later, I had a bathroom vanity with more character than anything I could buy in a store. The open shelves weren’t part of the original plan, but removing those musty drawers turned out to be the best accident ever.
Why Rustic Wood Works
There’s something about real wood in a bathroom that instantly makes the space feel warmer and more inviting. My vanity has dings, scratches, and water marks that would be defects on new furniture but somehow look intentional on rustic pieces. It’s like having permission for your furniture to look lived-in from day one.
The wood also ages beautifully in bathroom conditions—if you seal it properly. Skip this step and you’ll have a warped, moldy disaster within months. I used three coats of marine-grade polyurethane, and two years later, it still looks amazing despite daily water exposure.
Open Shelf Organization
Open shelves force you to be organized, which terrified me initially. My under-sink areas had always been chaos zones hidden behind doors. But here’s the secret: when everything’s visible, you naturally keep it neater. It’s like having company over every day—you can’t let things get too crazy.
I organize my open shelves with:
- Matching baskets for hiding ugly necessities
- Rolled towels displayed spa-style
- Glass jars for cotton balls and Q-tips
- A small plant that somehow survives the humidity
- Pretty soap dispensers I actually want to look at
Making Rustic Feel Intentional
The key to rustic vanities is making them look deliberate, not like you found something on the curb and called it a day. I paired mine with modern elements—a sleek vessel sink, contemporary faucet, and minimalist mirror. The contrast keeps it from feeling like I’m living in a cabin.
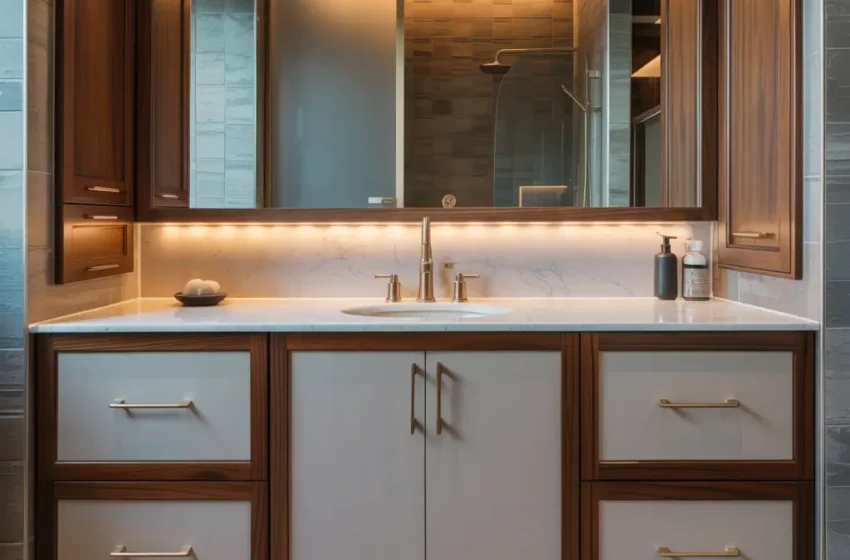
3. Sleek Modern Wall-Mounted Cabinet
Wall-mounted cabinets that aren’t floating (they extend to the floor visually but mount to the wall) offer the best of both worlds. Mine looks like a standard floor cabinet but doesn’t actually touch the floor, making cleaning easier while maintaining that grounded look. It’s basically the mullet of bathroom cabinets—business on top, party on the bottom.
The Wall-Mount Advantage
Wall mounting eliminates that gross gap between the cabinet and wall where mystery gunk accumulates. You know exactly what I’m talking about—that narrow space that’s impossible to clean where hair ties and dust bunnies form their own ecosystem. With wall-mounted cabinets, that problem simply doesn’t exist.
The installation requires finding studs and using proper anchors, but it’s actually easier than installing a freestanding cabinet that needs leveling on uneven floors. My bathroom floor has more waves than the ocean, so wall-mounting was actually the simpler option.
Modern Design Elements
Modern cabinets embrace clean lines and hidden functionality. Mine has integrated handles that are just subtle grooves in the door fronts. No protruding hardware to catch towels on or collect grime. The interior includes USB charging ports (game-changer for electric toothbrushes) and LED strips that turn on when you open the doors.
These little touches make daily routines so much smoother. Ever fumbled for your face wash at 6 AM in the dark? The automatic LED lighting means I can actually see what I’m grabbing without blinding myself with overhead lights.
Color Choices That Pop
Modern doesn’t have to mean white or gray. I went with a deep navy blue that makes my white sink pop like a piece of art. Bold colors in modern cabinets work because the clean lines prevent them from overwhelming the space. Just remember—dark colors show water spots more, so keep a microfiber cloth handy.
Also Read: 12 Cozy Bathroom Linen Cabinet Ideas for Modern Homes
4. Compact Corner Basin Storage Unit
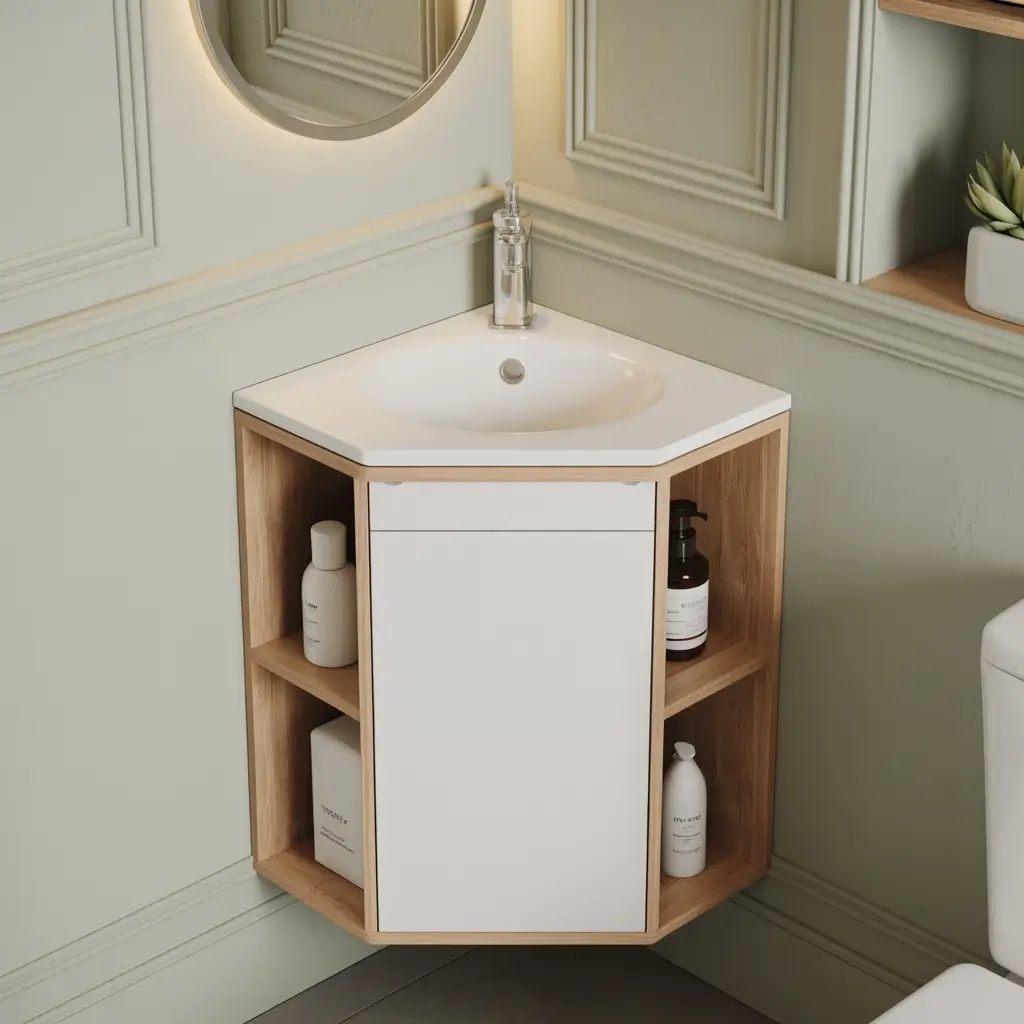
Corner basin units are the answer to that awkward corner space that every small bathroom seems to have. I installed one in my powder room, and that previously useless corner now holds a surprising amount of stuff while taking up minimal floor space.
Making Corners Work
Corners are tricky because traditional rectangular cabinets leave dead space. Corner units with angled fronts maximize every inch. Mine fits snugly into a 90-degree corner but has a diagonal front that gives me full access to the storage inside.
The basin itself is triangular, which felt weird at first but actually provides plenty of washing space. The key is getting the height right—too low and it feels cramped, too high and it looks like the sink is trying to escape the corner.
Storage Solutions for Tight Corners
Corner cabinets can be black holes where products disappear forever. I combat this with:
- Lazy Susan for easy access to everything
- Tiered shelving to use vertical space
- Door-mounted organizers for small items
- Pull-out drawers if budget allows
- Clear containers so I can see what’s hiding
Design Tricks for Corner Units
Corner installations can look awkward if not styled properly. I extended the countertop slightly along both walls, creating small surface areas for soap and toothbrush holders. This visual extension makes the corner unit feel integrated rather than shoved into place.
Adding a corner mirror above also helps—it reflects light and makes the corner feel like a deliberate design choice rather than a space-saving compromise.
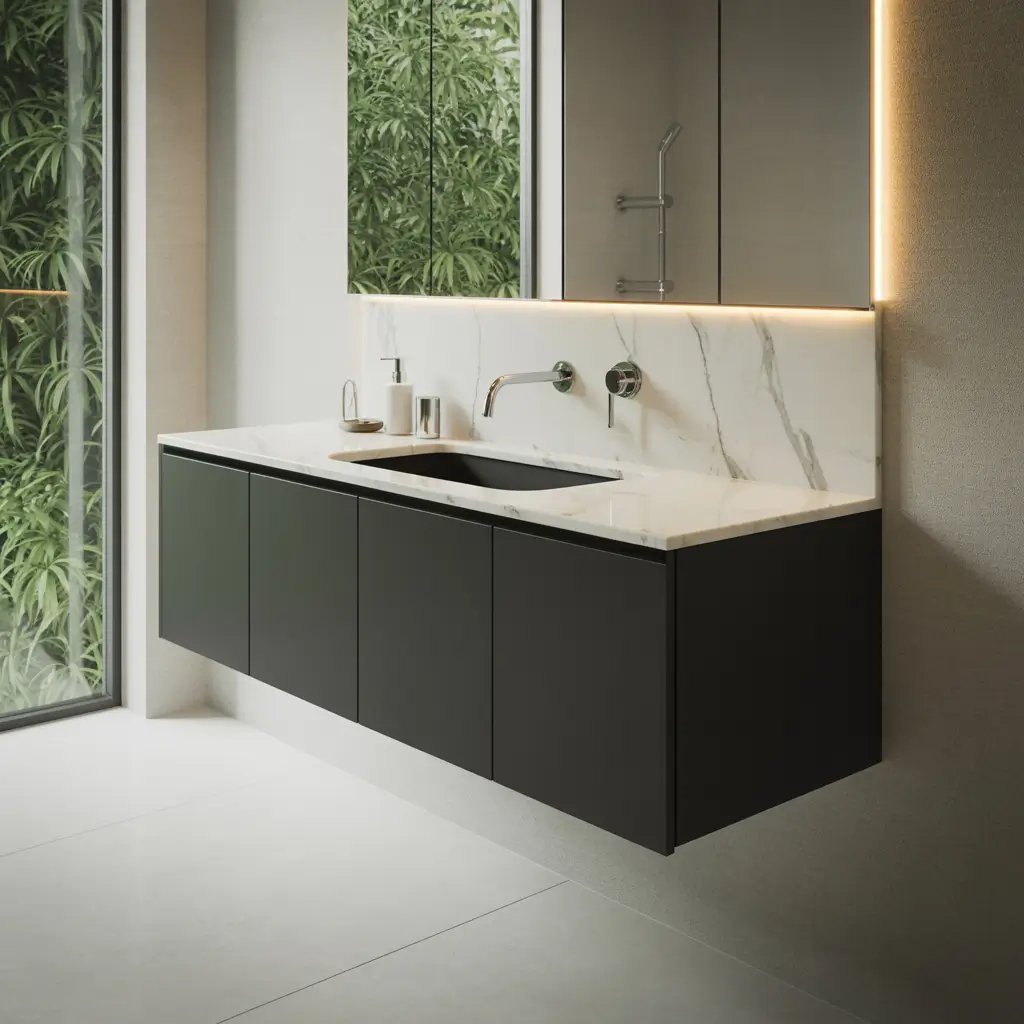
5. Dual-Tone Luxury Bathroom Vanity
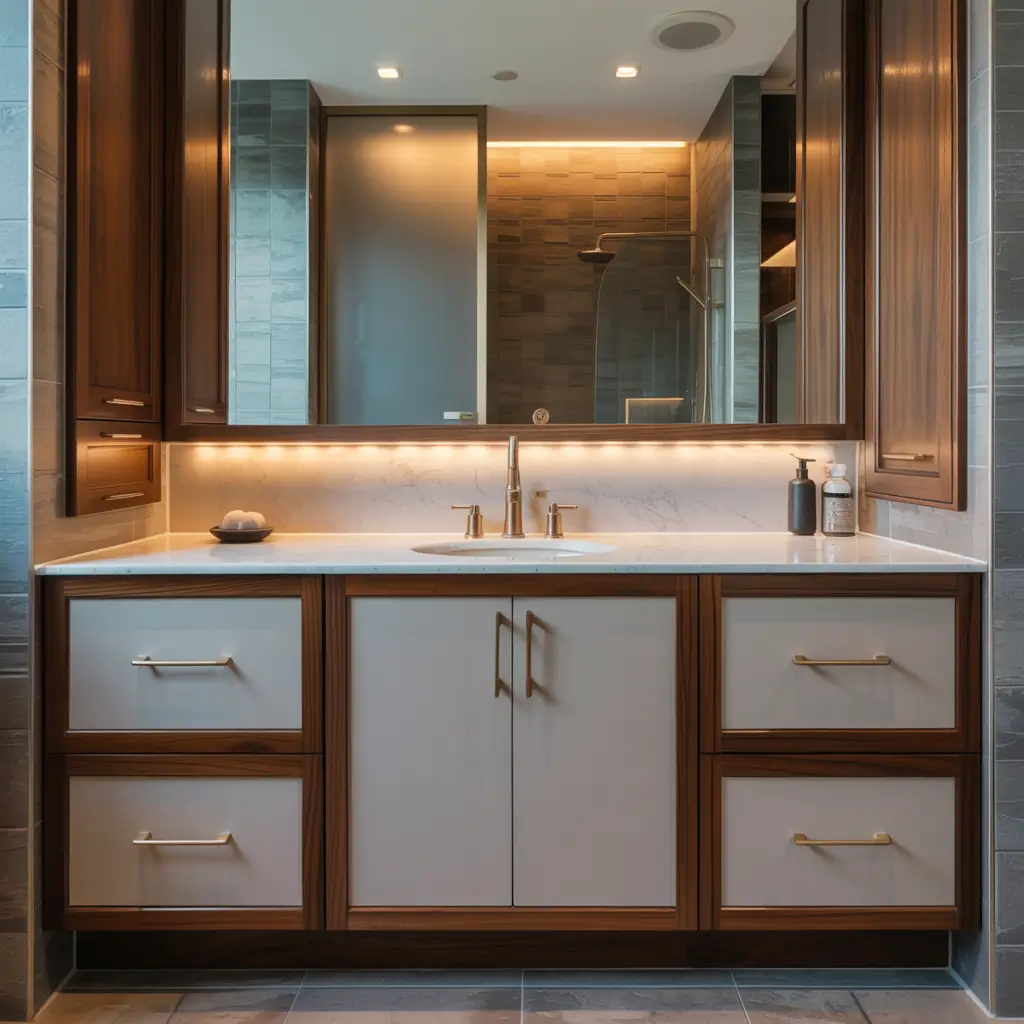
Two-tone vanities are everywhere right now, and I finally understand why after installing one. My white upper drawers and navy lower cabinet create visual interest without overwhelming the space. It’s like wearing a perfectly coordinated outfit—everything just works together.
The Psychology of Two-Tones
The two-tone trend works because it breaks up the visual weight of a large vanity. My 60-inch double vanity would look massive in solid navy, but with white upper drawers, it feels lighter and more dynamic. The color break at drawer height also creates a natural visual line that makes the room feel taller.
I chose colors with the same undertones (cool whites and cool blues) to ensure they harmonized. Mixing warm and cool tones can work, but it requires more finesse than I possess before coffee.
Execution Without Regret
Painting a two-tone vanity requires patience and painter’s tape. Lots of painter’s tape. I learned to:
- Remove all hardware first (seems obvious but I forgot)
- Sand everything properly (skipping this leads to peeling)
- Use primer designed for bathrooms
- Apply thin coats rather than thick ones
- Remove tape while paint is slightly tacky
Styling Two-Tone Vanities
The beauty of two-tone vanities is their built-in visual interest. You don’t need much else to make them shine. I kept accessories simple—matching soap dispensers, a single piece of art, and coordinating towels. The vanity does the heavy lifting design-wise.
6. Vintage Cabinet with Glass Front Doors
Glass-front cabinets force organization upon you, which sounds terrible but actually changed my bathroom game entirely. My vintage medicine cabinet with glass doors means everything inside needs to look presentable. The public shame factor is real, and it works.
Finding Vintage Gems
I found my glass-front cabinet at an estate sale for $40. It needed new glass (one pane was cracked), fresh paint, and new hardware, but the bones were solid wood and the craftsmanship was better than anything modern in my budget.
FYI, actual vintage pieces often have non-standard dimensions. Measure everything three times, then measure again. My cabinet was 1.5 inches narrower than modern standards, which meant creative installation solutions.
The Glass Door Dilemma
Glass doors mean no hiding anything. This forced me to:
- Declutter ruthlessly (goodbye, hotel shampoo collection)
- Invest in matching containers
- Actually fold washcloths properly
- Keep only products I use regularly
- Make peace with my type-A tendencies
Styling Behind Glass
I treat my glass-front cabinet like a display case. Pretty apothecary jars hold cotton balls and bath salts. Vintage bottles display mouthwash and hand soap. Even my medications hide in an antique tin. It’s extra effort, but the result looks like a boutique hotel bathroom.
Also Read: 10 Space-Saving Bathroom Built In Cabinet Wall Storage Ideas for
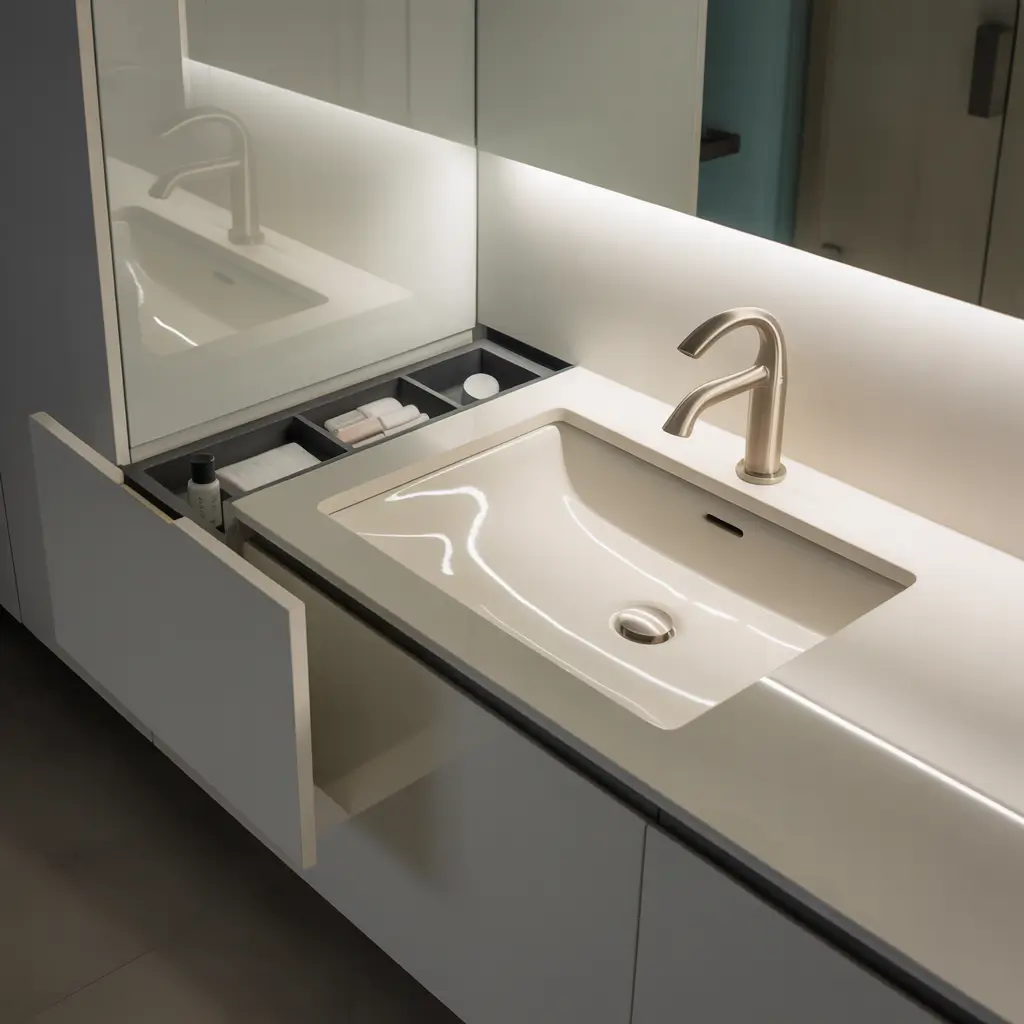
7. Hidden Storage Pull-Out Basin Cabinet

Pull-out storage changed how I think about basin cabinets entirely. What looks like a normal cabinet door opens to reveal sliding shelves that bring everything forward. No more archaeological digs to find that face cream buried in the back.
The Pull-Out Revolution
Traditional basin cabinets waste the back half of their depth. You stack things in front of other things, and eventually, products migrate to the back to die. Pull-out shelves solve this by bringing everything to you.
My pull-out system has three tiers:
- Top tier: Daily skincare and medications
- Middle tier: Hair products and tools
- Bottom tier: Cleaning supplies and backups
Installation Considerations
Adding pull-outs to existing cabinets is possible but requires precision. The drawer slides need to be perfectly level or they’ll stick, jam, or make annoying noises. I tried DIY first, failed spectacularly, then hired a handyman who made it look easy. Sometimes professional help is worth every penny.
Maximizing Pull-Out Potential
The key to pull-out success is weight distribution and organization. Heavy items go on bottom shelves, lighter items up top. I use small bins to corral similar items and prevent the dreaded product slide when pulling shelves out.
8. Industrial Pipe Frame Vanity with Drawers
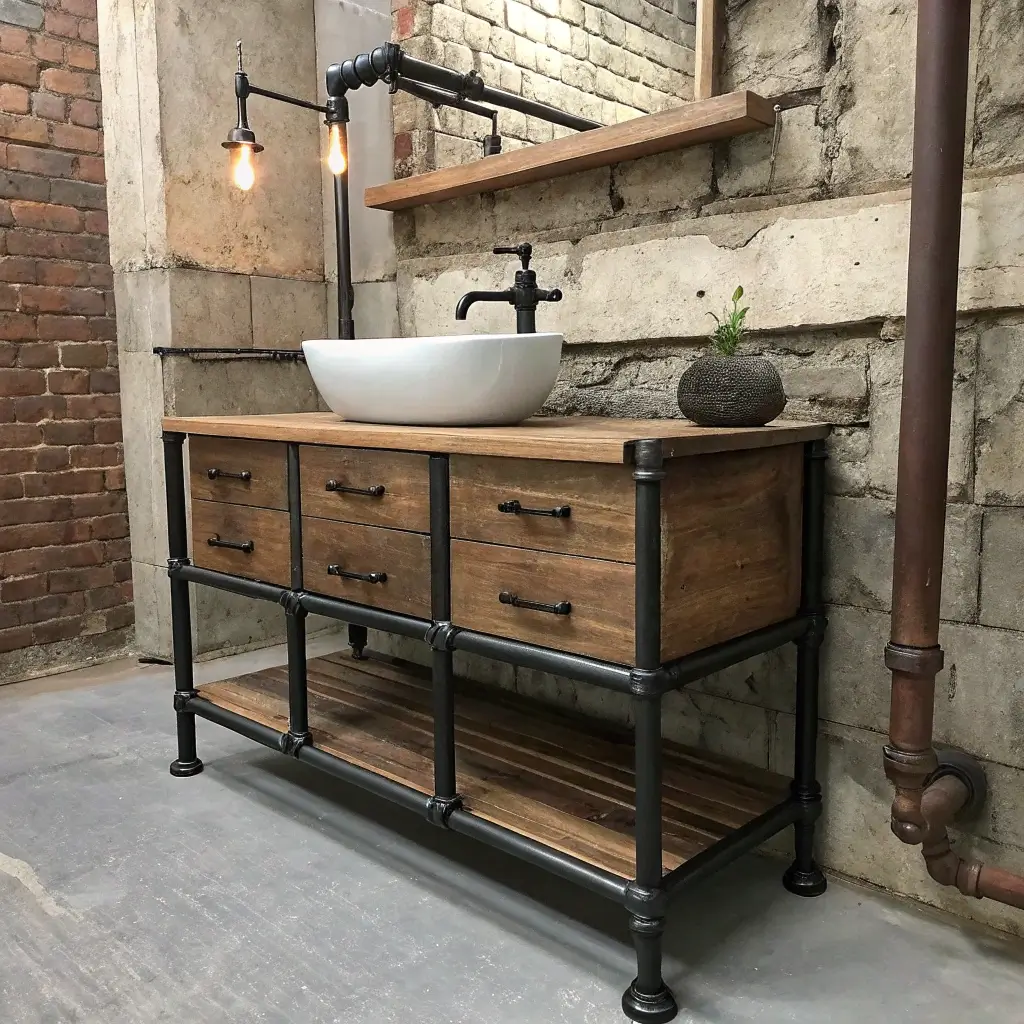
Industrial pipe vanities bring urban edge to bathrooms that would otherwise feel too precious. I built mine using plumbing pipes from the hardware store and reclaimed wood, creating something that looks like it belongs in a converted loft rather than my suburban bathroom.
Building with Pipes
The pipe frame construction is actually easier than traditional cabinetry. Pipes screw together like very expensive adult Legos. I spent about $150 on pipes and fittings, which sounds like a lot until you price out custom vanity bases.
The trick is planning your design completely before buying anything. Pipes and fittings add up fast, and returns are annoying when everything’s been assembled and disassembled multiple times. Ask me how I know :/
Adding Drawer Functionality
Incorporating drawers into a pipe frame requires creativity. I used vintage wooden crates that slide on wooden runners attached to the pipe frame. They’re not soft-close fancy drawers, but they work perfectly and add to the industrial vibe.
Industrial Styling Tips
The key to industrial style is balance. Too much metal and your bathroom feels cold. I warmed mine up with:
- Rich wood countertop with visible grain
- Warm Edison bulb lighting
- Soft textiles in neutral colors
- One living plant (succulents survive everything)
- Brass accents for warmth
9. Mirrored Basin Cabinet with LED Lighting
Mirrored cabinets with integrated LED lighting are basically Instagram filters for your bathroom. I look better in mine than I do anywhere else, which makes morning routines significantly more pleasant. The storage is great, but honestly, the flattering lighting sold me.
The LED Advantage
LED lighting around mirrors provides even illumination that eliminates shadows. No more doing makeup in weird shadows only to discover in daylight that your foundation doesn’t match. The LED strips in my cabinet are adjustable—bright white for detail work, warm white for general use.
The lights also include a defogger feature that seemed gimmicky until I used it. Stepping out of the shower to a clear mirror? Life-changing. No more wiping with towels and leaving streaks.
Mirror Cabinet Placement
Positioning mirrored cabinets requires thinking about reflection angles. Mine initially reflected directly into the toilet, which was weird for everyone. Shifting it two inches to the left solved the problem. Small adjustments make big differences.
Storage Behind the Mirror
The storage in mirrored cabinets is typically shallow but perfect for bathroom essentials. I organize mine by frequency of use:
- Eye level: Daily items
- Top shelf: Medications and first aid
- Bottom shelf: Backup supplies
- Door storage: Small items like tweezers
Also Read: 10 Elegant Bathroom Storage Cabinet Ideas with Hidden Storage
10. Eco-Friendly Bamboo Bathroom Cabinet
Bamboo cabinets bring sustainability and style together. Mine has held up beautifully for three years despite daily bathroom humidity, proving that eco-friendly doesn’t mean sacrificing durability. Plus, the natural bamboo grain adds warmth that makes my bathroom feel like a spa.
Why Bamboo Works
Bamboo is technically a grass, not wood, which means it grows incredibly fast and regenerates without replanting. But the environmental benefits are just the beginning. Bamboo is naturally antimicrobial and moisture-resistant—basically designed for bathrooms.
My bamboo cabinet has survived everything from steamy showers to kids’ bath time splashing. The key is choosing quality bamboo products with proper sealing, not the cheap stuff that falls apart when you look at it wrong.
Bamboo Cabinet Care
Maintaining bamboo is surprisingly easy:
- Wipe down weekly with damp cloth
- Oil occasionally with mineral oil
- Avoid harsh chemical cleaners
- Keep relatively dry (no standing water)
- Reseal annually if needed
Styling with Natural Materials
Bamboo pairs beautifully with other natural materials. I combined mine with a white quartz countertop, chrome fixtures, and plenty of green plants. The result feels organic and calming—exactly what you want in a bathroom.
Making Your Basin Cabinet Choice
After exploring all these options, here’s my honest advice: choose the basin cabinet that solves your actual problems, not the one that looks best on Pinterest.
My floating minimalist cabinet is gorgeous, but my pull-out storage cabinet is the one that actually changed my daily life.
Start by identifying your biggest bathroom frustration. No storage space? Go vertical with wall-mounted options. Hate clutter? Glass-front doors will keep you honest. Working with an awkward layout? Corner units might be your answer.
Consider your long-term commitment too. IMO, it’s better to invest in one quality piece that’ll last than to buy cheap and replace repeatedly. I’ve done both, and quality wins every time—especially in the humid bathroom environment.
Don’t forget about installation reality. Some of these options are definitely DIY-friendly (looking at you, industrial pipe frame), while others require professional help unless you’re seriously skilled.
There’s no shame in hiring pros for complex installations. Better to pay for expertise than repair expensive mistakes.


