12 Simple Bathroom Cabinet Organization Ideas and DIY Tricks
- Bathroom Design
 Ben
Ben- 0
- 46 minutes read

Remember that moment when you opened your bathroom cabinet and an avalanche of half-empty bottles attacked you? Yeah, me too. Last Tuesday, actually.
A bottle of expired sunscreen literally bounced off my head and landed in the toilet. That was my rock bottom, organization-wise.
If you’re reading this while side-eyeing your chaotic bathroom cabinet, you’re in good company.
I’ve spent the last five years perfecting the art of bathroom cabinet organization (after failing spectacularly for the previous ten), and I’m here to share what actually work not just what looks pretty on Pinterest for exactly three seconds before real life happens.
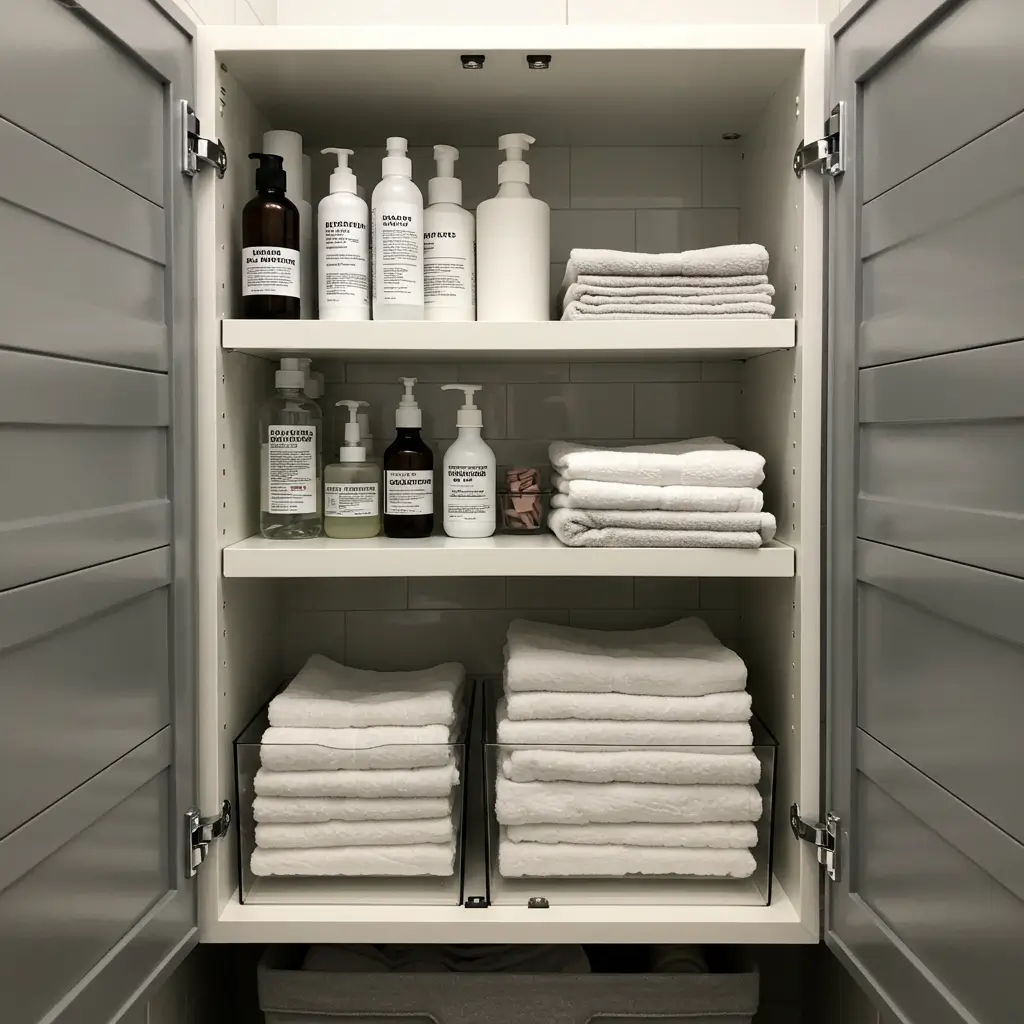
1. Minimalist Bathroom Cabinet Makeover

Let’s start with the nuclear option—going full minimalist. I know, I know, the word “minimalist” makes some people break out in hives. But hear me out. When I finally embraced minimalism in my bathroom cabinet, my morning routine went from a 45-minute scavenger hunt to a zen-like 15-minute experience.
The Great Purge
First things first—you need to evict the squatters. I found products in my cabinet from 2015. TWO THOUSAND FIFTEEN. That face mask expired when Obama was still president. Time to let go.
Here’s my ruthless purging criteria:
- Expired? Trash it
- Haven’t used in 6 months? Donate or toss
- Duplicate products? Keep one, ditch the rest
- Mystery bottles? If you don’t know what it is, it goes
I eliminated 70% of my cabinet contents in one afternoon. The remaining 30%? Stuff I actually use. Revolutionary concept, right?
Organizing What’s Left
Once you’ve Marie Kondo’d your cabinet, organizing becomes surprisingly simple. I keep only:
- Daily essentials on the middle shelf (eye level)
- Weekly items on the top shelf
- Backup products in a single designated bin
- Emergency supplies in a small container
The empty space isn’t wasted—it’s breathing room. Your products aren’t playing Tetris anymore, and you can actually see what you have.
Maintaining Minimalist Bliss
The trick to keeping it minimal? One in, one out rule. Buy new moisturizer? The old one leaves immediately. No exceptions, no “but what if I need it someday” thoughts. Spoiler alert: you won’t need it someday.
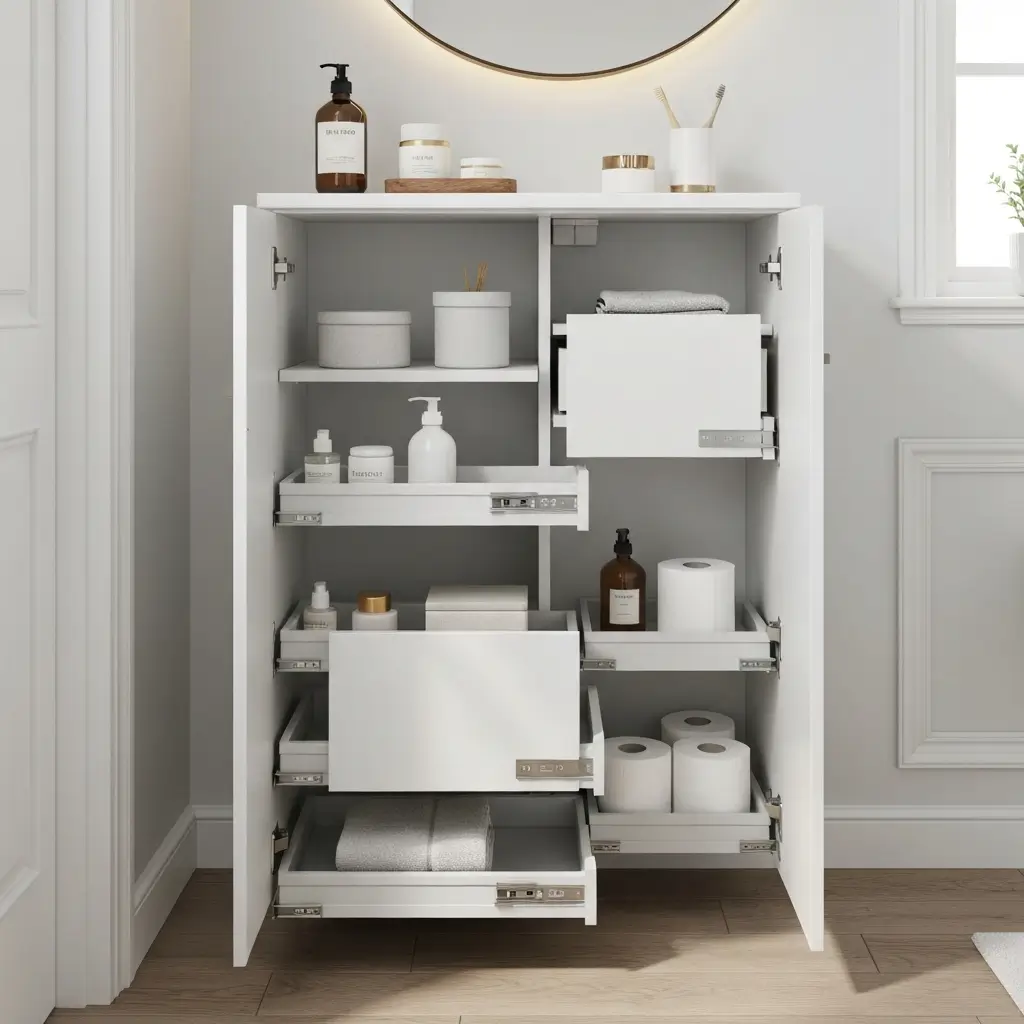
2. DIY Pull-Out Drawer Organizers
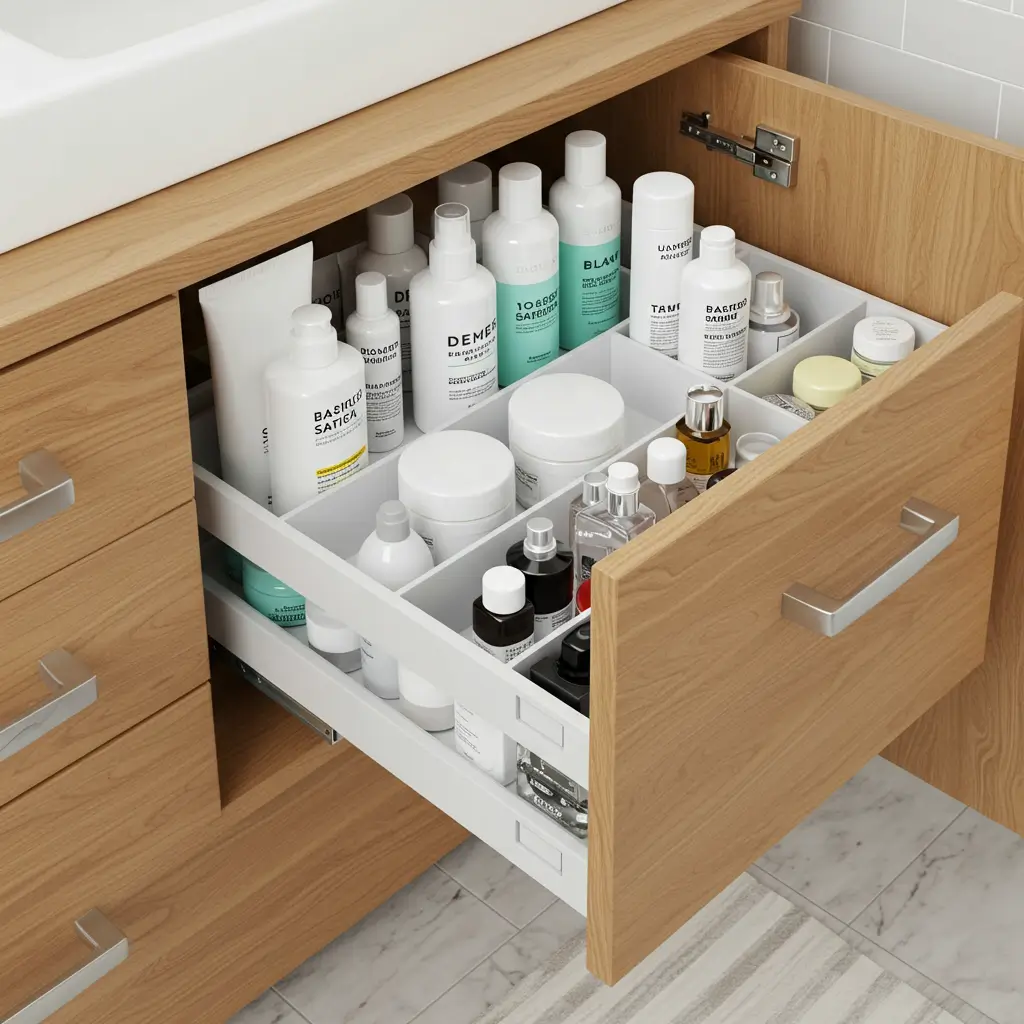
Ever tried to reach something at the back of a deep cabinet? It’s like an archaeological dig, except instead of finding ancient artifacts, you’re finding that expensive serum you forgot you bought. Pull-out drawers changed my life—and yes, you can DIY them without a engineering degree.
Building Your Own Pull-Out System
I built my first pull-out drawer using a $15 sliding hardware kit from Amazon and a wooden crate from Michael’s. Total cost? Under $25. Total time? One episode of Netflix (okay, three episodes, but who’s counting?).
What you’ll need:
- Drawer slides (measure your cabinet depth first!)
- A shallow box or crate that fits your cabinet
- Screws and a drill
- Patience (and maybe wine)
Installation Without Tears
Installing drawer slides sounds scarier than it is. I managed it with zero DIY experience and only minor cursing. The secret? Measure seventeen times, drill once. Also, use a level—crooked drawers will haunt your dreams.
Pro tips that saved my sanity:
- Start with the bottom drawer (easier to see what you’re doing)
- Use painters tape to mark where slides should go
- Test the slide movement before loading with products
- Accept that the first one might be wonky (mine was)
What Goes in Pull-Out Drawers
Pull-out drawers work best for:
- Hair tools and accessories
- Medication and first aid supplies
- Backup toiletries
- Cleaning supplies (because yes, you should clean your bathroom)
I use shallow containers inside the drawers to prevent the dreaded product migration—you know, when everything slides to the back corner like it’s trying to escape.
3. Tiered Shelving for Small Cabinets
Small cabinet? Join the club. My guest bathroom cabinet is so small, I’m pretty sure it was designed for ants. But tiered shelving turned that tiny space into an organizational masterpiece.
Choosing the Right Tiered System
Not all tiered shelves are created equal. I’ve tried the bamboo ones (pretty but bulky), plastic ones (functional but ugly), and metal ones (just right). Look for:
- Expandable width options
- Non-slip feet
- Easy to clean materials
- Height that maximizes your cabinet space
The Tetris Strategy
Arranging items on tiered shelves requires strategy. Think of it like Tetris, but instead of clearing lines, you’re maximizing visibility. I organize by:
- Height (tall items in back, short in front)
- Frequency of use (daily items most accessible)
- Category (skincare together, hair products together)
- Weight (heavy items on bottom tier for stability)
Making Small Spaces Mighty
My tiny cabinet now holds twice what it used to, and I can see everything. The game-changer? Using the vertical space I’d been wasting. Who knew that six inches of previously dead air could become prime storage real estate?
Also 10 Inspiring Bathroom Cabinet Ideas and Modern Decor TouchesRead:
4. Clear Container Bathroom Storage Hacks
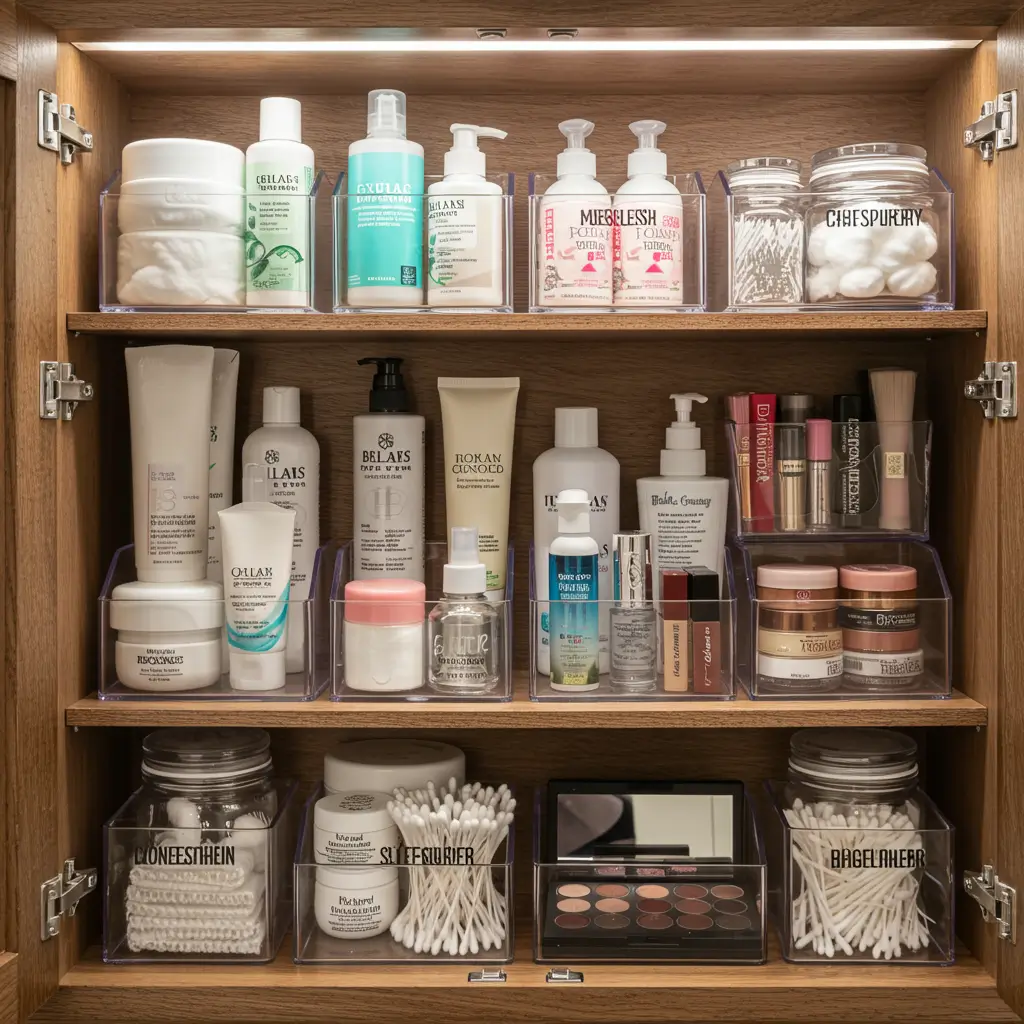
Clear containers are the unsung heroes of bathroom organization. Can you see what’s inside? Yes. Do they look neat even when you’re messy? Also yes. It’s basically organized chaos that looks intentional.
The Clear Container Revolution
I switched to clear containers after the Great Cotton Ball Avalanche of 2021. Never again would I open a mystery container only to be pelted by flying cotton products. Now everything has a clear home, and I can see inventory levels at a glance.
Best items for clear container storage:
- Cotton balls, swabs, and rounds
- Hair ties and bobby pins (the mysterious disappearing species)
- Bath bombs and salts
- Travel-sized products
- Makeup samples (we all hoard them)
Labeling Without Looking Like a Pharmacy
Labels are crucial, but you don’t want your bathroom looking like a medical supply closet. I use minimalist labels on the bottom of containers—visible when you need them, invisible when you don’t. Genius? Maybe. Learned from Pinterest? Definitely.
Stacking and Arranging Like a Pro
The beauty of clear containers? They stack beautifully. I created a three-tier system:
- Bottom: Heavy items (extra shampoo bottles)
- Middle: Medium-use items (weekly face masks)
- Top: Light, frequently used items (daily cotton rounds)
FYI, square containers use space more efficiently than round ones. Basic geometry, but it took me embarrassingly long to figure this out.
5. Lazy Susan for Under-Sink Organization

The under-sink cabinet—where products go to die. Or at least, that’s what mine was before I discovered the magic of the Lazy Susan. Now it’s like a product carousel of efficiency.
Why Lazy Susans Work Under Sinks
That awkward plumbing takes up prime real estate, creating weird corners where bottles congregate like they’re having a secret meeting. A Lazy Susan brings those hiding products into the light with one simple spin.
I use two Lazy Susans under my sink:
- Large one for cleaning supplies
- Small one for hair products
- The plumbing? It sits between them like a weird roommate
Choosing the Right Lazy Susan
Not just any Lazy Susan will do. Under-sink units need:
- Raised edges (nothing rolls off during spinning)
- Water-resistant material
- Non-slip base
- Size that works around plumbing
I learned the hard way that wooden Lazy Susans and under-sink moisture don’t mix. RIP to that warped disaster currently living in my garage.
Maximizing the Spin Zone
Organize your Lazy Susan by category, not size. I tried organizing by bottle height once—looked pretty, functioned terribly. Now I group by purpose:
- Cleaning products together
- Hair care in one section
- Skincare in another
- Random stuff I don’t know where else to put (we all have this category)
6. Vertical Storage Solutions for Toiletries

Going vertical isn’t just for cities anymore. Your bathroom cabinet has been begging you to use its height, and you’ve been ignoring it like that text from your ex. Time to change that.
Shelf Risers That Actually Help
I bought my first shelf riser thinking it would magically double my space. It didn’t—because I used it wrong. The secret? Choose risers that create usable space, not just any space.
What works:
- Expandable risers that fit your exact cabinet
- Heights that accommodate your products
- Sturdy materials that won’t collapse
- Open sides for easy access
Door Storage That Doesn’t Suck
The inside of your cabinet door is prime real estate you’re probably wasting. I installed adhesive organizers on mine, and suddenly I had homes for:
- Tweezers and nail tools
- Travel toothbrushes
- Sample packets
- That one random thing you never know where to put
Just make sure whatever you attach doesn’t prevent the door from closing. Ask me how I know :/
Creating Vertical Zones
I divided my cabinet vertically into zones:
- Top third: Rarely used items
- Middle third: Daily essentials
- Bottom third: Bulk items and backups
This system means I’m not reaching over daily items to grab something I use once a month. Revolutionary? No. Life-changing? Actually, yes.
Also Read: 10 Beautiful Vintage Cottage Bathroom Ideas with Pastel Touches
7. Color-Coded Bathroom Cabinet System
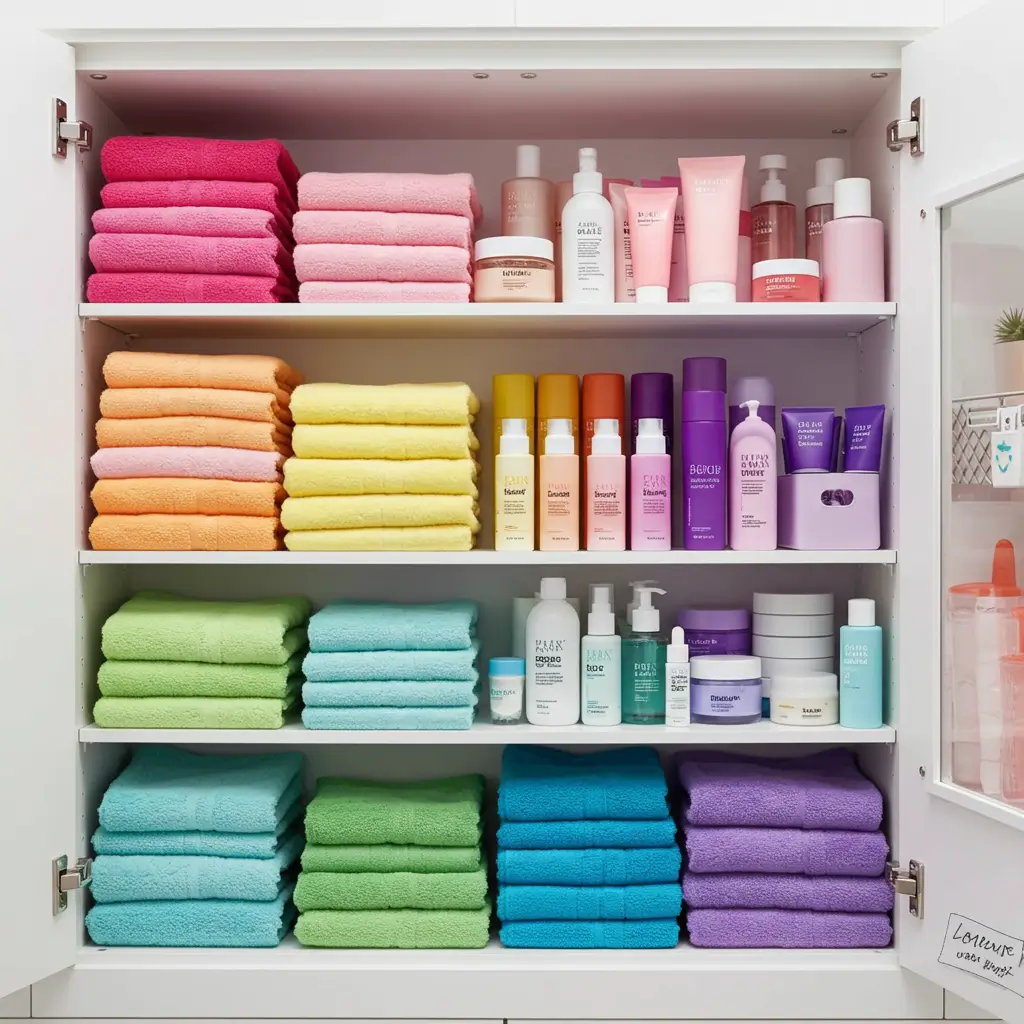
Color coding isn’t just for office supplies and kindergarten classrooms. When I started color coding my bathroom cabinet, my partner finally stopped asking where everything was. Coincidence? I think not.
Developing Your Color System
My system is embarrassingly simple:
- Blue: His stuff
- Pink: My stuff
- Green: Shared products
- White: Medical/First aid
You don’t need colored containers (though they help). Even colored labels or dots work. The point is instant visual recognition.
Making It Work for Everyone
Living with others means bathroom cabinet chaos multiplied. Color coding solved our daily “where’s my deodorant?” crisis. Now everyone knows: hands off the pink section unless you want to smell like vanilla orchid all day.
The Unexpected Benefits
Color coding revealed some shocking truths:
- We had four identical tubes of toothpaste open
- Someone (not naming names) was hoarding hotel shampoos
- The “shared” section was 90% my stuff
- We needed a dedicated “guest” section
Knowledge is power, and apparently, power is finally having an organized cabinet.
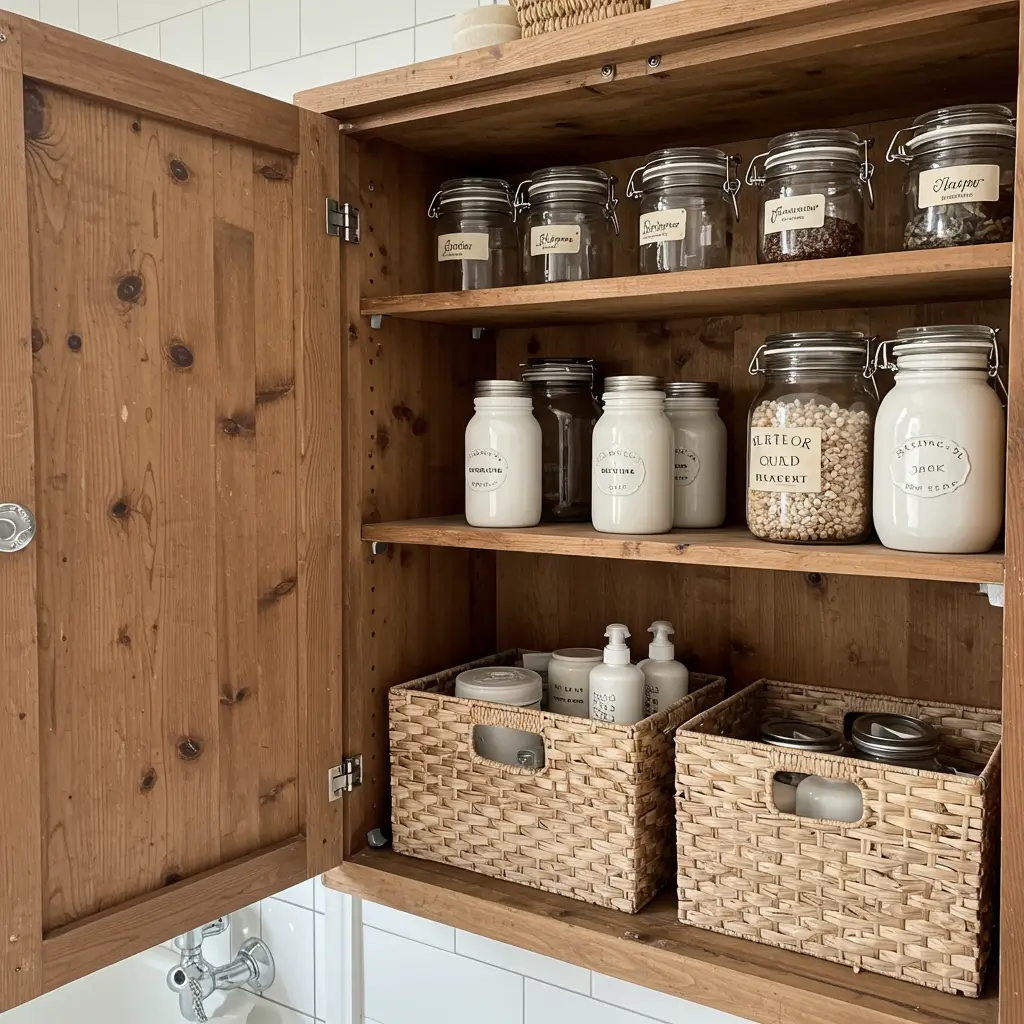
8. Repurposed Jars and Baskets Storage Ideas
Before you buy expensive organizers, raid your recycling bin. I’m serious. Some of my best organization solutions started life as pasta sauce jars and Amazon delivery boxes.
Jar Organization That Looks Intentional
Glass jars aren’t just for Pinterest crafters. They’re actually brilliant for bathroom storage:
- Tall jars for makeup brushes
- Short jars for cotton swabs
- Wide-mouth jars for bath salts
- Tiny jars for bobby pins (the Bermuda Triangle of hair accessories)
Remove labels with oil and baking soda, and suddenly that pickle jar looks like a $30 container from The Container Store.
Basket Weaving (Sort Of)
Small baskets are organizational gold. I use:
- Woven baskets for texture and warmth
- Wire baskets for easy cleaning
- Fabric baskets for flexibility
- Plastic baskets for under-sink moisture zones
The trick? Uniform baskets look expensive. Mismatched baskets look like you raided a garage sale. Choose your fighter.
Making Repurposed Look Purposeful
The difference between “creative organization” and “hoarding trash” is presentation. I spray painted all my repurposed jars matte black. Suddenly my spaghetti sauce jar collection looked like a designer storage system. Cost? $5 for spray paint. Impact? Priceless.
9. Over-the-Door Cabinet Organizer Tricks
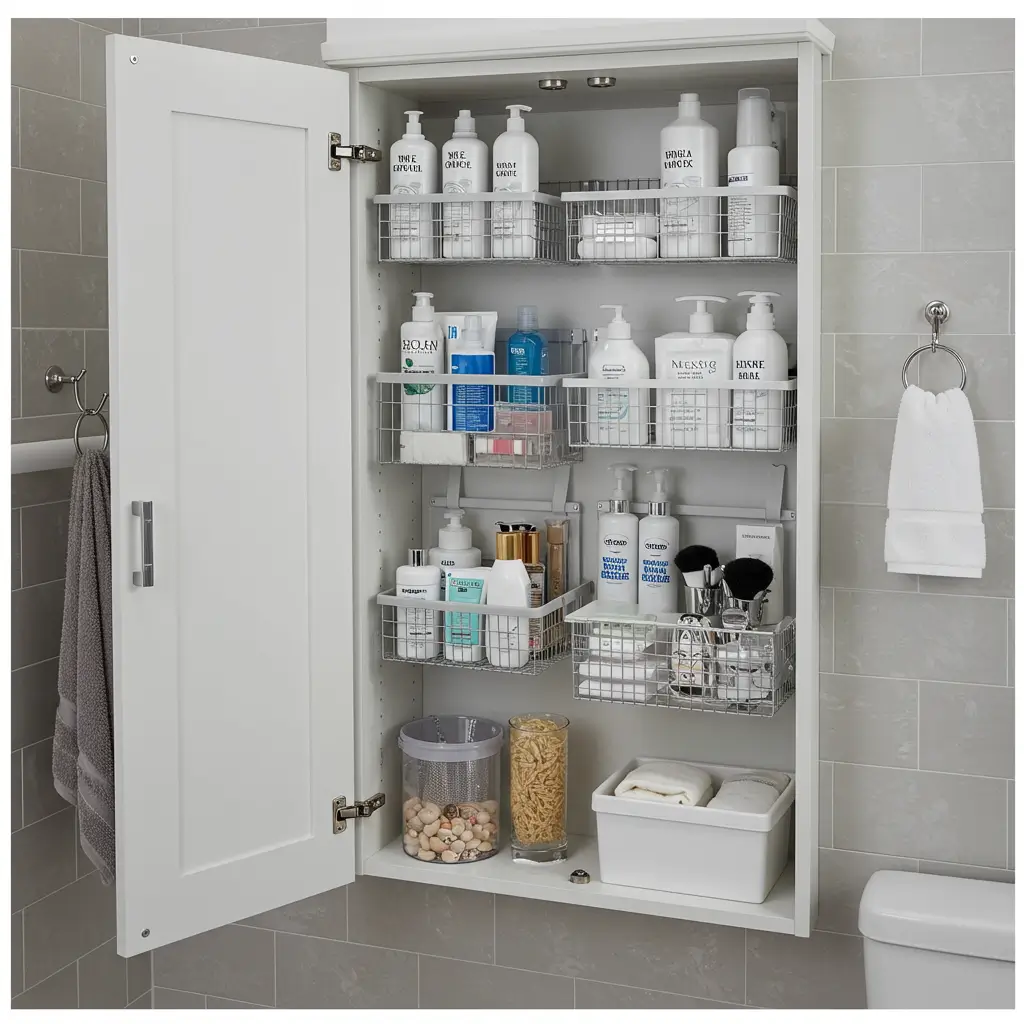
That space on the back of your cabinet door is begging to be used, yet most of us ignore it like vegetables at a birthday party. Time to change that.
Choosing Over-Door Solutions
Not all over-door organizers are created equal. I’ve tried:
- Wire racks (great but noisy)
- Plastic pockets (useful but ugly)
- Adhesive bins (perfect until they weren’t)
- Magnetic strips (game-changer for metal items)
The winner? A combination system using adhesive bins for products and magnetic strips for tools.
Installation Without Destruction
Renters, rejoice! Most over-door solutions don’t require drilling. Command strips are your best friend here, but follow the weight limits unless you want a 3 AM crash wake-up call.
My installation tips:
- Clean the door surface with rubbing alcohol first
- Wait 24 hours before adding weight
- Start with lighter items to test
- Have a backup plan (because physics happens)
Maximizing Door Space
Think strategically about door organization:
- Eye level: Daily items
- Top: Light, occasional items
- Bottom: Heavier, stable items
- Very bottom: Nothing (unless you like things falling when you open the door)
Also Read: 12 Gorgeous Small Cottage Bathroom Ideas and Space-Saving Tips
10. Hidden Storage for Small Bathroom Cabinets
Sometimes the best storage is the storage nobody sees. I’ve become a master of hidden storage, mainly because my bathroom cabinet is smaller than my expectations for adult life.
Secret Storage Spots
Places you’re not using (but should be):
- Behind products on deep shelves
- The dead space above the cabinet interior
- Corner gaps that seem useless
- That weird indent around plumbing
I added a tiny shelf in the dead space above my cabinet interior. It holds exactly three extra toilet paper rolls. Not glamorous, but incredibly satisfying.
Creating Hidden Compartments
DIY hidden storage is easier than you think:
- Magnetic containers on the cabinet ceiling
- Slim boxes behind visible products
- Hanging organizers on interior walls
- False bottoms in drawers (very spy movie, very practical)
The Psychology of Hidden Storage
Hidden storage serves two purposes: actual storage and psychological relief. Knowing you have backup supplies hidden away means you can maintain that minimalist aesthetic without the anxiety of running out of toilet paper at 2 AM.
11. Step-by-Step Cabinet Decluttering Guide
Let’s get real about decluttering. It’s not a one-time event—it’s a relationship. And like all relationships, it requires regular maintenance and occasional therapy (retail therapy counts, right?).
The Realistic Decluttering Timeline
Forget those “organize your entire bathroom in 30 minutes” lies. Here’s a realistic timeline:
- Hour 1: Pull everything out, have existential crisis
- Hour 2: Sort into keep, toss, donate, “why do I own this?”
- Hour 3: Clean cabinet, question life choices
- Hour 4: Put back only what you’re keeping
- Hour 5: Admire your work, swear to maintain it
The Four-Box Method
I use four boxes for decluttering:
- Keep: Things you actually use
- Relocate: Belongs elsewhere
- Donate: Good condition but not for you
- Trash: Self-explanatory
The secret fifth box? “Decide later”—but that’s just trash with commitment issues.
Maintaining Your Decluttered Space
The key to maintaining organization? Regular check-ins:
- Weekly: Quick tidy
- Monthly: Inventory check
- Seasonally: Mini declutter
- Yearly: Full reorganization
I set phone reminders because apparently, I need technology to remind me to adult properly.
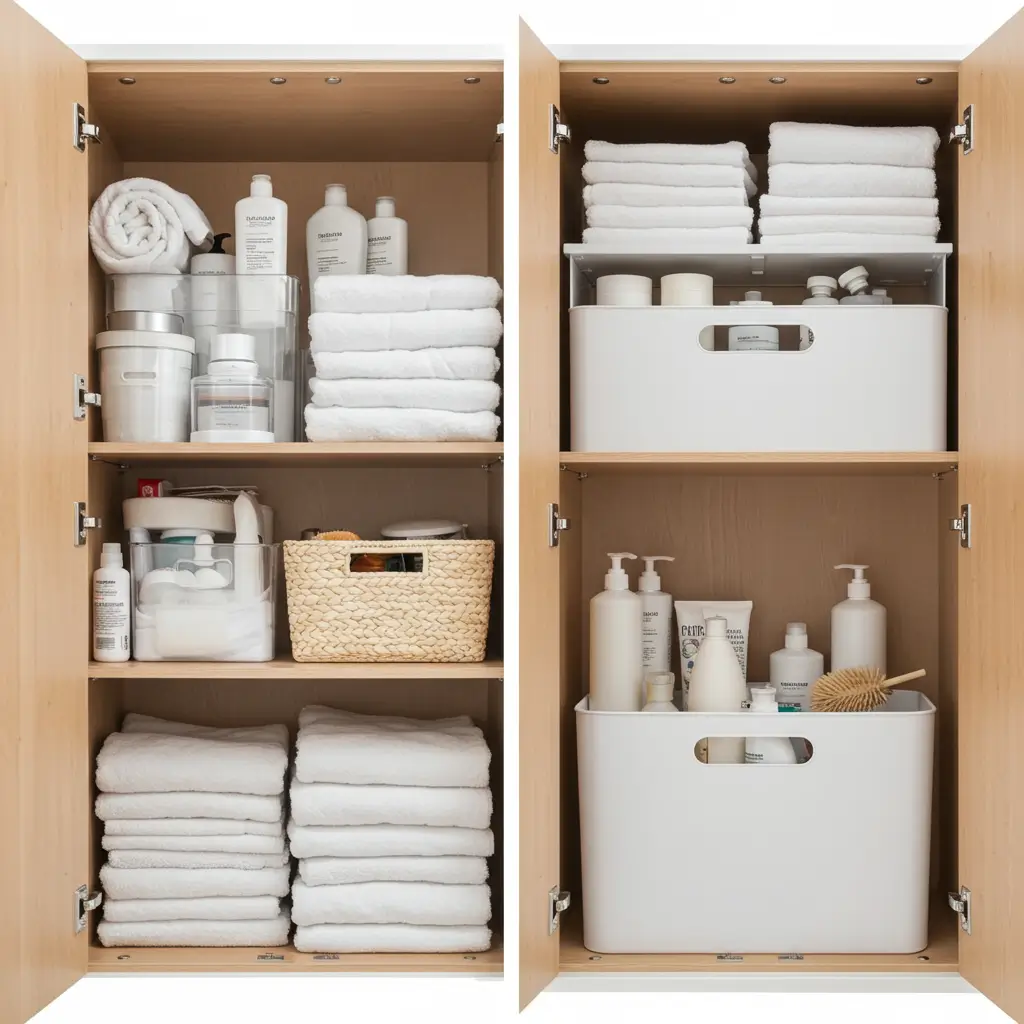
12. Stylish Cosmetic & Skincare Organization
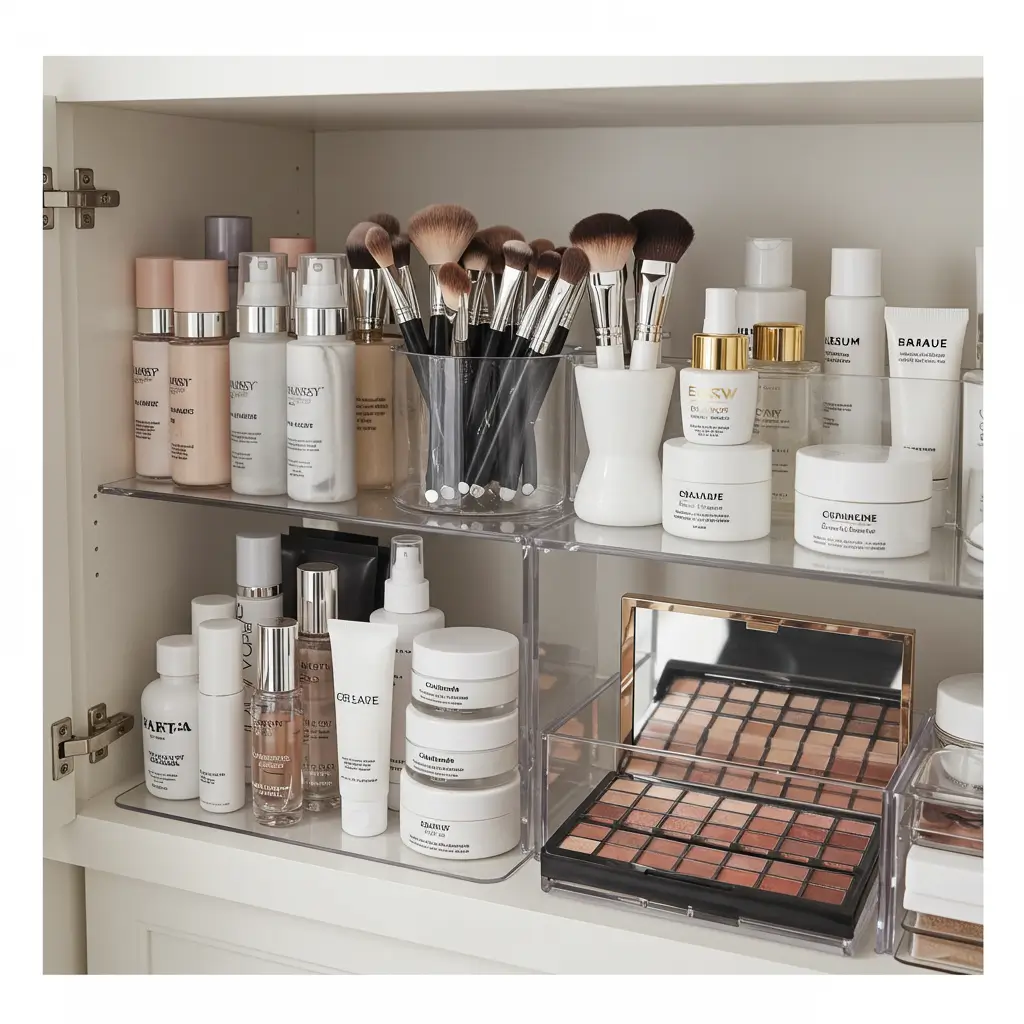
Your skincare routine might be 47 steps, but your organization doesn’t have to be complicated. After years of knocking over serums while reaching for moisturizer, I finally cracked the code to stylish and functional cosmetic organization.
The Skincare Station Setup
I created a dedicated skincare zone in my cabinet:
- Top shelf: Morning routine products
- Middle shelf: Evening routine products
- Bottom shelf: Weekly treatments and masks
Each shelf has a small acrylic tray. Products go back in the same spot every time. It’s like assigned seating, but for skincare.
Makeup Organization That Makes Sense
Organizing makeup by category seems logical until you’re doing your makeup half-asleep. Now I organize by routine order:
- Primer/base products
- Foundation/concealer
- Eye products
- Lip products
- Setting sprays/powders
Each category has its own container. No more digging through lipsticks to find eyeshadow primer.
The Expiration Date Reality Check
Cosmetics expire, people! I write purchase dates on products with a Sharpie. Unsexy? Yes. Preventing eye infections? Also yes. IMO, health trumps aesthetics when it comes to expired mascara.
Making Your Bathroom Cabinet Organization Stick
Here’s the truth bomb organization isn’t a destination, it’s a journey. A journey filled with expired products, mystery bottles, and the occasional victory dance when everything actually fits in your cabinet.
The secret to bathroom cabinet organization that actually lasts? Find systems that work with your laziness, not against it.
I’m never going to maintain a complex color-coded, alphabetized system. But basic zones and clear containers? That I can do.
Start with one idea from this list. Just one. Master it, live with it for a month, then add another. Before you know it, you’ll have a bathroom cabinet that makes you smile instead of sigh.
And honestly? That small victory every morning is worth all the effort.
Remember, your bathroom cabinet doesn’t need to look like a magazine spread. It needs to work for your actual life. Whether that means minimalist perfection or organized chaos, the best system is the one you’ll actually maintain.
Now excuse me while I go admire my beautifully organized cotton ball container—because celebrating small wins is what adulthood is all about!


