10 Genius Bathroom Organization Under Sink Ideas for Clean Spaces
- Bathroom Design
 Ben
Ben- 0
- 30 minutes read

Let me paint you a picture: you open your bathroom cabinet, and an avalanche of half-empty shampoo bottles, mystery cleaning products, and that hair dryer you forgot you owned comes tumbling out.
Sound familiar? The under-sink cabinet is basically the Bermuda Triangle of bathroom storage – stuff goes in and never comes out again.
I spent years playing Jenga with bottles every time I needed something from under my sink. Then I got serious about organization (okay, my partner threatened to throw everything out), and discovered some genuinely life-changing solutions.
These aren’t those Pinterest-perfect setups that require a trust fund and a label maker addiction – these are real organizing ideas that work in actual bathrooms.
Ready to transform that disaster zone into organized bliss? Let’s talk about 10 under sink organization ideas that’ll make you actually want to open that cabinet door.
1. Pull-Out Bins Around Sink Pipes

Those pipes under your sink aren’t just annoying – they’re storage saboteurs. But pull-out bins that work around pipes completely change the game. I discovered these bad boys after knocking over the same bottle of toilet bowl cleaner for the hundredth time.
The genius of pull-out bins lies in their design. They slide on rails that mount to your cabinet walls, bringing everything forward when you pull them out. No more blindly reaching into the back corners or doing that awkward squat-and-reach move we all know too well.
Why Pull-Out Bins Beat Everything Else
Here’s what makes them brilliant:
• Custom configurations that fit around any pipe layout
• Full extension slides that bring everything into view
• Removable bins for easy cleaning when things inevitably spill
• Adjustable dividers to keep bottles from playing dominoes
I installed a two-tier pull-out system last year, and honestly? It’s the best $40 I’ve ever spent on bathroom organization. The top bin holds daily stuff like face wash and toothpaste, while the bottom handles cleaning supplies. Everything stays put, nothing falls over, and I can actually see what I have.
The installation takes about 20 minutes if you can use a drill. Can’t drill into your cabinets? Some versions use heavy-duty adhesive strips that actually work (shocking, I know).
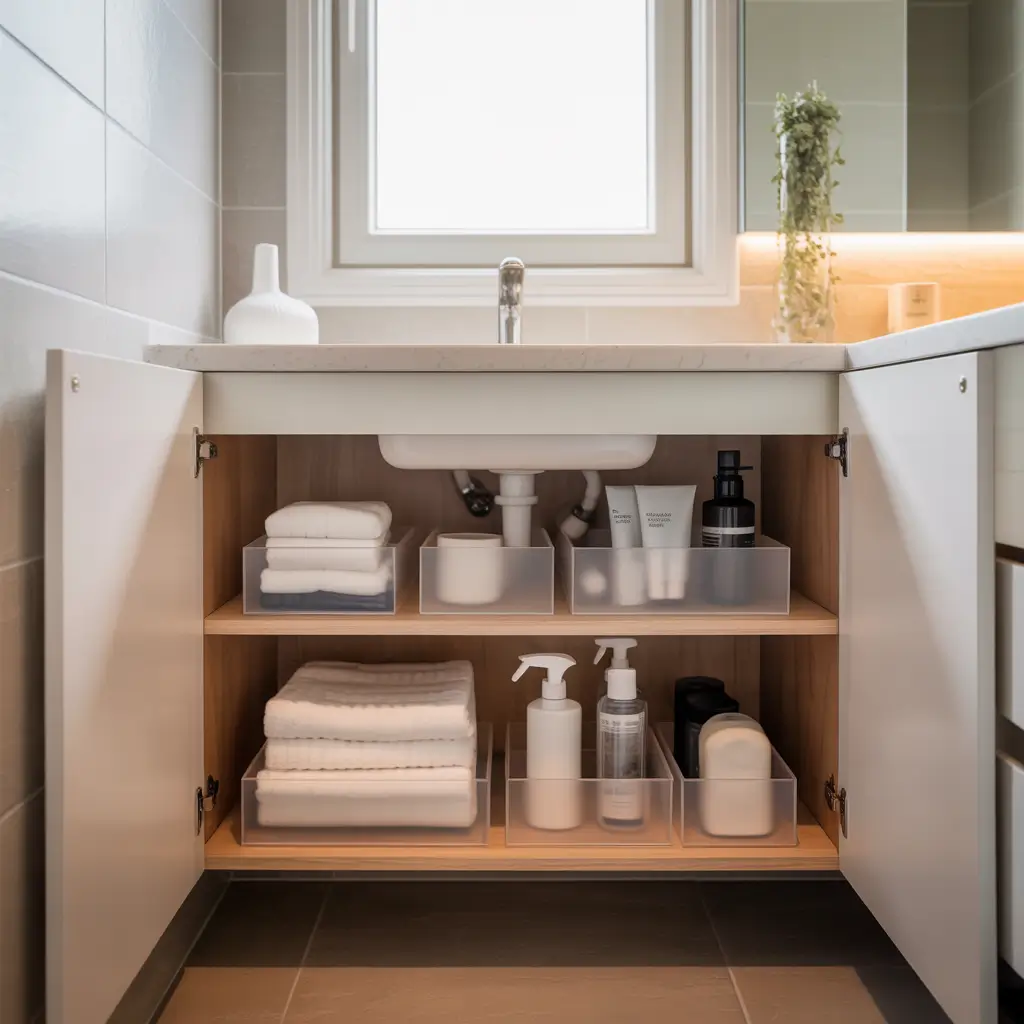
2. Stackable Clear Drawer System
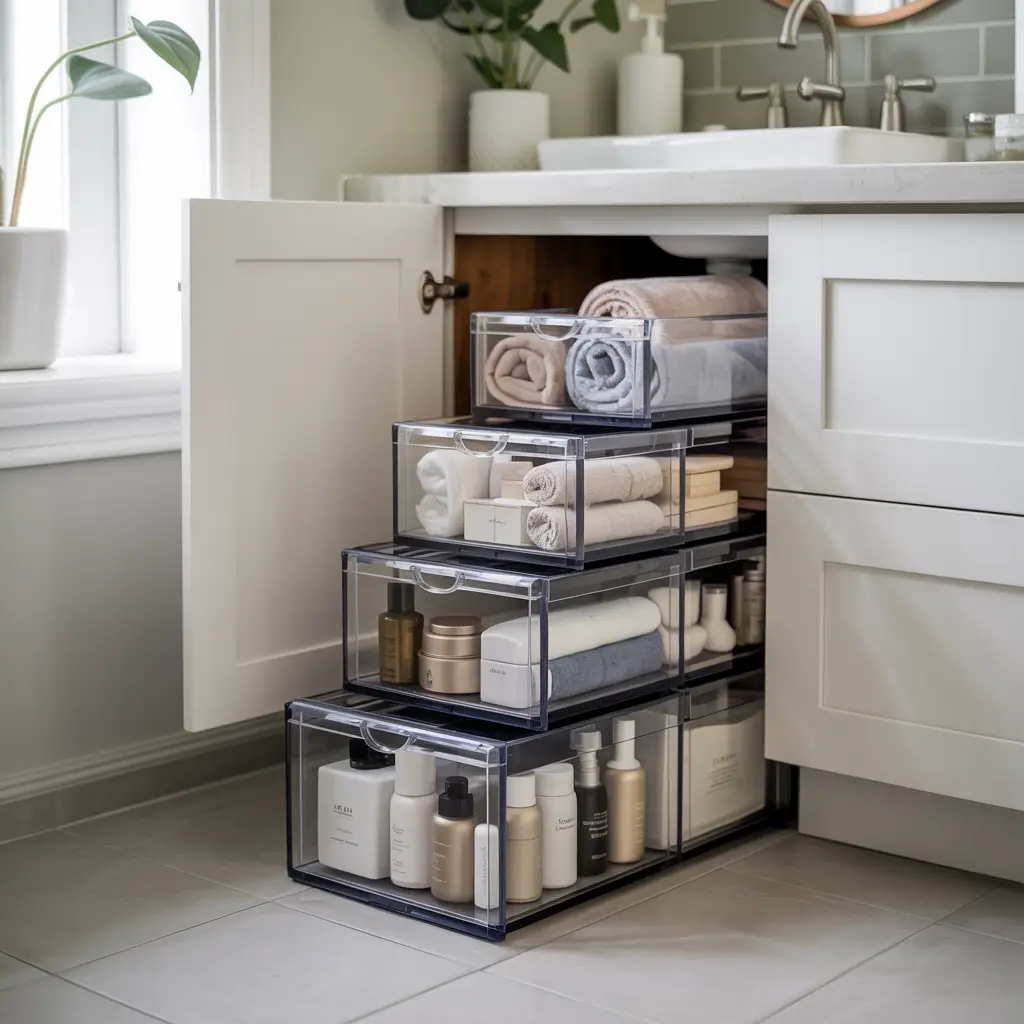
You know what’s revolutionary? Being able to see everything you own without moving a single thing. Clear stackable drawers make this dream a reality, and they’re basically organization magic.
I stumbled onto these while desperately searching for a solution that didn’t require construction skills. These drawers just stack on top of each other – no tools, no mounting, no commitment issues. The clear plastic means you can spot that specific hair product without disturbing the entire ecosystem under your sink.
Making Stackable Drawers Work For You
The trick to stackable drawers is thinking vertically. Most under-sink spaces have tons of wasted vertical room that we ignore because we’re too busy cramming things horizontally. Stack three or four drawer units, and suddenly you’ve tripled your storage.
What goes where in my setup:
• Top drawer: Daily essentials (deodorant, face cream, contacts)
• Middle drawer: Hair stuff (because let’s be real, it multiplies)
• Bottom drawer: Backup products and travel sizes
• Floor level: Cleaning supplies in their own contained drawer
The best part? When you need to deep clean, you just pick up the whole stack and move it. No unloading required. Plus, these drawers cost about $8 each at most stores, making this solution budget-friendly AF.
3. Tension Rod Cleaning Spray Holder

This might be the simplest hack on this list, but don’t let that fool you. A single tension rod transforms wasted vertical space into prime storage real estate. I learned this trick from my mom, who’s basically the MacGyver of organization.
Install a tension rod toward the front of your cabinet, and suddenly all those spray bottles have a home. Hang them by their triggers, and they’re not taking up any shelf space. It’s so obvious once you see it, but most of us never think of it.
The Tension Rod Setup That Changes Everything
Here’s how to maximize this simple solution:
• Position the rod about 1/3 back from the cabinet opening – far enough to close the door but close enough to reach easily
• Choose a rod with rubber ends to prevent slipping
• Organize bottles by frequency of use – daily cleaners in front
• Leave space between bottles so they don’t knock into each other
Want to level this up? Install two rods at different heights. The front rod holds frequently used items, while the back rod stores those once-a-month products. Just make sure your cabinet is deep enough – learned that one the hard way :/
Also Read: 12 Modern Pedestal Sink Bathroom Ideas for Apartments
4. Sliding Basket Organizer Cabinet

Remember those old-school filing cabinets with hanging folders? Someone genius-ified that concept for bathroom storage, and sliding basket organizers were born. These babies make accessing under-sink items feel almost luxurious.
I discovered sliding baskets during a midnight Amazon shopping spree (we’ve all been there), and they’ve completely changed how I organize. The baskets glide on smooth rails, bringing everything forward with a gentle pull. No more losing things in the black hole at the back of the cabinet.
Why Sliding Baskets Win
The beauty of sliding baskets lies in their versatility:
• Wire baskets for easy visibility
• Different heights to accommodate various products
• Removable baskets for restocking or cleaning
• Adjustable rails to fit different cabinet widths
My current setup uses three sliding baskets. The shallow top basket holds everyday items like makeup remover and cotton balls. The medium basket manages hair tools and products. The deep bottom basket corrals all those cleaning supplies that used to live in chaos.
Pro tip: Line the baskets with shelf liner to prevent small items from falling through the wire. It also makes cleaning up spills way easier – just remove and rinse.
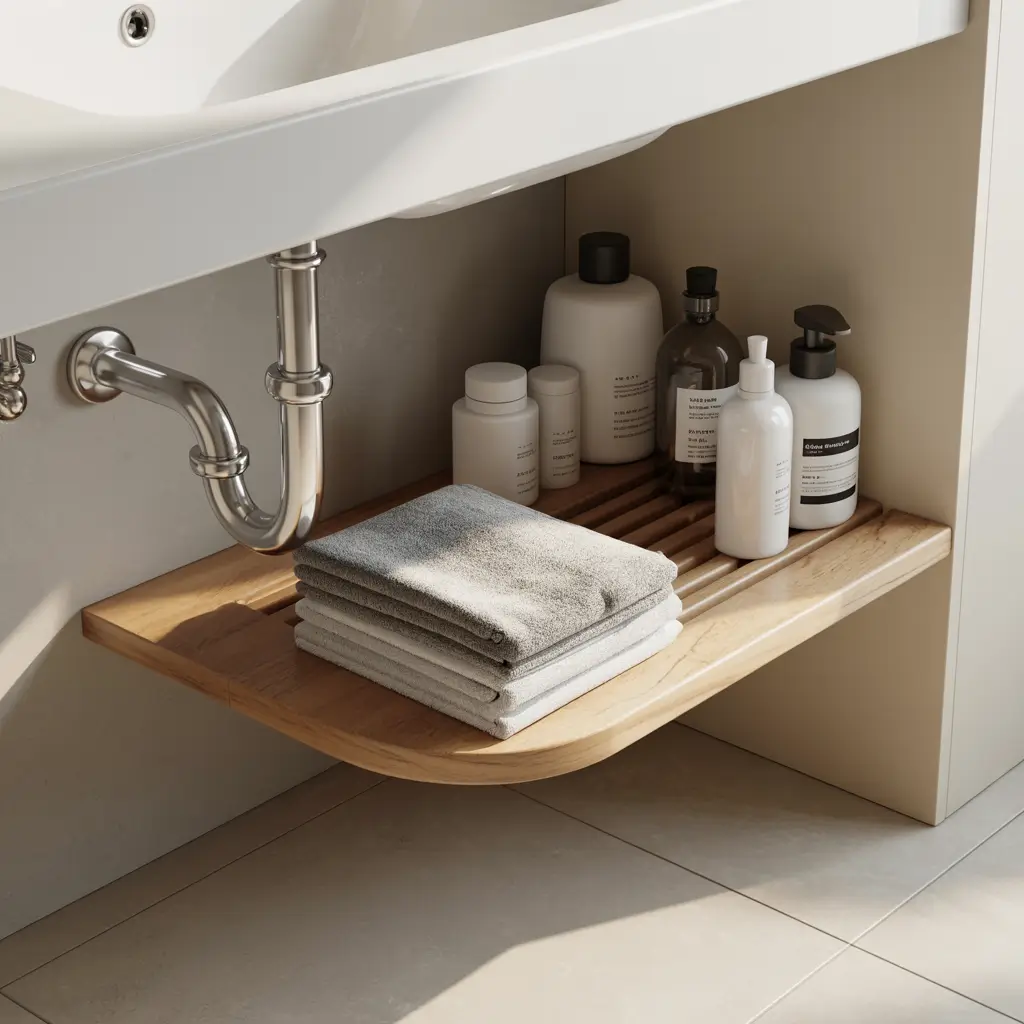
5. Tiered Shelf Pipe-Friendly Organizer

Those U-shaped shelves designed to fit around pipes? They’re the unsung heroes of under-sink organization. These tiered organizers turn that awkward pipe situation from a storage nightmare into an actual advantage.
I fought with my under-sink pipes for years, trying to arrange bottles around them like some frustrating game of Tetris. Then I found tiered pipe-friendly shelves, and everything clicked. These shelves embrace the pipes rather than fighting them.
Maximizing Tiered Shelf Space
Here’s what makes these organizers work:
• Multiple tiers create distinct zones for different items
• Expandable width to fit various cabinet sizes
• Non-slip feet keep everything stable
• Open design prevents water damage from minor leaks
The key to success with tiered shelves is grouping similar items on each level. My top shelf holds daily skincare, middle shelf manages hair products, and the bottom stays reserved for backup supplies. This system means I’m never digging through layers to find what I need.
Want to make these even better? Add small bins or containers on each shelf level. They prevent roll-offs and make it easy to pull out entire categories when needed.
6. Labeled Minimal Storage Zones
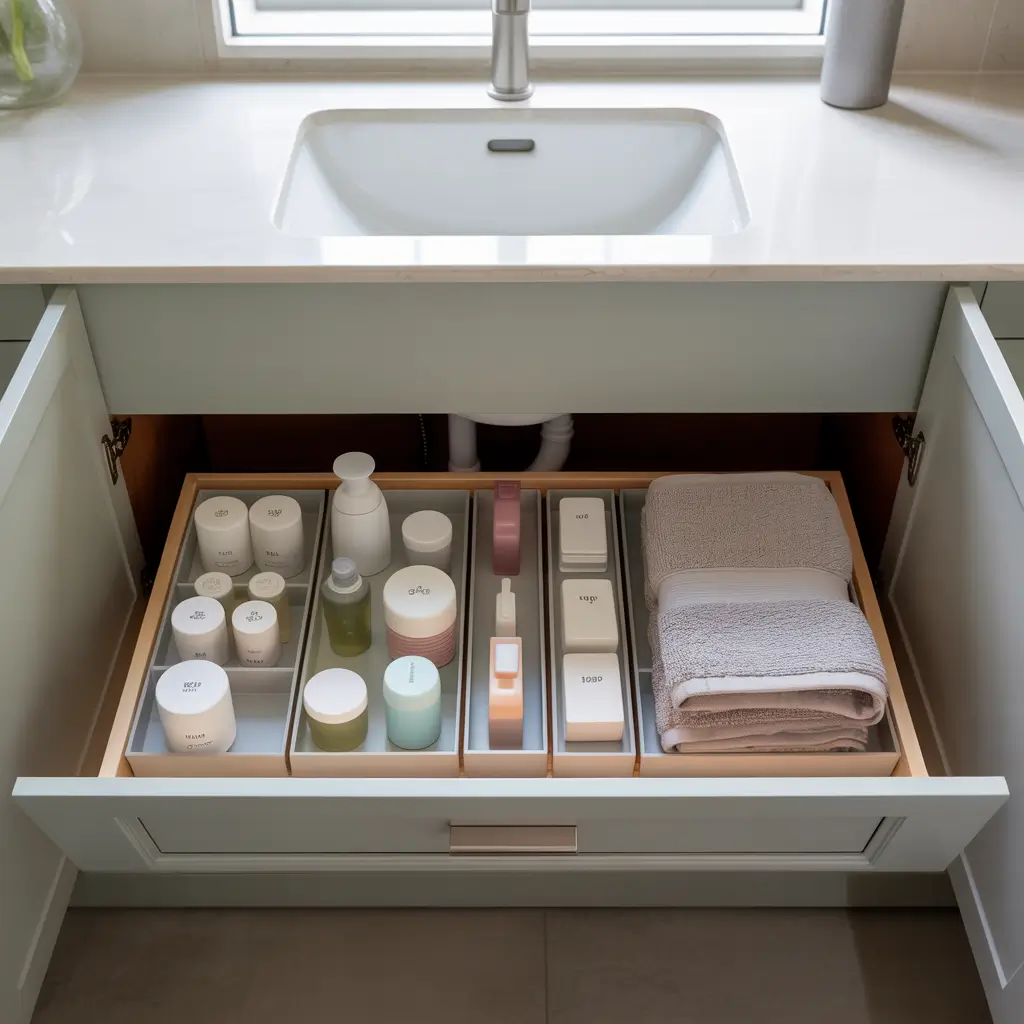
Okay, hear me out on the labels thing. I know it seems extra, but creating defined zones with labels actually trains your brain (and everyone else’s) to put things back where they belong. It’s psychology meets organization, and it works.
I resisted labels for years because they felt too Type-A for me. Then I realized I was spending 10 minutes every morning looking for the same things. Three hours with a label maker later, my mornings became infinitely smoother.
Creating Zones That Make Sense
The trick to zones is keeping them logical and minimal:
• Daily Zone: Everything you touch every single day
• Weekly Zone: Hair masks, deep conditioners, specialty treatments
• Stock Zone: Backups and bulk buys
• Cleaning Zone: All the bathroom cleaning supplies
Each zone gets its own container or section, clearly labeled so there’s no confusion. My zones aren’t Pinterest-perfect – I literally used masking tape and a Sharpie for some labels. But you know what? They work.
The minimal part is crucial. Don’t create 15 micro-zones that nobody will remember. Keep it simple, keep it logical, and watch how quickly everyone (including you) starts maintaining the system.
Also Read: 10 Beautiful Double Sink Bathroom Vanity Ideas for Family Bathrooms
7. Lazy Susan Under Sink Setup
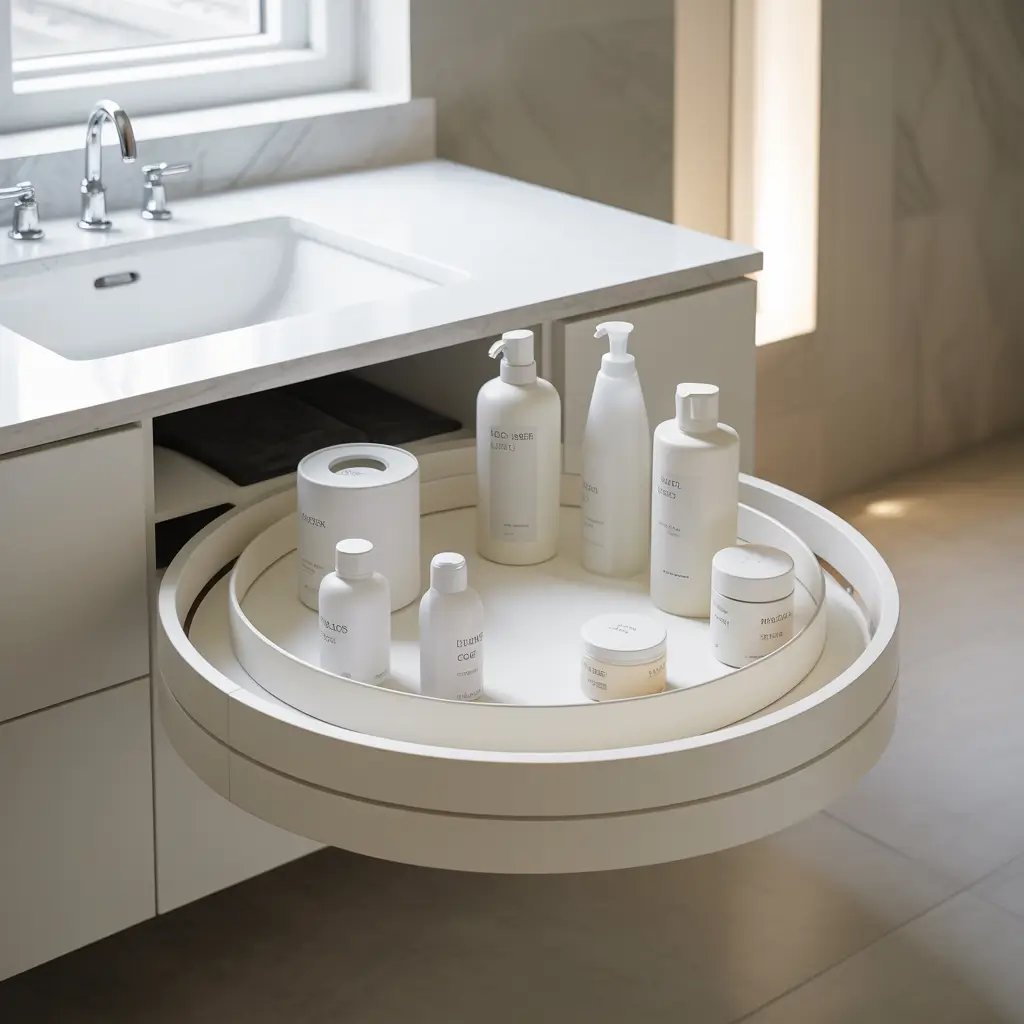
Who decided Lazy Susans were just for kitchens? These spinning wonders solve the eternal under-sink problem of losing things in back corners. One spin, and everything comes into view.
I added a Lazy Susan to my guest bathroom on a whim, mostly because I found one on clearance. Best impulse buy ever. That spinning motion means nothing gets forgotten in the depths of the cabinet.
Making Lazy Susans Work in Tight Spaces
Here’s how to optimize your spinning storage:
• Choose the right size – measure your cabinet and leave 2 inches clearance
• Use two smaller ones instead of one large if you have pipes
• Add dividers or small containers to prevent sliding
• Stick to similar-height items for easy access
My Lazy Susan setup is simple but effective. One holds all my face products (arranged from cleanser to moisturizer clockwise, because yes, I’m that person now). The other manages medications and first aid supplies – super handy when you need something quickly.
FYI, not all Lazy Susans are created equal. Get one with raised edges to prevent the great bottle avalanche of 2023 (still recovering from that one).
8. Adjustable U-Shaped Shelf Organizer
U-shaped organizers that adjust to fit around pipes are basically the Swiss Army knife of under-sink storage. They expand, contract, and configure to work with whatever weird plumbing situation you’re dealing with.
I’ve lived in five different apartments, and each one had completely different under-sink configurations. My adjustable U-shaped organizer has moved with me through all of them. It’s like the friendship that survives despite distance and time – reliable, adaptable, and always there when you need it.
Getting the Most from U-Shaped Organizers
The secret to these organizers is proper adjustment:
• Measure your pipe configuration first – don’t eyeball it
• Adjust width before loading – easier than fighting with full shelves
• Use shelf liners to prevent sliding
• Leave breathing room around pipes for maintenance access
My current setup has the organizer expanded to its full width, creating two distinct storage areas on either side of the pipes. Left side holds skincare, right side manages hair care. The shelf on top bridges both sides with smaller items in containers.
These organizers typically run $15-30, and honestly? They’re worth every penny for the sanity they provide.
9. Dollar Store Modular Bin Hack

Let’s talk about my favorite discovery: you can create a completely custom organization system for under $20 using dollar store bins. No joke, this hack transformed my main bathroom without destroying my budget.
I started with ten plastic bins from the dollar store (yes, literally $1 each) and created a modular system that rivals those expensive custom solutions. The key is buying all the same type so they stack and fit together perfectly.
Building Your Dollar Store System
Here’s the blueprint for budget organization:
• Measure your cabinet carefully before shopping
• Buy bins in 2-3 sizes max for consistency
• Stick to one color for a cohesive look
• Add contact paper or labels for that finished feel
My system uses six small bins and four medium ones. Small bins hold categories like dental care, skincare, and medications. Medium bins manage larger items like hair tools and backup products. Everything fits together like puzzle pieces.
The best part about this hack? You can reconfigure anytime. Need more space for cleaning supplies? Swap bin sizes. Found a new skincare routine? Dedicate a new bin. Total flexibility for basically no money 🙂
Also Read: 10 Creative Bathroom Sink Ideas and Small Bathroom Solutions
10. Waterproof Under Sink Storage System
Real talk: under-sink leaks happen. Whether it’s a dripping pipe or a knocked-over bottle, moisture is the enemy of organization. That’s why waterproof storage systems are absolutely worth the investment.
I learned this lesson the hard way when a small leak ruined everything stored under my sink, including the particleboard cabinet bottom. Now I use waterproof bins and mats religiously, and my stress levels thank me.
Creating a Leak-Proof Setup
Here’s how to protect your stuff and your sanity:
• Start with a waterproof mat covering the entire cabinet floor
• Use plastic or rubber bins exclusively – no fabric or cardboard
• Elevate everything slightly with wire shelving or risers
• Keep absorbent materials like towels in sealed containers
My waterproof system includes a thick rubber mat (like a heavy-duty door mat), plastic bins with lids for anything valuable, and open wire baskets for things that can get wet without drama.
IMO, the $30-40 you spend on waterproofing is insurance against much bigger headaches. Plus, cleanup becomes infinitely easier when you can just wipe everything down without worrying about water damage.
Quick Tips for Waterproof Success
Don’t forget these crucial details:
• Check for existing water damage before organizing
• Leave space around pipes for air circulation
• Use clear bins so you can spot leaks quickly
• Add moisture absorbers to prevent mildew
Making Your Under-Sink Organization Last
So there you have it – 10 ways to turn that under-sink disaster into an organized oasis. The best part?
You don’t need to implement all of these ideas at once. Start with one solution that addresses your biggest pain point.
For me, the pull-out bins were game-changing because I was tired of knocking things over. For you, it might be the tension rod that finally gives those spray bottles a home.
The key is starting somewhere and building from there.
Remember, the best organization system is the one you’ll actually use. Don’t create something so complex that maintaining it becomes another chore. Keep it simple, keep it functional, and adjust as your needs change.
Here’s my challenge to you: pick one idea from this list and implement it this weekend. Just one. That single change will motivate you to tackle more, and before you know it, you’ll have an under-sink area that actually makes sense.
And hey, when you finally achieve that organized under-sink nirvana? Take a picture. Not for social media (unless that’s your thing), but to remind yourself that you conquered the chaos.
Because if you can organize under your bathroom sink, honestly, you can organize anything.


