10 Beautiful Bathroom Vanity Makeover Ideas on a Budget
- Bathroom Design
 Ben
Ben- 0
- 32 minutes read
Staring at your outdated bathroom vanity and Googling “bathroom renovation costs” was your first mistake. Seeing those five-figure estimates was probably your second.
But here’s the truth nobody tells you: you don’t need to replace your entire vanity to make it look like you did. Sometimes a good makeover beats a full replacement every single time.
I learned this the hard way after getting a $4,000 quote to replace my perfectly functional but tragically ugly oak vanity. Instead, I spent $200 and one weekend transforming it into something that makes guests ask where I bought it.
Three vanity makeovers later (mine, my sister’s, and my best friend’s), I’ve figured out which transformations deliver maximum impact with minimum pain.
These ten bathroom vanity makeover ideas range from weekend projects to slightly-more-involved renovations, but all of them cost a fraction of replacement prices.
Whether your vanity is dated, damaged, or just boring, one of these makeovers will breathe new life into it without requiring a second mortgage.
Rustic Farmhouse Vanity Makeover

The farmhouse makeover turns basically any vanity into something Joanna Gaines would approve of. This transformation works especially well on dated oak or pine vanities that are structurally sound but aesthetically challenged.
My sister’s 1990s honey oak vanity was screaming for retirement until we gave it the farmhouse treatment. We sanded it lightly, painted it soft white, added shiplap panels to the sides, and swapped the brass handles for oil-rubbed bronze. The whole project cost $180 and took one weekend. Now her bathroom looks like it belongs on Pinterest instead of a time capsule.
The key to farmhouse makeovers is mixing rustic elements with clean, simple lines. You’re not creating a barn bathroom – you’re adding warmth and character. Think distressed paint finishes, natural wood accents, and vintage-inspired hardware.
Essential Farmhouse Makeover Elements
Creating authentic farmhouse style:
- Paint in warm whites or soft grays – skip stark white
- Add shiplap or beadboard details to sides or drawer fronts
- Distress edges lightly for worn, lived-in character
- Install farmhouse-style hardware – cup pulls or bin pulls
- Consider a vessel sink or apron-front basin if replacing
The beauty of farmhouse style is its forgiving nature. Small imperfections and variations actually enhance the aesthetic. If you’ve never tackled a furniture makeover, this is your starting point.
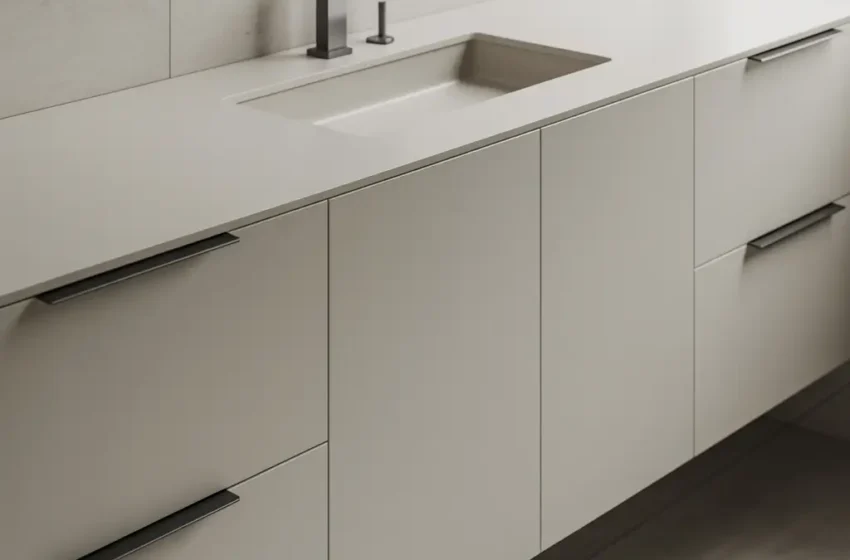
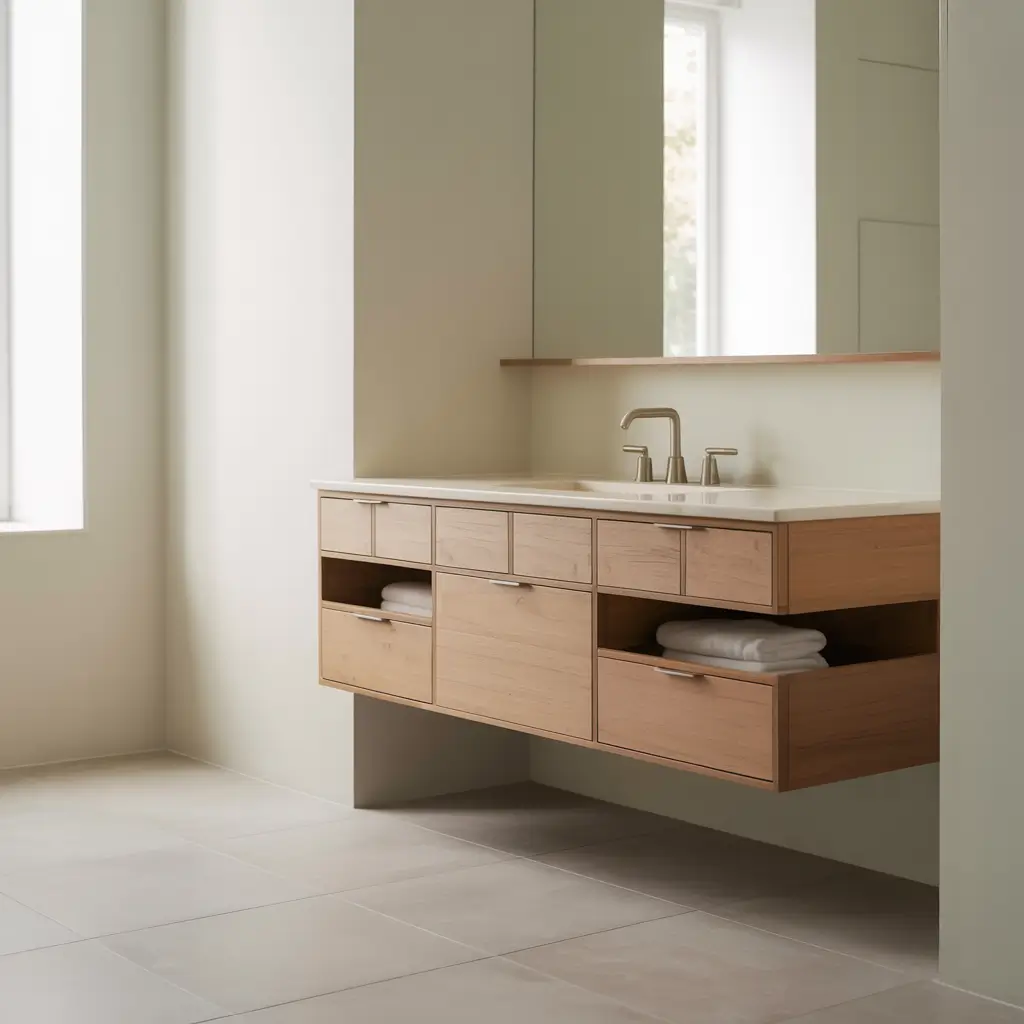
Modern Minimalist Vanity Transformation
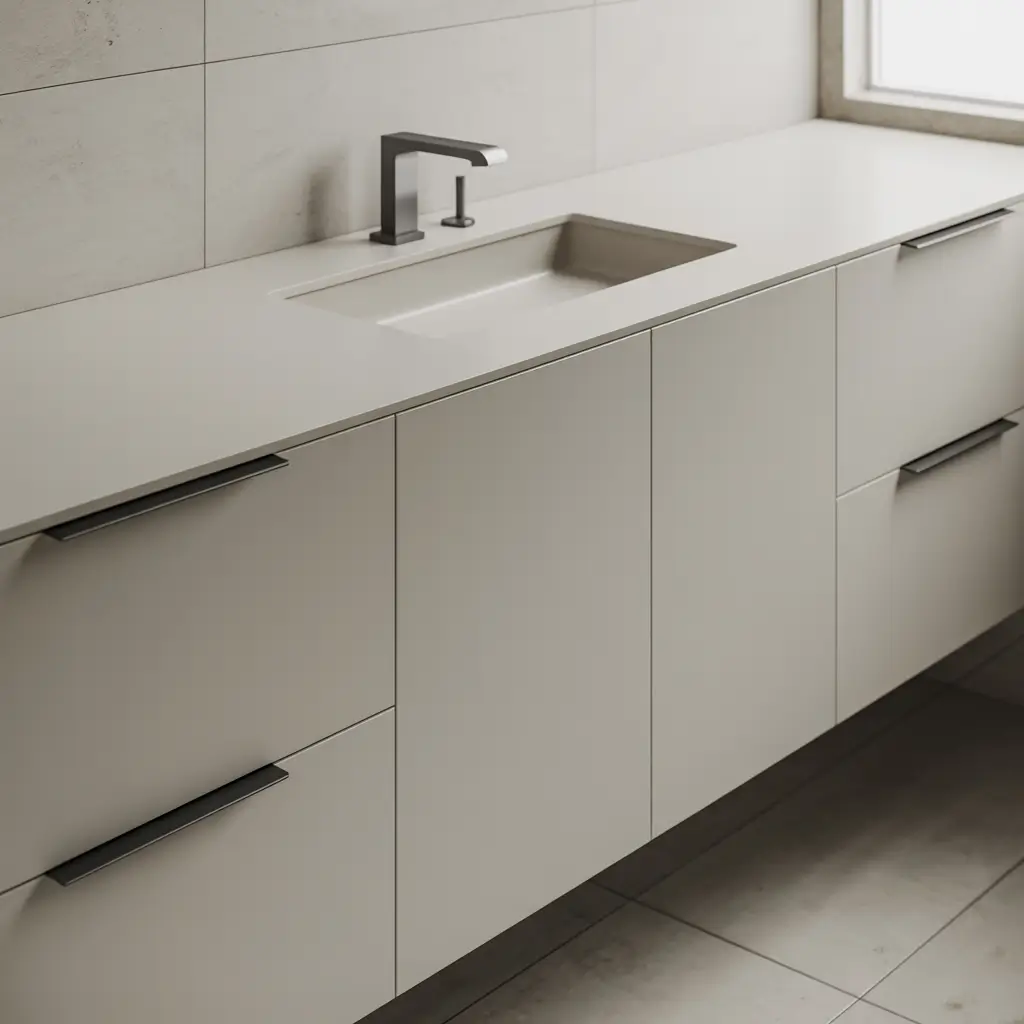
Modern minimalist makeovers strip away everything unnecessary, leaving clean lines and functional beauty. This approach works particularly well on builder-grade vanities with simple profiles that just need refinement.
I transformed my powder room vanity into a minimalist dream by removing the cabinet doors entirely, painting everything matte black, and installing a white vessel sink. Added some geometric shelf brackets inside for towel storage, and suddenly my basic vanity looked like something from a design blog. Total cost: under $150.
The minimalist transformation relies on reduction rather than addition. You’re removing ornate hardware, eliminating busy details, and creating visual calm through simplicity.
Minimalist Makeover Strategy
Creating clean, modern lines:
- Remove unnecessary hardware – consider push-to-open mechanisms
- Paint in monochromatic colors – black, white, or gray
- Eliminate ornate details – sand down decorative trim
- Choose integrated or vessel sinks for clean profiles
- Hide all toiletries – open counters are essential
This makeover requires discipline. You need excellent storage solutions because minimalism shows every item left on the counter. But the serene result makes the organizational effort worthwhile.
DIY Painted Vanity Refresh
Sometimes all your vanity needs is a fresh coat of paint in the right color. This is the fastest, cheapest, and most dramatic transformation you can do. One weekend, one can of paint, completely different bathroom.
My first vanity makeover was pure paint – took my boring builder-beige vanity to navy blue. The color transformation was so dramatic that people thought I’d replaced the entire thing. I spent $45 on quality paint and primer, and suddenly my bathroom had personality.
The trick to painted vanity success is proper preparation and quality paint. Skip these steps and you’ll watch your beautiful new color chip off in sheets. Don’t ask how I know this from my second vanity attempt.
Painting Vanities That Last
Getting professional results:
- Clean thoroughly – grease and grime prevent adhesion
- Sand everything – 220-grit creates tooth for paint
- Prime properly – especially over stained wood
- Use bathroom-specific paint – moisture resistance matters
- Apply thin coats – multiple thin beats one thick
Color choice changes everything here. Bold colors create focal points, neutrals blend seamlessly, and unexpected shades add personality. Test samples in your actual bathroom lighting before committing.
Also Read: 12 Stylish Green Bathroom Vanity Ideas and Trendy Layouts
Elegant Marble Top Upgrade
Keeping your vanity cabinet but upgrading to a marble countertop transforms the entire piece from builder-grade to custom luxury. This is where you splurge for maximum impact.
I kept my perfectly functional vanity base but replaced the cultured marble top with genuine Carrara marble. The natural stone elevated everything – suddenly my mediocre vanity looked expensive. The marble cost $400 (remnant from a fabricator), but it completely transformed the bathroom’s feel.
Marble upgrades work best when your cabinet structure is solid but the top is dated or damaged. You’re essentially giving your vanity a luxury hat that makes everyone forget about the budget body underneath.
Marble Top Upgrade Options
Choosing and installing stone tops:
- Check fabricators for remnants – small vanities use leftover pieces
- Consider marble alternatives – quartz looks similar, needs less maintenance
- Measure precisely – stone cutting is expensive to fix
- Hire professionals for installation – this isn’t DIY territory
- Plan for sealing – marble requires regular maintenance
The marble upgrade costs more than most makeovers but less than full replacement. Plus, you can DIY the cabinet refresh and splurge where it shows most.
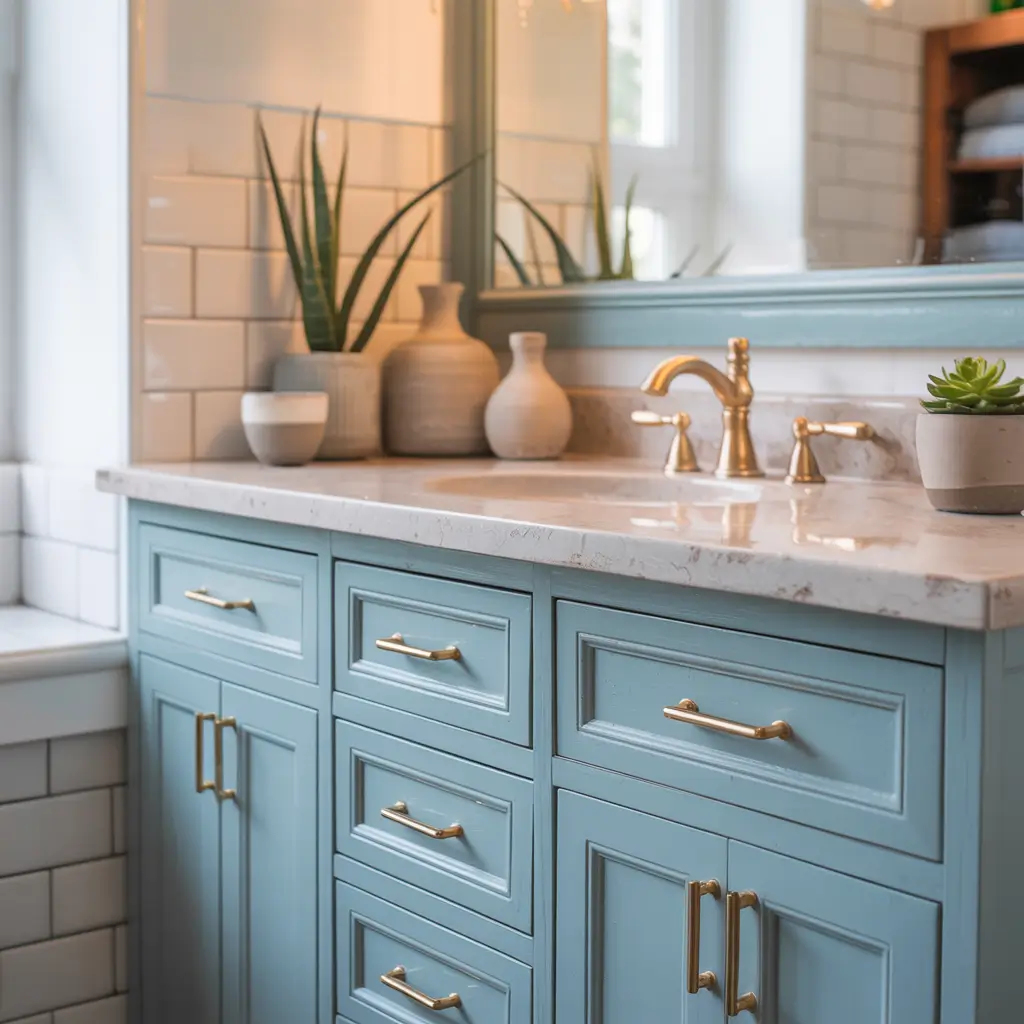
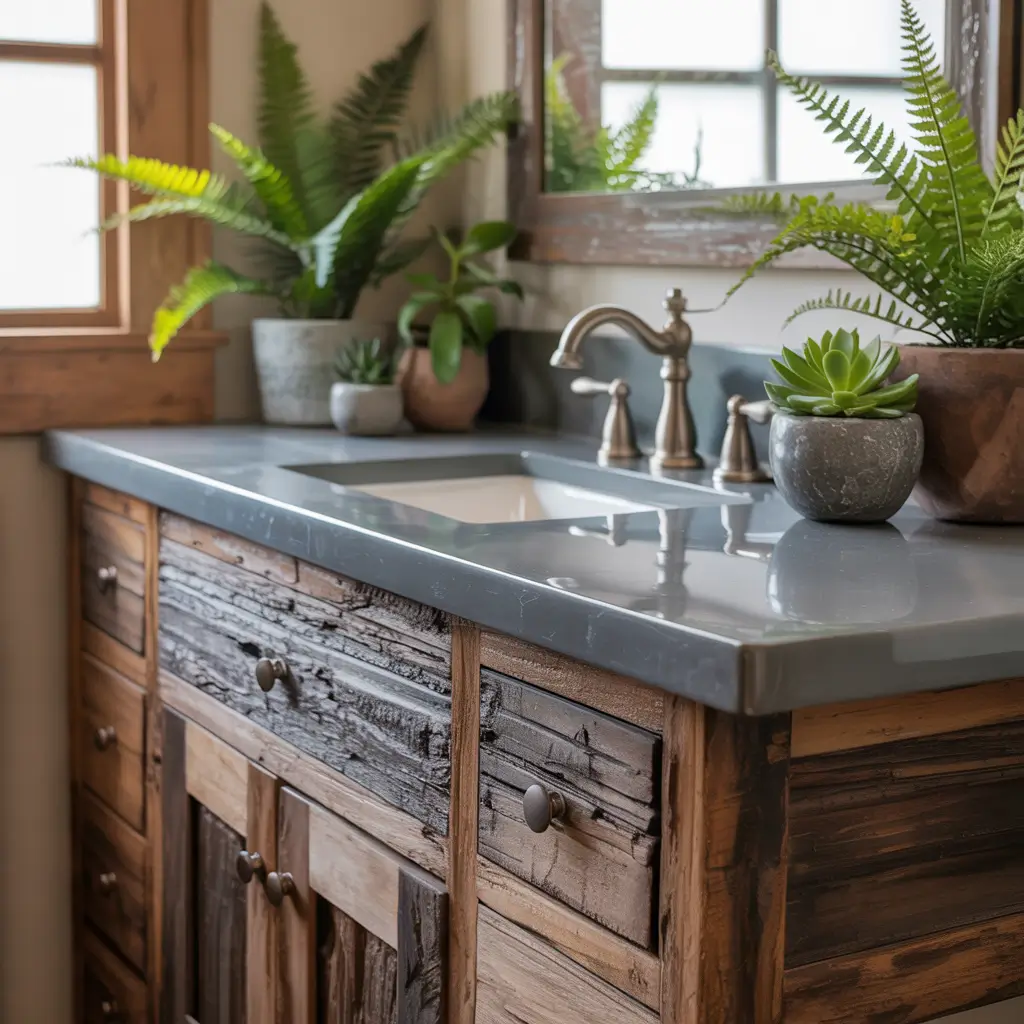
Coastal Beach-Inspired Vanity Ideas

The coastal makeover brings beach house vibes to any bathroom, regardless of your proximity to actual water. This transformation works through color, texture, and hardware choices.
My beach house rental needed a bathroom update on a tight budget. I painted the vanity weathered gray, added rope drawer pulls, swapped the boring mirror for a driftwood-framed one, and installed sea glass-colored drawer liners. The whole makeover cost $175 and made the bathroom feel like a seaside retreat.
Coastal transformations rely on soft, water-inspired colors and natural textures. You’re creating a relaxed, vacation vibe without literally decorating with seashells (please don’t do that).
Beach-Inspired Makeover Elements
Creating coastal without kitsch:
- Paint in weathered gray, soft blue, or sandy beige
- Add rope or jute details – drawer pulls, mirror accents
- Install nautical-inspired hardware – but keep it subtle
- Consider whitewashing wood for driftwood effect
- Include glass or ceramic elements in sea glass colors
The key is restraint. One or two coastal elements create atmosphere; too many create a theme restaurant bathroom. Aim for sophisticated seaside, not souvenir shop.
Vintage Vanity Revival
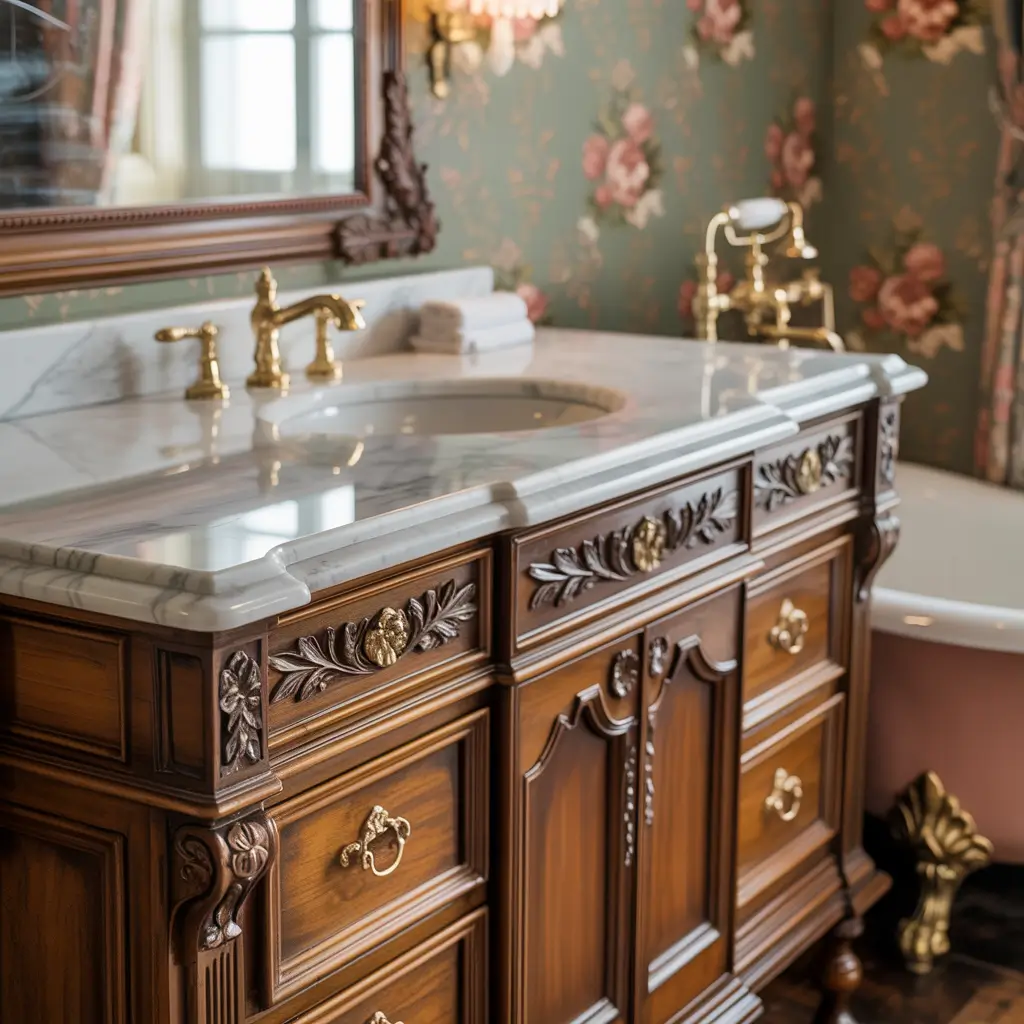
Vintage revivals bring old-world charm to dated vanities through careful updates that enhance rather than hide their age. This works spectacularly on solid wood vanities from the ’50s through ’80s.
I found a 1960s vanity on Facebook Marketplace for $30 that the seller called “outdated junk.” Cleaned it, restored the original finish, replaced one broken drawer pull with a matching vintage find, and added a marble top. Now it’s the star of my guest bathroom, and everyone wants to know its provenance.
Vintage makeovers require respecting the original design while updating function. You’re preserving character, not creating it from scratch.
Vintage Revival Techniques
Honoring original character:
- Restore original finishes when possible – stripping and refinishing
- Preserve or replicate original hardware – vintage pieces add authenticity
- Update only what’s necessary – plumbing, lighting, damaged parts
- Highlight period details – carved elements, unique proportions
- Pair with period-appropriate fixtures – vintage-style faucets
FYI, vintage revivals take more time than other makeovers because you’re working with the piece’s history, not against it. But the unique result can’t be replicated with new pieces 🙂
Also Read: 10 Modern Small Bathroom Vanity Ideas for Minimalist Style
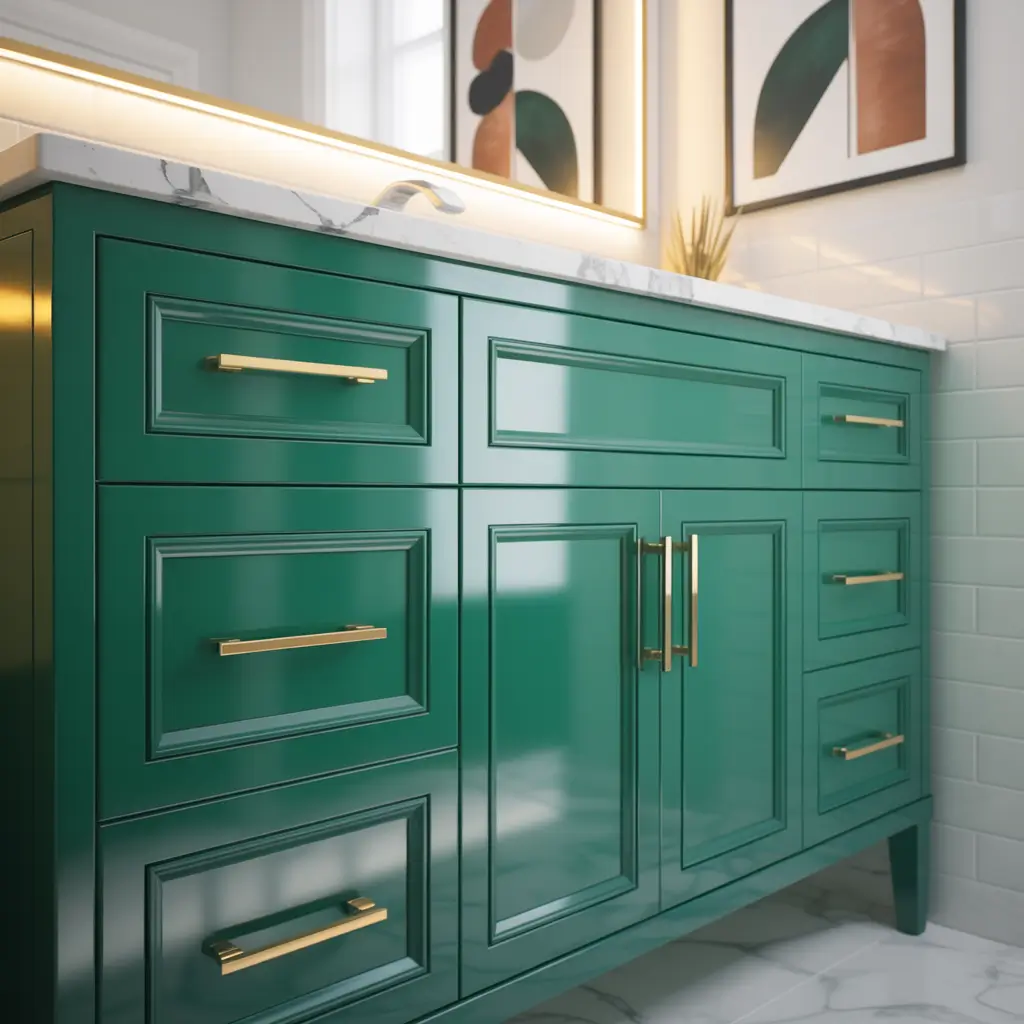
Bold Color Statement Vanities
Sometimes your bathroom needs a shot of personality more than anything else. Bold color makeovers transform boring vanities into conversation pieces that make every morning more interesting.
I painted my powder room vanity emerald green on what might’ve been a wine-fueled whim (no regrets). That single color choice transformed the entire bathroom from forgettable to “can I see your bathroom?” The bold color against white walls creates drama that neutral vanities simply can’t achieve.
Bold color makeovers work best in powder rooms or guest baths where you experience the intensity in doses rather than daily marathons. Though honestly, if you love the color, daily use makes it even better.
Bold Color Success Strategies
Making statement colors work:
- Choose colors you genuinely love – not just what’s trending
- Keep everything else neutral – let the vanity be the star
- Use quality paint – bold colors show every flaw
- Consider the undertone – test in your bathroom’s lighting
- Commit fully – tentative bold looks confused
Bold colors aren’t for everyone, and that’s totally fine. But if you’re craving personality in your bathroom, this makeover delivers maximum impact for minimum investment.
Small Bathroom Vanity Hacks
Small vanity makeovers focus on maximizing function and visual space rather than just aesthetics. These transformations make tiny vanities work harder and feel larger.
My rental bathroom had a minuscule 18-inch vanity that stored basically nothing. I removed the lower cabinet door, added a pull-out organizer, painted everything white to match the walls, mounted a large mirror, and installed a wall-mounted faucet to free counter space. Those small changes made the bathroom feel significantly less cramped.
Small vanity makeovers rely on strategic changes that enhance both function and perception. Every modification should either increase storage or create visual spaciousness.
Small Space Makeover Tactics
Maximizing tiny vanities:
- Paint to match walls – visually expands space
- Remove cabinet doors – add baskets for storage
- Install wall-mounted faucets – frees precious counter space
- Add a large mirror – reflects and doubles perceived space
- Include pull-out organizers – maximize interior storage
Small bathroom makeovers require creativity because you’re solving spatial puzzles, not just updating aesthetics. But the functional improvements genuinely enhance daily use.
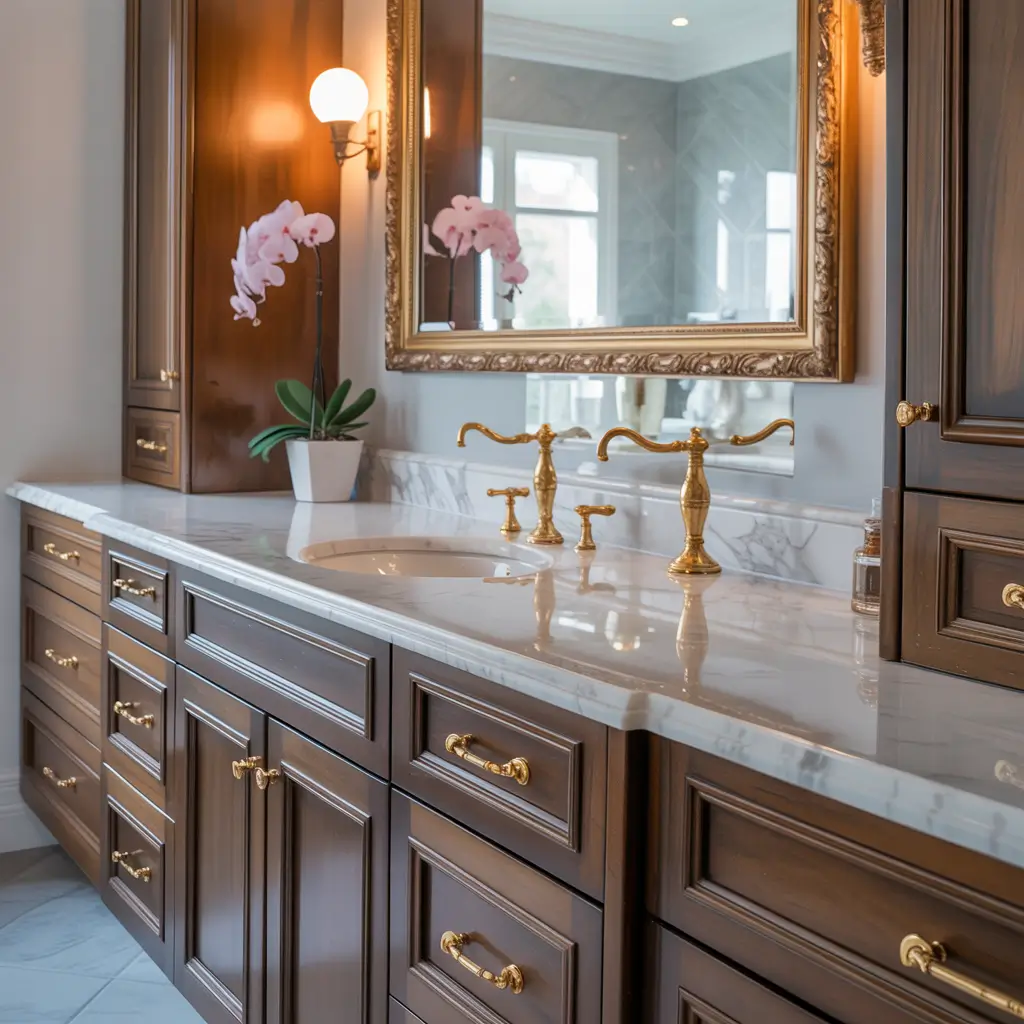
Luxury Hardware & Fixture Update
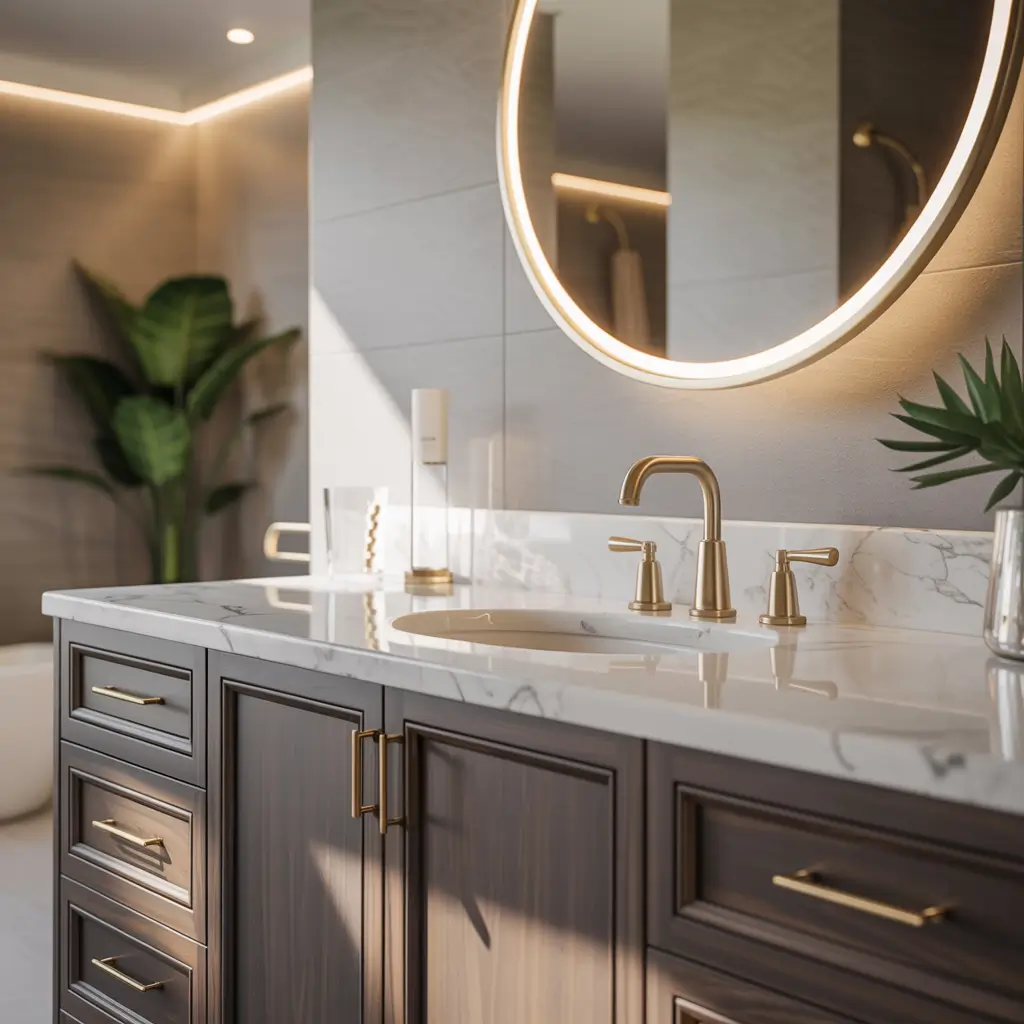
Sometimes the fastest vanity transformation is simply upgrading hardware and fixtures. New drawer pulls, faucets, and lighting can completely change how a vanity looks and feels.
I transformed my master bathroom vanity in one afternoon by replacing the builder-grade chrome hardware with brushed gold pulls and faucet. Added a statement light fixture above the mirror, and suddenly my basic vanity looked custom. Total cost: $320. Perceived value increase: easily $2,000.
Hardware and fixture upgrades work on any vanity that’s structurally sound but aesthetically boring. You’re essentially giving it jewelry that elevates the entire look.
Hardware Upgrade Strategy
Choosing impactful updates:
- Match all metal finishes – consistency creates cohesion
- Choose quality over quantity – one great faucet beats three cheap updates
- Consider scale – hardware should fit vanity proportions
- Update lighting simultaneously – it’s part of the overall look
- Don’t forget towel bars – they’re part of the vanity area
IMO, hardware upgrades deliver the best effort-to-impact ratio. Spending a few hundred on quality fixtures makes even builder-grade vanities look significantly more expensive.
Also Read: 10 Stylish Black Vanity Bathroom Ideas and Color Pairing Tips
Eco-Friendly Upcycled Vanity Makeover
Upcycled makeovers transform non-vanity furniture into bathroom vanities while keeping pieces out of landfills. This is the ultimate budget-and-planet-friendly option.
My favorite vanity makeover involved converting a vintage dresser into our master bath vanity. Cut holes for plumbing, added a vessel sink, sealed everything against moisture, and created a completely unique piece for under $200. The dresser would’ve been trash; now it’s treasure.
Upcycling requires creativity and basic carpentry skills, but the results are one-of-a-kind pieces with character that mass-produced vanities lack.
Upcycling Furniture Into Vanities
Successful furniture conversion:
- Choose solid wood furniture – particle board doesn’t handle moisture
- Ensure appropriate height – 30-36 inches works for most
- Plan for plumbing – you’ll cut through top and back
- Seal everything thoroughly – bathrooms are humid
- Preserve functional drawers – work around plumbing when possible
Upcycled vanities take more planning than other makeovers, but they create genuinely unique bathrooms while saving functional furniture from landfills. Plus, the bragging rights are unmatched.
Making Your Vanity Makeover Decision
After completing multiple vanity makeovers and helping friends tackle theirs, here’s what I know: the best makeover is the one that solves your specific problem. Hate the color? Paint it.
Need more storage? Get creative with organizers. Want luxury? Upgrade the countertop and hardware.
Start by honestly assessing what bothers you most about your current vanity. Then choose the makeover that addresses that pain point.
Don’t feel obligated to do everything at once – sometimes a simple paint refresh is enough, other times you need multiple changes.
The beauty of makeovers versus replacement is that you can tackle them in stages as budget and time allow.
Paint this month, new hardware next month, countertop upgrade when you find a great remnant deal. Your vanity transforms gradually without the chaos or cost of full replacement.
Whatever makeover you choose, remember that imperfections add character. My first painted vanity had brush strokes I obsessed over for weeks. Now I love them – they prove a human made this with their own hands, not a factory robot.
Your bathroom should feel personal, and makeovers deliver that authenticity in ways new purchases rarely do. Now stop researching and start making over – that vanity isn’t going to transform itself.


