10 Unique Bookshelf Organization Ideas for Clutter-Free Living
- Bookshelf Styling
 Ben
Ben- 0
- 44 minutes read
Your bookshelf looks like a crime scene, doesn’t it? Books crammed sideways, paperbacks balancing on hardcovers, random receipts poking out as makeshift bookmarks, and that one candle you shoved in there because you ran out of surface space. We’ve all been there. I spent an embarrassing number of years pretending my chaotic shelves had a “lived-in charm” before finally admitting they just looked messy.
Here’s the thing — organizing your bookshelf doesn’t mean sacrificing personality. You don’t need to live in a sterile showroom or toss half your collection. You just need the right approach. And lucky for you, I’ve tested, tweaked, and obsessed over enough bookshelf organization ideas to fill a small library (which I’d then need to organize, obviously).
These 10 methods range from effortlessly simple to weekend-project ambitious. Whether you own 30 books or 300, rent a studio apartment or live in a sprawling house, at least a few of these strategies will click for you. Let’s sort this out — literally.
Color-Coded Book Arrangements
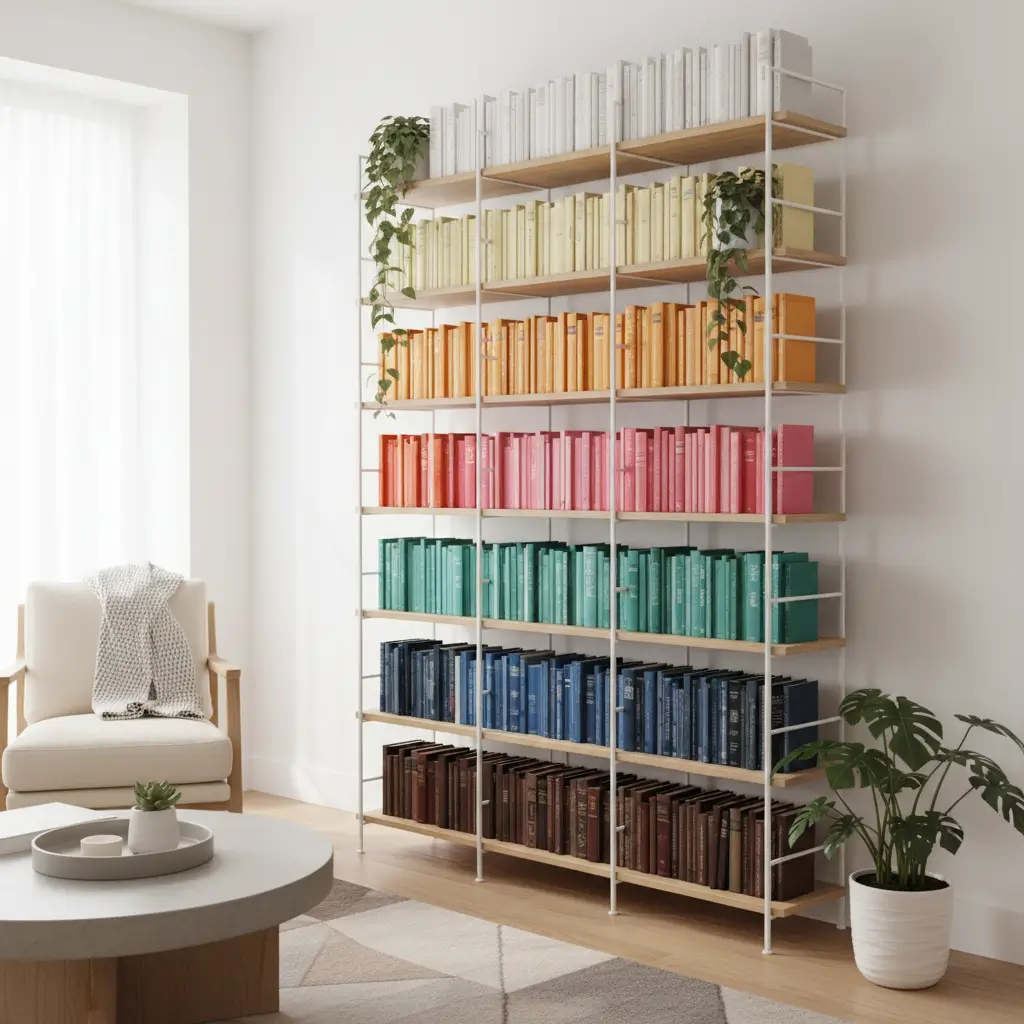
You’ve seen this on social media. You’ve probably rolled your eyes at it, too. But color-coded bookshelves look absolutely stunning in person, and I’ll defend this method until my last breath.
The concept couldn’t be simpler — arrange your books by the color of their spines. Reds flow into oranges, oranges melt into yellows, greens transition to blues, and so on. The result? A gorgeous rainbow gradient that transforms your bookshelf from storage furniture into a genuine piece of art.
How to Get the Rainbow Right
Here’s the step-by-step approach that actually works:
- Pull every book off the shelf — yes, every single one
- Sort into color piles on the floor — don’t overthink shades yet
- Arrange each color group from lightest to darkest within its section
- Place white and black spines at opposite ends as visual anchors
- Mix book heights within each color group so it doesn’t look rigid
I reorganized my living room shelves this way last spring, and every single person who walks in comments on them. The visual impact genuinely surprises people. It makes your collection look intentional and curated, even if you bought half those books at garage sales.
The Practical Trade-Off
Let’s address the elephant in the room — finding a specific title gets harder. You’ll search by color memory instead of alphabetical order. “Where’s that psychology book? It had a blue cover… I think?” That becomes your life now.
My workaround? I keep a simple list on my phone of titles and their shelf locations. Takes five minutes to create and saves me from pulling apart the rainbow every time I want a specific read. Is it perfect? No. Does the shelf look incredible? Absolutely worth it.
Minimalist Floating Shelves
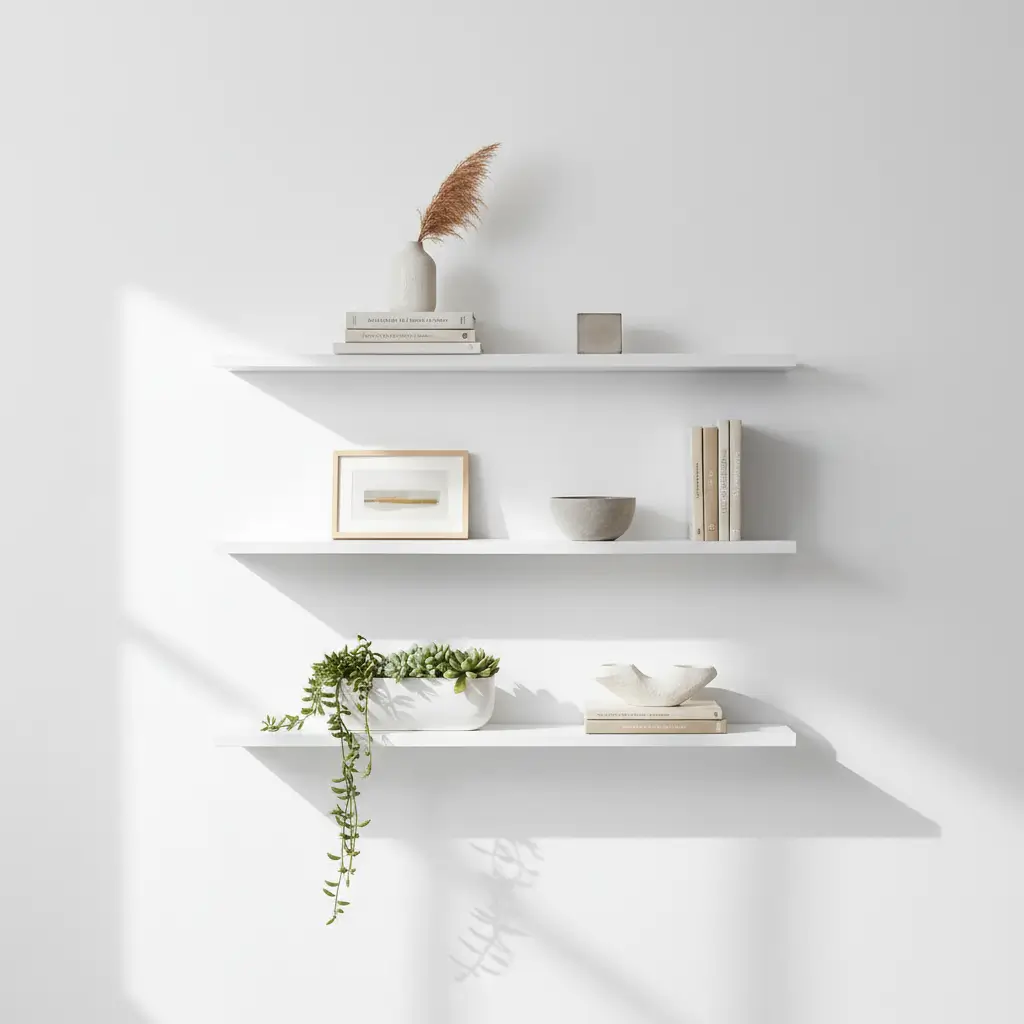
Floating shelves represent the single best upgrade you can make if your bookshelf situation feels heavy, bulky, or visually overwhelming. Minimalist floating shelves create the illusion that your books hover against the wall, and they open up floor space that traditional bookcases hog.
I replaced a massive wooden bookcase with three simple white floating shelves two years ago. My room instantly felt twice as big. The visual weight just vanished, and suddenly the books became the focal point instead of the furniture holding them.
Choosing the Right Floating Shelves
Not all floating shelves perform equally. Keep these factors in mind:
- Weight capacity — check the rating before loading up heavy hardcovers
- Shelf depth — 8 to 10 inches accommodates most book sizes comfortably
- Material quality — solid wood or thick MDF beats flimsy particleboard
- Mounting hardware — heavy-duty brackets and wall anchors prevent disasters
- Finish — matte finishes hide dust better than glossy ones (trust me on this)
The sweet spot for most rooms? Three to five shelves, staggered at varying heights. This creates movement and visual interest without cluttering the wall. Symmetry works too, but staggered arrangements feel more organic and personal.
Keeping Minimalist Shelves Clutter-Free
The whole point of floating shelves involves restraint. Don’t fill every inch. Leave breathing room between groupings of books. A small gap between clusters creates rhythm and prevents that overcrowded feeling.
Think of each shelf as having three zones — books on the left, a small decorative object in the middle, and books on the right. Or books on one side with open space on the other. Negative space isn’t wasted space — it’s what makes minimalist shelving actually feel minimalist.
Books with Decorative Accents
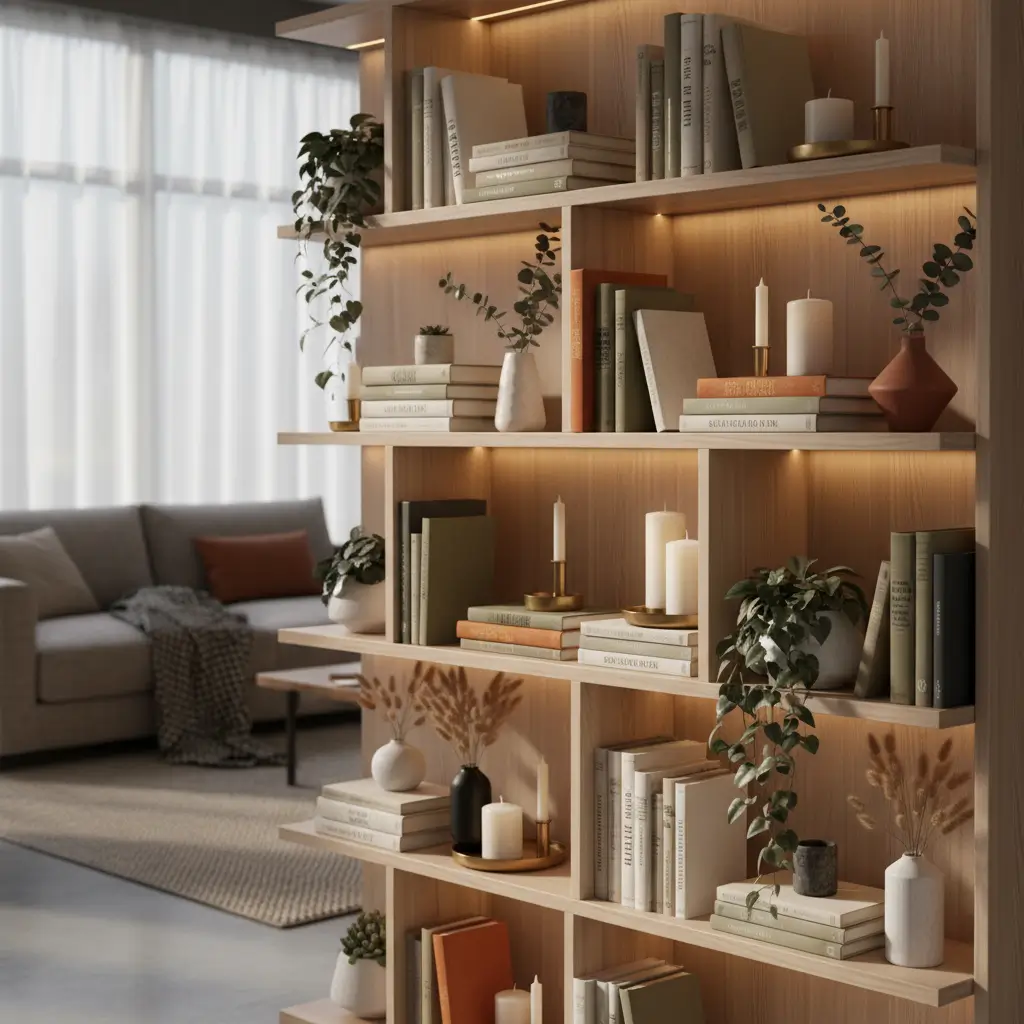
Ever notice how designers’ bookshelves never contain just books? They scatter in plants, sculptures, framed photos, candles, and interesting objects that break up the rows of spines. Mixing books with decorative accents creates a layered, styled look that pure book arrangements can’t achieve alone.
This method turned my boring office shelf from “storage unit” to “conversation piece.” I tucked a small succulent between two book stacks, leaned a vintage postcard against a row of novels, and placed a ceramic vase at one end. Took about ten minutes. Looked like I’d hired an interior designer.
The Art of Book-and-Decor Balance
Here’s the ratio that consistently works:
- 70% books, 30% decor — keeps the shelf functional while adding personality
- Vary the heights of decorative objects so they don’t all sit at the same level
- Choose a cohesive color palette for accents — metallic, neutral, or matching your room’s tones
- Include at least one organic element — a plant, a piece of driftwood, a stone
- Avoid clutter disguised as decor — every object should earn its spot
The biggest mistake people make? Overdoing the accessories. Your shelf should still read as a bookshelf, not a knick-knack display case. If the decorative items outnumber the books, you’ve gone too far. Pull a few pieces off, step back, and reassess.
Accent Ideas That Actually Work
Not sure what to place alongside your books? These options consistently look great:
- Small potted plants or succulents — add life without demanding attention
- Framed photographs — lean them against books for a casual vibe
- Interesting bookends — geometric shapes, animal figures, marble blocks
- Travel souvenirs — meaningful objects that spark stories
- Small sculptures or art pieces — one per shelf maximum
FYI, avoid anything too fragile on lower shelves if you have pets or kids. My cat knocked over a ceramic figurine on day two of my shelf makeover. Lesson learned the expensive way.
Also Read: 10 Stylish Nursery Bookshelf Ideas for Trendy Baby Rooms
Tiered Stack Organization
Here’s a method that looks incredibly intentional but takes almost zero planning — tiered stacking. Instead of placing every book upright, you alternate between vertical rows and horizontal stacks at different heights. The result creates a dynamic, architectural look that professional stylists use constantly.
I stumbled onto this approach by accident when I ran out of vertical space on a shelf and started laying books flat. Suddenly the whole arrangement looked purposeful and dimensional. Happy accidents happen, people.
Building Effective Tiers
The technique follows a simple pattern:
- Start with a horizontal stack of 3-5 books on one side of the shelf
- Stand a group of books vertically next to the stack
- Add another smaller horizontal stack at a different height
- Place a decorative object on top of the horizontal stack
- Repeat the pattern with variations across each shelf
The horizontal stacks serve double duty — they create height platforms for decorative objects AND they give your eyes a place to rest between vertical sections. Think of them as visual punctuation marks in a sentence made of book spines.
Making Tiers Look Polished
A few pro tips that separate “deliberately styled” from “couldn’t fit these anywhere”:
- Keep horizontal stacks to 5 books maximum — taller stacks look unstable
- Align the edges of horizontal stacks neatly — messy edges ruin the effect
- Use your largest, most attractive books for horizontal stacks since their covers become visible
- Vary stack heights across the shelf — uniform heights defeat the purpose
This method works beautifully on deep shelves where you have room for both depth and height play. Shallow shelves limit your stacking options, so keep that in mind when planning your layout.
Hidden Storage Baskets
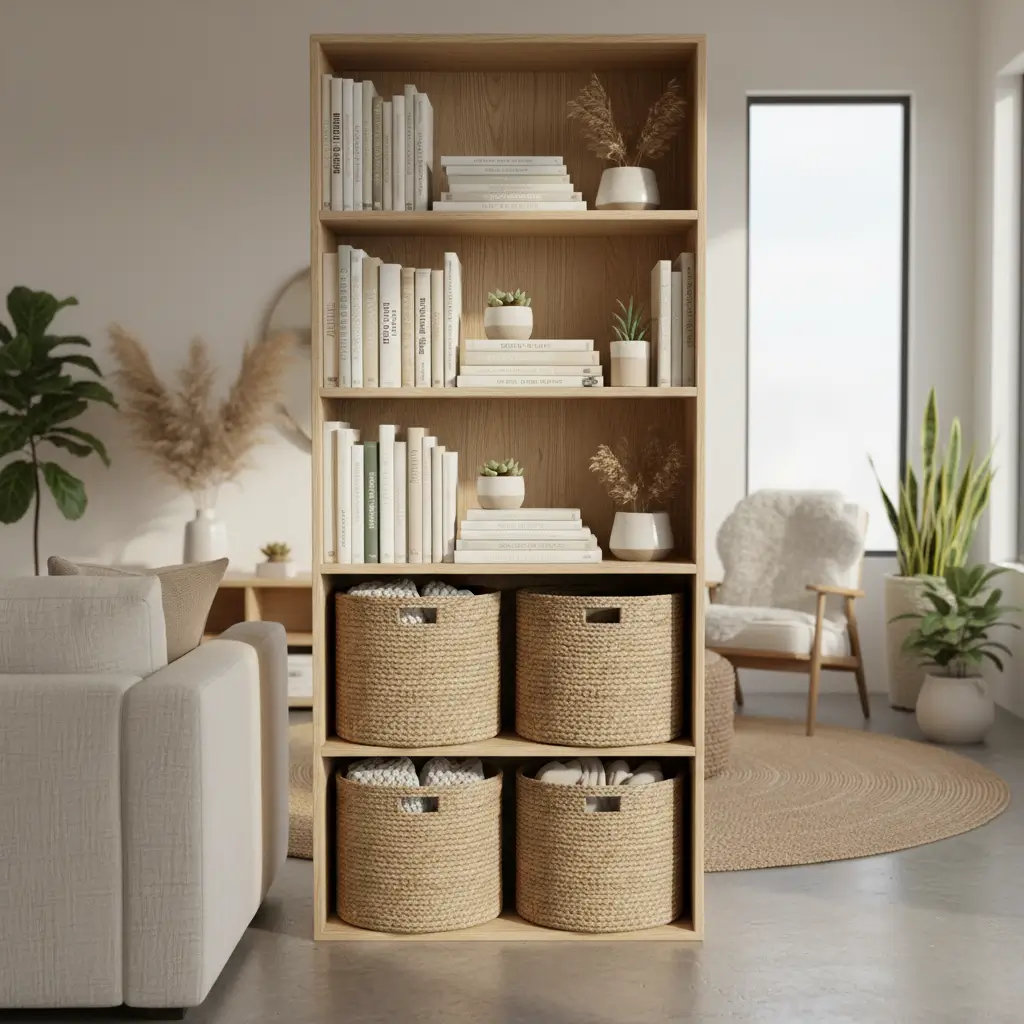
Can we acknowledge something real for a second? Not everything on your bookshelf deserves to be seen. Chargers, remote controls, unopened mail, random cables — every household accumulates visual clutter that needs a home but doesn’t need a spotlight. Hidden storage baskets solve this problem elegantly.
Woven baskets, fabric bins, or decorative boxes tucked between book groupings absorb all that miscellaneous stuff while looking completely intentional. My partner used to scatter charging cables across every surface. Now they live in a seagrass basket on the second shelf, and our living room looks approximately 500% more put-together.
Choosing the Right Baskets
The basket selection matters more than you’d think:
- Woven seagrass or rattan — warm, natural texture that complements most styles
- Linen or canvas bins — clean, modern look with soft structure
- Wire baskets — industrial vibe, but contents remain partially visible
- Wooden boxes with lids — polished and completely concealing
- Patterned fabric bins — add color and personality
Size matters here. Measure your shelf openings before purchasing baskets. Nothing looks worse than a basket that’s slightly too big, wedged in at an angle, bulging awkwardly. Ask me how I know.
Strategic Basket Placement
Don’t just scatter baskets randomly across your shelves. Follow this placement strategy:
- Bottom shelves — larger baskets for bulkier items (board games, blankets, tech accessories)
- Middle shelves — medium baskets for everyday items (remote controls, notebooks, small supplies)
- Top shelves — smaller decorative boxes for things you rarely access
The ideal ratio? One basket for every two or three shelf sections. This keeps the storage functional without making your bookshelf look like a basket warehouse. The baskets should complement the books, not compete with them.
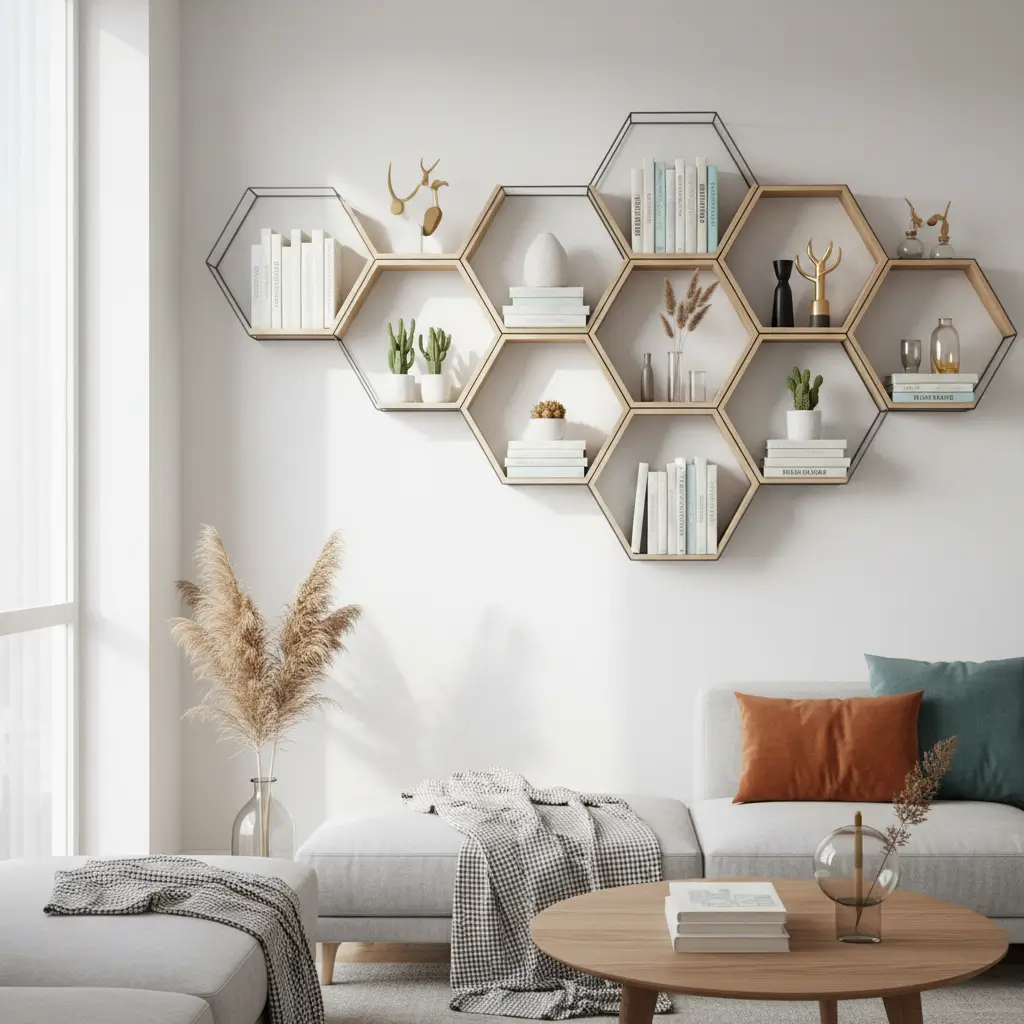
Themed Book Displays
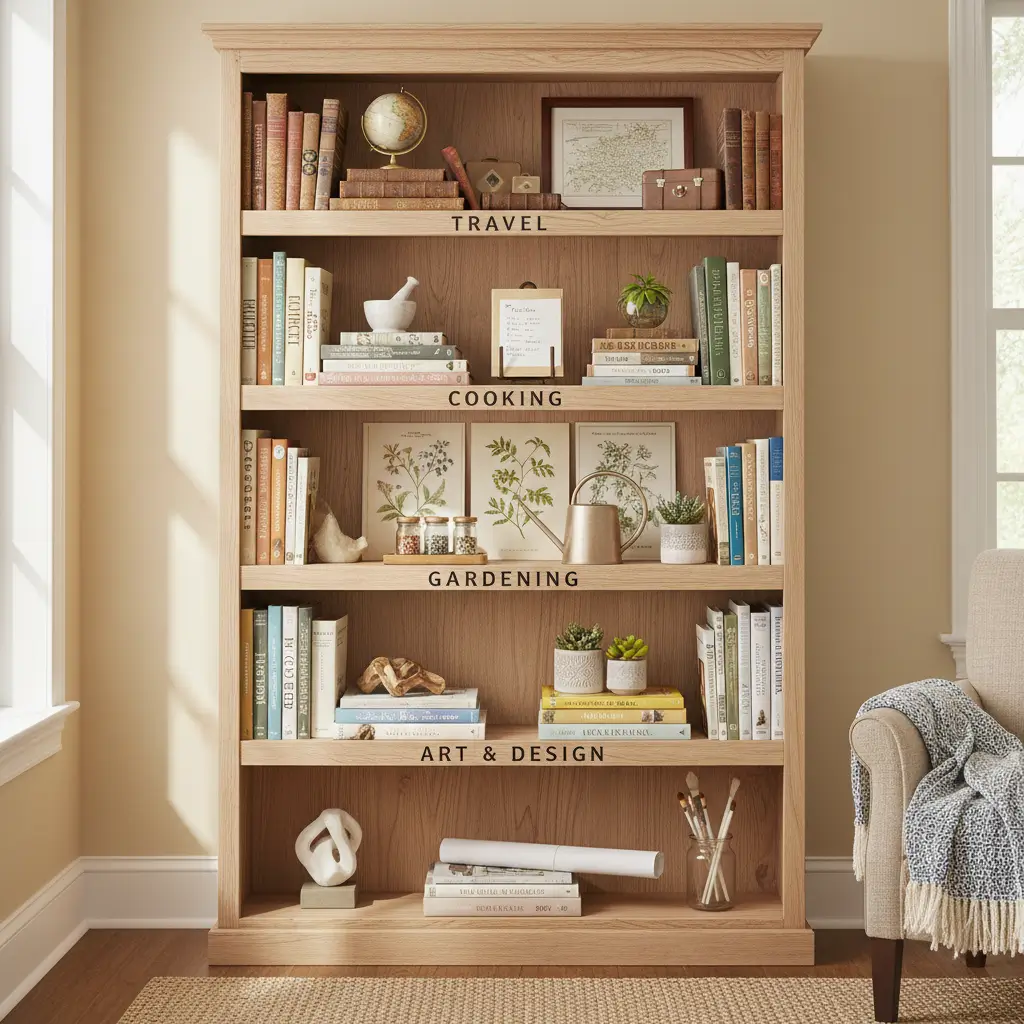
Here’s where bookshelf organization gets genuinely fun. Themed displays group your books by subject, mood, or aesthetic and turn each shelf section into a mini-collection with its own identity. Think of it as creating tiny curated exhibitions within your larger bookshelf.
I organize one shelf around travel books paired with a small globe and some postcards. Another shelf holds my cooking books alongside a vintage kitchen scale. Each section tells a micro-story, and browsing my own bookshelf feels like wandering through different rooms of a museum. Dramatic? Maybe. Effective? Definitely.
Theme Ideas That Work Beautifully
Need inspiration? These themes create cohesive, eye-catching sections:
- Travel — guidebooks, travel memoirs, maps, souvenirs from trips
- Seasons — rotate books and accents to match the current season
- Genre clusters — mysteries together, memoirs together, sci-fi together
- Color themes — monochromatic sections (all blue books, all green books)
- Author spotlights — dedicate a section to your favorite writer’s complete works
The key to themed displays? Commit fully within each section but keep sections distinct from each other. Clear visual boundaries between themes prevent the shelf from looking random.
Rotating Themes Seasonally
One approach I absolutely love involves rotating your themed displays every few months. In autumn, bring forward your cozy reads — mysteries, comfort fiction, books with warm-toned covers. In summer, spotlight travel guides, beach reads, and lighter fare.
This rotation keeps your bookshelf feeling fresh without buying new furniture or accessories. You already own the books — you just shuffle the spotlight. It also motivates re-reading, which honestly? Underrated habit.
Also Read: 10 Cozy Bookshelf Wall Decor Ideas and Warm Living Room
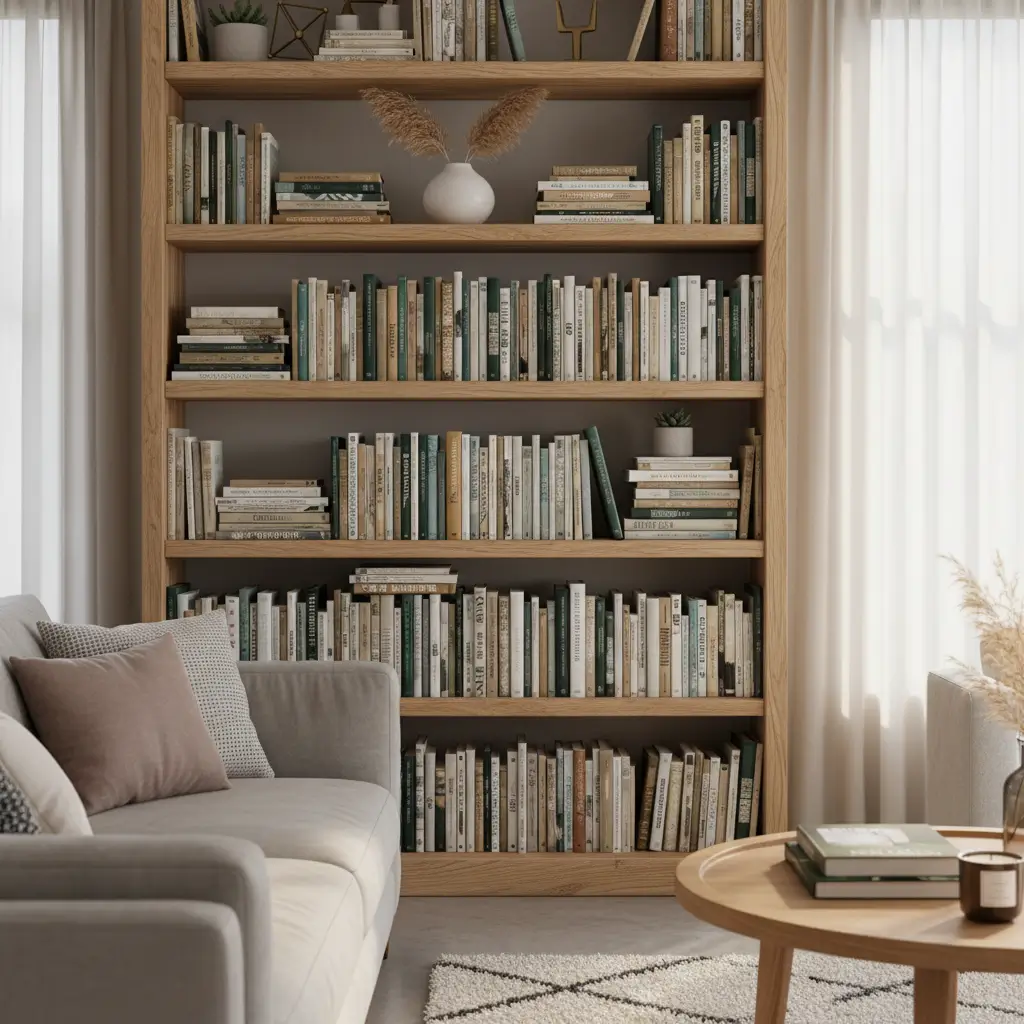
Vertical and Horizontal Mix
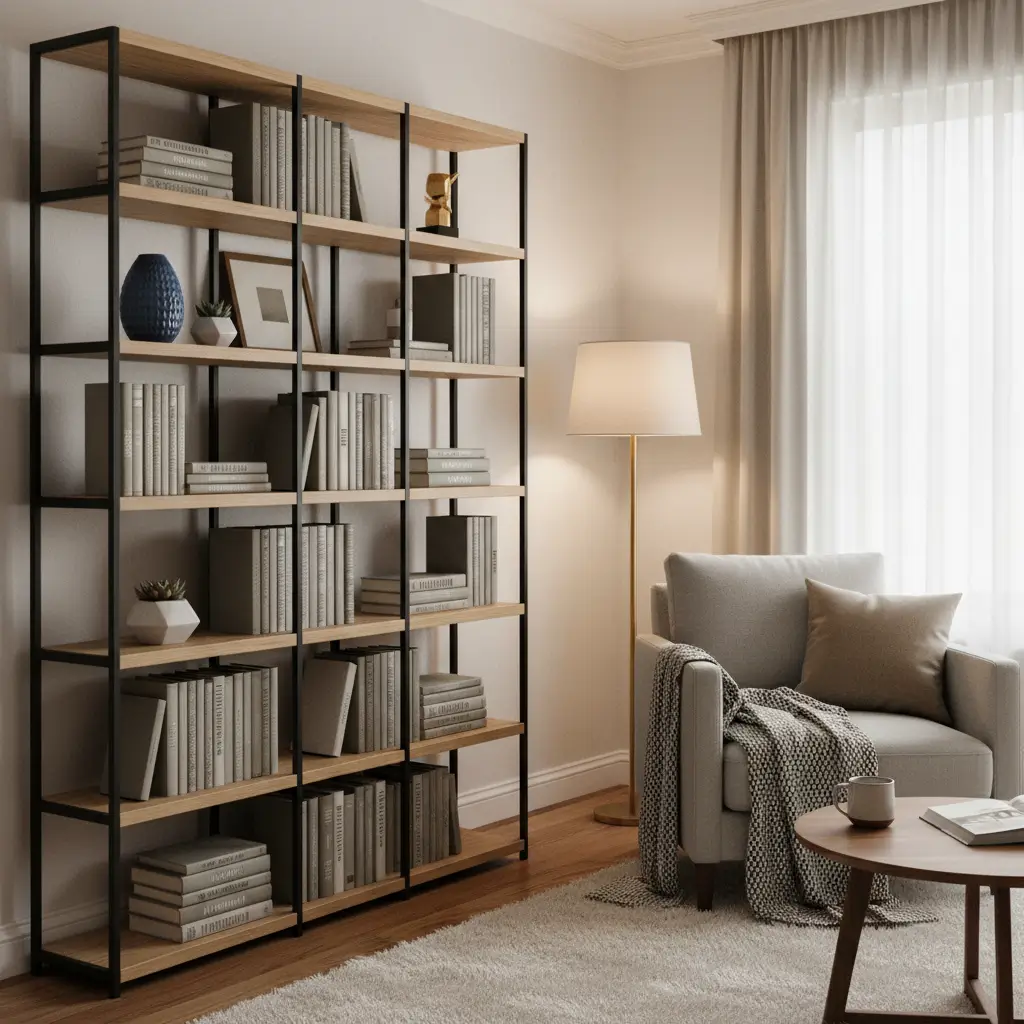
This method sounds basic, but mixing vertical and horizontal book orientations across your shelves creates surprisingly sophisticated visual rhythm. Most people default to standing every book upright, spine out, in a straight row. That works, but it also looks a bit like a library reference section — functional, not exciting.
When you intentionally alternate between vertical groupings and horizontal stacks, you create natural variation that draws the eye across the shelf. The arrangement feels collected and personal rather than rigid and institutional.
The Formula for Perfect Mixing
Follow this approach for consistently good results:
- Group 4-6 books vertically as one unit
- Lay 2-3 books horizontally next to the vertical group
- Place a decorative object on top of or beside the horizontal stack
- Leave a small gap before starting the next grouping
- Vary the group sizes across different shelves — no two should look identical
The horizontal books serve as visual speed bumps. They force your eyes to pause, which makes the overall arrangement feel more interesting. Without these breaks, long rows of vertical spines blur together into visual monotony.
Common Mistakes to Avoid
A few things that sabotage this technique:
- Too many horizontal stacks — the shelf starts looking lazy instead of styled
- Ignoring book sizes — cluster similar-height books vertically for cleaner lines
- Forgetting about depth — push some books back slightly to create shadow layers
- Overfilling — leave at least 10-15% of each shelf empty for breathing room
IMO, this method offers the best effort-to-impact ratio of any organization approach. Five minutes of rearranging creates a shelf that looks like you spent hours styling it. That’s efficiency I can get behind.
DIY Rustic Shelf Makeover
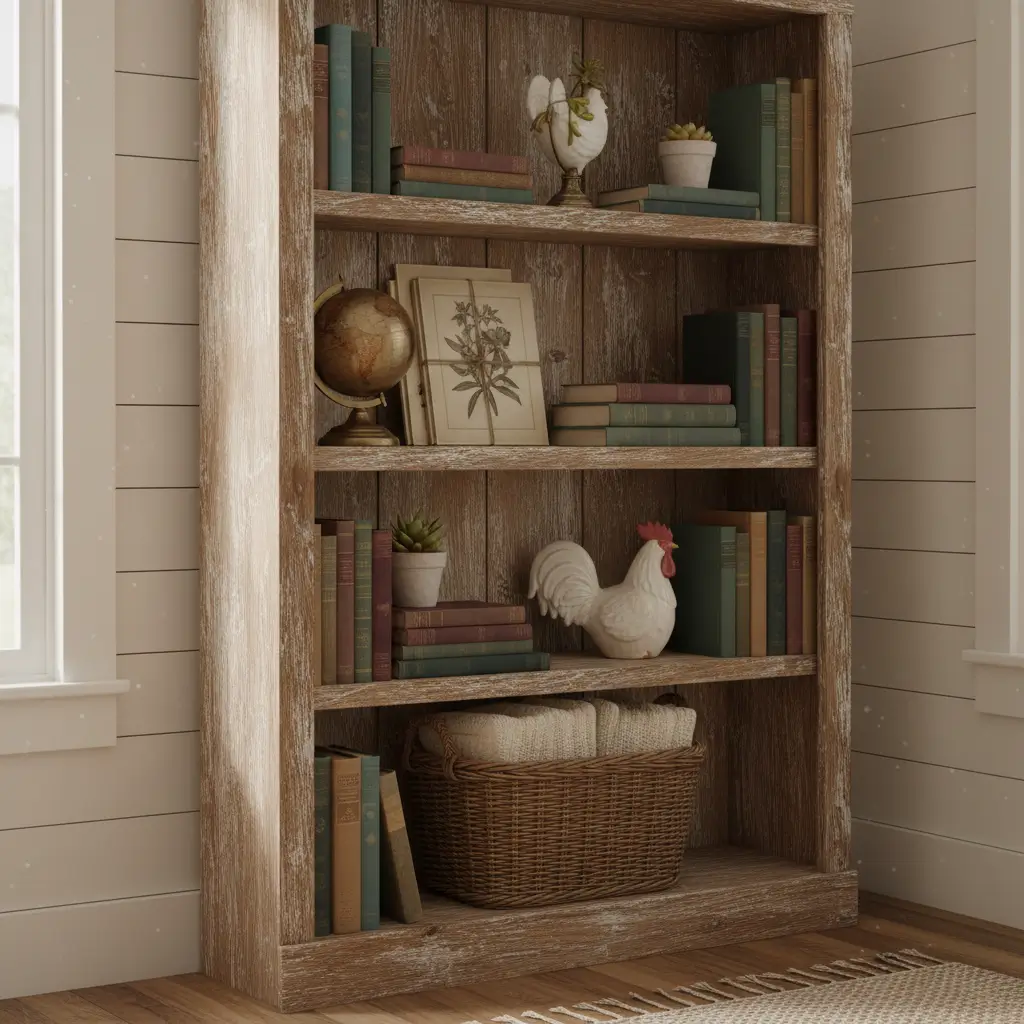
Sometimes the problem isn’t how you organize your books — it’s the shelf itself. A boring, builder-grade bookcase drags down any room’s aesthetic no matter how beautifully you arrange your collection. A DIY rustic makeover transforms basic shelving into a statement piece, and you don’t need professional carpentry skills to pull it off.
I took a standard IKEA Billy bookcase and turned it into something that looks like it came from a reclaimed wood workshop. Total investment: $40 in supplies and one afternoon of effort. The transformation genuinely shocked people who’d seen the “before” version.
Simple Makeover Techniques
These upgrades range from beginner-friendly to moderately handy:
- Peel-and-stick wood grain wallpaper on the back panel — instant warmth
- Replace standard shelves with reclaimed wood planks cut to size
- Add crown molding to the top for a built-in look
- Paint with chalk paint and lightly sand edges for a distressed finish
- Swap out backing — replace thin cardboard with beadboard panels
- Add trim or molding to shelf edges for dimension
The back panel upgrade alone makes a dramatic difference. Most standard bookcases have thin, cheap backing. Covering it with textured wallpaper, shiplap panels, or even painted planks adds depth that makes every book and object pop.
Making Rustic Look Intentional
The line between “charming rustic” and “falling apart” sits thinner than you’d think. Focus on consistency. If you distress the finish, distress it evenly. If you use reclaimed wood, make sure the tones complement each other. Random chaos doesn’t read as rustic — it reads as neglected.
Pair your rustic shelf with warm metallic accents — brass bookends, copper picture frames, or iron brackets. These materials naturally complement wood tones and reinforce the rustic aesthetic without feeling heavy-handed.
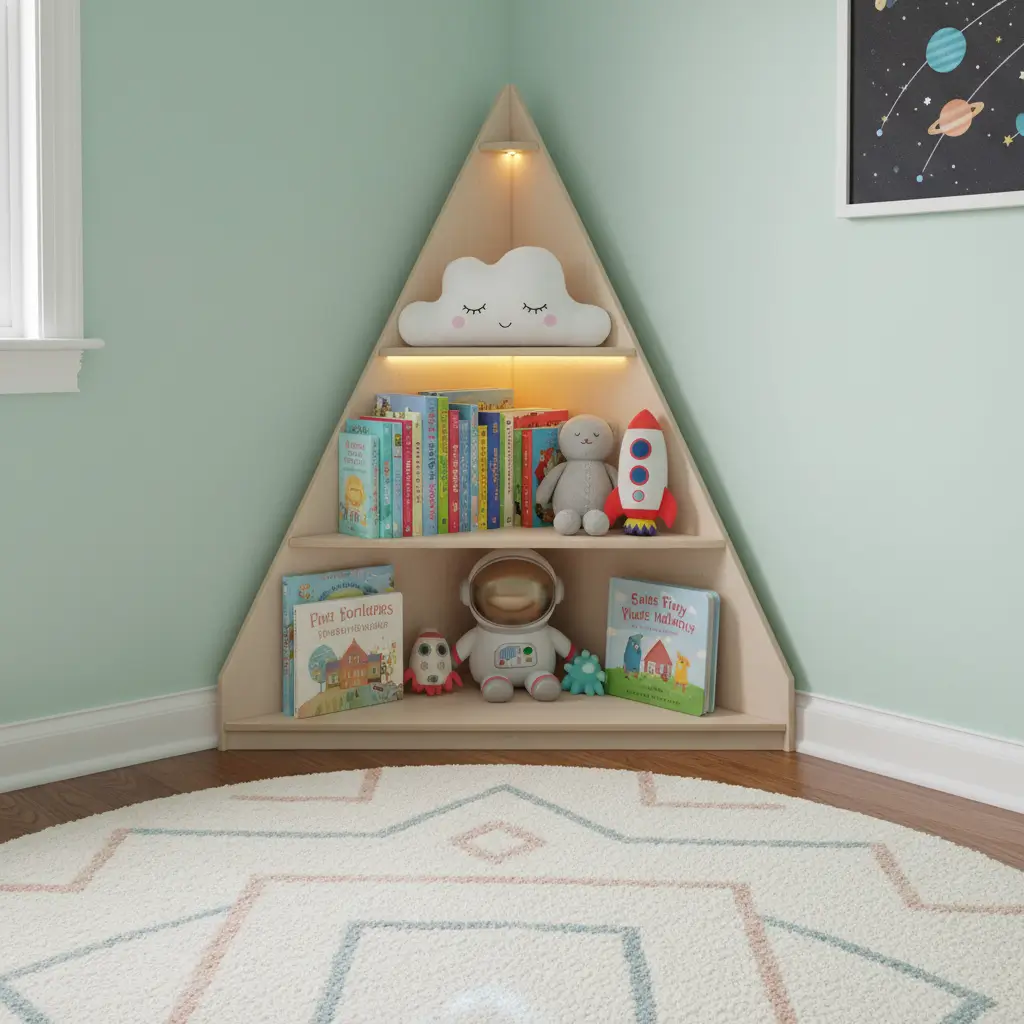
Corner Shelf Optimization
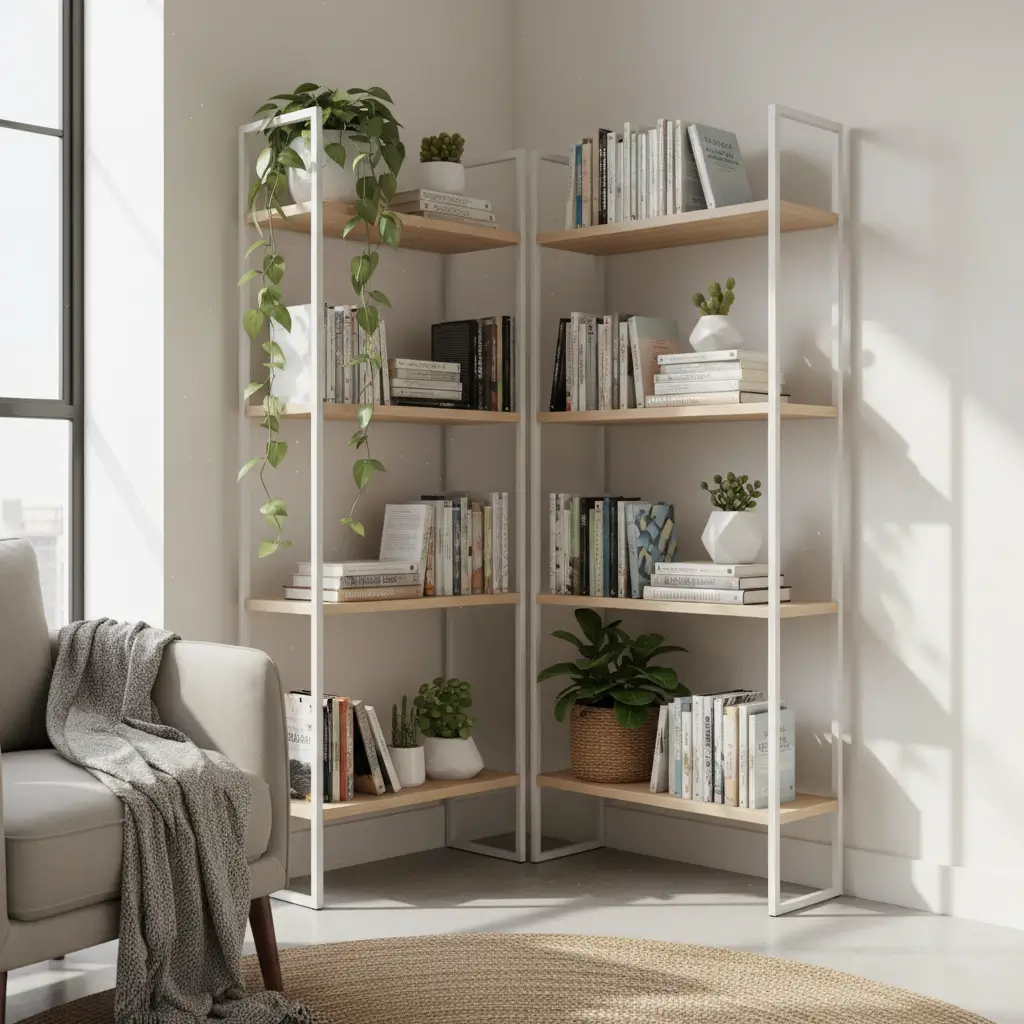
That empty corner mocking you from across the room? It holds way more potential than you think. Corner bookshelves transform dead space into functional, stylish storage that takes advantage of square footage most people completely ignore.
I installed a corner shelf unit in my bedroom last year — a spot that previously held nothing but dust bunnies and regret. Now it holds about 40 books, a trailing pothos plant, and a reading lamp. Best use of a 90-degree angle I’ve ever found.
Corner Shelf Options Worth Considering
Several formats work for corner organization:
- Quarter-round freestanding units — designed specifically for corners
- Triangular floating shelves — mount at varying heights for a modern look
- Ladder-style corner shelves — lean against both walls for a casual feel
- Rotating carousel shelves — spin to access all sides without reaching
- Custom built-in shelves — permanent but perfect for awkward corners
Triangular floating shelves deliver the best visual impact for minimal investment. Mount three to five at staggered heights, and suddenly that useless corner becomes a feature wall. The triangular shape naturally draws the eye upward, making your room feel taller.
Maximizing Corner Storage
Corners present unique organizational challenges. Books don’t always sit neatly in triangular or curved spaces. Here’s how to make it work:
- Use the deepest part of the shelf for taller books stood upright
- Place shorter books or objects near the front edges
- Don’t overfill — corner shelves look cluttered faster than flat-wall shelves
- Add lighting — corners tend toward dimness, so clip-on lights or LED strips help
The goal with corner shelving? Make it look like a deliberate design choice, not an afterthought. A well-styled corner shelf unit draws attention precisely because most people leave their corners empty. You’ll look like you understand spatial design, even if you just needed somewhere to put your mystery novels.
Also Read: 10 Whimsical Tree Bookshelf Ideas for Cozy Corners
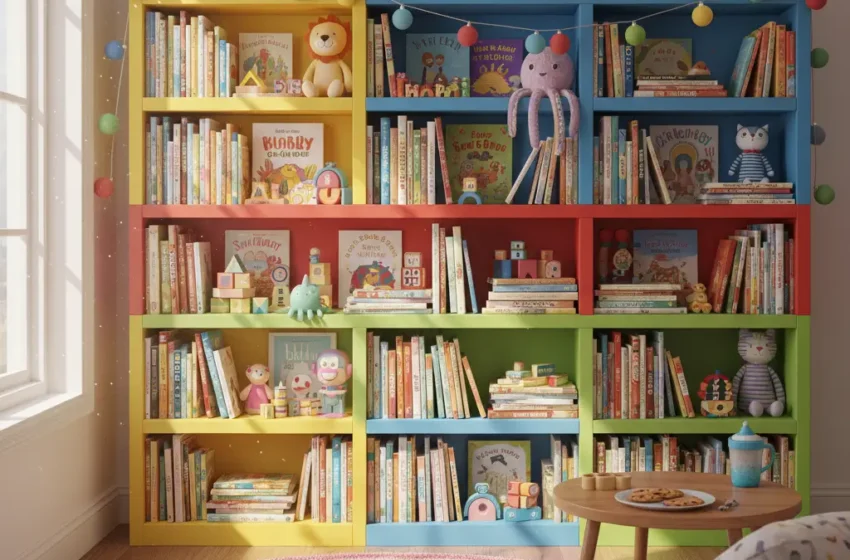
Kids’ Fun Bookshelf Zones
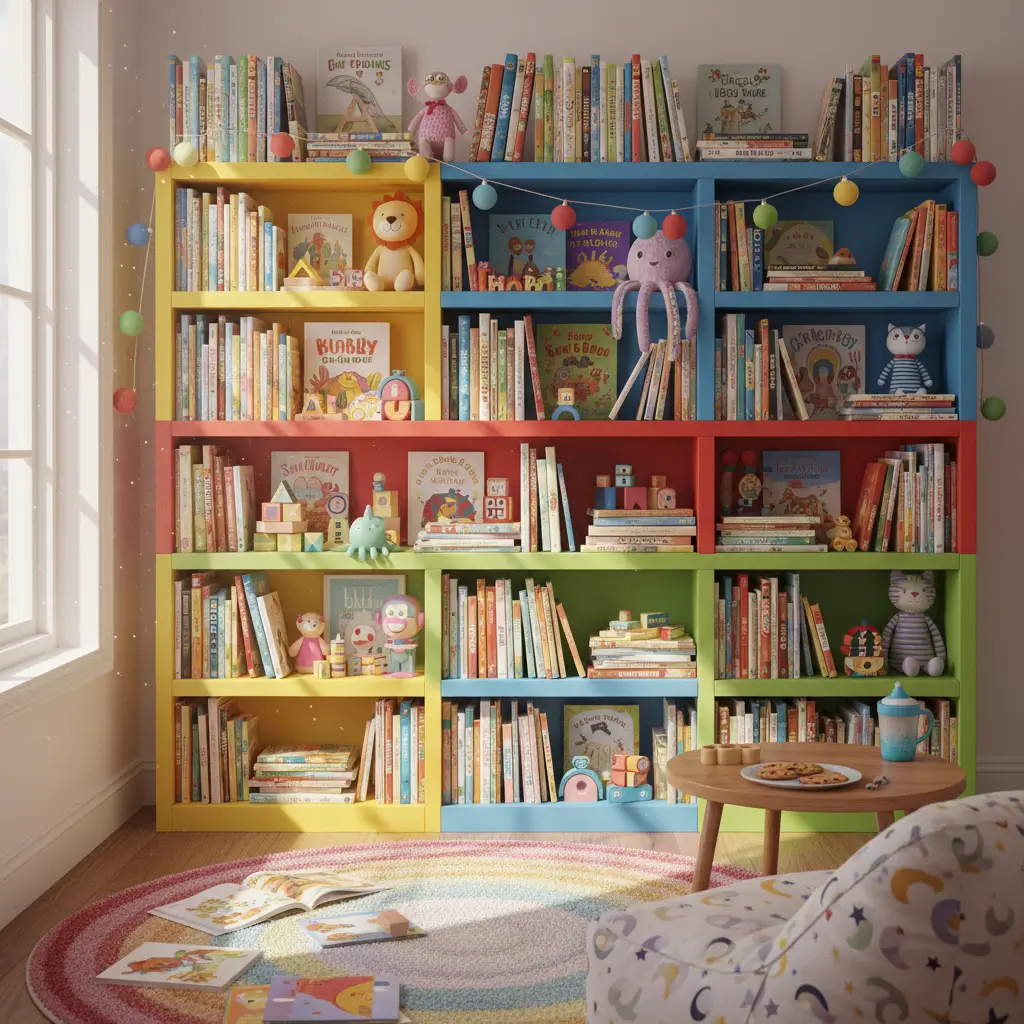
If you have children, you already know that standard bookshelf organization goes out the window approximately thirty seconds after a toddler discovers they can reach the bottom shelf. Rather than fighting this reality, embrace it with dedicated kids’ bookshelf zones designed for small hands and developing minds.
My sister set up a kid-friendly book zone in her family room, and her three-year-old now “shops” for books independently every evening before bedtime. The independence factor alone makes this approach worth every minute of setup time.
Setting Up a Kid-Friendly Zone
Child-accessible book zones prioritize visibility, reachability, and fun:
- Forward-facing display — show covers, not spines (kids choose by pictures)
- Low placement — bottom two shelves belong to the smallest readers
- Sturdy bins or baskets — for board books that don’t stand well on their own
- Category labels with pictures — animals, bedtime, funny stories
- A cozy element nearby — floor cushion, small rug, or bean bag
The forward-facing display matters enormously. Children don’t browse spines the way adults do. They recognize books by their covers. When you display covers facing forward, you empower even pre-readers to choose their own stories. That builds autonomy and a genuine love of reading.
Keeping Kids’ Zones Organized
Here’s the reality — kids’ zones get messy. Build your system expecting that:
- Use basket categories — “Books We Love,” “New Books,” “Bedtime Books”
- Rotate books weekly — keep 10-15 accessible and store the rest
- Make cleanup simple — if a two-year-old can’t put it back, your system needs simplifying
- Add playful bookends — dinosaurs, animals, alphabet blocks
Rotation keeps things fresh and prevents overwhelm. Too many choices paralyze small children just like they paralyze adults scrolling Netflix. A curated selection of 10-15 books encourages deeper engagement with each title rather than surface-level flipping through dozens.
Bringing It All Together
Organizing your bookshelf doesn’t require a design degree, an unlimited budget, or Marie Kondo on speed dial. It requires intention. Every method here — from color-coding to corner optimization — shares one common thread: making deliberate choices about what goes where and why.
Here’s a quick refresher on your options:
- Color-coded arrangements for stunning visual impact
- Minimalist floating shelves for space and simplicity
- Books with decorative accents for styled, layered depth
- Tiered stacking for architectural dimension
- Hidden storage baskets for concealing everyday clutter
- Themed displays for storytelling and personality
- Vertical and horizontal mixing for effortless rhythm
- DIY rustic makeovers for character on a budget
- Corner shelf optimization for using every inch wisely
- Kids’ fun zones for building young readers
You don’t need to implement all ten at once. Pick two or three that resonate with your space, your style, and your patience level. Start small, rearrange as you go, and remember — the best bookshelf organization system works for your actual life, not your aspirational Pinterest life.
Now stop reading about organizing bookshelves and go actually organize yours. Those books have waited long enough for a proper home. And that mystery receipt bookmark from 2019? You can probably toss it. Probably.