12 Unique DIY Floating Shelves Ideas and Decorative Touches
- Floating Shelves
 Ben
Ben- 0
- 35 minutes read
Remember that time you walked into West Elm, saw those gorgeous floating shelves, checked the price tag, and immediately walked back out? Yeah, me too.
That’s exactly how I became a DIY floating shelf convert – pure sticker shock mixed with stubborn determination to prove I could make something just as good for a fraction of the cost.
Here’s the thing: making your own floating shelves isn’t just about saving money (though saving 80% definitely helps). It’s about creating exactly what you want, sized perfectly for your weird wall space, in whatever wild color or style makes your heart sing.
I’ve built over 20 different floating shelf projects in the past three years, failed spectacularly at least five times, and learned enough tricks to save you from my mistakes.
Whether you’re a weekend warrior with a full workshop or someone whose entire tool collection fits in a kitchen drawer, these 12 DIY floating shelf ideas will transform your walls from boring to brilliant.
And the best part? Most of these can be knocked out in a single afternoon, leaving you plenty of time to admire your handiwork while sipping that well-deserved victory beer.
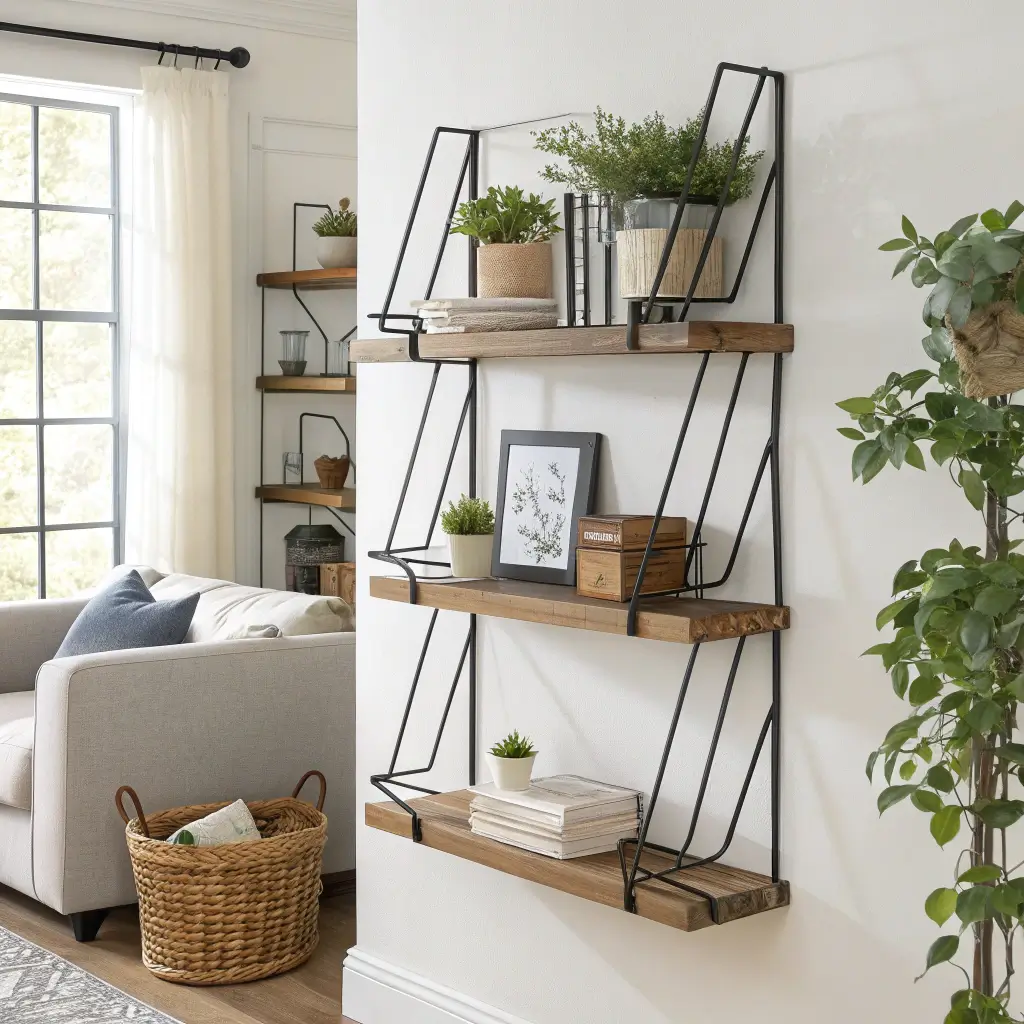
1. Rustic Reclaimed Wood Floating Shelves
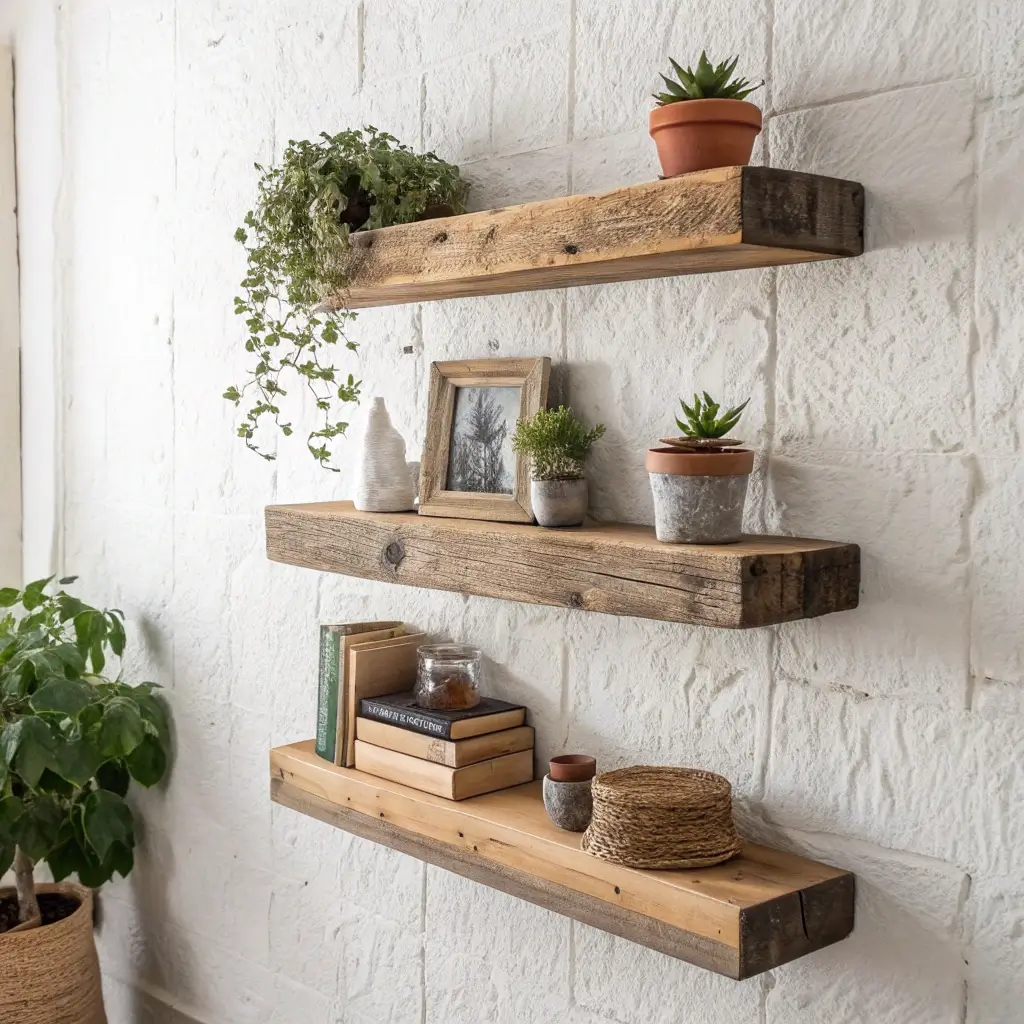
Nothing says “I have my life together” quite like rustic reclaimed wood shelves. I built my first set from old fence boards I found on Craigslist for free, and now everyone thinks I shop at expensive antique stores.
The beauty of reclaimed wood is that imperfections are features, not flaws. That weird nail hole? Character. The uneven edge? Rustic charm. The fact that you measured wrong and it’s slightly crooked? Vintage authenticity, baby.
Finding Your Wood
Check Craigslist, Facebook Marketplace, and local demolition sites for free or cheap wood. I once scored beautiful barn wood from someone who just wanted it gone. Old pallets work too, but make sure they’re heat-treated (look for “HT” stamp) not chemically treated.
Visit architectural salvage yards for unique pieces. Yes, they cost more than free, but still way less than buying new “distressed” wood. Plus, you get actual history instead of fake aging.
Don’t overlook your own backyard. Old deck boards, fence pieces, or that lumber pile behind the garage can become shelf gold with some cleaning and sanding.
DIY Process for Rustic Shelves
Sand lightly to remove splinters but keep the character. I use 120-grit sandpaper and go easy – you want smooth enough to not snag sweaters, rough enough to look authentic.
Apply a food-safe sealant if using in the kitchen. I learned this after my first unsealed shelf started warping from steam. Tung oil or beeswax work great and maintain the natural look.
Install with heavy-duty floating shelf brackets rated for the wood’s weight. Reclaimed wood is often heavier than new lumber. My first shelf crashed at 2 AM because I cheaped out on brackets – don’t be like past me.
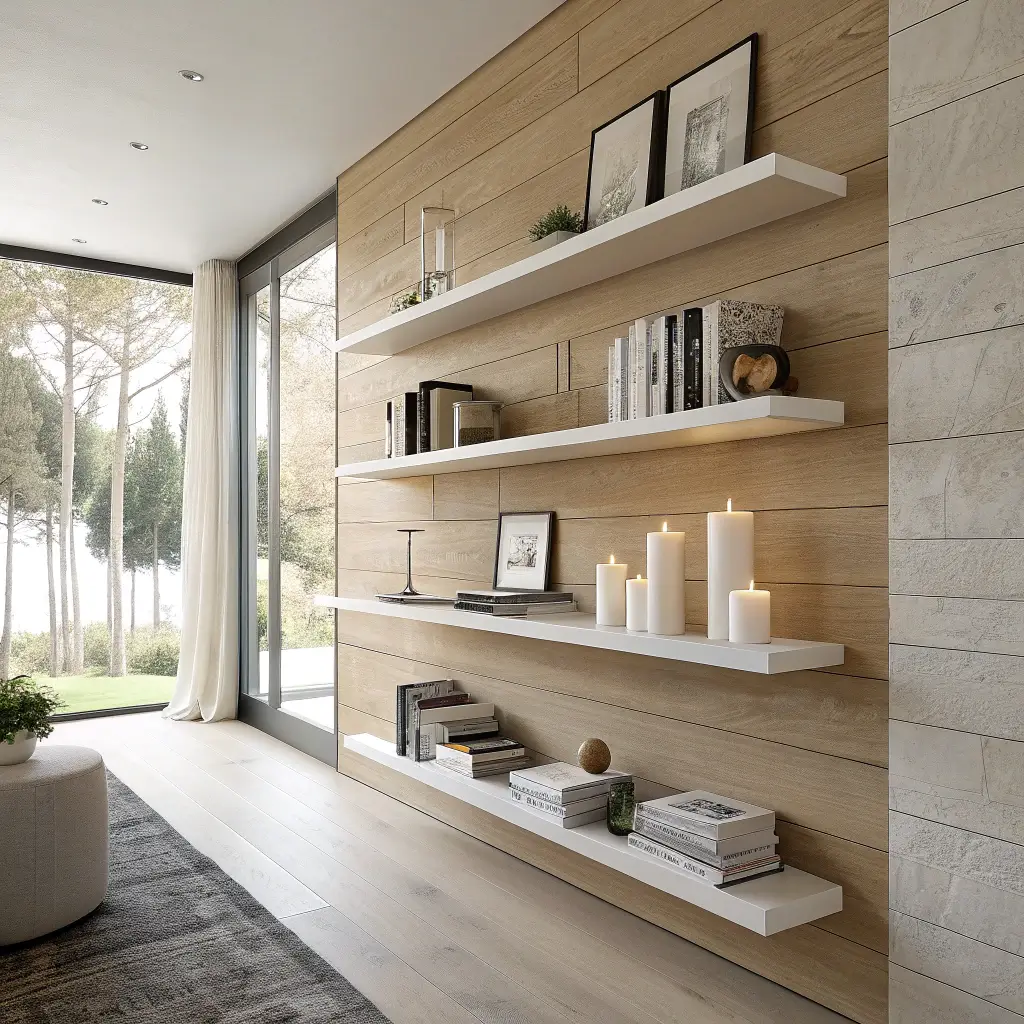
2. Minimalist White Wall-Mounted Shelves
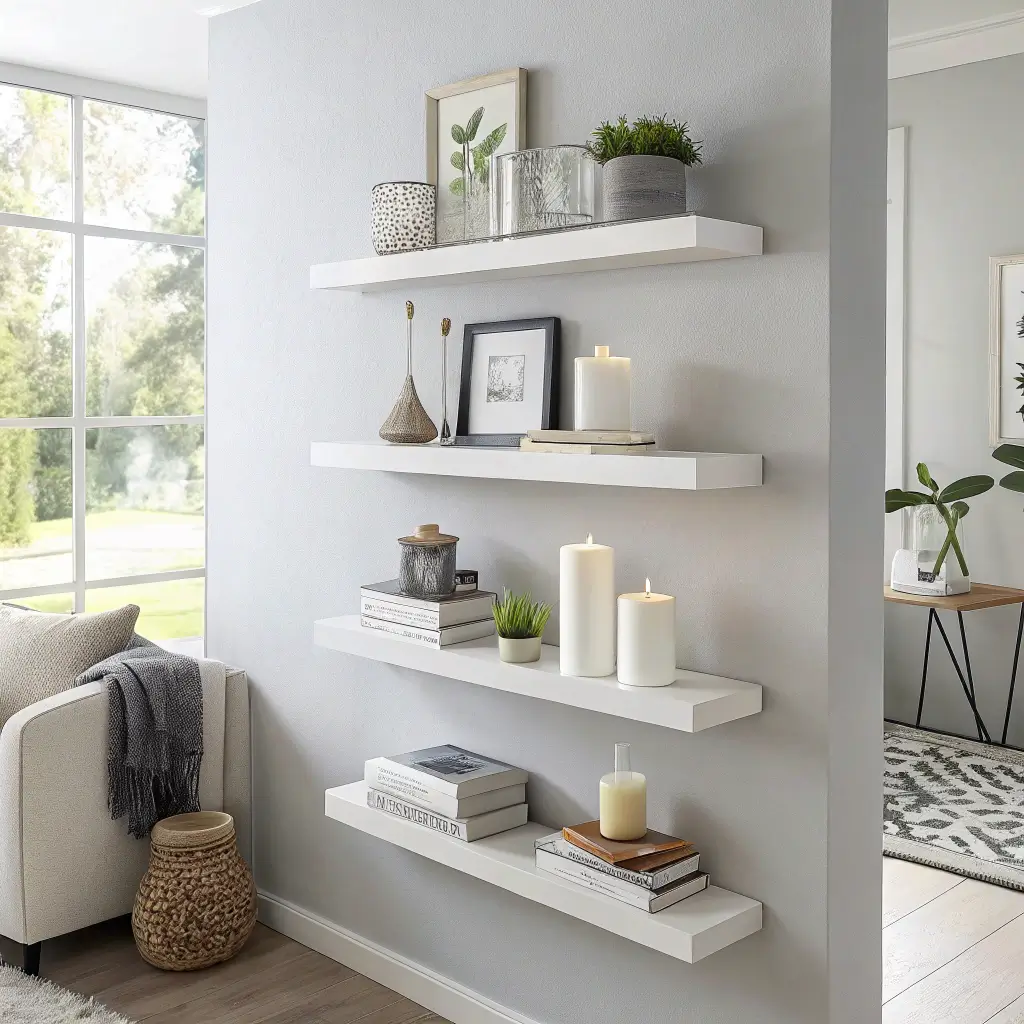
Clean, simple, and impossible to mess up – minimalist white shelves are the little black dress of DIY projects. I built a set for my bathroom in under two hours, and they look like they came from a Scandinavian design store.
The secret to minimalist shelves is precision. Unlike rustic styles where wonky adds character, minimalist demands clean lines and perfect edges.
Materials and Prep
Use MDF or plywood for the smoothest finish. Pine works too but requires more sanding and filling. I prefer ¾-inch MDF because it’s cheap, straight, and paints beautifully.
Prime before painting – this step is non-negotiable. Skip it and watch your perfect white paint job turn blotchy. I use Kilz primer and have never regretted the extra step.
Sand between coats for that professional smooth finish. Use 220-grit sandpaper and barely touch the surface. It feels like overkill but makes the difference between DIY and designer.
Getting That Perfect White
Apply thin, even coats rather than one thick coat. I do three thin coats with a foam roller, which eliminates brush marks. Patience here pays off big time.
Use cabinet-grade paint for durability. Regular wall paint chips and shows wear quickly on shelves. I learned this after having to repaint my first set after six months.
Consider adding a clear protective coat. Especially important for high-traffic areas or if you’re a serial shelf re-decorator like me.
3. Geometric Triangle Floating Shelves

Triangle shelves are having a moment, and honestly, they deserve it. I made a set for my kid’s room, and they’re both functional and art-like. Plus, triangles are surprisingly easy to build once you figure out the angles.
These work especially well in modern or eclectic spaces where traditional rectangles feel too boring.
Cutting Those Angles
Set your miter saw to 30 degrees for equilateral triangles. This gives you three 60-degree angles that fit together perfectly. I messed this up twice before realizing my middle school geometry teacher was right – angles matter.
Use a speed square to mark consistent angles if cutting by hand. It’s slower but totally doable. My first set was hand-cut, and while it took longer, the satisfaction was worth it.
Make a cardboard template first. Trust me on this – wood is expensive, cardboard is free, and mistakes are inevitable.
Assembly Tricks
Use wood glue and pocket screws for invisible joints. The pocket screw jig was the best $40 I ever spent on a tool. No visible screws means cleaner lines.
Clamp everything and let the glue dry completely before mounting. Triangles are only as strong as their weakest joint. Rushing here leads to sagging corners later.
Consider making multiple sizes for a gallery effect. I have three different-sized triangles on my wall, and the variation looks intentional and artistic.
Also Read: 10 Gorgeous Kitchen Floating Shelves Ideas and Space Savers
4. Floating Corner Shelf Units
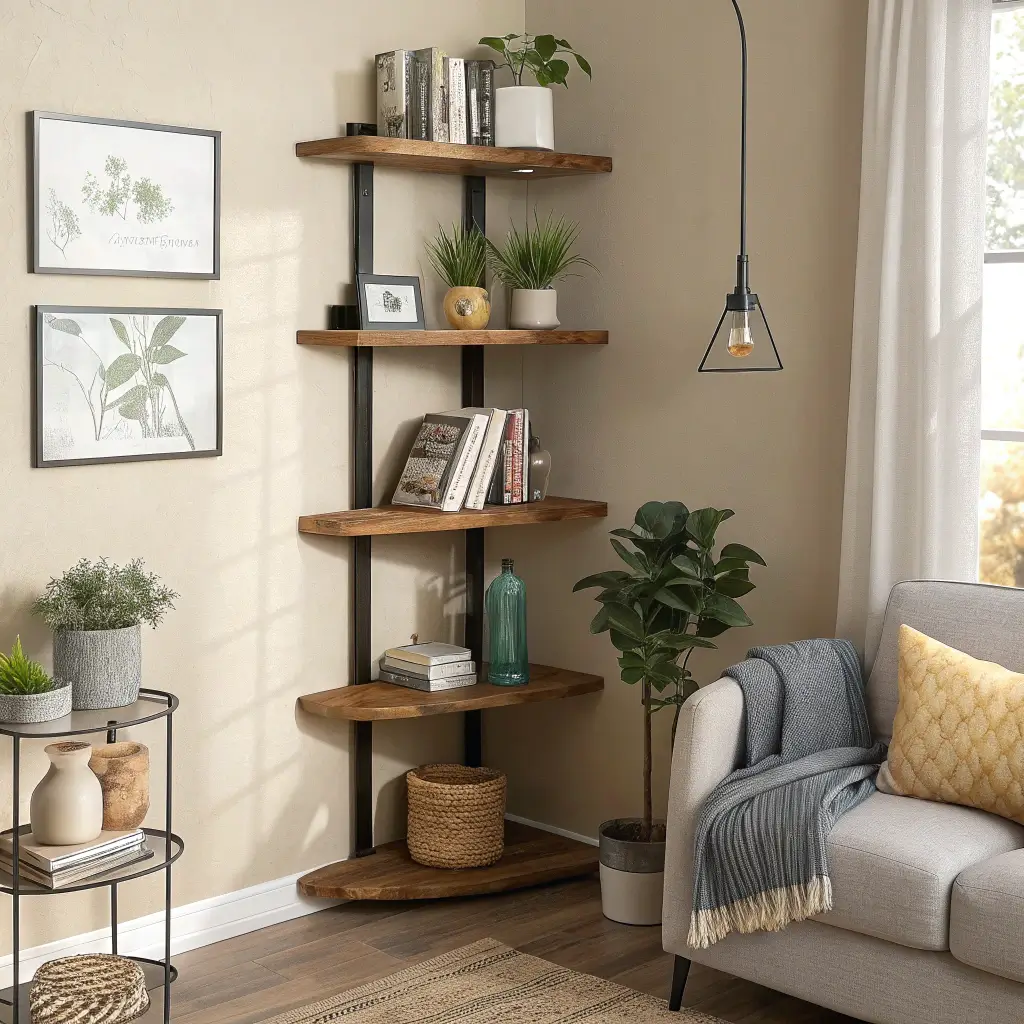
Corner spaces are the Bermuda Triangle of home decor – things go there to disappear. But corner floating shelves turn that dead space into the hero of the room. I built corner shelves for my awkward bedroom corner, and now it’s my favorite spot.
Corner shelves require different thinking than standard shelves, but they’re not actually harder to make.
Measuring and Planning
Measure your corner angle – not all corners are 90 degrees. My 1940s house has corners ranging from 87 to 93 degrees. A digital angle finder saved my sanity.
Plan for the right depth. Too deep and they jut out awkwardly, too shallow and they’re useless. I find 8-10 inches works for most corners.
Consider making templates from cardboard first. Corners are unforgiving, and wood doesn’t stretch when you cut it too short.
Corner-Specific Installation
Use corner-specific brackets or create a cleat system. Standard brackets don’t work well in corners. I make L-shaped cleats that distribute weight evenly.
Find studs on both walls for maximum stability. Corner shelves bear weight from different angles and need solid support. My first attempt with just drywall anchors lasted exactly three days.
Level across both walls. A shelf that’s level on one wall might slope on the other. Check both directions before securing.
5. Industrial Pipe and Wood Shelves

Industrial pipe shelves scream “I’m handy AND stylish.” I built my first set for my home office, and now I get more compliments on the shelves than anything else in the room.
The combination of warm wood and cold metal creates perfect contrast that works in almost any space.
Working with Pipes
Buy pipes and fittings from the plumbing aisle, not the decor section. Same product, half the price. I saved $60 on my project by shopping smart.
Have pipes cut and threaded at the hardware store. Most will do it for free, and it saves you from buying threading tools you’ll use once.
Clean pipes thoroughly before assembly. They come with oils and residue that prevent paint or sealant from adhering properly.
Assembly and Design
Dry-fit everything before final assembly. Pipes thread together tightly, and taking them apart risks stripping threads. I map out my entire design first.
Use flanges to attach to both wall and shelves. This creates the most stable connection. Some people skip the shelf flanges, but I like the extra security.
Consider adding a crossbar for longer shelves. Anything over 36 inches benefits from middle support. My 48-inch shelf started sagging until I added a center pipe.
6. Floating Shelves with Hidden Brackets
Hidden bracket shelves are basically magic – they look like they’re defying gravity. I installed these in my living room, and guests always ask how they’re staying up.
The secret is in the bracket system, which requires more precision but delivers that clean, floating look.
Choosing Hidden Bracket Systems
Floating shelf brackets come in rod-style or channel-style. Rod-style is easier for beginners, channel-style holds more weight. I use rod-style for decorative shelves, channel for books.
Match bracket capacity to intended use plus 50%. If you plan to load 20 pounds, get 30-pound brackets. Over-engineering prevents midnight crashes.
Check wall material before buying brackets. Drywall-only installation limits weight capacity significantly. I always try to hit at least one stud.
Installation Precision
Level is everything with hidden brackets. Even slightly off and your stuff slides off. I use a laser level now after learning this lesson the hard way.
Drill pilot holes to exact specifications. Too big and brackets wobble, too small and you’ll split the wood. Measure twice, drill once.
Test weight capacity before final decorating. I put water bottles equaling my intended weight on new shelves and leave them overnight.
Also Read: 10 Beautiful Floating Shelves Bedroom Ideas and Space Hacks
7. Colorful Ombre Painted Shelves
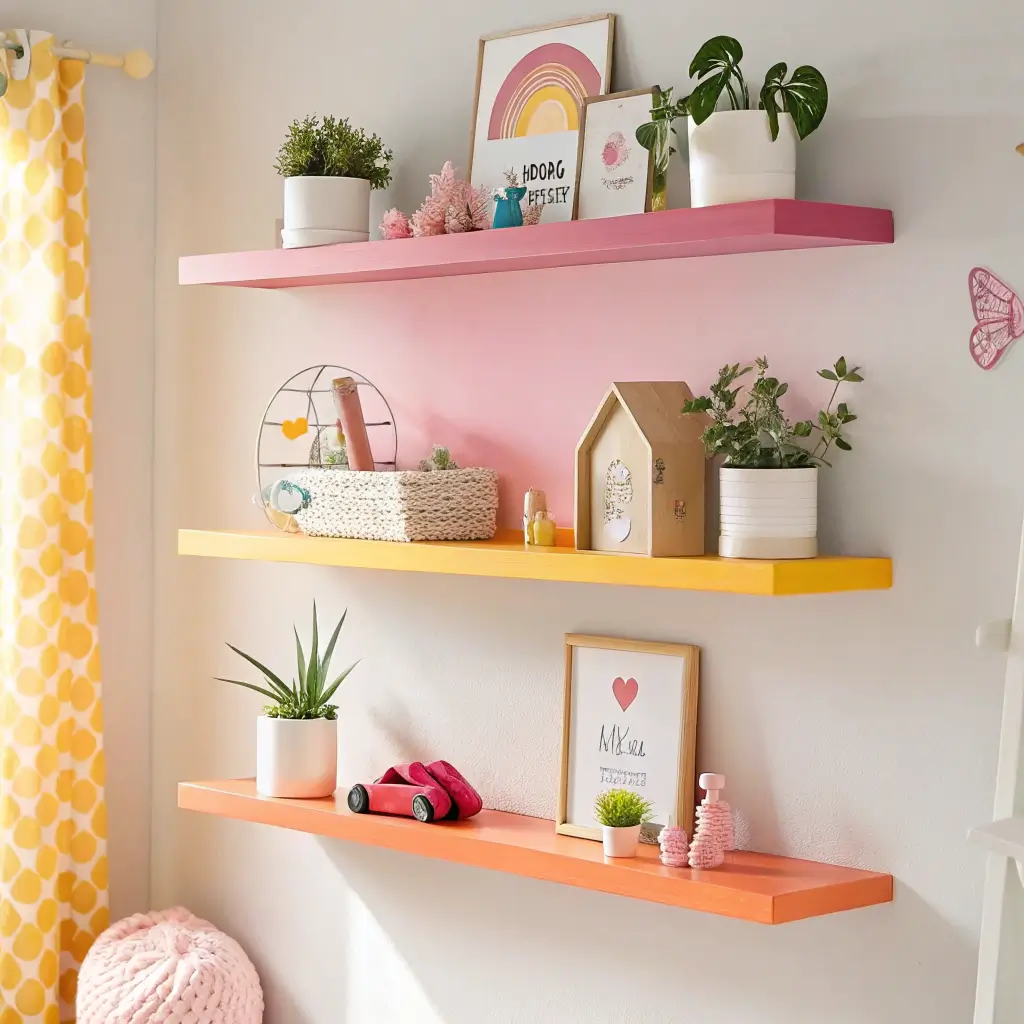
Ombre shelves are like rainbow magic for your walls. I made a set for my daughter’s room, starting with dark purple and fading to pale lavender, and she thinks I’m the coolest parent ever.
The gradient effect looks complicated but is actually pretty forgiving – imperfections blend into the fade.
Creating the Perfect Gradient
Start with your darkest color at full strength. Mix in increasing amounts of white for each successive shelf. I use disposable cups marked with ratios to maintain consistency.
Paint each shelf separately before mounting. Trying to create ombre on mounted shelves is a nightmare of drips and uneven coverage.
Blend edges while paint is still wet. Use a barely damp brush to feather where colors would meet. This creates seamless transitions.
Color Selection Tips
Choose colors from the same family for smoothest gradients. Blue to green works, blue to orange doesn’t. I stick to analogous colors on the color wheel.
Test your gradient on sample boards first. What looks good in your head might not work in reality. My first attempt at yellow to red looked like a sunset gone wrong.
Consider your room’s lighting. Colors look different under various lights. That perfect pink might look orange under your warm LEDs.
8. Floating Shelves with Built-in Planters

Plant shelves are basically two trends in one – floating shelves AND urban jungle vibes. I built shelves with integrated planters for my kitchen, and now I have fresh herbs without sacrificing counter space.
The trick is planning for water drainage and weight from the start.
Building Planter Integration
Cut holes slightly smaller than your planters for a snug fit. I use a hole saw and test fit frequently. Too loose and planters fall through, too tight and they won’t sit flush.
Seal wood thoroughly around planter areas. Water is wood’s enemy. I use three coats of polyurethane around and under planter spots.
Include a lip or rim to catch water overflow. Even careful waterers (not me) occasionally overpour. A small ridge prevents water from running onto the floor.
Plant Considerations
Choose plants appropriate for shelf lighting. My north-facing shelf herbs struggled until I switched to low-light tolerant varieties.
Use plastic liners inside decorative planters. This protects the shelf and makes plant swapping easier. I learned this after killing my third succulent.
Plan for growth when spacing planters. That tiny succulent will triple in size. Leave room or be prepared to repot frequently.
9. Floating Bookshelves with Ladder Support
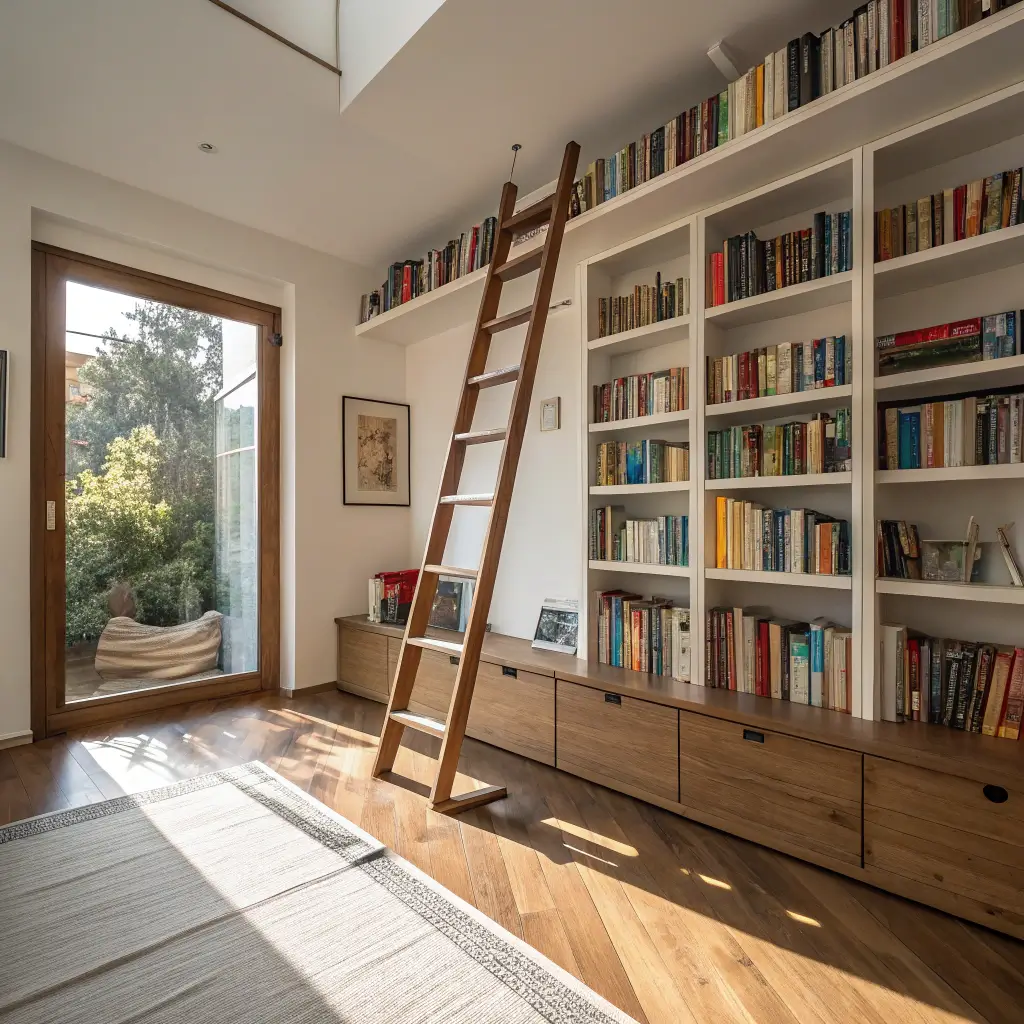
Ladder bookshelves combine the openness of floating shelves with the stability of traditional bookcases. I built one for my home library corner, and it holds an embarrassing amount of books I swear I’ll read someday.
The ladder adds both function and visual interest while providing extra support for heavy loads.
Building the Ladder Frame
Use hardwood for the ladder sides if possible. Pine works but can bow under heavy loads. I splurged on oak for mine and haven’t regretted it.
Angle ladder sides slightly for stability. Five degrees back from vertical prevents tipping. I learned this after my prototype wanted to dive forward.
Connect shelves to ladder and wall for maximum support. The ladder helps but shouldn’t bear all the weight. Wall mounting is still crucial.
Spacing for Books
Vary shelf heights based on your book collection. Paperbacks need 8 inches, hardcovers 12 inches, coffee table books more. Measure your tallest books first.
Leave finger space above books for easy removal. An extra inch makes grabbing books much easier. My too-tight shelves require book wrestling.
Consider adjustable shelf pins for flexibility. Drilling multiple holes lets you reconfigure as your collection grows.
Also Read: 12 Chic Floating Shelves Living Room Ideas for Modern Interiors
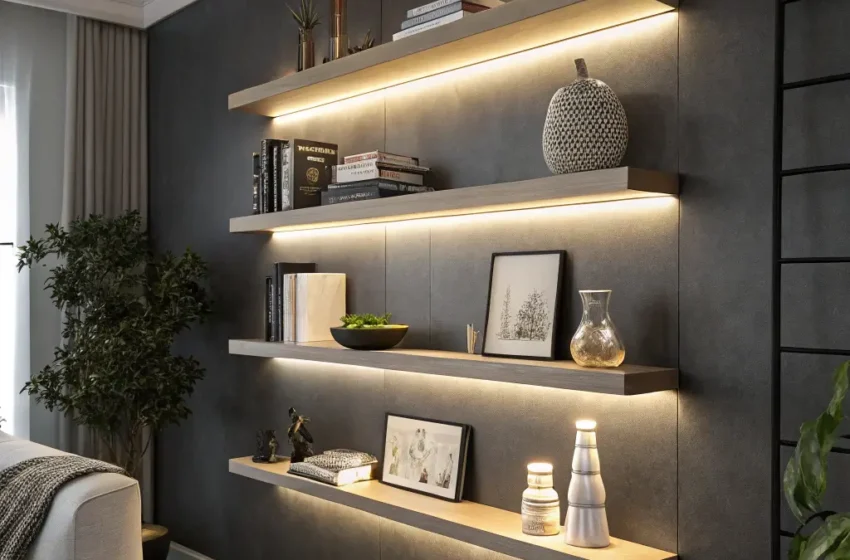
10. Floating Shelves with LED Backlighting
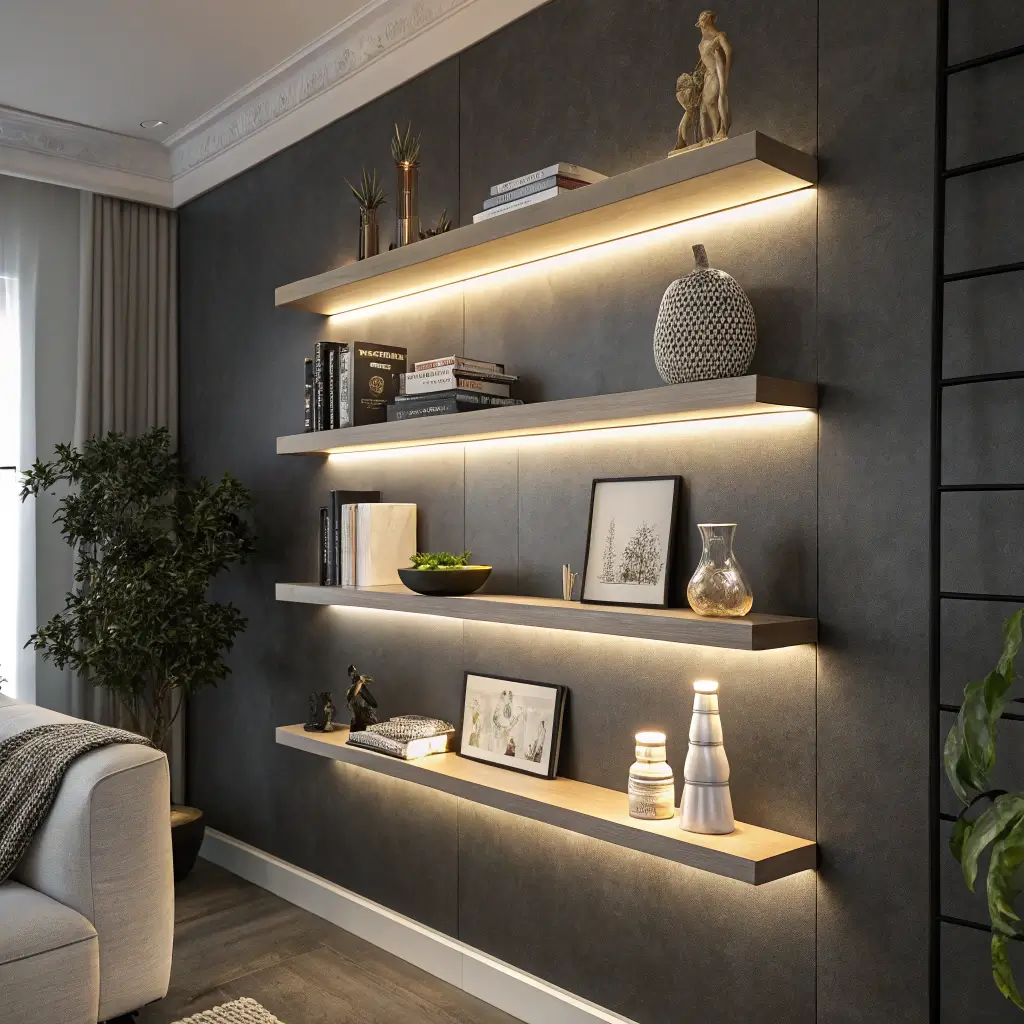
LED-lit shelves turn storage into art. I added backlighting to my bar shelves, and now my bourbon collection looks like a high-end speakeasy display.
The lighting transforms basic shelves into architectural features.
Installing LED Strips
Use aluminum channels for professional-looking LED installation. They diffuse light evenly and hide the individual LED dots. Naked strips look cheap.
Run wiring through the wall if possible. Surface-mounted wires kill the floating effect. I use cord covers painted to match the wall when I can’t go through.
Connect all strips to one controller. Individual controls for each shelf gets annoying fast. One dimmer to rule them all.
Lighting Effects
Warm white creates cozy ambiance, cool white feels modern. I use warm in living spaces, cool in my office. Color-changing is fun but gets old quickly.
Position strips to avoid direct eye contact. Hidden behind the shelf edge or facing the wall creates glow without glare.
Consider adding a dimmer. Full brightness is rarely needed, and dimming creates better mood lighting. My shelves are usually at 40% brightness.
11. Floating Shelves with Wire Frame Accents
Wire frame shelves blend industrial and minimalist styles perfectly. I made these for my teenager’s room, and they’re edgy without being too harsh.
The combination of wood and wire adds visual texture while maintaining an open feel.
Working with Wire
Use galvanized wire mesh for durability. Chicken wire looks cute but bends too easily. I use ½-inch hardware cloth for most projects.
Attach wire with a staple gun for hidden fasteners. Regular staples show and look amateur. Construction staples disappear into the wood.
Spray paint wire before attaching for custom colors. Black is classic, but I’ve done gold and copper for different rooms. Paint adheres better before assembly.
Design Applications
Use wire backing to prevent items from falling through. Great for kids’ rooms or earthquake-prone areas. My wire-backed shelves have survived two minor quakes.
Create wire baskets underneath for extra storage. I bend wire mesh into simple baskets that slide under the main shelf.
Mix solid and wire sections for variety. All wire can look busy. I alternate materials for visual rhythm.
12. Floating Shelves with Hanging Hooks

Shelves with integrated hooks are the Swiss Army knives of storage. My entryway version holds mail on top and keys below – organization heaven.
The combination maximizes vertical space and keeps related items together.
Adding Hooks Effectively
Install hooks on the underside before mounting shelves. Way easier than trying to add them while lying on your back under mounted shelves.
Space hooks based on intended use. Keys need less space than bags. I measure my items first and mark spacing.
Use screw-in hooks for adjustability. Fixed hooks limit flexibility. Screw-in lets you reconfigure as needs change.
Placement Strategy
Position hooks where they won’t interfere with shelf items. Nothing worse than knocking things off while hanging your coat.
Keep hook length proportional to shelf depth. Long hooks on shallow shelves look awkward and catch on everything.
Making Your DIY Shelves Last
After building dozens of floating shelves, here’s what I know for certain: preparation and patience matter more than perfection. My first shelves were crooked disasters, but they taught me everything I needed to know.
Always buy 20% more materials than you think you need. Mistakes happen, wood splits, and that “perfect” board might have a hidden flaw. Better to have extra than make another hardware store run mid-project.
Invest in a few quality tools rather than many cheap ones. A good level, stud finder, and drill will serve you better than a garage full of bargain bin tools. My $30 level has saved me from countless crooked shelf disasters.
Don’t skip the planning phase. I know you want to start building RIGHT NOW (been there), but 30 minutes of planning saves hours of fixing. Measure your space, sketch your design, and think through the process before cutting anything.
FYI, your first shelf probably won’t be perfect, and that’s totally fine. My living room shelves have a 2-degree tilt that only I notice. They’ve held books for three years without issue. Sometimes “good enough” really is good enough 🙂
Remember, the best DIY floating shelf is the one you actually build. Stop pinning ideas and start making sawdust.
Your walls are waiting, your wallet will thank you, and honestly, there’s nothing quite like the satisfaction of building something with your own hands. Now grab that drill and make something awesome!
BTW, when friends ask where you got those amazing shelves, the correct answer is “Oh, these old things? I just threw them together one weekend.” Then enjoy their shocked faces when they realize you’re basically a DIY genius now.


