12 Easy DIY Girls Room Decor Ideas and Charming Bedroom Flair
- Bedroom Design
 Ben
Ben- 0
- 46 minutes read
Your daughter’s room should feel like her personal kingdom—a space where she can dream, create, and just be herself. But let’s be real: those magazine-perfect rooms you see online often come with price tags that make your wallet weep.
The good news? You absolutely don’t need to spend a fortune to create a space she’ll love and actually want to hang out in.
I’ve decorated girls’ rooms more times than I can count (thanks to a daughter who changes her style preferences like most people change socks), and I’ve learned that DIY isn’t just the budget-friendly route—it’s actually way more fun and meaningful.
There’s something incredibly special about creating personalized pieces that reflect her unique personality instead of buying generic stuff that every other kid has.
So grab your crafting supplies, maybe put on a playlist you both love, and let’s transform that bedroom into a space that’s totally her.
These twelve ideas work for various ages, styles, and skill levels, so whether she’s into fairytale princess vibes or modern boho chic, we’ve got you covered.
1. Fairy Light Canopy Bed
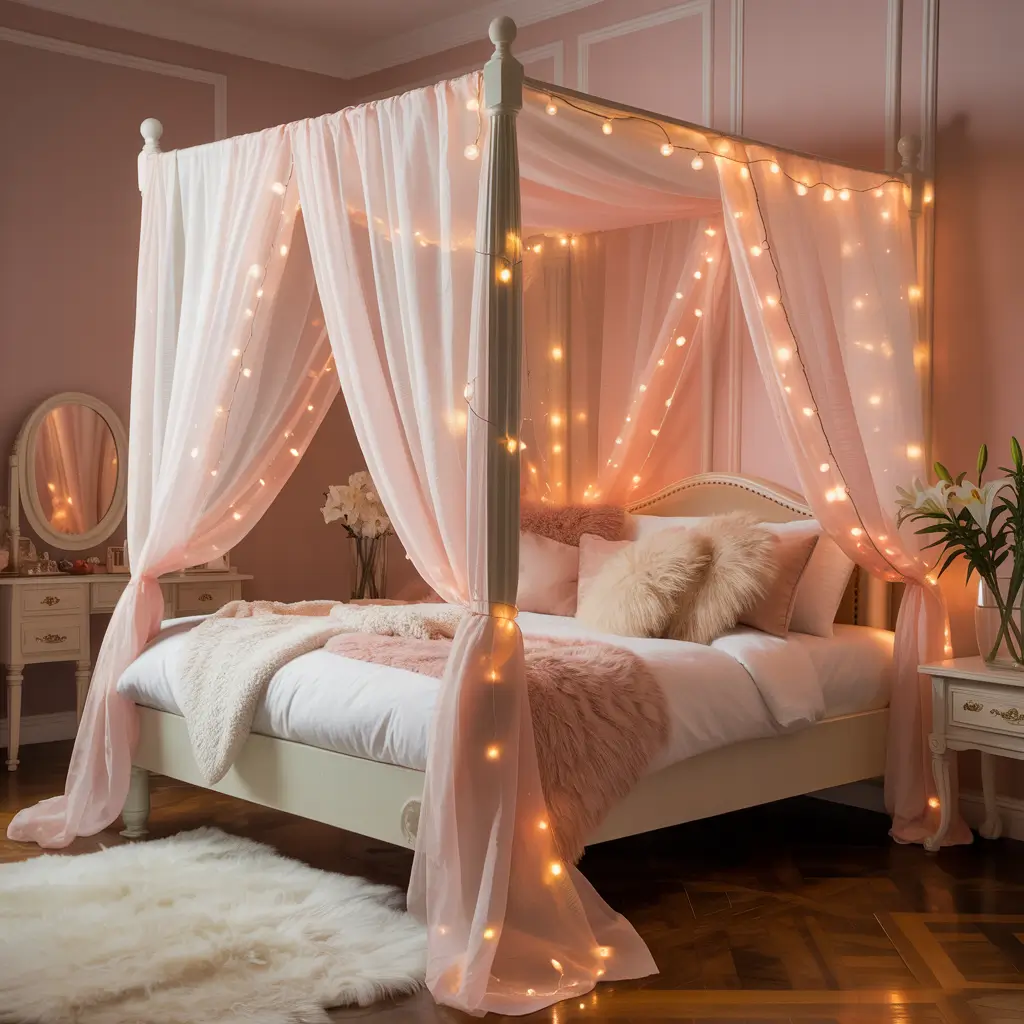
Creating Magic Overhead
Fairy lights have this universal appeal that transcends age—they’re magical when you’re seven and still magical when you’re seventeen. Draping them over a bed canopy creates this dreamy, enchanted atmosphere that makes bedtime feel less like a chore and more like retreating to a cozy sanctuary.
I installed one of these in my daughter’s room when she was eight, and honestly, she still hasn’t gotten tired of it. She reads under those lights, has sleepovers where everyone piles under the canopy, and swears it helps her fall asleep. Who am I to argue with results?
Building Your Canopy Structure
You need a sturdy anchor point above the bed—a ceiling hook screwed into a joist works perfectly. Grab a large embroidery hoop (at least 24 inches diameter) or a hula hoop if you want something bigger. Wrap it in ribbon, fabric, or leave it plain depending on your aesthetic.
Drape sheer fabric over the hoop—tulle, organza, or lightweight cotton in whatever color matches her room. I used white for a classic look, but blush pink, lavender, or even mint green would look gorgeous. You need about 5-7 yards of fabric for a nice flowing effect. Gather the fabric at the hoop and secure it with hot glue, zip ties, or by sewing it in place.
Adding the Lights
Here’s where the magic happens. Weave battery-operated fairy lights (never plug-in ones for safety reasons) throughout the gathered fabric at the top and cascading down the draping sections. Go for warm white lights for a cozy glow, or pick colored lights if she prefers something more playful. I used lights with different settings—steady, twinkling, fading—so she could change the mood.
Secure the light strands with small clear zip ties or fishing line so they don’t slip around. Make sure the battery pack is accessible for turning lights on and off without having to dismantle anything. Mount your canopy hoop to the ceiling hook, and let the fabric drape down along the wall behind the bed, creating that magical tent-like effect.
FYI, position this high enough that even when she’s jumping on the bed (which they all do when you’re not looking), she can’t reach and pull it down. Safety first, magic second.
2. Personalized Name Wall Art
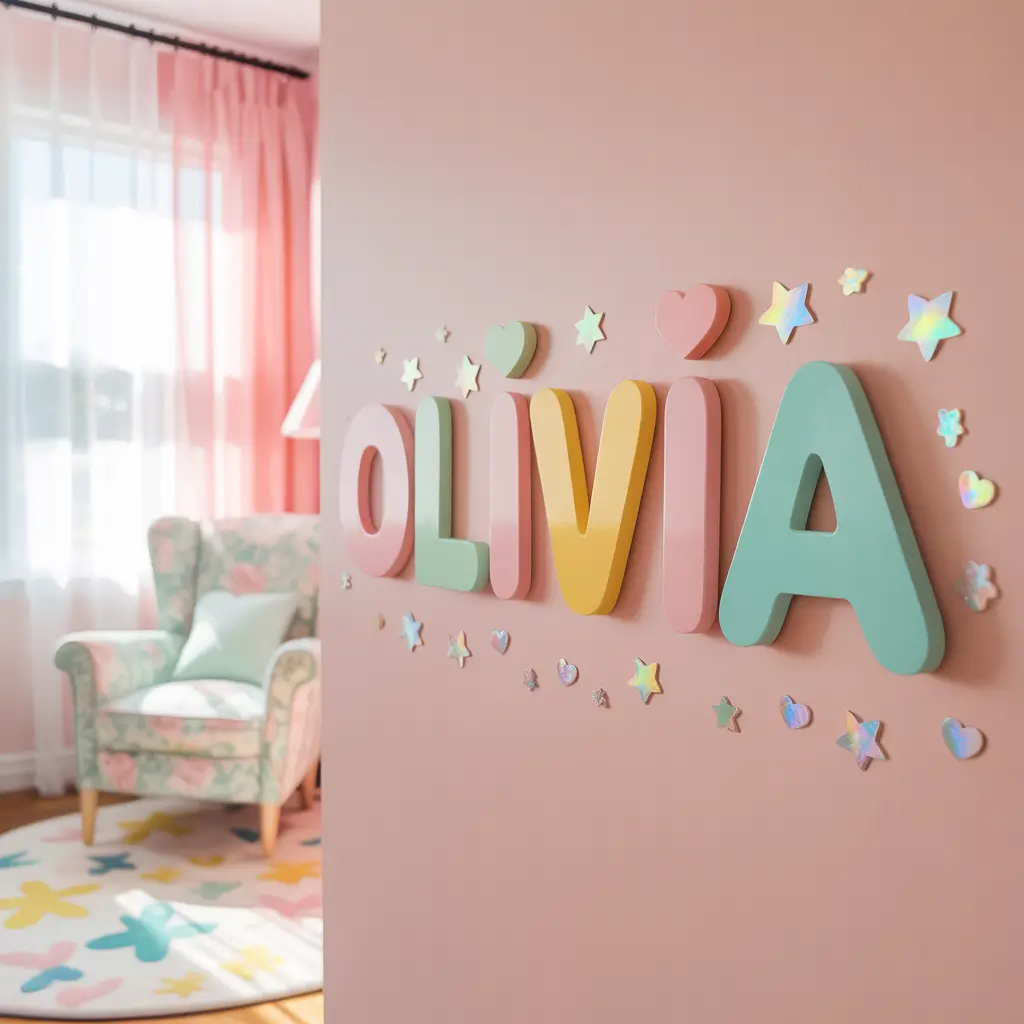
Her Name in Lights (or Paint, or Wood…)
There’s something empowering about seeing your name displayed prominently in your personal space—it’s a daily reminder that this room is hers. Creating custom name art lets you match her exact style and room colors while adding that deeply personal touch that store-bought decor just can’t deliver.
I’ve made name art for my daughter’s room probably four different times as her style evolved. The beauty of DIY is you can change it up without feeling guilty about wasting money on something she outgrew.
Material Options
You can go several routes here depending on your skill level and her style. Wooden letters from the craft store offer endless possibilities—paint them in ombre colors, cover them in fabric or scrapbook paper, add glitter or rhinestones, wrap them in yarn, or decoupage them with images from her favorite things. Each letter can be a different color or pattern for a playful look, or keep them uniform for something more sophisticated.
For a more modern approach, cut letters from plywood or thick cardboard and paint them in bold colors. I made 12-inch tall letters for my daughter’s name, painted each one a different pastel shade, and mounted them on her wall above her desk. The dimensional quality makes them pop off the wall in a way flat decals can’t match.
Alternative Approaches
If power tools aren’t your thing, create name art on canvas using acrylic paints. Paint the background in an ombre effect or solid color, then paint her name in a contrasting shade. Add decorative elements like flowers, stars, or butterflies around the letters. This method is super forgiving—if you mess up, just paint over it and try again.
Another option I love is string art. Print out letters in your desired font, tape the paper to a wooden board, hammer small nails along the letter outlines, remove the paper, and weave colorful thread or embroidery floss between the nails. The geometric web pattern looks incredibly impressive and is way easier than it seems.
Mounting and Placement
Position name art where she’ll see it daily—above the bed, over her desk, or on a prominent wall as you enter the room. Use command strips for lightweight pieces or mount directly with screws for heavier wooden letters. The visual impact of seeing her name displayed like artwork reinforces that this space belongs to her and celebrates her identity.
3. Pastel Ombre Accent Wall
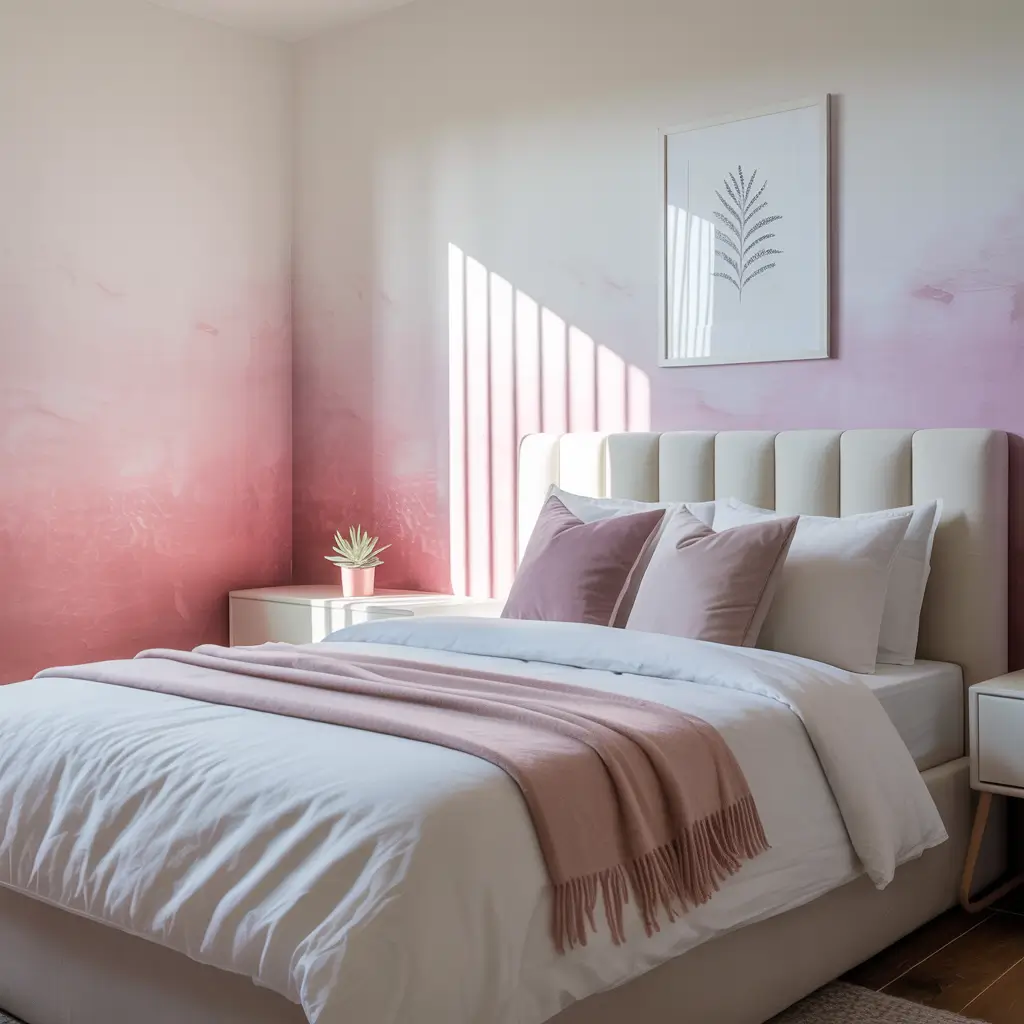
Gradient Goals
Ombre walls create this soft, dreamy effect that works beautifully in girls’ rooms without being overly juvenile. The gradient color transition adds visual interest and sophistication, and you can customize it to match any color scheme she’s into. Plus, it’s way less intimidating to paint than you might think.
I was terrified to attempt an ombre wall initially, but after watching a few tutorials and just going for it, I realized it’s actually pretty forgiving. The blending doesn’t have to be perfect—slight imperfections add to the handmade charm rather than detracting from it.
Choosing Your Colors
Pick 3-4 shades of the same color family in graduated tones. For a classic look, go from white at the top to a deeper pastel at the bottom. Pink to white, lavender to soft purple, mint to deep teal—whatever resonates with her current style. I did a peachy-pink gradient in my daughter’s room that starts almost white at the ceiling and deepens to a coral-pink at the floor.
Grab sample pots of your chosen colors before committing to full gallons. Test them on the actual wall to see how they look in your room’s lighting. Natural light versus artificial light can dramatically change how colors appear, so test at different times of day.
Painting Technique
Start with your lightest color at the top of the wall, painting down about one-third of the wall height. Then apply your next shade in the middle third, slightly overlapping where the two colors meet. Apply your darkest shade at the bottom third, again overlapping at the transition.
Here’s the magic step: while the paint is still wet, use a large dry brush or blending brush to blend where the colors meet. Work in horizontal strokes, back and forth across the transition areas until the colors blend smoothly. You can also use a damp sponge for blending, though I found the brush gave me more control.
Don’t stress about achieving perfect Instagram-worthy blending on your first try. The beauty of ombre is in the gentle transition, not razor-sharp color changes. If you’re not happy with how it looks, you can always go over it again. I did two coats on mine to get the depth and blending I wanted, and it turned out way better than I expected.
Also Read: 10 Cute DIY Baby Room Decor Ideas for Dreamy Spaces
4. DIY Hanging Macrame Shelf
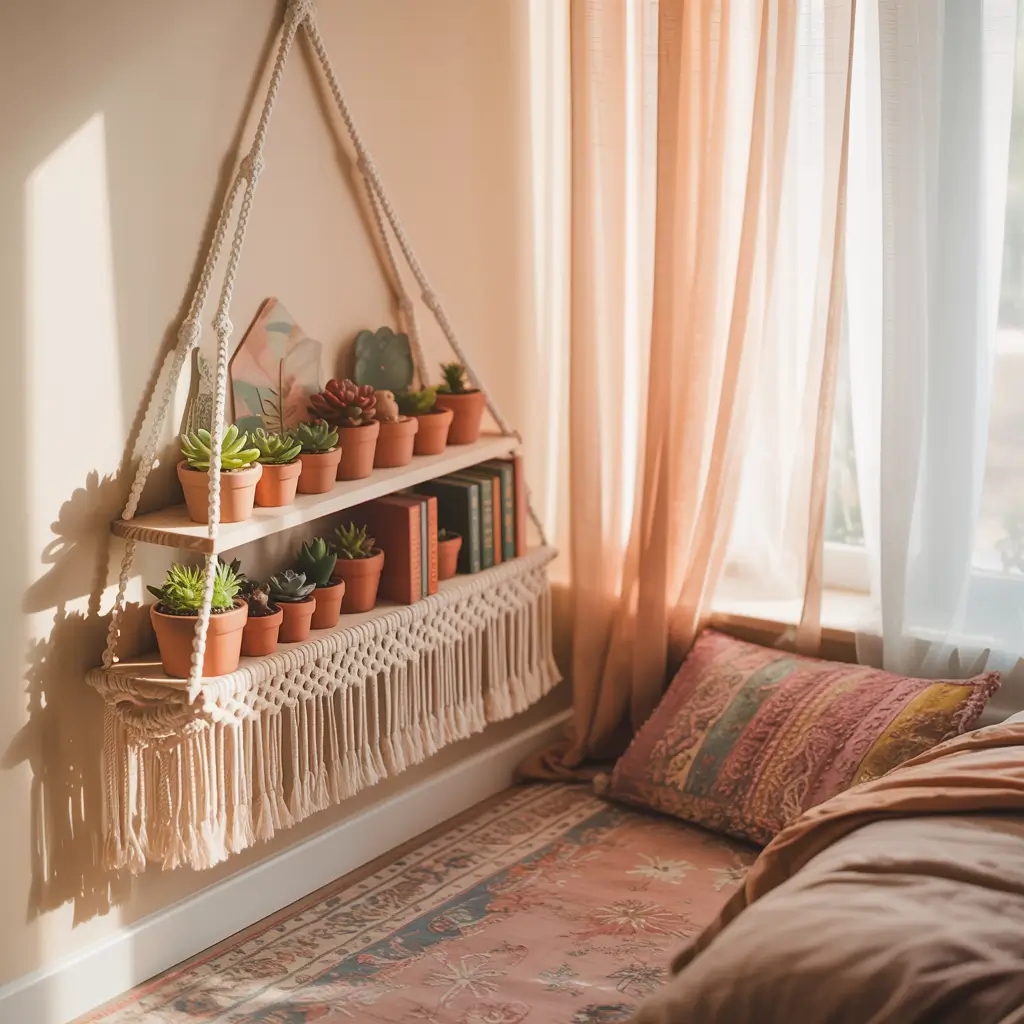
Boho Vibes Without the Boutique Price
Macrame is having a serious moment, and for good reason—it adds texture and that laid-back boho aesthetic that works beautifully in girls’ rooms. A hanging macrame shelf combines function with style, giving her a place to display treasures while looking like you hired a professional decorator.
I made one of these for my daughter’s room when she needed somewhere to display her rock collection (why do kids collect rocks?!), and it became such a statement piece that her friends all wanted one too.
Basic Macrame Skills Needed
You only need to know a few basic macrame knots for this project, and YouTube is your friend here. The square knot and lark’s head knot are your foundation—master those two, and you’re golden. I promise, if I can learn macrame while simultaneously keeping a child alive, anyone can.
Grab some cotton rope or macrame cord (about 100 feet should do it), a wooden dowel rod or branch for hanging, and a small wooden board or thick plywood piece for the shelf platform. Sand your wood pieces smooth so she doesn’t get splinters.
Creating Your Shelf
Cut your cord into eight pieces, each about 12 feet long. Fold each piece in half and attach to your dowel rod using lark’s head knots—you should now have 16 hanging strands. Divide these into four groups of four strands each.
Work your way down using square knots, creating the rope “sides” of your shelf. About 18 inches down from your dowel, place your wooden shelf platform and secure it by continuing your square knots underneath, effectively trapping the shelf in place. The cords should support the shelf from all four corners.
Continue knotting below the shelf for another foot or so, then gather all cords together and tie them in one big knot at the bottom. Trim the ends to create a tassel effect, or leave them long for a flowing look. Add beads or wrap sections with colored cord for extra decoration.
Styling Your Shelf
Hang your macrame shelf using a ceiling hook or strong wall mount. Style it with lightweight items—small plants (real or fake), books, photos, small trinkets, or decorative objects. I keep reminding my daughter not to overload it because it’s decorative storage, not industrial-strength shelving, but she pushes those limits regularly 🙂
5. Starry Night Glow Ceiling
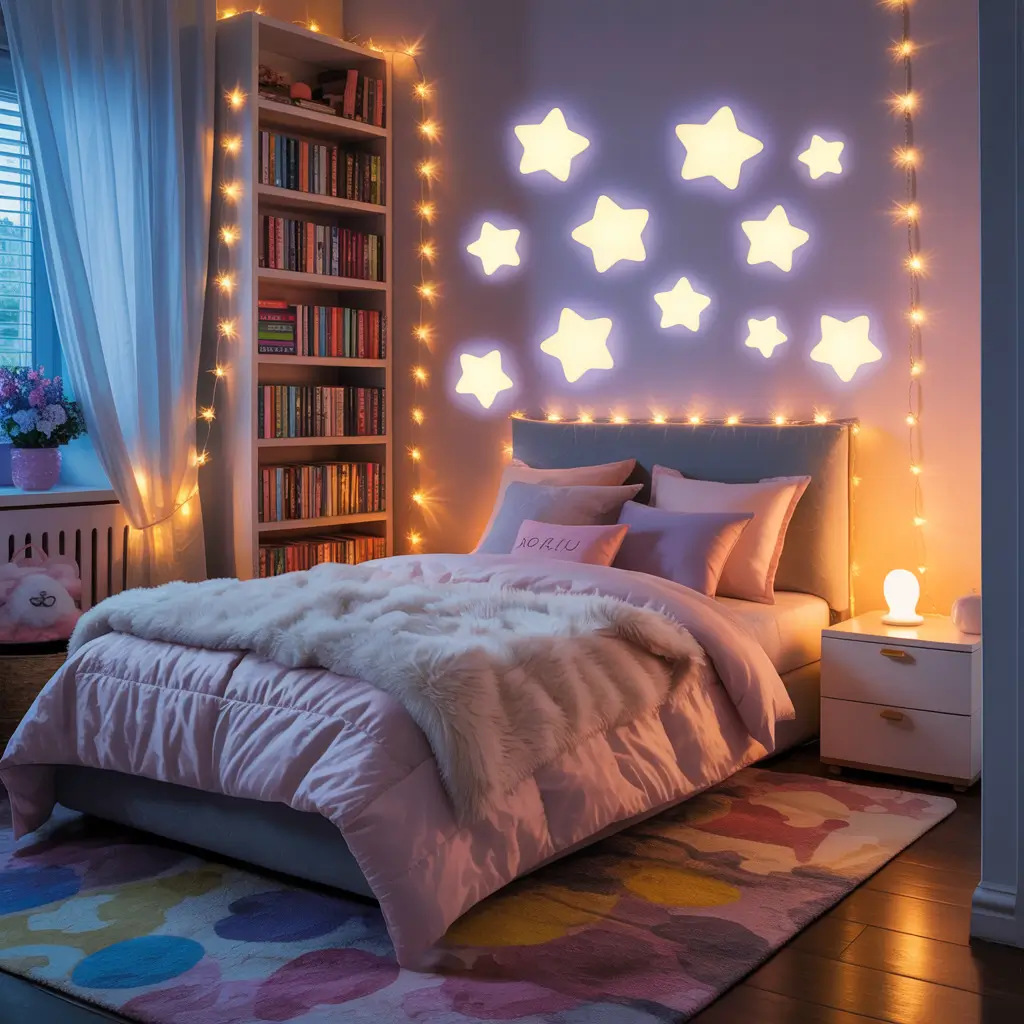
Bedtime Without the Battle
Glow-in-the-dark stars on the ceiling might seem basic, but when you take the time to create actual constellations and add shooting stars and various sizes, it transforms from elementary to enchanting. This project makes bedtime something to look forward to instead of something to fight about—the room becomes a mini planetarium.
My daughter still asks me to turn off her lights so she can watch her ceiling stars glow, and she’s almost a teenager. Some things just don’t get old.
Planning Your Night Sky
Invest in quality glow-in-the-dark stars—the cheap ones barely glow and fade within minutes. Get a variety pack with different sizes, and if you can find planets and shooting stars, even better. I found a set with 300 pieces including stars, planets, and comets for about fifteen bucks.
Print out constellation maps (tons of free resources online) and use them as guides to create real star patterns. I did the Big Dipper, Orion, Cassiopeia, and several others. This adds an educational element and makes the ceiling more interesting than random scattered stars.
Installation Strategy
Use small pieces of poster putty instead of the adhesive that comes with star stickers—it’s easier to reposition and won’t damage the ceiling. Stand on a sturdy ladder and press stars onto the ceiling following your constellation patterns.
Vary the density—cluster stars more heavily in some areas and leave other sections sparser for a more realistic night sky effect. Add a few shooting stars (longer comet shapes) angled across the ceiling for dynamic movement. I placed extra stars above her bed so she has the best view when lying down.
Charging the Glow
The stars need light exposure to charge before they’ll glow. Make sure the ceiling light is on for at least 15-20 minutes before bedtime. Some people use a small UV flashlight to “charge” the stars super bright right before bed, which creates an extra strong glow that lasts longer. The charged stars can glow for hours, though the intensity fades gradually.
Add some stars on the walls too, especially near the light switch and door. This creates a magical transition and provides gentle wayfinding if she needs to get up at night.
6. Upcycled Crate Storage Units
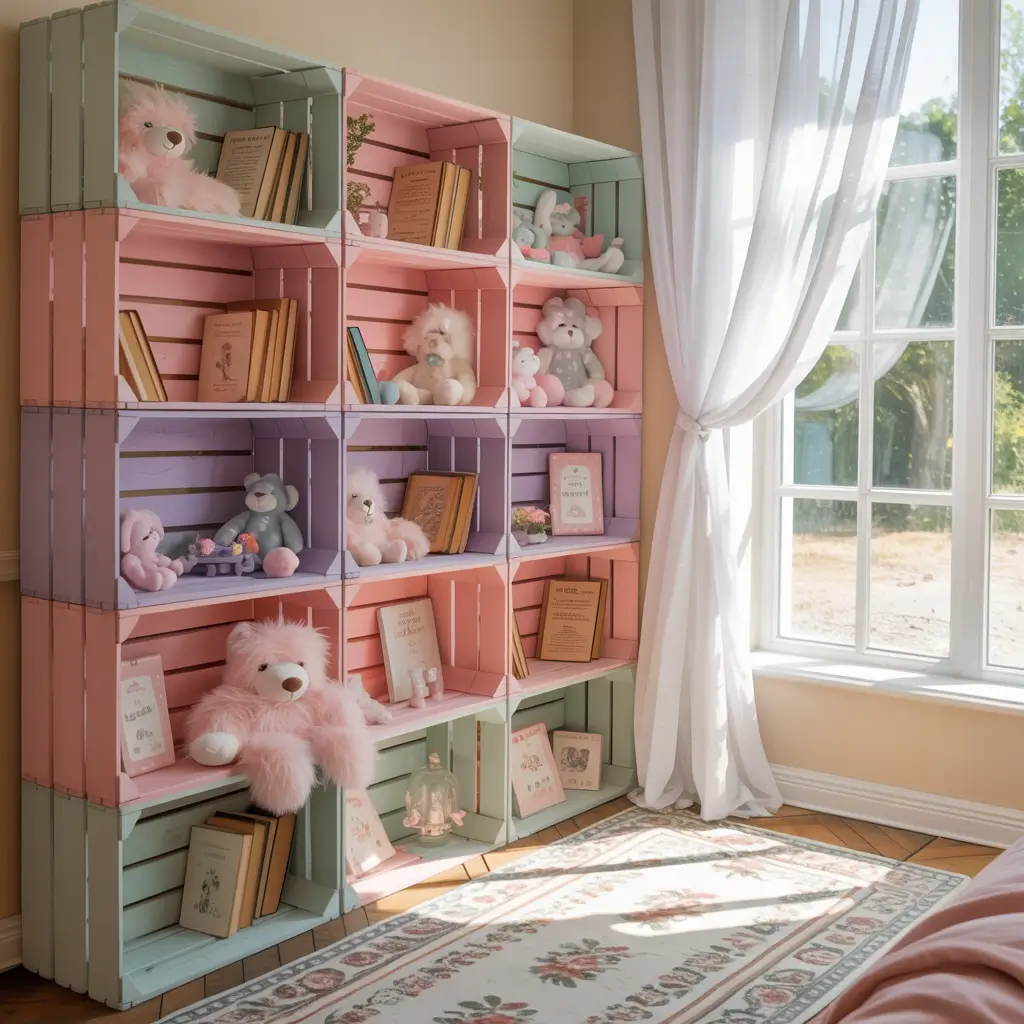
Rustic Storage That Actually Looks Good
Wooden crates are like the Swiss Army knife of DIY decor—they’re versatile, cheap (or free if you know where to look), and can be customized to match literally any style. Turning them into storage units gives her organized space for all her stuff while adding rustic charm to the room.
I have eight crates in various configurations in my daughter’s room, and they’ve been absolute workhorses. Books, toys, craft supplies, sports equipment—these crates hold it all while looking intentional rather than cluttered.
Sourcing Your Crates
Check craft stores for unfinished wooden crates, or look for free ones at grocery stores, farmer’s markets, or furniture stores—many businesses will give them away if you ask. You can also build simple crate-style boxes from scrap wood if you’re feeling ambitious and have basic woodworking skills.
Sand your crates thoroughly to remove any rough edges or splinters. This step is crucial—nobody wants a splinter situation, especially kids who tend to handle everything roughly.
Customization Options
Paint them in colors that match her room—all one color for cohesion, or different colors for a playful rainbow effect. I did mine in white, blush pink, and soft grey for a modern look. You could also stain them for a more natural wood aesthetic, or leave them raw and rustic.
Add decorative touches like stenciled designs, her initial on each crate, or even decoupage with fabric or patterned paper on the inside back panel. I stenciled different categories on mine—”Books,” “Art,” “Treasures”—so she knows what goes where. This actually helped with room cleanup because everything has a designated home.
Configuration Ideas
Stack crates vertically to create a bookshelf tower, securing them together with wood glue or small brackets for stability. Mount them on walls as floating shelves, or line them up horizontally under a window for a storage bench effect. I have three stacked vertically beside her desk, two mounted on the wall above her bed, and three more under her window creating a reading nook with cushions on top.
Add rope handles, fabric liners, or wheels to the bottom for easy mobility. The versatility means you can reconfigure them as her needs change without buying new furniture.
Also Read: 12 Bright DIY Kids Room Decor Ideas for Cheerful Bedroom
7. Handmade Tassel Garland
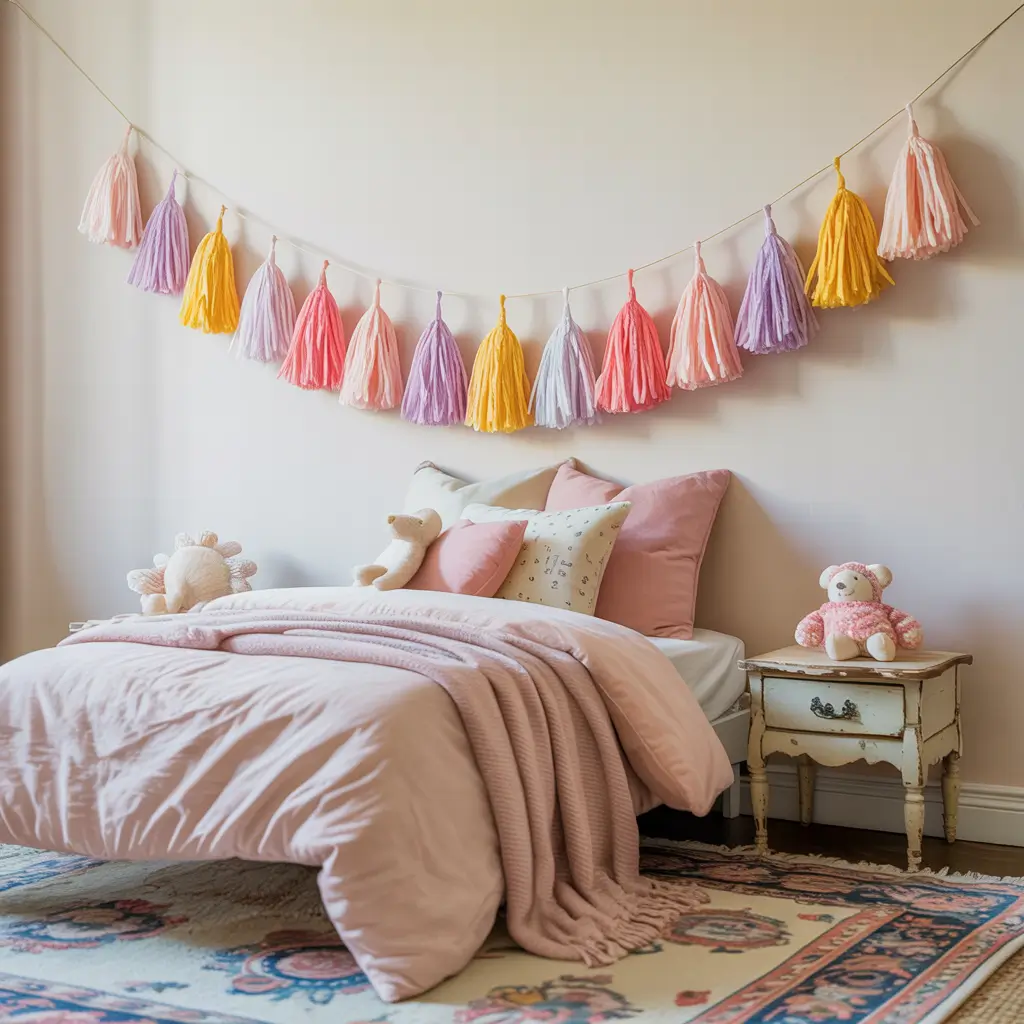
Quick Project, Big Impact
Tassel garlands are ridiculously easy to make, add instant color and texture to any wall, and cost next to nothing. They’re perfect for hanging above beds, across windows, on bulletin boards, or anywhere that needs a pop of playful decoration. Plus, this is a great project to do together if your daughter wants to help.
I’ve made probably a dozen different tassel garlands over the years because they’re so simple and satisfying. Each one takes maybe an hour and completely changes the vibe of whatever space it goes in.
Materials and Process
Grab tissue paper or crepe paper in colors that match her room. You need about 5-6 sheets per tassel. Stack your paper sheets together, fold them accordion-style (back and forth), then tie a piece of string or twine tightly around the center.
Cut the folded ends on both sides to create fringe, then gently separate and fluff each layer. The tissue paper naturally creates this full, fluffy tassel that looks way more complex than it actually is. Repeat this process in various colors until you have 10-15 tassels depending on your desired garland length.
Assembly and Hanging
Thread your tassels onto a long piece of twine, ribbon, or string, spacing them evenly. I usually do one tassel every 6-8 inches for a nice, full look without being too crowded. You can organize colors in a pattern (rainbow order, alternating shades, ombre gradient) or randomly mix them for a more eclectic vibe.
Hang your garland using small nails, command hooks, or washi tape. Drape it in a gentle swag or keep it taut and straight—both looks work. I hung ours above my daughter’s bed in a swooping arc, and it adds such a cheerful, festive element to the space. IMO, this is the best effort-to-impact ratio project on this entire list.
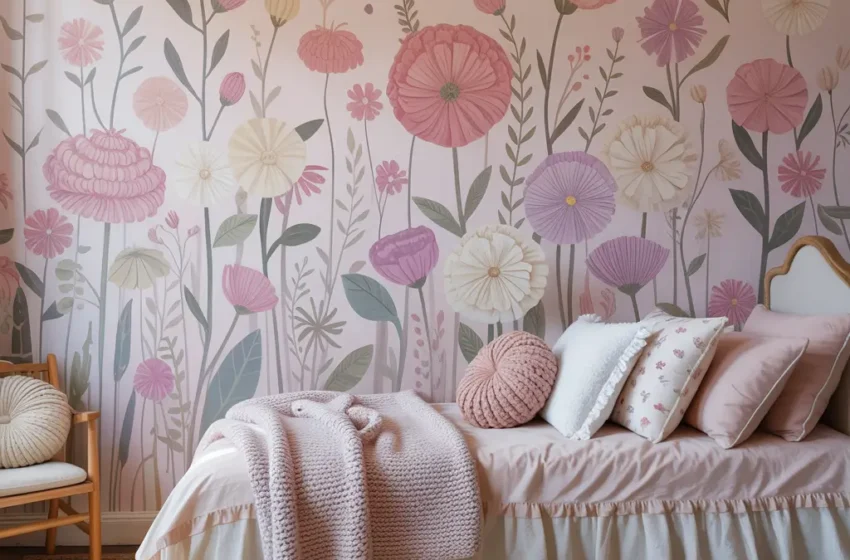
8. Floral Wall Decal Collage
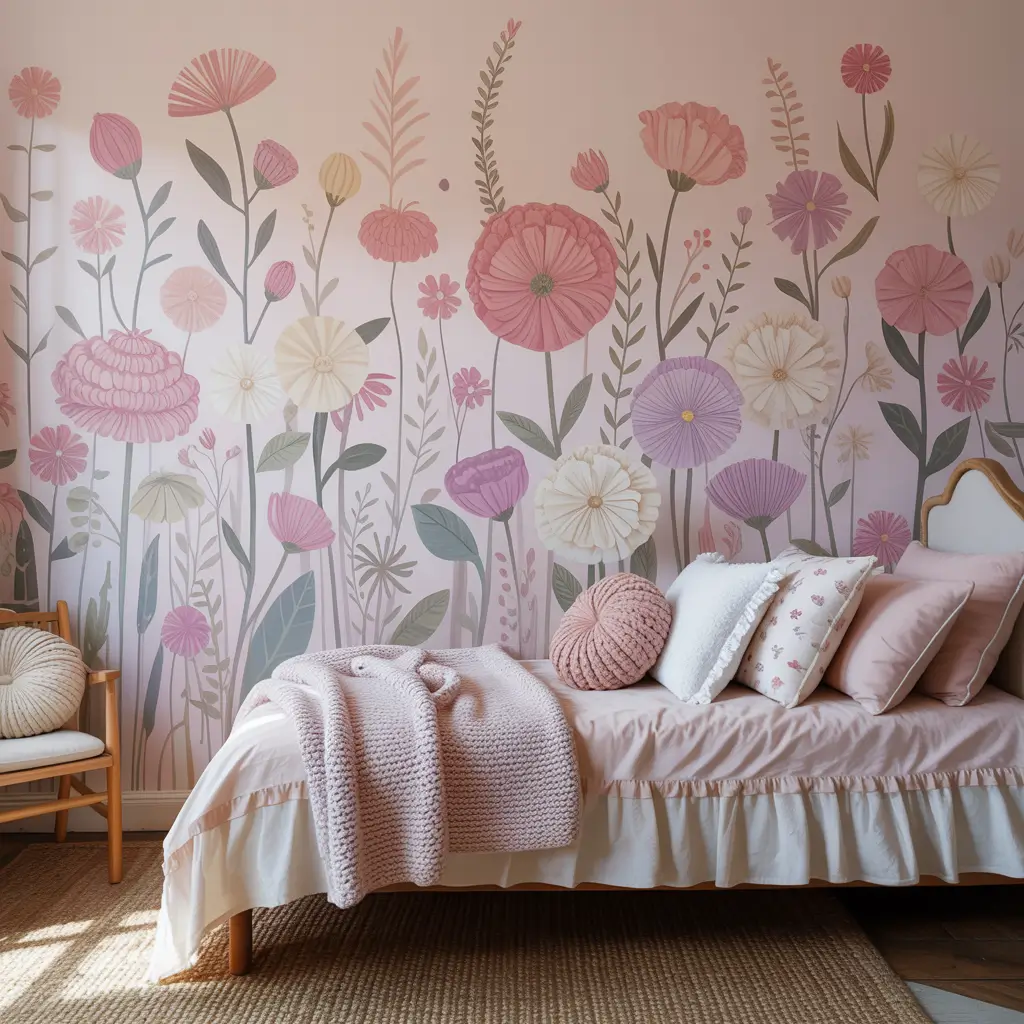
Garden Without the Maintenance
Floral elements bring softness and natural beauty to girls’ rooms without the commitment of a full mural. Creating a collage of flower decals allows for creativity and customization—you can arrange them however you want and easily change or remove them when styles evolve.
My daughter went through an intense flower phase (pink roses everywhere), and instead of painting murals I’d regret later, I created a removable floral collage that we could adapt as her tastes changed. Smart move, past me.
Sourcing Your Florals
You can buy pre-made wall decals in floral designs, but making your own gives you total control. Print floral images onto adhesive vinyl sheets or regular paper that you’ll attach with removable adhesive. I found gorgeous vintage botanical prints online (many are free and public domain), sized them how I wanted, and printed them on adhesive paper.
Another option is using fabric flowers. Cut flower shapes from felt or cotton fabric in various sizes and colors, then attach them to the wall with poster putty. This creates texture and dimension that flat decals can’t match. I mixed both methods—some printed florals and some fabric flowers—for maximum visual interest.
Creating Your Collage
Start with one larger focal flower, then build around it with smaller blooms, leaves, and stems. Work outward organically, letting the arrangement grow naturally rather than forcing a rigid pattern. I created a flowing arrangement that starts near her headboard and climbs up the wall, almost like vines growing.
Vary the sizes, colors, and types of flowers for depth and interest. Mix roses with daisies, add some wildflowers, throw in some greenery. The variety keeps it from looking too matchy-matchy or predictable. Step back frequently as you work to assess the overall composition.
Seasonal Changes
The beauty of decals and removable florals is you can change them seasonally or whenever she wants a refresh. Summer blooms can transition to fall leaves, then winter branches, then spring blossoms. This flexibility means the room evolves without major overhauls.
9. Chalkboard Painted Wall Section
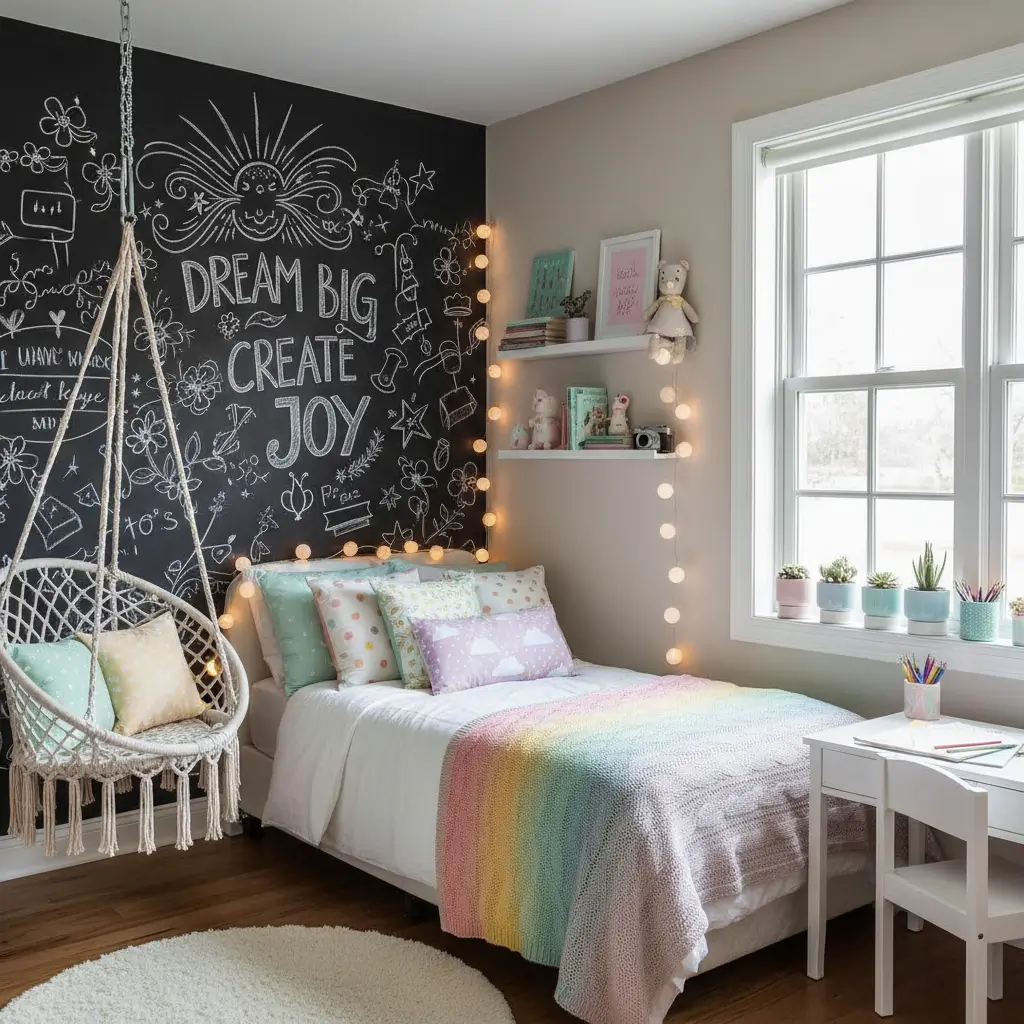
Doodle Central
Giving kids a designated space to draw, write, and express themselves creatively prevents them from doing it on surfaces you’d prefer stayed pristine (ask me how I know). A chalkboard wall section becomes both functional and decorative—she can change the “art” daily based on her mood.
I painted a 4×4 foot square section of my daughter’s wall with chalkboard paint, and it’s been the most-used feature in her entire room. She leaves herself notes, draws elaborate scenes, practices spelling words, and decorates it for holidays. The constant rotation keeps the room feeling fresh.
Painting Your Chalkboard
Choose your chalkboard location strategically—pick a wall section that’s easily accessible and visible but won’t be covered by furniture. Tape off a geometric shape (rectangle, square, even a house or cloud shape) using painter’s tape.
Apply chalkboard paint within your taped area. Most chalkboard paints require 2-3 coats for full coverage and that smooth, matte finish that actually writes well. Follow the manufacturer’s instructions for drying time between coats. Remove tape carefully before the final coat is completely dry for the cleanest edges.
Seasoning and Use
Once your chalkboard is fully dry (usually 24 hours), you need to “season” it before use. Rub regular chalk all over the surface horizontally, then vertically, then erase it. This prevents ghost images from permanent first drawings. Skip this step and you’ll have those first marks forever—I learned this the hard way.
Add a small ledge or cup holder nearby for chalk storage and keep an eraser handy. I installed a narrow floating shelf right below the chalkboard that holds chalk, erasers, and small decorative items. My daughter also uses magnetic clips attached to decorative magnets on other walls to display special drawings before erasing them.
Creative Uses Beyond Drawing
Beyond artwork, the chalkboard becomes functional—daily schedules, to-do lists, homework reminders, positive affirmations, or even just random thoughts and quotes. My daughter uses hers for everything from practicing math to writing friendship notes to documenting her current music obsessions.
Also Read: 10 Cool DIY Grunge Room Decor Ideas with Vintage Vibes
10. Boho Dreamcatcher Corner
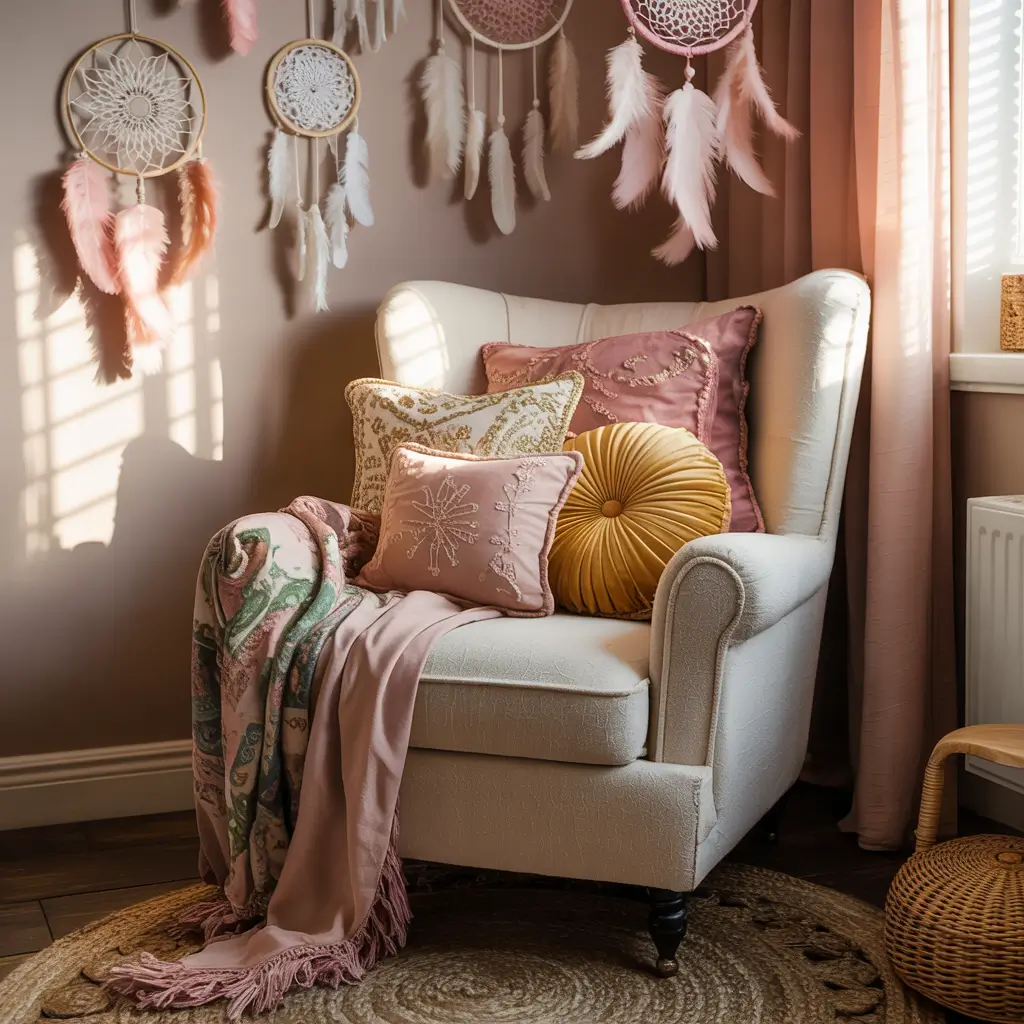
Cultural Appreciation Done Right
Dreamcatchers have deep cultural significance in Native American traditions, so if you’re incorporating them into decor, approach it respectfully. That said, creating a dedicated boho corner with dreamcatcher-inspired elements (or authentic dreamcatchers from Indigenous artisans) can be stunning and meaningful.
I created a boho corner in my daughter’s room with three handmade dreamcatcher-style pieces arranged at different heights, and it became her favorite spot to sit, read, and daydream.
Creating Your Pieces
If making your own dreamcatcher-style pieces, use embroidery hoops or metal rings as your base. Wrap them in suede cord, leather strips, or yarn in natural tones—tans, browns, creams, and rust colors work beautifully. Create the web pattern inside using string or embroidery floss, working in a spiral or geometric pattern from the center outward.
Add hanging elements—feathers (craft feathers are fine, no need for real bird feathers), beads, more string, fabric strips, or even small bells. Let these elements hang at varying lengths to create movement and visual interest. I used a mix of cream and tan macrame cord, wooden beads, and soft cream feathers for a cohesive natural look.
Corner Arrangement
Choose a corner that could use some visual warmth—maybe by a window or near her reading chair. Mount three circular pieces at different heights and slightly overlapping to create depth. Add some hanging plants (real or fake), a floor cushion or bean bag, maybe a small side table with a lamp, and you’ve created a dedicated peaceful spot within the room.
Layer in other boho elements like a jute rug, woven baskets for storage, or a macrame wall hanging. The accumulated texture and natural materials create that relaxed, eclectic vibe that defines boho style.
Respecting Origins
If you want authentic dreamcatchers rather than inspired pieces, buy them from Native American artisans. Many sell their work online through Indigenous-owned shops and marketplaces. This way, you’re supporting the culture that originated this tradition rather than appropriating it.
11. Ribbon and Clip Photo Display
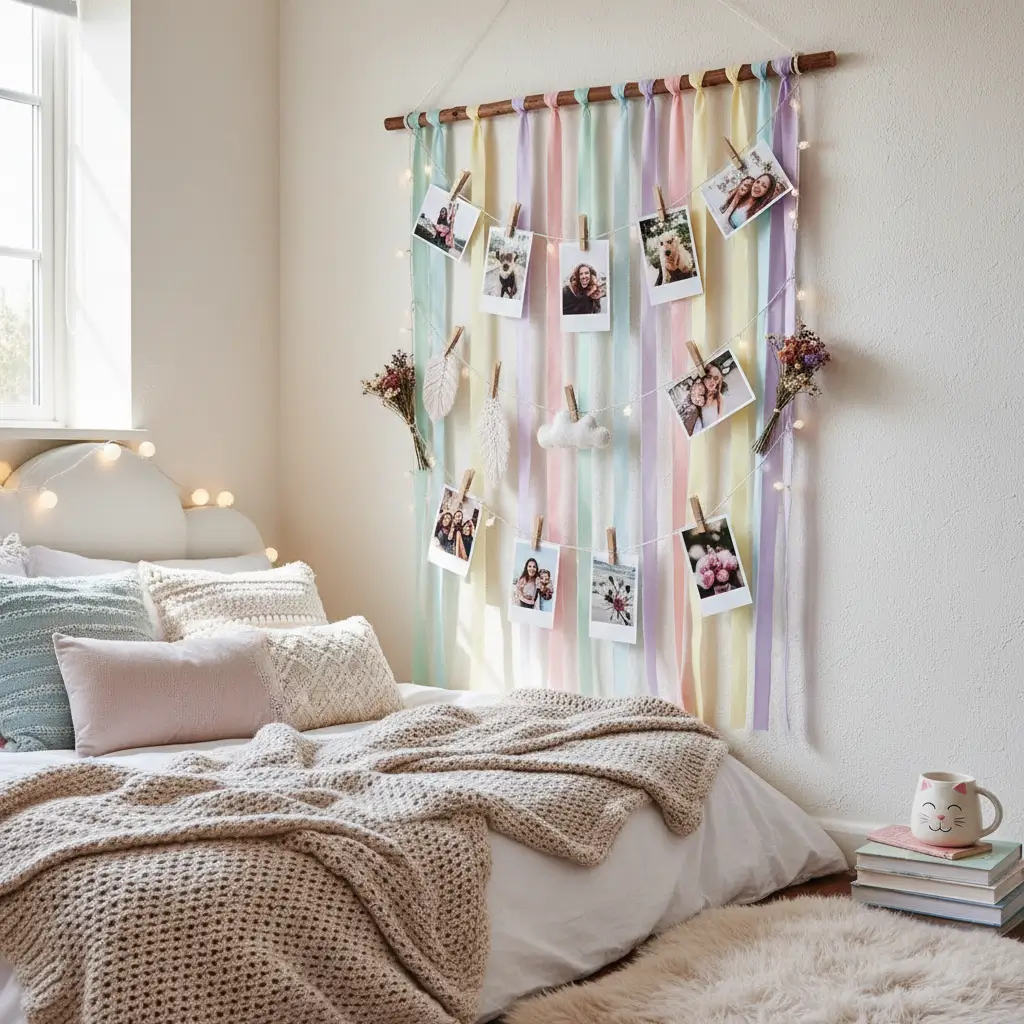
Memories on Rotation
Photo displays that are easy to change encourage regular updates, keeping the room feeling current and connected to her life. A ribbon and clip system makes swapping photos effortless—no frames to open, no tape to remove, just clip new photos up whenever she wants.
My daughter changes her photo display at least monthly, rotating in new pictures from sleepovers, school events, family gatherings, and random moments she wants to remember. It’s become this evolving documentation of her life that I love as much as she does.
Setting Up Your Display
Mount two small hooks or nails on the wall about 3-4 feet apart. String ribbon, twine, or decorative cord between them, letting it hang in a gentle swag. You can do a single strand or multiple parallel strands at different heights for more photo capacity.
Attach small clothespins, binder clips painted in cute colors, or decorative clips along the ribbon. Space them evenly—I did one clip every 4-5 inches, which holds a good amount of photos without looking too crowded. You can paint wooden clothespins in colors that match her room, wrap them with washi tape, or even hot glue small decorative elements onto them.
Display Ideas
Obviously photos are the main attraction, but this display works for other paper items too—artwork, quotes printed on cardstock, greeting cards, concert tickets, ribbons from achievements, postcards, or anything else she wants to showcase. The clips make everything interchangeable and low-commitment.
Create multiple rows at different heights for a gallery wall effect, or keep it simple with one or two strands. I arranged three horizontal strands in my daughter’s room—one for photos with friends, one for family photos, and one for random art and quotes she likes. The categorization helps her organize mentally while keeping the display from feeling chaotic.
12. DIY Window Seat with Cushions
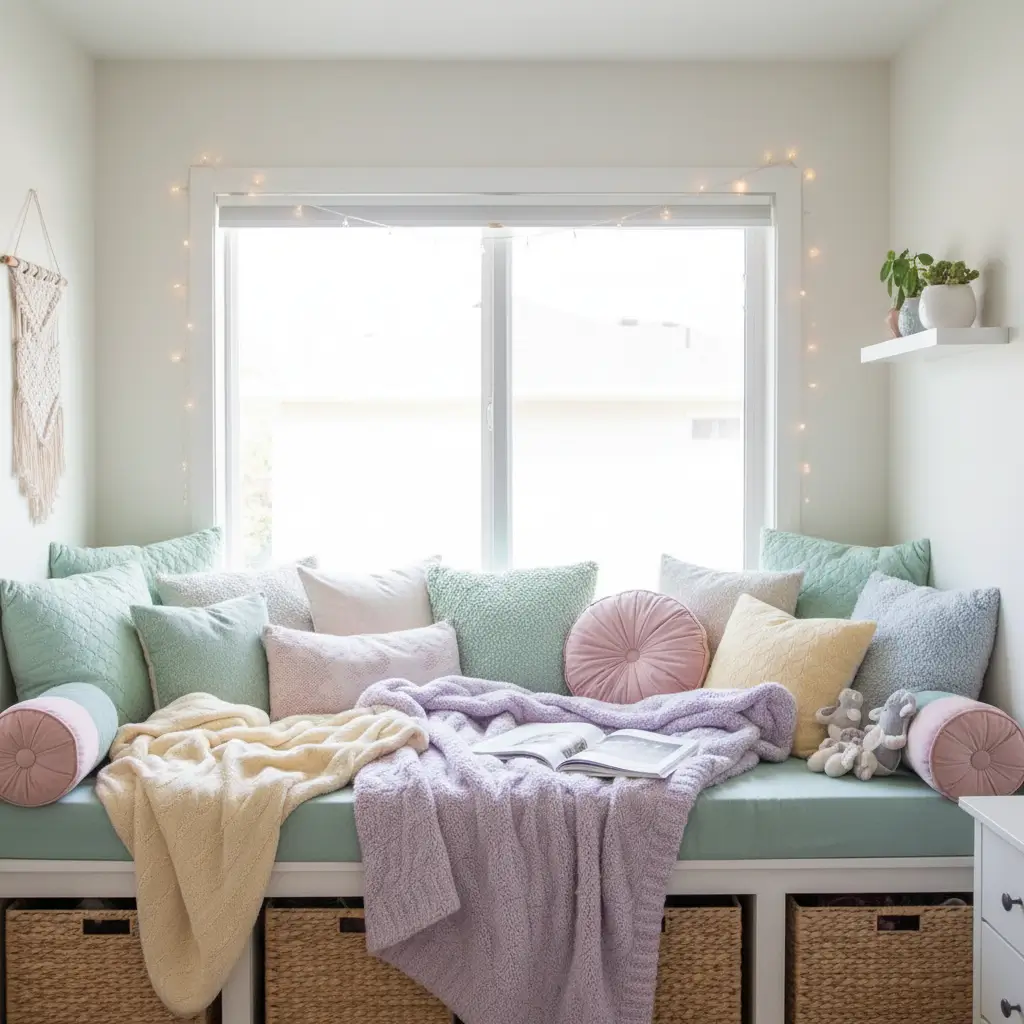
Cozy Corner Goals
If she has a window that’s low enough and wide enough, transforming that space into a window seat creates the coziest reading nook imaginable. This requires a bit more effort than some other projects, but the result is absolutely worth it—a dedicated cozy corner that becomes her favorite spot in the house.
I built a simple window seat in my daughter’s room two years ago, and she spends more time there than anywhere else. Reading, drawing, watching the world outside, FaceTiming friends—that window seat has become the heart of her room.
Building the Base
Measure your window opening carefully. You need a sturdy base platform that fits the space—I used a simple frame made from 2x4s topped with plywood. If your window has a radiator or heater underneath, leave ventilation gaps. For a no-build option, place a storage bench or even several sturdy crates side-by-side under the window.
Paint or stain your base to match the room. I painted mine white to match the window trim, creating a built-in look. Add decorative trim around the edges if you want to make it look more finished and intentional.
Cushion Creation
This is where the comfort comes in. Make or buy a long rectangular cushion that fits your window seat perfectly. I made mine by sewing together two rectangles of fabric (one cute patterned fabric, one solid coordinating color), stuffing it with foam cushion insert, and sewing it closed. If sewing isn’t your thing, foam cushions covered with fitted fabric or even a yoga mat wrapped in fabric works.
Add throw pillows in various sizes and patterns. Mix textures—velvet, cotton, knit—and patterns—florals, geometrics, solids—for that layered, lived-in look. I have about six pillows on our window seat, and my daughter rearranges them constantly based on her sitting position and mood.
Styling and Storage
Add a soft throw blanket draped over one end for extra coziness. If your base includes storage (like those crates I mentioned), fill them with books, blankets, or whatever she needs nearby. Mount a small shelf or ledge beside the window seat to hold a reading lamp, water bottle, or current book.
Hang curtains that frame the window seat, creating a little alcove effect. Sheer curtains let in natural light while adding softness, or go with heavier curtains she can close when she wants full privacy in her cozy corner. String some fairy lights around the window frame for evening reading ambiance.
Creating Her Dream Space
Decorating a girl’s room is about more than just aesthetics—it’s about creating a space where she feels comfortable being completely herself.
These twelve DIY projects give you the tools to build a room that reflects her personality, interests, and style without breaking the bank or settling for generic decor.
The best part about going the DIY route? You can adapt and evolve as she grows and her tastes change.
That pink-obsessed seven-year-old becomes a teal-loving tween becomes a minimalist teen, and with DIY decor, you’re not stuck with expensive furniture and decorations that no longer fit.
You just paint over, redecorate, and start fresh.
Plus, involving her in these projects teaches valuable skills—creativity, problem-solving, the satisfaction of making something with your own hands.
My daughter now tackles her own DIY projects because she’s seen that you don’t need to be an expert or have unlimited funds to create beautiful, functional things.
So stop scrolling through overpriced furniture websites and start creating. Her perfect room is waiting to be built, one DIY project at a time.
And honestly? The imperfect, handmade, totally personalized space you create together will mean more than any professionally designed room ever could 🙂


