12 Bright DIY Kids Room Decor Ideas for Cheerful Bedroom Vibes
- Bedroom Design
 Ben
Ben- 0
- 46 minutes read

Let’s be honest—decorating your kid’s room can drain your wallet faster than they go through snacks on a road trip. One minute you’re browsing cute decor online, the next you’re staring at a shopping cart total that makes your heart skip a beat.
But here’s the thing: you don’t need to take out a second mortgage to create a magical space your kids will actually love.
I’ve been down the DIY kids room decor rabbit hole more times than I can count, and I’m here to tell you that homemade beats store-bought pretty much every time.
Not just because it’s cheaper (though that’s definitely a perk), but because there’s something special about creating personalized pieces that reflect your kid’s personality.
Plus, some of these projects you can even do WITH your kids, which means quality time and decor in one go. Win-win, right?
So grab your glue gun, dust off those craft supplies you swore you’d use someday, and let’s transform that bedroom into a space that’ll make your kid’s friends jealous.
These ideas range from super simple to slightly more involved, but I promise—they’re all totally doable, even if you’re not exactly a crafting wizard.
1. Cardboard Castle Wall Panels
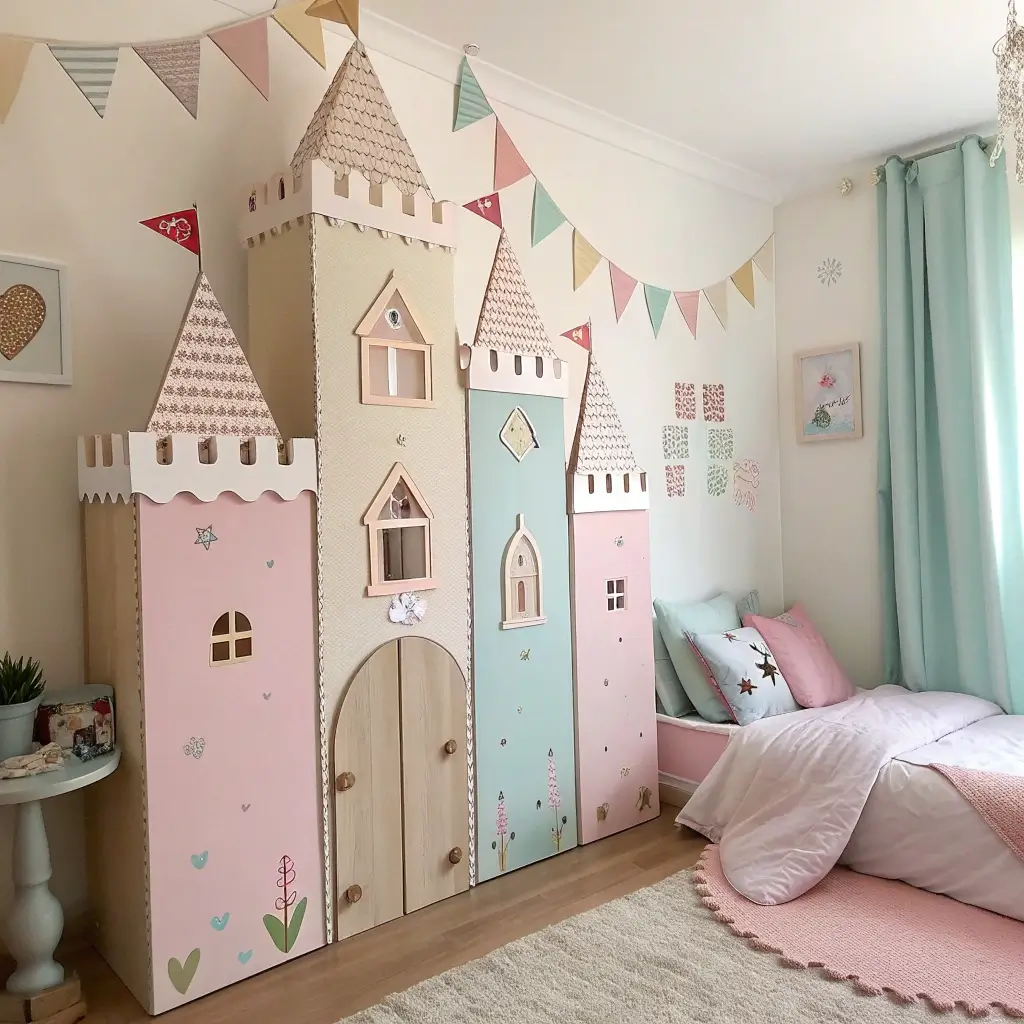
Because Every Kid Deserves Their Kingdom
Remember when you were little and the best toy was literally just the box it came in? Yeah, kids haven’t changed. There’s something magical about castles and forts, and creating castle wall panels from cardboard brings that fantasy right into their everyday space.
I tried this in my nephew’s room last year, and he legitimately refused to sleep anywhere else for weeks. The project cost me maybe ten dollars total, and most of that was spray paint. Can’t beat that kind of return on investment.
Building Your Castle Walls
Start collecting large cardboard boxes—appliance boxes are perfect, but even Amazon boxes work if you tape several together. You want pieces big enough to make an impact on the wall, so think at least 3 feet tall.
Sketch out castle battlements along the top edge (those iconic up-and-down teeth that castle walls have). Cut along your lines with a box cutter or sturdy scissors. Don’t stress about perfection here—uneven battlements actually look more realistic and weathered. Draw on some stone blocks with a marker to give that authentic castle wall texture, or go wild and paint them grey to look like real stone.
Here’s where it gets fun: add details. Cut out window shapes (perfect for displaying small toys or photos), paint on vines or moss for that ancient castle vibe, or even attach some fabric scraps as flags. I hot-glued some dollar store flags to wooden skewers and stuck them on top of the battlements, and it looked legitimately impressive.
Installation Tips
Mount these panels to the wall using command strips or poster putty—both are renter-friendly and won’t damage walls. I usually put them behind the bed or along one accent wall to create a focal point. You can even make them removable so your kid can rearrange their castle however they want. Talk about interactive decor!
The best part? When your kid inevitably moves on to their next obsession (pirates, astronauts, whatever), you just recycle the cardboard and start fresh. No guilt about wasting money on something they outgrew in three months.
2. Rainbow Yarn Wall Hanging
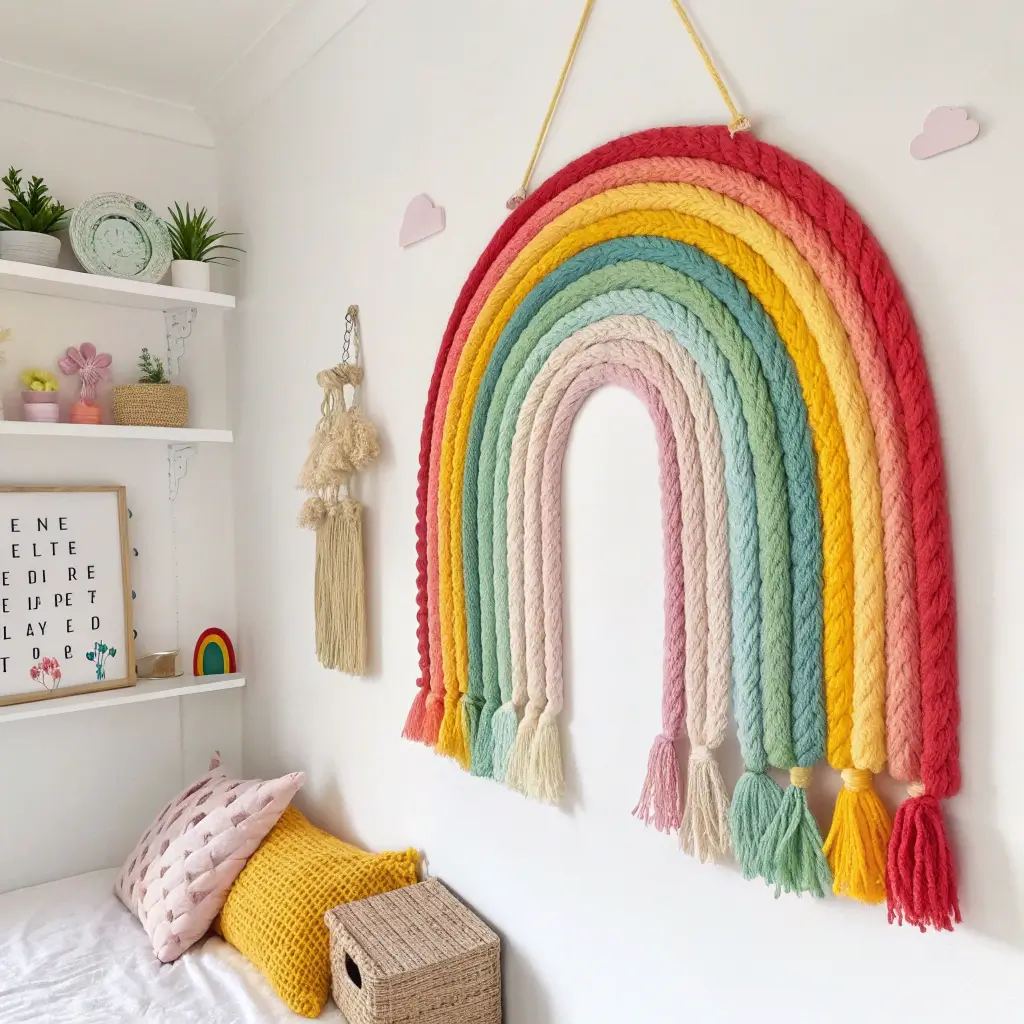
Color Therapy For Tiny Humans
Kids are naturally drawn to bright colors—it’s like moths to a flame but less dangerous and more adorable. A rainbow yarn wall hanging brings that burst of color in a soft, textured way that doesn’t feel overwhelming or chaotic. Plus, it’s ridiculously simple to make, even if you’ve never crafted anything in your life.
I made one of these for my daughter’s room when she was going through an intense rainbow phase (is there any other kind of rainbow phase for kids?). Three years later, it’s still hanging there, and she still loves it. That’s practically an eternity in kid-years.
Creating Your Rainbow
You need yarn in rainbow colors—red, orange, yellow, green, blue, purple—and a dowel rod or stick to hang it from. Hit up a craft store during a sale, and you can get all the yarn you need for under fifteen bucks. You could even use a sturdy branch from outside for a more natural vibe, which costs exactly zero dollars.
Cut your yarn into lengths—I recommend varying lengths to create a waterfall effect. Start with red at about 12 inches, orange at 14 inches, yellow at 16 inches, and so on. You want each color progressively longer to create that cascading rainbow effect.
Fold each piece of yarn in half and loop it over your dowel rod using a basic lark’s head knot (sounds fancy, but it’s literally just looping the yarn over the rod and pulling the ends through). Do this for all your colors, keeping them grouped by color in rainbow order. The more strands you add, the fuller and more impressive it looks.
Hanging and Styling
Tie a piece of twine or ribbon to each end of your dowel for hanging. I mounted mine on a small nail above my daughter’s reading nook, and the yarn strands catch the light beautifully throughout the day. You can trim the bottom edges straight across or leave them at different lengths for a more organic look.
FYI, this project is perfect to do with older kids—they can help cut yarn, choose colors, and loop them onto the rod. It becomes their creation, which means they’ll appreciate it even more.
3. Glow-in-the-Dark Star Ceiling
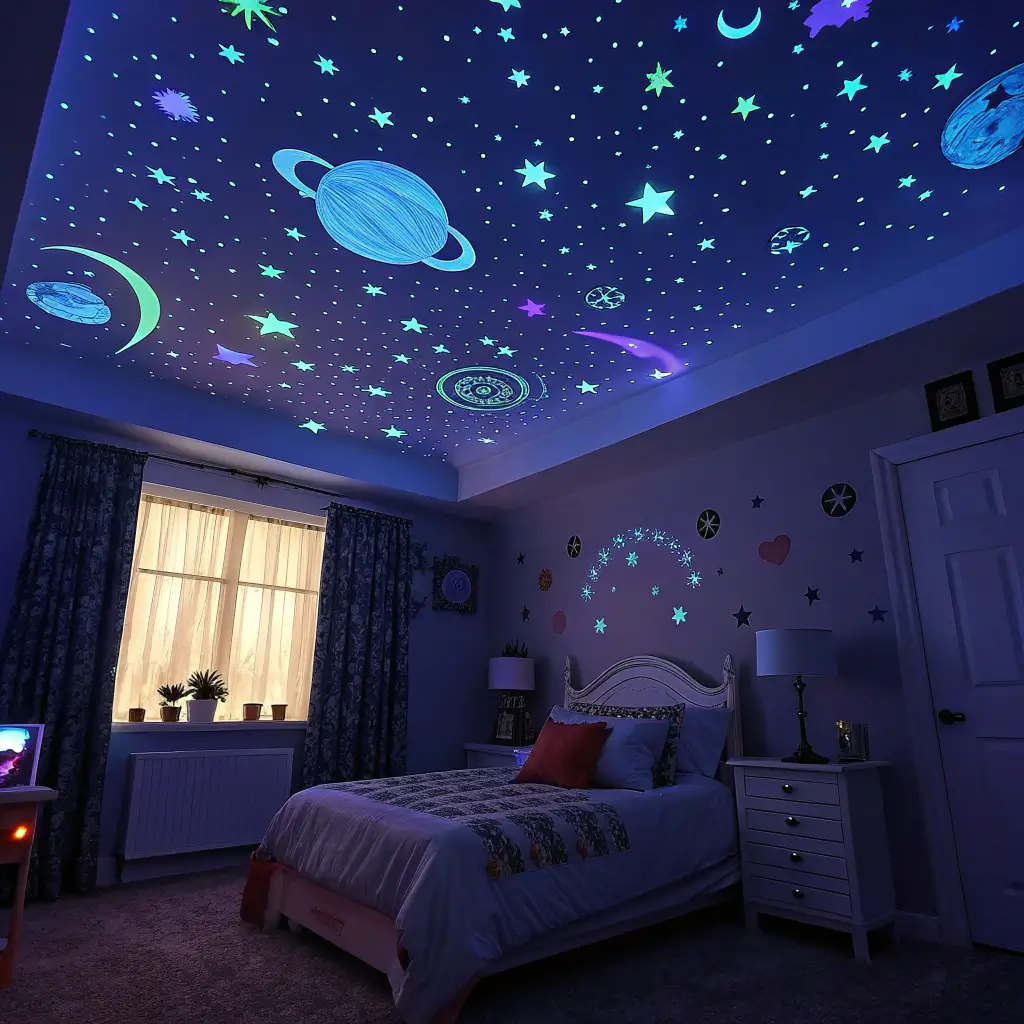
Night Sky Without The Cold
Bedtime battles are real, and anything that makes bedtime more appealing is worth its weight in gold, right? A glow-in-the-dark star ceiling transforms the scary darkness into a magical experience. I’m talking about creating an actual starry night sky that appears once the lights go out.
This was one of the first things I did when we moved into our current place, and my son still talks about his “special ceiling” to anyone who’ll listen. The installation took maybe thirty minutes, and the impact has lasted years.
Choosing Your Stars
You can buy glow-in-the-dark star stickers pretty cheaply, but here’s a pro tip: not all glow stars are created equal. Invest in the slightly more expensive ones that actually glow brightly and for longer. The cheap ones barely glow and fade within minutes, which defeats the whole purpose.
Get a variety of sizes—mixing large stars with smaller ones creates depth and looks more like an actual night sky. Some sets even include planets and moons, which adds extra coolness points. I grabbed a pack with about 300 pieces for around twelve dollars, and that was enough to cover my son’s entire ceiling.
Creating Constellations
Here’s where you can get creative or educational (or both, because why not?). You can randomly stick stars up there for a general starry effect, or you can actually map out real constellations. I printed out simple constellation patterns online and used them as guides to create the Big Dipper, Orion’s Belt, and a few others.
Use a small piece of poster putty on the back of each star instead of the included adhesive stickers—they’re easier to remove and reposition, and they won’t damage your ceiling. Stand on a sturdy ladder or stool, and press stars onto the ceiling. Cluster some areas more densely and leave other areas sparser for a more realistic night sky effect.
Maximizing The Glow
The stars need to “charge” with light before they’ll glow, so make sure your kid’s ceiling light is on for a bit before bedtime. Some people even use a blacklight or UV flashlight to charge them up extra bright. The glow effect lasts longer and shines brighter when they’re fully charged, making the whole experience more magical.
Pro tip from experience: put a few stars on the walls too, especially near the door and light switch. It creates a nice transition and gives your kid reference points in the dark if they need to get up.
Also Read: 10 Cool DIY Grunge Room Decor Ideas with Vintage Vibes
4. DIY Felt Animal Wall Art

Soft Sculpture Without The Skill
Felt is basically the most forgiving craft material ever invented. It doesn’t fray, it’s cheap, it comes in every color imaginable, and you can cut it with regular scissors. Creating felt animal wall art is surprisingly simple, and the finished pieces look way more professional than the effort required.
I discovered this technique when I was desperate to add something soft and playful to my daughter’s room but didn’t want to deal with sewing plushies or anything complicated. These flat felt animals hit the sweet spot between cute and achievable.
Choosing Your Animals
Pick animals that your kid loves or that match their room theme. Safari animals, woodland creatures, ocean life—whatever speaks to them. I printed out simple animal silhouettes from free online templates (just search “animal silhouette printable” and you’ll find tons). Cut out your paper templates.
Trace the templates onto felt sheets in appropriate colors—brown for bears, orange for foxes, grey for elephants, you get the idea. Cut out your felt shapes. Here’s where you add personality: use smaller pieces of felt in contrasting colors to create details like eyes, ears, noses, or spots. A giraffe gets brown spots, a ladybug gets black dots, and so on.
Assembly and Mounting
Hot glue the detail pieces onto your main animal shape. You can add googly eyes for extra character (kids love googly eyes), or just cut small circles of white and black felt for a cleaner look. The beauty here is that there’s no wrong approach—make them as simple or detailed as you want.
Mount these felt animals directly to the wall using poster putty or command strips. I created an entire safari scene across one wall with elephants, giraffes, lions, and zebras at different heights. You can arrange them in a group, scatter them around the room, or even create a marching line of animals around the door frame.
The soft texture of felt adds warmth to the room, and unlike paper decorations, these can handle the occasional curious touch from little hands without getting damaged immediately.
5. Storybook Quote Wall Decals
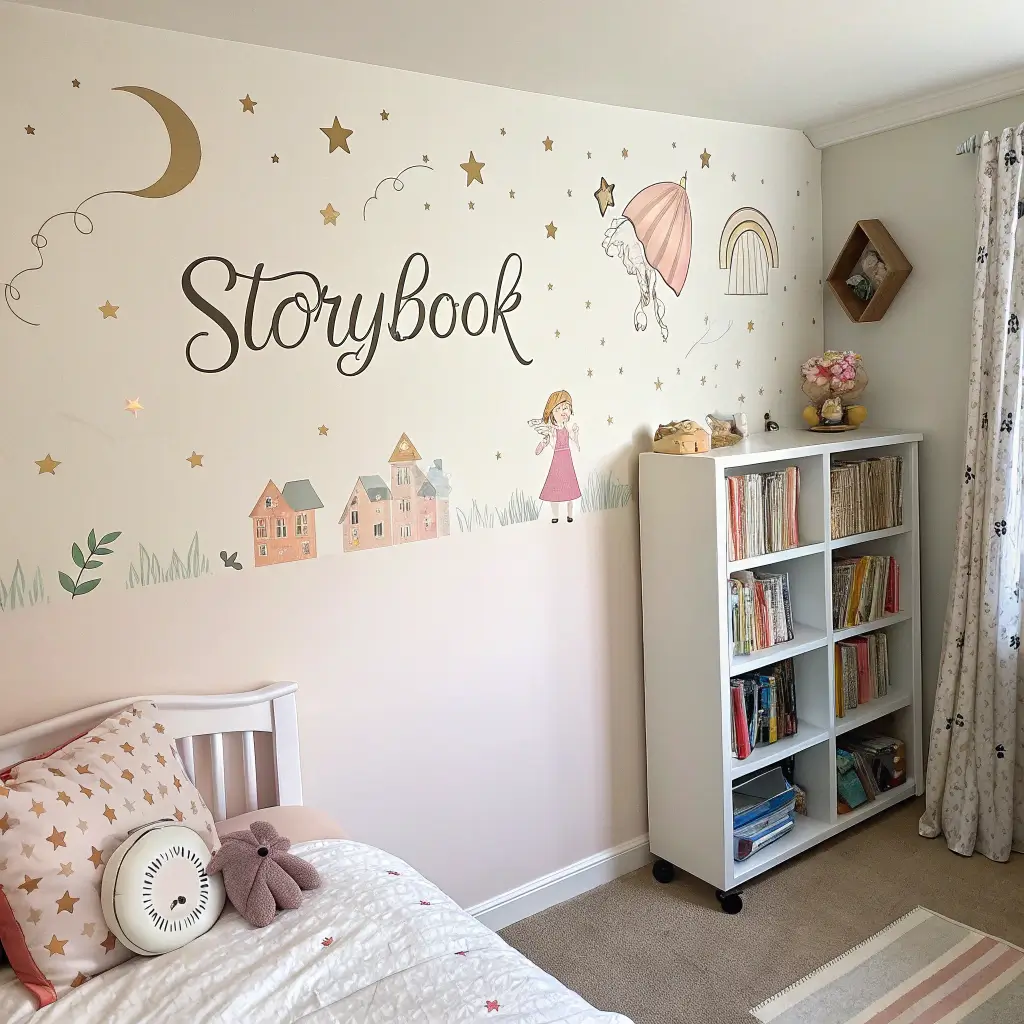
Words That Inspire Little Minds
There’s something powerful about surrounding kids with words that inspire imagination and kindness. Favorite quotes from beloved storybooks become daily reminders of the stories and values you want them to carry with them. Plus, literary wall decals make you look like Parent of the Year 🙂
I started doing this after reading the same bedtime stories approximately eight million times and realizing certain lines just stuck with my kids. Why not put those words where they can see them every day?
Selecting Your Quotes
Think about your kid’s favorite books or quotes that carry meaning for your family. “You are braver than you believe” from Winnie the Pooh, “Unless someone like you cares a whole awful lot, nothing is going to get better” from The Lorax, or “A person’s a person no matter how small” from Horton Hears a Who. These are classics for a reason.
You can hand-letter these quotes if you’ve got the skills, but there’s zero shame in using technology. Design your quote in a word processor using a fun, readable font. Print it out sized to your preference. Now you have two options: trace the letters onto contact paper or vinyl adhesive sheets and cut them out to create removable decals, or simply frame the printed quote in a colorful frame.
Creating DIY Decals
If you’re going the vinyl route, trace your printed letters onto the adhesive side of contact paper, cut them out carefully with scissors or a craft knife, and peel off the backing. Apply directly to your wall. Contact paper removes cleanly, making this super renter-friendly.
I arranged multiple quotes at different heights around my son’s room—one above his bed, one near his bookshelf, one by the door. The varied placement means his eyes catch different quotes throughout the day, and he’s actually started memorizing them and reciting them at random times (which is both adorable and slightly creepy, but mostly adorable).
Frame Option For The Less Crafty
Not feeling the DIY decal thing? Just print your quotes on nice paper or cardstock, pop them in budget-friendly frames from the dollar store, and hang them up. You can even involve your kid in decorating the frames with paint, stickers, or washi tape to make them more personal.
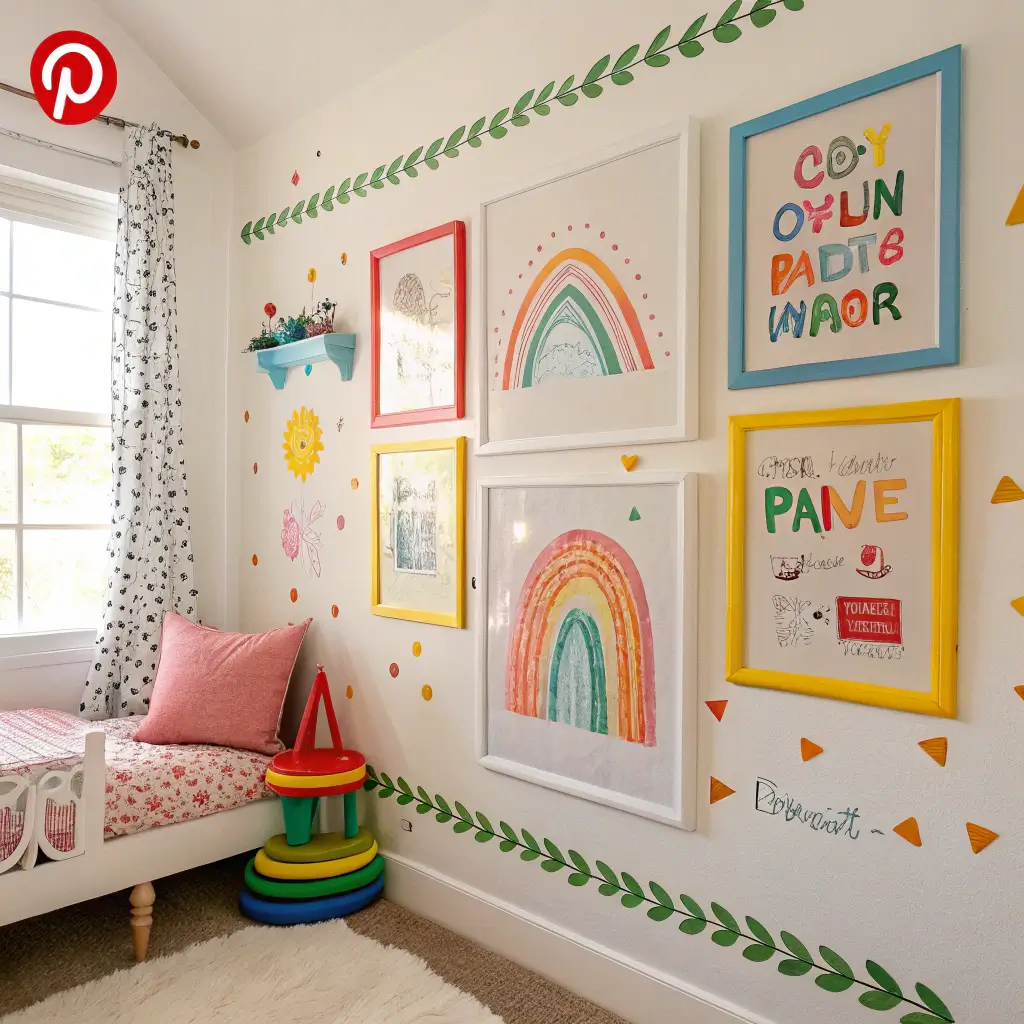
6. Crayon-Inspired Wall Frames
Art Supplies As Art
Kids and crayons go together like peanut butter and jelly—it’s a universal truth. So why not celebrate that relationship with crayon-inspired decor? This project takes those cheap wooden frames and transforms them into colorful, playful pieces that scream “kid’s room” in the best possible way.
I stumbled onto this idea when organizing my daughter’s overwhelming crayon collection and thought, “These are actually kind of beautiful when you look at them as design objects.” Weird revelation, but it led to one of my favorite DIY projects.
Frame Transformation
Grab some basic wooden frames from the dollar store or thrift shop—you want the cheap ones with wide borders that give you room to work. Remove the glass and backing for now.
Paint each frame a different bright color, or do a rainbow set where each frame is a different crayon color. You could also keep them natural wood and just add crayon elements. Once your base is painted and dry, here’s where it gets fun: hot glue actual broken crayon pieces around the frame border. Mix colors or keep each frame monochromatic—both approaches look great.
Alternatively, you can skip the real crayons and just paint crayon shapes onto the frame with acrylics. Draw the classic crayon shape with its pointed tip and wrapper ridges. This method is less bumpy and might work better if you’re planning to hang these at kid height where they’ll get touched.
What To Frame
Put your kid’s artwork inside these frames, obviously. Rotate the art regularly—it’s way easier to swap out artwork when you’ve got dedicated frames ready to go. I keep a box of my daughter’s drawings and paintings, and every month or so, we pick new ones to display. She loves having her art showcased like a real gallery, and it makes her feel proud of her creations.
You could also frame inspirational words like “Create,” “Imagine,” or “Dream” printed in fun fonts. Or go with photos of your kid doing their favorite activities. The crayon frames work with pretty much anything and instantly make whatever’s inside feel more playful and kid-appropriate.
Also Read: 10 Stylish Cardboard DIY Room Decor Ideas for Teens
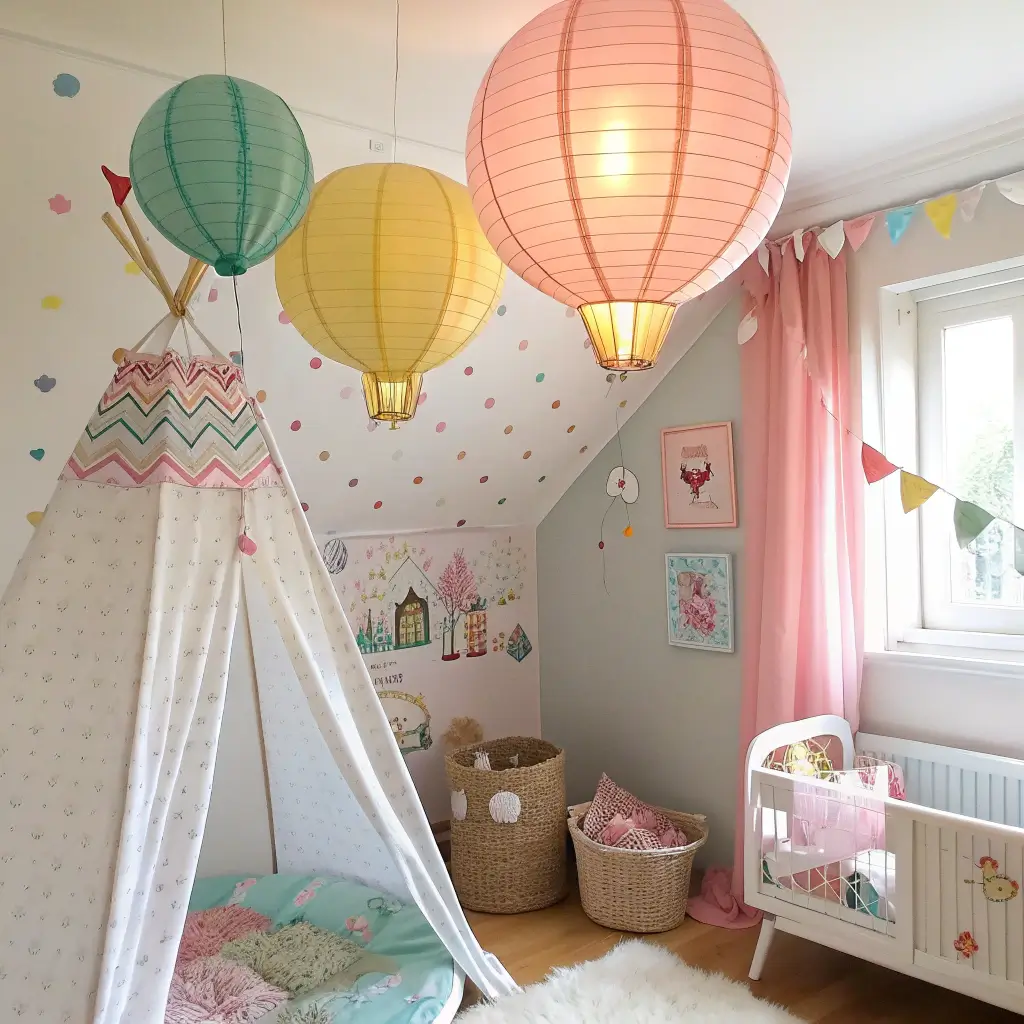
7. Hot Air Balloon Paper Lanterns
Floating Dreams Overhead
Hot air balloons represent adventure and dreaming big—perfect themes for a kid’s room. Creating hot air balloon decorations from paper lanterns is easier than it sounds and creates this whimsical floating effect that kids absolutely love. Plus, they add dimension to the room by utilizing that often-ignored vertical space.
My daughter’s obsessed with her hot air balloon lanterns. She named each one (because of course she did), and they’ve become characters in her imaginative play. Sometimes the simplest decor ideas spark the biggest creativity.
Materials and Assembly
Buy round paper lanterns in different sizes and colors—you can get these super cheap at party stores or online. You want at least three in varying sizes for the best visual effect. Grab a small basket or container for each lantern, or make tiny baskets from paper cups or small berry baskets.
Attach strings or twine from the bottom of each lantern to your little basket using hot glue or by poking holes and tying knots. You want four strings evenly spaced around the lantern, all connecting to the corners of your basket, just like a real hot air balloon. Fill the baskets with tiny stuffed animals, plastic figures, or leave them empty—totally up to you.
Installation
Here’s the cool part: hang these at different heights from your ceiling using clear fishing line or white string. I secured mine to small ceiling hooks, but command hooks work great too. Vary the heights so some balloons hang lower and others float higher—creates more visual interest and makes it feel like they’re actually floating at different altitudes.
If you want to get extra creative, add small details like painted designs on the lanterns, ribbon streamers, or even hand-drawn clouds on the walls around them. The whole effect is magical, especially when light shines through the paper lanterns and creates soft colored glows.
IMO, this project has the highest impact-to-effort ratio of everything on this list. It looks super elaborate and professional, but you can knock it out in an hour.
8. Personalized Name Letter Art
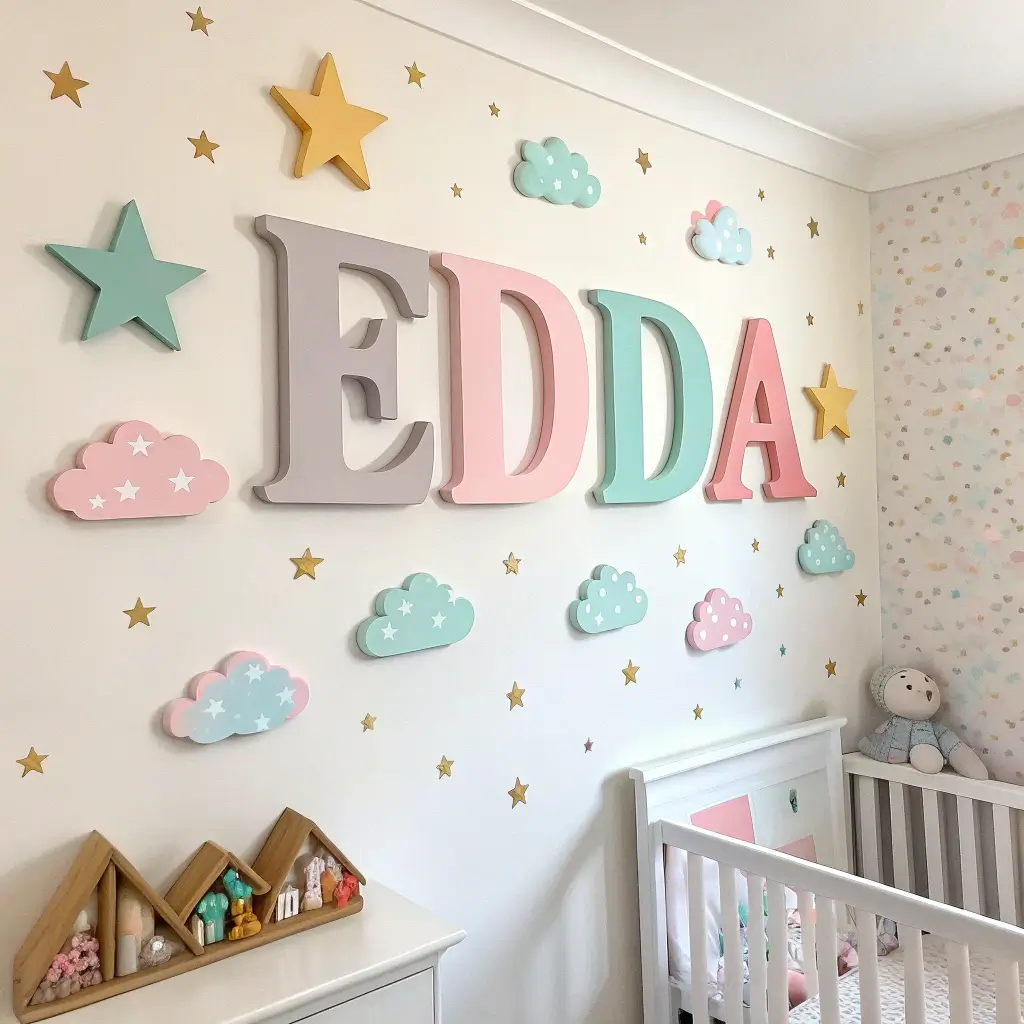
Because Their Name Is Special
There’s something about seeing your own name that makes kids light up. Personalized name art isn’t exactly revolutionary, but the way you execute it can take it from basic to special. I’m talking about creating dimensional, decorated letters that become a true focal point in the room.
I made name letters for both my kids when they were babies, and even now that they’re older, those letters are still some of their favorite room features. They’ve become part of their identity and space in a way that generic decor never could.
Getting Your Letters
You can buy wooden or cardboard letters at craft stores—they come in various sizes and fonts. For budget-conscious folks, trace letters onto thick cardboard yourself and cut them out with a box cutter. If you go the cardboard route, stack and glue multiple layers together to create thickness and dimension.
Now comes the fun part: decorating. You have endless options here. Paint each letter a different color, cover them in patterned scrapbook paper or fabric, wrap them in yarn, bedazzle them with sequins and glitter, or decoupage them with comic book pages. Match the decoration style to your kid’s interests and room theme.
Creative Decoration Ideas
For a space-themed room, paint letters dark blue and add white paint splatter “stars.” For an animal lover, decoupage with pictures of animals cut from magazines. Sports fan? Cover letters with pages from old sports magazines or team colors. The customization possibilities are literally endless.
I covered my daughter’s letters in different patterned fabrics using Mod Podge—florals, polka dots, stripes—and the mix-and-match look is surprisingly cohesive. My son wanted his letters to look like they were made of LEGO bricks, so we painted them in bright primary colors and added black lines to simulate LEGO studs. He still thinks that’s the coolest thing ever.
Display Options
Mount the letters directly on the wall above the bed or dresser using command strips. You can also stand them on shelves or the top of a bookcase if you prefer not to put holes in walls. Some people string letters together and hang them like a banner, though that works better with lighter materials.
9. Toy Storage Wall Pockets
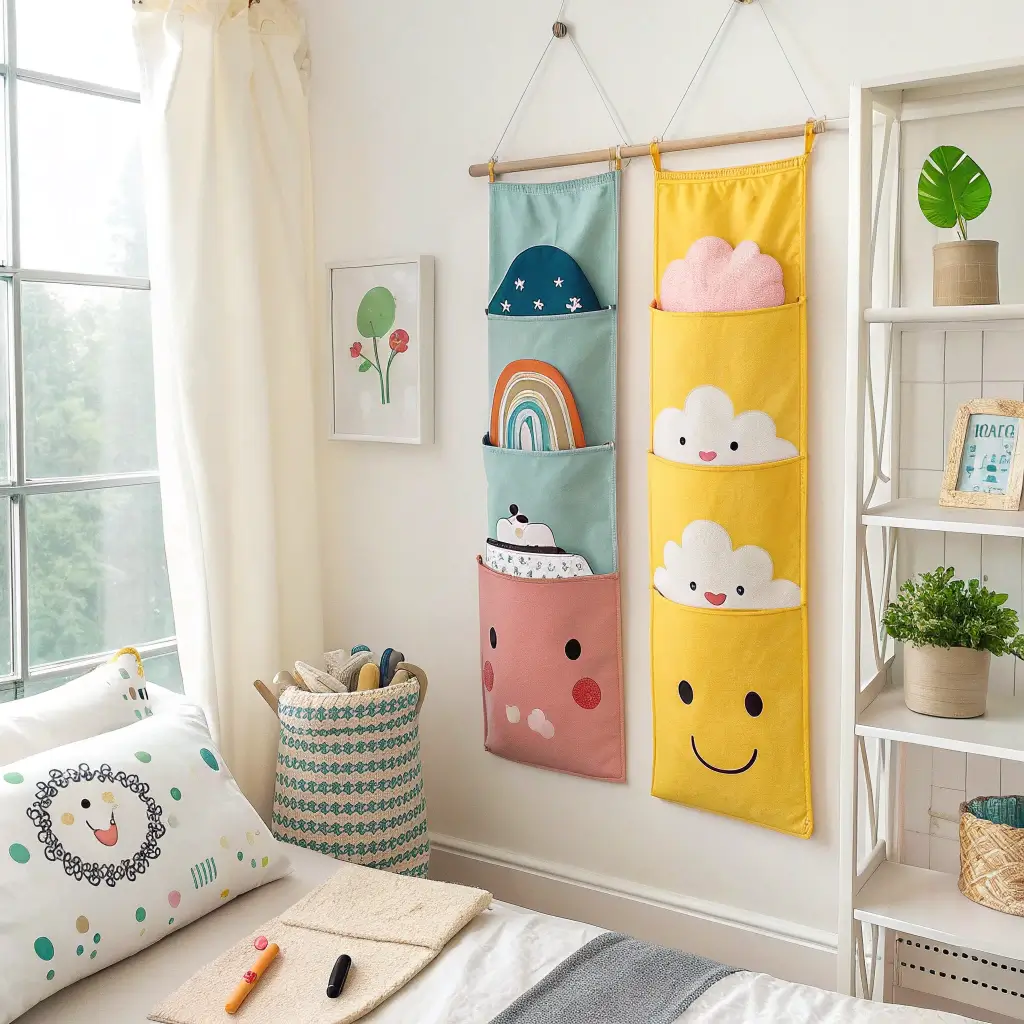
Function Meets Fun
Let’s address the elephant in the room—kids have SO MUCH STUFF. Toys, books, crayons, random collections of rocks or stickers or whatever they’re currently hoarding. Storage is essential, but it doesn’t have to be boring plastic bins. Wall pockets combine storage with decor and keep clutter off the floor.
I installed these in my son’s room mostly out of desperation because his floor was a constant minefield of small toys. Best decision ever. His room stays cleaner because everything has a visible, accessible home.
Creating Your Wall Pockets
You can make these from fabric, felt, or even repurposed materials like old jeans pockets. For fabric pockets, cut rectangles of canvas or sturdy cotton fabric, fold and hem the edges, and sew or hot glue a front pocket piece onto a backing piece, leaving the top open.
For a no-sew option, use large pieces of felt. Felt doesn’t fray, so you can cut pocket shapes and hot glue them onto a felt backing without any hemming or sewing required. Make pockets in different sizes—small ones for crayons and markers, medium for small toys, large for books or stuffed animals.
Decoration and Installation
Let your kid help decorate the pockets before you mount them. They can use fabric paint to add designs, iron-on patches, or puffy paint. We did one pocket for each category of toy and labeled them with fabric markers—”Cars,” “Art Supplies,” “Dinosaurs,” etc. The labels help with cleanup time because kids know exactly where things go.
Mount the finished pockets on the wall at kid height using small nails or command strips. I arranged ours in a grid pattern, but you could do a scattered arrangement or even a vertical row. The key is making them accessible so your kid can actually use them independently.
These wall pockets have seriously reduced the “I can’t find it” complaints in my house because everything is visible and organized. Plus, they add color and personality to the walls while serving a real function.
Also Read: 12 Stylish DIY Living Room Decor Ideas for Modern Homes
10. Hand-Painted Growth Chart Ruler
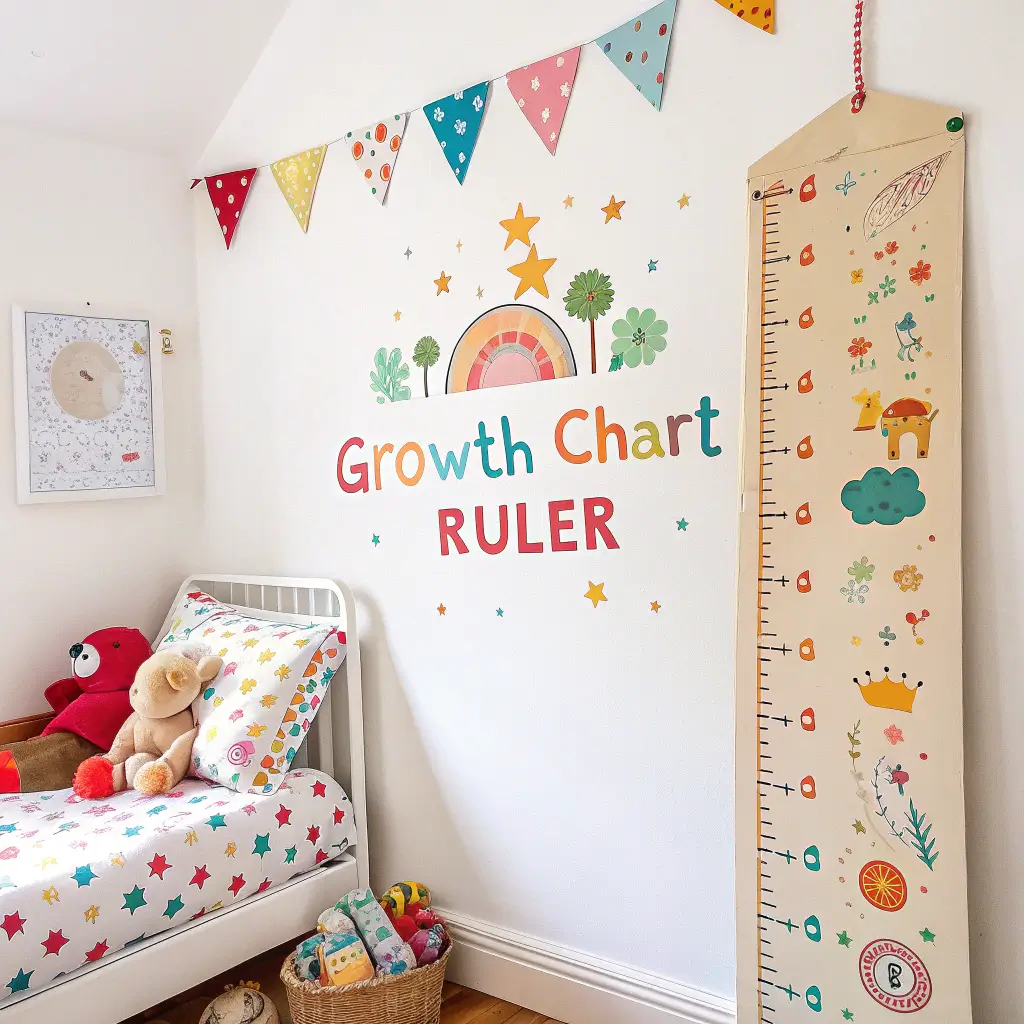
Measuring Memories
Kids grow so fast it’s almost disturbing—one day they’re tiny babies, the next they’re asking to borrow your car keys (okay, maybe not that fast, but close). A hand-painted growth chart ruler becomes both functional decor and a tangible record of your kid growing up.
I made one of these when my daughter turned two, and we’ve been marking her height every birthday since. Looking at all those little marks brings back such specific memories of what she was like at each age. It’s sentimental without being cheesy, you know?
Building Your Ruler
You need a long, thin piece of wood—a 1×6 board cut to 6 feet tall works perfectly. Sand it smooth so you don’t get splinters. Paint the board white or a light color as your base.
Now you’re going to turn it into a ruler. Using a measuring tape and pencil, mark inches (or centimeters, whatever you prefer) starting from the bottom. You don’t need to mark every single inch—I did every 6 inches with a longer line and labeled those with numbers, then added shorter lines for the inches in between.
Personalizing Your Chart
Paint the measurement lines in a fun color that matches the room. Add decorative elements like small painted designs—stars, animals, flowers, whatever fits your kid’s personality. I painted small butterflies scattered around the numbers on my daughter’s chart. My son’s has dinosaurs because obviously.
You can also use letter stickers or paint to add a title at the top like “Watch Me Grow!” or your child’s name. Some people add birth stats at the bottom (name, birth date, weight, length) to make it extra sentimental.
Installation and Use
Mount the ruler firmly to the wall using screws into studs—you want this thing secure since you’ll be using it for years. The bottom of your ruler should start exactly at floor level for accurate measurements.
Use a pencil to mark your kid’s height and date each measurement. Every birthday, height check. Start of school year, height check. Random Tuesday when they insist they’ve grown, height check. These marks accumulate into a visual timeline of childhood that you’ll treasure forever.
The best part? Unlike those paper growth charts or marks directly on the wall, this ruler is portable. When you move houses, you take it with you and all those memories come along.
11. Paper Cloud Shelf Decor
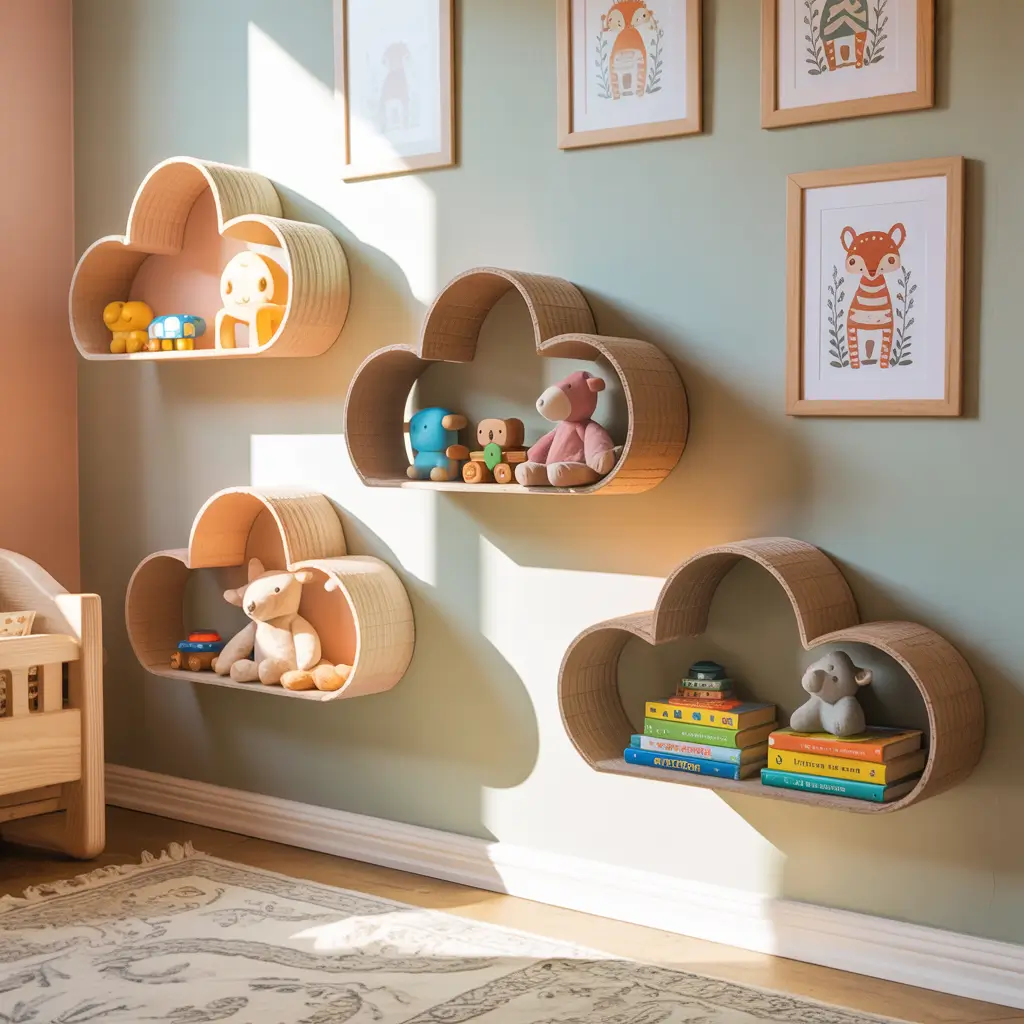
Floating Storage Solutions
Cloud shelves are having a moment, but buying them pre-made costs way more than they should for what’s essentially a shaped piece of wood. Making your own cloud shelf is surprisingly straightforward, and you can customize the size and color to fit your exact needs.
This project happened because I needed somewhere to display my son’s growing rock collection (why do kids collect rocks?), but I didn’t want just another boring shelf. The cloud shape adds whimsy while still being totally functional.
Cutting Your Cloud
You need a sturdy piece of wood or thick plywood. Draw a cloud shape on it freehand—clouds are naturally irregular, so there’s no wrong way to do this. Make it big enough to actually hold stuff, though. I’d suggest at least 18 inches wide.
Cut out your cloud shape with a jigsaw or have the hardware store cut it for you (many will do this for free or cheap). Sand all the edges smooth so they’re safe for a kid’s room. Paint your cloud white, light blue, or even a soft pink or yellow for sunset clouds. Several light coats work better than one thick coat.
Mounting and Styling
Attach small shelf brackets or L-brackets to the back of your cloud. Mount it to the wall by screwing into a stud for maximum security—you don’t want this falling if it’s over a bed or play area.
Style your cloud shelf with small toys, books stood upright, small plants (if your kid is old enough not to eat them), or decorative items. I keep my son’s favorite dinosaur figures on his cloud shelf, and it looks like the dinosaurs are hanging out in the sky. He’s explained the entire lore behind it multiple times, complete with voices.
You can make multiple clouds at different sizes and hang them at various heights to create a whole sky scene. Add some hanging stars or paper raindrops below the clouds for extra effect. The vertical arrangement makes the room feel more dynamic and uses wall space efficiently.
12. Upcycled Puzzle Piece Wall Art
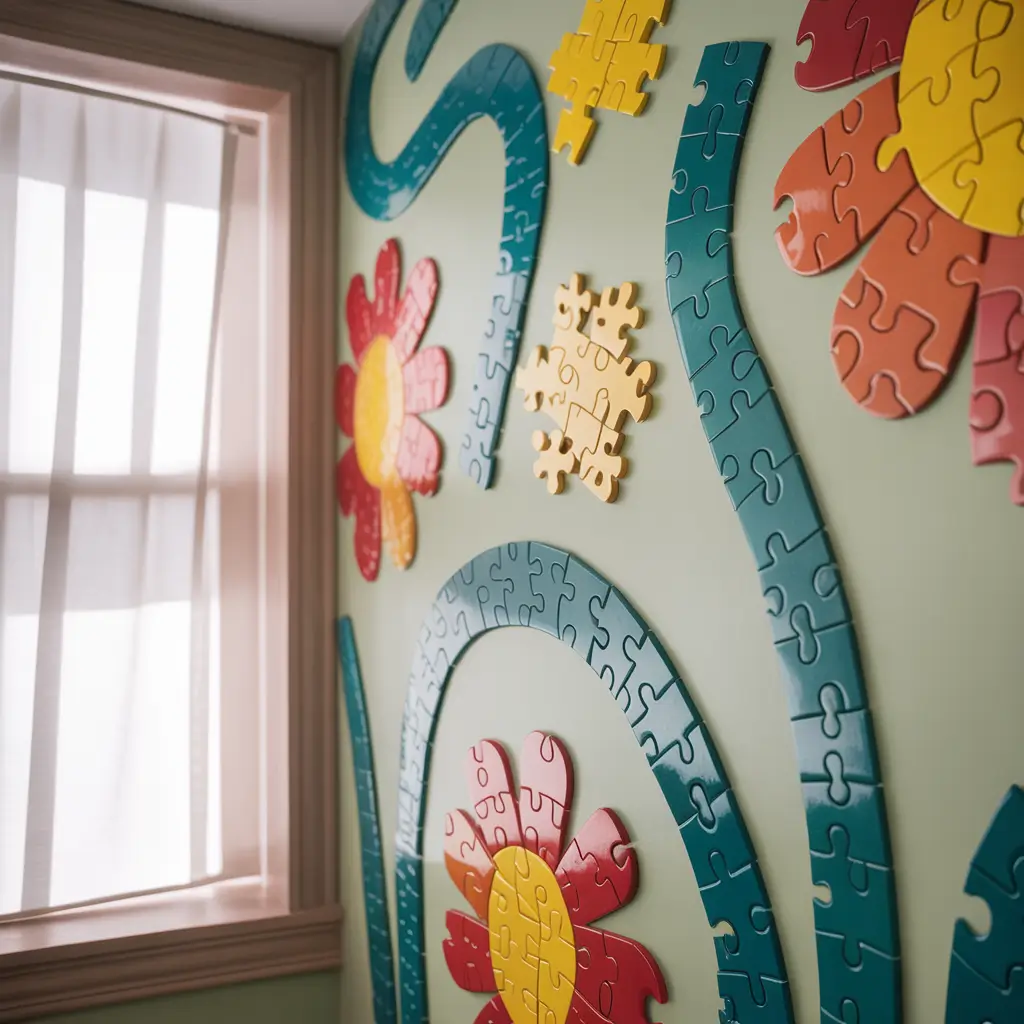
When Puzzles Lose Pieces, Make Art
We’ve all been there—you’re almost done with a puzzle, and there’s a piece missing. It’s heartbreaking. But instead of tossing incomplete puzzles, turn those colorful pieces into unique wall art. This is upcycling at its finest, and the result is genuinely cool-looking and totally unique.
I started hoarding puzzle pieces after my kids went through their puzzle phase and inevitably lost pieces from every single one. Figured there had to be something creative I could do with them, and honestly, this turned out way better than expected.
Creating Your Design
Collect puzzle pieces from old, incomplete puzzles. The more colorful and varied, the better. You can also hit up thrift stores—they usually have incomplete puzzles in their toy sections for basically nothing.
Paint a canvas or thick cardboard in a base color. Now here’s where you get creative with arrangement. You can create a specific shape by arranging puzzle pieces into a heart, star, or your kid’s initial. Or go abstract and create a colorful mosaic pattern. Ombre effects look cool too—arrange pieces from light to dark shades.
Assembly and Details
Hot glue each puzzle piece onto your base. Overlap them slightly or leave small gaps between them—both approaches create interesting textures. You can leave the puzzle pieces their original colors, or paint them all one color for a monochromatic effect. I’ve seen people paint all the pieces metallic gold, which looks unexpectedly sophisticated.
Once all pieces are glued down, you can add an extra layer of interest by painting details, adding glitter to certain pieces, or outlining some pieces with paint markers. The three-dimensional quality of the puzzle pieces creates shadows and depth that makes the art pop off the wall.
Frame your finished piece if you want, or mount it directly to the wall. Multiple puzzle piece art pieces grouped together create a gallery wall that’s truly one-of-a-kind. Guests always ask about these because they’re so unusual and creative.
Putting It All Together
Creating a magical kid’s room doesn’t require a massive budget or professional design skills—it just requires a little creativity and willingness to get crafty.
These twelve DIY projects prove that personalized, meaningful decor beats generic store-bought stuff every single time.
The real beauty of DIY kids room decor is that it grows and changes with your child. When they move on from dinosaurs to outer space, you’re not stuck with expensive themed furniture.
You just make new paper lanterns or swap out the felt animals. The flexibility is built right in.
Plus, involving your kids in these projects (when age-appropriate) teaches them that rooms don’t just magically appear perfect—people create and shape their spaces.
They learn basic crafting skills, color theory, and the satisfaction of making something with their own hands. Those are lessons worth more than any overpriced decor item.
So next time you’re scrolling through expensive kids’ decor websites and feeling that wallet-panic, remember that your glue gun and creativity are powerful tools.
Your kids will love their room just as much (probably more) when it’s filled with things you made together or specifically for them.
And years from now, when you look at photos of their childhood room, you’ll remember the process of creating these pieces and the joy on their faces when they saw the finished results.
Now stop reading and go start creating—your kid’s dream room is waiting, and it’s hiding inside a cardboard box and some craft supplies 🙂


