12 Smart DIY Pantry Shelves Ideas for Maximum Storage
- Floating Shelves
 Ben
Ben- 0
- 25 minutes read
Let’s talk about pantry chaos. You know that moment when you buy another can of diced tomatoes because you can’t see the five you already own hiding behind the cereal boxes?
After spending years playing “find the ingredient” in my own pantry and helping friends organize theirs, I’ve discovered that the right shelving can transform even the most chaotic pantry into an organized oasis.
I’ve built, rebuilt, and modified more pantry shelves than I care to admit. Some were spectacular failures (like my first attempt that collapsed under the weight of my baking supplies), but each disaster taught me something valuable.
Now I’m here to share what actually works in real pantries for real people who occasionally buy too many snacks during grocery sales.
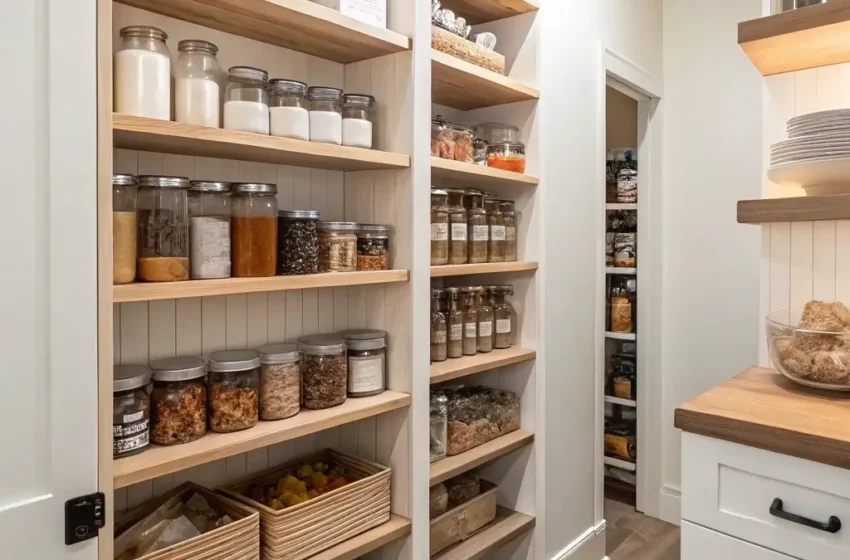
Floor-to-Ceiling Adjustable Wood Shelves: The Space Maximizer
Floor-to-ceiling adjustable shelves changed my pantry game completely. I installed these in my narrow pantry last year, and suddenly I had double the storage space. The adjustable part is crucial because, let’s face it, not all groceries are created equal in height. Those tall cereal boxes and tiny spice jars need different spaces to live harmoniously.
The beauty of adjustable shelving lies in its flexibility. I can modify shelf heights whenever my storage needs change, which happens more often than I’d like to admit (looking at you, pandemic-inspired canning supplies).
Making Adjustable Shelves Work
Choose the right track system. I learned this after my first attempt with cheap tracks pulled out of the wall under the weight of my flour collection. Now I use heavy-duty tracks rated for serious weight. Better to overbuild than clean up a flour explosion.
Install tracks perfectly level. Even slight misalignment makes shelves look wonky and can cause stability issues. I use a laser level now after my first “close enough” attempt resulted in rolling cans and sliding boxes.
Plan shelf spacing based on your actual items. I measured my tallest and shortest items first, then created zones. Cereal boxes and tall bottles up top, canned goods in the middle, small items down low where they’re easy to see.
Budget Plywood Pantry Shelf System: The Money Saver
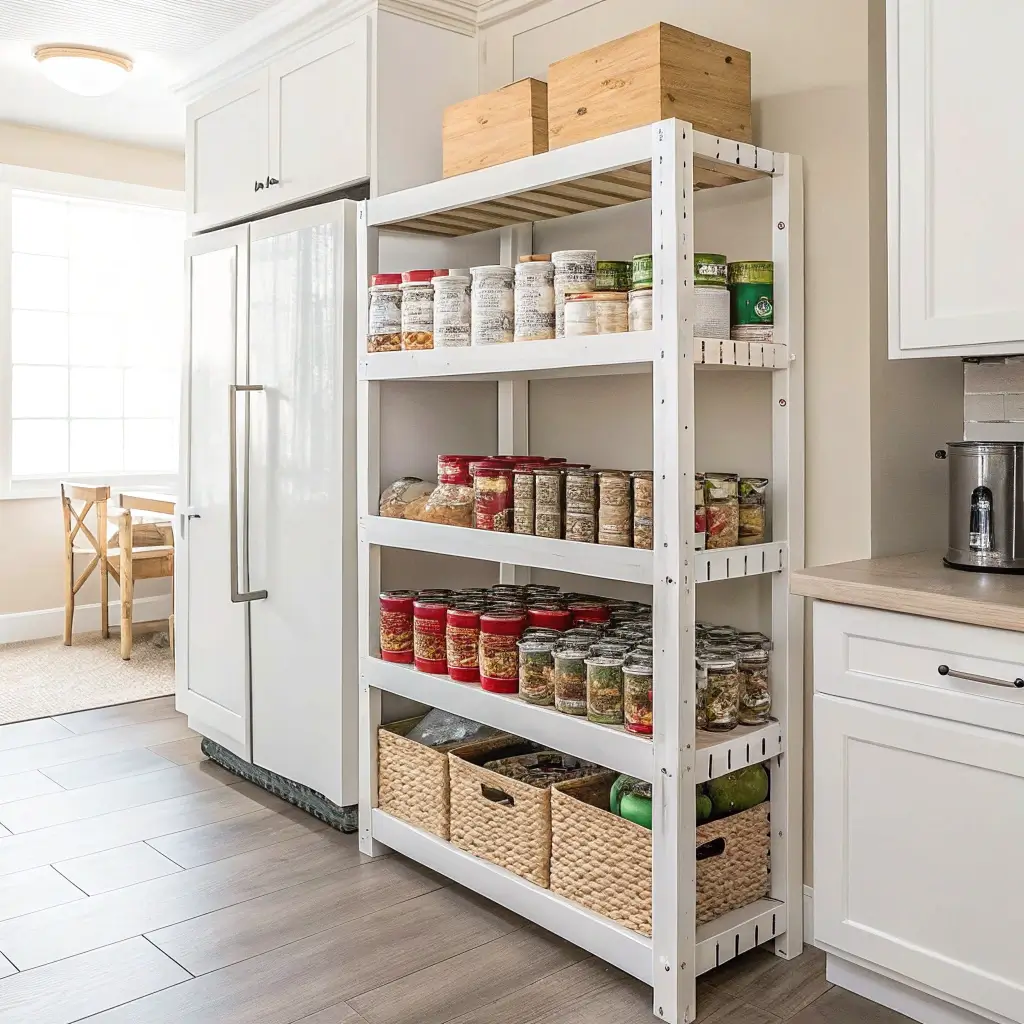
Don’t let the word “budget” scare you – plywood shelves can look amazing while saving serious cash. My entire pantry shelving system cost less than $100 to build, and it holds more weight than those fancy wire systems that cost five times as much.
The key to great plywood shelves is proper preparation and finishing. Nobody wants their pantry looking like a construction site, but with the right techniques, plywood becomes downright sophisticated.
Making Plywood Look Professional
Sand edges thoroughly before installation. Rough plywood edges snag clothing and look unfinished. I spend extra time with medium-grit sandpaper, then finish with fine-grit for smooth edges that feel store-bought.
Use edge banding or trim pieces. Raw plywood edges aren’t pretty. I cover mine with iron-on edge banding or thin wood trim. This small detail elevates the entire project from DIY to “where did you buy that?”
Seal everything properly. Raw plywood in a food storage area isn’t ideal. I use food-safe sealant on all surfaces. It protects the wood and makes cleaning easier when inevitable spills happen.
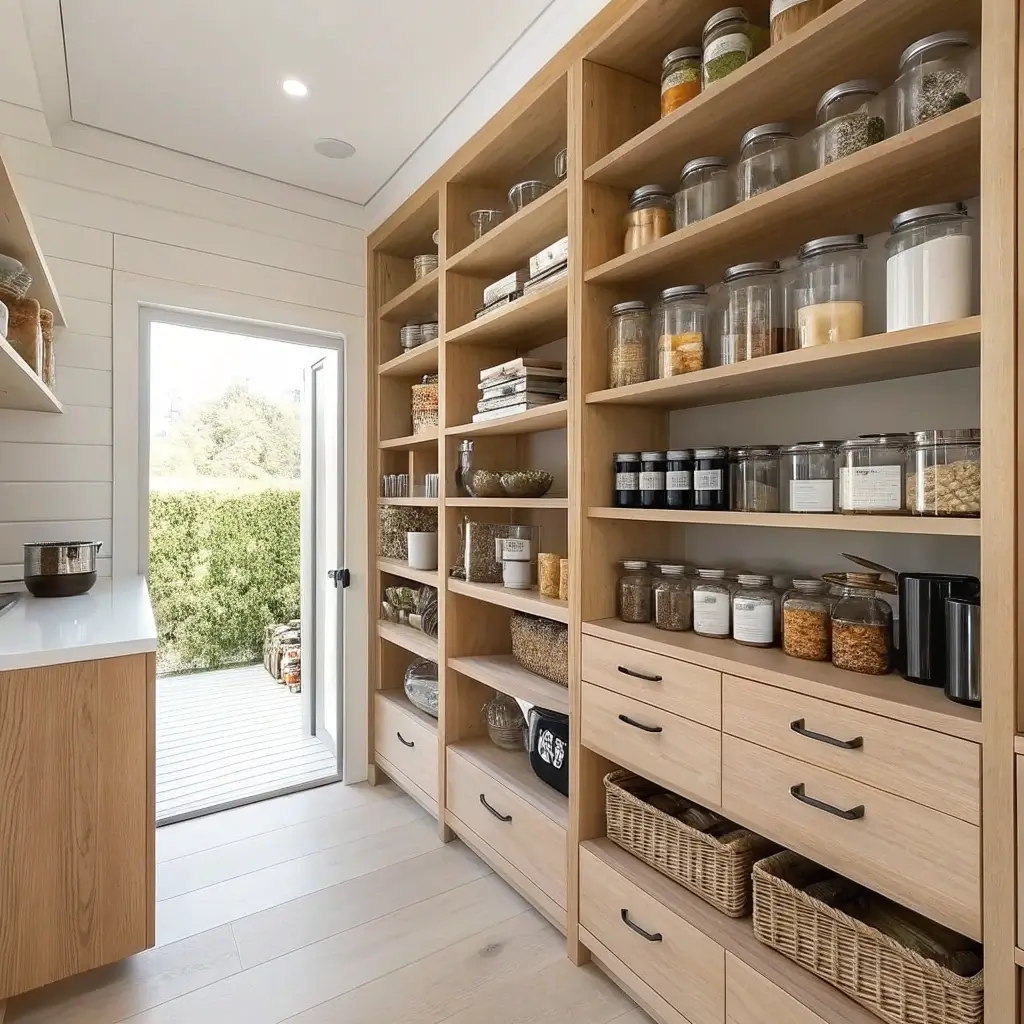
Floating Pantry Shelves for Small Spaces: The Minimalist Dream
Floating shelves bring that clean, modern look while maximizing space in small pantries. My tiny apartment pantry went from cluttered nightmare to Instagram-worthy with three deep floating shelves that seem to defy gravity.
The lack of visible brackets keeps sight lines clean and makes small spaces feel larger. Plus, you can squeeze more storage into tight spots when you’re not working around shelf supports.
Floating Shelf Success Strategies
Use proper mounting hardware. Those little bracket systems from the hardware store won’t cut it for pantry storage. I invest in heavy-duty floating shelf hardware rated for at least 75 pounds per shelf.
Calculate depth carefully. Too shallow and large items hang over; too deep and you can’t reach the back. I found 16 inches perfect for most pantry items while still being accessible.
Create zones on each shelf. Without visible dividers, items can migrate. I use clear bins and baskets to keep categories separate and prevent the dreaded pantry sprawl.
Also Read: 10 Simple Shelves Above Toilet Ideas That Look Expensive
Built-In Pantry Shelves with Trim Finish: The Professional Look
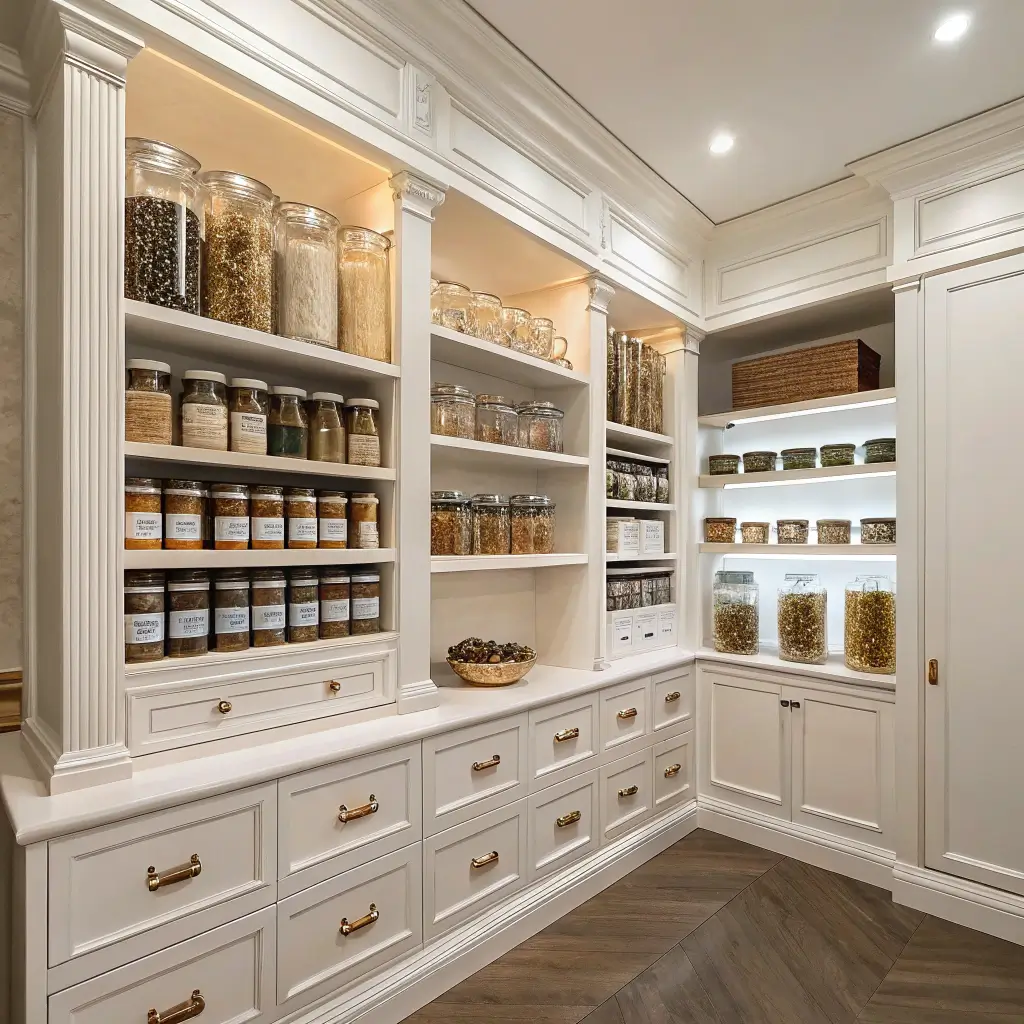
Built-in shelves with trim work transform basic pantry storage into a custom kitchen feature. My pantry looks like it was designed by a professional cabinet maker, but I built it myself over a weekend with basic tools and moderate skills.
The trim details make all the difference between “DIY shelves” and “custom pantry.” A few pieces of molding turn simple boards into architectural features.
Achieving That Built-In Look
Measure obsessively before cutting. Built-ins need to fit perfectly or they look amateur. I make paper templates for odd corners and angles before cutting any wood.
Add trim in layers. Start with basic shelf construction, then build up trim pieces. I use quarter round at shelf edges, crown molding at the top, and baseboards at the bottom for a truly built-in look.
Paint everything one color. Matching paint color and finish helps separate pieces look like one unit. I use semi-gloss for easy cleaning and unified appearance.
Pull-Out Pantry Shelves on Drawer Slides: The Back-Saver
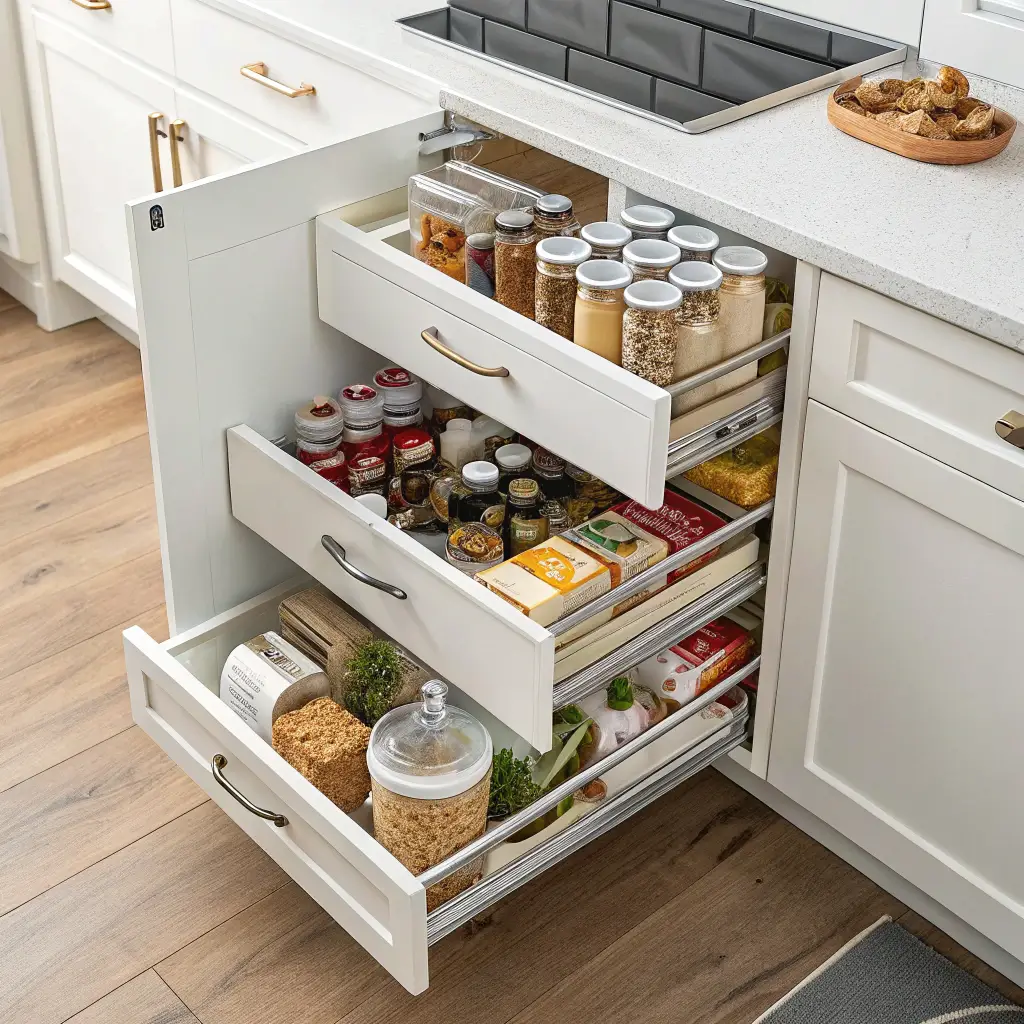
Pull-out shelves eliminate the need for archaeological expeditions to find items in deep pantries. I added these to my mom’s pantry, and she literally cried happy tears the first time she accessed her back-row items without a flashlight and grabber tool.
The sliding mechanism brings everything into view and reach. No more forgotten cans or expired items hiding in dark corners.
Sliding Shelf Strategies
Choose quality drawer slides. Cheap slides fail under weight and frequent use. I use ball-bearing slides rated for at least 100 pounds – they cost more but last forever.
Build slightly smaller than opening. Leave clearance for smooth operation. My first pull-outs were too tight and scraped the sides. Now I leave 1/4 inch clearance on each side.
Add containment rails. Items shift during sliding. I install small rails around shelf edges to prevent items from falling off during enthusiastic pulling.
Corner Pantry Shelves to Maximize Dead Space: The Corner Champion
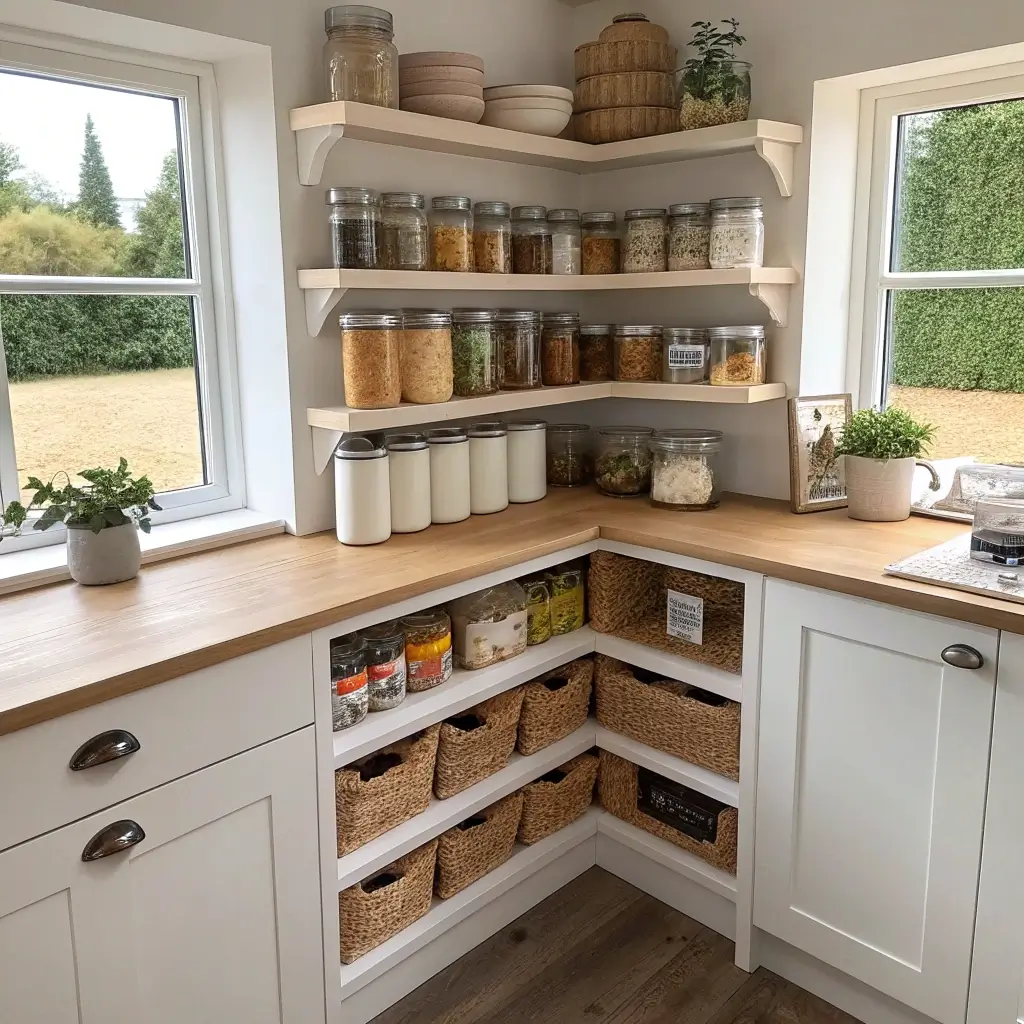
Corner shelves turn awkward pantry angles into storage gold mines. My L-shaped pantry wasted tons of space until I installed custom corner shelves that reach every inch of that previously unusable corner.
The secret lies in making corners accessible rather than just stuffing them full. Properly designed corner shelves bring items forward where you can actually see and reach them.
Conquering Corners
Measure actual corner angles. Not all corners are 90 degrees (shocking, I know). I make cardboard templates first because my “square” corner was actually 87 degrees.
Use rotating systems for deep corners. Lazy Susan mechanisms make deep corner storage actually usable. I install these in corners deeper than 24 inches.
Create graduated depths. Deeper shelves in back, shallower in front creates natural organization. I use this technique to prevent items from disappearing into corner black holes.
Also Read: 10 Unique LEGO Shelves Ideas and Colorful Inspiration
Wire-to-Wood Pantry Shelf Upgrade: The Transformation King
Converting wire shelves to wood creates instant pantry upgrade vibes. I transformed my rental pantry’s flimsy wire shelves into solid wood platforms without removing the existing hardware. The landlord was impressed, and my small items stopped falling through the gaps.
This upgrade works with existing wire shelf brackets, making it perfect for renters or anyone not ready for major construction.
Wire-to-Wood Wonder
Cut wood to fit between brackets. Precise measurements make installation easy. I cut my boards 1/8 inch shorter than the space for easy fitting.
Add non-slip shelf liner. Wood can be slippery. I line my shelves with washable liner that keeps items in place and protects the wood.
Consider removability. Future moves might require returning to wire shelves. I don’t attach my wood permanently – it sits securely but can lift out if needed.
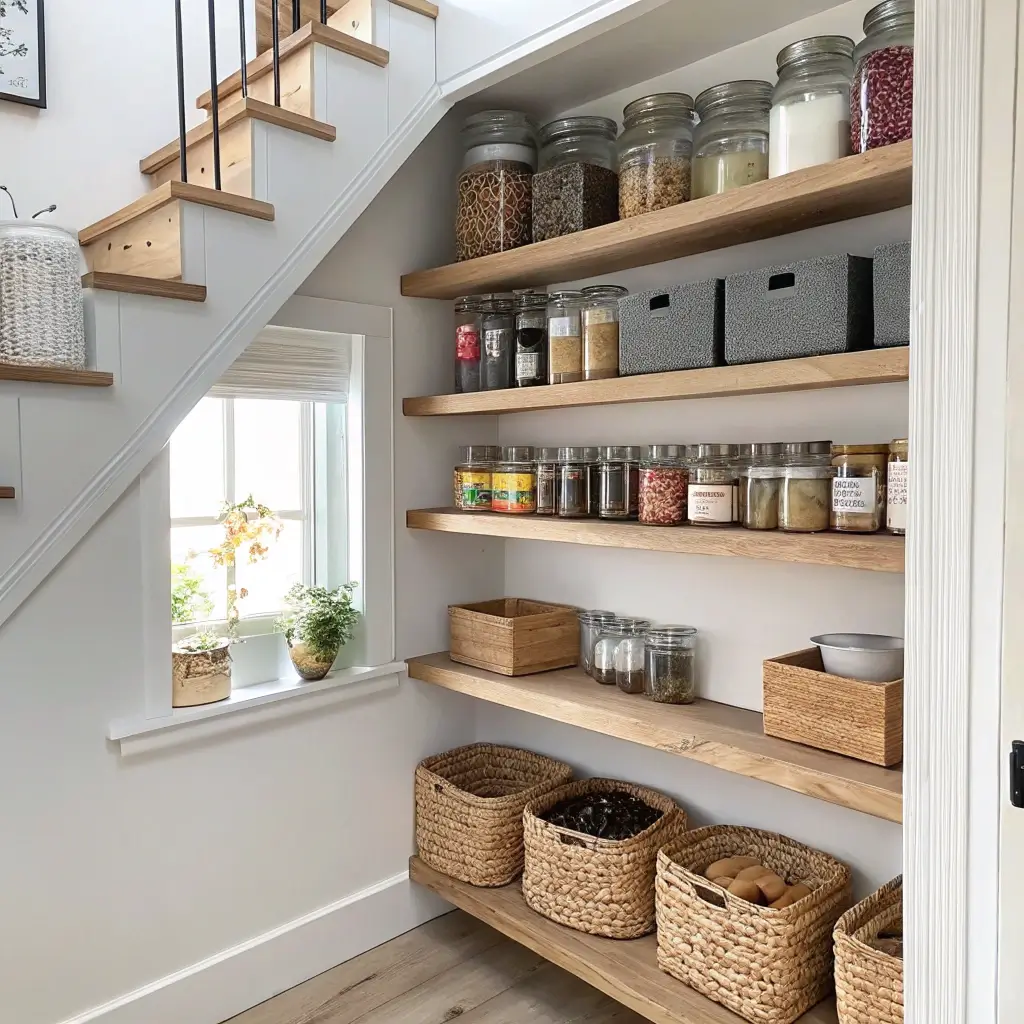
Narrow Pantry Shelves for Tight Pantries: The Slim Solution

Narrow shelves turn tiny spaces into functional pantries. My friend’s apartment had a 12-inch wide “pantry” that seemed useless until we installed custom narrow shelves. Now it holds an impressive amount of groceries in an organized way.
Shallow shelves prevent items from hiding behind each other. Everything stays visible and accessible, even in super narrow spaces.
Narrow Space Navigation
Use every vertical inch. Height becomes crucial in narrow spaces. I install shelves closer together to maximize vertical storage without wasting space.
Create specific zones by height. Tall items get dedicated shelves. I measure common items like pasta boxes and canned goods to determine optimal shelf spacing.
Install at proper depths. Too deep and you waste space, too shallow and items fall. I find 10 inches perfect for most pantry items in narrow spaces.
Open Crate-Style Pantry Shelving: The Rustic Organizer
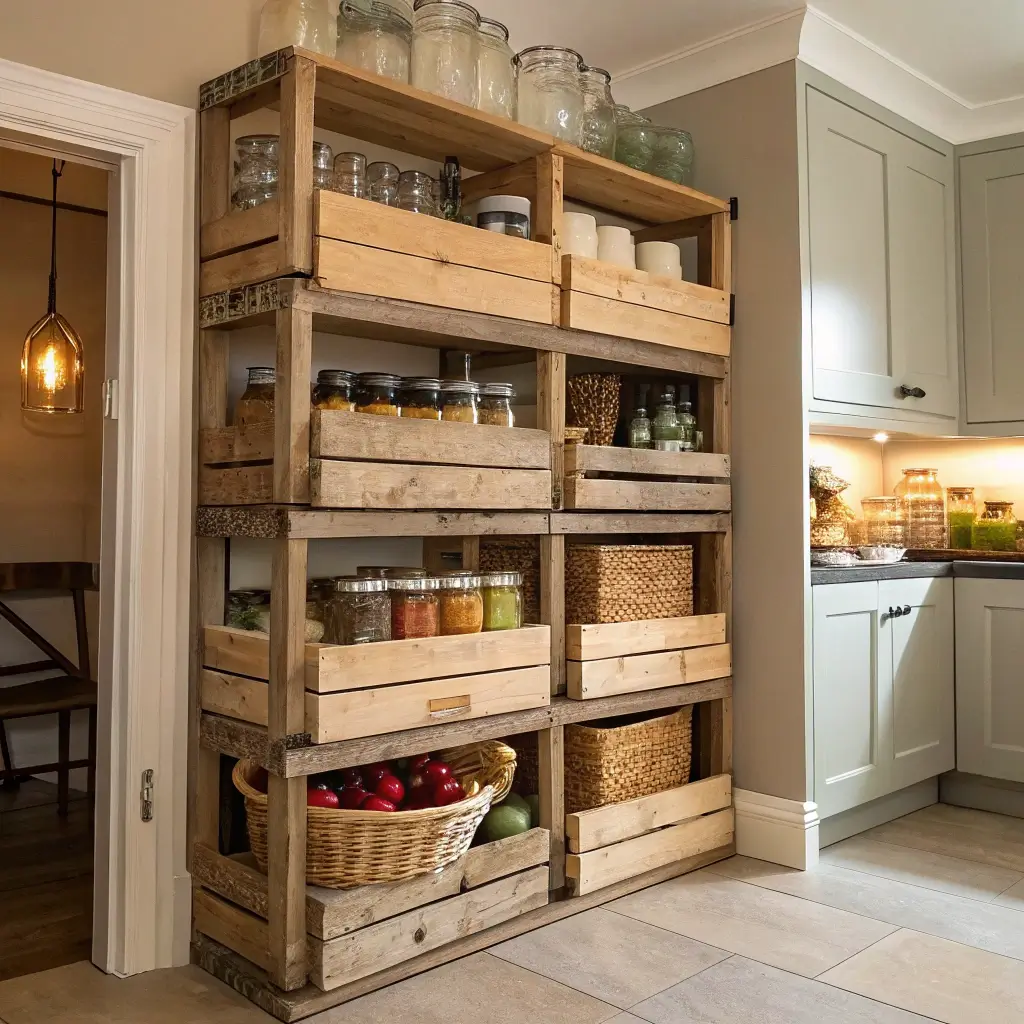
Crate shelving brings farmhouse charm while providing practical storage. My pantry features repurposed wooden crates that create natural dividers and add character to basic food storage.
The open design keeps everything visible while compartments prevent sprawl. Plus, crates can be rearranged as needs change.
Crate Creation Tips
Clean and treat crates thoroughly. Old crates need serious cleaning. I sand rough spots and treat wood with food-safe sealant before using for food storage.
Secure crates properly. Stacked crates need anchoring. I connect mine to each other and the wall for stability.
Create themed crate zones. Different crates for different categories. I designate crates for baking, snacks, canned goods, etc.
Also Read: 12 Creative Nursery Shelves Ideas and Fun Room Designs
Industrial Pipe DIY Pantry Shelves: The Urban Edge
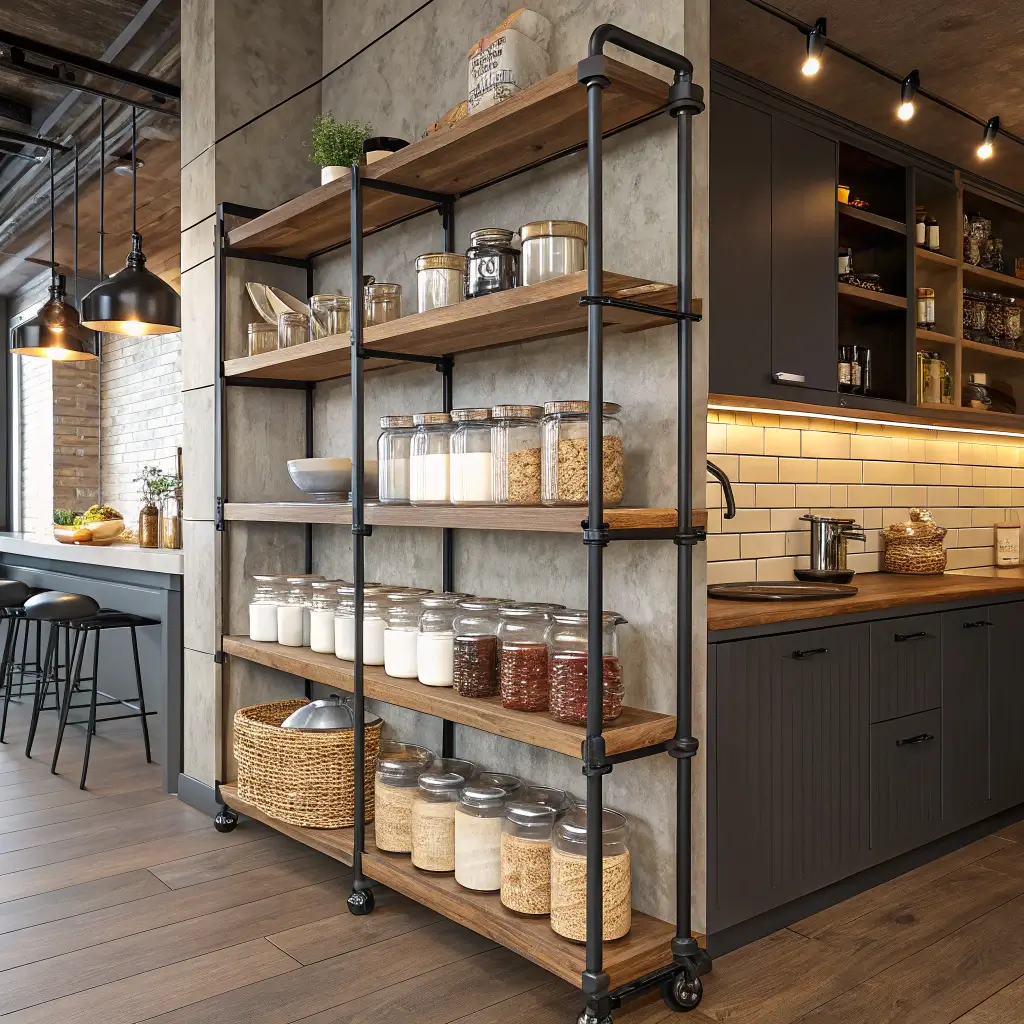
Pipe shelving brings industrial chic to pantry storage. My industrial pipe shelves look expensive but cost way less than professional versions. They hold serious weight while adding style.
The combination of pipes and wood creates perfect balance between industrial and warm elements.
Pipe Dream Reality
Clean pipes before assembly. New pipes have manufacturing oil. I clean thoroughly with degreaser to prevent transfer to stored items.
Plan pipe configuration carefully. Returns are annoying with cut pipe. I sketch my design and list every fitting needed before shopping.
Use proper floor protection. Pipes can damage floors. I add rubber feet to bottom pipes to prevent scratches.
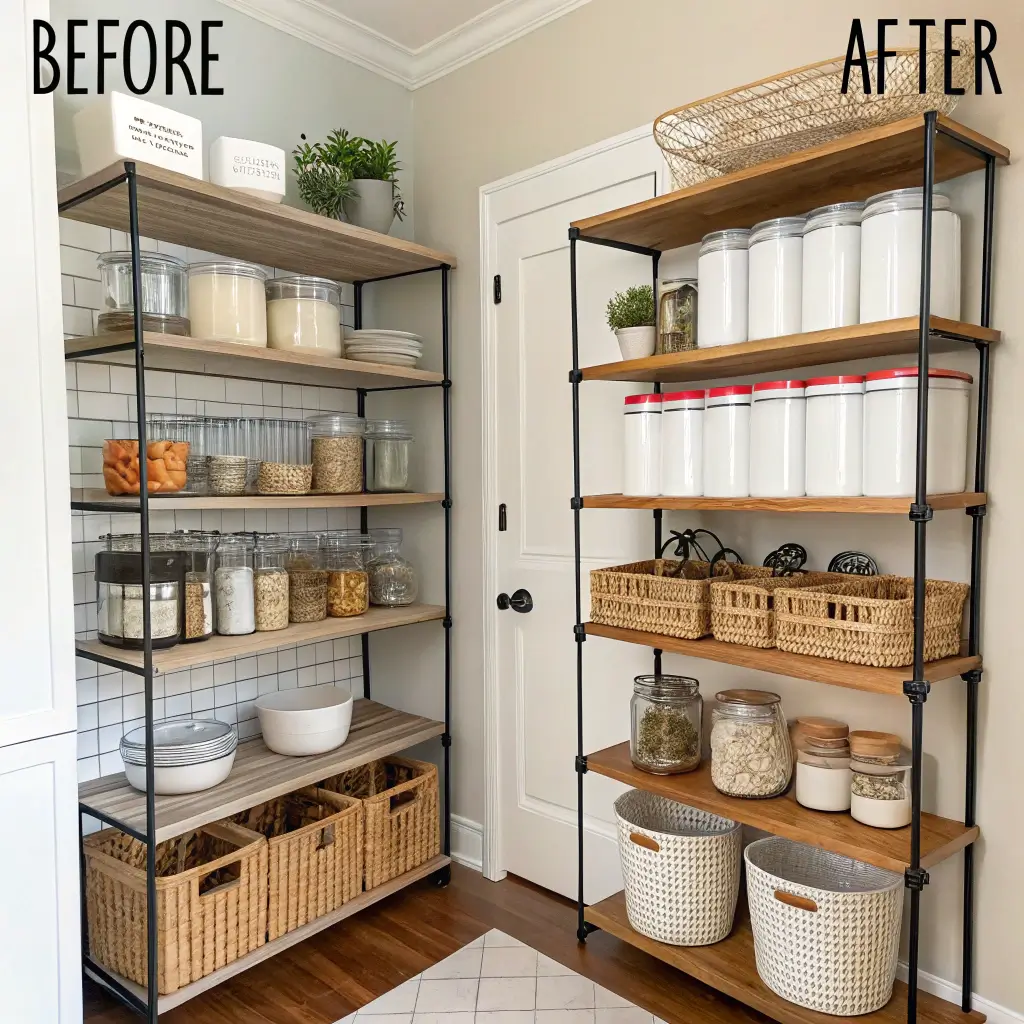
Stackable Modular Pantry Shelves: The Flexible Friend
Modular shelving grows with your needs. My pantry started with three units and expanded to six as my cooking habits changed. The flexibility prevents waste while maintaining organization.
Each module works independently but looks cohesive together. Perfect for evolving storage needs.
Modular Magic Methods
Choose compatible systems. Future additions need to match. I stick to one brand/style for consistent expansion options.
Plan for growth spaces. Leave room for additional units. I keep overhead space free for vertical expansion.
Use consistent containers. Matching storage containers look better in modular systems. I standardize container sizes for clean lines.
Rustic Farmhouse Pantry Shelves: The Character Builder
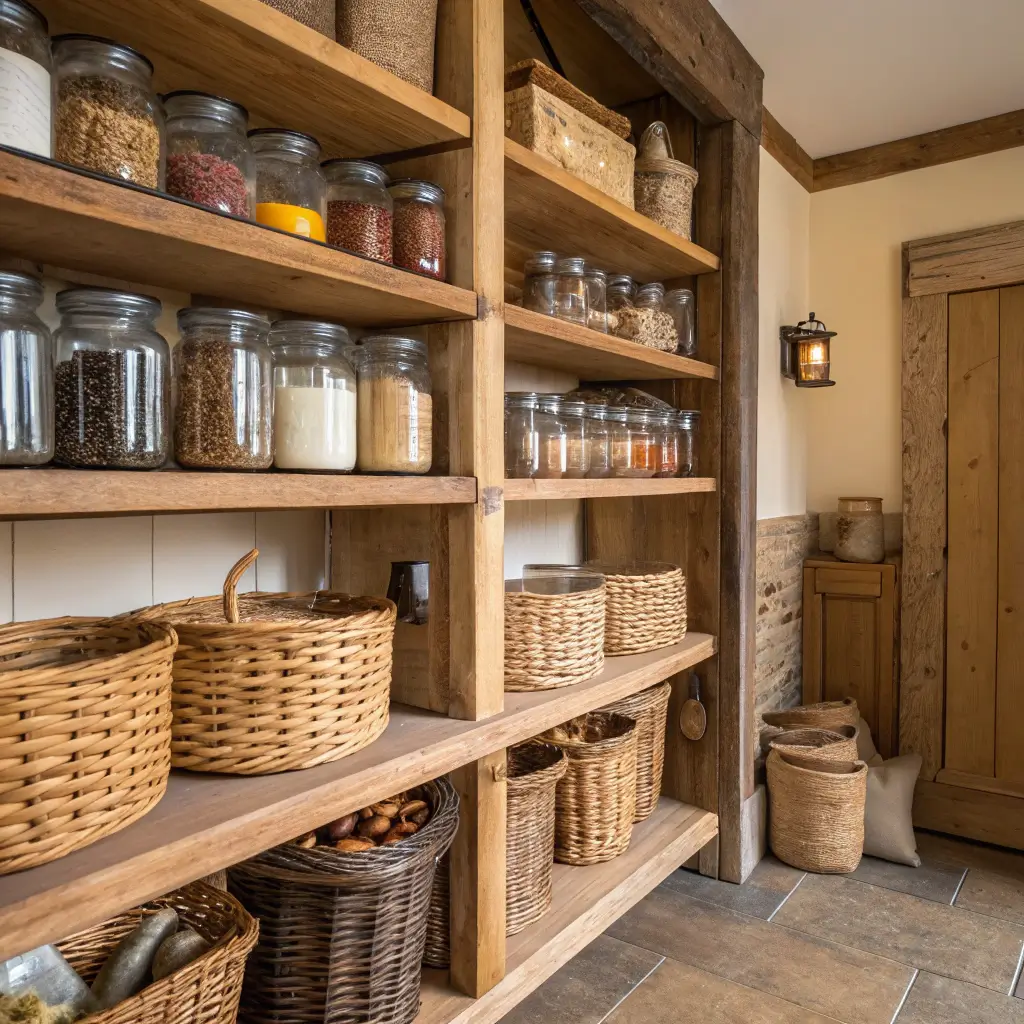
Farmhouse shelves add warmth while providing serious storage. My pantry shelves use reclaimed barn wood that makes even basic groceries look Pinterest-worthy.
The natural wood adds character that manufactured shelving can’t match.
Farmhouse Functionality
Treat wood appropriately. Old wood needs cleaning and sealing. I use food-safe treatments to preserve character while ensuring safety.
Add proper support. Rustic doesn’t mean rickety. I reinforce old wood with modern brackets where needed.
Embrace imperfections. Knots and marks add charm. I work around wood character rather than trying to hide it.
Making DIY Pantry Shelves Work for Real Life
Here’s what I’ve learned from countless pantry projects: the best system matches your actual shopping and cooking habits. Those beautiful open shelves with decanted everything? They only work if you’ll maintain them.
Start small and expand based on real needs. I began with basic shelves and added features as I identified specific storage challenges. This prevents overbuilding and wasted space.
Consider your cleaning tolerance when choosing materials and finishes. Some options require more maintenance than others.
I’d rather have slightly less Instagram-worthy shelves that stay functional than high-maintenance ones that quickly become cluttered.
Remember that pantry needs change seasonally. Holiday baking, summer canning, back-to-school snacks – different seasons need different storage solutions. Build flexibility into your system.
Your pantry deserves better than becoming a black hole where groceries disappear. Whether you go minimal with floating shelves or create a full farmhouse fantasy, the right DIY shelving solution can transform chaos into organization.
Now stop losing cans in the back of your pantry and start building something that actually works for your kitchen life!