10 Stylish Easy DIY Room Decor Ideas for Modern Rooms
- Bedroom Design
 Ben
Ben- 0
- 53 minutes read
Your room is boring, and you know it. That blank wall’s been mocking you for months, and those plain white sheets aren’t fooling anyone into thinking you have your life together.
I’ve been there—staring at my sad, beige walls thinking “I should do something about this” while simultaneously scrolling through impossibly perfect Pinterest rooms created by people who apparently have unlimited time and budgets.
Here’s the thing about room decor: you don’t need to spend your entire paycheck at overpriced home stores or possess some magical crafting gene to make your space look amazing.
After transforming my own room from “college dorm reject” to “actually kind of Instagram-worthy” using mostly stuff I already had (and some strategic dollar store runs), I’ve learned that the best decor comes from creativity, not credit cards.
Whether you’re a broke college student, a renter who can’t make permanent changes, or just someone who wants to refresh their space without the commitment of a full renovation, these 10 easy DIY room decor ideas will help you create a room you actually want to spend time in.
No power tools required, minimal artistic talent needed, and your wallet will thank you.
1. No-Tool Wall Art DIY
Let’s start with the most intimidating blank canvas in any room—your walls. Creating wall art without any tools sounds impossible, but trust me, it’s not only doable, it’s actually pretty fun once you get started.
The Beauty of Simple Materials
Creating art without tools forces you to think creatively about what you already have lying around. Magazines, fabric scraps, old book pages, even receipts can become art when you arrange them thoughtfully. It’s like being forced to cook with whatever’s in your fridge—sometimes the restrictions make you more innovative.
I created my favorite piece of wall art using pages from a book I accidentally destroyed in the rain (RIP, thrift store paperback). Instead of throwing it away, I arranged the water-stained pages in an ombre pattern from dark to light. People think I bought it from some fancy art store. The reality? Thirty minutes, some tape, and a happy accident.
No-Tool Art Ideas That Actually Work
- Magazine collages: Cut or tear images you love, arrange on poster board
- Fabric swatches: Layer different textures for dimensional art
- Paint chip gradients: Free from hardware stores, endless color options
- Pressed flowers: Between glass frames or on cardboard
- Newspaper art: Black and white images create sophisticated looks
- Washi tape designs: More on this later, but tape is basically art magic
Making It Look Intentional
The secret to no-tool art looking professional:
- Stick to a color palette (3-4 colors max)
- Use odd numbers when grouping pieces (3, 5, 7)
- Keep spacing consistent between elements
- Choose a theme or concept to unify the collection
- Don’t overthink it—imperfect is interesting
Hanging Without Damage
For renters or commitment-phobes:
- Command strips are your best friends
- Washi tape doubles as both art and hanging method
- Leaning large pieces against walls works too
- Clipboards mounted with removable hooks
- String and clothespins for rotating gallery
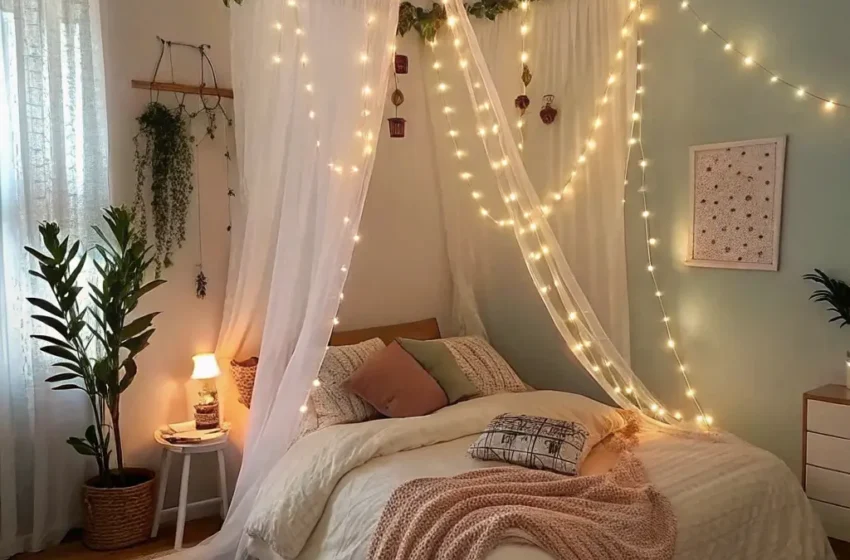
2. Fairy Light Room Decor
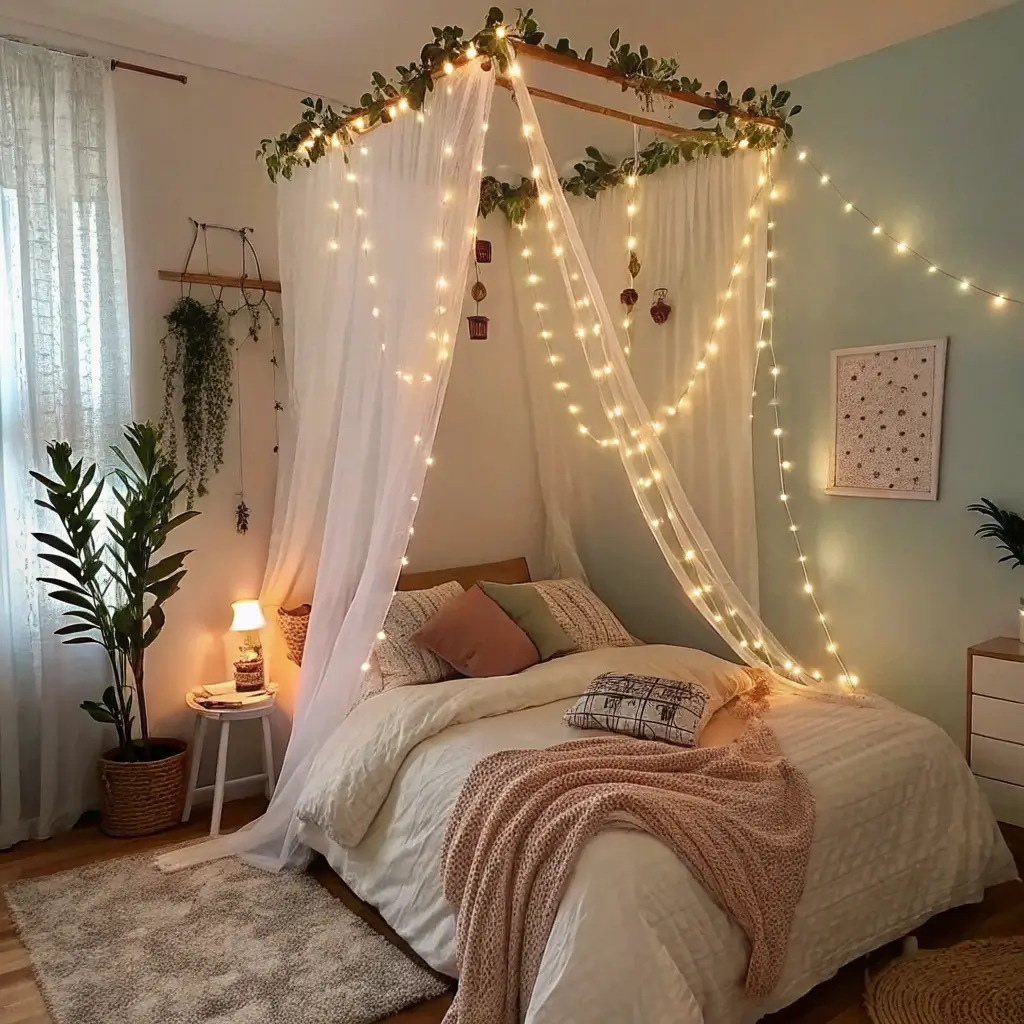
Fairy lights are the duct tape of room decor—they fix everything and make it instantly better. Basic room? Add fairy lights. Boring corner? Fairy lights. Existential crisis at 2 AM? Fairy lights won’t solve it, but they’ll make it more atmospheric.
Why Fairy Lights Are Magic
String lights create instant ambiance that overhead lighting could never achieve. They’re soft, warm, and forgiving (hiding all sorts of decorating sins in their gentle glow). Plus, they’re ridiculously cheap and require zero installation skills.
I was skeptical about fairy lights being “too college dorm” until I strung some warm white ones across my bedroom ceiling. Now I literally never use my overhead light. The vibe went from “interrogation room” to “cozy sanctuary” for less than fifteen bucks.
Creative Ways to Use Fairy Lights
- Headboard backdrop: String behind bed for dreamy effect
- Photo display: Clip photos to string with mini clothespins
- Shelf accent: Wind along bookshelf edges
- Curtain layer: Hang behind sheer curtains
- Mirror frame: Outline mirrors for vanity vibes
- Ceiling canopy: Create overhead starlight effect
Fairy Light Pro Tips
Making string lights look intentional:
- Choose warm white over multi-color (unless you’re into that)
- Hide battery packs or plugs behind furniture
- Use clear or white wire to blend with walls
- Layer different string lengths for depth
- Combine with other decor for cohesive look
- Invest in timer plugs for automatic ambiance
Safety Matters
Don’t burn your house down:
- Check voltage and power requirements
- Never cover lights with flammable materials
- Use LED options for less heat
- Unplug when leaving for extended periods
- Buy from reputable sellers (cheap can be dangerous)
3. Paper Craft Wall Decor
Paper crafts sound elementary school, but modern paper art is having a serious moment. From geometric origami to intricate paper cuts, there’s a paper project for every skill level and aesthetic.
The Versatility of Paper
Paper is cheap, forgiving, and infinitely customizable. Mess up? Start over with minimal waste. Want to change colors? Buy different paper. It’s the ultimate low-stakes, high-reward craft material.
My first paper craft attempt was a disaster—I tried making complex origami cranes and gave up after the fifth deformed bird. Then I discovered simple paper flowers, and suddenly I had a whole garden on my wall. The lesson? Start simple and work your way up.
Easy Paper Craft Ideas
- 3D paper flowers: Layer circles or petals for dimension
- Geometric shapes: Fold and arrange in patterns
- Paper chains: Retro but chic in monochrome
- Cut silhouettes: Simple shapes make bold statements
- Rolled paper art: Quilling creates delicate designs
- Layered landscapes: Different colored papers create depth
Materials You’ll Need
Keeping it simple and cheap:
- Cardstock in your color palette
- Regular printer paper works too
- Scissors (this barely counts as a tool)
- Glue stick or tape
- Optional: Paper cutter for clean lines
- Templates from internet (free downloads everywhere)
Making Paper Art Last
Protect your creations:
- Spray with fixative to prevent yellowing
- Keep away from direct sunlight
- Frame behind glass for longevity
- Accept that paper is temporary (and that’s okay)
- Seasonal swaps keep things fresh
FYI, you can find countless free paper craft templates online—no need to reinvent the wheel or have artistic skills.
Also Read: 12 Stylish Room Decor Ideas DIY Ideas to Try Today
4. Cozy Cushion Cover DIY
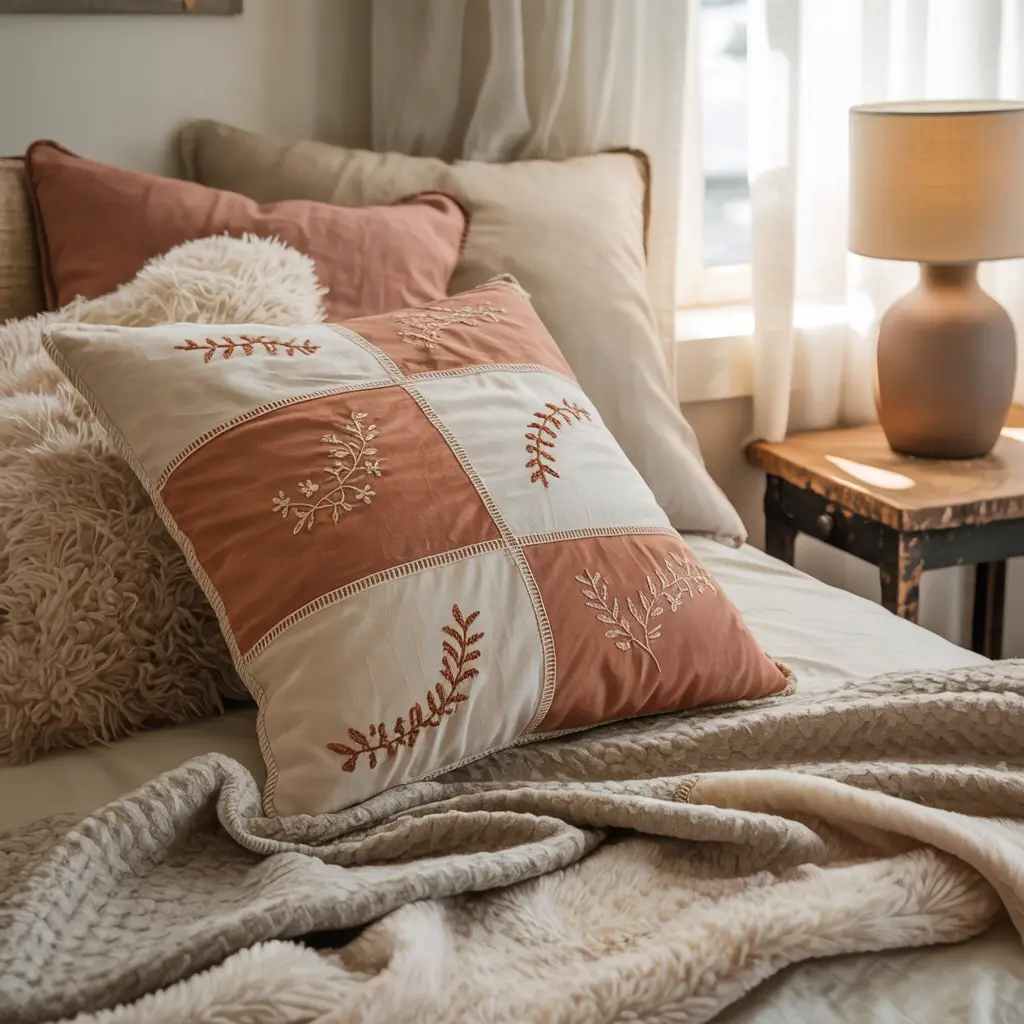
Throw pillows are expensive for what amounts to stuffed fabric. Making your own covers lets you change your room’s vibe seasonally without buying entirely new pillows every time you get bored.
Why DIY Cushion Covers Rock
Cushion covers transform your space instantly with minimal effort and maximum impact. They’re like accessories for your furniture—change them out and suddenly you have a whole new look.
I made my first cushion cover out of an old band t-shirt I couldn’t bear to throw away. No sewing required—I just wrapped it around a pillow and tied the excess fabric in a knot. It looked intentionally edgy, and people asked where I bought it. Sometimes the easiest solutions are the best.
No-Sew Cushion Cover Methods
- Fabric wrap and tuck: Fold and tuck fabric around pillow
- Tie corners: Knot fabric at corners for rustic look
- Safety pin closure: Hidden pins keep fabric in place
- Hot glue: Quick fix for non-washable covers
- Fabric tape: Removable and renter-friendly
- Button closure: Use existing buttonholes or create with scissors
Fabric Options Beyond Fabric Stores
Get creative with materials:
- Old scarves (thrift stores are goldmines)
- Vintage table linens
- Sweaters for cozy texture
- Denim jeans for industrial vibe
- Dish towels (seriously, they work great)
- Fabric remnants from craft stores’ discount bins
Styling Your Cushion Collection
Making it look curated:
- Mix patterns and solids
- Vary sizes (square, lumbar, round)
- Stick to 3-4 colors throughout
- Add texture variety (smooth, knit, furry)
- Odd numbers look more natural
- Don’t match everything perfectly
5. Simple Photo Frame Decor
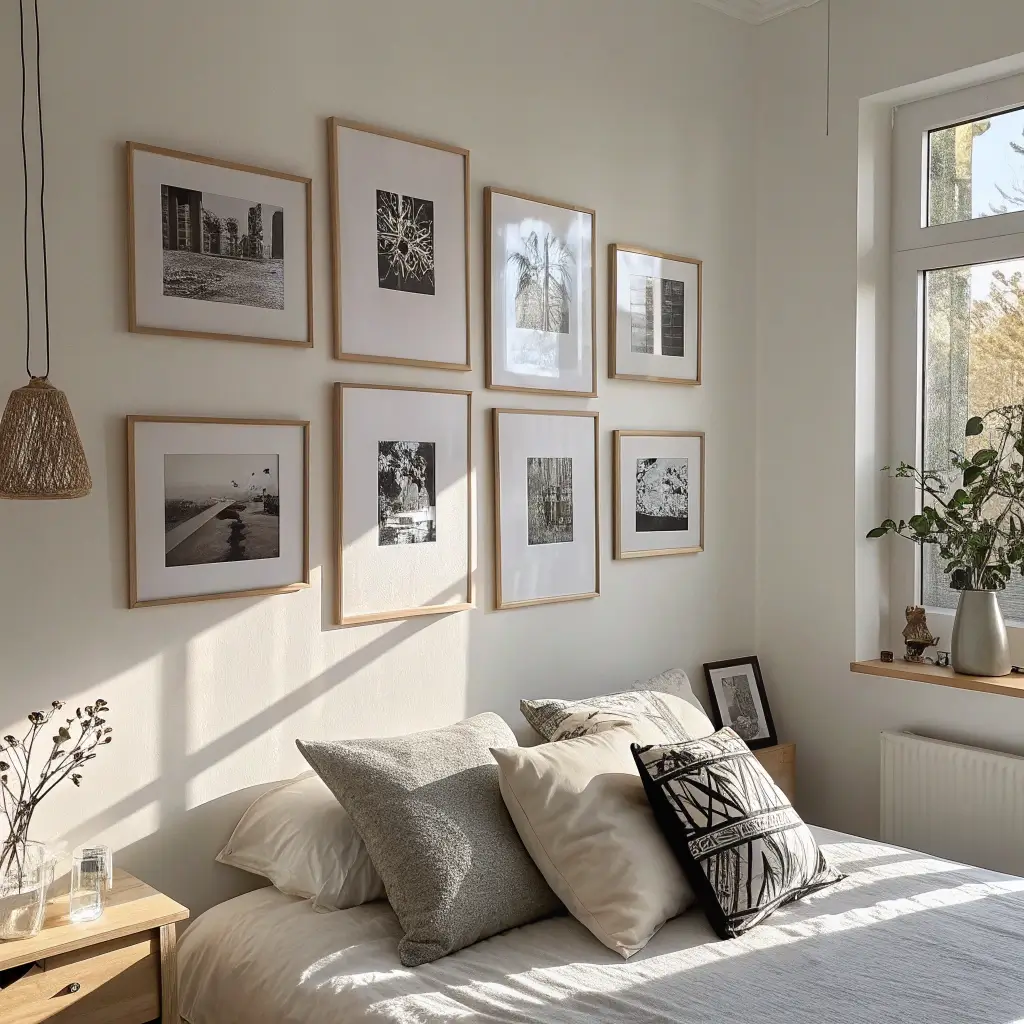
Photo frames are underrated as decor. They’re not just for photos anymore—they’re versatile tools for displaying basically anything flat that brings you joy.
Beyond Basic Photos
Frames give importance to whatever you put inside them. That random magazine cutout becomes art. That concert ticket becomes a memory. That pressed flower becomes botanical elegance. Frames are like the fancy outfit that makes everything look more put-together.
I have a collection of thrifted frames (none matching, all under $3) displaying everything from vintage postcards to fabric swatches to my kid’s drawings. The mismatched frames actually look more intentional than matching sets would. Sometimes chaos is curated.
What to Frame Besides Photos
- Pressed plants: Flowers, leaves, herbs
- Fabric samples: Beautiful textiles become art
- Maps: Highlight places you’ve been or want to go
- Book pages: Poetry, quotes, illustrations
- Magazine pages: Fashion, art, nature photography
- Postcards: Vintage or modern
- Ticket stubs: Concerts, movies, travel
- Paint chips: Create abstract color studies
Frame Styling Strategies
Creating cohesive gallery walls:
- Mix frame sizes and orientations
- Maintain consistent mat color (white or cream usually)
- Keep spacing between frames uniform
- Create templates with paper before hanging
- Balance visual weight across the display
- Leave some wall space breathing room
Budget Frame Sources
Where to find cheap frames:
- Thrift stores (always check!)
- Dollar stores (basic but functional)
- IKEA (affordable classics)
- Yard sales (vintage gold)
- Facebook Marketplace (people give them away)
- Family members (ask around)
6. DIY Desk Corner Styling
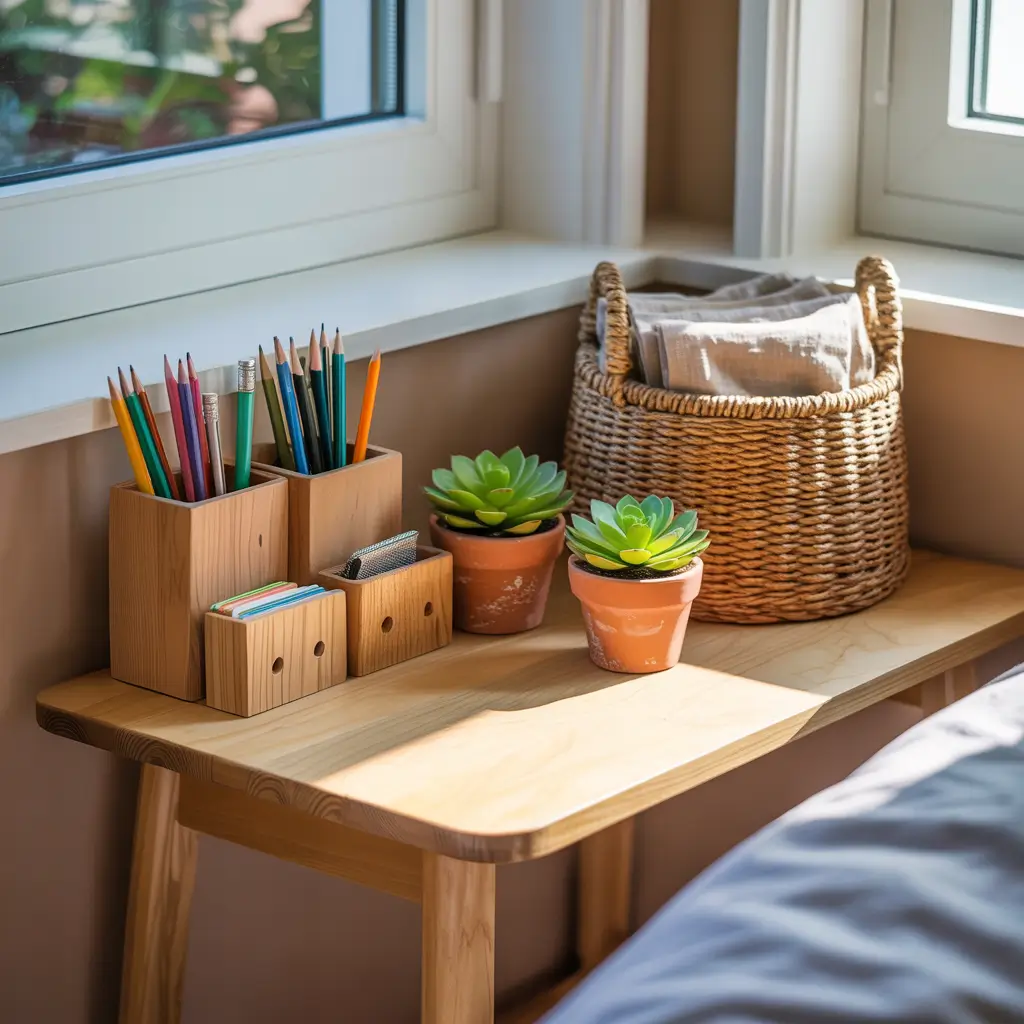
Your desk doesn’t have to be a chaotic pile of papers and random pens. With a few intentional styling choices, you can create a workspace that actually inspires productivity instead of anxiety.
The Power of an Organized Corner
A well-styled desk corner creates a mental shift from “ugh, work” to “I’m a capable person who has their life together.” Even if it’s a lie, fake it till you make it, right? A beautiful workspace makes the work itself feel more manageable.
My desk went from cluttered nightmare to styled sanctuary in about 30 minutes. I grouped similar items in pretty containers, added a plant, and suddenly I could actually find my pens. Revolutionary? No. Effective? Absolutely.
Desk Styling Essentials
- Pretty storage: Jars, boxes, trays for corralling clutter
- One plant: Real or fake, adds life and color
- Personal item: Photo, trinket, something meaningful
- Lighting: Desk lamp with warm bulb
- Vertical storage: Wall organizers free up surface space
- Color coordination: Limit to 3-4 colors for cohesion
Creating Functional Beauty
Making it work, not just look good:
- Store frequently used items within arm’s reach
- Use drawer dividers for small items
- Label containers (pretty labels exist)
- Keep surfaces mostly clear
- Designate zones (work, storage, display)
- Regular editing prevents re-cluttering
Budget Desk Decor
Styling without spending:
- Repurpose jars and containers you already have
- Print free motivational quotes or art
- Use books as risers for height variation
- Thrift vintage desk accessories
- Make pen holders from cans wrapped in paper
- Steal (borrow) plants from other rooms
IMO, a styled desk corner is the quickest way to feel like you’re winning at adulting, even when everything else is chaos.
Also Read: 10 Stylish DIY Room Decor Ideas for Trendy Interiorsc
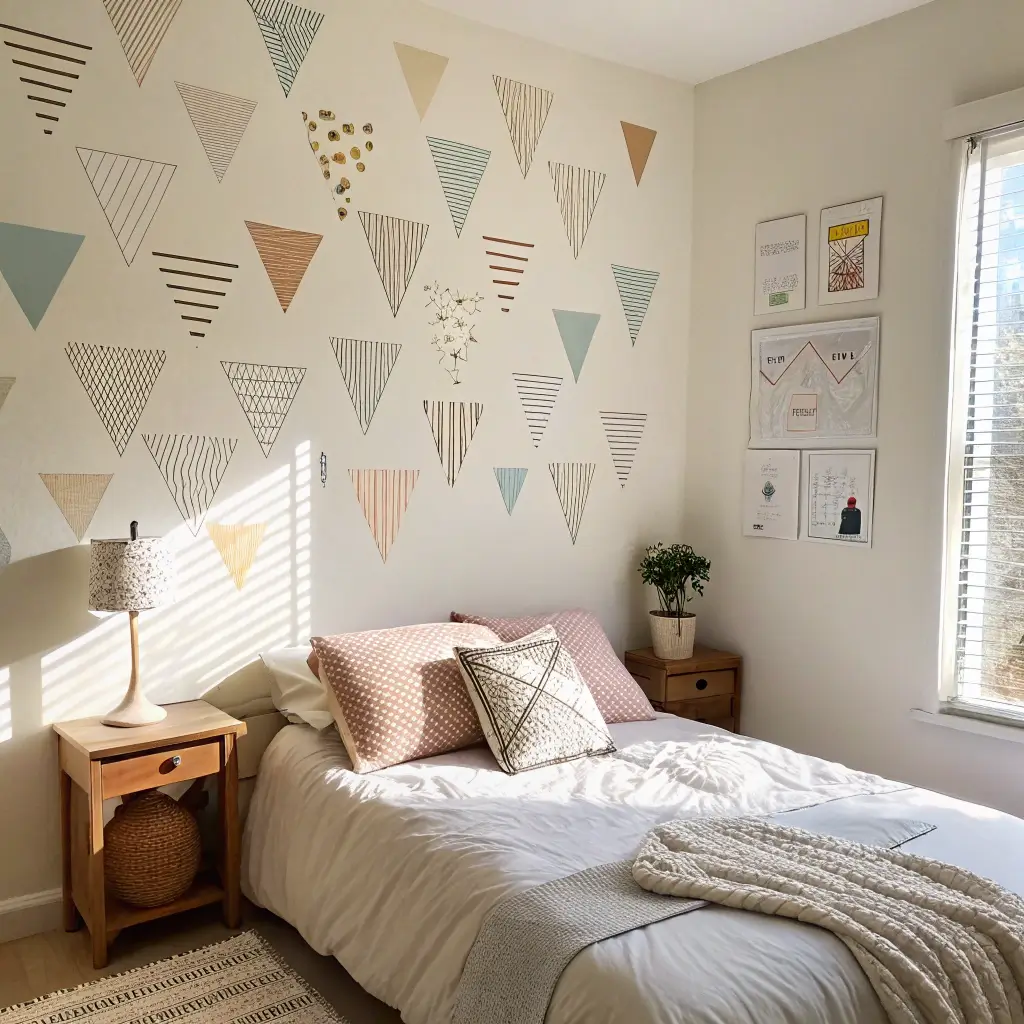
7. Washi Tape Wall Design

Washi tape is basically magic in roll form. It’s removable, repositionable, comes in infinite patterns and colors, and requires zero artistic skill to create impressive designs.
Why Washi Tape is a Game-Changer
Washi tape lets you be bold without commitment. Hate it? Peel it off. No damage, no regret, no money wasted. It’s the commitment-phobe’s dream decorating material.
I created an entire geometric wall design with washi tape during a particularly boring weekend. Cost: $12 for three rolls. Time: two hours including the part where I changed my mind three times. The compliments I’ve received: countless. People genuinely think I painted it or hired someone. Nope, just tape and determination.
Washi Tape Design Ideas
- Geometric patterns: Triangles, hexagons, diamonds
- Frame effect: Outline areas like faux frames
- Headboard substitute: Create bed backdrop
- Border designs: Accent walls without paint
- Grid patterns: Modern and architectural
- Accent stripes: Vertical or horizontal lines
- Custom murals: Create simple shapes and scenes
Design Tips for Success
Making tape look intentional:
- Plan design with pencil marks first
- Use level or measuring tape for straight lines
- Overlap corners neatly for crisp edges
- Choose 2-3 tape patterns/colors max
- Step back frequently to check proportions
- Take your time—rushing shows
Where to Use Washi Tape
Beyond walls:
- Furniture edges for pop of color
- Lampshades for custom designs
- Picture frames for temporary decoration
- Light switches as accents
- Mirrors as decorative borders
- Doors for pattern without paint
8. Minimal Jar Decor DIY
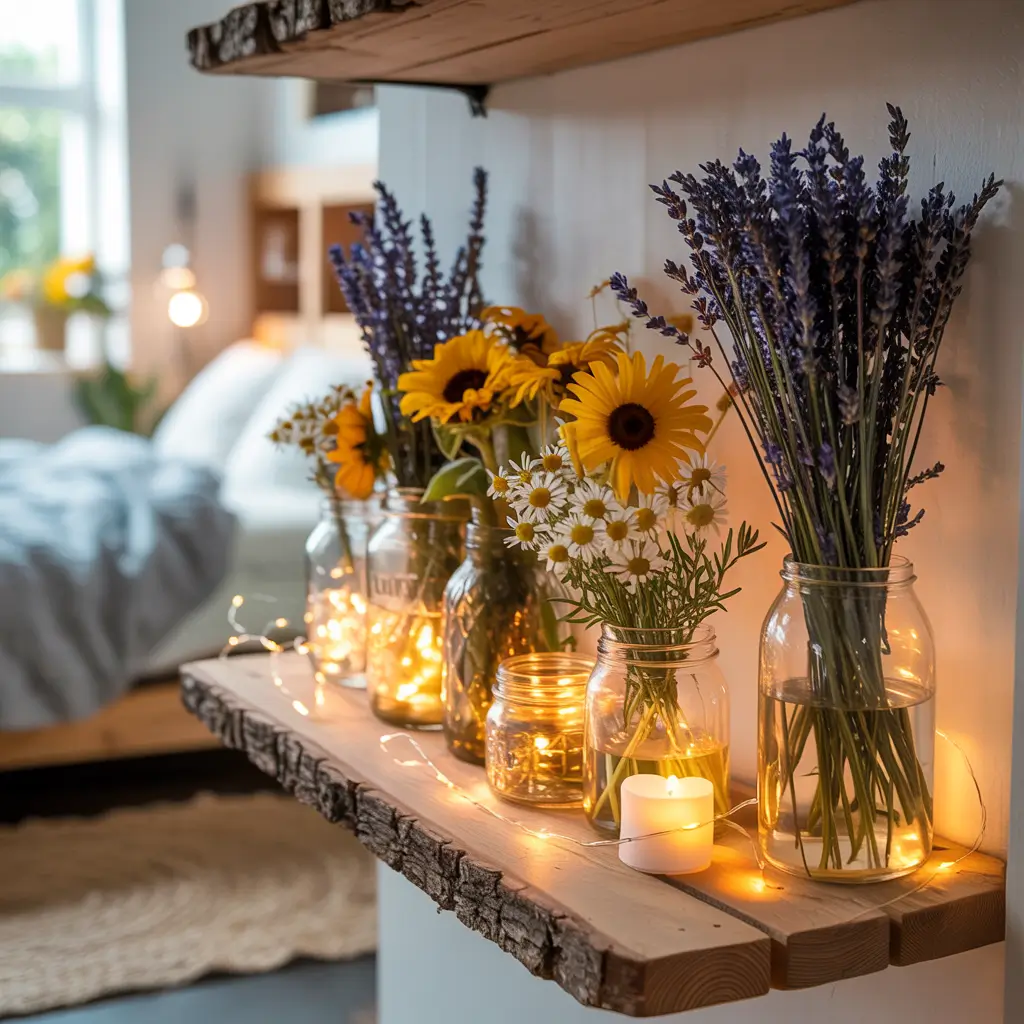
Empty jars are free decor waiting to happen. Before you recycle that pasta sauce jar, consider its potential for holding, organizing, or just looking pretty on your shelf.
The Humble Jar’s Hidden Potential
Jars are versatile, free, and instantly make anything inside look more intentional. Loose change becomes a savings display. Cotton balls become spa vibes. Random craft supplies become an organized collection.
I have probably 20 jars scattered around my room, and they all serve different purposes while looking cohesive. My secret? I removed all labels and stuck to clear glass only. That one simple rule makes my collection look curated instead of like I’m hoarding empties.
Ways to Use Decorative Jars
- Flower vases: Single stems look elegant
- Pen/pencil holders: Desk organization
- Bathroom storage: Cotton balls, swabs, bath salts
- Fairy light containers: Glow from within
- Terrarium vessels: Mini plant worlds
- Layered ingredients: Pasta, beans, baking supplies
- Collection displays: Shells, stones, buttons
Making Jars Look Intentional
Elevating free containers:
- Remove labels completely (hot water helps)
- Group similar sizes together
- Vary heights for visual interest
- Add contents that match your color scheme
- Paint lids in coordinating colors
- Tie twine or ribbon around necks
- Use consistently (all glass, no plastic)
What to Put in Decorative Jars
Display-worthy jar fillings:
- Fresh or dried flowers
- Colored sand in layers
- Seasonal items (pinecones, ornaments)
- Office supplies (paper clips, rubber bands)
- Beauty products (brushes, cotton rounds)
- Collections (buttons, beads, marbles)
9. Easy Bedside Decor Setup

Your bedside table is prime real estate for creating atmosphere. It’s the last thing you see before sleep and first thing you see when waking—make it good.
The Nightstand Trifecta
Every perfect bedside needs three elements: light, something living, and something personal. This formula works whether your “nightstand” is an actual table or a stack of books on the floor (no judgment).
My bedside evolution went from “dumping ground for water glasses and phone chargers” to “styled vignette that makes me feel calm before bed.” The transformation required exactly three items: a lamp, a plant, and a small framed photo. That’s it. Sometimes simple is all you need.
Essential Bedside Elements
- Lighting: Lamp, fairy lights, or candle
- Plant: Real or high-quality fake
- Personal item: Photo, meaningful object, or book
- Storage: Tray or box for essentials
- Something elevated: Books or small platform
- Optional: Diffuser, small clock, water bottle
Styling Your Nightstand
Creating balance and function:
- Stack books for height variation
- Use trays to corral small items
- Keep only current reading material
- Charge phone elsewhere (seriously, try it)
- Display one beautiful object
- Maintain some clear space
No-Nightstand Solutions
When you don’t have a table:
- Floating shelf mounted to wall
- Small stool or chair
- Stack of books (double duty)
- Wall-mounted organizer
- Crate turned on its side
- Window sill if positioned right
Also Read: 10 Charming Unisex Kids Bathroom Ideas and Easy DIY Hacks
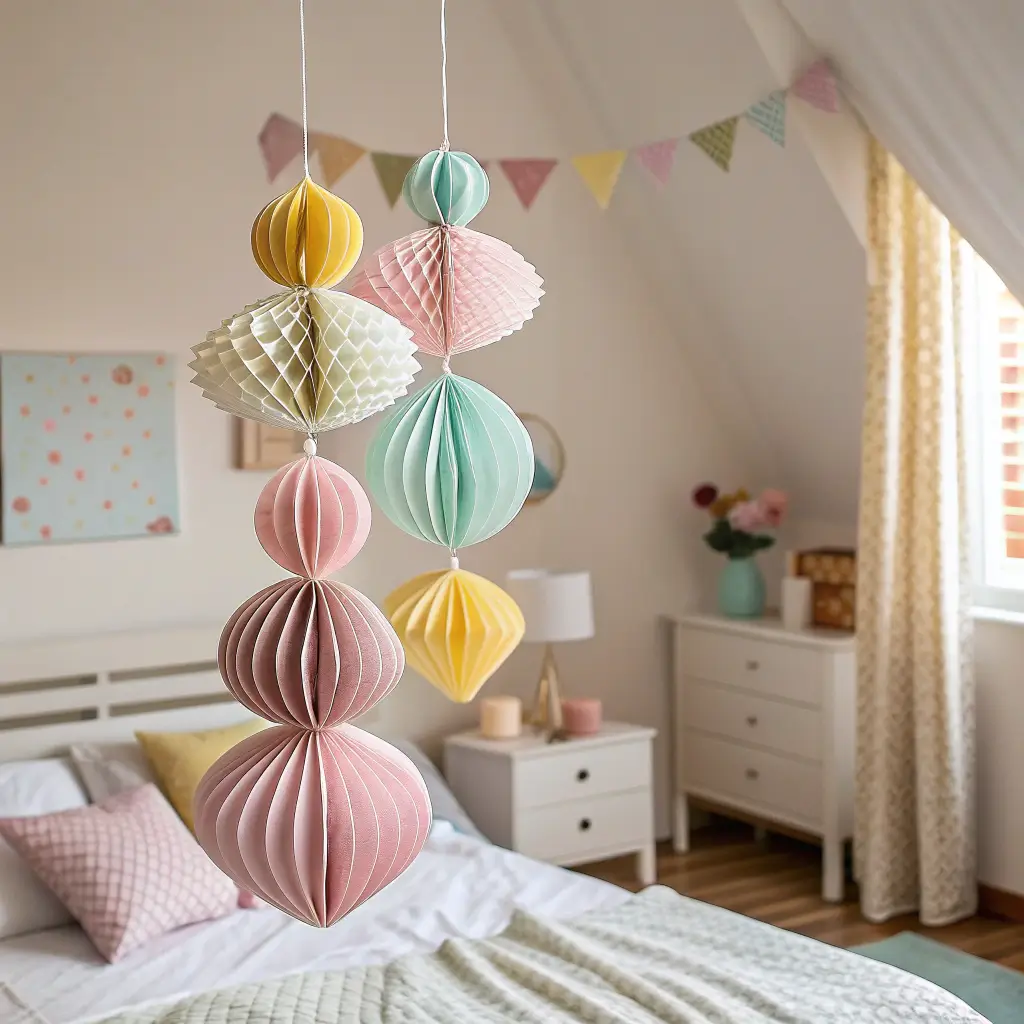
10. DIY Hanging Paper Decor
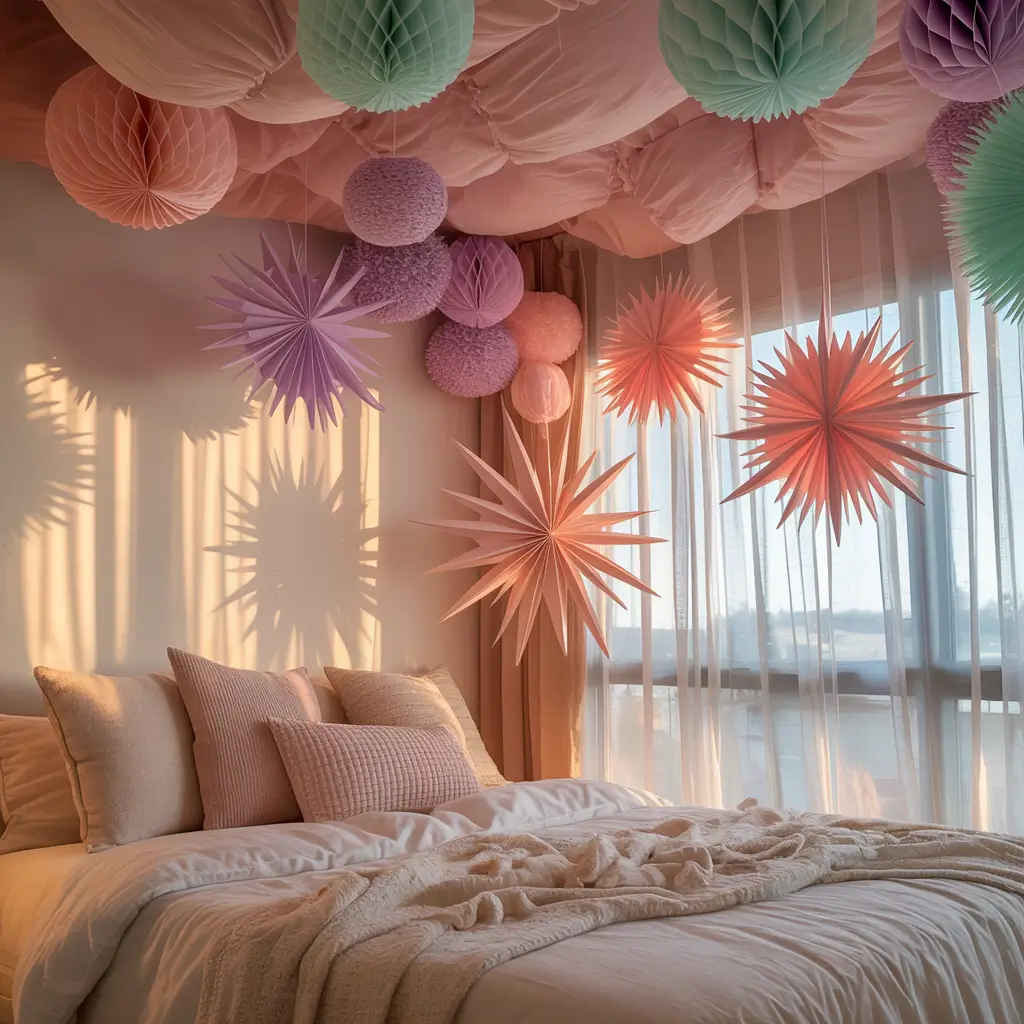
Hanging decor adds dimension and movement to your space. Paper makes it lightweight, affordable, and easy to change with seasons or moods.
The Appeal of Overhead Decor
Hanging decorations draw the eye up, making rooms feel taller and more dynamic. They also use that awkward ceiling space that otherwise just sits there being boring.
I created paper cranes (after finally mastering them) and hung them at different lengths from my ceiling. The gentle movement when air circulates makes my room feel alive. Plus, lying in bed and watching them slowly spin is oddly meditative. Who needs expensive mobiles?
Easy Hanging Paper Ideas
- Paper cranes: Classic origami with fishing line
- Pom-poms: Tissue paper creates soft spheres
- Garlands: Paper shapes on string
- Geometric shapes: 3D paper forms catch light
- Paper lanterns: DIY or store-bought
- Photo strings: Memories floating overhead
- Paper butterflies: Delicate and dimensional
- Streamers: Simple but effective for parties or permanence
Hanging Methods That Work
Ceiling-safe installation:
- Command hooks (removable and strong)
- Thumbtacks in textured ceilings
- Fishing line (nearly invisible)
- Ribbon or twine (visible but decorative)
- Existing light fixtures (careful!)
- Curtain rods for room-dividing displays
Making It Look Intentional
Avoiding the “elementary school classroom” look:
- Stick to a color palette
- Vary hanging heights
- Create clusters rather than random spacing
- Choose adult-appropriate designs
- Use quality paper that photographs well
- Keep it subtle (less is often more)
Making DIY Decor Work for You
Here’s what I’ve learned after turning my room from boring to actually kind of impressive using mostly free or cheap materials: the best decor reflects who you are, not what’s trending on Instagram.
Those perfectly styled rooms you see online? They’re usually staged for the photo and probably look different five minutes later.
Start with one project that genuinely excites you. Don’t try to tackle everything at once—that’s how you end up with half-finished projects creating more clutter than you started with.
I know this from experience (my closet is still hiding several “I’ll finish this eventually” disasters).
The beauty of DIY decor is that it’s not permanent. Made something you hate? Take it down. Found a better idea? Switch it out.
The low commitment is actually freeing—you can experiment without the pressure of expensive mistakes.


