10 Smart Floating Shelves Bathroom Ideas for Tiny Bathrooms
- Floating Shelves
 Ben
Ben- 0
- 32 minutes read
Let’s talk about bathroom storage for a second. Mine used to be a disaster zone where products went to die under the sink, never to be seen again.
I had bottles falling like dominoes every time I reached for my toothbrush, and don’t even get me started on the towel situation. Then I discovered floating shelves, and honestly, it changed my whole bathroom game.
Floating shelves in bathrooms aren’t just about looking pretty on Instagram (though they definitely do that).
They’re about finally having a place for all your stuff that doesn’t involve shoving it into an overstuffed medicine cabinet or playing Jenga with bottles on your counter.
I’ve installed floating shelves in three different bathrooms now, and each time I wonder why I didn’t do it sooner.
Whether you’re dealing with a tiny powder room or a sprawling master bath, these 10 floating shelf ideas will transform your bathroom from cluttered chaos to organized oasis.
And the best part? Most of these solutions work even if you’re renting and can’t go crazy with renovations.
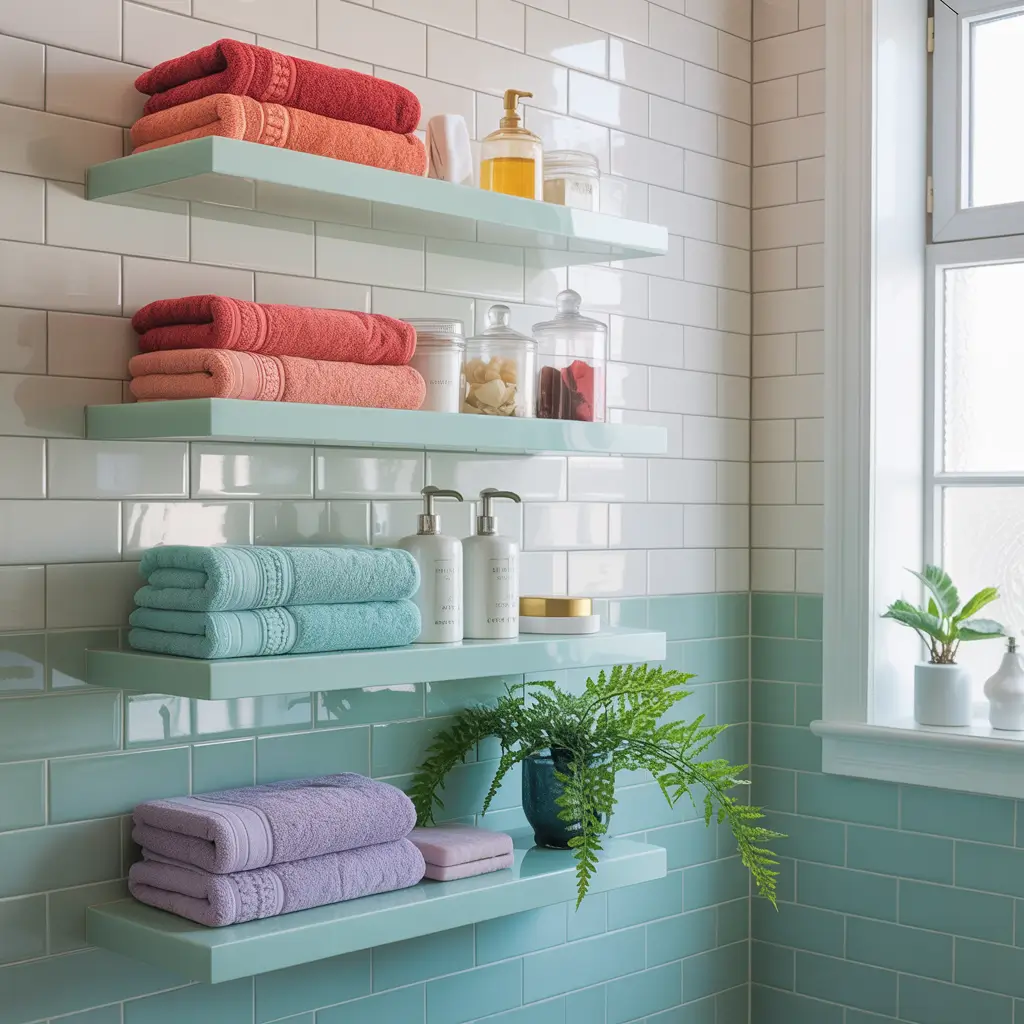
1. Minimalist White Floating Shelves with Greenery
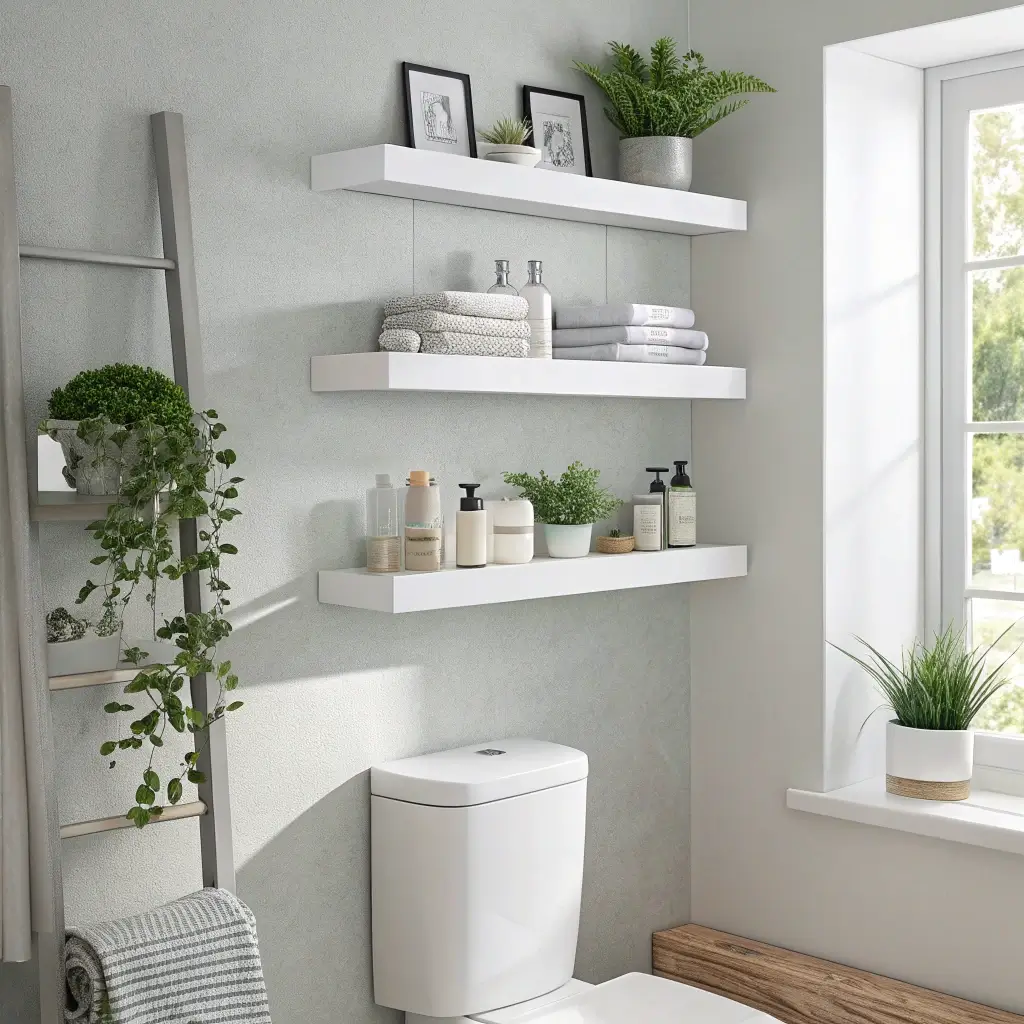
White floating shelves with plants are basically the yoga pants of bathroom decor – they go with everything and somehow make everything look better. I installed three simple white shelves in my guest bathroom, added some pothos and succulents, and suddenly it looked like a spa.
The combination of clean white shelves and green plants creates this fresh, calming vibe that makes even the smallest bathroom feel more spacious. Plus, many plants actually thrive in bathroom humidity, so it’s a win-win situation.
Choosing the Right White Shelves
Not all white shelves are created equal in bathrooms. You need something that can handle moisture without warping or peeling. I learned this the hard way when my first cheap particle board shelves basically melted after six months of steamy showers.
Go for sealed MDF, solid wood with waterproof coating, or even white-painted metal. These materials laugh in the face of bathroom humidity. My current white oak shelves have been going strong for two years with just a good sealant.
Keep the brackets minimal to maintain that clean look. Hidden brackets or slim white supports disappear into the wall. Those chunky decorative brackets might look cute in the living room, but they’ll make your minimalist bathroom shelves look cluttered.
Adding Plants That Won’t Die
Choose humidity-loving plants that can handle lower light. Pothos, spider plants, and snake plants are basically indestructible. My pothos has survived everything from overwatering to complete neglect, and it still looks amazing.
Use proper drainage to protect your shelves. Place plants in containers with drainage holes inside decorative pots. Water damage on white shelves shows immediately, and nobody wants brown water stains on their pristine shelves.
Consider the splash zone when placing plants. That shelf right next to the shower? Maybe not the best spot for your succulent collection. I keep water-sensitive plants on higher shelves away from direct splash.
2. Rustic Wooden Shelves Above Toilet Storage
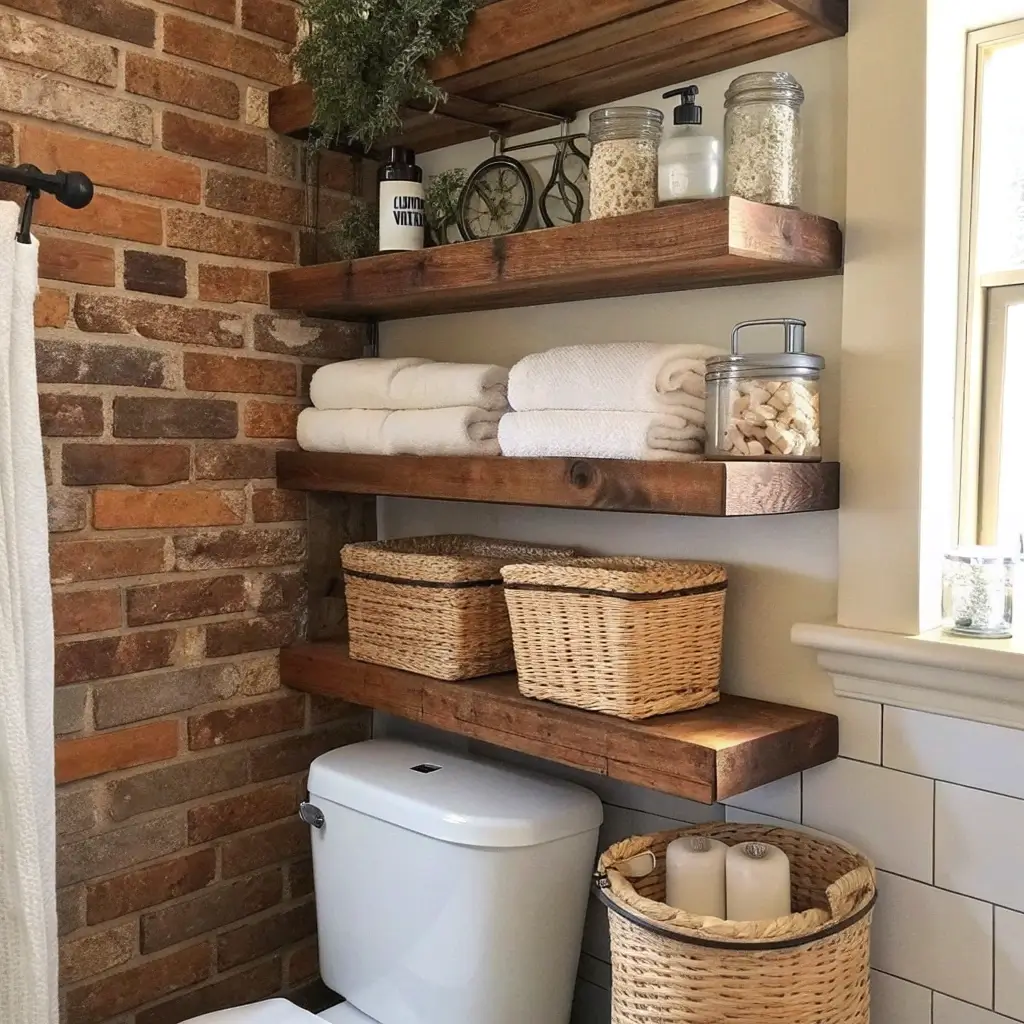
The space above your toilet is prime real estate that most bathrooms waste completely. I installed rustic wood shelves above my toilet, and it’s like I discovered a whole new room worth of storage.
Rustic wooden shelves bring warmth to bathrooms that can often feel cold and clinical. They’re perfect for storing everything from extra toilet paper to decorative items that make your bathroom feel more like a living space.
Making Over-Toilet Shelves Work
Keep the lowest shelf at least 24 inches above the toilet tank. Trust me, you need clearance for cleaning and tank maintenance. I initially went lower and regretted it every time I had to fix the flapper.
Use proper wall anchors, especially for heavy wood. The area above toilets often doesn’t have convenient studs. Heavy-duty drywall anchors rated for 50+ pounds are your friends here.
Consider the depth carefully. Too deep and they’ll bonk heads, too shallow and they’re useless. I find 8-10 inches perfect for most bathroom storage needs without creating a head hazard.
Styling Rustic Bathroom Shelves
Mix functional and decorative items. Store toilet paper in attractive baskets, display pretty bottles of bath salts, and add a small plant or two. My rustic shelves hold everything from extra towels to my collection of vintage apothecary bottles.
Embrace the imperfections in the wood. Knots, grain variations, and slight color differences add character. My reclaimed barn wood shelves have nail holes that I left visible – they’re conversation starters.
Seal the wood properly for bathroom use. Bathrooms are humid, and unsealed wood will warp, crack, or grow mold. I use three coats of polyurethane on all my bathroom wood shelves.
3. Corner Floating Shelves for Small Bathrooms

Corner space in bathrooms is like that friend who’s always available but never gets invited anywhere – totally underutilized. I installed corner floating shelves in my tiny apartment bathroom, and suddenly I had room for all the products I’d been keeping in a shower caddy.
Corner shelves are perfect for small bathrooms because they use space that literally serves no other purpose. They’re like finding free square footage you didn’t know you had.
Installing Corner Shelves Right
Measure your corner angles carefully. Not all corners are perfect 90-degree angles, especially in older homes. My 1950s bathroom has corners that are more like 92 degrees, which I discovered after my first shelf didn’t fit.
Use corner-specific brackets or create a cleat system. Regular shelf brackets don’t work well in corners. I use specially designed corner brackets that distribute weight across both walls.
Start from the bottom and work up. This lets you adjust spacing based on what you’re actually storing. I learned this after installing all my shelves and realizing my tallest bottles didn’t fit.
Maximizing Corner Shelf Storage
Use turntables on corner shelves. Nothing gets lost in the back corner when everything spins to the front. My lazy Susan for skincare products has been a game-changer.
Keep frequently used items on lower shelves. Reaching into a corner while balancing on wet feet isn’t fun. Daily items go low, occasional items go high.
Add a small lip or rail to prevent items from falling. Corner shelves can be precarious, especially with round bottles. A small edge makes everything more secure.
Also Read: 12 Unique DIY Floating Shelves Ideas and Decorative Touches
4. Glass Floating Shelves with LED Lighting

Glass shelves with LED lighting are like the jewelry of bathroom storage – they’re functional but they’re also straight-up gorgeous. I installed these in my master bathroom, and now it looks like a fancy hotel.
The combination of glass and light creates this ethereal, spa-like atmosphere while providing practical storage. Plus, the transparency of glass makes small bathrooms feel larger.
Working with Glass Shelves
Use tempered glass only. Regular glass in a bathroom is asking for disaster. Tempered glass is stronger and safer if it does break. My installer wouldn’t even consider regular glass, and I’m grateful for his wisdom.
Choose the right thickness based on what you’re storing. Light items like cosmetics need ½ inch glass, heavier items like stacked towels need ¾ inch. I went with ¾ inch for everything because I know myself.
Install proper supports every 16-24 inches. Glass needs more support points than wood. My 36-inch shelf has three brackets, and it’s rock solid.
Adding LED Lighting Magic
Install LED strips above or below shelves for different effects. Above creates a spotlight effect, below creates ambient glow. I have strips above my shelves, highlighting my pretty bottles and creating shadows that add depth.
Use warm white LEDs in bathrooms. Cool white makes everyone look terrible in the mirror. I learned this after installing cool strips and looking like a zombie every morning.
Include a dimmer switch. Full brightness for cleaning and tasks, dimmed for relaxing baths. My LED strips connect to a smart dimmer I can control from my phone.
5. Industrial Metal Pipe Floating Shelves
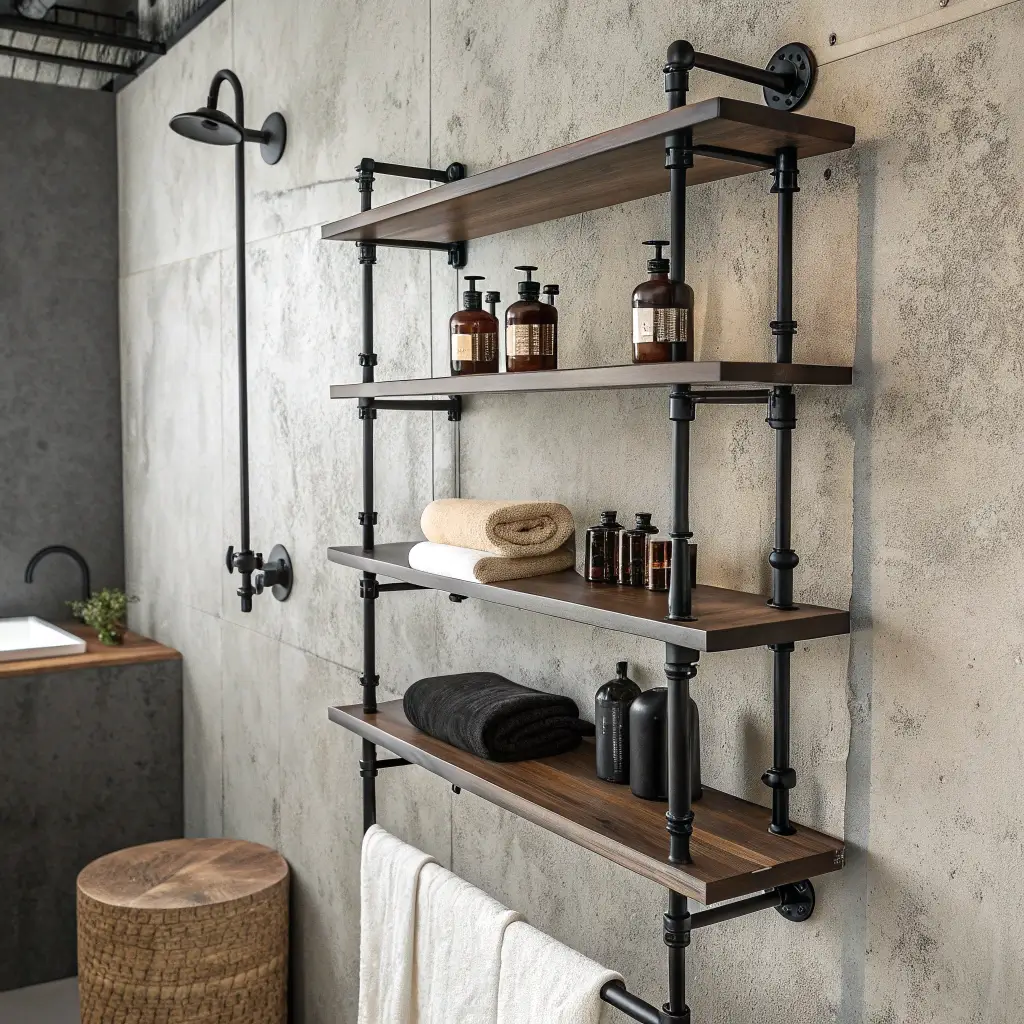
Industrial pipe shelves bring that trendy loft vibe to your bathroom without requiring you to actually live in a converted warehouse. I built these for my guest bathroom, and they’re the perfect mix of tough and stylish.
The contrast between cold metal and warm wood (or whatever shelf material you choose) creates visual interest that works surprisingly well in bathrooms.
Building Pipe Shelf Systems
Buy pipes from the plumbing section, not the decor section. Same pipes, half the price. I saved $75 on my project by shopping in plumbing instead of the “industrial decor” aisle.
Clean pipes thoroughly before installation. They come coated in oil that needs to be removed. I use degreaser and steel wool to get them perfectly clean.
Consider powder coating or sealing pipes. Raw metal can rust in humid bathrooms. I clear-coated mine, but powder coating in black looks amazing too.
Styling Industrial Bathroom Shelves
Balance the harsh industrial elements with soft items. Fluffy towels, woven baskets, and plants soften the hard edges. My industrial shelves hold white towels and eucalyptus, creating a nice contrast.
Keep the color palette simple. Industrial style can handle maybe three colors max before it gets chaotic. I stick to black pipes, wood shelves, and white accessories.
Use the pipes for extra hanging storage. S-hooks on the pipes hold loofahs, small baskets, or towels. It’s functional and adds to the industrial aesthetic.
6. Tiered Floating Shelves for Towels and Toiletries
Tiered floating shelves are like the Swiss Army knife of bathroom storage – they handle everything from washcloths to shampoo bottles with style. I installed a three-tier system next to my shower, and it revolutionized my morning routine.
The graduated sizes or staggered arrangement creates visual interest while maximizing storage in a small footprint.
Planning Your Tier System
Vary shelf depths based on intended use. Deep shelves for towels, medium for bottles, shallow for small items. My tiers are 12, 8, and 6 inches deep, perfect for their designated purposes.
Space shelves based on your tallest items. Measure your tallest bottle and add 2 inches. Nothing’s worse than having to lay bottles sideways because they don’t fit.
Consider accessibility when planning heights. You should reach the middle shelf comfortably while standing. My middle shelf is at chest height, making it perfect for daily items.
Organizing Tiered Shelves
Assign each tier a category. My top tier holds extra towels, middle has daily products, bottom has kids’ bath toys. This system prevents the inevitable shelf chaos.
Use matching containers to create cohesion. Even mismatched products look organized in matching baskets or jars. I transferred everything to amber glass containers, and it looks like a fancy apothecary.
Roll towels instead of folding for better display. Rolled towels take up less space and look more spa-like. Plus, they don’t create that annoying fold line.
Also Read: 10 Gorgeous Kitchen Floating Shelves Ideas and Space Savers
7. Floating Shelves with Integrated Hanging Hooks

Shelves with built-in hooks are the multitaskers of bathroom storage. My version holds products on top and towels hanging below – it’s like getting two storage solutions for the price of one.
This combination maximizes vertical space and keeps related items together, which is crucial in bathrooms where space is always at a premium.
Adding Hooks to Floating Shelves
Install hooks on the underside before mounting. Way easier than trying to add them while lying on your back under a mounted shelf. Ask me how I know.
Space hooks based on intended use. Towel hooks need 6-8 inches apart, robe hooks need more. I measured my towels first and marked spacing accordingly.
Choose hooks that complement your shelf style. Sleek modern shelves need simple hooks, rustic shelves can handle more decorative options.
Making the Most of Shelf-Hook Combos
Keep wet items on hooks, dry items on shelves. This prevents water damage to your shelves and keeps things organized. Towels hang, toiletries sit on top.
Position shelf-hook combos strategically. Near the shower for towels, by the sink for hand towels and frequently used items. Location is everything for functionality.
Don’t overload hooks. Too many items on hooks looks messy and can damage the shelf. I limit myself to two towels per hook maximum.
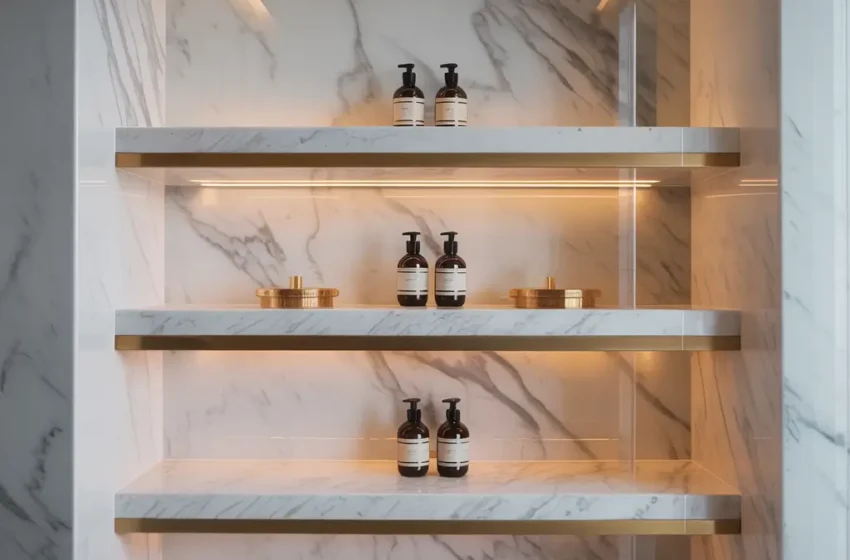
8. Marble Floating Shelves for a Luxury Look
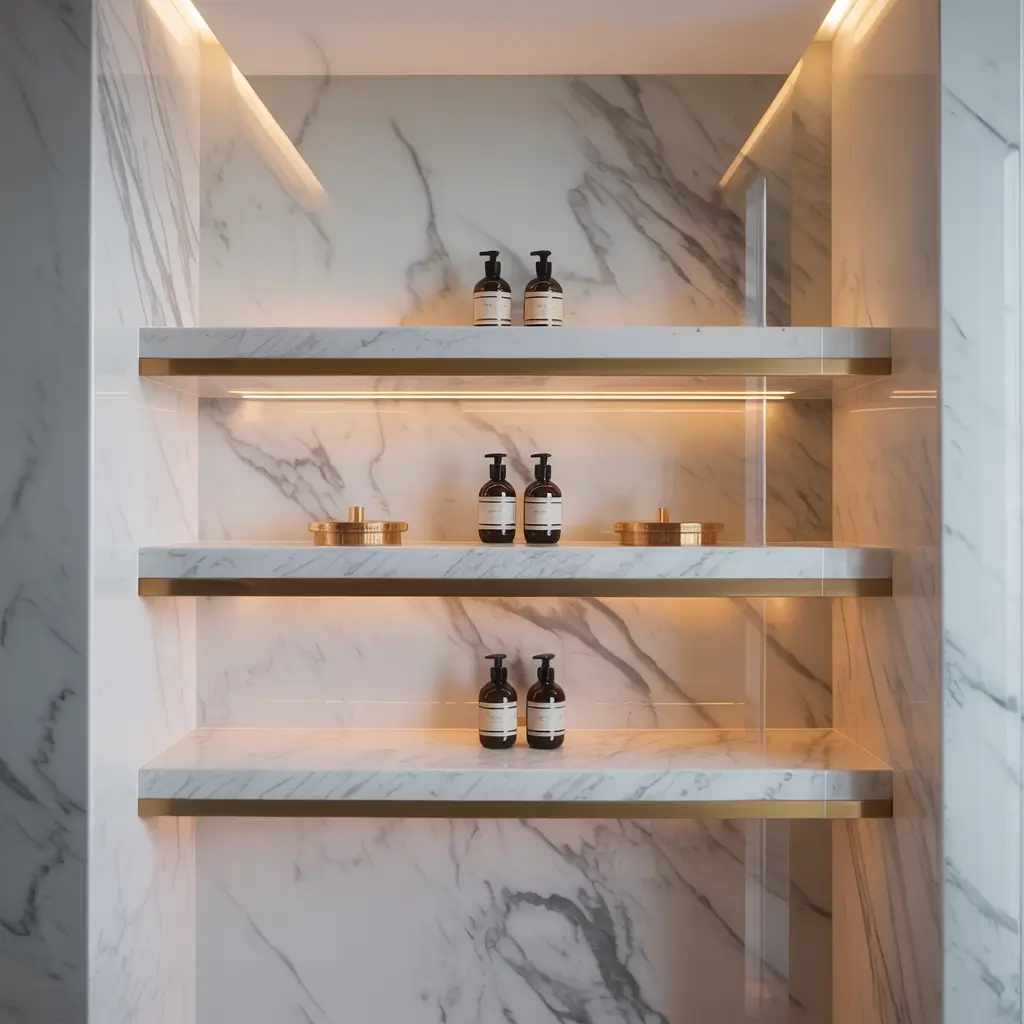
Marble floating shelves instantly elevate any bathroom from basic to bougie. I splurged on one marble shelf for my powder room, and it makes the whole space feel like a high-end hotel.
The natural veining and cool touch of marble adds luxury that no other material can quite match.
Working with Marble Shelves
Understand that real marble needs maintenance. It stains and etches with acidic products. I learned this when my face toner left a permanent mark. Now I use coasters under everything.
Consider marble-look alternatives for less maintenance. Quartz and porcelain that look like marble are more practical for bathrooms. They’re cheaper too, though I’m a sucker for the real thing.
Ensure your wall can handle the weight. Marble is heavy – like, really heavy. My single 24-inch marble shelf weighs 30 pounds. Proper installation is crucial.
Styling Marble Shelves
Keep styling minimal to let the marble shine. The stone is the star, so don’t clutter it. I display only my prettiest bottles and a small orchid.
Stick to a luxe color palette. Gold, white, and black look amazing with marble. My gold soap dispenser and white containers create a cohesive high-end look.
Protect the marble surface. Use small trays or dishes under products to prevent staining. My marble shelf has a small acrylic tray that’s nearly invisible but protects the surface.
9. Floating Shelves with Decorative Baskets

Floating shelves with baskets combine open and closed storage perfectly. I use this system in my kids’ bathroom, where the ability to quickly hide mess is essential for sanity.
Baskets add texture and warmth while hiding the not-so-pretty necessities that every bathroom needs.
Choosing the Right Baskets
Pick baskets that fit your shelf depth with room to spare. You need to be able to pull them out easily. I leave about an inch of clearance on all sides.
Consider water-resistant materials for bathroom use. Plastic-lined baskets or treated wicker handle humidity better. My seagrass baskets have plastic liners that have saved them from bathroom moisture.
Match basket styles for a cohesive look. Mixing basket styles looks chaotic. I use all white-washed baskets in varying sizes for visual consistency.
Organizing with Basket Systems
Label baskets subtly. Small tags or chalk labels help everyone find what they need. My kids’ baskets have picture labels so even the little one knows where things go.
Assign categories to each basket. Hair stuff in one, first aid in another, extra supplies in a third. This prevents the dreaded “junk basket” syndrome.
Don’t overfill baskets. They should slide in and out easily. Overstuffed baskets defeat the purpose and look messy even when “organized.”
Also Read: 10 Beautiful Floating Shelves Bedroom Ideas and Space Hacks
10. Open and Closed Floating Shelf Combo
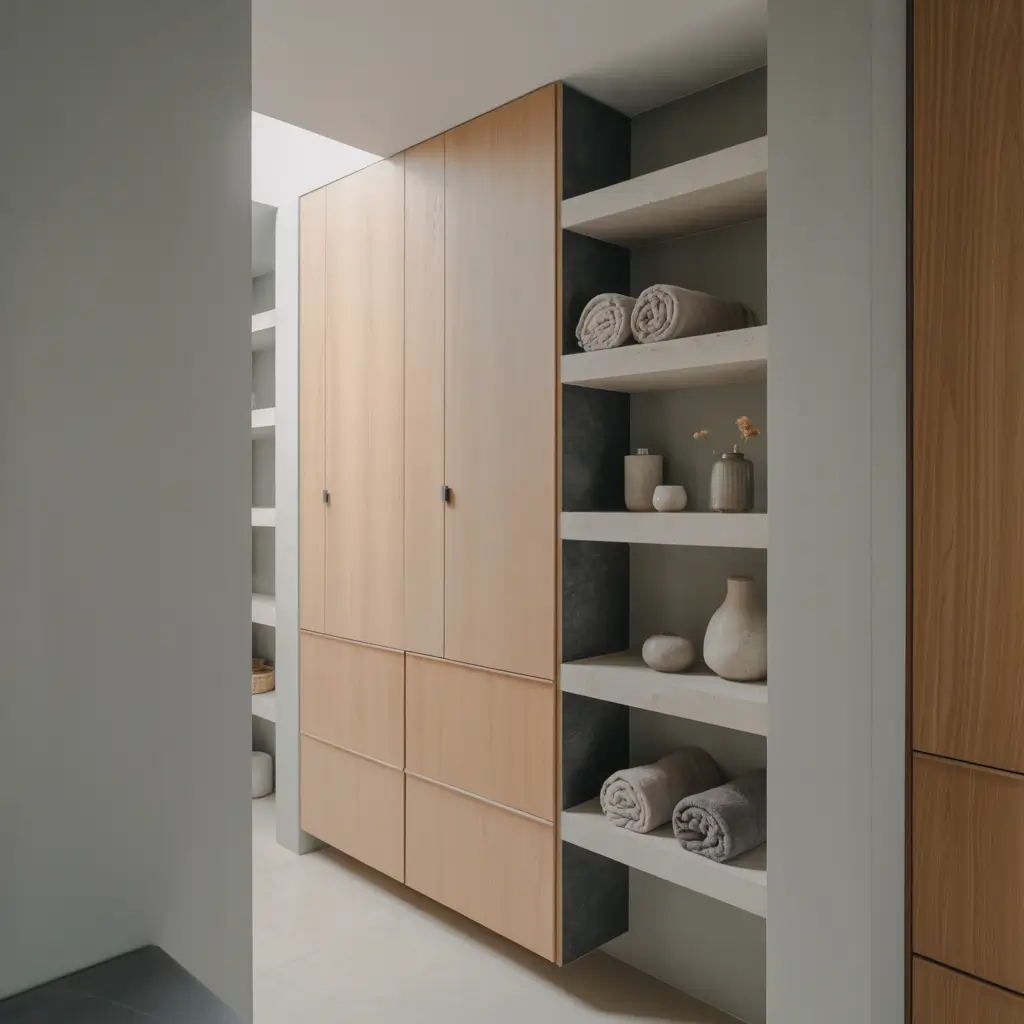
Combining open and closed floating storage gives you the best of both worlds – pretty display space and hidden storage for the not-so-pretty stuff. I designed this combo for my master bathroom, and it’s honestly the smartest thing I’ve ever done.
This approach lets you showcase your nice items while hiding the everyday chaos that real bathrooms accumulate.
Creating Mixed Storage Systems
Plan your ratio of open to closed storage. I go with 60% closed, 40% open. This hides most of the mess while still having display space for pretty things.
Use cabinets with doors that match your floating shelves. Consistency in material and color creates a cohesive built-in look. My white cabinets and shelves look like one custom unit.
Position closed storage at eye level or below. Higher open shelves draw the eye up and make the space feel larger. Plus, daily-use items in closed storage are easier to access at lower heights.
Styling Mixed Storage
Display only your prettiest items on open shelves. Nice towels, pretty bottles, and plants earn display rights. Everything else goes behind doors.
Organize closed sections ruthlessly. Just because it’s hidden doesn’t mean it should be chaos. I use drawer organizers even in my closed cabinet sections.
Rotate displayed items seasonally. This keeps your bathroom looking fresh without buying new stuff. I swap out display items every few months for a new look.
Making Floating Shelves Work in Your Bathroom
After installing floating shelves in multiple bathrooms, here’s what I know for sure: the right shelving can transform even the most challenging bathroom into an organized, beautiful space.
Start with one small shelving project before going all-in. I began with a single shelf above my toilet, and now I have them throughout my bathroom. You’ll learn what works for your space and style as you go.
Always account for humidity when choosing materials. Bathrooms are basically tropical rainforests when you shower, and the wrong materials will warp, peel, or grow stuff you don’t want. Seal everything, twice.
Don’t forget about weight limits. Wet towels are surprisingly heavy, and bottles add up quickly. I always choose brackets rated for double what I think I’ll need. Better safe than dealing with a 3 AM shelf crash.
BTW, measure everything three times before drilling. Bathrooms are usually the smallest rooms in the house, so mistakes are super noticeable. That slightly crooked shelf will mock you every morning 🙂
Remember, the goal isn’t Pinterest perfection – it’s creating storage that actually works for your real life. My bathroom shelves aren’t always photo-ready, but they keep my bathroom functional and (mostly) organized. And honestly? That’s a win in my book.
FYI, once you experience the joy of reaching for a towel and actually finding one where it’s supposed to be, you’ll never go back to bathroom chaos.
These floating shelf ideas aren’t just about storage – they’re about making your bathroom a space you don’t dread dealing with every morning. Now go forth and float some shelves!


