10 Modern Frame Bathroom Mirror Ideas and Sleek Styles
- Bathroom Design
 Ben
Ben- 0
- 30 minutes read
Remember that builder-grade mirror in your bathroom? The one that’s basically a sad piece of glass glued to the wall with absolutely zero personality?
Yeah, I lived with one of those for three years, avoiding eye contact with it every morning like it owed me money.
Then I discovered the magical world of framed mirrors, and suddenly my bathroom went from “public restroom vibes” to “boutique hotel energy.”
Here’s the thing nobody tells you about bathroom mirrors – the frame makes all the difference. It’s like putting the right outfit on a great personality. You can have the cleanest mirror in the world, but without a proper frame, it’s just… there. Existing. Being boring.
After framing five different mirrors in three different homes (and making approximately 47 trips to Home Depot), I’ve learned what actually works and what’s just Pinterest fantasy.
Whether you’re dealing with a rental bathroom that needs some love or planning a full renovation, these frame ideas will transform your mirror from forgettable to fabulous.
And the best part? Most of these you can DIY without calling in favors from that handy friend who’s getting tired of your weekend projects.
1. Rustic Wood Frame Mirror

Rustic wood frames are like that perfectly worn leather jacket – they get better with age and go with everything. I installed my first rustic wood frame after watching one too many episodes of Fixer Upper, and honestly, Joanna Gaines was onto something.
The beauty of rustic wood lies in its imperfections. Those knots, grain patterns, and weathered edges add character that you just can’t fake. Well, you can try, but trust me, I’ve seen enough “distressed” wood that looks like someone attacked it with a chain – it’s not the same.
Finding the Perfect Wood
You want wood that tells a story, not wood that looks like it needs therapy. Reclaimed barn wood is the holy grail, but let’s be real – we can’t all have access to picturesque abandoned barns. I found my wood at a local salvage yard for $30, and it had more character than most reality TV shows.
Pine and cedar work beautifully for rustic frames because they age gracefully. My current bathroom has a cedar frame that I left unsealed, and it smells amazing every time the room gets steamy. It’s like having a mini spa experience every morning.
DIY Rustic Frame Tips
Creating a rustic frame doesn’t require master carpenter skills. I made mine with a miter saw, wood glue, and determination. The best part about rustic style? Mistakes look intentional. That gap in the corner? Rustic charm. Uneven stain? Character.
Keep the frame proportional to your mirror – about 3-4 inches wide for standard bathroom mirrors. Any wider and it starts looking like you’re framing a medieval castle window. I learned this after making a 6-inch frame that made my small bathroom feel like a hobbit hole.
2. Modern Minimalist Metal Frame
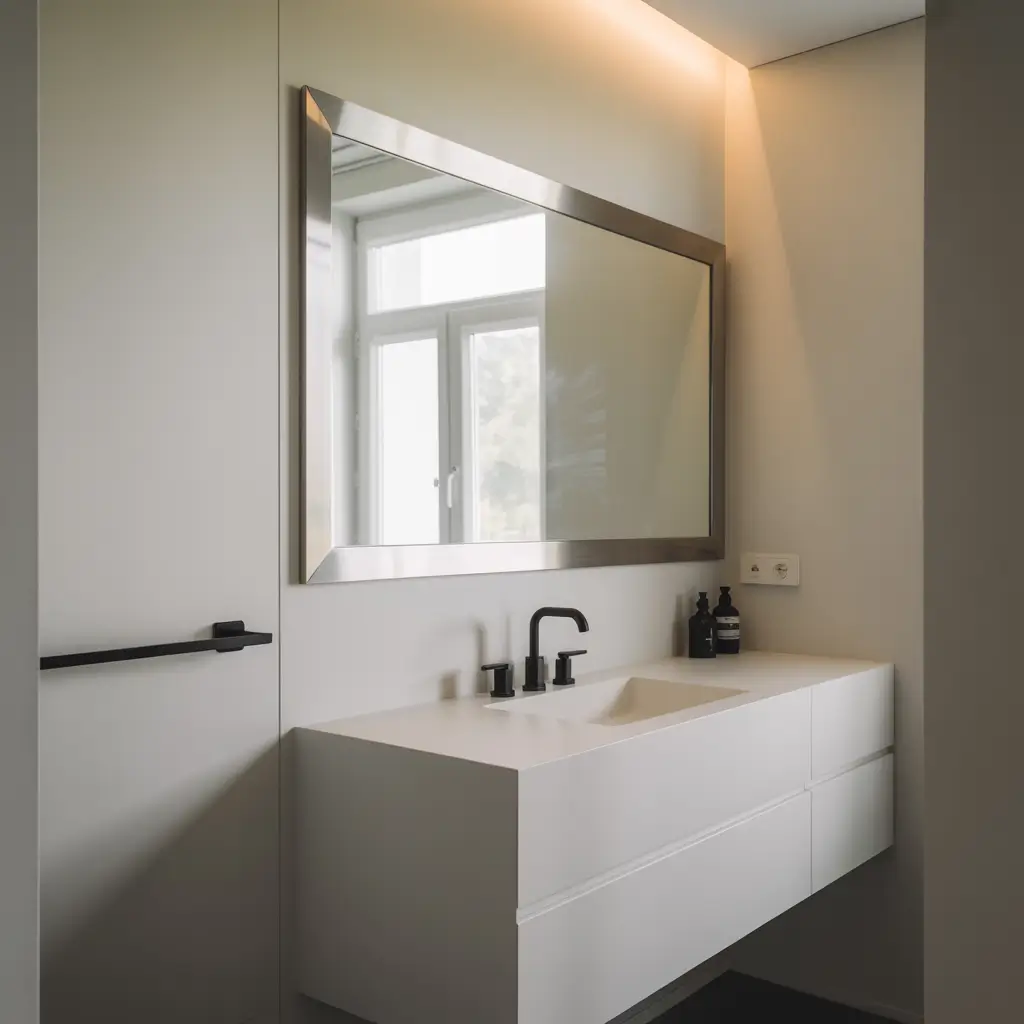
Minimalist metal frames are the bathroom equivalent of a little black dress – classic, sophisticated, and they make everything else look better. I switched to a thin black metal frame in my guest bathroom, and suddenly the whole space felt like it belonged in a boutique hotel.
The key to modern minimalist frames is restraint. We’re talking frames so thin they’re basically just a suggestion. My frame is literally 1/4 inch wide, and it completely transforms the mirror without overwhelming the space.
Choosing Your Metal Finish
Black matte is having a moment, and I’m here for it. It doesn’t show fingerprints, water spots, or the existential dread of Monday mornings. I’ve also seen stunning brushed brass and copper frames that add warmth without sacrificing that minimalist vibe.
Chrome and polished nickel work if your bathroom already has those finishes, but honestly? They’re kind of boring. It’s like ordering vanilla ice cream when there’s salted caramel right there. Go for something with personality.
Installation Without the Drama
Metal frames can be surprisingly lightweight, which makes installation easier. I hung my 36-inch metal-framed mirror solo (not recommended, but I’m impatient). The trick is using proper wall anchors – drywall anchors are not your friend here. Find the studs, people. Your future self will thank you when the mirror doesn’t come crashing down at 3 AM.
3. Vintage Gold Ornate Mirror

Ornate gold mirrors are for those of us who believe more is more and subtle is overrated. I inherited a vintage gold mirror from my grandmother, and after years of hiding it in the closet (sorry, Grandma), I finally hung it in my powder room. Now it’s everyone’s favorite feature.
These mirrors bring instant drama and elegance. You don’t need any other decoration when you have a mirror that looks like it belongs in Versailles. My mirror has cherubs, flowers, and scrollwork that would make Marie Antoinette jealous.
Finding Authentic Vintage vs. Reproductions
Real vintage mirrors have a patina that new reproductions just can’t replicate. The gold isn’t uniform – it’s worn in places, darker in the crevices, and has that beautiful aged quality. I found mine at an estate sale for $50, which was basically highway robbery.
If you’re buying reproduction, look for ones with intentional aging. The good ones have varied gold tones and deliberate imperfections. The bad ones look like someone spray-painted plastic gold and called it a day.
Making Ornate Work in Modern Spaces
The secret to ornate mirrors in contemporary bathrooms? Let them be the star. Everything else should be simple and clean. I paired my gold mirror with white subway tile and a simple pedestal sink. The contrast between ornate and minimal is absolutely gorgeous.
Don’t try to match other gold elements exactly – that way lies madness. My mirror is antique gold, my faucet is brushed brass, and somehow it all works because I’m not trying to make them match perfectly.
Also Read: 12 Elegant Bathroom Light Fixtures Over Mirror Ideas for Glow
4. Boho Woven Frame Mirror

Boho woven frames bring that relaxed, vacation vibe that makes you feel like you’re getting ready in a beachside bungalow. I added a jute-wrapped frame to my bathroom last summer, and now every morning feels like I’m on vacation (even though I’m definitely not).
Woven frames add texture without weight, which is perfect for small bathrooms. My frame combines jute rope with small wooden beads, and it cost less than $20 to make. That’s less than a fancy coffee order, and it lasts way longer.
Materials That Work
Natural fibers like jute, rattan, and macramé are your best friends here. They handle bathroom humidity surprisingly well if you seal them properly. I learned this after my first unsealed jute frame grew some interesting fungi. Now I spray everything with clear sealant and haven’t had issues since.
You can also mix materials – wrap the main frame in rope, then add shells, beads, or dried flowers for extra personality. My friend went full beach theme with tiny starfish, and while it’s not my style, it looks amazing in her coastal bathroom.
DIY Woven Frame Tutorial
Start with a basic wooden frame and a hot glue gun that you’re not afraid to sacrifice to the craft gods. Wrap your material tightly, overlapping slightly as you go. The key is keeping tension consistent – loose spots look sloppy, trust me.
I spent four hours wrapping my first frame because I kept unwrapping sections that weren’t perfect. My second frame took 45 minutes because I embraced the “perfectly imperfect” boho aesthetic. Sometimes good enough really is perfect.
5. Farmhouse Shiplap Frame Mirror
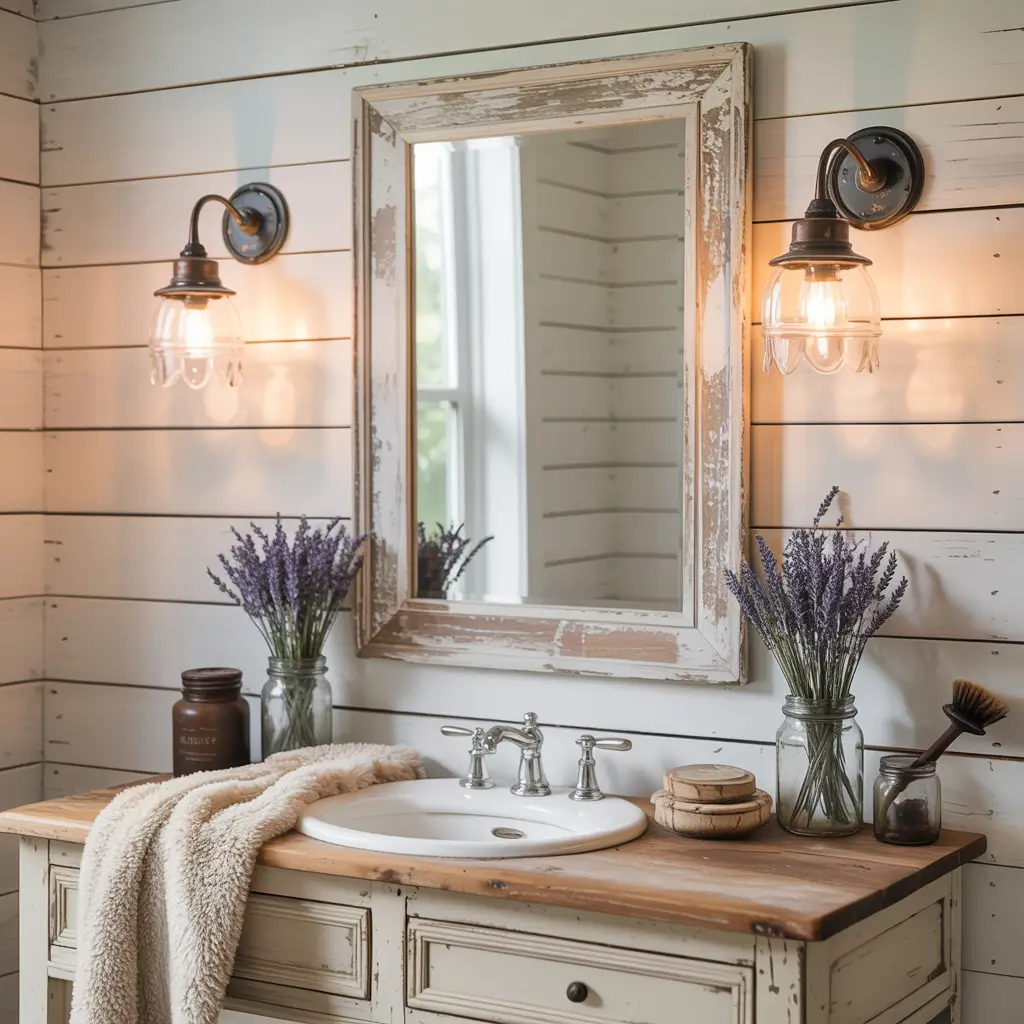
Shiplap frames are basically the pumpkin spice latte of bathroom mirrors – basic? Maybe. Delicious? Absolutely. I fought the farmhouse trend for years, but then I installed a shiplap frame mirror and understood the hype.
The horizontal lines of shiplap create this visual trick that makes your mirror (and bathroom) look wider. It’s like wearing horizontal stripes, but for your walls. My narrow bathroom suddenly felt twice as spacious with a shiplap-framed mirror.
Real Shiplap vs. Faux Shiplap
Real shiplap has those distinctive grooves that overlap. Faux shiplap is basically thin boards with gaps between them. Both work, but real shiplap has that authentic farmhouse feel that HGTV dreams are made of.
I used real shiplap because I’m extra like that, but honestly? The faux stuff looks almost identical once it’s painted. Save yourself the hassle and go faux unless you’re a purist. Your Instagram followers won’t know the difference.
Painting and Distressing
White is classic, but don’t be afraid of color. I’ve seen gorgeous sage green and navy shiplap frames that add personality without overwhelming the space. My frame is white with gray undertones that I dry-brushed on for that weathered look.
The distressing is where you can really customize. Sand the edges, add some dings with a hammer, make it look like it’s been through some things. My frame has strategic damage that I definitely didn’t create by accidentally dropping it down the stairs. Nope, totally intentional.
6. Black Matte Industrial Frame
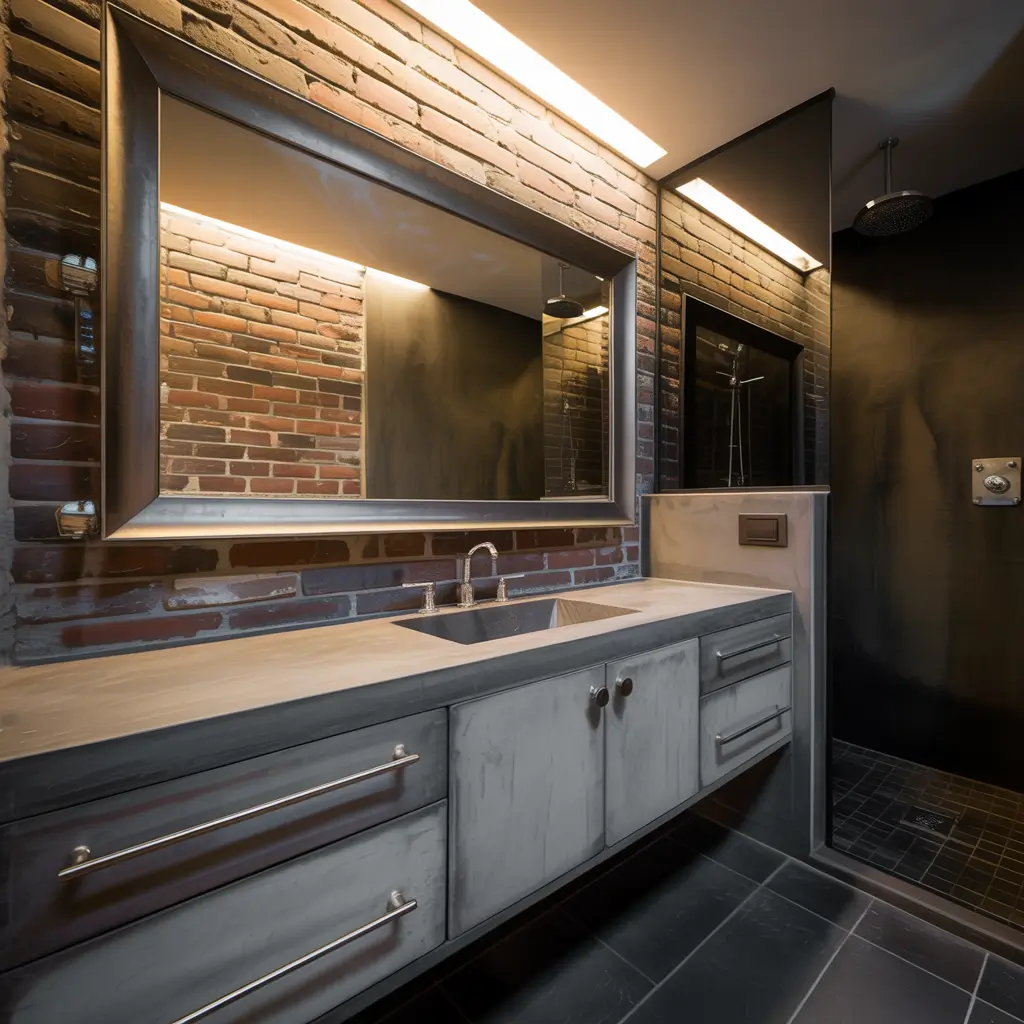
Black matte industrial frames are what happens when minimalism and edginess have a baby. They’re sophisticated but with attitude. I installed one in my teenage son’s bathroom, and suddenly he actually wants to spend time in there (miracle).
Industrial frames typically feature exposed hardware, raw edges, and that “unfinished” finish that’s actually very finished. It’s controlled chaos, and it works brilliantly in modern bathrooms.
Getting the Industrial Look Right
True industrial frames use real metal with visible welds and joints. The frame shouldn’t be perfect – that’s the whole point. I found mine at a local metal fabricator who made it from steel pipe for less than a store-bought version.
The matte black finish is crucial. Glossy black looks too formal, like it’s trying too hard. Matte black says “I’m cool without trying,” which is exactly the vibe we’re going for.
Pairing with Other Elements
Industrial frames work best with other raw materials. Think concrete countertops, exposed brick, or subway tile. My son’s bathroom has white subway tile with dark grout, and the black frame ties it all together perfectly.
Don’t overdo the industrial elements though. You want “converted loft,” not “abandoned warehouse.” One or two industrial pieces are enough to set the tone without making your bathroom feel cold.
Also Read: 10 Creative Bathroom Vanity Lighting Over Mirror Ideas for Inspiration
7. Colorful Painted Frame Accent
Colorful frames are for the brave souls who refuse to live in a beige world. I painted my daughter’s mirror frame hot pink, and it’s the best decision I’ve made since buying a coffee maker with a timer.
Color instantly changes the entire mood of your bathroom. That boring builder mirror? Slap a bright blue frame on it and suddenly it’s a statement piece. It’s the fastest, cheapest way to add personality to your space.
Choosing Your Color
Pick a color that makes you happy every time you see it. Life’s too short for colors you’re “meh” about. I chose hot pink because my daughter loves it, but I’ve done teal, coral, and even a gradient ombre effect (that one required wine and patience).
Consider your existing bathroom colors, but don’t be a slave to them. Sometimes a pop of unexpected color is exactly what a neutral bathroom needs. My friend has an all-white bathroom with a bright orange mirror frame, and it’s absolutely perfect.
Paint That Actually Lasts
Bathroom paint needs to handle humidity, temperature changes, and the occasional toothpaste splatter. Use a high-quality enamel paint with a primer built in. I learned this after my first painted frame started peeling after two months.
Apply thin, even coats and let each one dry completely. I know you want to rush, but trust me – patience now saves touch-ups later. My current frame has lasted two years with zero chips or peeling because I took my time.
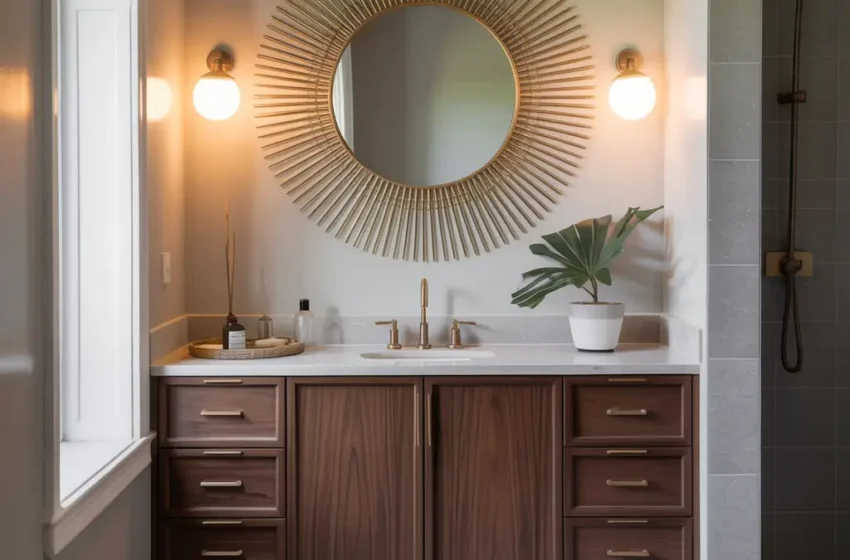
8. Round Sunburst Frame Mirror

Sunburst mirrors are like sunshine for your bathroom – they instantly brighten everything up. I was skeptical about the round mirror trend (team rectangle for life), but a sunburst frame converted me completely.
The radiating design draws your eye outward, making your bathroom feel larger and more dynamic. It’s basically an optical illusion that also happens to look gorgeous. My sunburst mirror makes my tiny powder room feel like a proper space instead of a closet with plumbing.
DIY Sunburst Options
You can create a sunburst frame with almost anything stick-like. Wooden dowels, metal rods, even painted rulers (yes, really – Pinterest didn’t lie about that one). I used bamboo skewers spray-painted gold, and it cost me $15 total.
The trick is varying the lengths of your rays. All the same length looks too uniform and boring. I did alternating long and short rays, and it creates this beautiful rhythm that’s way more interesting than a perfect circle.
Placement and Proportion
Sunburst mirrors need breathing room. Don’t cram them into tight spaces or surround them with other decor. They need space to shine (pun intended). My mirror has at least 6 inches of clear wall space around it, and it looks perfectly balanced.
BTW, sunburst mirrors work best centered over the vanity. Off-center sunburst mirrors look like the sun is setting in your bathroom, which sounds poetic but looks weird.
9. Floating Frame with LED Backlight

Floating frames with LED backlighting are living in 3021 while the rest of us are stuck in 2024. I installed one six months ago, and now regular mirrors look prehistoric to me.
The frame appears to float off the wall while LED strips create this gorgeous halo effect. It’s functional art that also happens to give you perfect lighting for selfies. Win-win.
Understanding the Tech
The LEDs hide behind the frame, bouncing light off the wall for a soft, diffused glow. You can get color-changing LEDs (my teenager’s choice) or stick with warm white (my choice after the rainbow phase got old).
Most LED strips are adhesive and plug into a regular outlet. I hardwired mine because I’m fancy like that, but honestly? The plug-in version works just as well and doesn’t require an electrician.
Creating the Floating Effect
The frame needs to be mounted with spacers to create that floating appearance. I use 1-inch spacers, which creates enough gap for the light to spread without making the mirror stick out awkwardly from the wall.
The key is hiding the LED strips completely. You should see the glow, not the source. I had to adjust mine three times before getting it right, but the effect is absolutely worth the effort.
Also Read: 15 Elegant Bathroom Vanity Mirror Ideas That Upgrade Spaces
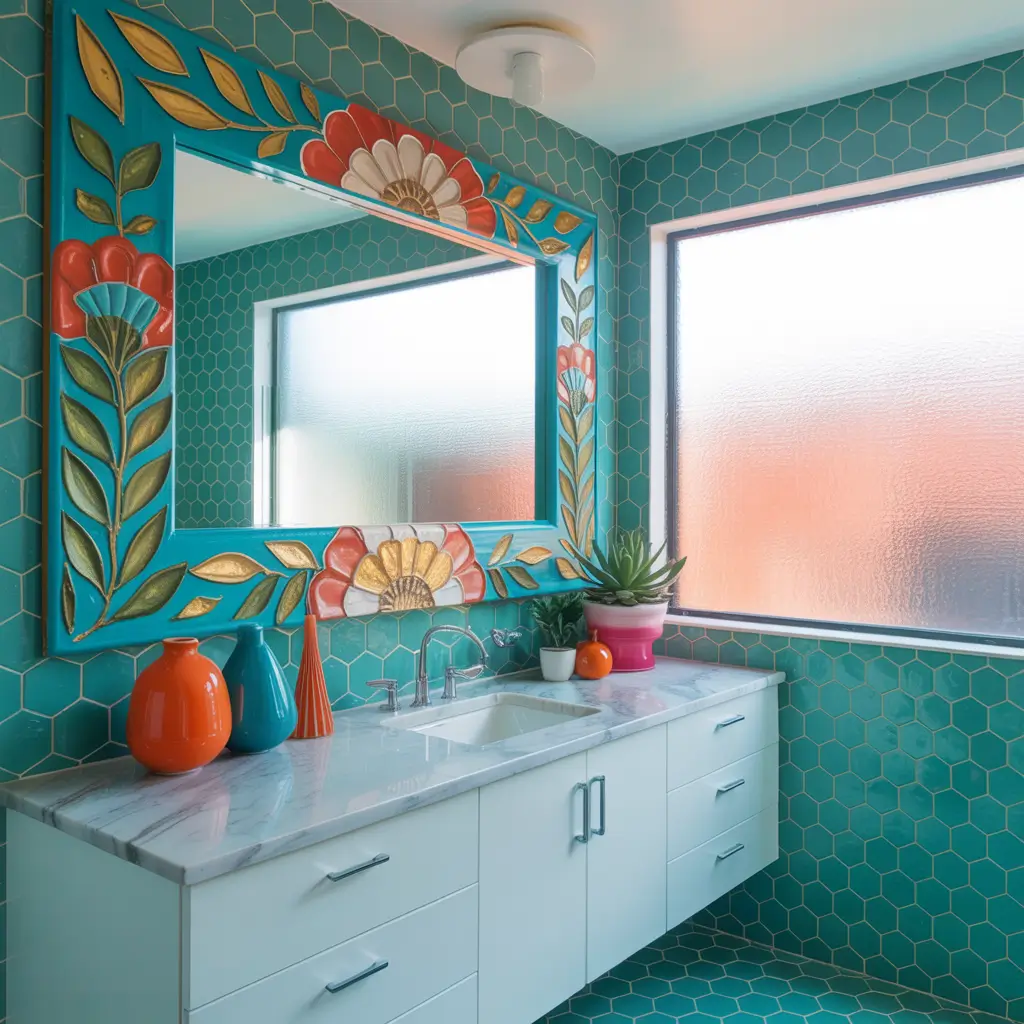
10. Mosaic Tile Frame Mirror
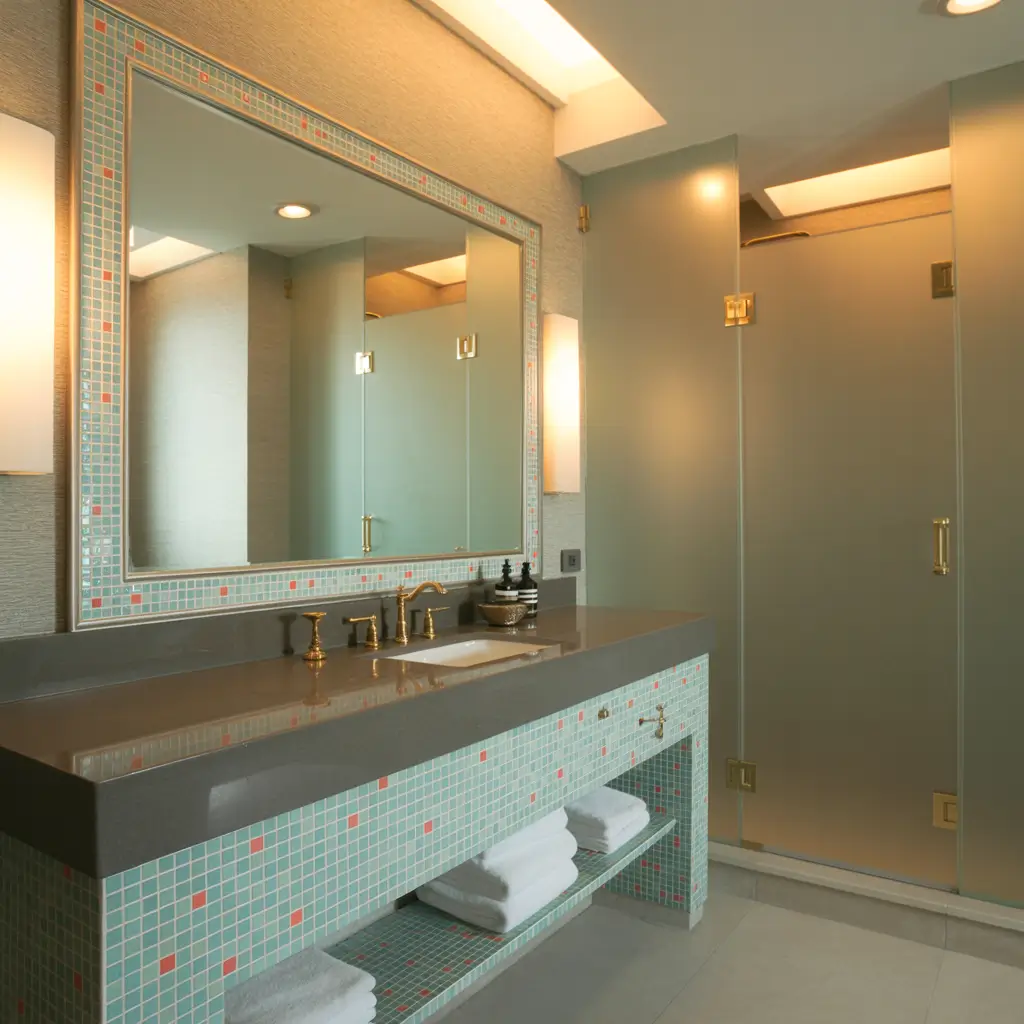
Mosaic tile frames are where creativity meets functionality. They’re waterproof, gorgeous, and completely customizable. I made my first mosaic frame during lockdown when I had nothing but time and leftover tiles, and it’s still my favorite mirror.
You can use glass tiles, ceramic pieces, broken china, or even sea glass. My frame combines blue and green glass tiles that catch the light differently throughout the day. It’s like having a different mirror depending on the time.
Planning Your Mosaic Design
Sketch your design first, or embrace chaos and go freestyle. I tried planning but ended up going rogue halfway through. The random pattern actually looks more organic and interesting than my careful sketch would have.
Consider your grout color carefully – it makes a huge difference. White grout makes colors pop but shows dirt. Gray grout is forgiving but can muddy bright colors. I used light gray and haven’t regretted it once.
Installation and Sealing
Mosaic frames are heavier than regular frames, so proper mounting is crucial. Use heavy-duty anchors and find those studs. My first attempt with regular drywall anchors ended with a 3 AM crash that terrified everyone in the house.
Seal everything properly for bathroom use. Unsanded grout for narrow gaps, sanded for wider ones. Then seal the whole thing with grout sealer. Yes, it’s an extra step, but mold growing in your beautiful mosaic is not the aesthetic we’re going for.
Making the Final Decision
After all these frame adventures, here’s what I know for sure: the best frame is the one that makes you smile every time you see it.
Whether that’s rustic wood that reminds you of your cabin vacation or hot pink paint that makes Monday mornings bearable, choose what speaks to you.
Don’t overthink it. I spent three months deciding on a frame for my guest bathroom, and you know what? The one I picked on impulse for the powder room gets way more compliments. Sometimes your gut knows better than your Pinterest board.
Consider your commitment level too. Paint is easy to change if you get bored. Mosaic tile? That’s basically a marriage. I’ve had the same mosaic frame for three years and still love it, but I’ve repainted other frames multiple times.
FYI, you don’t have to stick to just one style. My house has rustic wood in the master, industrial in my son’s bathroom, and colorful paint in my daughter’s. Each room has its own personality, and that’s what makes a house feel like home.
The most important thing? Just do something. That builder-grade mirror isn’t getting any less boring on its own. Pick a frame style, grab your tools (or your credit card), and make it happen. Your bathroom deserves better, and honestly, so do you.
Every morning starts in that bathroom – might as well make it a space that starts your day right 🙂


