8 Smart Garage Floor Ideas for Organized Spaces
- Garage Decor
 Ben
Ben- 0
- 50 minutes read
Your garage floor is probably the most abused surface in your entire home. Think about it – cars drip oil on it, heavy tools crash onto it, road salt eats away at it every winter, and you drag everything from lawnmowers to furniture across it without a second thought. Yet most people completely ignore their garage floor until it looks like a lunar landscape of cracks, stains, and crumbling concrete.
I ignored mine for seven years. Seven! Every time I walked into my garage, I’d see that ugly, stained concrete and think “I’ll fix that next weekend.” Spoiler alert: I never did. Then one day my neighbor coated his garage floor with metallic epoxy, and the jealousy hit me so hard I started researching garage floor options that same evening.
Here’s what I discovered: the right garage floor transforms everything about your space. It doesn’t just look better – it actually helps you stay organized. Clean floors motivate you to keep things tidy. Durable floors handle your messiest projects without permanent damage. And certain flooring options even create visual zones that naturally organize your space.
Let me share eight smart garage floor ideas that’ll turn your crumbling concrete embarrassment into an organized, functional surface you’re actually proud of.
Epoxy Coated Garage Floors
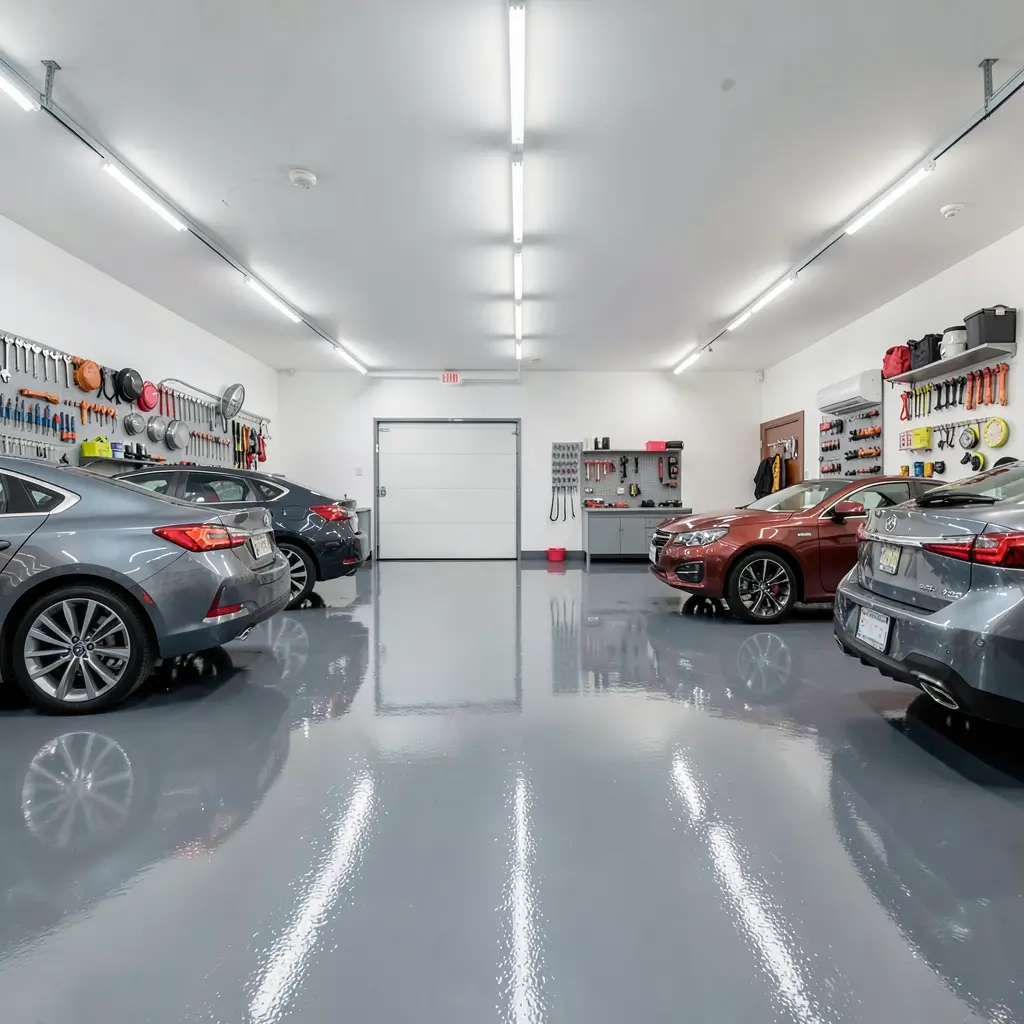
Let’s start with the heavyweight champion of garage flooring – epoxy coating. There’s a reason epoxy dominates the garage floor market: it’s tough, gorgeous, and protects your concrete like a suit of armor.
I coated my garage floor with a two-part epoxy system two years ago, and I still catch myself admiring it when I pull in at night. The glossy surface reflects my overhead lights perfectly, making the entire garage brighter and feel significantly larger.
Understanding Epoxy Types
Not all epoxy products deliver the same results:
- Water-based epoxy: Easiest to apply, thinnest coat, least durable
- Solvent-based epoxy: Moderate difficulty, better adhesion, stronger fumes
- 100% solid epoxy: Professional-grade, thickest coat, maximum durability
- Hybrid polyurea/epoxy: Fastest cure time, excellent chemical resistance
I went with 100% solid epoxy after my first attempt with a water-based kit from the hardware store peeled within eight months. The premium product cost three times more but has shown zero signs of failure after two years of daily use.
The Prep Work Nobody Wants to Do
Here’s the unsexy truth about epoxy: preparation matters more than the product itself. You can buy the best epoxy on earth, and it’ll fail spectacularly on improperly prepared concrete.
Essential prep steps:
- Moisture test: Tape plastic sheeting to the floor for 24 hours and check for condensation
- Acid etching or diamond grinding: Opens the concrete pores for adhesion
- Crack and divot repair: Fill everything with concrete patch compound
- Thorough cleaning: Remove every trace of oil, grease, and dust
- Primer coat: Some systems require a dedicated primer layer
I spent an entire day just prepping my floor. Boring? Absolutely. Worth it? Every single minute. My buddy skipped the acid etching step and watched his beautiful new epoxy peel off in sheets three months later. Don’t be that guy.
Cost and Time Investment
Real talk about the budget:
- DIY water-based kit: $100-200 (covers a two-car garage)
- DIY professional-grade epoxy: $400-800
- Professional installation: $1,500-3,500
- Cure time: 24-72 hours before walking, 7 days before parking
The professional installation price tag stings, but you get a warranty and the peace of mind that comes with expert surface preparation. If your concrete has serious moisture issues, I’d strongly recommend hiring a pro.
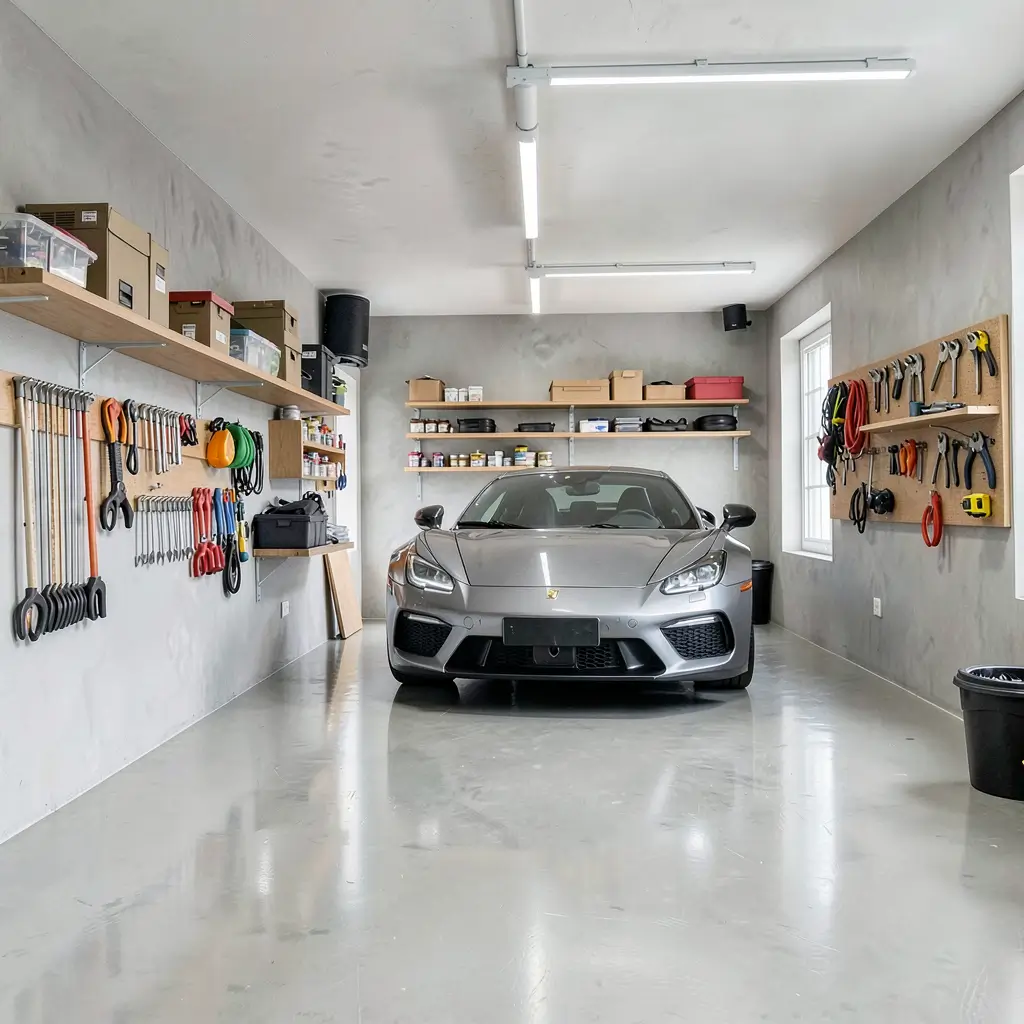
Polished Concrete Garage Floors

Want a garage floor that looks like polished marble without the marble price tag? Polished concrete transforms your existing slab into a glossy, reflective surface that gets better with age instead of worse.
I fell in love with polished concrete after visiting a friend’s garage that looked like a high-end car dealership. The floor literally reflected his vehicles like a mirror. No coatings, no overlays – just his original concrete, ground and polished to perfection.
The Polishing Process
Polished concrete requires specialized equipment and multiple passes:
- Coarse grinding removes surface imperfections and old coatings
- Progressive finer grinding smooths the surface gradually
- Densifier application hardens and fills the concrete pores
- Fine polishing passes create increasing levels of sheen
- Final sealer adds stain resistance and enhances the gloss
Each pass uses progressively finer diamond pads, similar to sanding wood through multiple grits. The entire process typically takes 2-3 days for a two-car garage.
Polished Concrete vs. Epoxy
These two options compete for the same customers, so let’s compare honestly:
Polished concrete wins on:
- Longevity (virtually permanent vs. 5-10 years for epoxy)
- Zero peeling or delamination risk
- Improves with age and use
- Lower long-term maintenance costs
- Natural, sophisticated appearance
Epoxy wins on:
- Color and design options
- DIY-friendliness
- Initial cost (for DIY)
- Chemical resistance
- Coverage of imperfect concrete
IMO, polished concrete delivers better long-term value if your existing slab is in decent condition. But if your concrete looks like a war zone, epoxy does a better job hiding those flaws.
Maintenance Requirements
Polished concrete practically maintains itself:
- Dust mop daily or as needed
- Damp mop weekly with pH-neutral cleaner
- Reapply sealer annually for maximum protection
- Buff occasionally to restore maximum shine
- Address spills promptly to prevent staining
The maintenance simplicity alone keeps your garage organized. When cleaning takes five minutes instead of fifty, you actually do it regularly. Clean floors motivate clean garages.
Interlocking Garage Floor Tiles
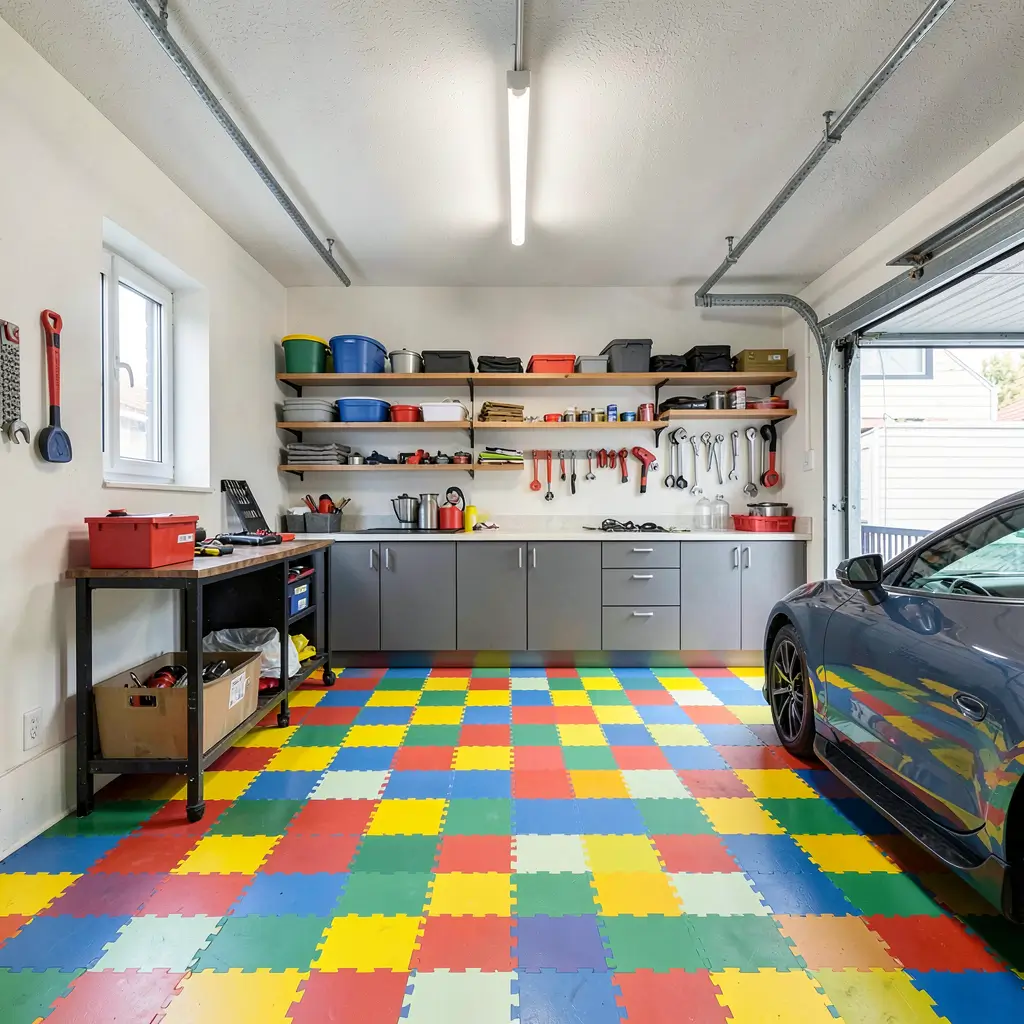
If commitment scares you (no judgment – it scares me too), interlocking garage floor tiles offer the perfect non-permanent flooring solution. You snap them together like a giant puzzle, and if something goes wrong, you pull them apart just as easily.
I installed these in my previous rental house because the landlord wouldn’t let me coat the concrete. Best temporary solution I’ve ever found. When I moved out, I pulled up every tile, threw them in boxes, and installed them in my new garage. Try doing that with epoxy.
Tile Material Options
The market offers several distinct materials:
- Polypropylene (rigid plastic): Most common, handles moderate loads
- PVC (flexible vinyl): Softer underfoot, great chemical resistance
- Rubber tiles: Best cushioning, heaviest, most expensive
- Composite tiles: Mix of materials for balanced performance
I prefer PVC tiles for daily drivers because they handle oil drips and chemical spills without staining. Polypropylene tiles work great for lighter-duty garages where chemical resistance isn’t critical.
Installation Speed and Simplicity
This is where interlocking tiles absolutely crush every other option:
- Zero concrete prep needed (just sweep the floor clean)
- No adhesives or tools required for most brands
- Average installation time: 2-4 hours for a two-car garage
- Cut border tiles with a utility knife or jigsaw
- Instant use – park on them immediately after installation
I tiled my entire two-car garage on a Saturday morning and parked my car on the new floor that same afternoon. No cure times, no fumes, no stress. Just snap, snap, snap, done.
Design and Organization Benefits
Interlocking tiles offer a unique organizational advantage: color zoning. You can use different colored tiles to visually define separate areas in your garage.
Smart zoning ideas:
- Gray tiles for parking areas
- Red border tiles outlining walkways
- Black tiles in the workshop zone
- Yellow accent tiles marking storage boundaries
- Contrasting checkerboard in the main area
This color-based organization naturally encourages you to keep things in their designated zones. When the workshop area looks different from the parking area, you instinctively avoid dumping random items in the wrong spot.
Also Read: 10 Stunning Two Car Garage Organization Ideas for Perfect Order
Stamped Decorative Concrete Floors
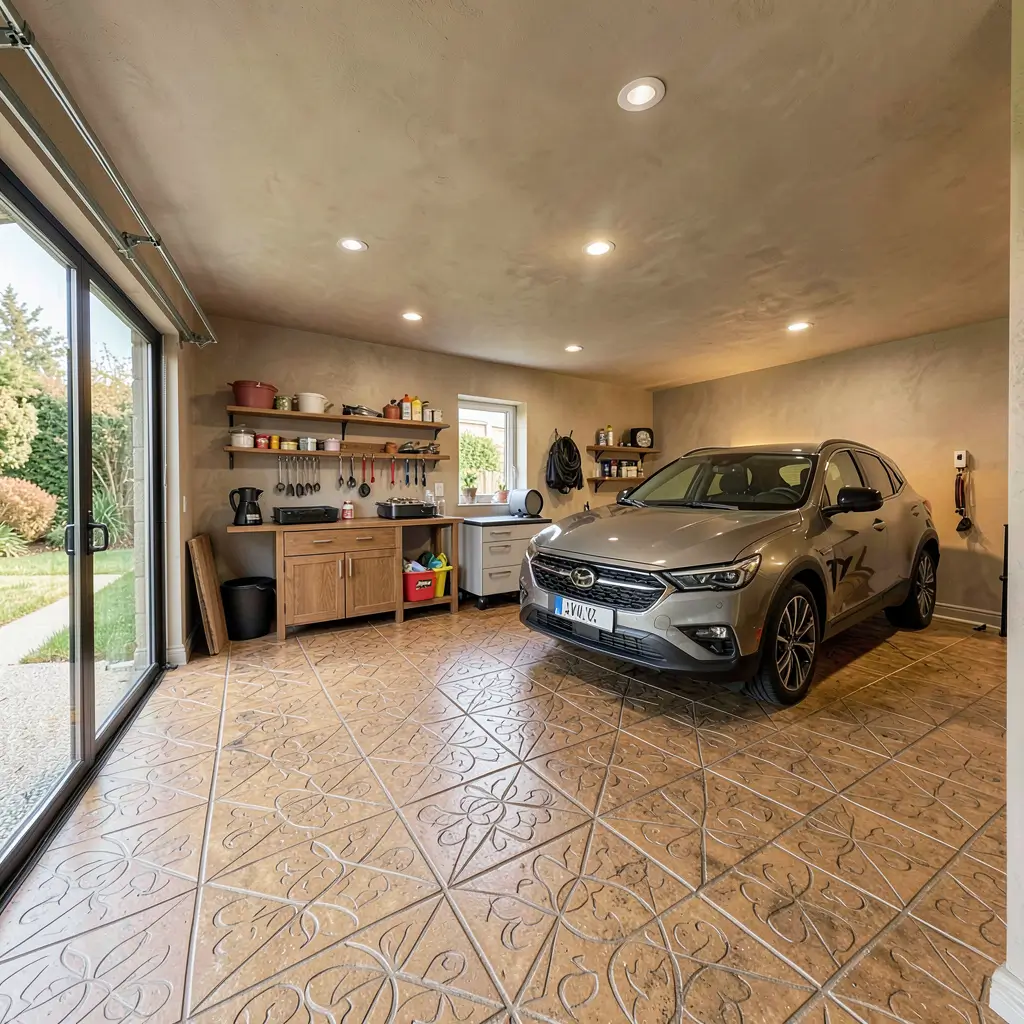
Want your garage floor to look like natural stone, brick, or tile without the astronomical material costs? Stamped concrete creates stunning decorative patterns right in your existing (or new) concrete surface.
My uncle installed stamped concrete in his three-car garage with a slate pattern, and I genuinely thought he’d laid real flagstone. The texture, color variation, and pattern depth fooled everyone who saw it.
Popular Stamping Patterns
The pattern options range from subtle to dramatic:
- Ashlar slate: Clean, geometric stone pattern
- European fan: Circular, cobblestone-inspired design
- Herringbone brick: Classic, timeless look
- Wood plank: Mimics hardwood flooring
- Random stone: Natural, organic appearance
The Stamping Process
Stamped concrete requires professional installation for best results:
- Pour fresh concrete or apply a stampable overlay to existing floors
- Apply color hardener for the primary color
- Broadcast release agent for secondary color and texture
- Press stamps into the wet surface with precise timing
- Detail the joints and edges by hand
- Seal the finished surface with a protective coating
Timing is everything with stamped concrete. Press the stamps too early and the pattern doesn’t hold. Press too late and the concrete resists the impression. This timing sensitivity explains why professional installation runs $8-18 per square foot.
Durability Considerations
Stamped concrete holds up remarkably well in garages:
- Resists tire marks when properly sealed
- Handles vehicle weight without cracking
- Lasts 25+ years with proper maintenance
- Resealing every 2-3 years maintains appearance
- Chemical resistance depends heavily on the sealer quality
The one downside? Hot tire pickup can sometimes damage certain sealers. Make sure your installer uses a high-quality acrylic or polyurethane sealer rated for garage use. Cheap sealers will lift off on hot tires faster than you can say “I should have spent more.”
Luxury Vinyl Garage Flooring

Hear me out on this one – I know luxury vinyl plank (LVP) sounds like an interior-only product, but specific garage-rated vinyl flooring has entered the market and it’s turning heads.
I initially laughed at the idea of vinyl in a garage. Then I saw an installation at a car enthusiast’s detailing bay, and my skepticism evaporated immediately. The space looked like a showroom, felt comfortable underfoot, and cleaned up with a simple mop.
Garage-Rated vs. Standard Vinyl
Critical distinction here – you cannot use regular household LVP in your garage. Standard vinyl fails in garage environments due to temperature swings, moisture issues, and heavy loads.
Garage-rated vinyl differs in key ways:
- Thicker wear layer (20+ mil vs. standard 12 mil)
- Temperature resistance from -20°F to 150°F
- Reinforced core handling heavier point loads
- Moisture-proof construction resisting concrete vapor
- Chemical resistance against oil and automotive fluids
Best Applications
Vinyl flooring works best in specific garage scenarios:
- Converted living spaces (home gyms, offices)
- Detailing bays where comfort matters
- Show garages prioritizing aesthetics
- Climate-controlled garages with stable temperatures
For hardcore workshop environments with heavy machinery, welding sparks, and dropped tools, vinyl isn’t your best choice. Match your flooring to your actual use case rather than just picking what looks prettiest.
Installation on Concrete
Garage vinyl installation requires extra attention:
- Moisture barrier over the concrete (absolutely essential)
- Level the surface filling any dips deeper than 1/8 inch
- Floating installation allowing expansion and contraction
- Transition strips at the garage door threshold
- Expansion gaps around all walls and obstacles
FYI, skipping the moisture barrier guarantees failure. Concrete constantly wicks moisture upward, and that moisture will destroy vinyl flooring from below within months.
Rubber Garage Floor Mats
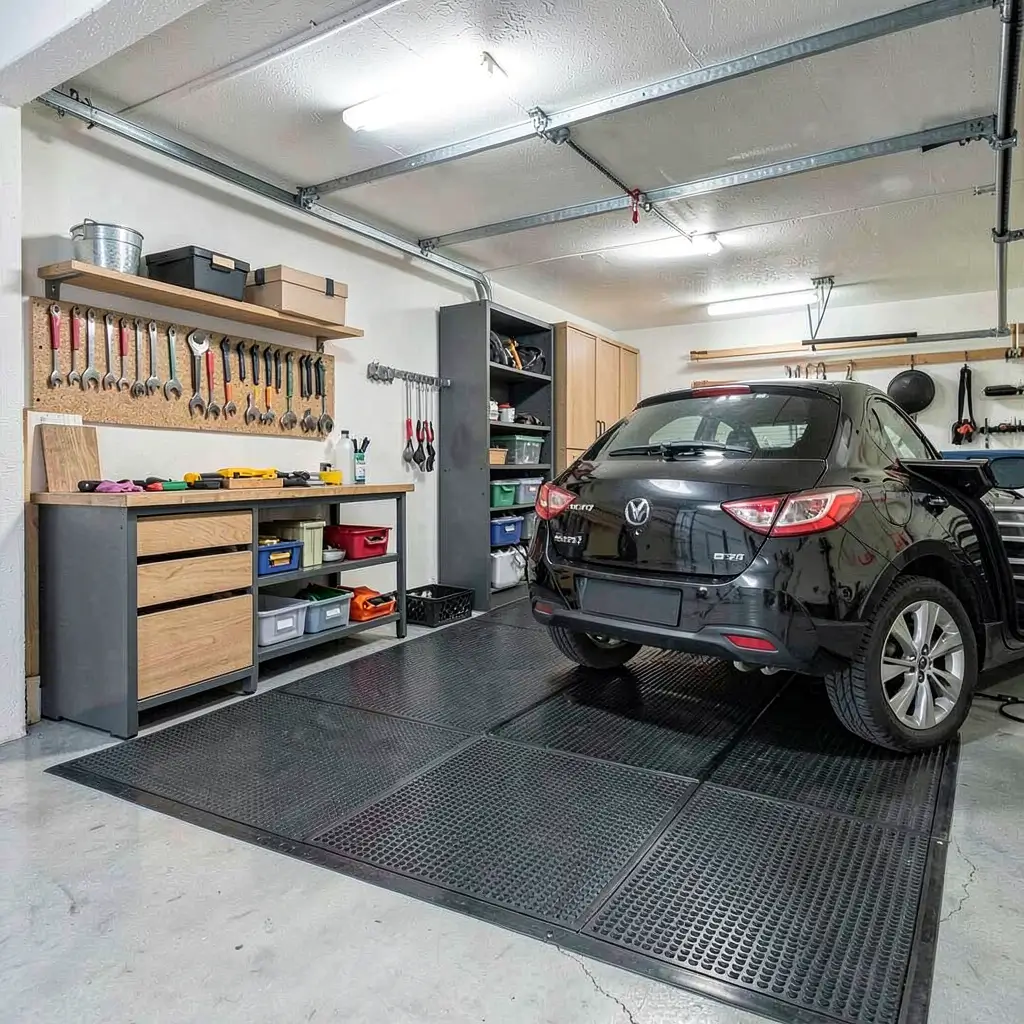
Rubber mats offer the easiest, most forgiving garage floor solution money can buy. You literally unroll them, trim the edges, and you’re done. No prep, no chemicals, no cure time, no stress.
I keep rubber mats in my workshop zone because they protect both the concrete and my aging knees. Standing on concrete for hours while working on projects used to leave me hobbling around the next day. Rubber mats eliminated that problem completely.
Mat Types and Thickness Options
Rubber garage mats come in several configurations:
- Rolled rubber: Large continuous sheets, fewer seams, heavier
- Interlocking rubber tiles: Easier to handle, removable, more seams
- Horse stall mats: Budget king, incredibly tough, heavy as lead
- Commercial gym mats: Designed for impact, excellent durability
Thickness matters significantly:
- 1/4 inch: Basic protection, minimal cushioning
- 3/8 inch: Good balance of protection and comfort
- 1/2 inch: Excellent cushioning for standing work
- 3/4 inch: Maximum cushioning, gym and workshop use
The Horse Stall Mat Secret
Want the best value in rubber garage flooring? Head to your local farm supply store. Horse stall mats cost roughly $2 per square foot compared to $5-8 for “garage-specific” rubber mats. They’re the exact same material – heavy-duty vulcanized rubber – just without the fancy marketing.
I bought six horse stall mats from Tractor Supply for my workshop area. Total cost: $240 for about 120 square feet. The equivalent “garage rubber flooring” from a specialty retailer? Over $700 for the same coverage. Same product, different label, triple the price.
The only downside? New rubber stinks. That strong rubber smell lingers for about 2-3 weeks. Open your garage door and run a fan during that initial off-gassing period. It fades completely, but those first couple weeks test your patience.
Organization Through Placement
Use rubber mats strategically to define zones:
- Workshop mat: Cushioned area around your workbench
- Parking mats: Contain oil drips to specific areas
- Walkway runners: Define traffic paths through the garage
- Equipment pads: Dedicated spots for heavy machinery
- Entryway mat: Transition zone from garage to house
Each mat placement tells your brain “this area has a purpose.” That subconscious zoning naturally promotes organization without shelves, labels, or any additional effort.
Also Read: 10 Functional Garage Workbench Ideas That Save You Time
Painted Concrete Garage Floors
Sometimes the simplest solution works perfectly. Concrete paint gives your garage floor a fresh, clean look at the lowest cost of any garage flooring option. Nothing fancy, nothing complicated – just clean, colorful concrete.
I painted my first garage floor with concrete paint when I was 22 and broke. Spent $80 on two gallons of floor paint and a roller. The result wasn’t showroom quality, but it transformed that ugly, stained concrete into something I actually felt good about.
Paint Types for Garage Floors
Three main options exist:
Latex concrete paint:
- Cheapest option ($20-30 per gallon)
- Easy water cleanup
- Thinnest coat, least durable
- Best for low-traffic garages
- Lasts 1-3 years typically
Acrylic concrete paint:
- Moderate cost ($30-50 per gallon)
- Better adhesion than latex
- Decent chemical resistance
- Handles moderate traffic
- Lasts 2-4 years
Epoxy-fortified concrete paint:
- Higher cost ($50-80 per gallon)
- Strongest adhesion
- Good chemical and abrasion resistance
- Handles heavy traffic
- Lasts 3-5 years
I recommend epoxy-fortified paint for anyone serious about durability. The price difference between cheap latex and quality epoxy-fortified paint amounts to maybe $60 total for a two-car garage. Spending that extra $60 buys you potentially years of additional life.
Application Tips From My Mistakes
Learn from what I got wrong:
- Degrease thoroughly before painting (I skipped this once – the paint peeled in a week)
- Apply two thin coats instead of one thick coat
- Use a long-nap roller designed for rough surfaces
- Add anti-skid additive to the final coat for safety
- Allow full cure time before parking (usually 72 hours)
When Paint Makes Sense
Paint works best when:
- Your budget sits under $200
- You want quick, easy transformation
- You’re okay repainting every few years
- The concrete underneath is in reasonable condition
- You prefer simplicity over showroom perfection
Paint doesn’t make sense when your concrete has serious moisture problems, extensive cracking, or heavy chemical exposure. Those situations demand epoxy or polished concrete.
Metallic Epoxy Garage Floors
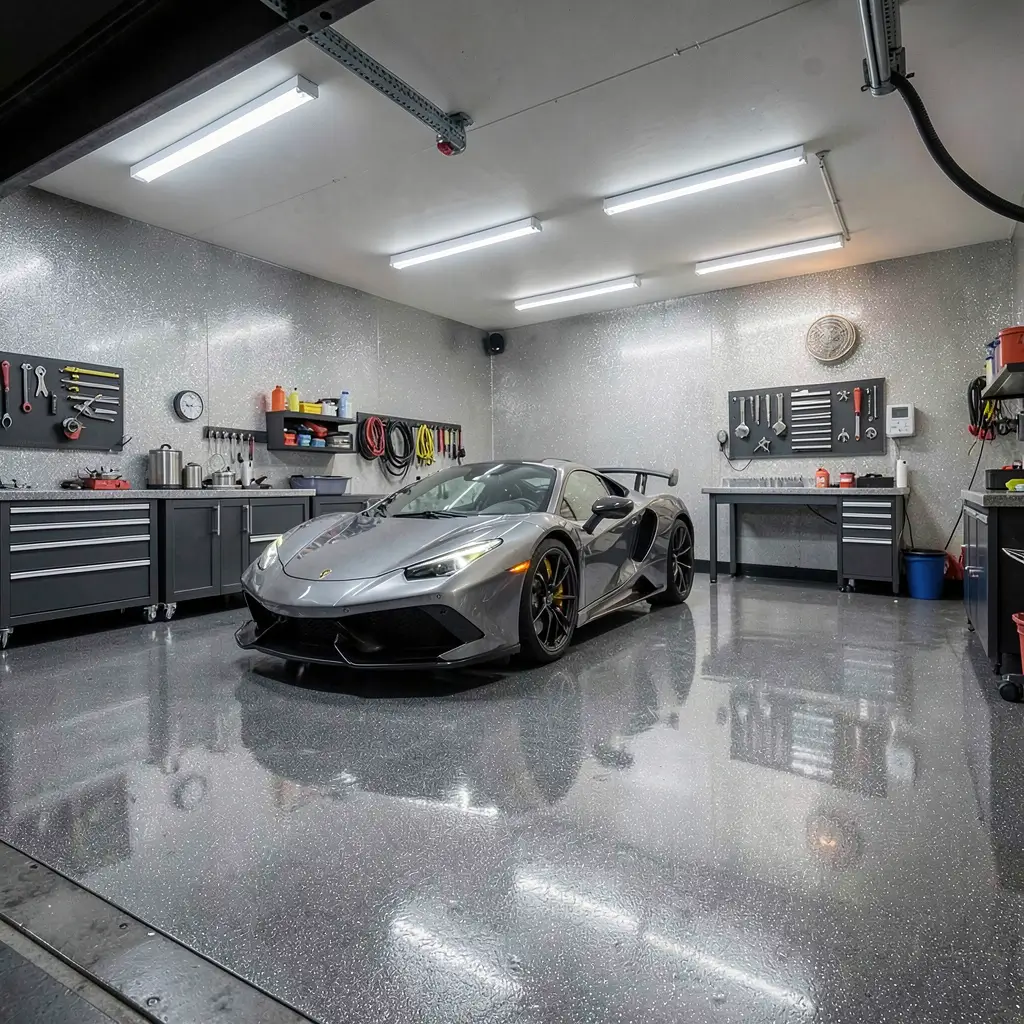
Save the best for last, right? Metallic epoxy floors create jaw-dropping, one-of-a-kind artistic surfaces that look like liquid metal, flowing lava, or swirling galaxies frozen in glass. Every single floor looks completely unique because the metallic pigments shift and swirl during application.
My neighbor’s metallic epoxy floor literally stops traffic. People walking their dogs pause to stare through his open garage door. It looks that incredible. The silver and blue metallic swirls catch the light differently from every angle.
How Metallic Epoxy Differs From Standard
Standard epoxy creates a uniform, solid color. Metallic epoxy uses special metallic pigments suspended in clear epoxy that create three-dimensional depth and movement. The installer manipulates these pigments during application using blowers, rollers, and solvents to create unique patterns.
Key differences:
- Standard epoxy: Consistent color, predictable results, easier application
- Metallic epoxy: Unique patterns, unpredictable movement, requires significant skill
- Cost difference: Metallic runs 2-3 times higher than standard epoxy
- Skill requirement: Metallic demands professional installation (seriously, don’t DIY this)
Popular Metallic Color Combinations
The most stunning combinations I’ve seen:
- Silver and charcoal: Sophisticated, modern, neutral
- Pearl white and gold: Luxurious, bright, showroom feel
- Copper and black: Bold, dramatic, masculine
- Ocean blue and silver: Unique, eye-catching, statement floor
- Gunmetal gray: Subtle metallic shimmer without being flashy
Why Professional Installation Matters
I’ll say it bluntly: do not attempt metallic epoxy yourself unless you have significant experience with epoxy application. The metallic pigments behave unpredictably. Timing, temperature, and technique all affect the final pattern. One wrong move creates permanent, unfixable flaws. :/
Professional metallic epoxy installation costs $6-12 per square foot installed. For a two-car garage, expect to pay $3,000-6,000. Expensive? Yes. But you’ll never find another floor that looks like yours anywhere on earth.
Maintenance for Maximum Shine
Keep your metallic masterpiece gleaming:
- Dust mop regularly to prevent micro-scratches
- Clean spills immediately to avoid staining
- Apply maintenance coat every 3-5 years
- Use furniture pads under anything that contacts the floor
- Avoid dragging heavy items across the surface
Choosing Your Perfect Garage Floor
We just covered eight wildly different approaches to garage flooring, and each one solves different problems for different budgets. Let me break down the decision simply.
Choose based on your priorities:
- Tightest budget: Painted concrete ($80-200)
- Easy DIY project: Interlocking tiles ($500-1,500)
- Maximum durability: Polished concrete ($1,500-3,000)
- Best overall value: Standard epoxy ($400-3,500)
- Ultimate wow factor: Metallic epoxy ($3,000-6,000)
- Comfort underfoot: Rubber mats ($200-800)
- Decorative beauty: Stamped concrete ($2,000-5,000)
- Showroom versatility: Luxury vinyl ($1,000-3,000)
Whatever you choose, remember this: any finished floor beats bare concrete. Even the cheapest paint job improves your garage’s appearance, cleanliness, and organizational motivation by a massive margin.
Your garage floor takes more punishment than any other surface in your home. It deserves better than crumbling, oil-stained concrete. Pick a solution that matches your budget, your lifestyle, and your organizational goals – then actually pull the trigger this weekend.
Because here’s what I’ve learned after years of “I’ll do it next weekend” – the only garage floor project you’ll regret is the one you keep postponing. Trust me, I wasted seven years staring at ugly concrete. Don’t repeat my mistake. Your garage (and your knees) will thank you. 🙂