10 Functional Garage Workbench Ideas That Save You Time
- Garage Decor
 Ben
Ben- 0
- 54 minutes read
I wasted an entire Saturday building a birdhouse last month. Not because birdhouses are complicated – a ten-year-old can build one. I wasted it because I spent four hours searching for tools, clearing space on my terrible workbench, and rigging up makeshift clamps because my setup had zero functionality.
That painful experience forced me to confront a truth most garage enthusiasts ignore: your workbench determines your productivity more than your tools do. You can own the fanciest power tools on the planet, but if your workbench wobbles, lacks storage, or eats up your entire garage, you’re fighting an uphill battle with every single project.
I’ve built, modified, and completely scrapped five different workbench setups over the past six years. Each failure taught me something valuable about what actually works versus what just looks cool on YouTube. Some of my best ideas came from total disasters – like the time my “sturdy” workbench collapsed under a table saw and nearly took out my kneecap.
Let me walk you through ten functional garage workbench ideas that genuinely save time and make every project smoother. Whether you’re working in a cramped single-car garage or a spacious workshop, one of these setups will transform how you work.
Foldable Wall-Mounted Workbench
If you’ve ever wished your workbench could just disappear when you don’t need it, the foldable wall-mounted design grants that exact wish. This setup folds flat against the wall when not in use, giving you back every inch of floor space for parking or other activities.
I built my first fold-down bench out of desperation. My garage could barely fit my car and a permanent workbench simultaneously, so something had to give. The fold-down solution let me keep both without any compromise.
Building the Perfect Fold-Down
The key components you need:
- Heavy-duty folding brackets rated for at least 500 pounds
- 3/4-inch plywood or butcher block for the work surface
- French cleat or direct stud mounting for the wall attachment
- Support legs or chains for extra stability when deployed
- Locking mechanism to prevent accidental deployment
I use benchcrafted-style folding brackets that hold 700 pounds each. Overkill for most projects? Sure. But I never worry about the bench collapsing, and that peace of mind lets me work confidently on heavier tasks.
Time-Saving Features to Add
Make your fold-down bench work harder:
- Magnetic tool strip on the wall above the bench position
- Retractable power cord reel mounted nearby
- Quick-release vise that stays attached even when folded
- Wall-mounted pegboard directly above for instant tool access
- LED light strip that activates when bench deploys
The retractable cord reel alone saves me five minutes every session. No more untangling extension cords or tripping over them while working. I mounted mine to the ceiling, and it retracts automatically when I fold the bench up.
Who Should Choose This Design
The foldable workbench works best for:
- Single-car garage owners who need parking space
- Weekend warriors with occasional project needs
- Renters who can’t make permanent modifications (use a stand-alone frame)
- Anyone who values clean, open garage space
It doesn’t work great for people who leave ongoing projects on the bench overnight. Obviously, folding up means clearing off everything first.
Rustic Wooden Garage Workbench
Nothing beats the feel of a solid hardwood workbench under your hands. The rustic wooden workbench connects you to centuries of craftsmanship tradition while providing a work surface that actually improves with age and use.
My current primary bench follows this style – a massive maple top on Douglas fir legs. Every scratch, stain, and burn mark tells a story. I accidentally drilled through the top once, and even that hole has become a convenient cord pass-through. Happy accidents, right?
Wood Selection Matters
Not all wood makes good bench material:
- Hard maple: The gold standard – dense, durable, resists denting
- Beech: European tradition, excellent work surface, affordable
- Douglas fir: Great for the base frame, less ideal for the top
- Southern yellow pine: Budget option, works but dents easily
- Reclaimed barn wood: Gorgeous character but inconsistent quality
I chose hard maple for the top and Douglas fir for the base. This combination keeps costs reasonable while giving you a rock-solid work surface that handles anything.
Classic Joinery for Strength
Rustic doesn’t mean flimsy. Traditional joinery creates benches that last generations:
- Mortise and tenon joints for leg-to-apron connections
- Through-tenon stretchers for maximum lateral stability
- Wedged joints that actually tighten over time
- Drawbored pegs for mechanical locking without glue
- Breadboard ends to prevent top from warping
You don’t need to master Japanese joinery here. Simple mortise and tenon joints made with a drill press and chisel create incredibly strong connections that outperform any screw or bolt.
Time-Saving Rustic Features
Traditional benches include brilliant functional elements:
- Dog holes for bench dogs and holdfasts
- Tool well (a recessed tray along the back edge)
- Front and end vises for secure clamping
- Lower shelf for storing planes and heavy tools
- Sliding deadman for supporting long boards
The holdfast system saves me more time than any other feature. Drop a holdfast into a dog hole, give it one whack with a mallet, and your workpiece locks firmly in place. Release takes one tap from behind. No spinning clamp handles, no fumbling.
Industrial Metal Garage Workbench
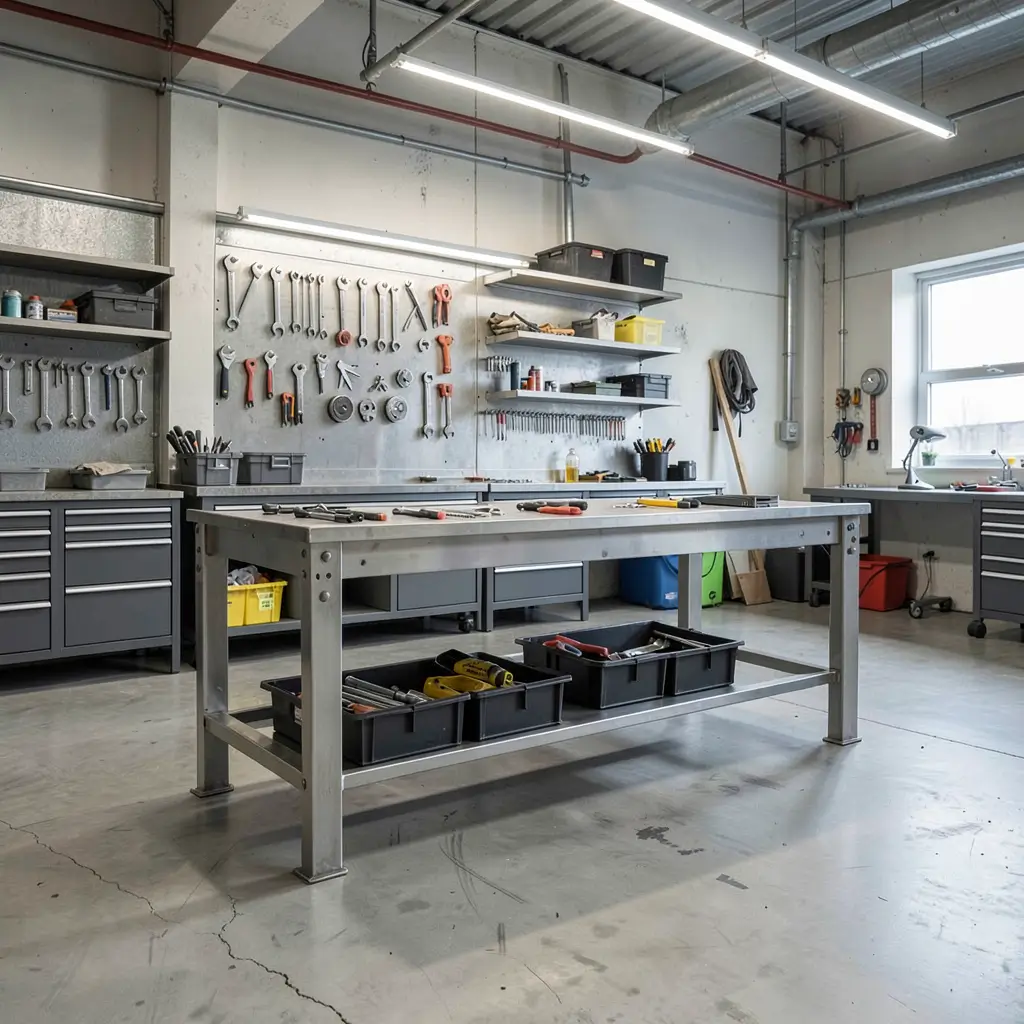
When you need a workbench that laughs at abuse, metal construction delivers. Industrial steel workbenches handle welding sparks, heavy machinery, and brutal impacts that would destroy wooden alternatives.
I added a steel workbench to my garage specifically for metalworking projects. Within the first week, I accidentally dropped a five-pound hammer on it from three feet up. Not even a dent. Try that on a wooden bench and you’ll create a permanent crater.
Steel vs. Aluminum Construction
Two metals dominate the workbench market:
Steel benches:
- Handle extreme weight loads (2,000+ pounds)
- Resist impact damage beautifully
- Cost less than aluminum
- Can rust without proper coating
- Heavier and harder to move
Aluminum benches:
- Lighter for repositioning
- Naturally rust-resistant
- Handle moderate loads well
- Cost significantly more
- Can bend under extreme force
For garage use, steel wins almost every time. The weight actually helps – a heavy bench stays put during aggressive sanding or hammering. My steel bench weighs about 200 pounds empty, and it doesn’t budge no matter what I do to it.
Protective Surface Options
Raw metal isn’t ideal for every task. Add these surfaces:
- Hardboard sacrificial top for general work
- Rubber mat for electronics and delicate projects
- Stainless steel sheet for chemical resistance
- Hardwood insert for woodworking tasks
- Magnetic pad for keeping small metal parts from rolling away
I keep two removable tops – hardboard for general abuse and a rubber mat for precision work. Swapping takes thirty seconds and protects both the bench and my projects.
Compact Corner Workbench Setup
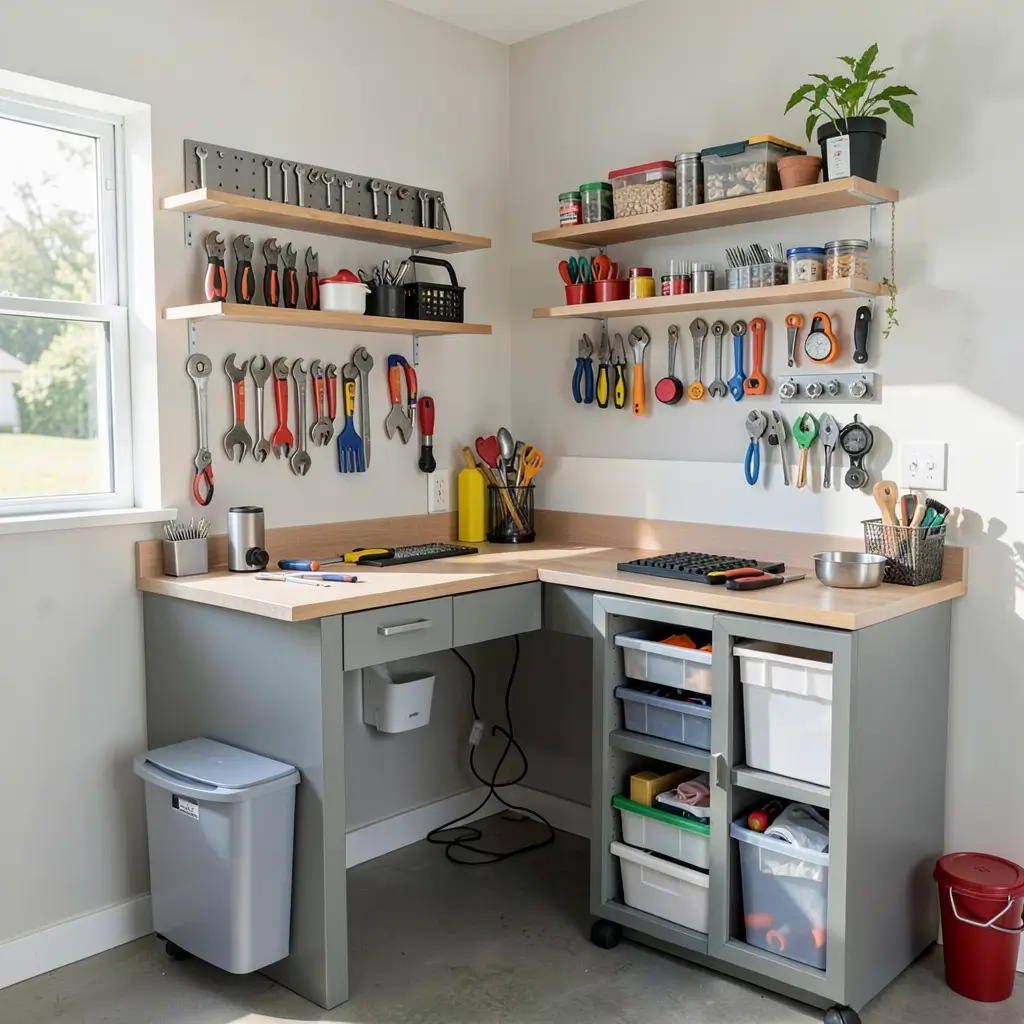
Corners are the most underutilized spaces in any garage. A compact corner workbench turns that dead zone into a fully functional workspace without stealing a single inch from your parking area or main floor space.
I installed a corner bench in my buddy’s tiny garage, and the results blew both of us away. We gained a 4-foot by 4-foot L-shaped work surface using space that previously held nothing but cobwebs and a broken rake.
L-Shaped Design Advantages
The L-shape offers surprising benefits:
- Two work zones for simultaneous tasks
- Natural division between messy and clean work
- Corner space accommodates a vise perfectly
- Both walls provide tool storage above the bench
- You can work facing two different directions
Building Into the Corner
Construction tips for corner benches:
- Attach ledger boards to both walls at identical heights
- Use a corner post for central support
- Make one side slightly deeper than the other for versatility
- Level everything obsessively – corners often aren’t square
- Add a diagonal brace underneath for rigidity
FYI, I learned the hard way that garage corners rarely form perfect 90-degree angles. Always measure the actual angle and cut your corner joint accordingly. My first attempt left a half-inch gap that drove me absolutely crazy until I fixed it.
Maximizing Corner Storage
The area under and above a corner bench offers premium storage:
- Lazy Susan turntable under the bench for heavy tools
- Corner shelving above for frequently used supplies
- Triangular drawers custom-fit to the corner space
- Pegboard wrapping around both walls above the bench
- Magnetic strips on both wall sections
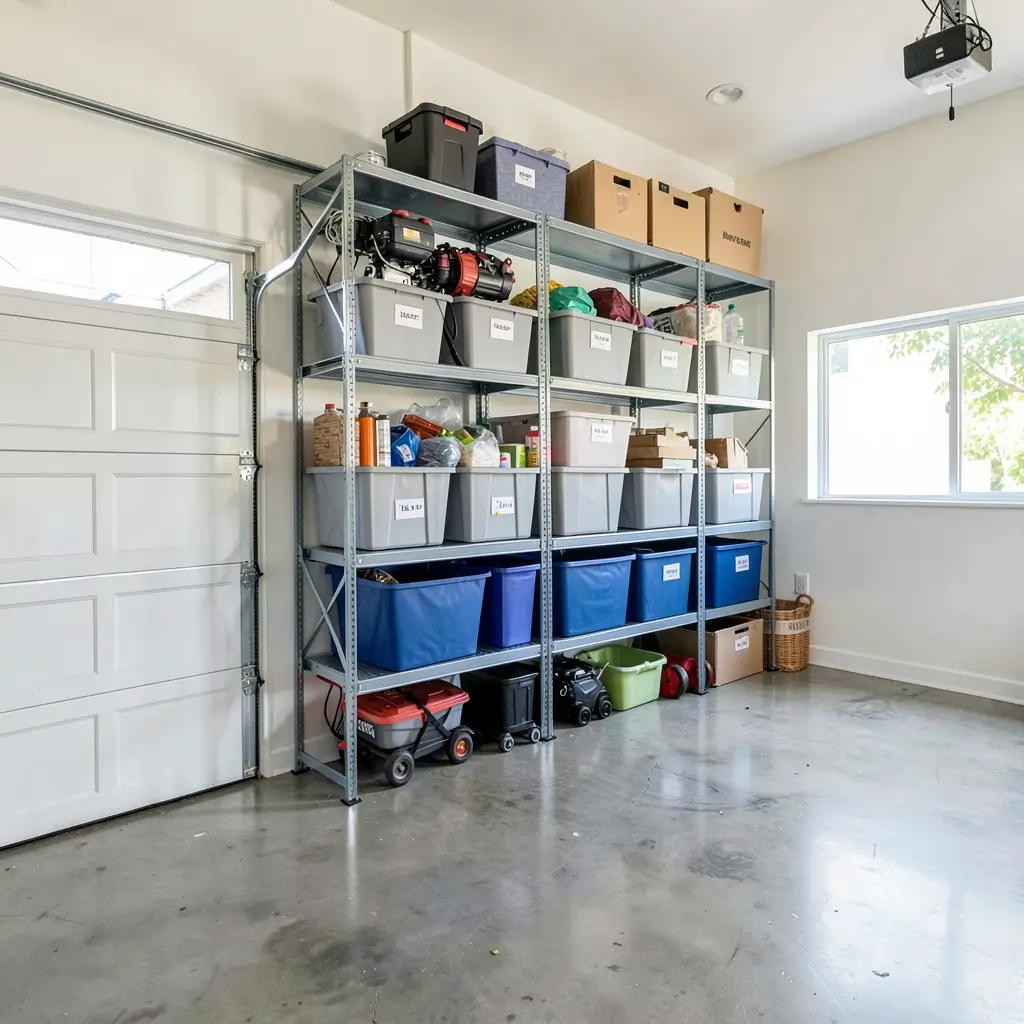
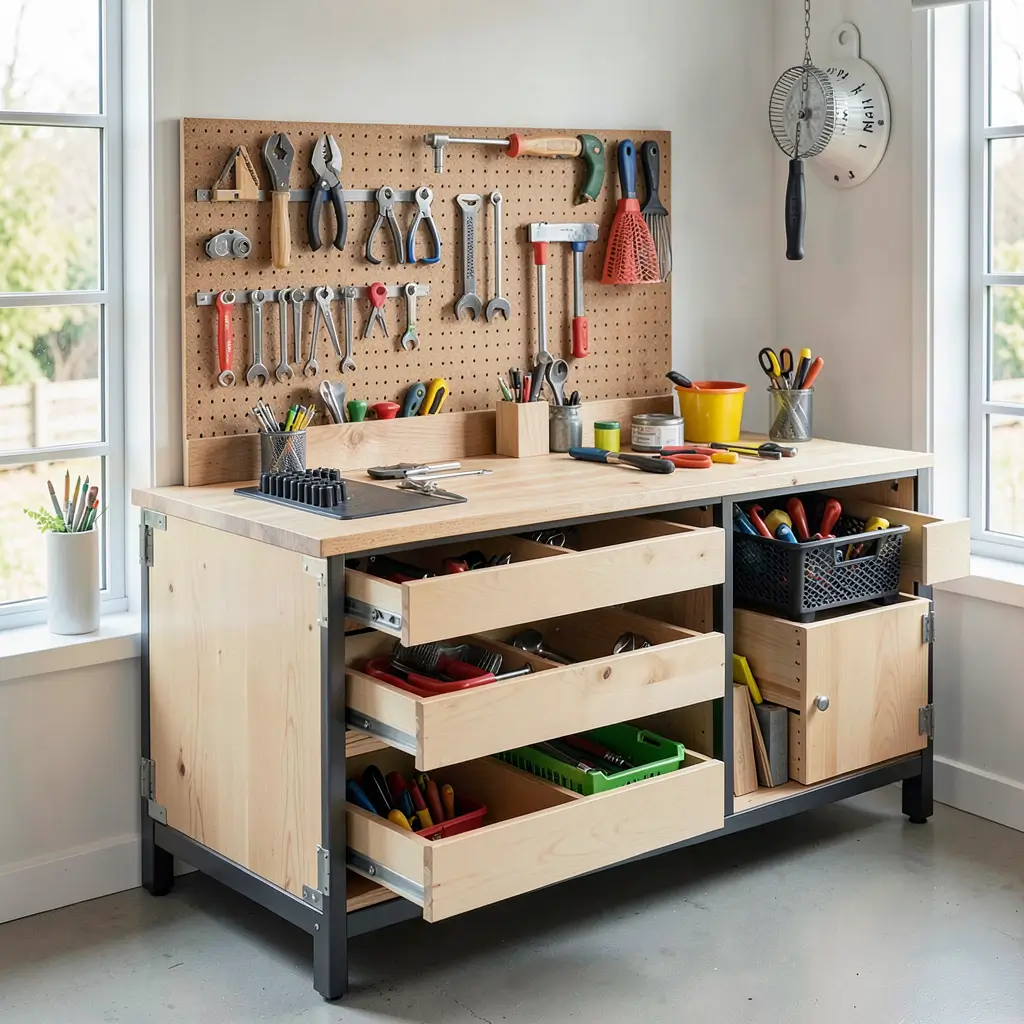
Multi-Tier Storage Workbench

Why separate your workbench from your storage when you can combine them into one glorious, space-saving unit? The multi-tier storage workbench stacks working and storage functions vertically, maximizing every cubic foot of your garage.
This design changed my organization game completely. Before building my multi-tier setup, I had a bench AND separate shelving units AND a tool chest. They collectively consumed about 40 square feet of floor space. My multi-tier bench handles everything in about 15 square feet.
Tier Layout Strategy
Organize your tiers by frequency of use:
- Top tier (above bench): Small parts bins, reference materials
- Work surface tier: Your primary workspace
- Under-bench tier: Drawers for frequently used hand tools
- Lower shelf tier: Power tools and heavy equipment
- Bottom tier: Bulk storage and rarely accessed items
Drawer vs. Shelf Debate
Each storage method has clear advantages:
Drawers work better for:
- Small tools and hardware
- Items you need to sort through
- Valuable items worth protecting
- Things that accumulate dust quickly
Open shelves work better for:
- Power tools you grab constantly
- Heavy items difficult to lift into drawers
- Items too tall for standard drawers
- Quick visual inventory checks
I use drawers on the left side and open shelving on the right. This hybrid approach gives me the best of both systems without compromise.
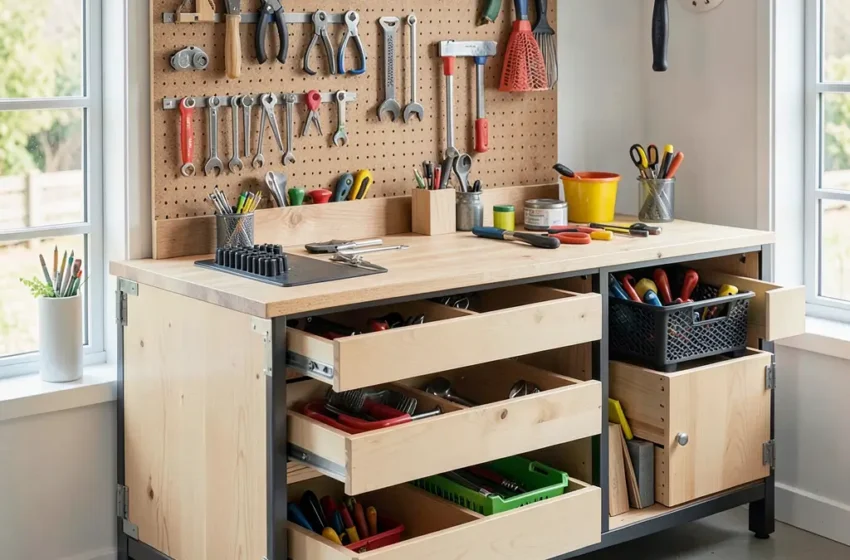
Time-Saving Drawer Organization
Random junk drawers waste time. Organized drawers save it:
- Custom foam inserts cut to fit each tool perfectly
- Dividers creating dedicated sections
- Drawer liners preventing tools from sliding around
- Labels on drawer fronts eliminating guesswork
- Full-extension slides providing complete access to rear contents
The foam inserts alone save me several minutes per project. I see immediately if something’s missing, and every tool returns to its exact spot without thinking about it.
DIY Modular Workbench System
The modular workbench system acknowledges a truth most designs ignore: your needs change over time. What works for furniture building doesn’t work for automotive repair. A modular system adapts to whatever project you’re tackling.
I designed my modular system after getting frustrated with my fixed bench. Every new hobby required a different workspace configuration, and I got tired of constantly working around limitations.
Core Module Design
Start with identical base modules:
- Standard dimensions (I use 24″ deep x 30″ wide x 34″ tall)
- Locking casters for easy repositioning
- Standardized bolt patterns for connecting modules
- Leveling feet that deploy when casters lock
- Identical top mounting system for swapping surfaces
Specialty Modules to Build
Add these purpose-built modules over time:
- Vise module with a heavy-duty front vise
- Power module with built-in outlets and USB
- Storage module packed with drawers
- Machine module reinforced for heavy equipment
- Assembly module with a perfectly flat reference surface
Reconfiguration Examples
My modular bench transforms based on the project:
- Woodworking mode: Three modules in a line, vise on the end
- Electronics mode: Two modules in an L-shape with the power module
- Automotive mode: Modules separated, surrounding the vehicle
- Assembly mode: All modules forming a large island
The ability to rearrange my entire workshop in fifteen minutes saves hours of frustration over the course of a year. Different projects genuinely need different setups, and modular design respects that reality.
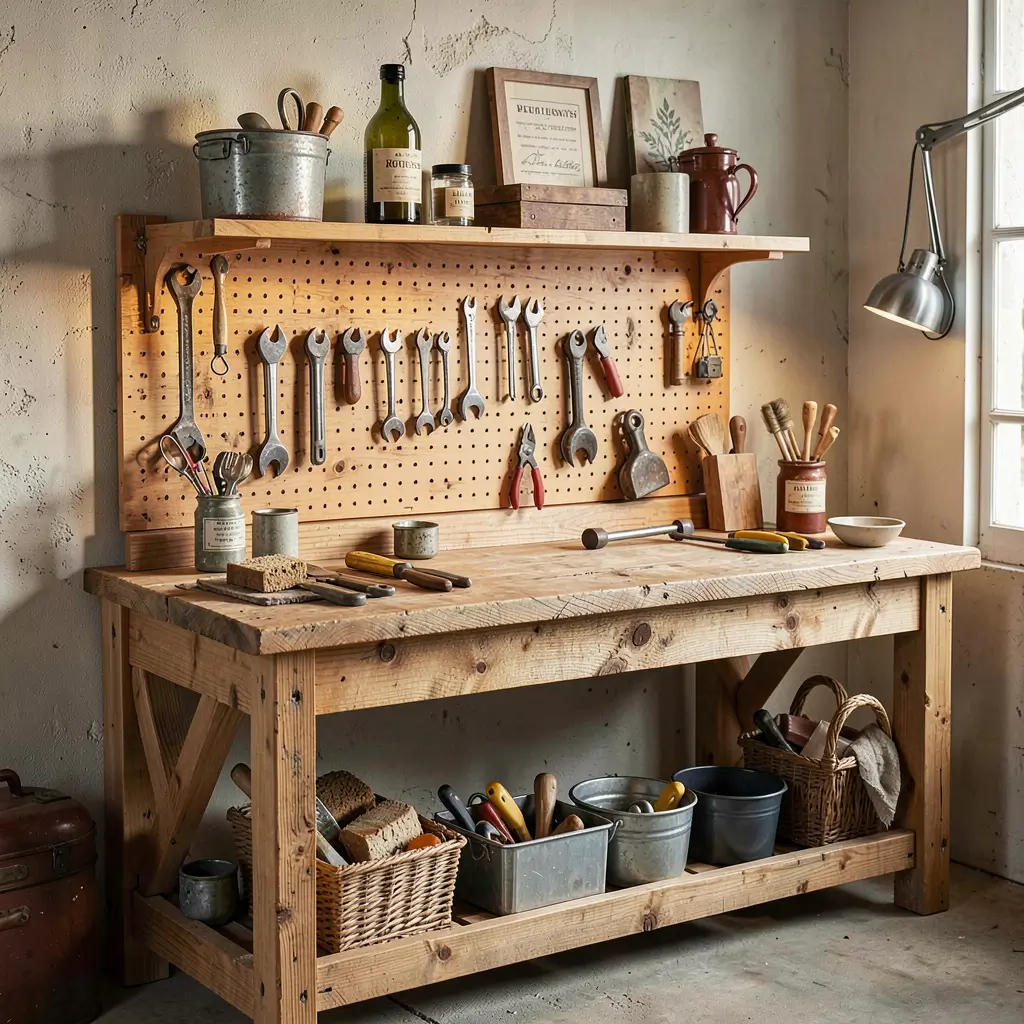
Vintage Style Garage Workbench
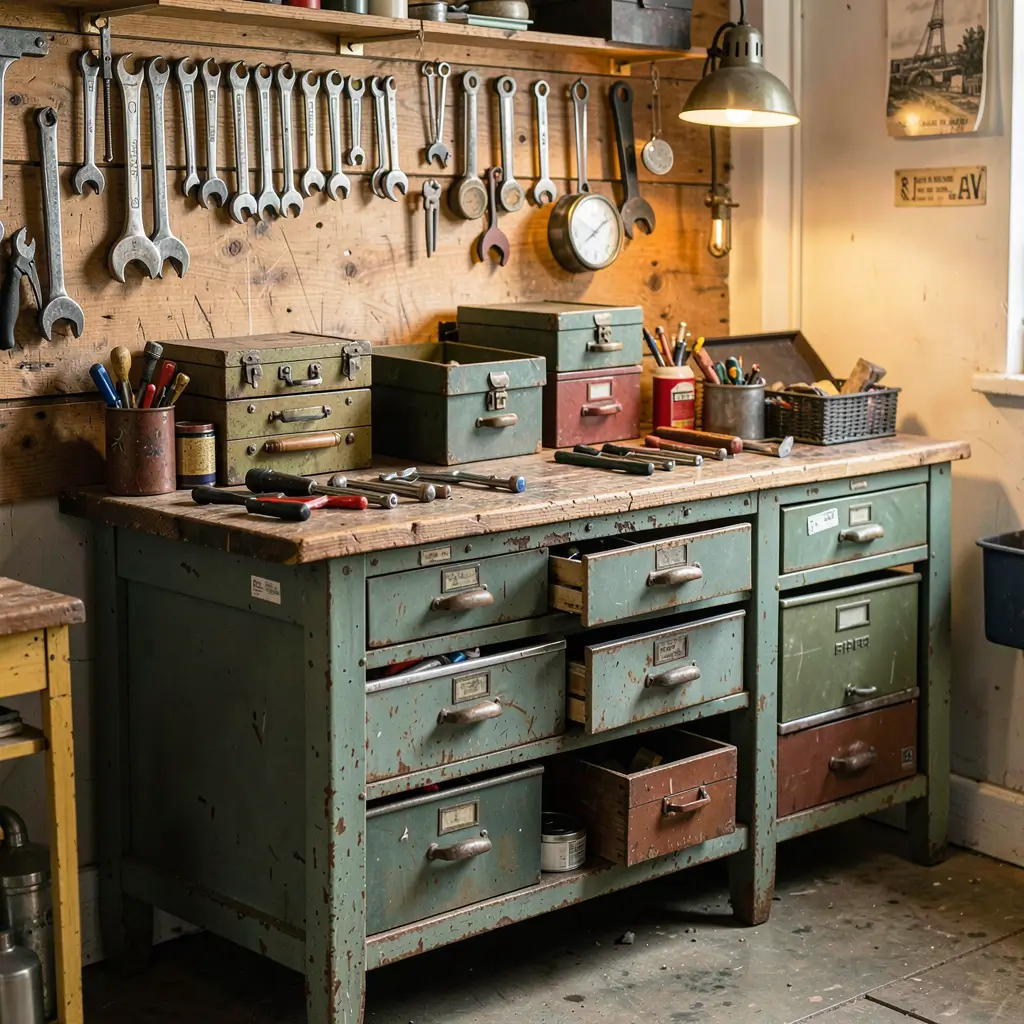
Some workbenches just ooze character. The vintage style bench brings old-school aesthetics into your modern garage while providing seriously solid functionality. Think weathered wood, cast iron hardware, and drawer pulls that look like they came from a 1920s machine shop.
I built mine using reclaimed lumber from a demolished barn combined with antique hardware from estate sales. People always assume the bench itself is an antique – nope, just built to look that way.
Sourcing Authentic Materials
Finding vintage-appropriate materials takes effort but rewards patience:
- Reclaimed lumber yards for aged wood with character
- Estate sales for antique vises, hardware, and drawer pulls
- Architectural salvage stores for cast iron brackets
- Online auctions for specific vintage tool brands
- Flea markets for decorative and functional hardware
Aging New Materials Convincingly
When authentic materials aren’t available:
- Vinegar and steel wool solution ages wood rapidly
- Wire brushing creates realistic wear patterns
- Strategic distressing mimics decades of use
- Dark wax finishes simulate years of oil and grime
- Patina solutions for metal hardware
I used the vinegar steel wool technique on fresh pine boards, and the results look genuinely aged. The chemical reaction between the iron-infused vinegar and the wood tannins creates authentic-looking gray weathering in about 24 hours.
Modern Functionality in Vintage Clothing
Hide modern features inside the vintage aesthetic:
- LED lighting concealed under shelf overhangs
- Power strips mounted behind vintage-looking panels
- Modern drawer slides hidden by traditional-looking fronts
- USB charging tucked inside a “vintage” wooden box
- Dust collection ports disguised with antique covers
The bench looks 1920s but functions 2024. Best of both worlds. :/
Heavy-Duty Garage Workbench
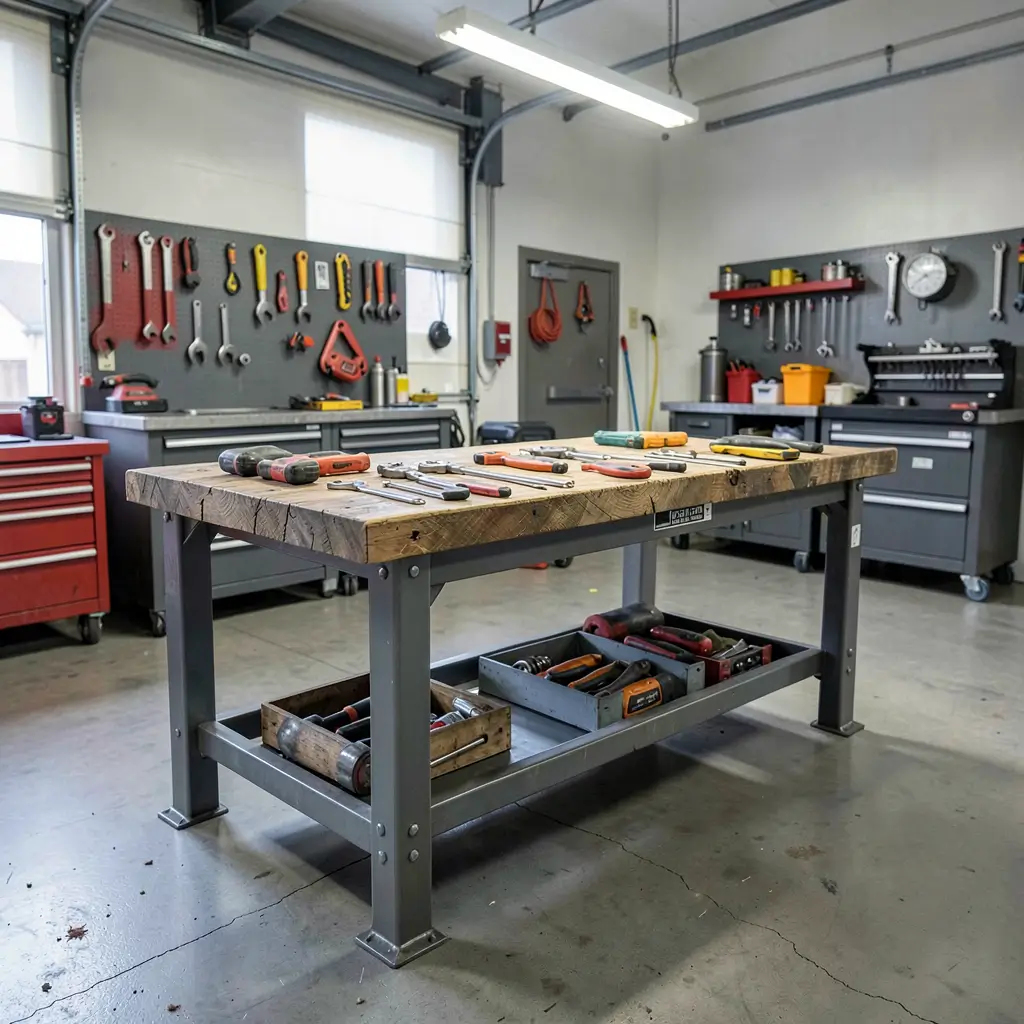
Some projects demand a bench that simply refuses to move, flex, or complain under extreme loads. The heavy-duty workbench handles engine blocks, vice operations, and aggressive metalwork without flinching.
After my lightweight bench shifted during a stubborn bolt removal and sent my wrench flying into my shin, I built a bench that weighs over 300 pounds and anchors to the wall. Nothing moves this thing. Nothing.
Construction for Maximum Strength
Heavy-duty benches need overbuilt construction:
- 4×4 legs minimum (6×6 if you’re serious)
- Double-thickness tops laminated together
- Cross-bracing on all four sides
- Through-bolted joints with washers
- Concrete floor anchors for anti-tipping security
Weight Capacity Considerations
Know your needs before building:
- Light-duty projects: 300-500 pound capacity (standard bench)
- Medium-duty projects: 500-1,000 pounds (reinforced bench)
- Heavy-duty projects: 1,000-2,000 pounds (industrial construction)
- Extreme loads: 2,000+ pounds (steel frame with concrete anchoring)
My bench handles 1,500 pounds comfortably. I’ve had a motorcycle engine, a transmission, and various tools on it simultaneously without any flex whatsoever.
Surface Protection Strategies
Heavy-duty work destroys unprotected surfaces:
- Replaceable hardboard top layer takes the abuse
- Steel plate insert for hammering and metalwork
- Welding blanket storage for spark-heavy tasks
- Rubber bumper edges protecting your body from sharp corners
I replace my hardboard top every six months – it costs about $15 and takes ten minutes to swap. This keeps my actual bench top pristine underneath while giving me a guilt-free surface to destroy.
Floating Wall Workbench Design
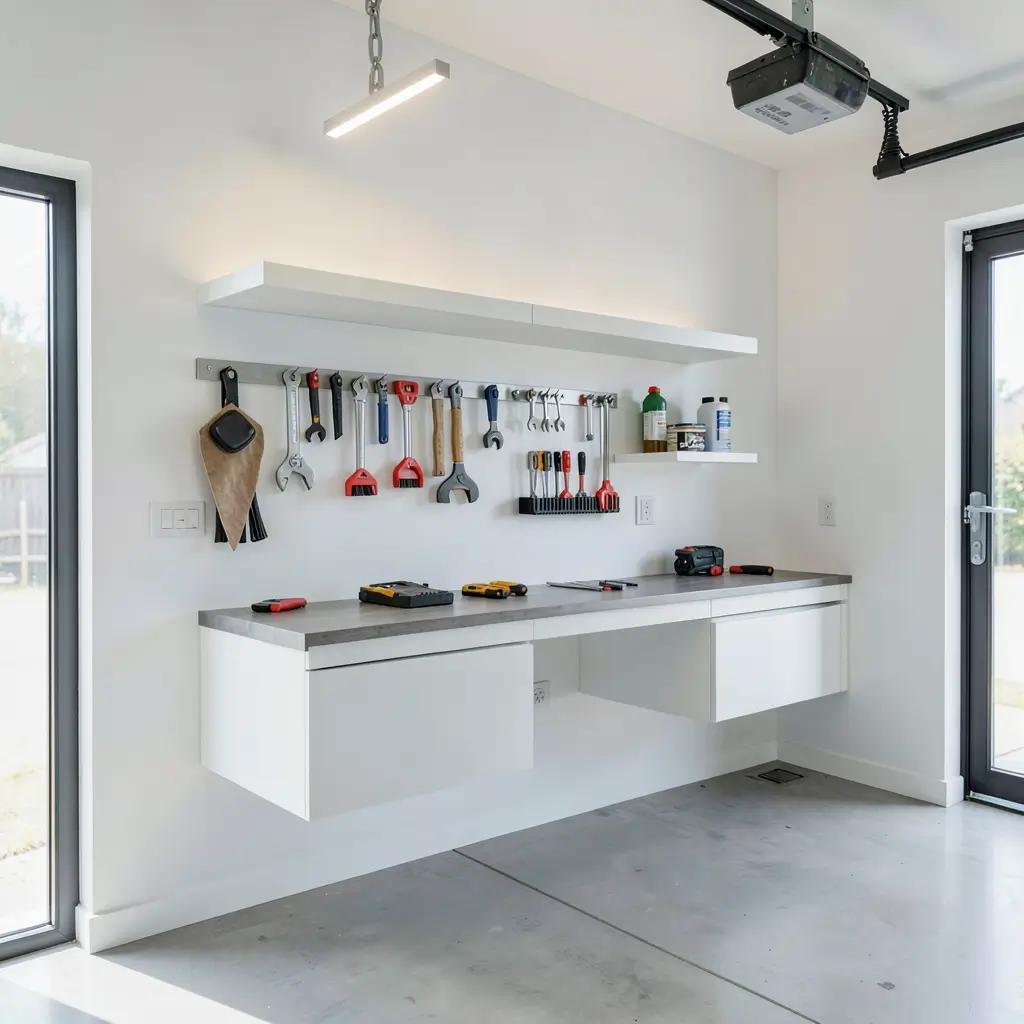
The floating wall workbench eliminates legs entirely, cantilevering the work surface directly from the wall. This creates completely open floor space underneath the bench, making sweeping, mopping, and storage underneath effortless.
I installed one of these in my detailing area, and the clean look still impresses me every time I walk past it. No legs means no obstacles, and the visual effect makes the garage look significantly more spacious.
Engineering the Cantilever
Floating benches need serious wall support:
- Heavy-duty ledger board lag-bolted into every stud
- Steel angle brackets at 16-inch intervals minimum
- Maximum depth of 24 inches for standard residential walls
- Weight distribution planning to prevent leverage failure
- Wall material assessment – drywall alone won’t cut it
Load Limits and Reality
Let’s talk honestly about floating bench limitations:
- Maximum practical load: 200-400 pounds (depending on mounting)
- Not suitable for heavy pounding or vise work
- Best for light to medium tasks like electronics, painting, or assembly
- Longer spans need more brackets or support cables
- Stud quality matters enormously
This bench style won’t replace a heavy-duty freestanding unit for serious work. But for dedicated task areas like electronics repair, model building, or small parts assembly, the floating design saves time through its clean, organized aesthetic.
Making It Look Professional
Finishing touches matter on floating benches:
- Hide brackets behind a fascia board for clean lines
- Route cables through the wall behind the bench
- Add under-bench LED lighting for a dramatic floating effect
- Edge-band exposed plywood for a polished appearance
- Match the bench finish to your garage’s overall aesthetic
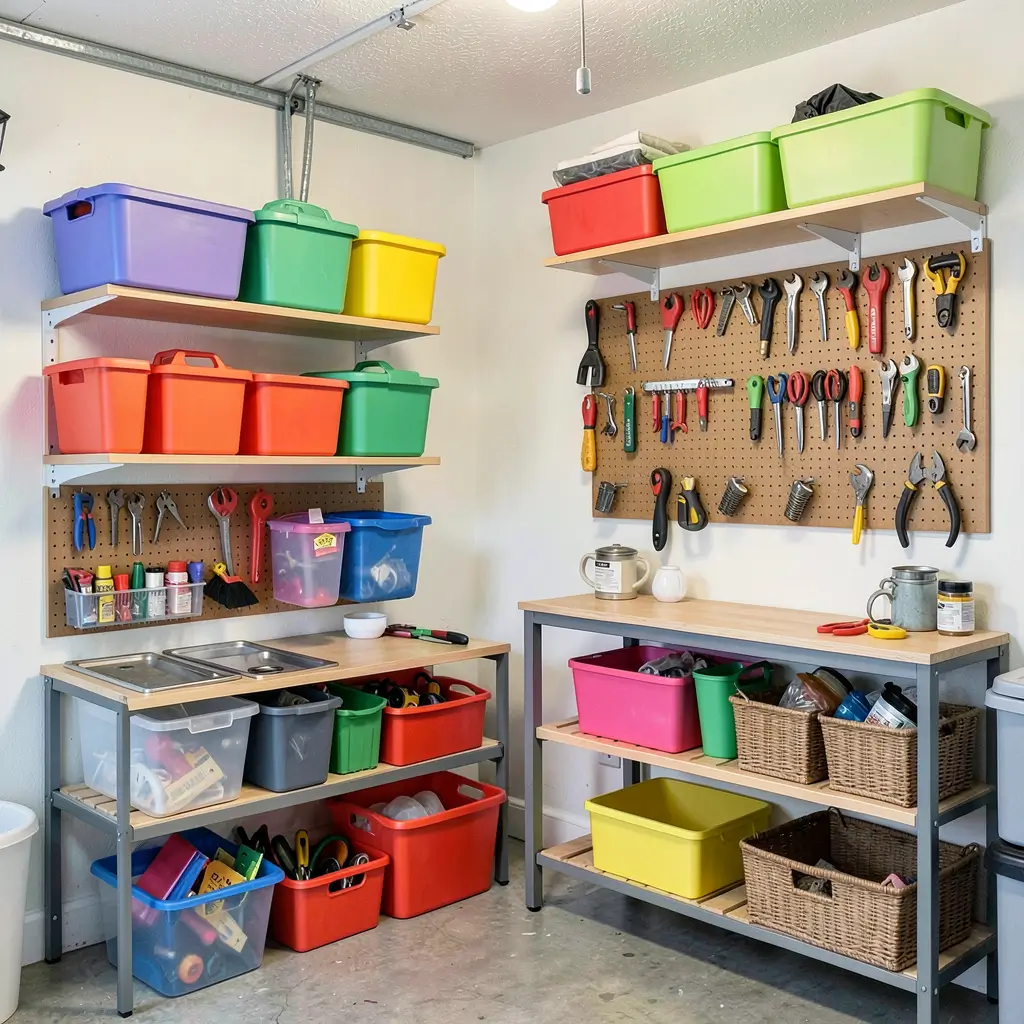
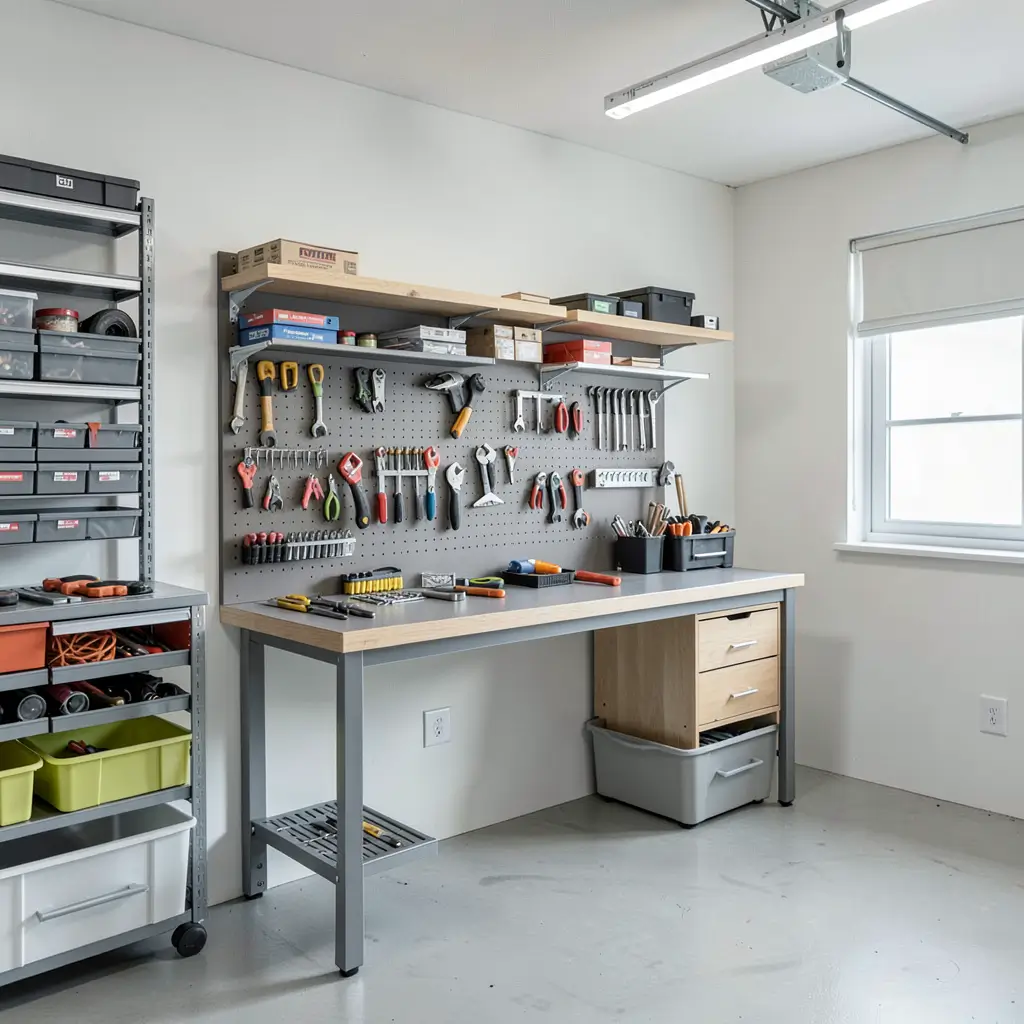
Workbench with Integrated Tool Storage

This final idea combines everything into one ultimate workstation. The integrated tool storage workbench puts every tool within arm’s reach of your working position, eliminating those constant trips across the garage that eat up your productive time.
IMO, this design philosophy saves more time than any other single workbench feature. I tracked my movement during a typical project before and after building an integrated bench. Before: I walked about 400 feet total fetching tools. After: maybe 20 feet. The efficiency gain felt almost unfair.
The Three-Zone Integration System
Organize tools in three zones around your bench:
Zone 1 – Immediate (within arm’s reach):
- Current project tools on the bench surface
- Magnetic strips holding frequently swapped tools
- Pencils, tape measures, and marking tools
Zone 2 – Close (one step away):
- Pegboard wall with hand tools
- Under-bench drawers with organized contents
- Power tool shelf at bench height
Zone 3 – Nearby (two to three steps):
- Overhead cabinets with specialty tools
- Side-mounted storage for long tools
- Floor-level storage for heavy equipment
Must-Have Integrated Features
Build these directly into the bench:
- Built-in power strip with USB charging
- Dust collection port connected to shop vacuum
- Recessed tool tray preventing items from rolling off
- Integrated clamp storage on the bench sides
- Swing-arm task light permanently mounted
The built-in dust collection port saves incredible amounts of cleanup time. I connected mine to a shop vac with an automatic switch – the vac kicks on whenever I activate a power tool plugged into the bench’s outlets.
Customization Over Time
The beauty of integrated storage? You keep improving it:
- Start with basic pegboard and hooks
- Add drawers as you identify needs
- Install specialty holders for new tools
- Upgrade lighting as tasks require
- Expand storage zones as your collection grows
My integrated bench looks completely different now than it did a year ago. I’ve added, moved, and removed components based on actual usage patterns. The bench evolves with your skills and projects.
Time to Build Your Perfect Workbench
We just covered ten distinct workbench styles, each solving different problems in different ways. The fold-down bench saves space. The rustic wooden bench connects you to tradition. The industrial metal bench handles abuse. The corner bench uses dead space. The modular system adapts to anything.
Here’s my honest advice: don’t overthink your first build. Start with something simple, use it for a few months, and pay attention to what frustrates you. Those frustrations point directly at the features your next bench needs.
The most time-saving workbench isn’t necessarily the fanciest one. It’s the one that fits your specific projects, your specific garage, and your specific working style. My rustic maple bench saves me more time than any fancy modular system ever could – because it matches how I actually work.
So pick a design that excites you, gather your materials this weekend, and start building. The irony of needing a good workbench to build a good workbench isn’t lost on me – but hey, that’s what the kitchen table is for one last time. 🙂
Your future self will thank you every single time a project takes one hour instead of three. And that, my friend, is the real value of a functional garage workbench.