15 Stunning Green Backsplash Kitchen Ideas for Modern Homes
- Kitchen ideas
 Ben
Ben- 0
- 35 minutes read

You know that feeling when you walk into someone’s kitchen and the backsplash just makes you stop and stare? That’s exactly what happened to me last month at my sister’s place.
She’d installed this gorgeous sage green subway tile, and honestly, I couldn’t shut up about it for weeks.
Green backsplashes are having their moment right now, and I’m totally here for it. Whether you’re going for that calming spa vibe or want something bold that screams personality, green tiles offer so many possibilities.
Trust me, after renovating three kitchens (yeah, I might have a problem), I’ve learned that the right backsplash can completely change your cooking space.
So grab a coffee and let’s chat about 15 green backsplash ideas that’ll make your kitchen the envy of every Pinterest board out there.
I promise you’ll find at least one that makes you think, “Yep, that’s the one!”
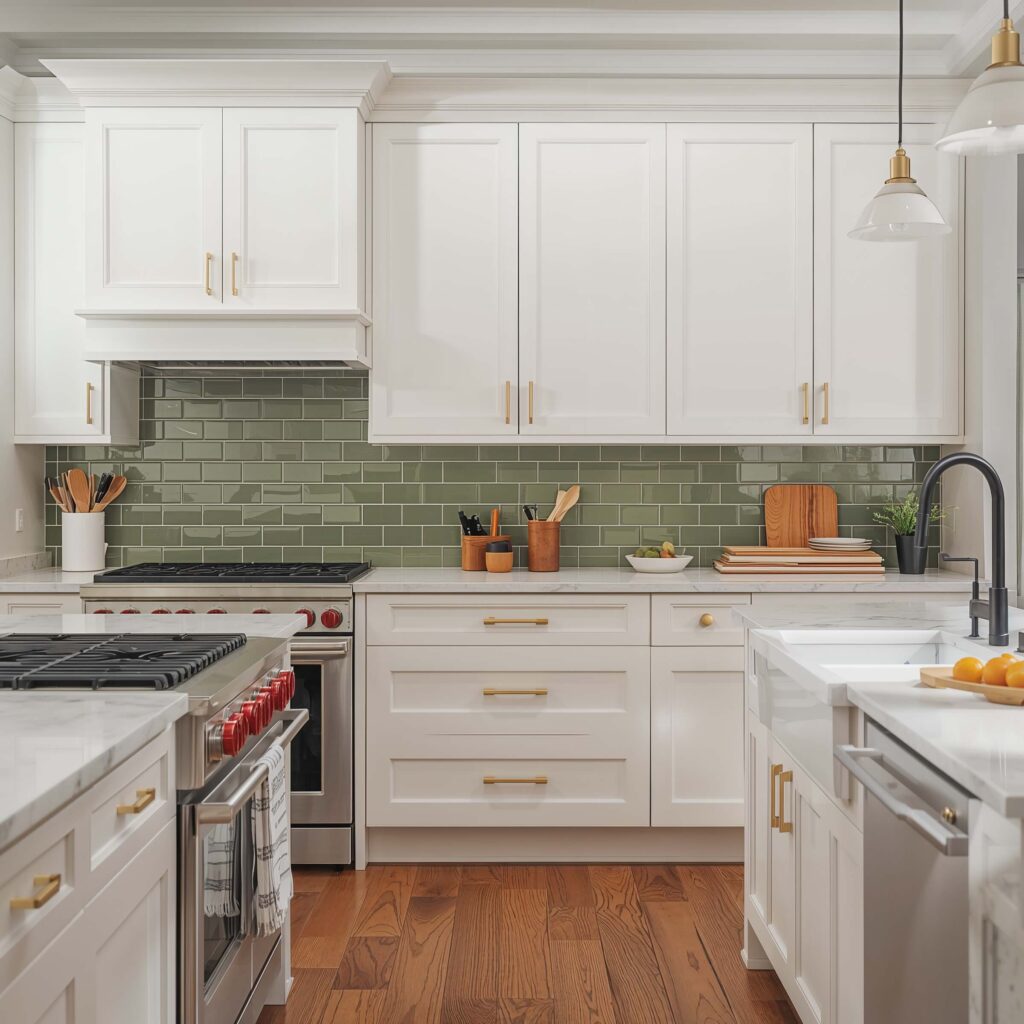
Sage Green Subway Tile Backsplash

Sage green subway tiles are basically the little black dress of kitchen backsplashes – they go with everything. I installed these beauties in my own kitchen last year, and let me tell you, they’re absolute magic with both white and wood cabinets.
What makes sage green so special? It’s that perfect middle ground between bold and subtle. You get color without the commitment of something super bright. Plus, this shade works incredibly well with natural light, shifting from a soft gray-green in the morning to a warmer tone by sunset.
The classic subway tile pattern gives you that timeless look that won’t feel dated in five years. I went with a standard brick pattern, but you could totally switch it up with a vertical stack or even a diagonal layout if you’re feeling adventurous. Pro tip: pair these with white grout for a crisp look, or go with a matching sage grout for something more seamless.
Why Sage Green Works So Well
- Versatility: Complements virtually any cabinet color
- Calming effect: Creates a serene cooking environment
- Light reflection: Makes small kitchens feel larger
- Trend-proof: Won’t look outdated anytime soon
Emerald Green Glossy Tile Backsplash
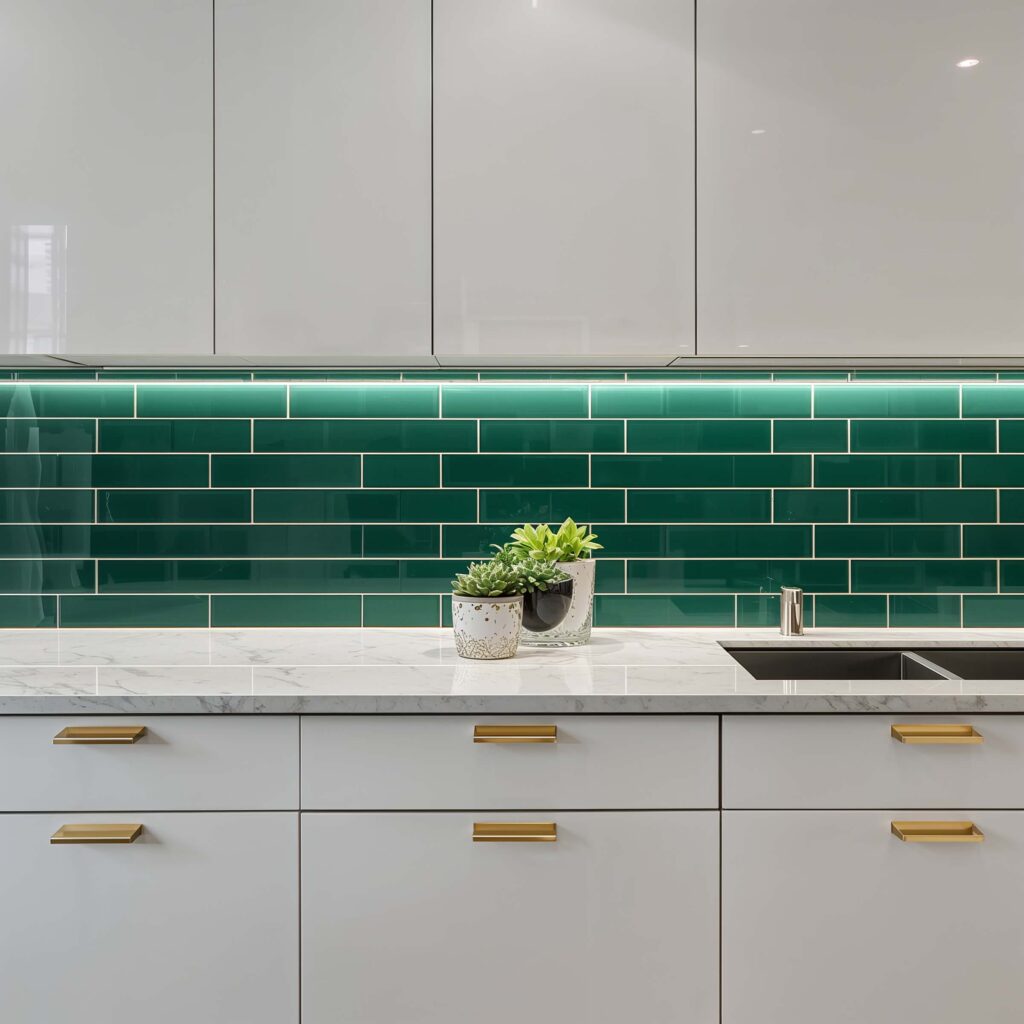
Ready to make a statement? Emerald green glossy tiles are your answer. These babies catch the light like nobody’s business and create this luxurious, jewel-box effect that’s absolutely stunning.
I helped my best friend install emerald tiles in her kitchen, and the transformation was insane. The high-gloss finish reflects light beautifully, making her tiny galley kitchen feel twice as big. We paired them with brass hardware, and honestly? Chef’s kiss. The combination looks like something straight out of a design magazine.
One thing to consider with glossy tiles – they show water spots and fingerprints more easily than matte finishes. But IMO, the wow factor totally makes up for the extra wiping. Just keep a microfiber cloth handy, and you’re golden.
Making Emerald Work in Your Space
The key to pulling off emerald green is balance. You want the tiles to be the star, so keep everything else relatively neutral. White or light gray cabinets work beautifully, and don’t forget about your countertops – marble or quartz with subtle veining creates the perfect backdrop.
Olive Green Mosaic Tile Design
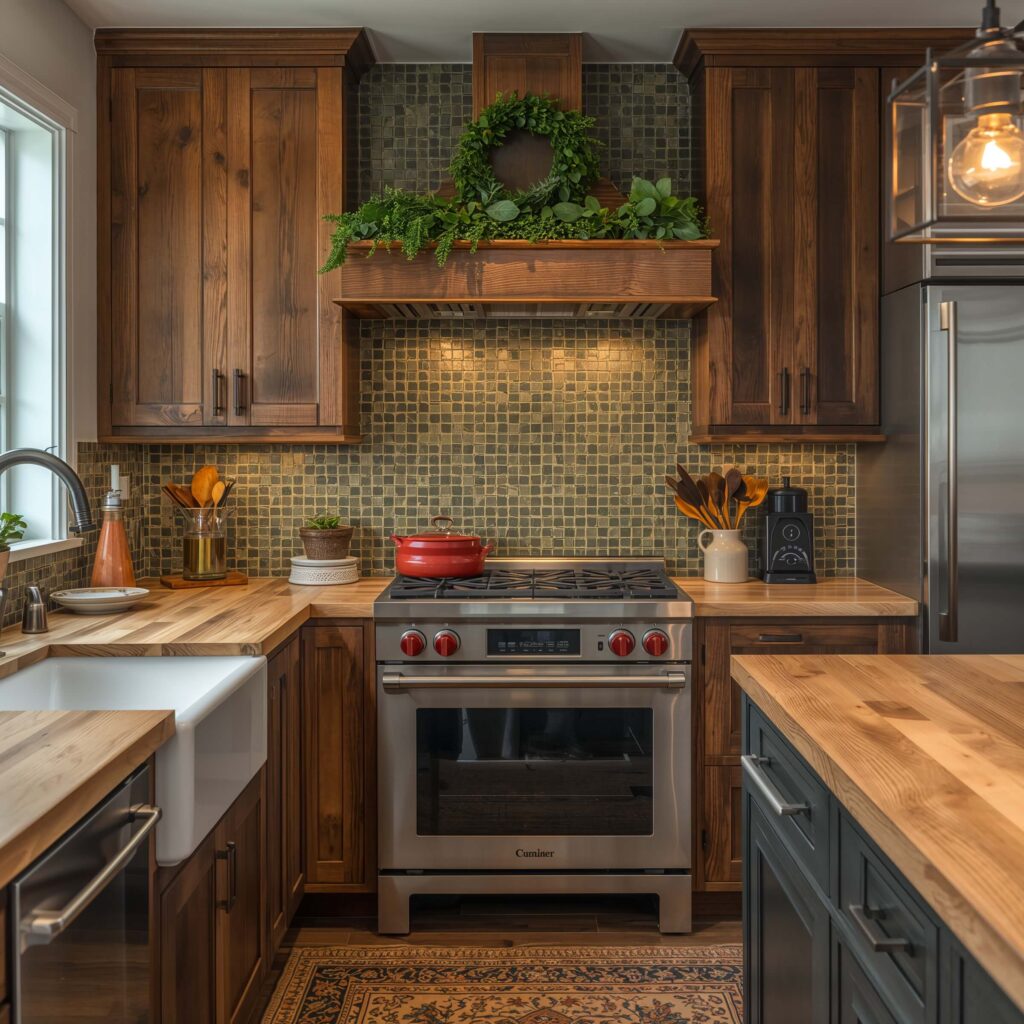
Can we talk about how underrated olive green is? This earthy tone brings such warmth to a kitchen, and when you use it in a mosaic pattern, you get texture and visual interest that’s just chef’s kiss.
Mosaic tiles give you so many creative options. You can go with tiny penny rounds, hexagons, or even mixed shapes for something really unique. I recently saw a kitchen with olive green mosaic tiles that incorporated little gold accents throughout the pattern – absolutely gorgeous!
The beauty of olive green is how well it plays with natural materials. Wood cutting boards, copper pots, and fresh herbs all look amazing against this backdrop. It’s like bringing a little bit of Tuscany right into your kitchen.
Design Tips for Olive Mosaics
- Mix different shades of olive for depth
- Consider adding metallic accents within the pattern
- Use white or cream grout to make the pattern pop
- Keep cabinet colors neutral to let the mosaic shine
Also Read: 15 Stunning Green Kitchen Walls Ideas for Stylish Home Decor
Mint Green Chevron Pattern Backsplash

Mint green chevron tiles? Yes, please! This combination brings both color and pattern to your kitchen in the most delightful way. The chevron pattern adds movement and energy that plain tiles just can’t match.
I’ll be honest – installing chevron patterns takes a bit more patience than straight subway tiles. But trust me, the end result is so worth it. The zigzag pattern creates this dynamic visual that makes your backsplash a true focal point.
Mint green is surprisingly versatile. It works beautifully in both modern and vintage-inspired kitchens. Pair it with white cabinets for a fresh, clean look, or go bold with navy blue lowers for something unexpected.
Why Choose Chevron?
The chevron pattern does more than just look pretty. It actually helps disguise imperfections in your wall and creates the illusion of a larger space. Plus, the angled lines draw the eye upward, making your ceilings feel higher. Pretty clever, right?
Dark Forest Green Marble Backsplash

Nothing says luxury quite like marble, and when you find it in dark forest green? Game over. This is sophistication at its finest, folks.
I recently toured a home where they’d used forest green marble with dramatic white veining, and I literally couldn’t stop staring. The natural variation in the stone means every section is unique – it’s like having a piece of art on your wall.
Now, let’s talk budget because marble isn’t cheap. But here’s a secret: you don’t need to do your entire backsplash in marble. Consider using it as an accent behind your stove and complementing it with simpler tiles elsewhere. You’ll get that high-end look without breaking the bank.
Marble Maintenance Reality Check
- Seal it regularly (every 6-12 months)
- Wipe spills immediately to prevent staining
- Use pH-neutral cleaners only
- Consider the investment – properly maintained marble lasts forever
Green Glass Tile with White Cabinets
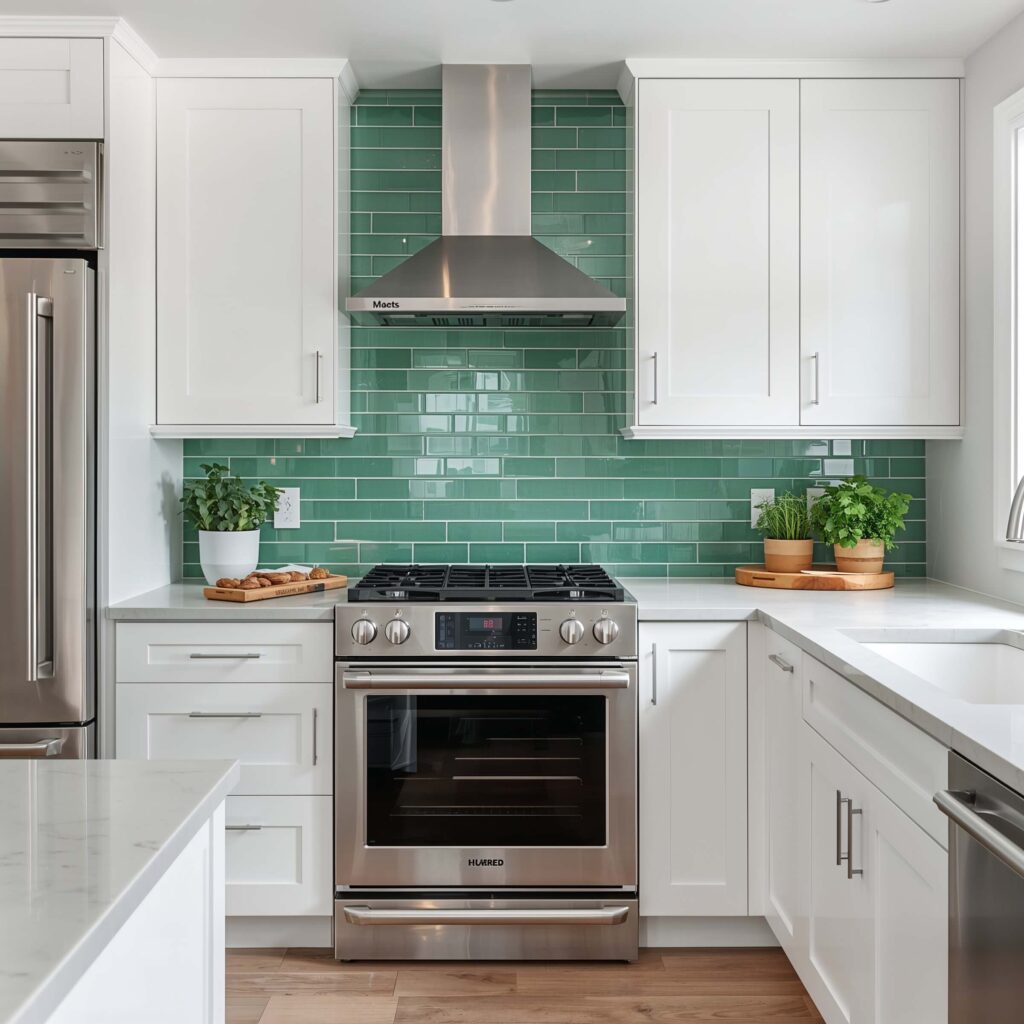
Glass tiles in green paired with crisp white cabinets? That’s a combo that never fails. The translucency of glass tiles creates this incredible depth that makes your backsplash look almost three-dimensional.
I love how glass tiles play with light throughout the day. Morning sun makes them sparkle, while evening lighting creates a soft, ambient glow. It’s like having a chameleon backsplash that changes personality depending on the time of day.
The combo with white cabinets keeps things fresh and bright. You get that pop of color without overwhelming the space. Plus, glass tiles are super easy to clean – a quick wipe and they’re sparkling again.
Glass Tile Pro Tips
Remember that glass can chip more easily than ceramic, so be careful during installation. Also, use white thinset adhesive – colored adhesive will show through and affect your tile color. Trust me on this one; I learned the hard way!
Also Read: 15 Stunning Olive Green Kitchen Ideas for Stylish Home Inspiration
Sage Green Herringbone Tile Backsplash
Herringbone patterns are having a major moment, and when you do them in sage green? Pure magic. This pattern brings a touch of elegance that makes even the simplest kitchen feel custom.
The herringbone layout creates this beautiful visual texture that’s sophisticated without being stuffy. I installed sage green herringbone tiles in my mom’s kitchen, and every single person who visits comments on them. The pattern adds architectural interest that flat-laid tiles just can’t compete with.
What’s great about herringbone is how it works with different tile sizes. Larger tiles create a bold, modern look, while smaller tiles give you a more traditional feel. Either way, you’re getting a backsplash that looks way more expensive than it actually is.
Installation Insights
Fair warning – herringbone is trickier to install than straight patterns. You’ll want to plan your layout carefully and maybe even practice with paper templates first. But don’t let that scare you off! The result is absolutely worth the extra effort.
Bold Emerald Green Hexagon Tiles

Hexagon tiles in emerald green? Now we’re talking! This geometric shape brings a modern edge that rectangular tiles just can’t match. The six-sided design creates natural grout lines that form a honeycomb pattern – it’s basically nature-inspired geometry at its finest.
I fell in love with emerald hex tiles when I saw them in a coffee shop kitchen. They’d used large-format hexagons, and the bold color combined with the geometric pattern created this incredible focal point. It made me rethink everything I thought I knew about kitchen backsplashes.
The best part about hexagon tiles? They work in any size. Tiny hex tiles create a subtle texture, while larger ones make a bolder statement. You can even mix sizes for a truly custom look.
Styling Hexagon Tiles
- Keep your countertops simple to balance the busy pattern
- Consider continuing the hex pattern onto one wall for drama
- Mix emerald with white hexagons for a softer look
- Use contrasting grout for extra pattern definition
Olive Green Subway Tile with Brass Accents

Olive green subway tiles paired with brass? That’s a match made in design heaven. This combination brings warmth and sophistication that feels both timeless and totally on-trend.
I recently helped style a kitchen with this combo, and the brass fixtures against the olive tiles created this gorgeous, earthy elegance. The warm undertones in both materials complement each other perfectly. We used brass cabinet pulls, faucets, and even a brass rail for hanging pots – the cohesive look was stunning.
The beauty of olive green is how it changes throughout the day. In bright light, it shows its green side, but in softer lighting, those brown undertones come through. Add brass’s warm glow, and you’ve got a kitchen that feels cozy and inviting 24/7.
Brass and Olive Styling Tips
Don’t go overboard with the brass – a little goes a long way. Focus on key pieces like your faucet and cabinet hardware. And here’s a hot tip: unlacquered brass develops a beautiful patina over time, adding even more character to your kitchen.
Also Read: 15 Fresh Dark Green Kitchen Ideas for Everyday Living
Soft Mint Green Peel-and-Stick Backsplash
Okay, let’s talk about the elephant in the room – not everyone owns their home or wants to commit to permanent tiles. Enter peel-and-stick backsplashes in soft mint green. These temporary solutions have come such a long way, and honestly? Some of them look incredibly realistic.
I used peel-and-stick tiles in my first apartment, and they survived three years of cooking splatters and steam. The mint green color brightened up that tiny, windowless kitchen and made cooking feel less like a chore. Plus, when I moved out, they came off without damaging the wall. Win-win!
The best part? You can install these bad boys in an afternoon. No special tools, no messy grout, no calling in favors from handy friends. Just peel, stick, and enjoy your new backsplash.
Peel-and-Stick Success Secrets
- Clean your wall thoroughly before applying
- Use a credit card to smooth out air bubbles
- Start from the center and work outward
- Buy 10% extra for mistakes (trust me on this)
Forest Green Brick-Style Tiles
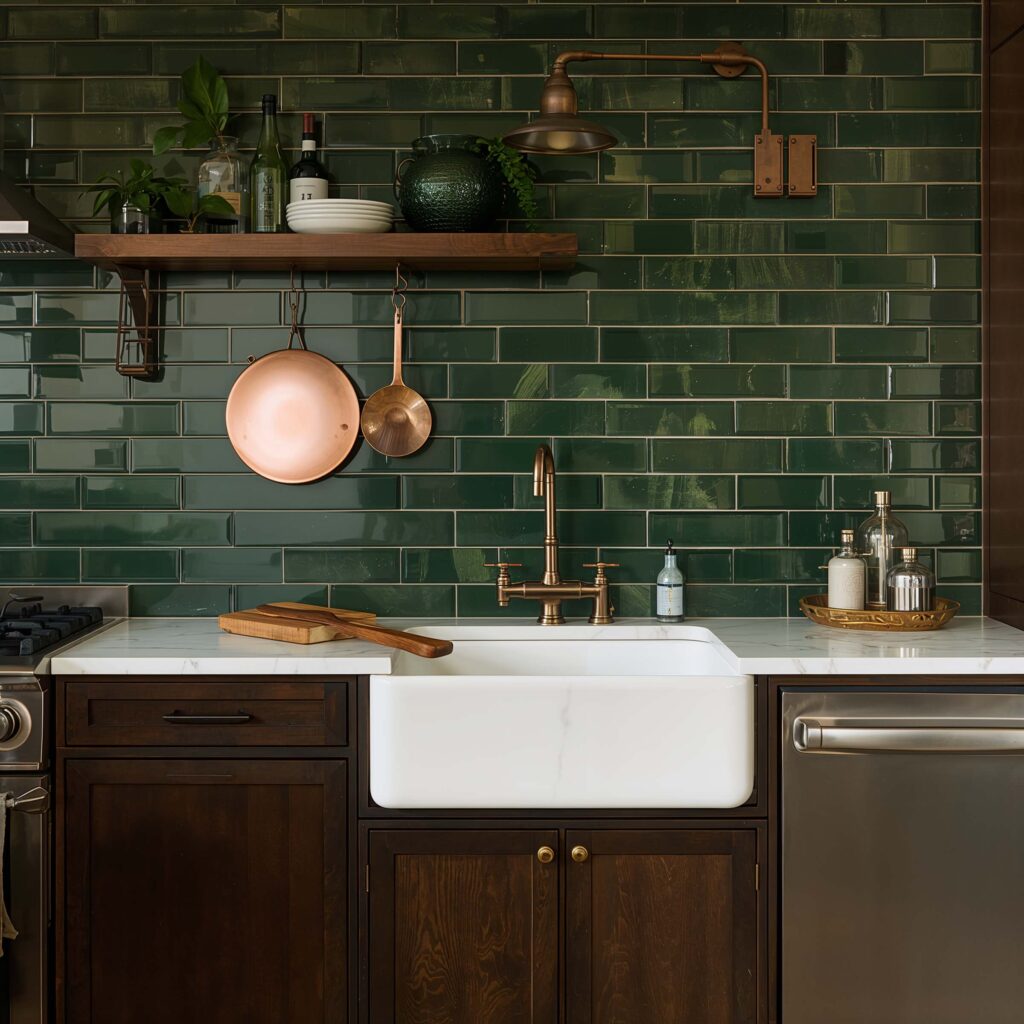
Forest green tiles laid in a brick pattern bring this gorgeous, earthy sophistication to any kitchen. The deep green color reminds me of pine forests after rain – moody, natural, and absolutely beautiful.
What I love about brick-style layouts is how they add subtle texture without overwhelming the space. The staggered pattern creates visual interest while still feeling classic and timeless. I’ve seen this done with both glossy and matte finishes, and both look amazing – it just depends on your style preference.
The darker color works especially well in kitchens with lots of natural light. It grounds the space and creates this cozy, enveloping feeling that makes you want to cook all day. Pair it with warm wood tones and copper accents for maximum impact 🙂
Working with Dark Colors
Remember that dark colors can make a space feel smaller, so balance is key. Keep your upper cabinets light, or better yet, go with open shelving. The contrast prevents the kitchen from feeling too cave-like while still giving you that dramatic backsplash moment.
Two-Tone Green Gradient Backsplash

Ready for something totally unique? A two-tone green gradient backsplash creates this stunning ombré effect that’s basically art for your kitchen. The gradual color transition from light to dark (or vice versa) adds incredible visual interest.
I saw this technique in a designer showhouse, and it blew my mind. They’d used tiles ranging from pale sage at the top to deep forest green at the bottom, creating this gorgeous fade effect. It looked like the wall was dipped in green dye – absolutely mesmerizing.
Creating a gradient takes planning, but the result is a one-of-a-kind backsplash that nobody else will have. You’ll need tiles in at least 3-5 different shades of green to achieve a smooth transition.
Gradient Installation Tips
- Map out your gradient on paper first
- Number your tile boxes to keep shades organized
- Consider hiring a pro – this technique is tricky
- Use consistent grout color throughout for cohesion
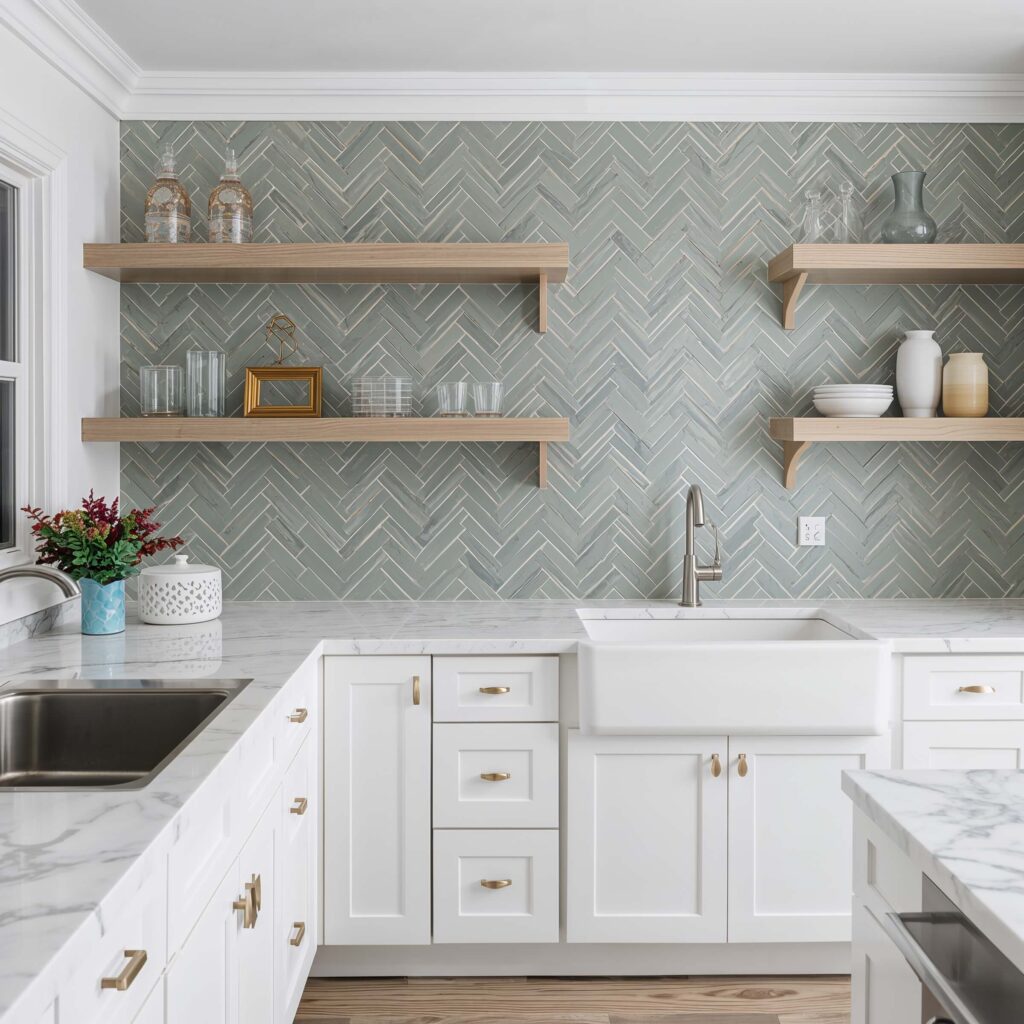
Sage Green Tiles with Open Shelving
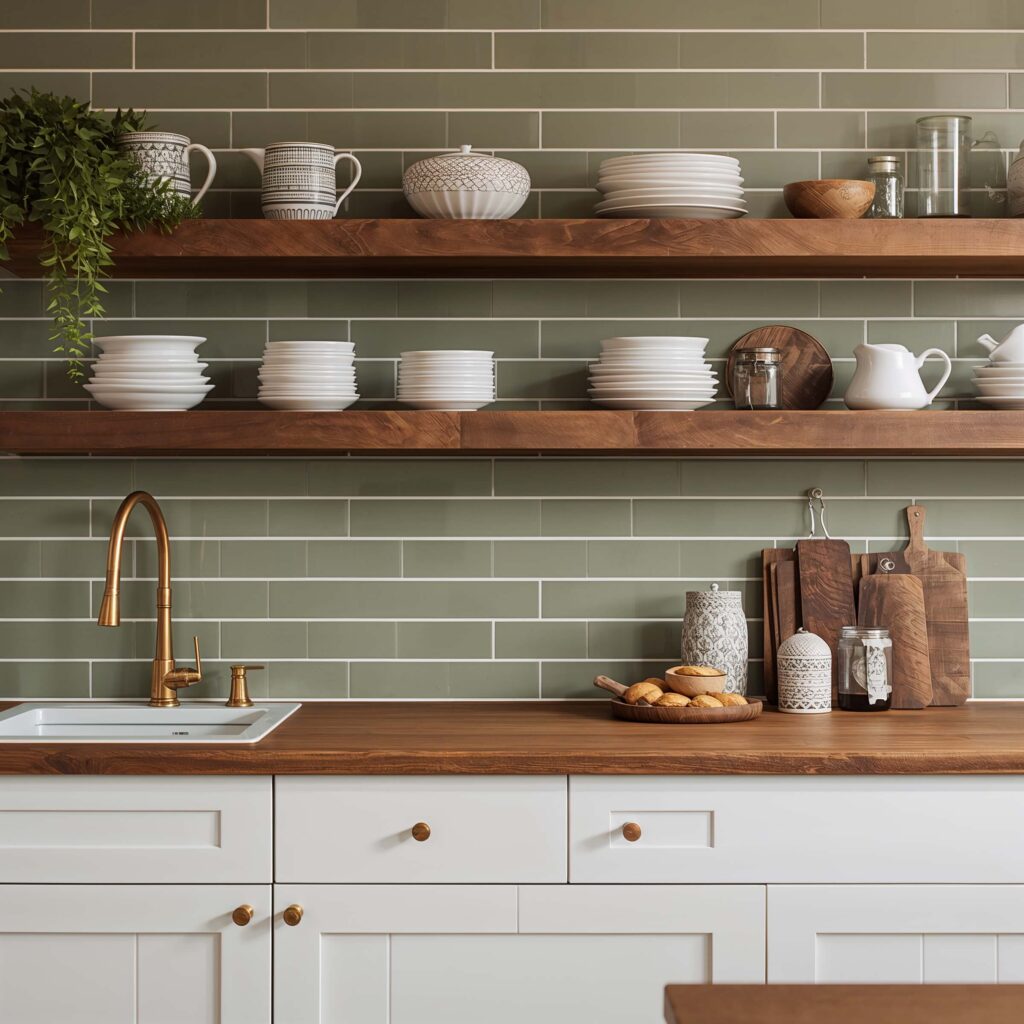
Combining sage green tiles with open shelving creates this perfect balance of color and function. The tiles provide a beautiful backdrop for displaying your prettiest dishes and glassware.
I made this combo work in my own kitchen, and it’s been a game-changer. The sage green tiles make my white dishes pop, and the open shelves keep the space feeling airy despite the colored backsplash. Plus, having everything visible forces me to keep things organized (okay, mostly organized).
The key is choosing the right shade of sage – too dark and your dishes might get lost; too light and you lose impact. I went with a medium sage that has just enough color to make a statement.
Open Shelving Considerations
- Install shelves at least 18 inches above countertops
- Use brackets that complement your hardware
- Mix practical items with decorative pieces
- Consider floating shelves for a cleaner look
Emerald Green Moroccan-Inspired Tiles

Moroccan-inspired tiles in emerald green bring exotic flair that transforms your kitchen into a global destination. These intricate patterns – think arabesques, geometric stars, and quatrefoils – create a backsplash that’s basically jewelry for your walls.
I’ll never forget walking into a friend’s kitchen where she’d installed emerald Moroccan tiles. The intricate patterns caught the light and created this mesmerizing display that made everyone stop mid-conversation. It felt like being transported to a Marrakech riad.
These tiles work best as a focal point – maybe just behind your stove or as a single accent wall. The busy pattern means you’ll want to keep the rest of your kitchen relatively simple to avoid visual overload.
Moroccan Tile Styling
- Pair with simple, solid-colored cabinets
- Consider mixing patterns for an authentic look
- Use thin grout lines to showcase intricate designs
- Balance busy patterns with minimal accessories
Olive and White Mixed Tile Backsplash

Last but definitely not least, mixing olive and white tiles creates this fresh, modern look that’s both sophisticated and playful. The combination keeps things interesting without overwhelming your space.
I love this approach because it gives you so many pattern possibilities. You can create checkerboards, stripes, or even random patterns. My neighbor did a diagonal stripe pattern with olive and white, and FYI, it looks like something from a fancy design magazine.
The white tiles help brighten the space while the olive adds warmth and personality. It’s the perfect compromise when you want color but worry about going too bold. Plus, if you get tired of the pattern in a few years, you’re not stuck with a totally colored backsplash.
Mixed Tile Design Ideas
- Try a 70/30 ratio of white to olive for subtlety
- Create a border design with olive tiles
- Use different sizes for added texture
- Consider matte white with glossy olive for contrast
Making Your Green Backsplash Dreams Reality
So there you have it – 15 green backsplash ideas that’ll transform your kitchen from basic to brilliant. Whether you’re drawn to the subtle elegance of sage green subway tiles or ready to go bold with emerald Moroccan patterns, there’s a green backsplash out there with your name on it.
Remember, your kitchen should reflect your personality and make you happy every time you walk in. Don’t be afraid to take risks – that’s how the best designs happen. And hey, if you’re still on the fence, start with peel-and-stick tiles to test the waters.
The most important thing? Choose something that makes you smile. Because at the end of the day, you’re the one cooking dinner in there every night. So go ahead, embrace the green, and create a kitchen that’s uniquely, beautifully yours. Your future self (and your dinner guests) will thank you!


