10 Inspiring Gypsum Ceiling Design Ideas and Luxe Room Vibes
- Ceiling Design
 Ben
Ben- 0
- 25 minutes read

Gypsum ceilings completely changed the game for me. I used to think fancy ceilings were only for people with fancy budgets, until I discovered what gypsum could do.
Last year, I helped my brother transform his boring apartment with a layered gypsum ceiling, and now everyone thinks he hired an expensive designer.
The best part? The whole project cost less than his monthly gym membership (which he never uses anyway).
Here’s why gypsum is the superhero of ceiling materials: it’s lightweight, affordable, incredibly versatile, and you can shape it into pretty much anything your imagination cooks up.
Plus, unlike other materials that require a PhD in engineering to install, gypsum is surprisingly DIY-friendly if you’re patient enough to learn.
I’ve experimented with gypsum ceilings in five different rooms over the past three years, and each time I discover something new about what this amazing material can do.
From simple, clean designs to elaborate patterns that make people stop and stare, gypsum delivers every single time. Let me share ten gypsum ceiling designs that’ll transform your space from “meh” to magnificent.
1. Layered Cove Gypsum Ceiling
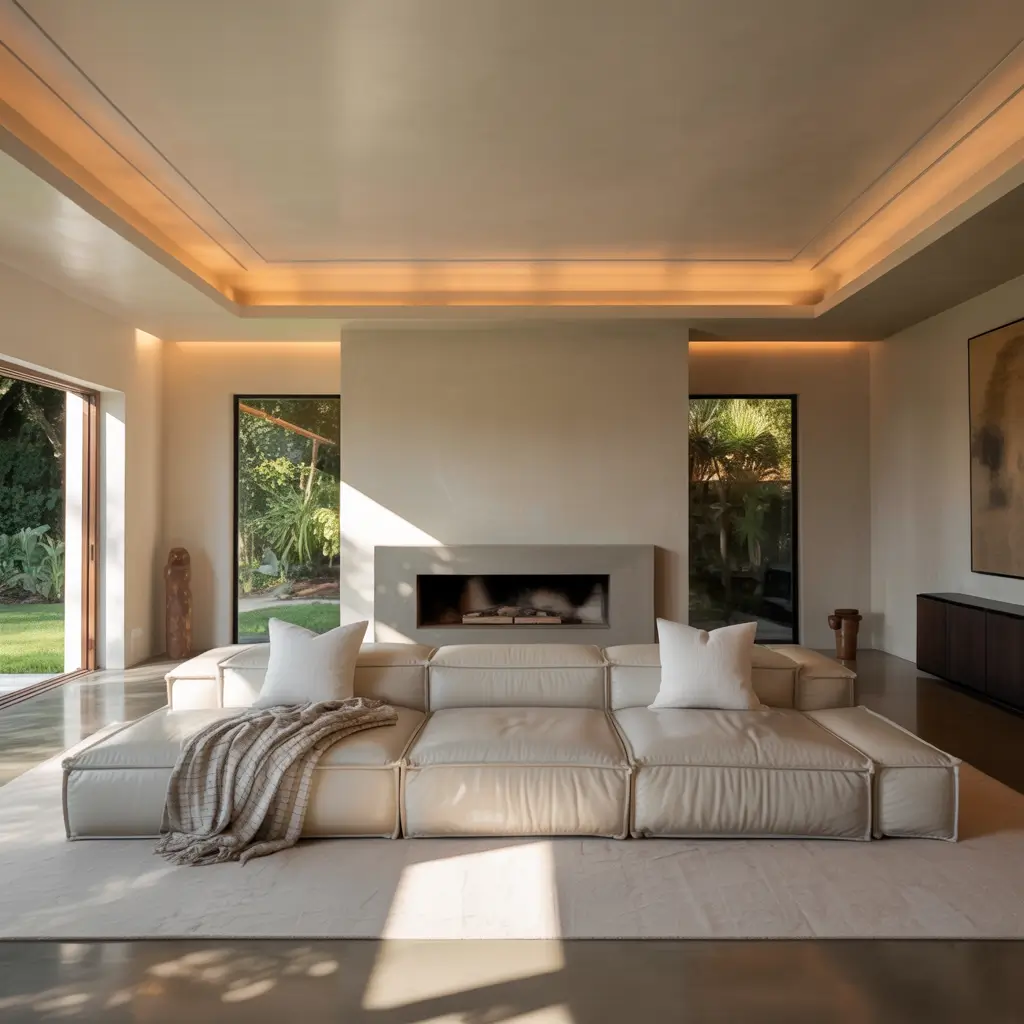
Layered cove ceilings create this incredible floating effect that makes your room feel taller and more sophisticated. I installed my first layered cove design in my living room, and the transformation was so dramatic that my neighbor asked if I’d knocked through to the apartment above.
The design works by creating stepped layers that recess into each other, with hidden LED strips between each layer. When you turn on the lights, each layer glows from behind, creating this ethereal floating effect that looks straight out of a luxury hotel. The best part? The whole installation took just a weekend with some help from YouTube University.
Making Layers Work for You
Start with a simple two-layer design if you’re new to this. My living room has three layers, but I probably should have started simpler. Each layer drops about 4 inches from the previous one, creating enough space for LED strips while maintaining proportion.
Plan your electrical work before installing anything. I learned this the hard way when I had to partially demolish my beautiful first layer to run wiring I’d forgotten about. Measure twice, install once – trust me on this one.
The finishing touch makes all the difference. Sand those edges until they’re smooth as butter, and use high-quality primer before painting. Any imperfection shows up dramatically when you backlight the layers, so take your time with the prep work.
2. Geometric Pattern Gypsum Ceiling
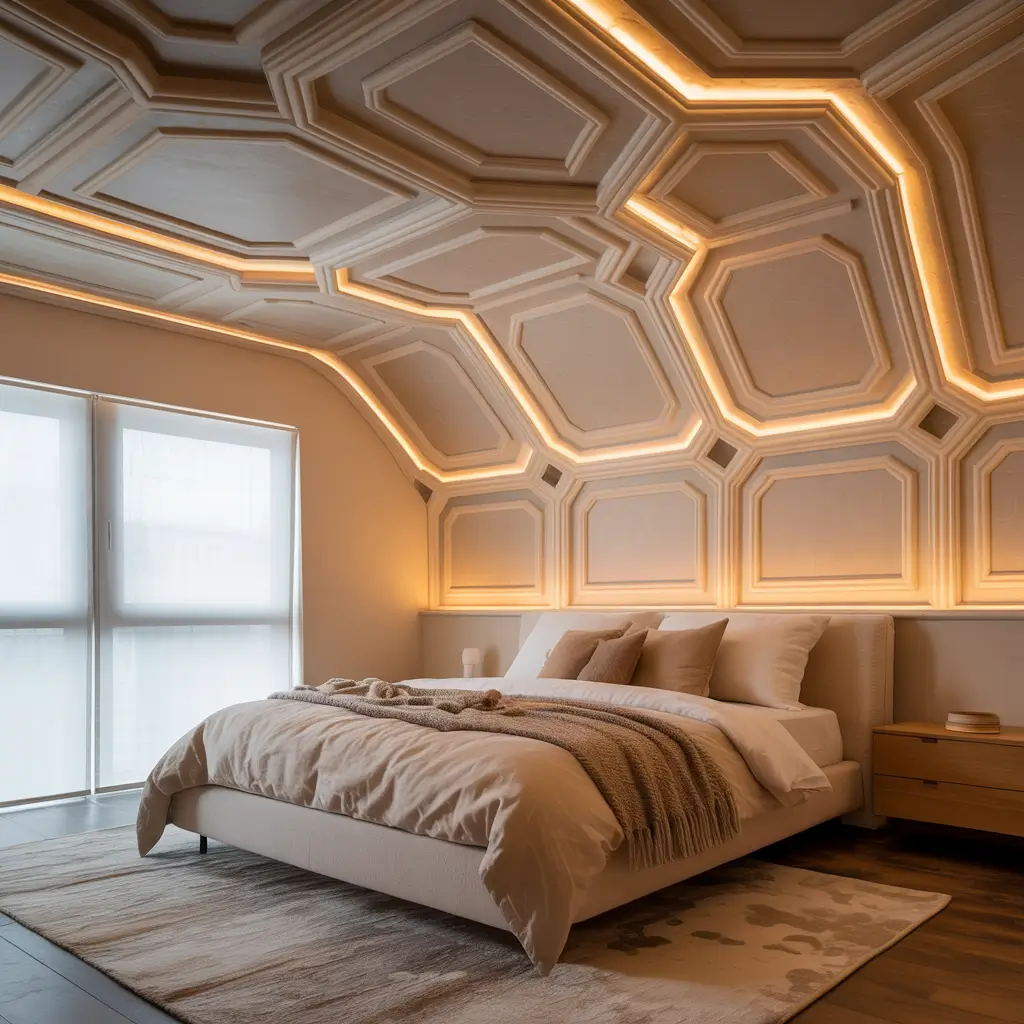
Geometric patterns turn boring ceilings into conversation starters. My home office features interlocking hexagons made from gypsum board, and every video call starts with someone asking about my ceiling. It’s become my signature background, and honestly, I love the attention.
The hexagon pattern creates visual interest without overwhelming the space. Each hexagon is slightly recessed with LED strips highlighting the edges, creating this honeycomb effect that’s both modern and timeless. The shadows play differently throughout the day, so the ceiling never looks the same twice.
Getting Your Geometry Right
Map out your pattern on paper first – seriously. I jumped straight into cutting hexagons and ended up with weird partial shapes at the edges that looked terrible. Graph paper and a ruler saved my second attempt.
Use templates for consistency. I made one perfect hexagon from cardboard and traced it for every piece. The uniformity makes the difference between professional and “my kid’s art project.” Each hexagon needs to be exactly the same size, or the pattern falls apart.
Consider the room’s dimensions when choosing your pattern. My 12×10 office fits seven complete hexagons perfectly. If your pattern requires partial shapes at the edges, either resize the shapes or reconsider the pattern entirely.
3. Modern Minimalist Gypsum Ceiling
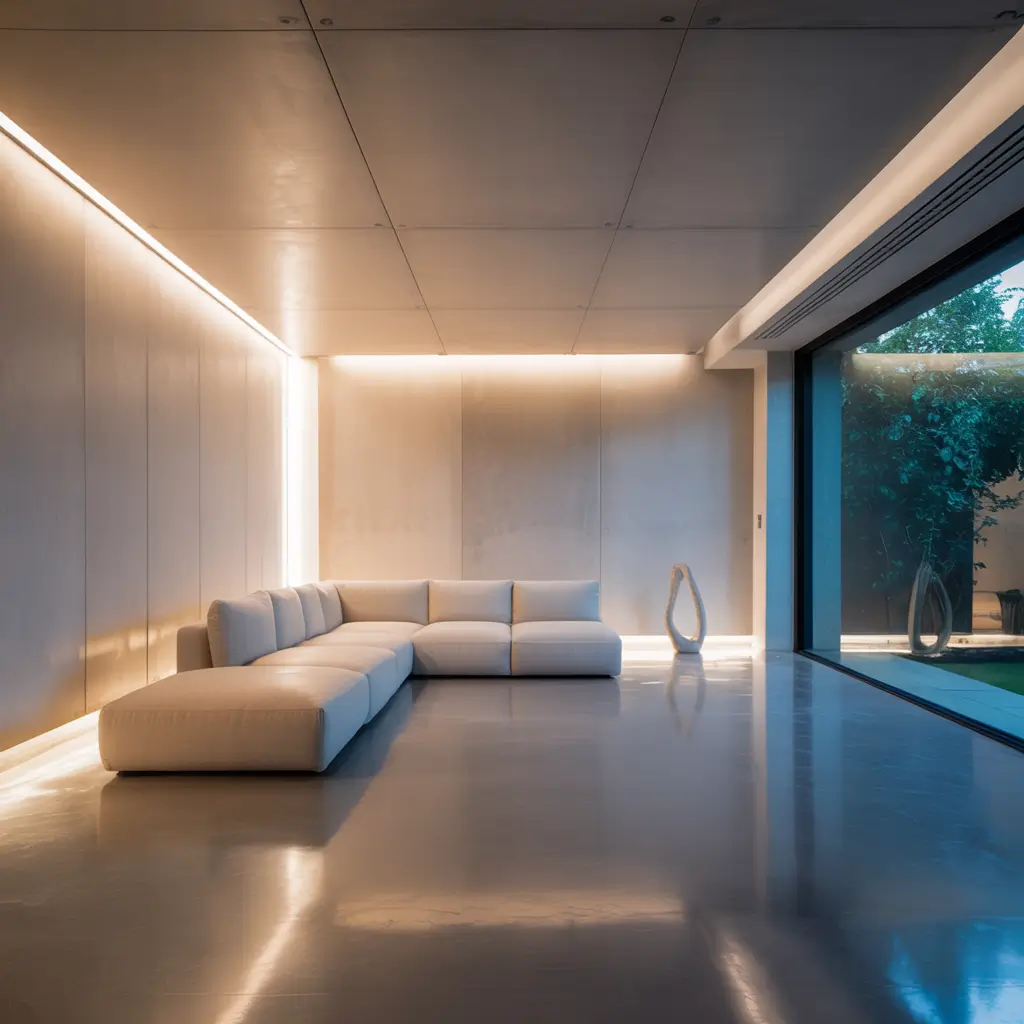
Minimalist gypsum ceilings prove that sometimes less really is more. My bedroom features a completely flat gypsum ceiling with recessed lighting and zero decoration, and it’s the most calming space in my house. No texture, no patterns, just pure, clean simplicity.
The key to minimalist gypsum design lies in the execution. Every surface needs to be perfectly smooth, every corner perfectly square, every light perfectly placed. It’s actually harder to achieve than elaborate designs because there’s nowhere for mistakes to hide.
Minimal Effort, Maximum Impact
Invest in quality finishing for minimalist designs. Level 5 finishing (the smoothest possible) costs more but delivers that magazine-worthy look. My contractor initially suggested Level 4 to save money, but the difference in appearance justified the extra cost.
Lighting placement becomes crucial with minimal designs. I spent hours planning where each recessed light would go, creating zones for different activities without cluttering the ceiling with fixtures. The result feels intentional and sophisticated.
Choose warm white paint over pure white. Pure white can feel harsh and clinical with minimalist design. I used a warm white with the tiniest hint of gray, and it adds just enough warmth without compromising the clean aesthetic.
Also Read: 12 Brilliant Luxury Ceiling Design Ideas for Modern Interiors
4. Circular Dome Gypsum Ceiling
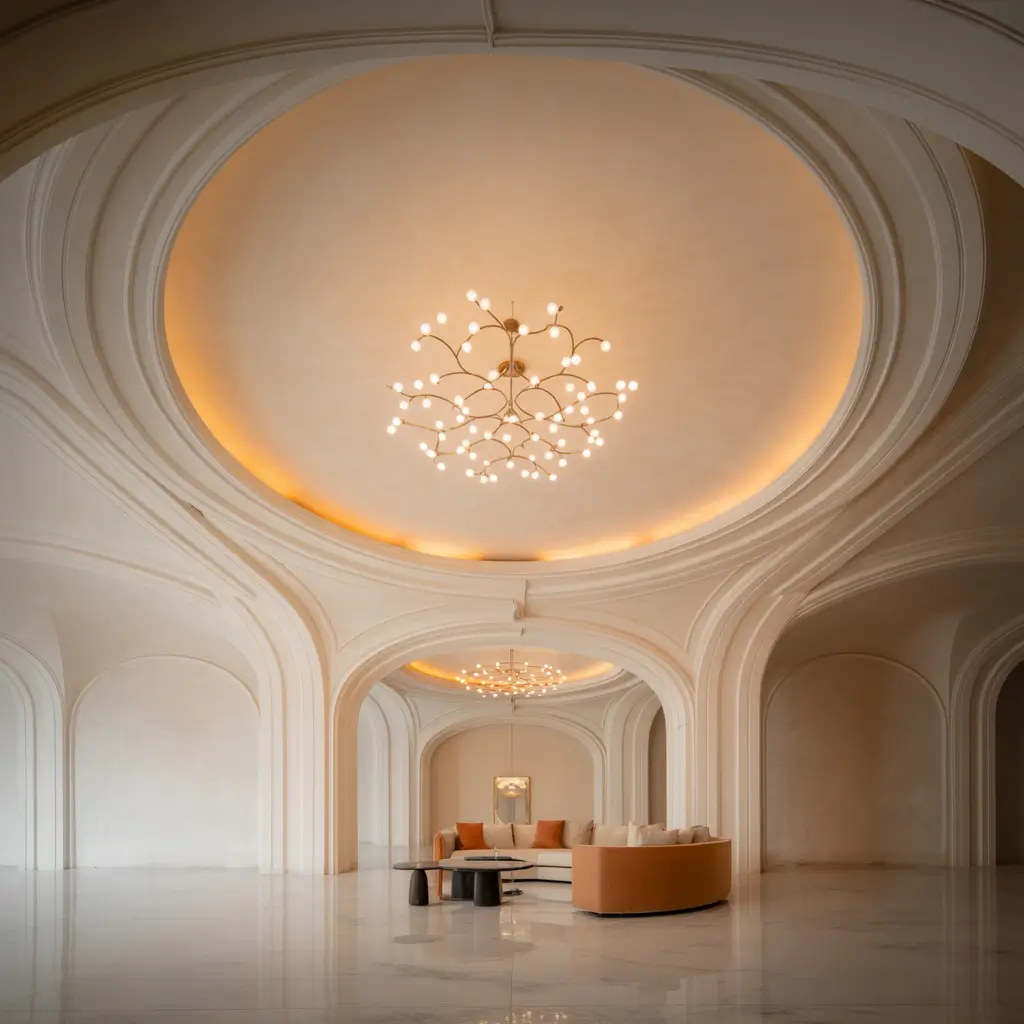
Circular domes add elegance that transforms ordinary rooms into extraordinary spaces. My dining room features a shallow gypsum dome that rises just 12 inches at the center, but it makes the room feel like a private dining club.
The dome creates a natural focal point for a chandelier while adding architectural interest that flat ceilings can’t match. The curved surface plays with light beautifully, creating gradients and shadows that change with the sun’s position.
Doming It Yourself
Start with a shallow dome for your first attempt. Deep domes require more complex framing and increase the chance of cracks. My 8-foot diameter dome rises just 12 inches – enough for visual impact without structural complications.
Build a proper frame before applying gypsum. I used flexible plywood bent into a dome shape as my base. Trying to create a dome with gypsum alone leads to disaster (ask me how I know). The frame provides the structure; gypsum provides the finish.
FYI, domes can affect room acoustics. My dining room dome actually improved conversation by directing sound back down to the table. Happy accident, but now I consider acoustics in all my ceiling designs.
5. LED Backlit Gypsum Panels
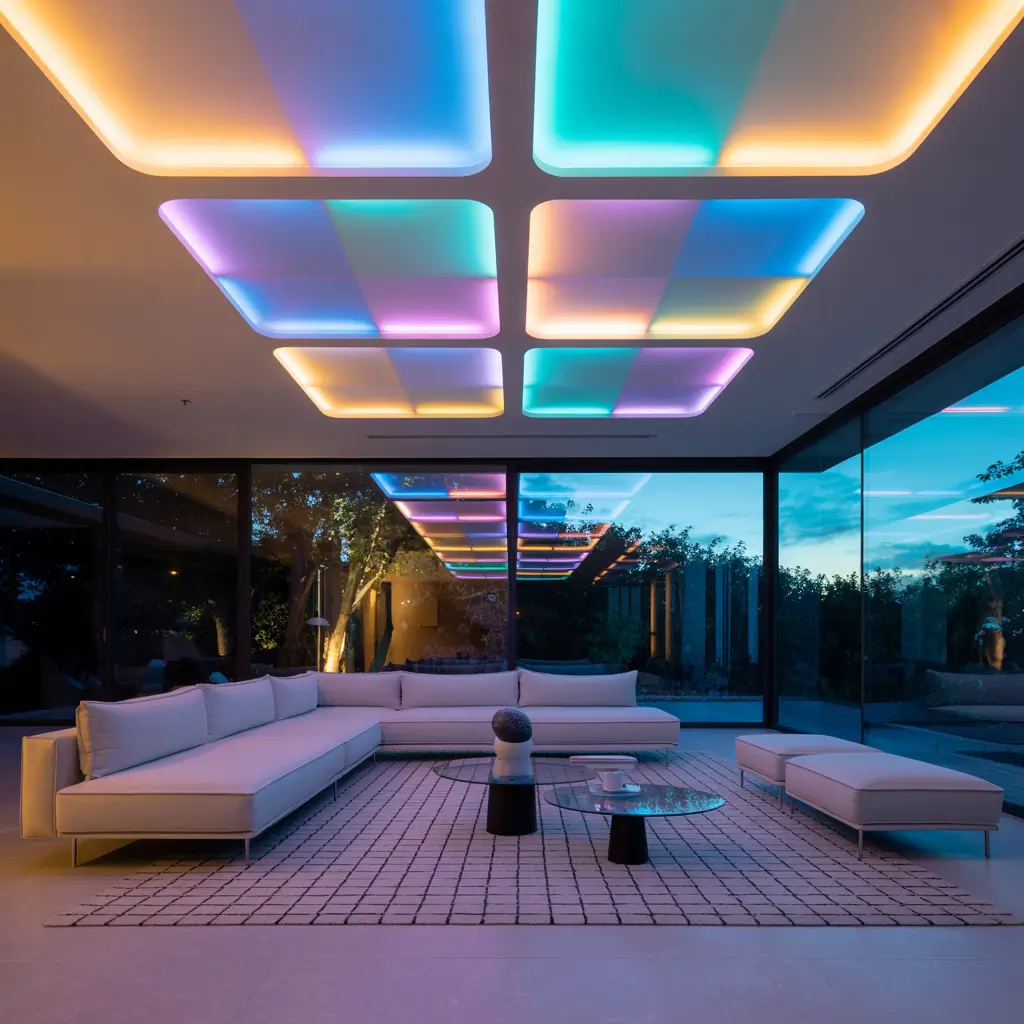
Backlit gypsum panels create ambient lighting that makes every room feel like a spa. I installed these in my bathroom, and now my morning routine feels like a luxury hotel experience. The soft, even light eliminates harsh shadows and makes everyone look better (crucial for those early morning video calls).
The panels consist of thin gypsum sheets with LED panels behind them. The gypsum diffuses the light perfectly, creating this glowing surface with no visible bulbs or hot spots. It’s like having a window to heaven in your ceiling.
Lighting Up Your Life
Choose the right thickness for your gypsum panels. Too thick and the light won’t penetrate evenly. Too thin and you’ll see the LED grid. I use 12mm panels – thick enough to diffuse light perfectly but thin enough for good illumination.
Install dimmer switches – non-negotiable for backlit panels. The ability to adjust brightness transforms the space from bright workspace to relaxing retreat. My bathroom goes from surgery-bright for grooming to candlelight-soft for evening baths.
Consider color-changing LEDs for ultimate flexibility. I initially thought this was gimmicky, but being able to shift from cool daylight to warm sunset colors actually helps regulate my sleep cycle. Science meets design!
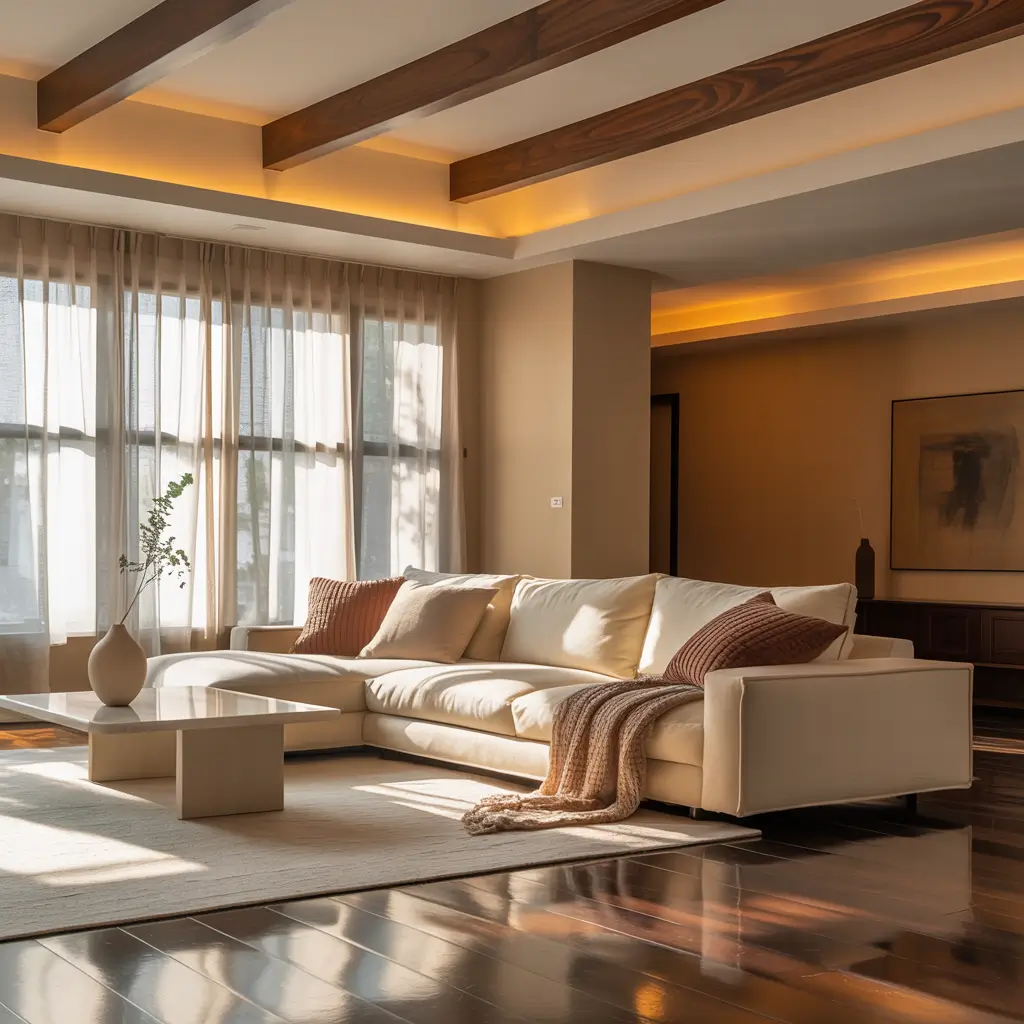
6. Wooden Accent Gypsum Ceiling
Combining wood accents with gypsum creates warmth that pure gypsum can’t achieve alone. My family room features gypsum panels with oak wood beam accents, bringing together modern convenience with rustic charm.
The gypsum provides a smooth, paintable surface while the wood beams add character and visual weight. It’s like getting the best of both worlds – the ease of gypsum installation with the timeless appeal of wood.
Wood You Believe It Works
Use faux wood beams if weight is a concern. Real wood beams are heavy and expensive. I used hollow polyurethane beams that look identical to solid oak but weigh practically nothing. The gypsum ceiling easily supports them.
Create a grid pattern for maximum impact. My ceiling has two longitudinal beams and three cross beams, creating six defined sections. Each section has subtle LED uplighting that highlights both the smooth gypsum and textured wood.
Stain your beams before installation. Trying to stain beams on the ceiling is a nightmare of drips and uneven coverage. I learned this the messy way – stain everything on the ground, then install.
Also Read: 10 Modern POP False Ceiling Design Ideas for Living Rooms
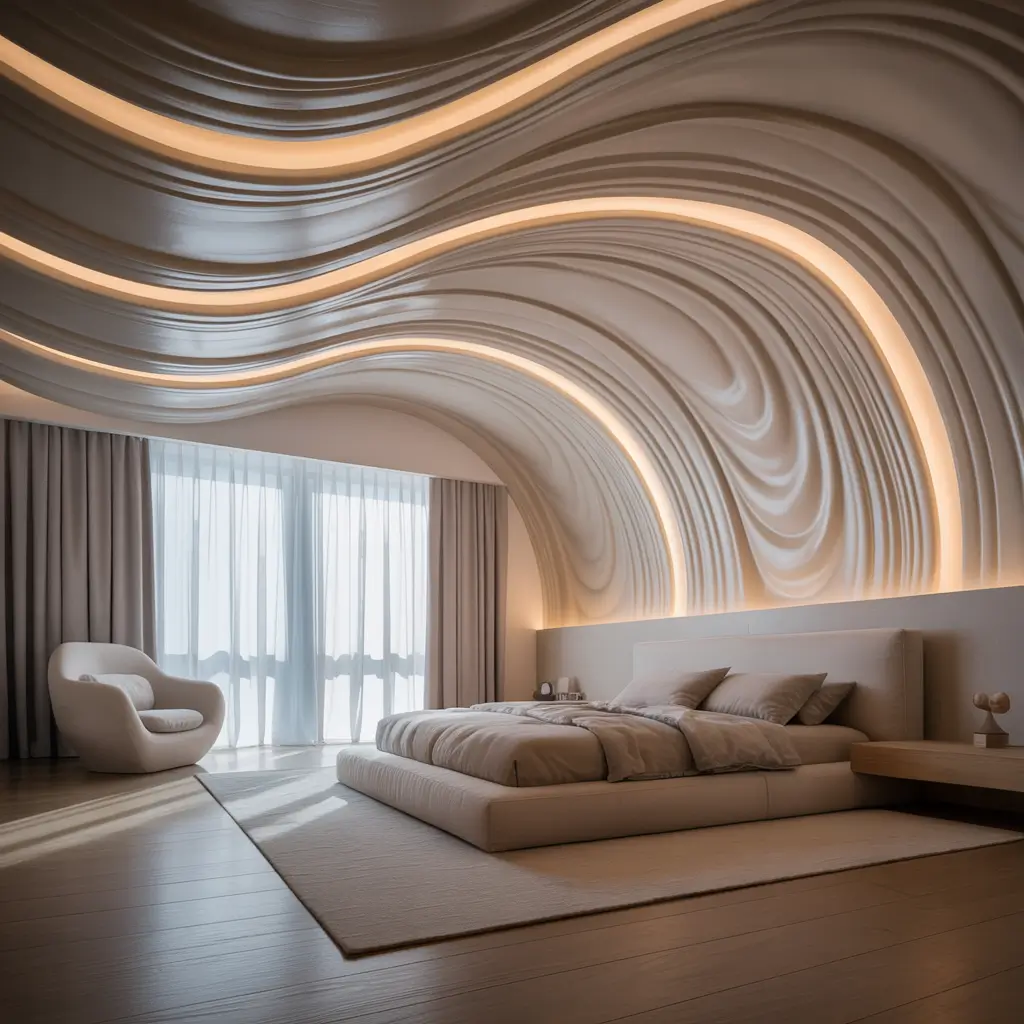
7. 3D Wave Gypsum Design
3D wave designs turn ceilings into sculptural art. My daughter’s room features gentle waves flowing across the ceiling, and she tells everyone she sleeps under the ocean. The organic curves soften the boxy room and create movement that static ceilings can’t match.
Creating waves in gypsum requires patience and the right technique. The material bends when wet, allowing you to create flowing forms that would be impossible with rigid materials. Each wave catches light differently, creating an ever-changing landscape overhead.
Making Waves Successfully
Start with gentle waves for your first attempt. My first design looked more like mountain ranges than ocean waves because I went too dramatic. Subtle undulations create elegance; dramatic peaks create chaos.
Use flexible gypsum board for easier installation. Regular gypsum can be scored and bent, but flexible boards make the process much simpler. The extra cost saves hours of frustration and delivers better results.
Plan your wave direction based on room traffic. My waves flow from the door toward the window, naturally guiding movement through the space. Random waves look exactly that – random and unintentional.
8. Floral Motif Gypsum Ceiling

Floral motifs add romantic elegance that transforms bedrooms into retreats. My master bedroom features carved gypsum roses around a central medallion, and it feels like sleeping in a boutique hotel.
The flowers aren’t just surface decoration – they’re carved into the gypsum itself, creating depth and shadow that painted designs can’t match. Each petal catches light differently, making the ceiling look different throughout the day.
Flowering Ceilings
Choose your floral scale carefully. Tiny flowers disappear from floor level. Massive blooms overwhelm. My roses are about 8 inches diameter – visible from below but not overwhelming the 14×16 room.
Consider using molds for repeated patterns. Hand-carving each flower takes forever and rarely matches. I bought silicone molds and cast identical roses in gypsum. The consistency looks professional rather than homemade.
IMO, less is more with floral designs. I have five roses total – one center and four corners. My friend did her entire ceiling in flowers, and it looks like wallpaper exploded overhead :/
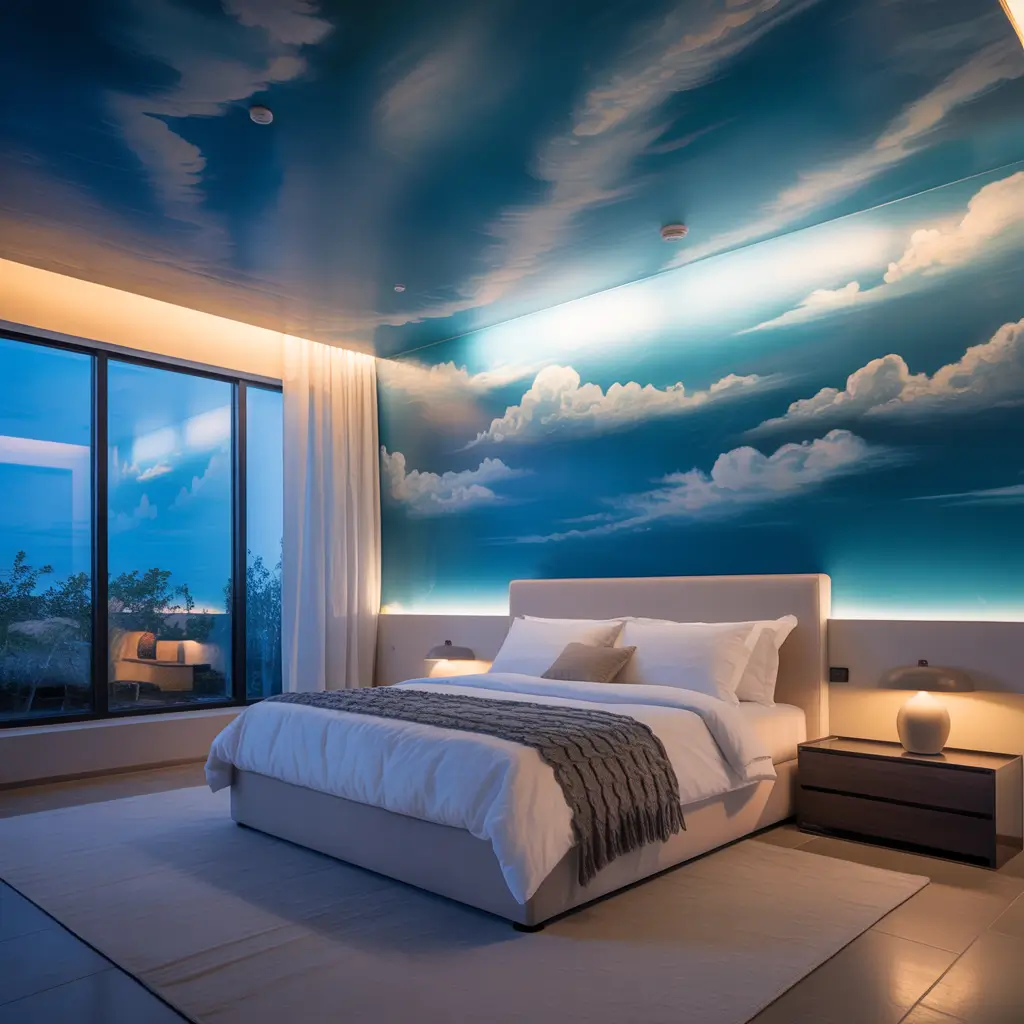
9. Sky-Inspired False Ceiling
Sky-inspired ceilings bring the outdoors in through clever gypsum work and painting. My son’s room features a cloud-filled sky complete with hidden color-changing LEDs that shift from sunrise to sunset throughout the day.
The clouds are built up from layers of gypsum, creating actual 3D formations rather than flat paintings. The texture adds realism that makes the illusion surprisingly convincing, especially with the right lighting.
Creating Your Indoor Sky
Build cloud formations in layers for realistic depth. I started with basic shapes and added smaller pieces for detail. Real clouds have layers and depth – your ceiling clouds should too.
Use graduated blue paint for authentic sky color. Dark blue at the edges fading to light blue in the center creates the illusion of atmospheric depth. One flat blue color looks like a painted ceiling, not sky.
Hide LED strips within cloud formations. The lights shining through and around the clouds create that ethereal backlit effect you see in real skies. Morning settings use cool whites; evening uses warm oranges.
Also Read: 10 Inspiring Ceiling Design Living Room Ideas for Every Style
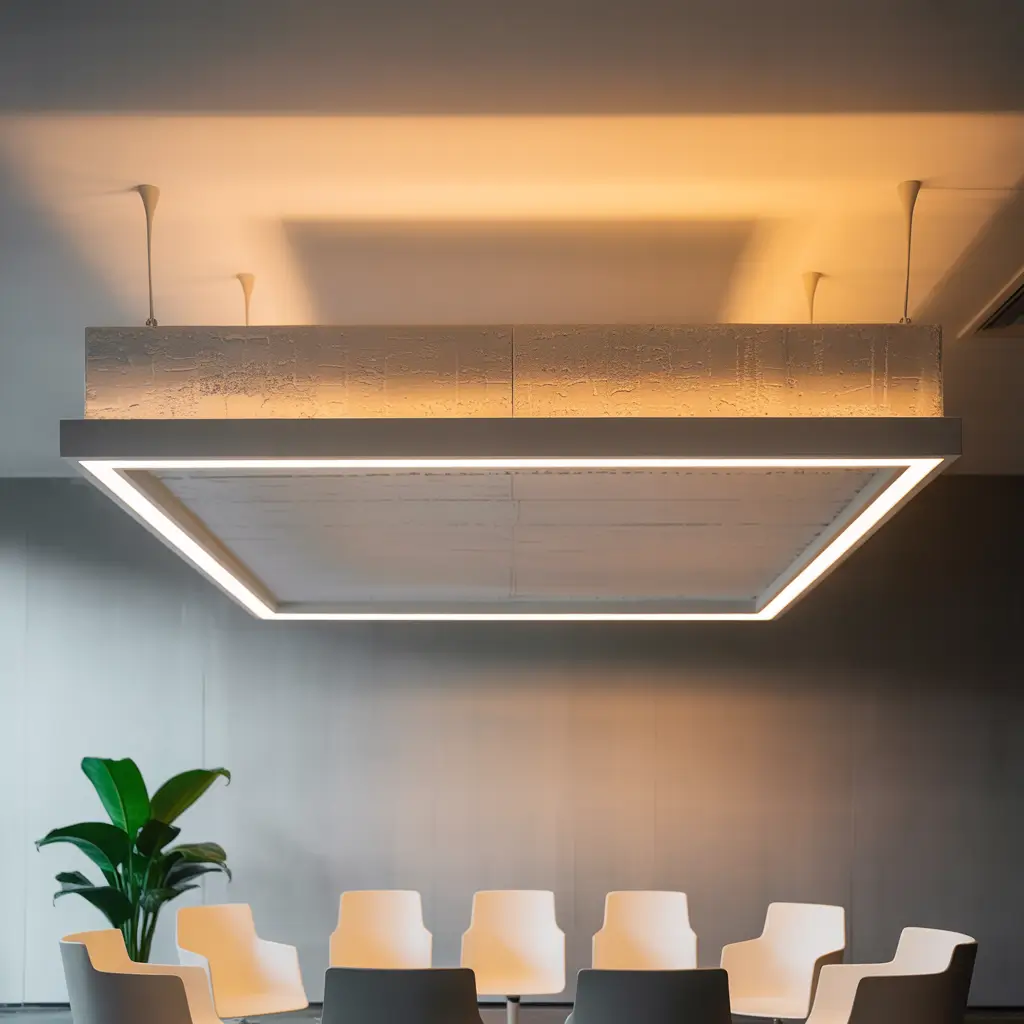
10. Floating Rectangle Gypsum Panels
Floating rectangular panels create modern sophistication that makes rooms feel larger and more dynamic. My open-concept living space has three floating rectangles at different heights, each defining a different zone without walls.
The panels appear to defy gravity, suspended from hidden mounting points with LED perimeter lighting that enhances the floating effect. Visitors always ask how they stay up – the illusion never gets old.
Making Rectangles Float
Size panels according to furniture placement below. My largest panel (8×10 feet) floats over the seating area, creating an intimate zone within the larger space. Random sizing looks exactly that – random.
Vary heights for visual interest. My three panels hang at 6, 9, and 12 inches from the main ceiling. The staggered heights create movement and prevent the static look of uniform drops.
Use panels to hide mechanicals stylishly. Each of my panels conceals something – speakers, projector, AC vents. They look decorative but serve serious functional purposes. Form meets function at its finest.
Wrapping Up Your Gypsum Journey
There you have it – ten gypsum ceiling designs that prove this versatile material can do pretty much anything you imagine.
From simple minimalist planes to elaborate 3D sculptures, gypsum adapts to any style, budget, or skill level.
The best part about working with gypsum? It’s forgiving. Made a mistake? Sand it down and try again. Want to change the design later? Gypsum modifications are totally doable.
This isn’t like structural changes where you’re stuck with your choices forever.
Start with whichever design speaks to you, but start simple if you’re new to this. My journey began with a basic flat ceiling and evolved into increasingly complex designs as my confidence grew.
Every project taught me something new, and honestly, the learning process was as rewarding as the results.
Your ceiling doesn’t have to be that boring white surface you ignore. With gypsum and a little creativity, it can become the feature that defines your entire room.
So look up, dream big, and remember – if I can do this, you definitely can too. Happy ceiling transformation! 🙂


