10 Delightful Minimal Birthday Decor Ideas and Subtle Charm
- Birthday Decor
 Ben
Ben- 0
- 25 minutes read

You know that feeling when you walk into a party and everything just feels… right? Not overwhelming, not chaotic, just perfectly balanced and effortlessly beautiful? That’s the magic of minimal birthday decor, and honestly, it’s become my absolute obsession lately.
I used to be that person who thought “more is more” when it came to party planning. Glitter everywhere, balloons covering every surface, decorations that practically screamed for attention. But after hosting one too many parties that left me exhausted and my guests looking slightly shell-shocked, I discovered the art of subtle celebration. Trust me, your future self (and your wallet) will thank you for this approach.
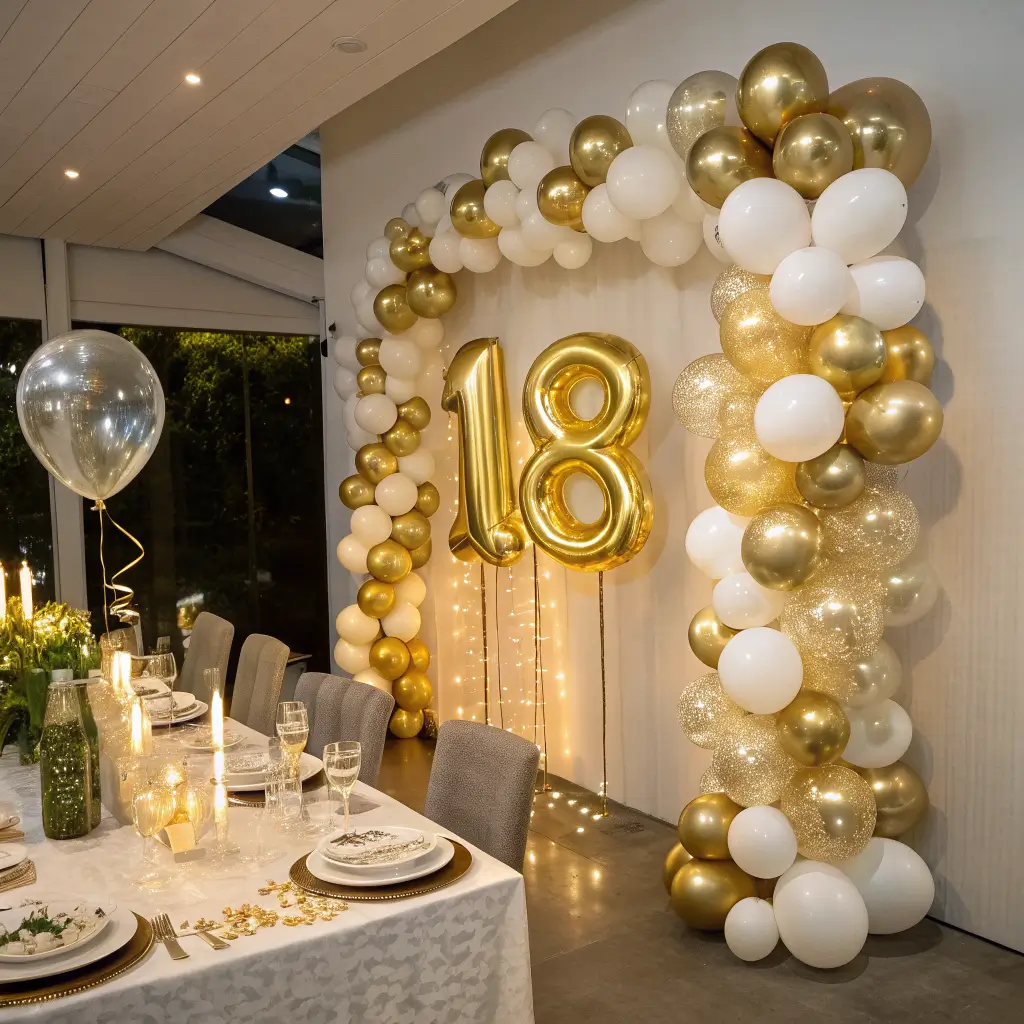
Neutral Balloon Arch Setup
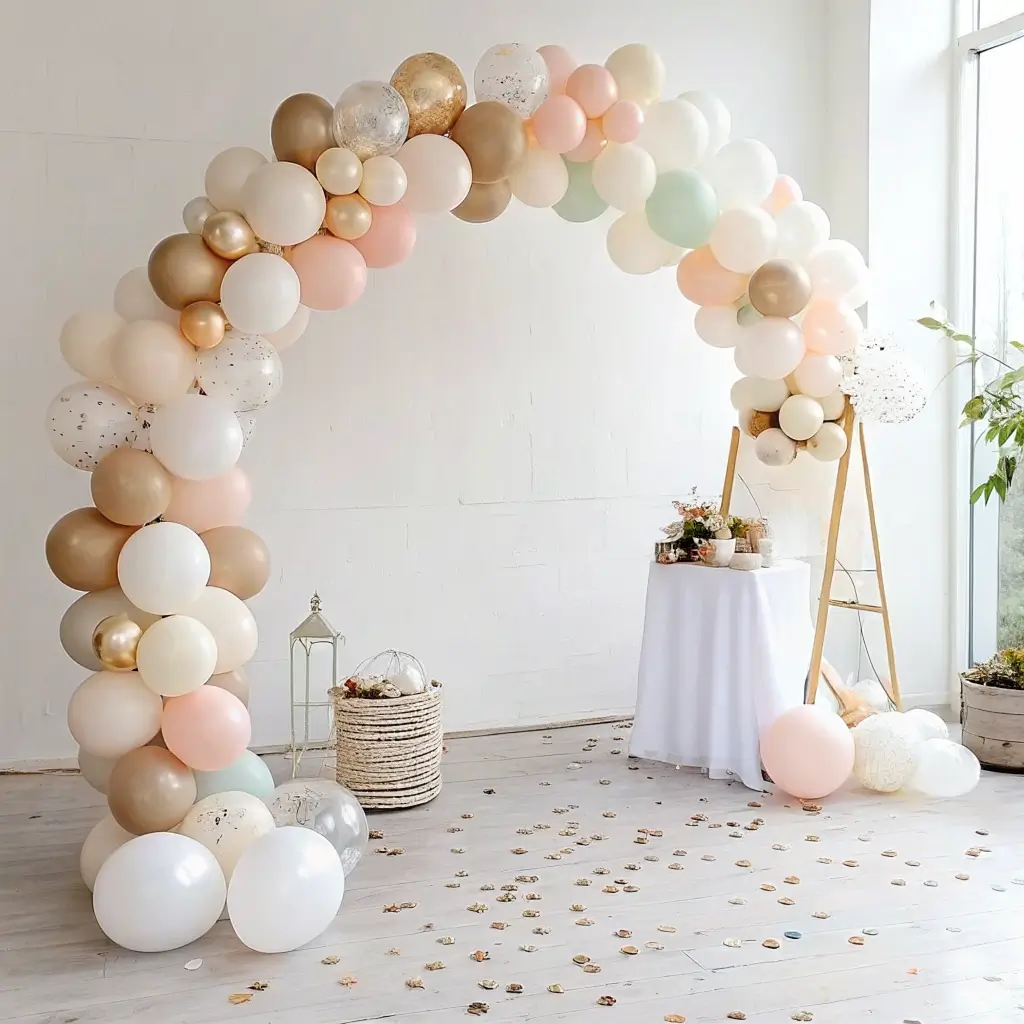
Let’s start with something that sounds fancy but is surprisingly doable – the neutral balloon arch. I’m talking about those Instagram-worthy setups that make everyone go “wow” without looking like a unicorn exploded in your living room.
The Beauty of Going Neutral
Forget the rainbow chaos. Stick to a palette of whites, creams, soft grays, and maybe a hint of sage green or dusty pink. These colors photograph beautifully and won’t clash with your existing decor (because let’s be real, who has time to redecorate their entire house for a birthday party?).
I learned this the hard way when I once created a neon pink and orange balloon arch that made my dining room look like a traffic cone convention. The photos were… interesting, to say the least 🙂
DIY Magic Without the Stress
You don’t need to be a balloon artist to pull this off. Here’s what actually works:
• Start with different sizes – mix 11-inch, 9-inch, and 5-inch balloons for visual interest
• Use a balloon decorating strip – this plastic strip with holes is a game-changer
• Add some greenery – eucalyptus or ivy woven through creates that organic, effortless look
• Keep it asymmetrical – perfect symmetry screams “trying too hard”
The key is making it look like you casually threw together this masterpiece in five minutes, even though we both know you spent an hour watching YouTube tutorials.
Monochrome Table Setting
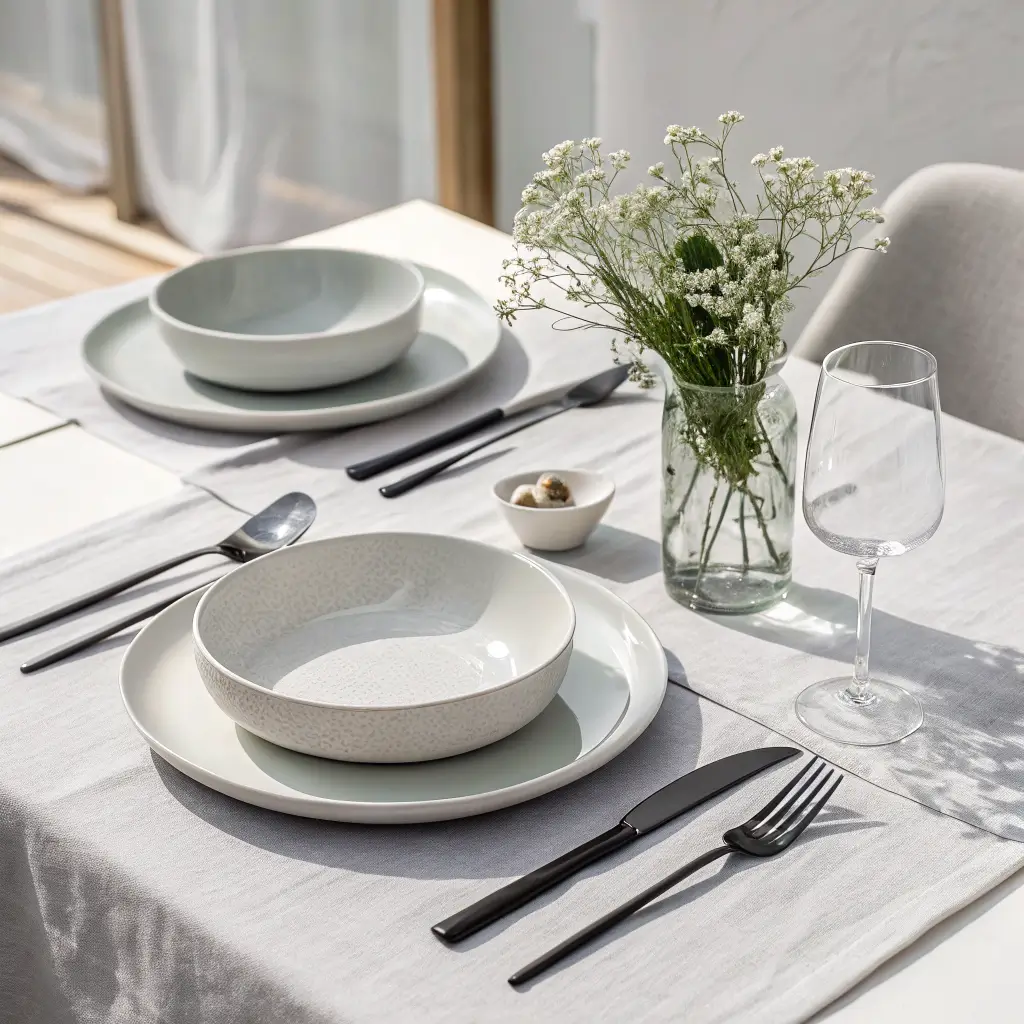
Ever wondered why some table settings just look more expensive than others? It’s usually because they stick to one color family and let texture do the talking.
The Power of One Color
Pick one color – let’s say soft gray – and run with it. Gray plates, gray napkins, gray tablecloth. Sounds boring? Think again. When you layer different shades and textures of the same color, you create depth that’s way more sophisticated than a rainbow explosion.
I once did an all-white table setting for my friend’s 30th, and people kept asking where I rented the fancy dinnerware. Plot twist: half of it came from Target, and the other half was borrowed from three different friends. The magic was in the cohesive color story.
Texture is Your Best Friend
This is where things get interesting:
• Mix materials – combine matte and glossy finishes
• Play with patterns – subtle stripes with solid colors
• Add natural elements – wooden chargers or linen napkins
• Include one metallic accent – maybe silver cutlery or gold-rimmed glasses
The goal is to create visual interest without visual chaos. Your guests should feel relaxed, not like they’re dining in a museum.
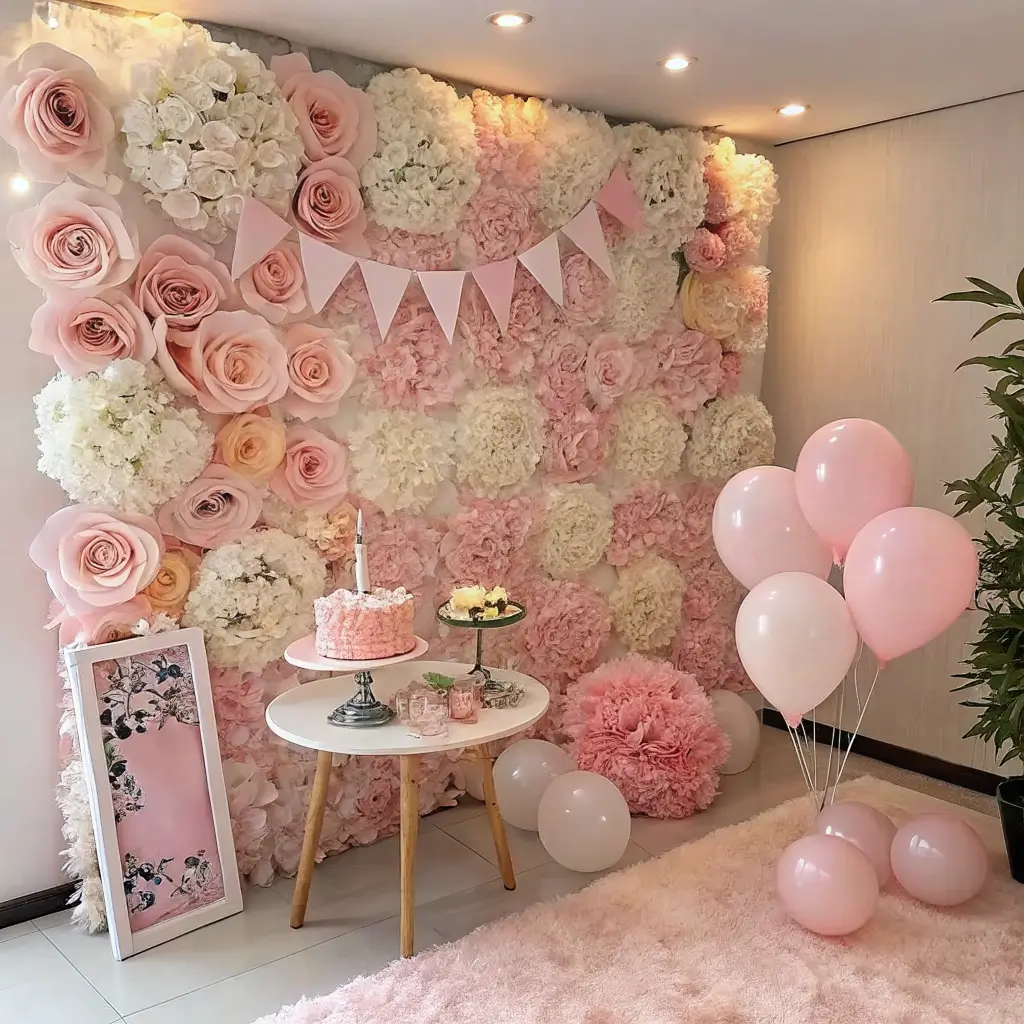
Minimal Floral Centerpieces
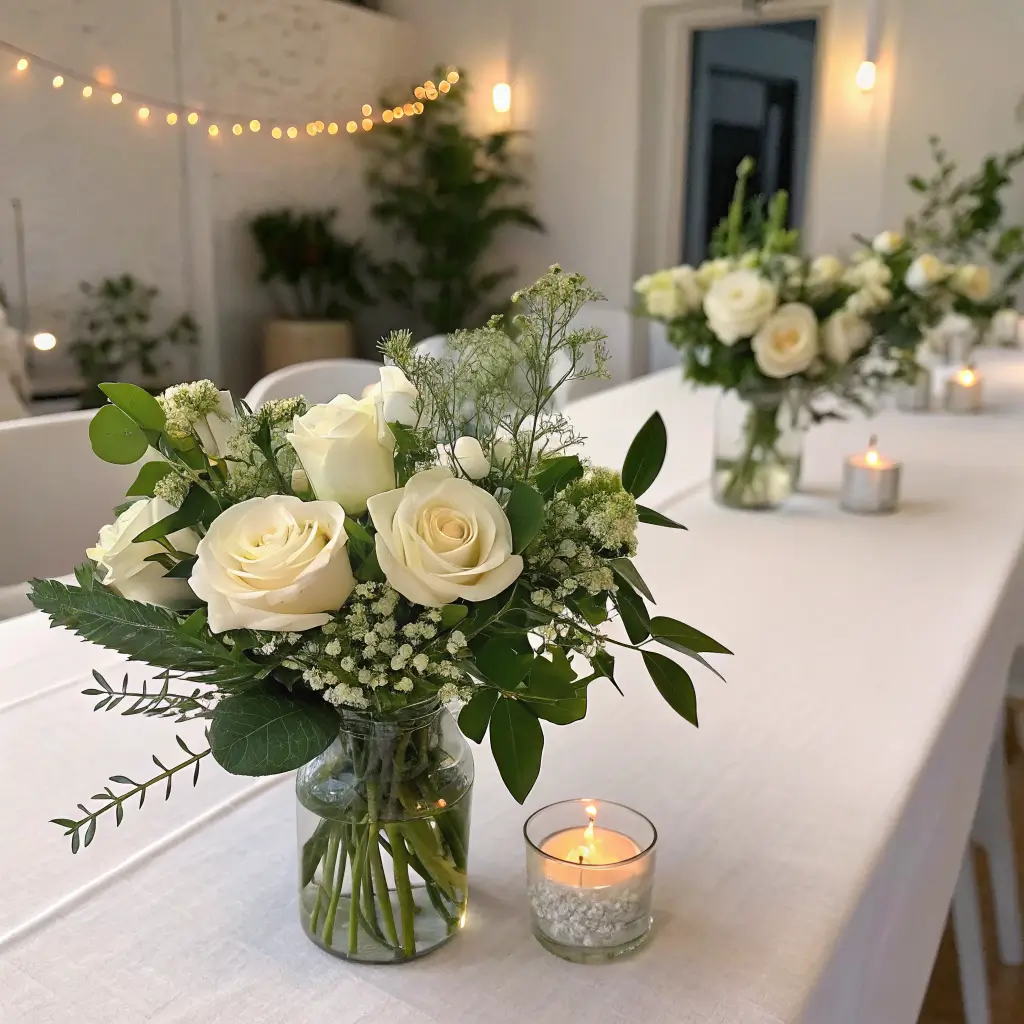
Flowers are beautiful, but giant arrangements that block conversation? Not so much. Let’s talk about centerpieces that enhance the vibe without dominating the table.
Less is Definitely More
I’m talking about single-stem arrangements or small clusters that don’t require guests to play peek-a-boo across the table. Think three white roses in a simple glass vase, or a handful of eucalyptus branches in a ceramic pitcher.
Budget-Friendly Flower Hacks
FYI, you don’t need to blow your budget at the fancy florist:
• Shop grocery stores – their flower sections are surprisingly good
• Use greenery as filler – it’s cheaper and lasts longer
• Repurpose household items – mason jars, wine bottles, even coffee mugs can work
• Go seasonal – whatever’s in season will be cheaper and look more natural
I once created stunning centerpieces using baby’s breath (super cheap) and vintage milk bottles I found at a thrift store. Total cost per centerpiece? About three dollars. The compliments? Priceless.
Also Read: 10 Fabulous Aesthetic Birthday Decor Ideas for Memorable Events
Simple DIY Banner Display
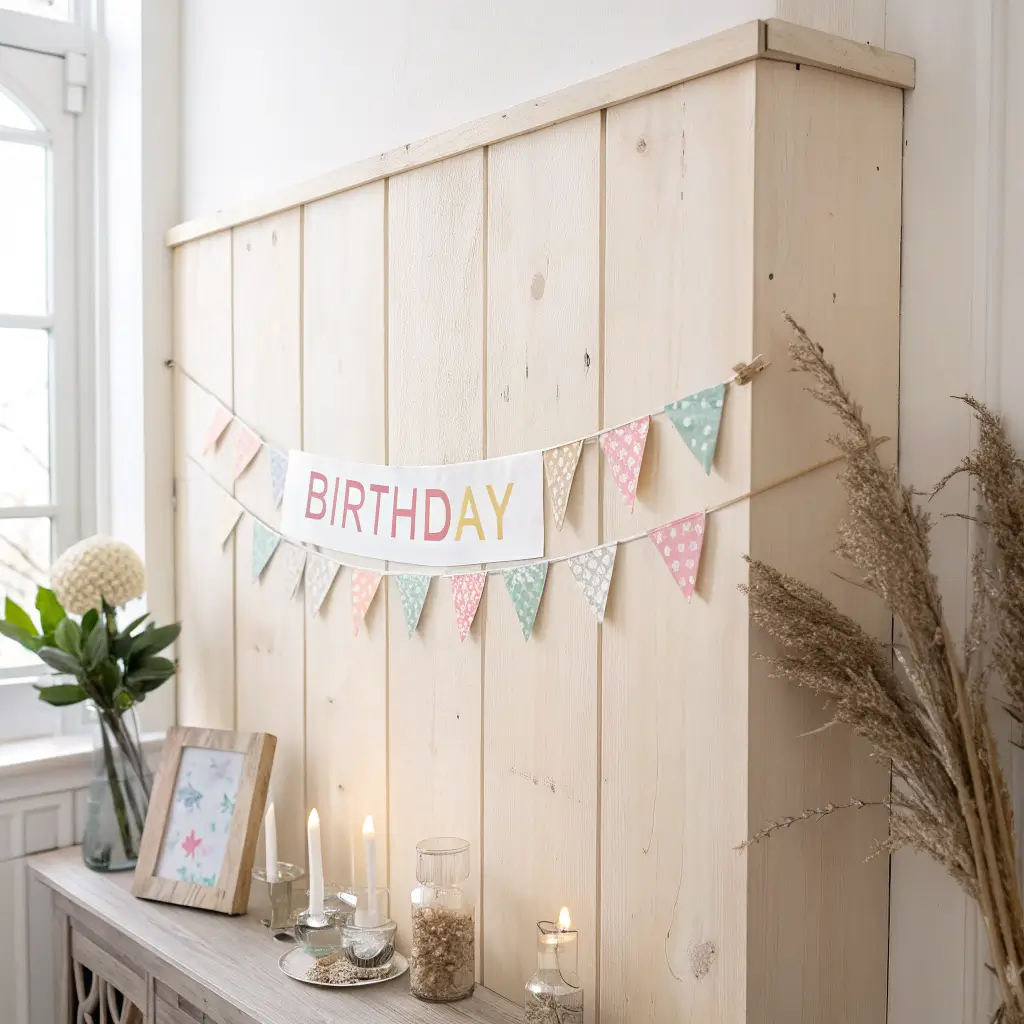
Banners can either look charming or like a craft store exploded. The difference is in the execution and, honestly, knowing when to stop.
The Art of Subtle Celebration
Skip the glittery “HAPPY BIRTHDAY” banner that screams from across the room. Instead, think understated elegance. A simple “Celebrate” in beautiful script, or even just the birthday person’s age in elegant numbers.
Materials That Actually Look Good
Here’s what works without looking like a kindergarten project:
• Quality cardstock – not construction paper, please
• Natural twine or ribbon – avoid anything too shiny
• Simple fonts – script or clean sans-serif
• Neutral colors – stick to your overall palette
I made a banner using kraft paper and white lettering for my sister’s birthday, and it looked so good that she kept it up for weeks afterward. Sometimes simple really is better.
Pastel Dessert Table Arrangement
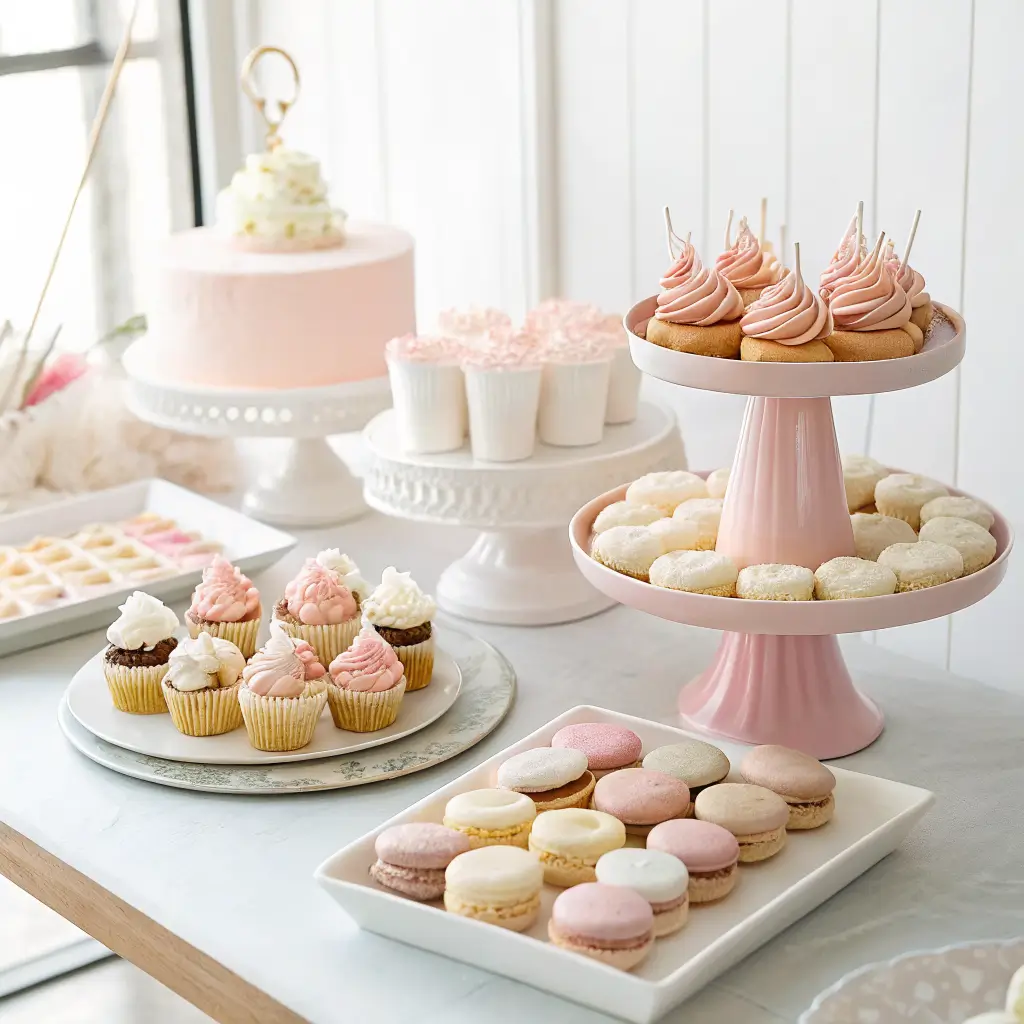
Dessert tables can easily become overwhelming sugar-coated disasters. But when done right, they’re the perfect focal point that doesn’t give your guests instant diabetes just by looking at it.
Color Coordination is Key
Choose 2-3 pastel colors and stick to them religiously. Soft pink, cream, and maybe a hint of lavender. This creates a cohesive look that’s Instagram-ready without being too precious.
Height and Visual Interest
The secret sauce is varying heights and textures:
• Use cake stands – different heights create visual drama
• Mix serving pieces – combine glass, ceramic, and wood
• Add non-food elements – small plants or candles between treats
• Keep it organized – group similar items together
I learned this lesson when I once created a dessert table that looked like a bakery had a nervous breakdown. Now I plan the layout before I start baking, and the results are so much better.
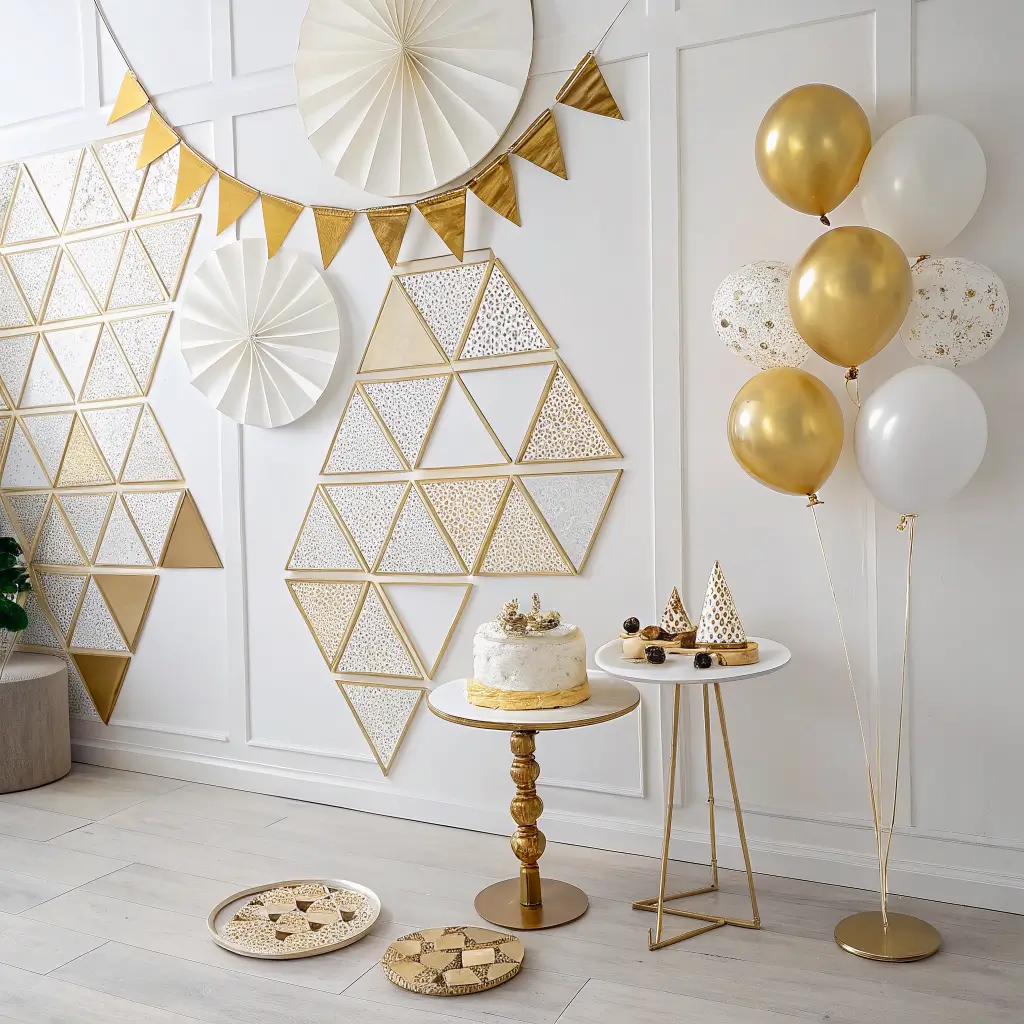
Modern Geometric Wall Decor
Wall decor can transform a space, but it doesn’t have to involve complicated installations or damage your security deposit.
Temporary but Impactful
Think removable wall decals, washi tape designs, or paper cutouts that create geometric patterns. The key is choosing shapes and colors that complement your overall theme.
DIY Geometric Magic
You don’t need to be an artist to create stunning wall decor:
• Use painter’s tape – create triangles, diamonds, or hexagons
• Paper cutouts – geometric shapes in your color palette
• Removable decals – invest in quality ones that won’t damage walls
• String art – simple geometric patterns with colored string
I once created a stunning backdrop using nothing but white paper triangles and double-sided tape. It took an hour to put up and looked like I hired a professional designer. The secret? I planned the pattern on paper first.
Also Read: 10 Easy Birthday Decor Ideas and Quick DIY Hacks
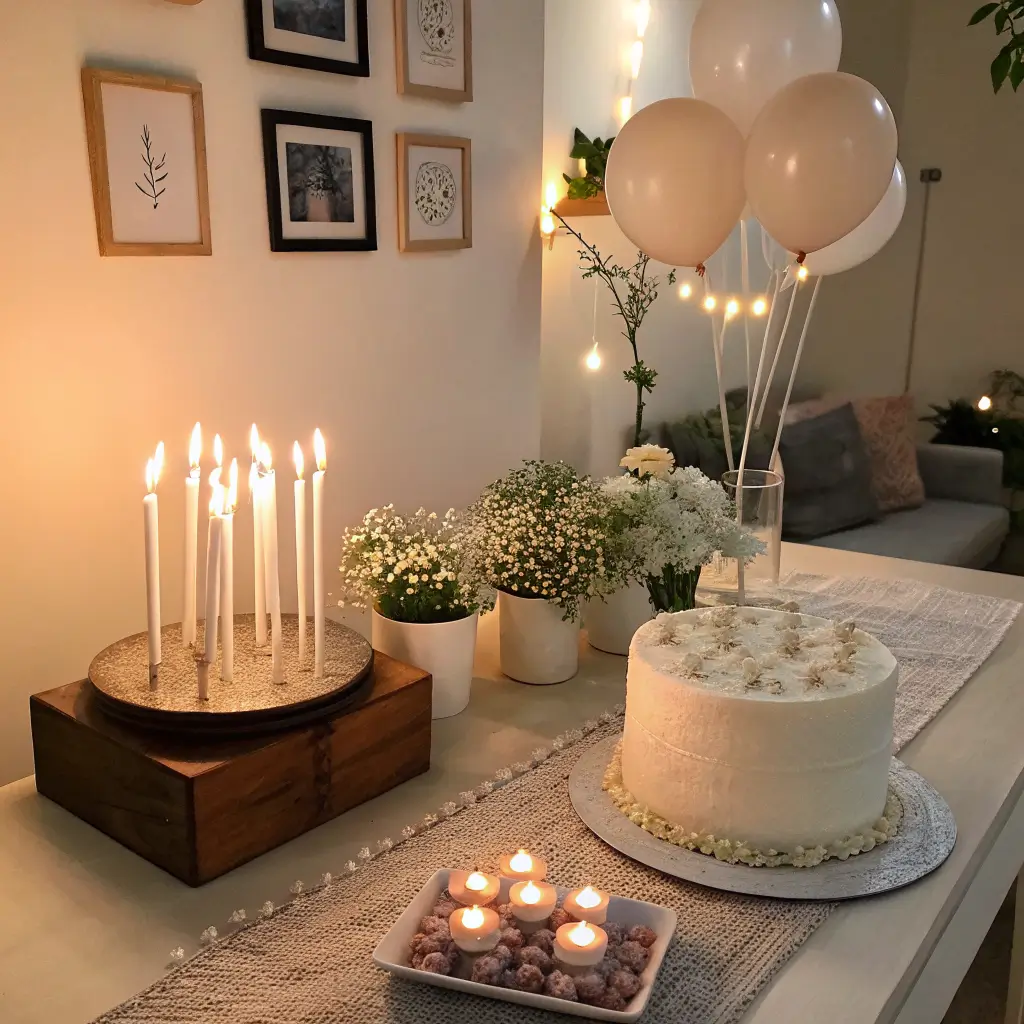
Minimal Candlelight Ambiance
Lighting can make or break a party atmosphere, and candles are the easiest way to create instant ambiance without rewiring your house.
The Warm Glow Effect
Candles create that magical warm lighting that makes everyone look better and feel more relaxed. But we’re not talking about a fire hazard situation here – just strategic placement of beautiful candles.
Safety Meets Style
Here’s how to do candlelight right:
• Use varying heights – pillar candles, votives, and tea lights
• Stick to unscented – you don’t want competing with food aromas
• Choose neutral colors – white, cream, or soft gray
• Consider LED alternatives – for areas where real flames aren’t practical
IMO, the best candle setup I ever created used white pillar candles of different heights grouped on a wooden tray. Simple, elegant, and nobody worried about setting anything on fire.
Elegant Gift Table Styling
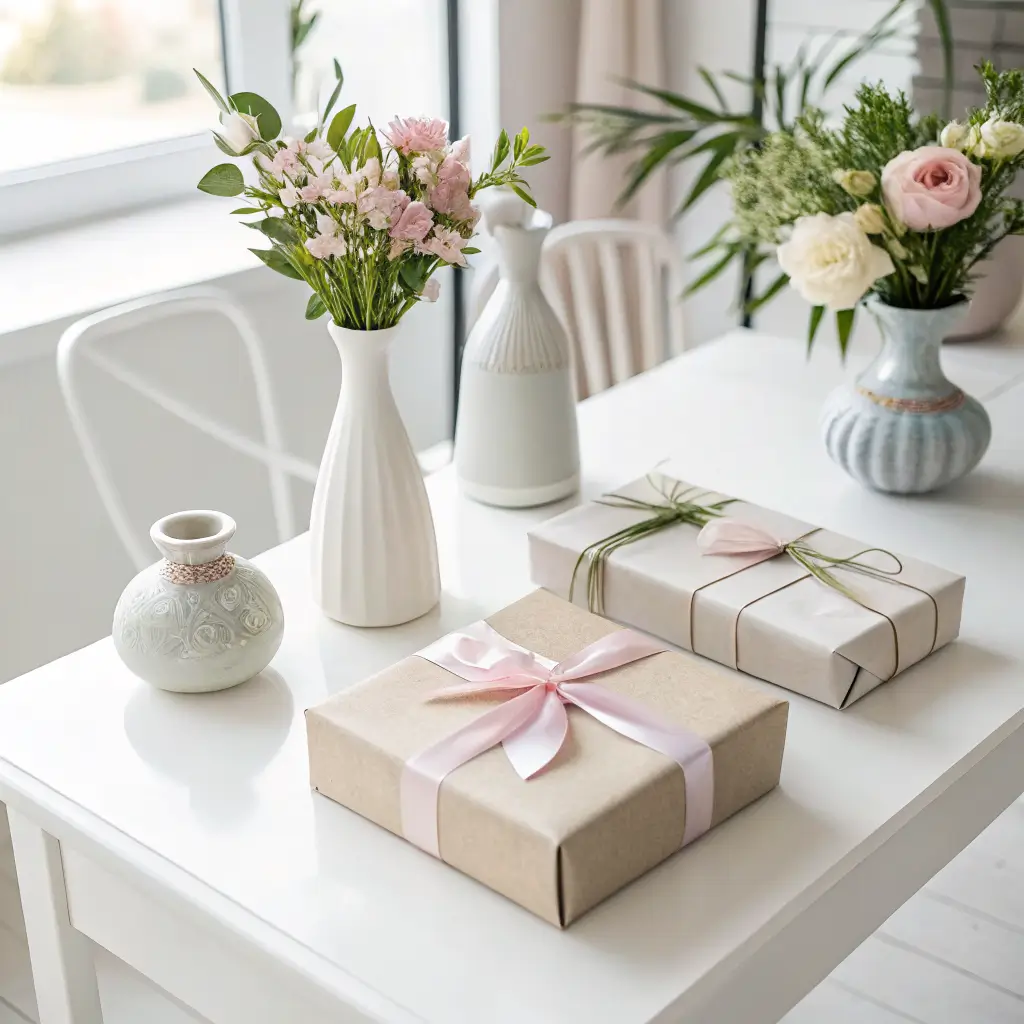
The gift table often becomes an afterthought, but it’s actually a great opportunity to extend your decor theme and create a beautiful focal point.
Making Gifts Part of the Decor
Instead of just dumping presents on a random table, think about how to make the gift display part of your overall design. A beautiful tablecloth, some coordinating decor elements, and thoughtful arrangement can turn a pile of presents into a design feature.
Styling Tips That Work
• Use a beautiful tablecloth – something that coordinates with your theme
• Add height variation – use books or boxes under the cloth to create levels
• Include some decor elements – small plants, candles, or flowers
• Create a card station – a beautiful box or basket for cards
I once styled a gift table using a vintage lace tablecloth and small potted succulents scattered around the presents. It looked intentional and beautiful, and the birthday girl loved the photos.
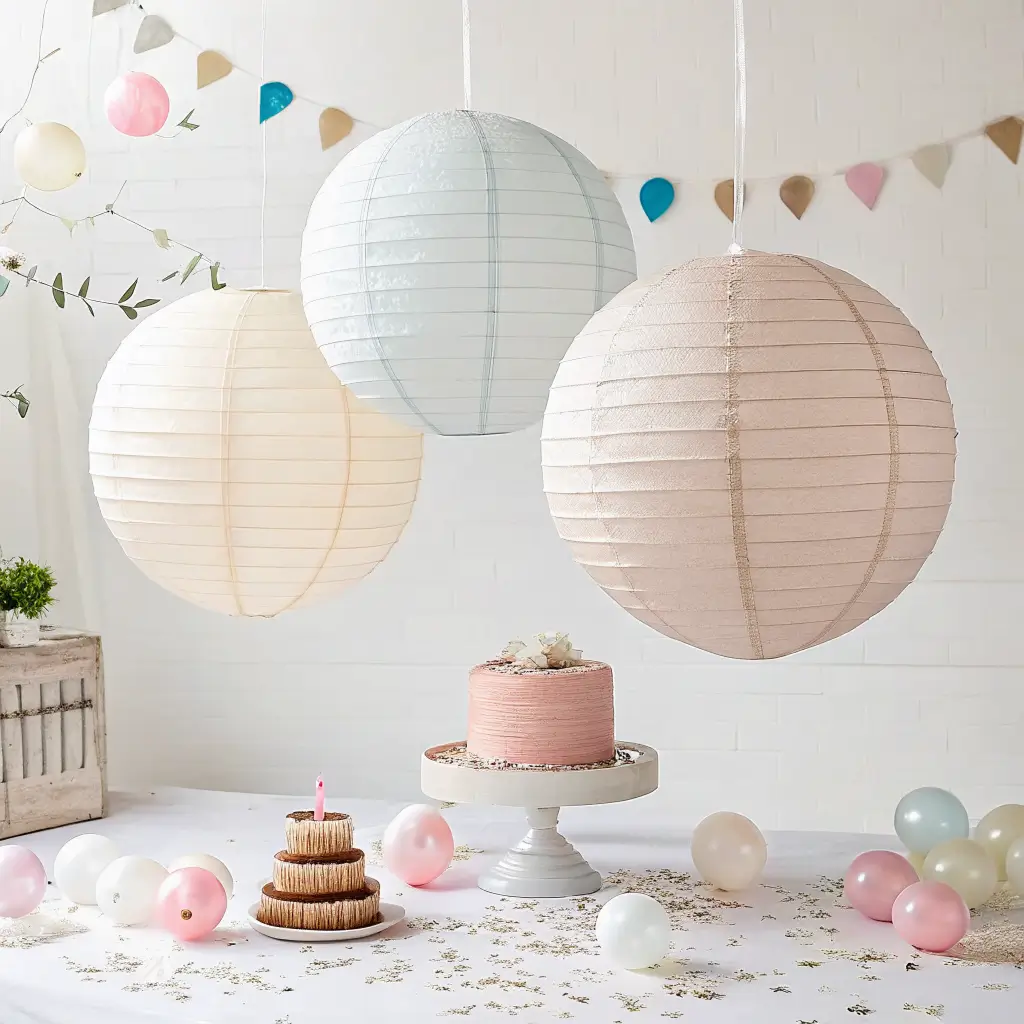
Subtle Hanging Lanterns
Overhead decor can completely transform a space, but it doesn’t have to involve complicated installations or calling in favors from handy friends.
Creating Atmosphere from Above
Paper lanterns or fabric versions in neutral colors can add visual interest and soft lighting without overwhelming the space. The key is choosing the right size and spacing them thoughtfully.
Easy Installation Ideas
You don’t need to be an engineer to hang beautiful lanterns:
• Use existing fixtures – hang from ceiling fans or light fixtures
• Command hooks – for lightweight options
• Fishing line – nearly invisible hanging method
• Vary the heights – creates more visual interest than uniform hanging
I hung white paper lanterns at different heights in my friend’s backyard for her birthday, and the effect was magical. The soft lighting created the perfect ambiance for evening photos, and setup took less than 30 minutes.
Also Read: 10 Vibrant Jewel Tone Wedding Decor Ideas for Colorful Weddings
Scandinavian-Inspired Birthday Corner
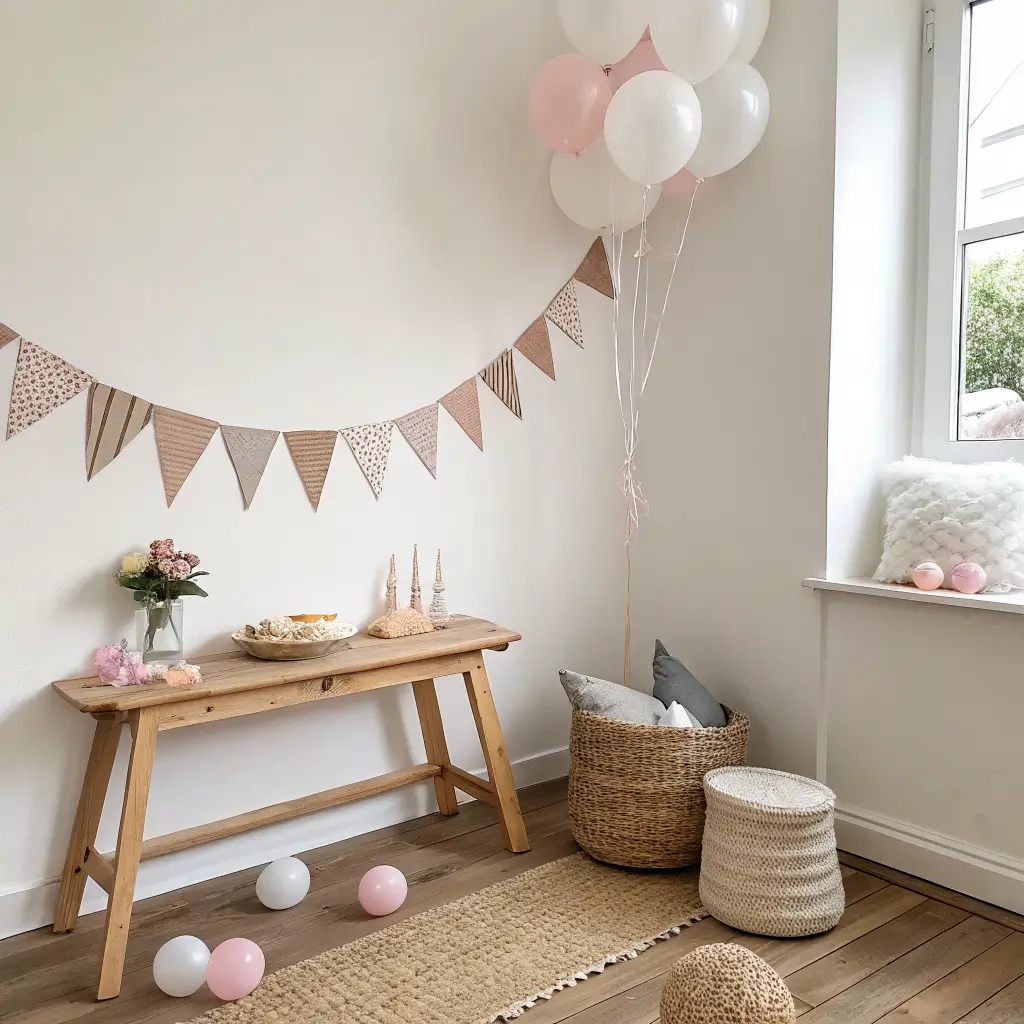
Creating a dedicated birthday corner gives you a focal point for photos and celebration without decorating your entire space. The Scandinavian approach is all about clean lines, natural materials, and cozy vibes.
The Hygge Factor
Think cozy, comfortable, and effortlessly beautiful. A comfortable chair, soft throw blanket, some plants, and minimal but meaningful decor elements. This becomes the perfect spot for birthday photos and gift opening.
Elements That Create the Look
• Natural materials – wood, linen, cotton
• Neutral colors – whites, grays, soft beiges
• Minimal accessories – a few carefully chosen pieces
• Cozy textures – soft blankets, textured pillows
• Living elements – plants or fresh flowers
The beauty of this approach is that it doesn’t look like party decor at all – it just looks like a beautifully styled corner of your home that happens to be perfect for celebrating.
Final Thoughts on Minimal Magic
Here’s what I’ve learned after years of party planning evolution: the best celebrations feel effortless, even when they’re not. Minimal decor isn’t about doing less work – it’s about doing smarter work. It’s about choosing elements that have maximum impact with minimal fuss.
The goal isn’t to impress people with how much you spent or how many decorations you crammed into one space. It’s about creating an atmosphere where people feel comfortable, relaxed, and ready to celebrate. And honestly? That’s so much better than any over-the-top party theme.
Your guests will remember how they felt at your party long after they’ve forgotten what the decorations looked like. So choose decor that enhances the celebration rather than overwhelming it, and you’ll create memories that last way longer than any balloon arch.
Trust me, once you go minimal, you’ll never want to go back to decoration chaos. Your stress levels, your budget, and your Instagram feed will all thank you for it.