10 Aesthetic Money Plant Decor Ideas for Small Spaces
- Plant Decor
 Ben
Ben- 0
- 39 minutes read

You know that feeling when you walk into someone’s apartment and their money plants just hit different? Yeah, I’m talking about those spaces where every green leaf seems perfectly placed, creating this whole vibe that makes you want to immediately redecorate your own place. Well, guess what? I’ve been obsessing over money plants for years now, and I’m about to spill all my secrets for making these beauties work in even the tiniest spaces.
Let me tell you, money plants are basically the MVPs of indoor gardening. They forgive you when you forget to water them, they grow like crazy with minimal effort, and they supposedly bring good luck and prosperity (I mean, I’m still waiting on that lottery win, but the plants look great!). The best part? You don’t need a massive house to create stunning displays with them.
Hanging Money Plant Wall Decor
Remember when I first tried hanging my money plants on the wall? Total game-changer. Wall-mounted money plants literally transform dead wall space into living art. You’re basically creating a vertical garden without sacrificing any precious floor space – genius, right?
The trick here lies in choosing the right containers and mounting system. I personally love using:
- Clear glass orb planters that catch light beautifully
- Geometric metal frames for that modern industrial vibe
- Wooden wall-mounted planters when you want something warm and rustic
- Test tube propagation stations for a minimalist lab-chic aesthetic
What makes this setup work so well? The trailing vines of money plants naturally cascade down, creating this waterfall effect that draws the eye upward. This makes your ceilings feel higher – a neat optical illusion for small spaces. I’ve got three hanging planters in my hallway, staggered at different heights, and everyone who visits comments on them.
Creating Your Wall Display
Start by mapping out your wall space with painter’s tape. Trust me on this one – I learned the hard way that eyeballing it doesn’t work when you’re dealing with multiple planters. Position your planters at varying heights to create visual interest. Think of it like creating a constellation of green on your wall.
The mounting process itself needs some attention. Use wall anchors appropriate for your wall type (drywall needs different anchors than concrete, FYI). I once had a planter crash down at 2 AM because I skimped on proper anchors – not fun. Invest in quality hardware; your plants and your security deposit will thank you.
Money Plant in Glass Bottle Aesthetic Setup
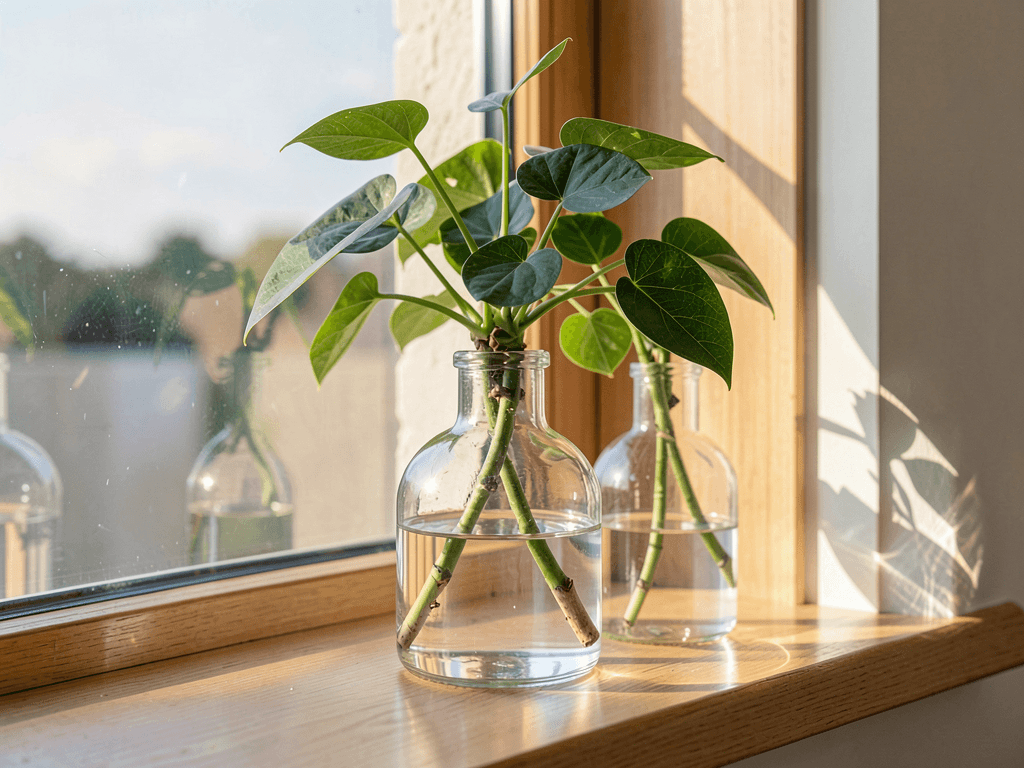
Who says you need fancy planters when you’ve got empty wine bottles lying around? This setup screams sustainable chic while keeping things budget-friendly. I started doing this after a particularly fun dinner party left me with several beautiful blue glass bottles, and now it’s become my signature move.
The glass bottle aesthetic works because it showcases the root development process, which honestly looks like underwater art. Watching those white roots spiral and grow creates this living sculpture effect that store-bought planters just can’t match. Plus, the transparency lets you monitor water levels easily – no more guessing games about when to refill.
Bottle Selection and Preparation
Not all bottles work equally well. Here’s what I look for:
- Colored glass (blue, green, or amber) to filter sunlight and prevent algae growth
- Wide necks that accommodate stem thickness without crushing
- Stable bases because nobody wants tippy plants
- Interesting shapes that add character to your display
Clean your bottles thoroughly with hot soapy water. Remove all labels – unless you’re going for that vintage apothecary vibe, in which case, rock those old labels! A mixture of baking soda and oil removes stubborn adhesive residue like magic.
Styling Your Bottle Garden
Group bottles of varying heights and colors together for maximum impact. I keep mine on a window ledge where the morning sun creates these amazing colored shadows through the glass. Three to five bottles work best – odd numbers just look more natural, you know?
Change the water every week to prevent it from getting murky. Add a piece of activated charcoal to each bottle to keep the water fresh longer. This little trick has saved me from dealing with that swampy smell that sometimes develops in water-propagated plants.
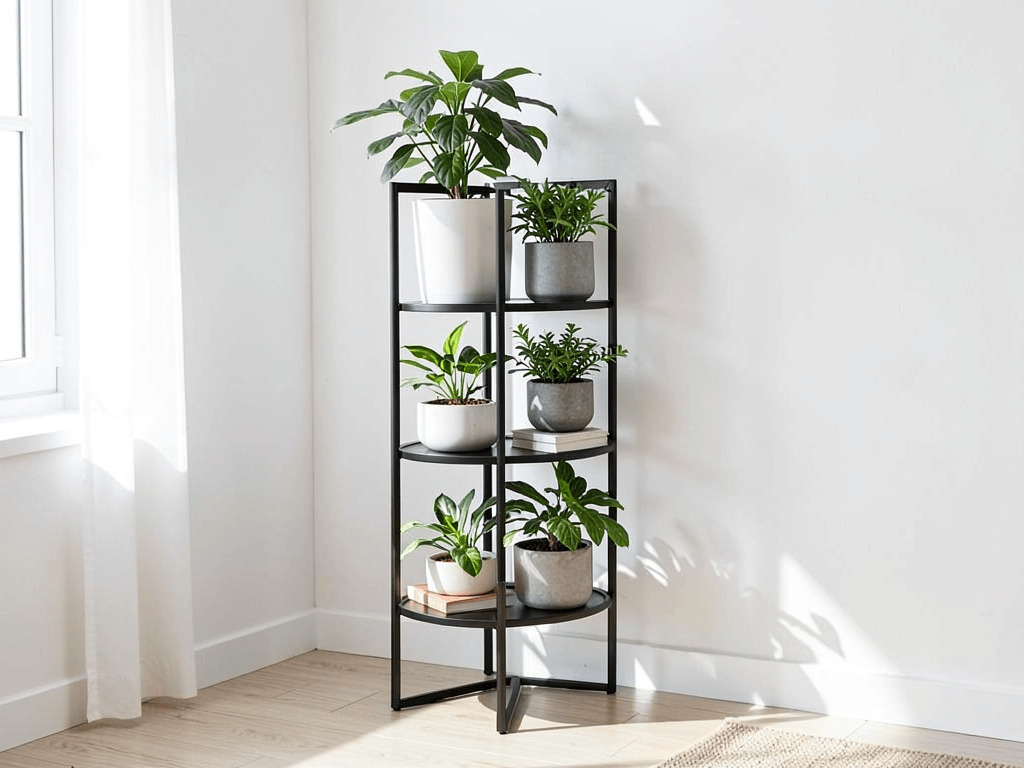
Vertical Money Plant Ladder Display
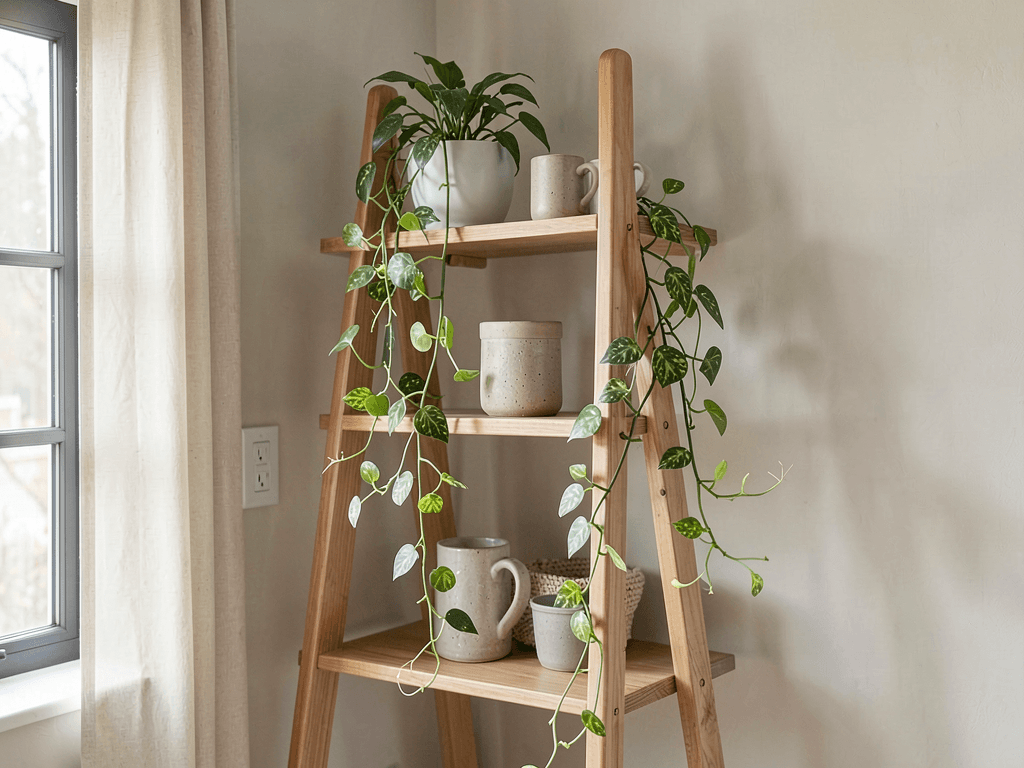
Ever looked at a decorative ladder and thought, “That could hold plants”? Welcome to my world! Ladder displays maximize vertical space while adding this rustic-meets-modern element that works with practically any decor style.
I found my ladder at a thrift store for $15, gave it a fresh coat of paint, and boom – instant plant stand that holds eight different money plant varieties. The angled design means each plant gets adequate light without overshadowing the others. It’s basically plant real estate optimization at its finest.
Setting Up Your Ladder Display
Position your ladder against a wall at roughly a 70-degree angle – steep enough to be stable but angled enough to be accessible. If you’re worried about it sliding (hardwood floors, anyone?), add furniture pads to the bottom. These little felt circles prevent scratches and provide grip.
Arrange your money plants strategically:
- Bushier varieties on lower rungs for a solid base
- Trailing types on upper rungs to cascade down
- Variegated specimens at eye level where their patterns shine
- Smaller pots on narrower upper rungs
The beauty of ladder displays? They’re totally customizable. Add fairy lights for evening ambiance, hang small mirrors between rungs to reflect light, or attach S-hooks for additional hanging planters. Mine currently sports a combination of potted plants and propagation stations – it’s like a money plant nursery and display case rolled into one.
Also Read: 10 Easy Plant Decor Indoor Ideas for Stylish Spaces
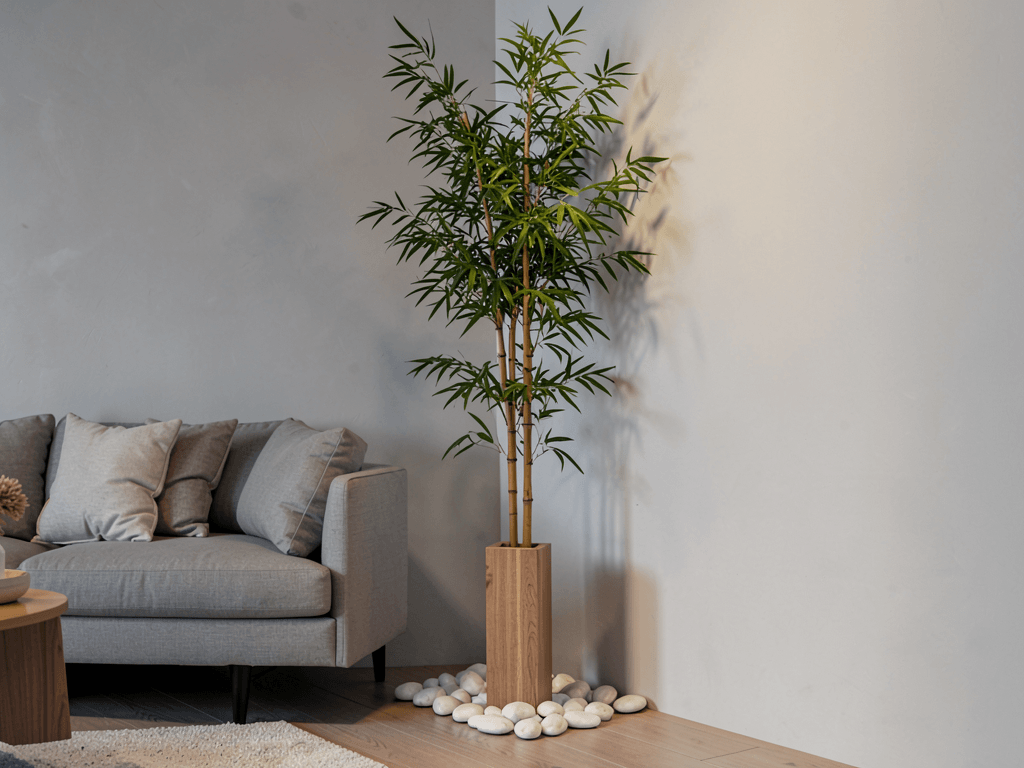
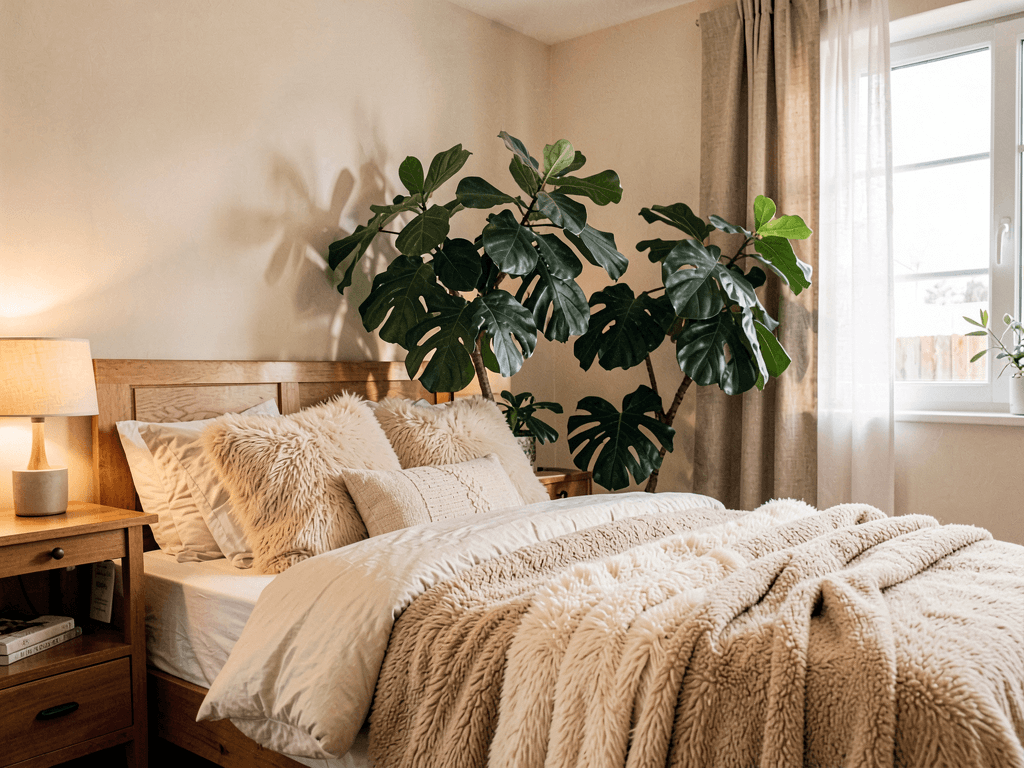
Cozy Corner Money Plant Styling
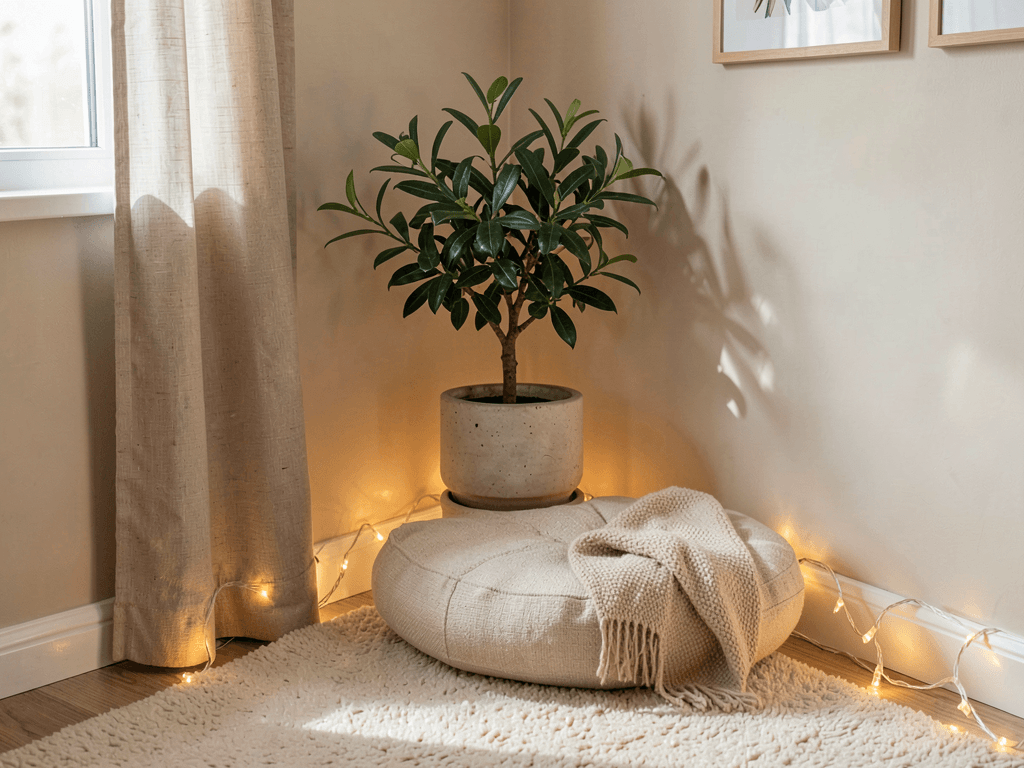
Got a sad, empty corner that needs some life? Money plants transform forgotten corners into cozy green sanctuaries. I turned my awkward bedroom corner into what I now call my “zen zone” – just a money plant, a floor cushion, and good vibes.
Corner styling works because it creates depth and dimension in small spaces. Instead of furniture that might make the room feel cramped, plants add visual interest without bulk. The vertical growth pattern of money plants naturally fills corner spaces from floor to ceiling.
Designing Your Corner Oasis
Start with a statement piece – maybe a large money plant in a gorgeous ceramic planter. Build around it with smaller plants at different heights using plant stands, stools, or stacked books (yes, I use old textbooks as plant stands – finally, a good use for that statistics book!).
Layer your corner display:
- Tall floor plant as your anchor piece
- Medium-height plant on a stand or stool
- Small propagation station on a floating shelf
- Trailing variety cascading from a wall hook
Add a small accent chair or floor cushion if space permits. This creates an actual usable space rather than just a plant display. I spend my mornings here with coffee, pretending I’m in some tropical paradise instead of my 600-square-foot apartment 🙂
Lighting Your Corner
Corners often lack natural light, so you might need to get creative. LED grow lights disguised as decorative fixtures work wonders. I use a sleek floor lamp with a grow bulb – looks like regular decor but keeps my plants thriving. Position it to highlight your plants while providing functional lighting for the space.
Money Plant Shelfie Decor Ideas
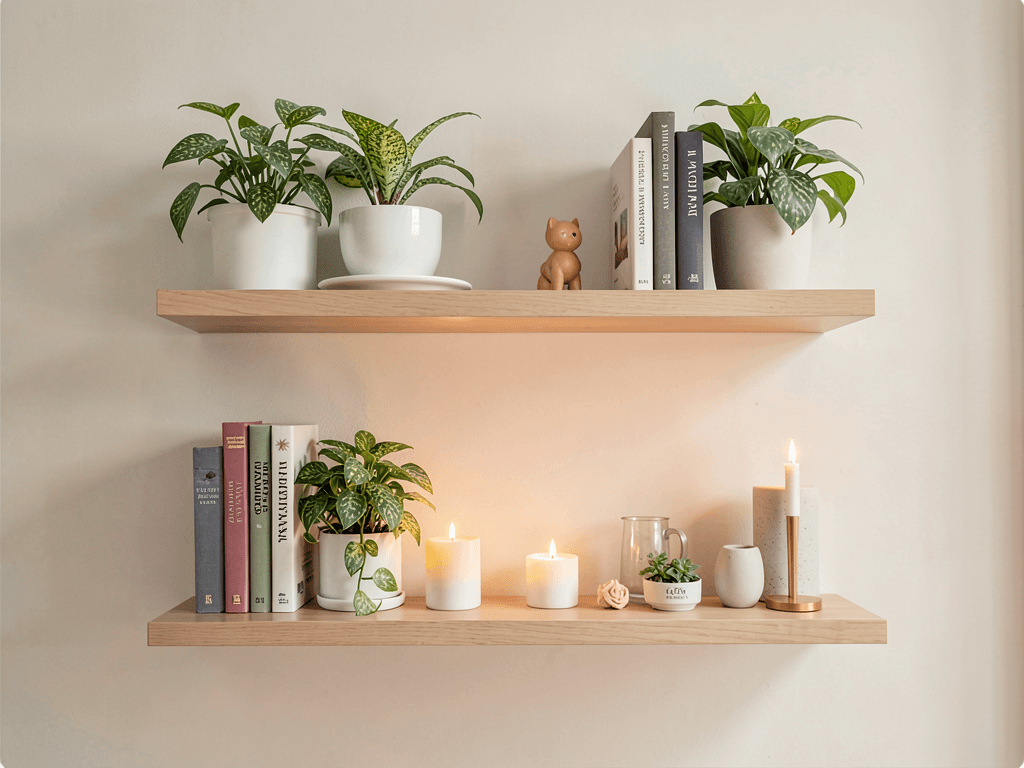
Instagram made shelfies a thing, and honestly? Money plants were born for this trend. Integrating plants into your shelf displays adds life to your book collection and breaks up the monotony of straight lines and right angles.
My living room shelves showcase this perfectly – books, plants, and personal objects creating layers of interest. The trailing vines of money plants soften the rigid shelf structure, making everything feel more organic and lived-in.
Crafting the Perfect Plant Shelfie
Balance is everything when styling shelves with plants. Follow the rule of thirds – divide each shelf mentally into three sections and place plants in one or two sections, leaving breathing room. This prevents the overcrowded plant shop look (unless that’s what you’re going for – no judgment!).
Mix plant sizes and pot styles:
- Small pots between book stacks
- Trailing plants on shelf edges for cascade effect
- Compact varieties in decorative cache pots
- Propagation vessels for that science-lab-meets-garden vibe
Consider your containers carefully. Matching pots create cohesion, while mixed styles add personality. I use a combination of white ceramic pots and clear glass vessels – the consistency of color keeps things looking intentional even with different materials.
Practical Shelfie Tips
Protect your shelves with waterproof coasters or trays under each pot. Water damage on wood shelves is real, and I’ve got the stains to prove it from my early plant parent days. Clear acrylic trays work great – almost invisible but totally functional.
Rotate your plants weekly to ensure even growth. Money plants lean toward light sources, and nobody wants a lopsided plant in their shelfie. This also gives you a chance to dust your shelves (because let’s be real, plants = more surfaces to collect dust).
Minimalist Money Plant Desk Setup
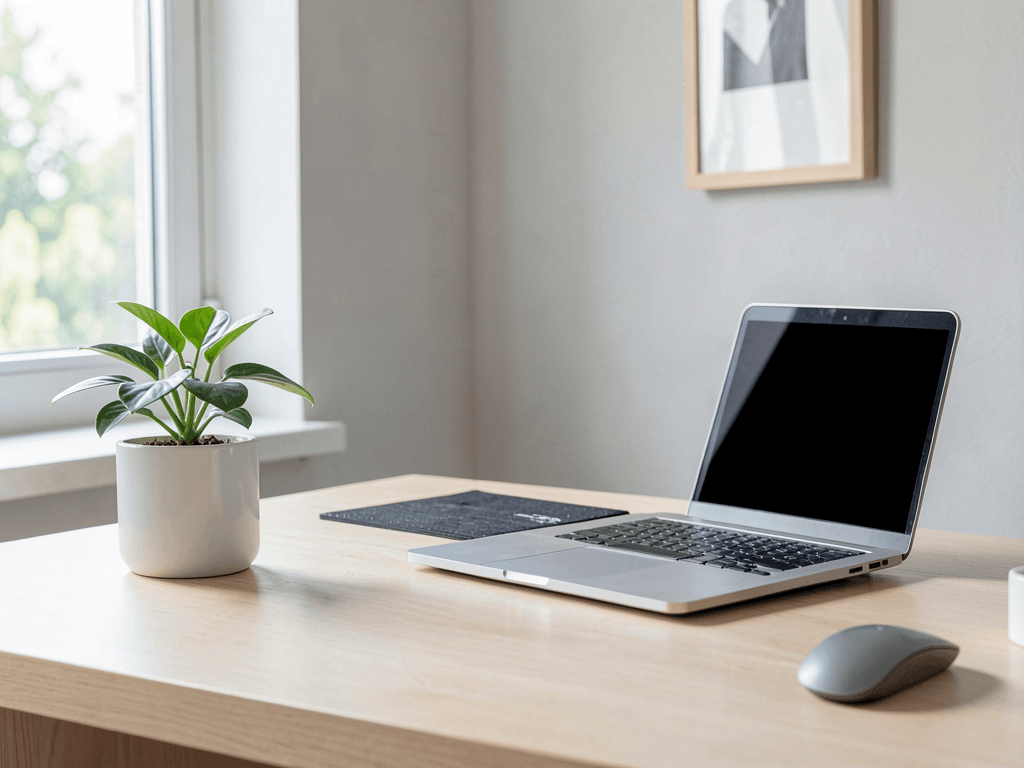
Working from home? Your desk needs a money plant, period. A single, well-placed money plant enhances productivity without cluttering your workspace. Studies show plants improve focus and air quality – though honestly, I just like having something green to stare at during boring Zoom calls.
My desk setup features one money plant in a simple white planter, positioned where it doesn’t interfere with my monitor but stays in my peripheral vision. The key to minimalist desk styling is restraint – resist the urge to create a jungle on your workspace.
Choosing Your Desk Plant
Select a compact money plant variety that won’t overtake your desk. Pothos N’Joy or Marble Queen work beautifully – they stay relatively contained while providing visual interest with their variegated leaves. Keep the pot size proportional to your desk; a 4-6 inch pot usually hits the sweet spot.
Position your plant strategically:
- Corner placement maximizes desk space
- Behind your laptop creates a green backdrop for video calls
- On a monitor stand utilizes vertical space
- Hanging from a desk lamp keeps surfaces clear
The container matters in minimalist setups. Choose something that complements your desk aesthetic without demanding attention. I love matte black or white ceramics – they disappear into the background while the plant takes center stage.
Maintenance for Busy Professionals
Real talk – desk plants need to be low-maintenance. Set weekly water reminders on your phone because you will forget. Trust me, nothing kills the minimalist vibe faster than a dying plant on your desk.
Keep a small watering can or bottle at your desk. Those fancy copper watering cans aren’t just for show – having attractive tools visible encourages regular care. Plus, the ritual of watering becomes a mindful break from screen time.
Also Read: 10 Lovely Plant Decor Ideas for Stylish Indoor Corners
Money Plant Balcony Jungle Look
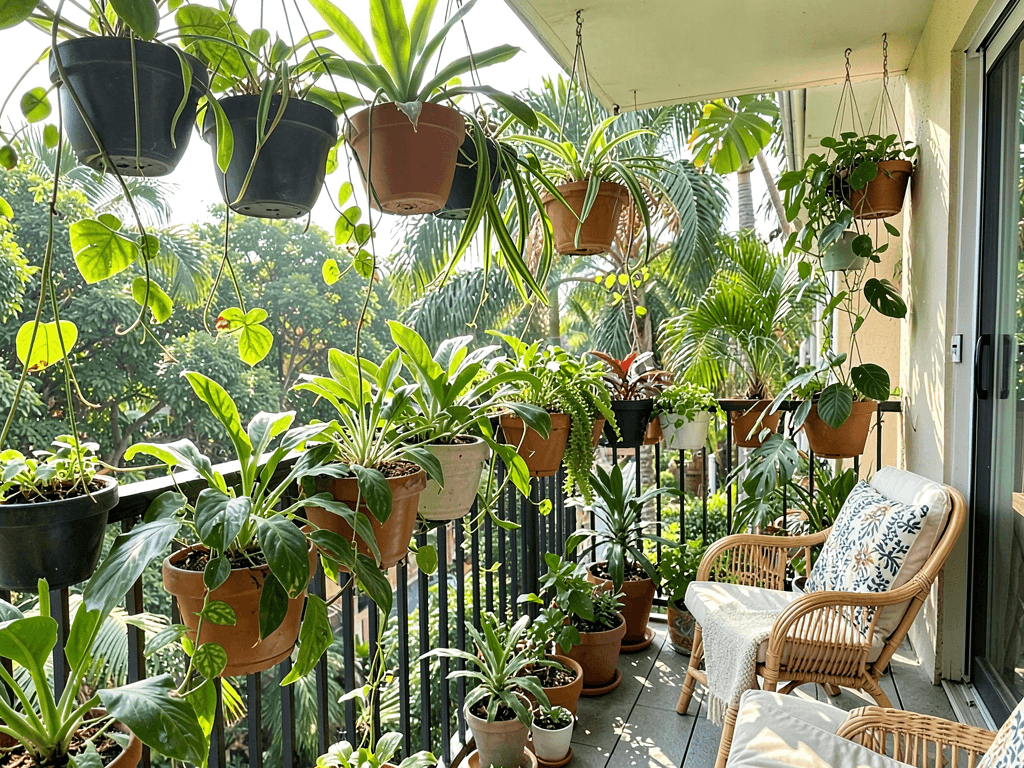
Got a tiny balcony? Perfect! You can create a lush jungle vibe even in the smallest outdoor spaces. My 4×6 foot balcony currently hosts twelve money plants (plus other friends), and it feels like a tropical escape rather than a concrete box.
The jungle look relies on layering plants at different heights and allowing vines to intertwine naturally. Money plants thrive in the filtered light of a crowded balcony garden, making them ideal for this setup.
Building Your Balcony Jungle
Start with vertical elements:
- Trellises against walls for climbing support
- Railing planters to maximize perimeter space
- Hanging baskets at varying heights
- Ladder or shelving units for multiple levels
Mix money plant varieties for texture diversity. Golden pothos, marble queen, and neon pothos together create this amazing tapestry of greens and yellows. Let them grow wild – the jungle look embraces controlled chaos rather than perfect pruning.
Weather-Proofing Your Setup
Outdoor money plants face elements indoor plants don’t. Wind is your biggest enemy – secure all planters and provide windbreaks. I learned this after finding my favorite pot three floors down after a storm (RIP to that beautiful ceramic planter).
Consider these protective measures:
- Heavy pots for floor plants to prevent tipping
- Secured hangers with safety chains
- Wind-resistant varieties in exposed areas
- Shade cloth for intense afternoon sun
During extreme weather, have a plan to bring plants inside quickly. I keep a collapsible wagon ready for emergency plant evacuation – might seem excessive, but it’s saved my collection multiple times.
DIY Money Plant Wall Frame Design
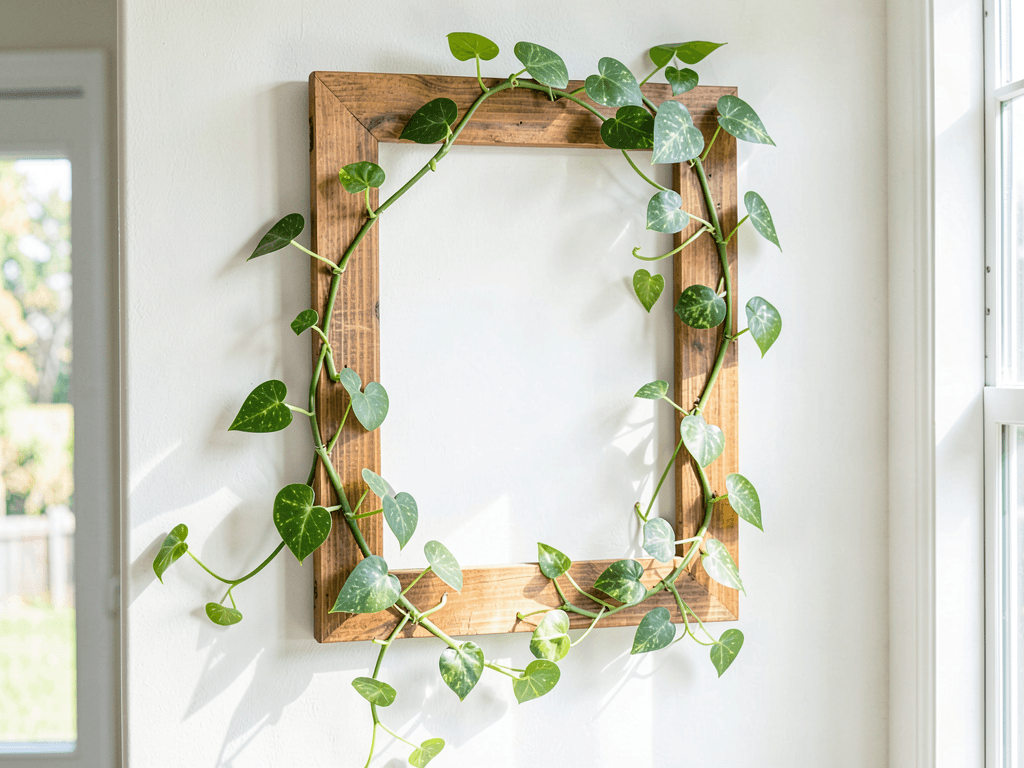
Want something totally unique? Creating living wall art with money plants combines crafting with gardening for a personalized statement piece. I made my first frame from an old window frame, chicken wire, and moss – total cost under $20, but it looks like expensive living art.
These frames work brilliantly in small spaces because they’re completely customizable to your wall dimensions. You control the size, shape, and design, making them perfect for awkward wall spaces that standard art can’t fill.
Building Your Living Frame
Gather your materials:
- Sturdy frame (thrift stores are goldmines for these)
- Chicken wire or mesh for plant support
- Sphagnum moss for moisture retention
- Small money plant cuttings for planting
Attach mesh to the frame back, creating pockets with moss for planting. The moss holds moisture while allowing roots to establish. Start with rooted cuttings rather than fresh cuts – they establish faster and look fuller sooner.
Design Patterns and Layouts
Plan your plant placement before inserting cuttings. Create patterns with different varieties:
- Gradient effects from light to dark greens
- Geometric patterns using contrasting varieties
- Random placement for natural, organic appearance
- Letter or shape designs for personalized art
Water your frame by misting regularly rather than pouring. The moss retains moisture, but frames dry out faster than traditional pots. I mist mine every other day and do a thorough soak weekly by laying it flat in the bathtub.
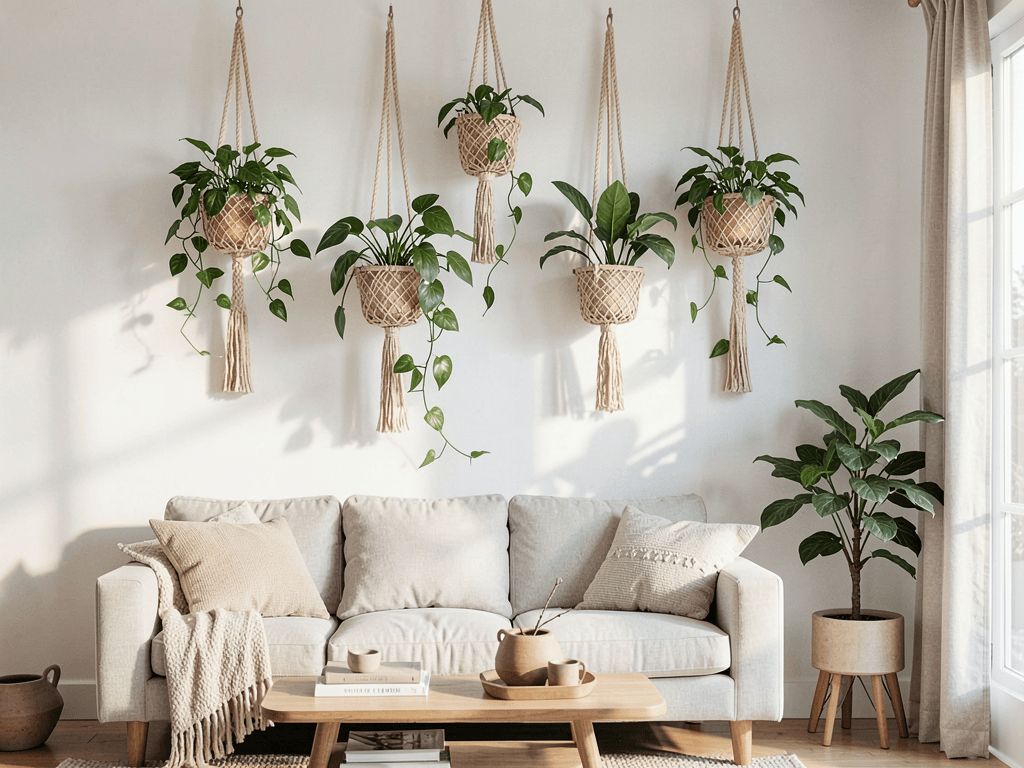
Money Plant in Macrame Hanger Style
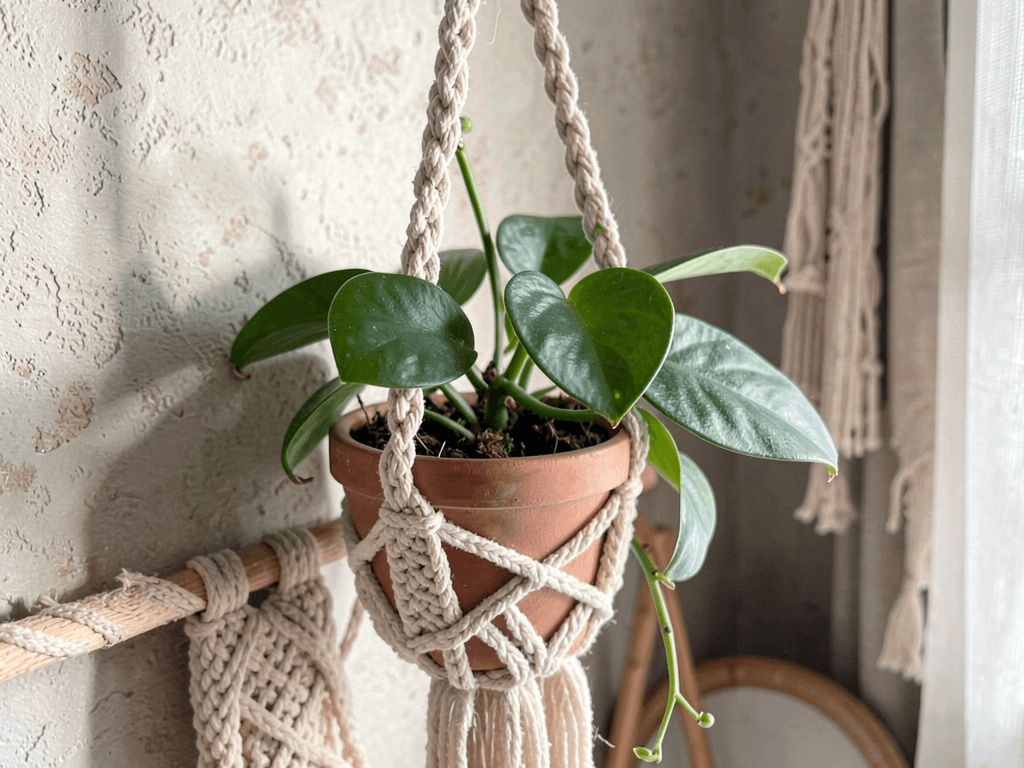
Macrame hangers and money plants? Name a more iconic duo for boho-chic spaces. IMO, this combo brings serious ’70s revival vibes while being surprisingly practical for small spaces. The vertical hanging aspect frees up surfaces while adding textural interest through the macrame itself.
I taught myself macrame during lockdown (didn’t we all pick up weird hobbies then?), and now half my plants hang in handmade hangers. The best part? You can customize length, style, and color to match your exact space and aesthetic.
Selecting Your Macrame Style
Different knot patterns create different vibes:
- Simple spiral patterns for minimalist looks
- Complex diamond patterns for bohemian richness
- Chunky knots for modern texture
- Mixed patterns for eclectic personality
Choose cord material based on your decor. Natural jute works for rustic spaces, white cotton for modern minimalism, and colored cord for playful pops. The planter should complement, not compete with the hanger – simple pots let elaborate macrame shine.
Hanging Heights and Arrangements
Vary your hanging heights to create visual flow. I hang mine in odd-numbered groups (usually three) at different levels – it creates movement and prevents that uniform “plant shop” look. The lowest plant should hang at eye level or slightly above for best viewing.
Consider these hanging spots:
- Corner clusters for maximum impact
- Window frames for light-loving varieties
- Room dividers using ceiling tracks
- Stairwell cascades for dramatic effect
Pro tip: Use ceiling hooks rated for more weight than needed. Wet soil gets heavy, and the last thing you want is your beautiful macrame creation crashing down. Ask me how I know this… :/
Also Read: 10 Eye-Catching Over Fireplace Decor Ideas for Perfect Styling
Floating Shelf Money Plant Arrangement
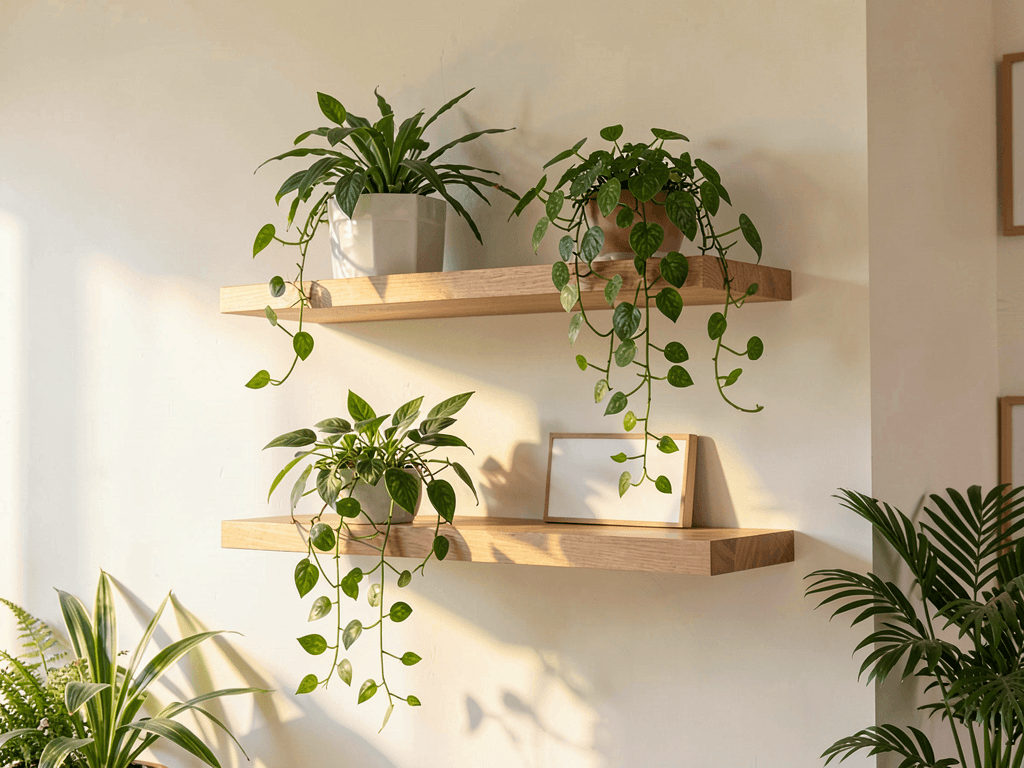
Floating shelves offer clean, modern display options that make plants appear to levitate on your walls. My bedroom features three floating shelves in a staggered pattern, each holding different money plant varieties. The effect? Pure minimalist magic.
These arrangements work especially well in small spaces because they maintain clean wall lines while adding greenery. No bulky furniture required – just sleek shelves and beautiful plants creating an airy, open feeling.
Installing Your Floating Garden
Choose shelf placement carefully:
- Near windows for natural light access
- Above furniture to utilize vertical space
- Corner installations for wraparound effect
- Bathroom walls for humidity-loving plants
Use quality brackets hidden within the shelf for that true floating appearance. Level everything meticulously – crooked floating shelves with plants look like a disaster waiting to happen. I use a laser level now after learning this lesson the hard way.
Styling Your Shelf Display
Keep arrangements asymmetrical for visual interest. Place your largest plant on one end, medium in the middle, and trail a vine over the opposite edge. This creates movement and prevents the static museum display look.
Mix plant heights and pot styles:
- Tall, narrow pots for height variation
- Low, wide bowls for spreading varieties
- Hanging elements draping over shelf edges
- Propagation stations for work-in-progress beauty
Add non-plant elements sparingly. A small sculpture, crystal, or candle can complement without overwhelming. Remember, the plants are the stars – everything else plays supporting roles.
Maintenance Considerations
Floating shelves mean careful watering to protect walls. Use saucers under every pot, even if the pot has drainage holes sealed. Water slowly and carefully – rushing leads to overflow and potential wall damage.
Dust accumulates on floating shelves quickly. Weekly dusting during plant rotation keeps everything looking fresh. A slightly damp microfiber cloth works wonders for both shelf and leaf cleaning.
Final Thoughts
Creating beautiful money plant displays in small spaces isn’t about having perfect Instagram-worthy setups from day one. It’s about experimenting, learning what works for your specific space, and having fun with it. Every apartment, every corner, every shelf has potential – you just need to see it through plant-parent eyes.
Start small with one or two of these ideas. See what resonates with your style and space. Money plants forgive mistakes and grow enthusiastically even when you’re figuring things out. That’s why they’re perfect for both beginners and experienced plant enthusiasts.
Remember, the best plant display is one that makes you happy every time you see it. Whether that’s a single plant on your desk or a full jungle balcony, if it brings you joy, you’re doing it right. Now go forth and create your own green sanctuary – your money plants (and your mental health) will thank you for it!