12 Beautiful POP Ceiling Design Ideas and Cozy Home Interiors
- Ceiling Design
 Ben
Ben- 0
- 37 minutes read
POP ceilings are basically the unsung heroes of interior design. I spent years living with boring flat white ceilings before finally installing a POP false ceiling in my living room, and honestly?
The transformation was so dramatic that my neighbor asked if I’d added an entire floor to my house (I hadn’t—just discovered what happens when you stop ignoring the fifth wall).
Here’s the thing about POP (Plaster of Paris) ceilings: they’re versatile, relatively affordable, and can hide all sorts of construction sins like wiring, pipes, and that questionable patch job from 2015. \
After helping three friends design their POP ceilings (yes, I’ve become the ceiling person in my group), I’ve learned exactly what works, what doesn’t, and what makes people walk into a room and immediately look up in awe.
Ready to discover how POP ceiling designs can transform your space from forgettable to absolutely stunning? Let’s explore twelve ideas that actually work in real homes where people live, cook, and occasionally forget to dust.
1. Minimalist POP Ceiling Designs for Small Rooms
Minimalist POP ceilings in small rooms are basically magic tricks for making spaces feel bigger. I installed a simple single-layer POP design in my tiny bedroom, and suddenly the room felt 30% larger. The secret? Less is genuinely more when you’re working with limited square footage.
The Simple Border Approach
The easiest minimalist POP design creates a subtle border around your ceiling perimeter. I went with a clean 8-inch border that’s slightly recessed, and it draws the eye upward without overwhelming the space. The border creates definition without eating into your ceiling height—crucial when you’re working with standard 9-foot ceilings.
This design works because it:
- Adds depth without bulk
- Creates space for hidden LED strips
- Maintains ceiling height in the center
- Costs significantly less than complex designs
- Takes less time to install (mine was done in two days)
Single Recessed Panel Design
Another minimalist winner is the single recessed panel in the ceiling center. My friend tried this in her small home office, and the subtle drop creates visual interest without making the ceiling feel heavy. We kept it simple—just a rectangular recess about 2 feet from each wall.
The key is keeping proportions right. Too large and it overwhelms; too small and it looks like a mistake. We measured her room, divided by thirds, and used the center third as our guide. Perfect proportions every time.
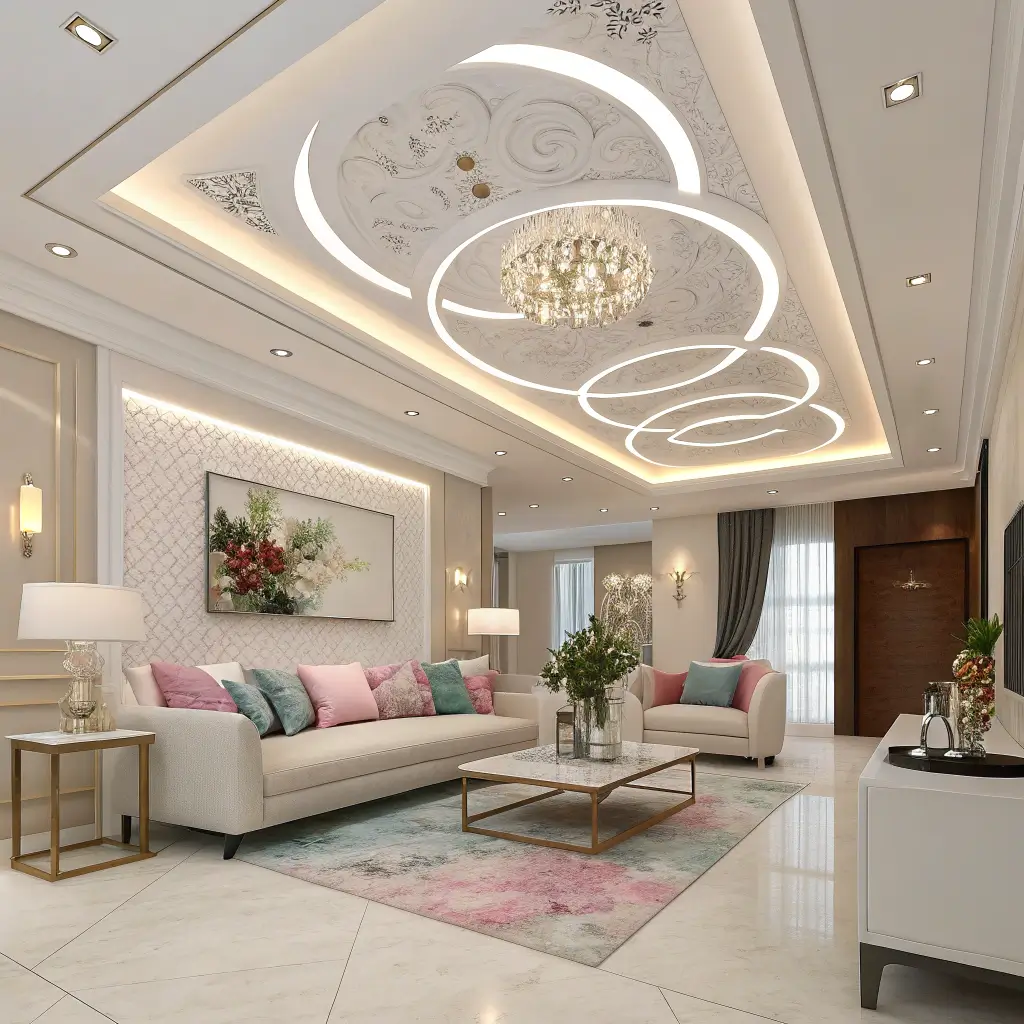
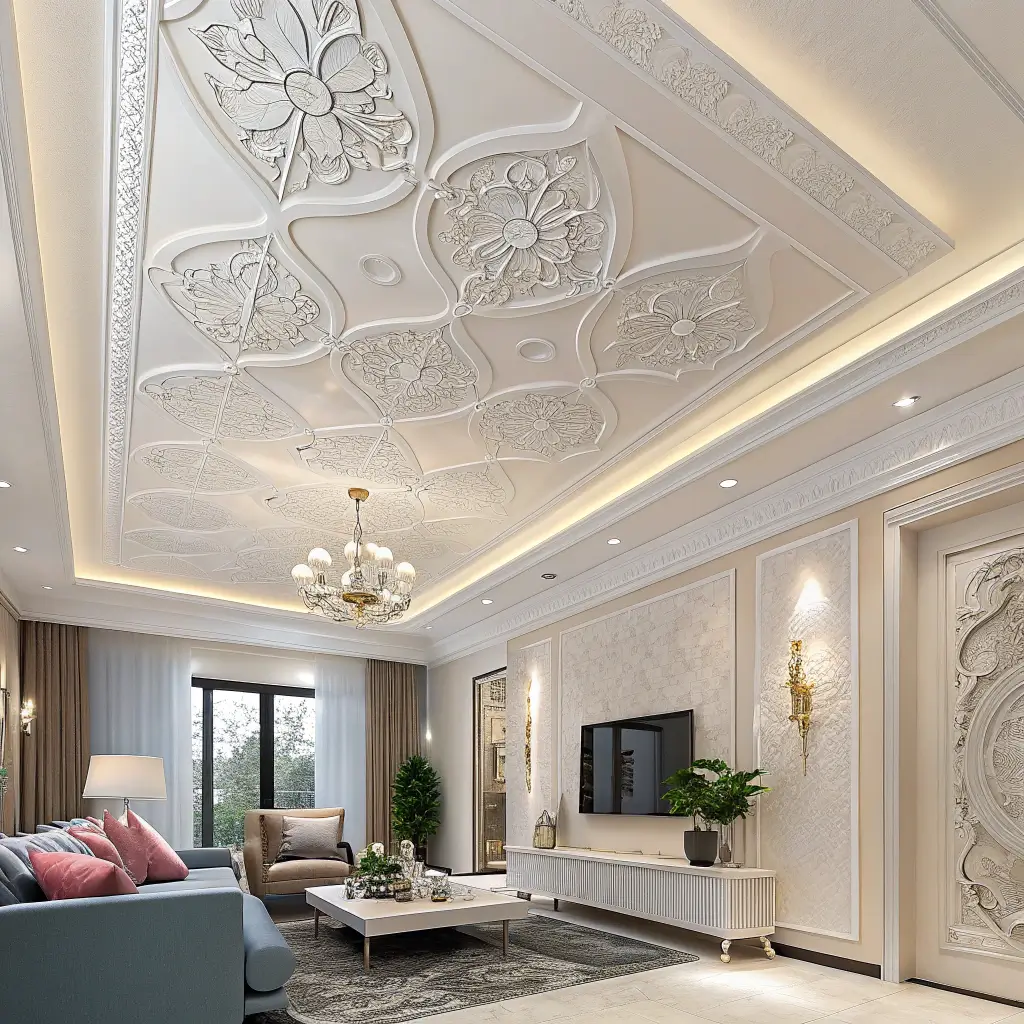
2. Luxurious POP Ceiling Ideas for Living Rooms
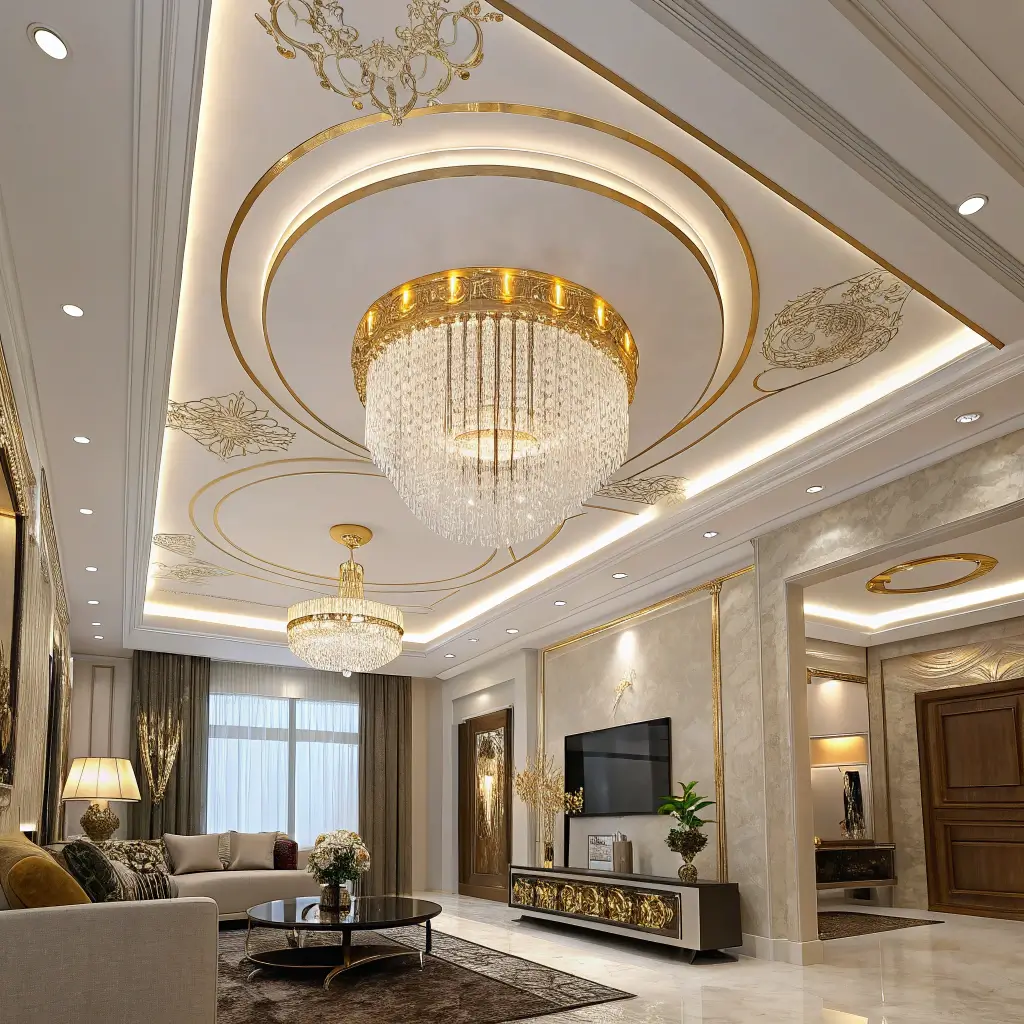
Luxury POP ceilings in living rooms make a statement that screams “I have my life together” (even if your sock drawer tells a different story). I designed my living room ceiling with multiple layers and integrated lighting, and it became the room’s main conversation piece.
Multi-Layer Dramatic Design
Layered POP ceilings create incredible depth and luxury. My design has three distinct levels—the main ceiling, a mid-level with cove lighting, and a central dropped section with a statement chandelier. The layers create this cascading effect that makes the ceiling architectural art.
Installation took longer (about a week), and yes, it cost more than simple designs. But the impact? Absolutely worth every penny. Guests literally crane their necks to admire it.
Coffered Ceiling Effect
Creating coffered ceiling effects with POP gives you that high-end library or hotel lobby vibe. My neighbor installed this in his living room, and the geometric grid of recessed squares looks like he spent a fortune (he didn’t—smart POP work just looks expensive).
The trick with coffered designs:
- Keep squares proportional to room size
- Add subtle molding details
- Paint each section slightly different shades
- Install recessed lights in alternate squares
- Don’t go too deep (4-6 inches max)
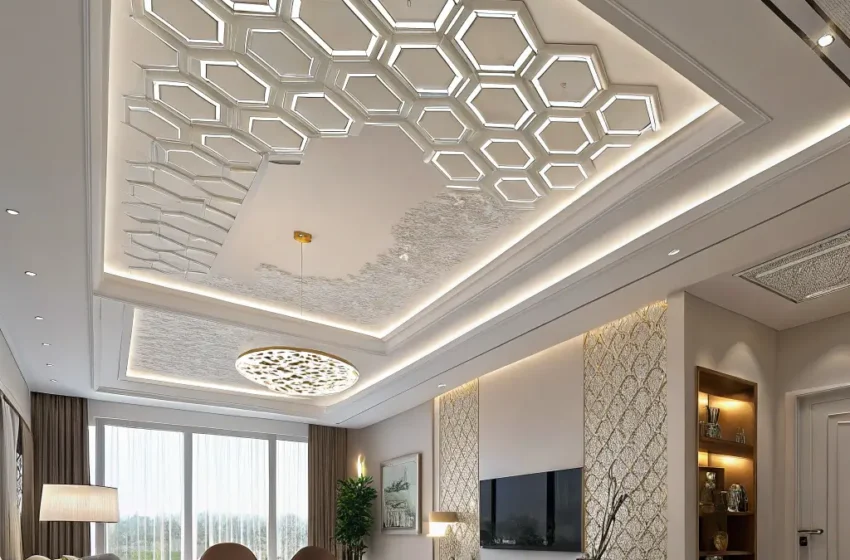
3. Modern Geometric POP Ceiling Patterns
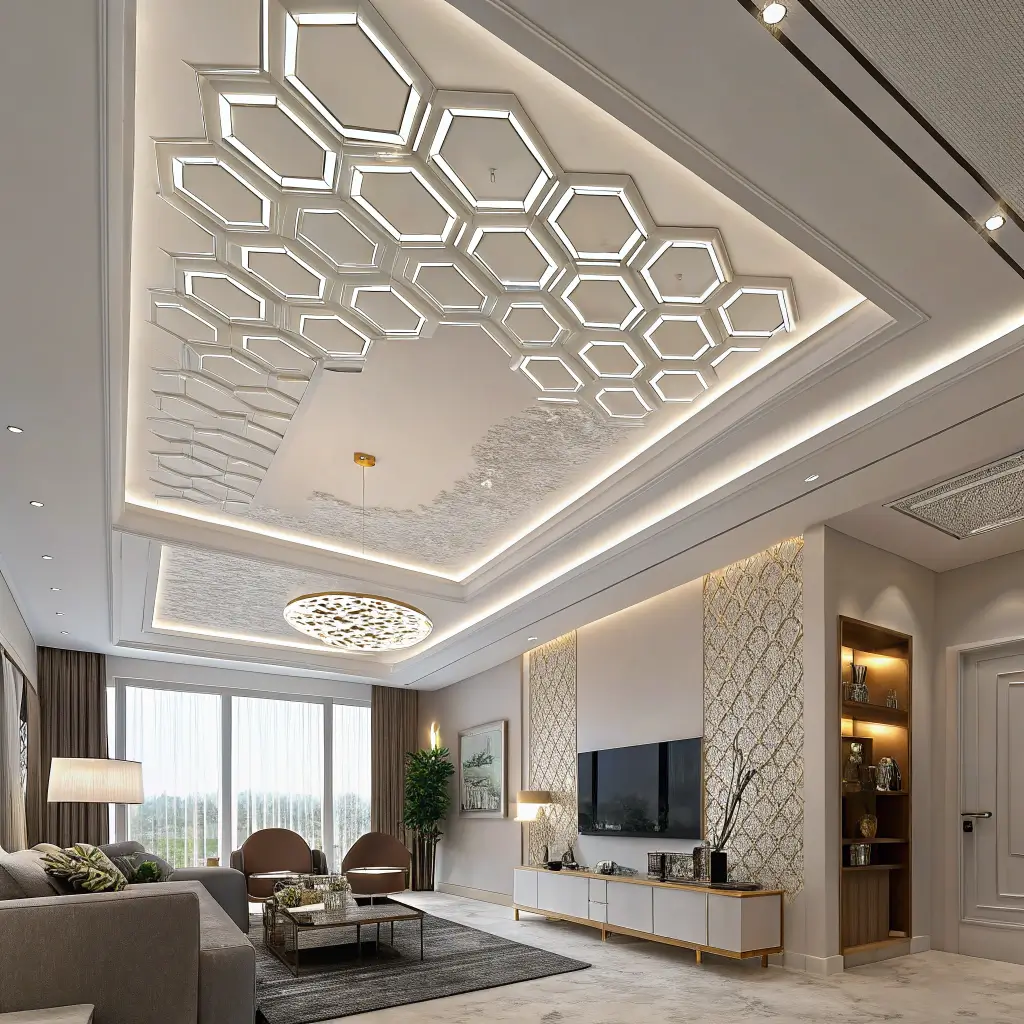
Geometric POP patterns bring contemporary edge to any room. I created a chevron pattern in my den using simple straight lines and angular cuts, and it transformed the space from boring box to modern masterpiece.
Linear Geometric Designs
Straight lines and geometric shapes create clean, modern aesthetics. My den ceiling features parallel lines running lengthwise, creating the illusion that the room is longer than it actually is. The lines incorporate LED strips that highlight the geometry beautifully.
Geometric designs work because they:
- Create visual movement
- Define spaces in open floor plans
- Add contemporary sophistication
- Photograph incredibly well
- Appeal to modern design sensibilities
Abstract Geometric Patterns
For the bold, abstract geometric POP patterns make serious statements. My friend’s architect created an asymmetrical design with overlapping rectangles and triangles, and while I was skeptical during installation, the finished product is stunning. It looks like modern art permanently installed overhead.
The key is working with a skilled contractor. Geometric designs require precision—sloppy execution turns contemporary into chaotic fast.
Also Read: 10 Creative Wooden Ceiling Design Ideas for Modern Spaces
4. POP Ceilings with Ambient LED Lighting

Combining POP ceilings with LED lighting is where the real magic happens. I installed warm LED strips in all my POP ceiling recesses, and the ambient glow transforms the entire atmosphere of my home from morning to night.
Cove Lighting Integration
Cove lighting hidden in POP ceiling borders creates this floating effect that’s absolutely magical. My living room POP has a recessed border where I installed LED strips facing upward. The light washes the ceiling, creating soft, indirect illumination that makes everything look better.
Installation tips from my experience:
- Use warm white LEDs (2700K-3000K)
- Install dimmers (crucial for controlling mood)
- Hide the actual LED strips (show the glow, not the source)
- Use quality LEDs (cheap ones die fast)
- Plan electrical during POP design phase
Spotlights and Downlights
Integrating spotlights into POP designs gives you focused task lighting plus ambiance. I have eight recessed spotlights in my kitchen POP ceiling, positioned exactly where I need light for cooking. The POP design hides all the wiring and creates clean, flush installations.
FYI, planning lighting placement before POP installation saves massive headaches. Moving lights after POP is installed? Not fun.
5. False POP Ceiling Designs for Bedrooms
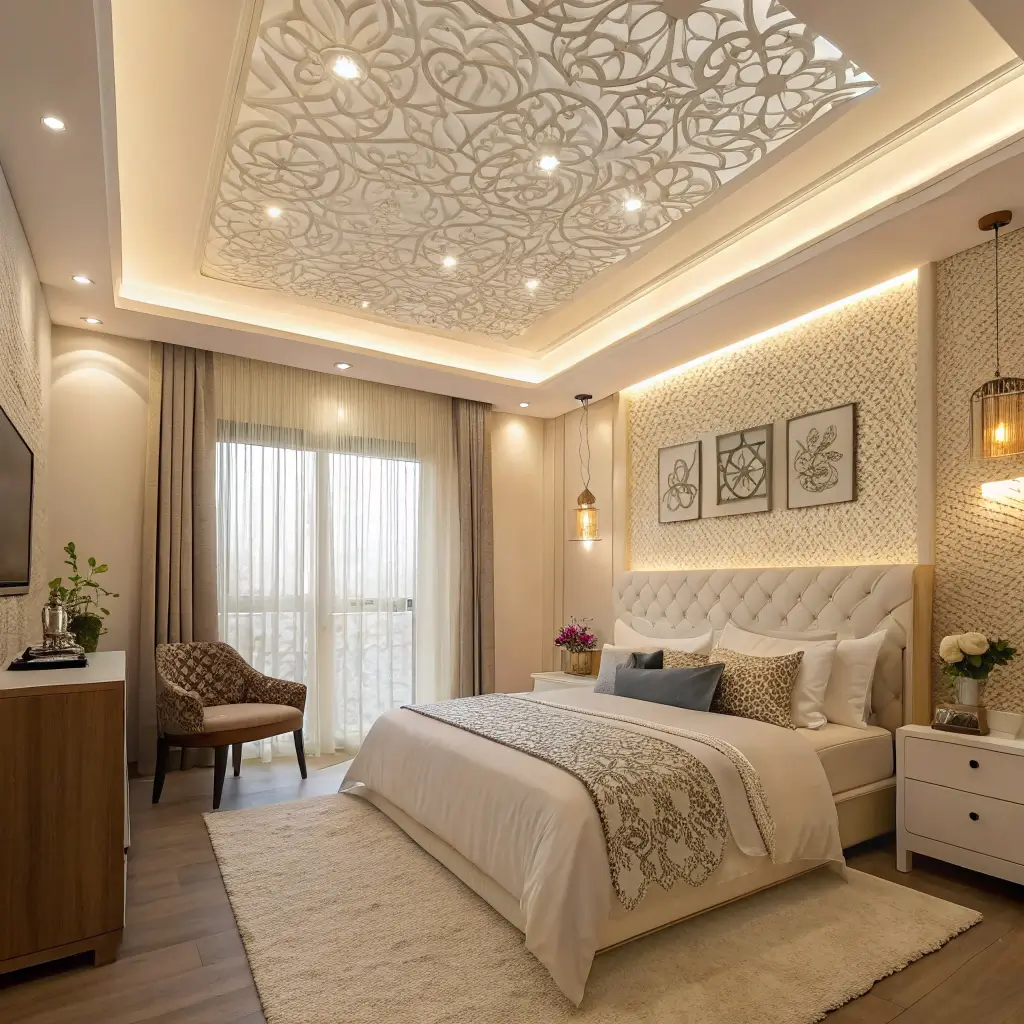
Bedroom POP ceilings create cozy, intimate atmospheres perfect for relaxation. I designed my master bedroom ceiling with a central circular recess above the bed, and it’s become my favorite design element in the entire house.
Central Circular Design
A circular POP design centered over the bed creates a focal point and defines the sleeping area. Mine is about 5 feet in diameter with integrated soft lighting that I control with a dimmer. The circle adds softness to the room’s rectangular geometry.
The circular design works beautifully because:
- It’s romantic and soft
- Creates intimate lighting zones
- Centers the bed visually
- Adds architectural interest
- Feels cozy without being claustrophobic
Tray Ceiling Effect
Tray ceiling designs in bedrooms add luxury and height. My sister installed an inverted tray (raised center section) in her bedroom, and the added height makes the room feel significantly more spacious. We added LED strips around the perimeter, and the upward glow is incredibly soothing.
Tray ceilings work especially well in bedrooms because they add drama without being overwhelming. You want bedrooms to feel special but still restful.
6. Elegant POP Ceiling with Wooden Accents
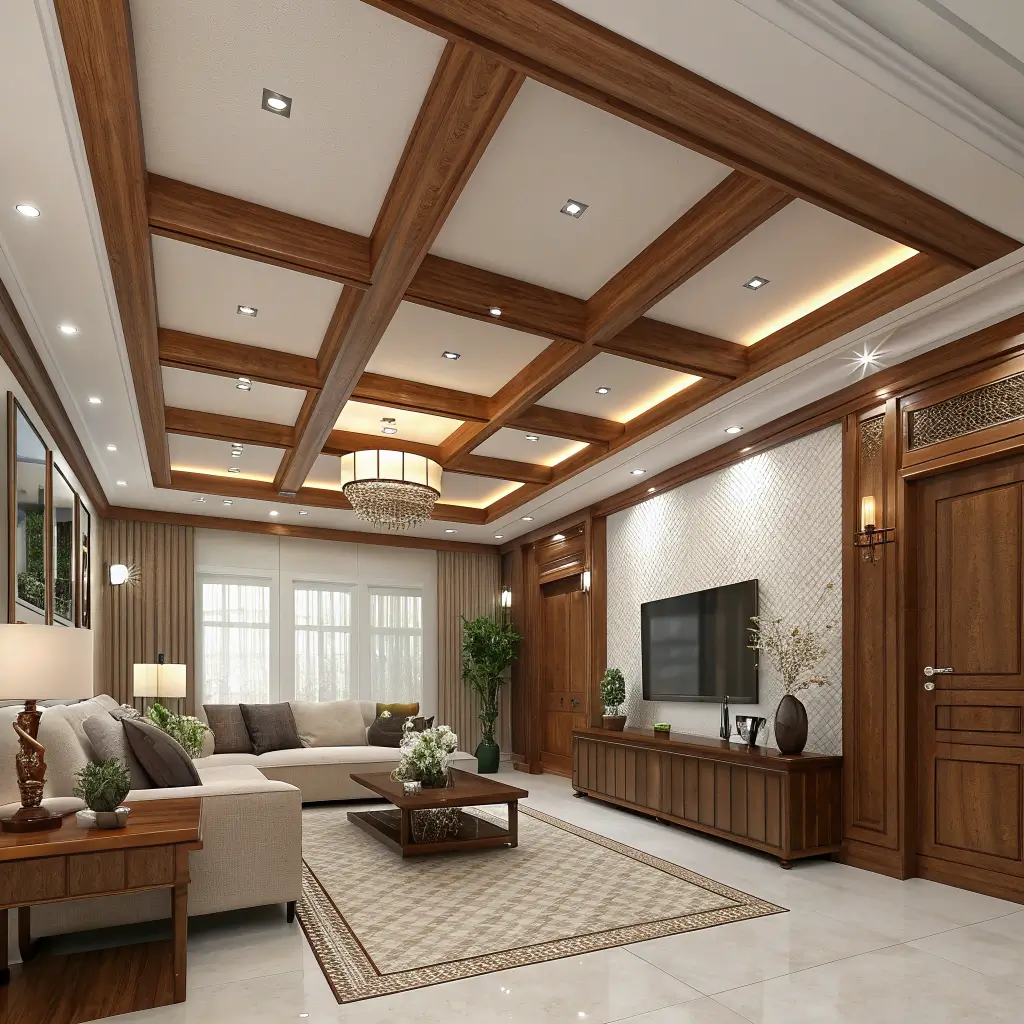
Combining POP with wood creates warmth that pure white POP can’t achieve. I added wooden beams to my POP ceiling design, and the mix of materials adds incredible visual richness.
Wooden Beam Integration
Fake wooden beams installed within POP ceiling designs bring texture and warmth. My living room has three dark walnut beams running across the white POP ceiling, and the contrast is stunning. The beams aren’t structural—they’re decorative, hiding LED strip lighting.
The wood-POP combination works because:
- It adds warmth to cool white POP
- Creates visual texture
- Breaks up large ceiling expanses
- Hides lighting brilliantly
- Appeals to both modern and traditional tastes
Wooden Panel Accents
Adding wooden panels within POP ceiling designs creates interesting focal points. My friend installed a wooden slat panel in the center of her POP ceiling, and it adds this organic element that prevents the space from feeling too polished or cold.
The panels work best when they contrast with the POP—dark wood against white POP, or light wood against colored POP.
Also Read: 10 Beautiful Simple False Ceiling Design Ideas on Budget
7. POP Ceiling Designs for Home Offices
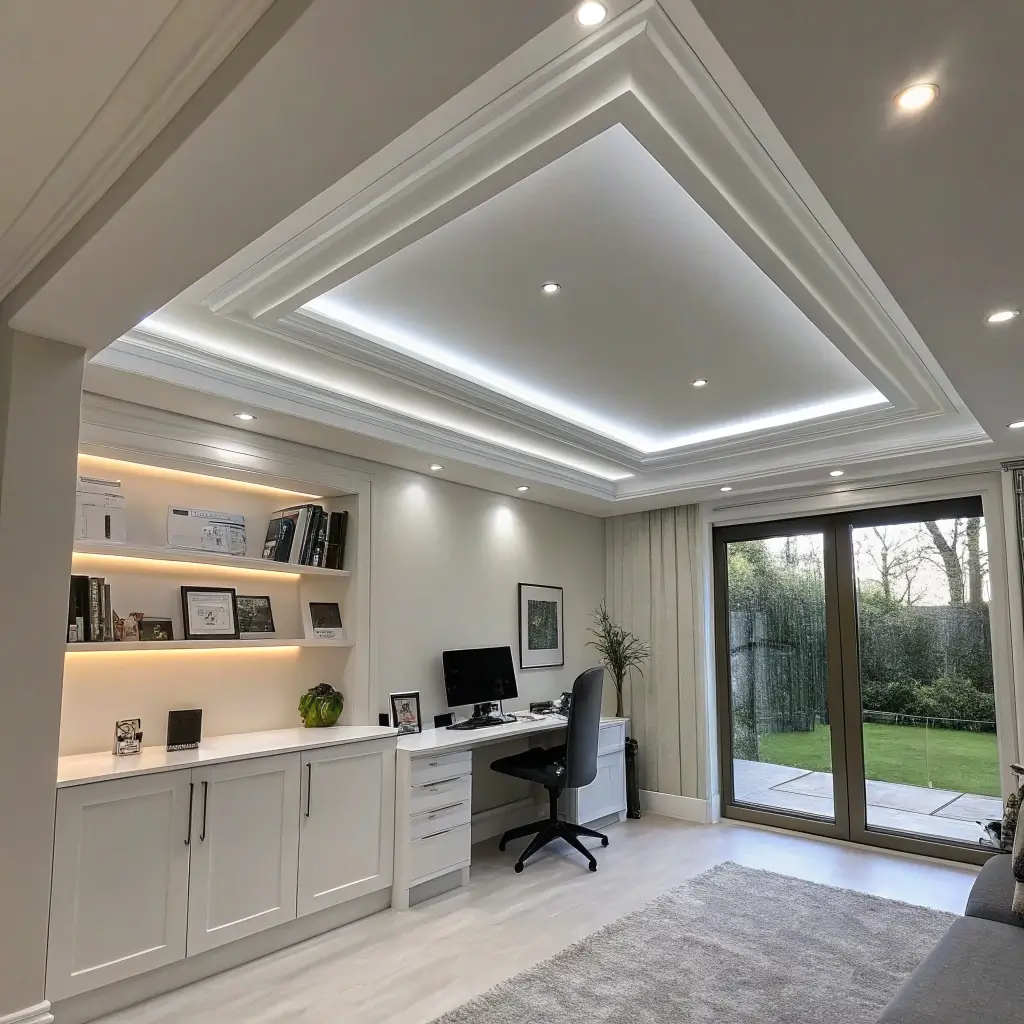
Home office POP ceilings need to balance professionalism with personality. I designed my home office ceiling with clean lines and integrated task lighting, and it creates the perfect work atmosphere.
Grid Pattern with Integrated Lighting
A grid pattern POP ceiling in home offices creates organized, focused energy. My design divides the ceiling into six equal rectangles, each with recessed lighting. The geometry mirrors the organized feeling I want in my workspace.
Office POP designs should:
- Provide excellent task lighting
- Create clean, professional aesthetics
- Avoid being too distracting
- Incorporate sound-dampening if possible
- Support your work style
Linear Modern Office Design
Straight-line POP designs running the length of your office create directionality and flow. My neighbor’s home office has parallel lines with integrated LED strips, and the lines guide your eye through the space, making it feel purposeful and organized.
The linear design also creates natural zones—desk area, meeting area, storage area—all defined by the ceiling design.
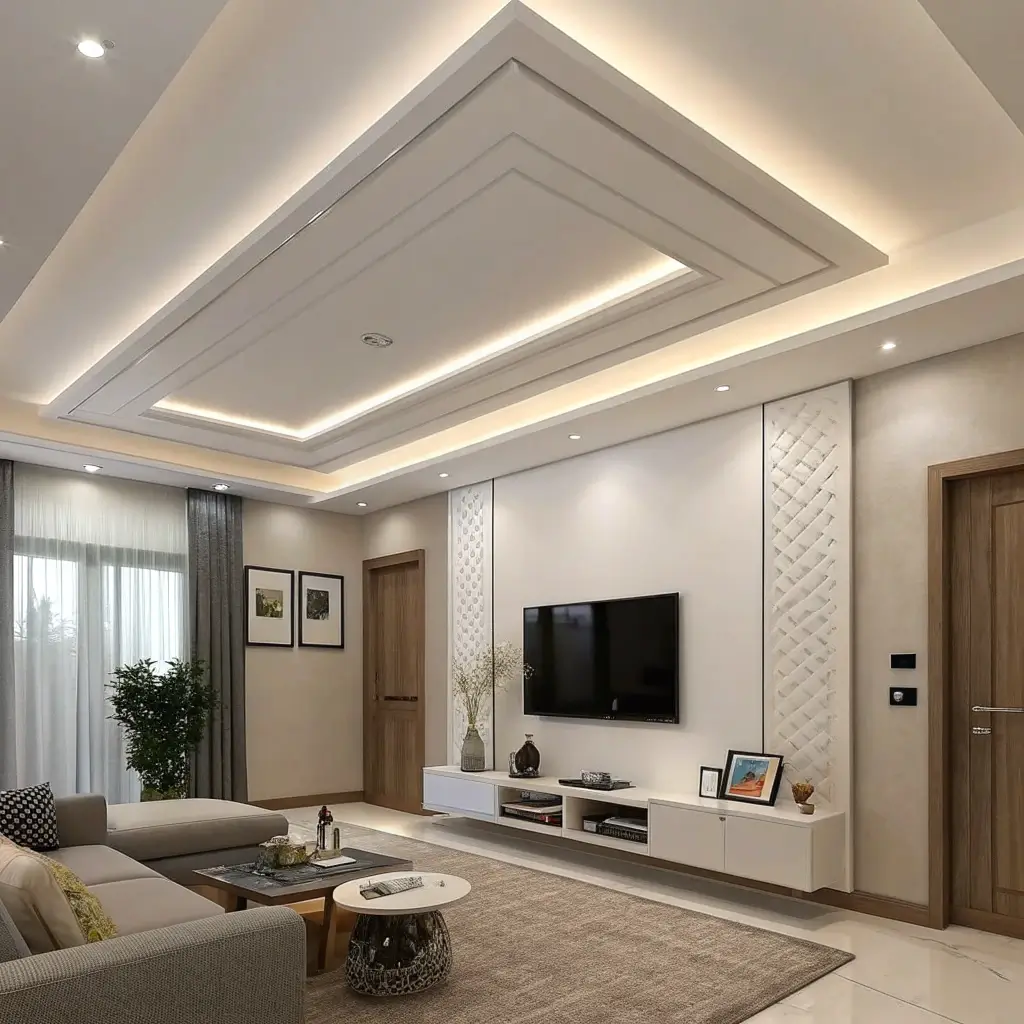
8. Creative Multi-layered POP Ceiling Ideas
Multi-layered POP ceilings create incredible depth and drama. My dining room ceiling has four distinct levels, and the cascading effect makes the room feel taller despite the dropped elements.
Stepped Layer Design
Creating stepped layers in POP ceilings adds architectural drama. Each layer drops slightly from the previous one, creating this waterfall effect. My design starts at the perimeter at full height, drops 4 inches for the second layer, another 3 inches for the third, with a final central drop of 2 inches.
The layering creates:
- Amazing depth and dimension
- Opportunities for varied lighting
- Visual movement
- Luxury hotel vibes
- Conversation-starting architecture
Asymmetrical Layer Design
For the adventurous, asymmetrical multi-layer designs break all the rules beautifully. My architect friend created a design where layers don’t match on opposite sides, and the organic, flowing result is absolutely stunning. It’s art overhead.
This approach requires serious design skills and a contractor who understands the vision. Not a DIY project unless you’re a pro.
9. POP Ceiling with Floral and Artistic Motifs
Artistic POP designs bring personality and uniqueness. I helped my aunt install a subtle floral motif in her bedroom ceiling, and the delicate detail adds romance without being overwhelming.
Floral Corner Details
Floral motifs in ceiling corners add Victorian charm without going full grandma-parlor. We installed delicate flower designs in each corner of her bedroom, and they create visual interest without dominating. The key is subtlety—bold florals overhead can feel oppressive.
Artistic elements work best when:
- They’re proportional to room size
- They match the room’s overall style
- They’re executed with skill
- They don’t overwhelm
- They add rather than dominate
Abstract Artistic Patterns
Abstract artistic POP designs let you create custom art installations overhead. My friend’s designer created flowing, organic shapes that suggest clouds or waves, and the abstract pattern is stunning without being literal.
Custom artistic POP requires skilled artisans. This isn’t basic construction—it’s craftsmanship. Expect to pay more, but the unique result is worth it.
Also Read: 10 Inspiring Gypsum Ceiling Design Ideas and Luxe Room Vibes
10. Budget-Friendly POP Ceiling Makeovers
POP ceilings don’t have to break the bank. I’ve designed several budget-friendly options that deliver maximum impact for minimum cost, proving that smart design beats expensive materials every time.
Simple Single-Border Design
The most budget-friendly POP design creates a simple border around the ceiling perimeter. This design uses minimal material, installs quickly, and creates space for affordable LED strips. My guest room has exactly this—a clean 6-inch border with hidden LEDs—and it cost under $500 for a 12×12 room.
Budget-saving strategies:
- Keep designs simple
- Skip complex curves (labor-intensive)
- Use standard shapes
- Minimize layers
- Do finishing work yourself if skilled
Strategic Accent Sections
Rather than doing entire ceilings, create POP accents in strategic areas. My budget-conscious friend installed POP only in the center section of her living room, leaving the perimeter plain. The contrast works beautifully, and she spent 40% less than a full ceiling would cost.
Strategic placement gives you POP’s impact without POP’s full cost. Smart design wins again.
11. POP Ceiling Ideas for High-Rise Apartments
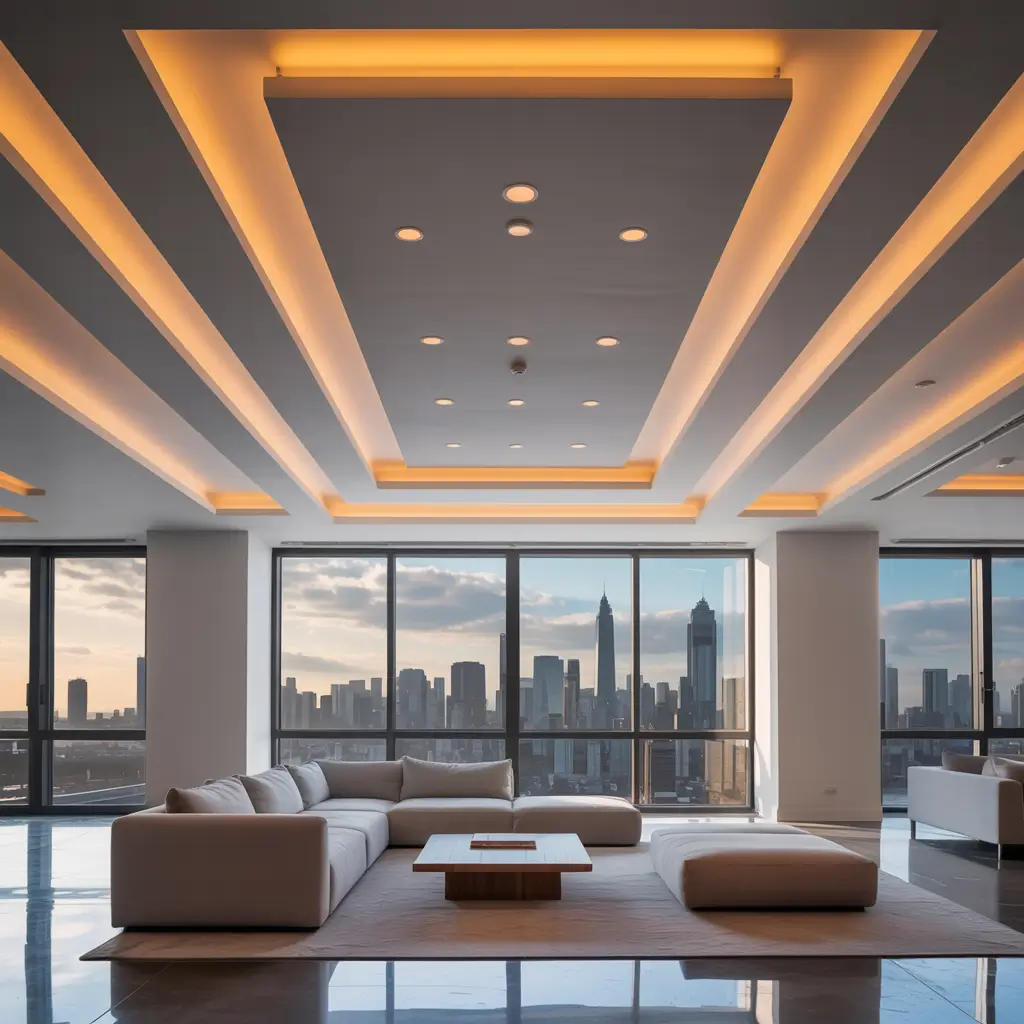
High-rise apartments present unique challenges—building restrictions, weight limits, and often lower ceilings. I designed my high-rise apartment POP within these constraints, and it proves limitations spark creativity.
Lightweight Minimal Design
High-rises often restrict ceiling modifications due to weight and building regulations. My design uses minimal POP—just a slim border and one central recessed panel—meeting building requirements while adding visual interest.
High-rise considerations:
- Check building regulations first
- Keep designs lightweight
- Avoid heavy chandeliers
- Plan for limited ceiling height
- Work with approved contractors
Reflective and Light Designs
In high-rises, maximizing natural light is crucial. I designed my POP ceiling to enhance light flow—white POP reflects light beautifully, and strategic LED placement compensates for typical high-rise lighting challenges.
The key is working with your apartment’s limitations rather than fighting them. My POP design actually makes my compact high-rise unit feel more spacious.
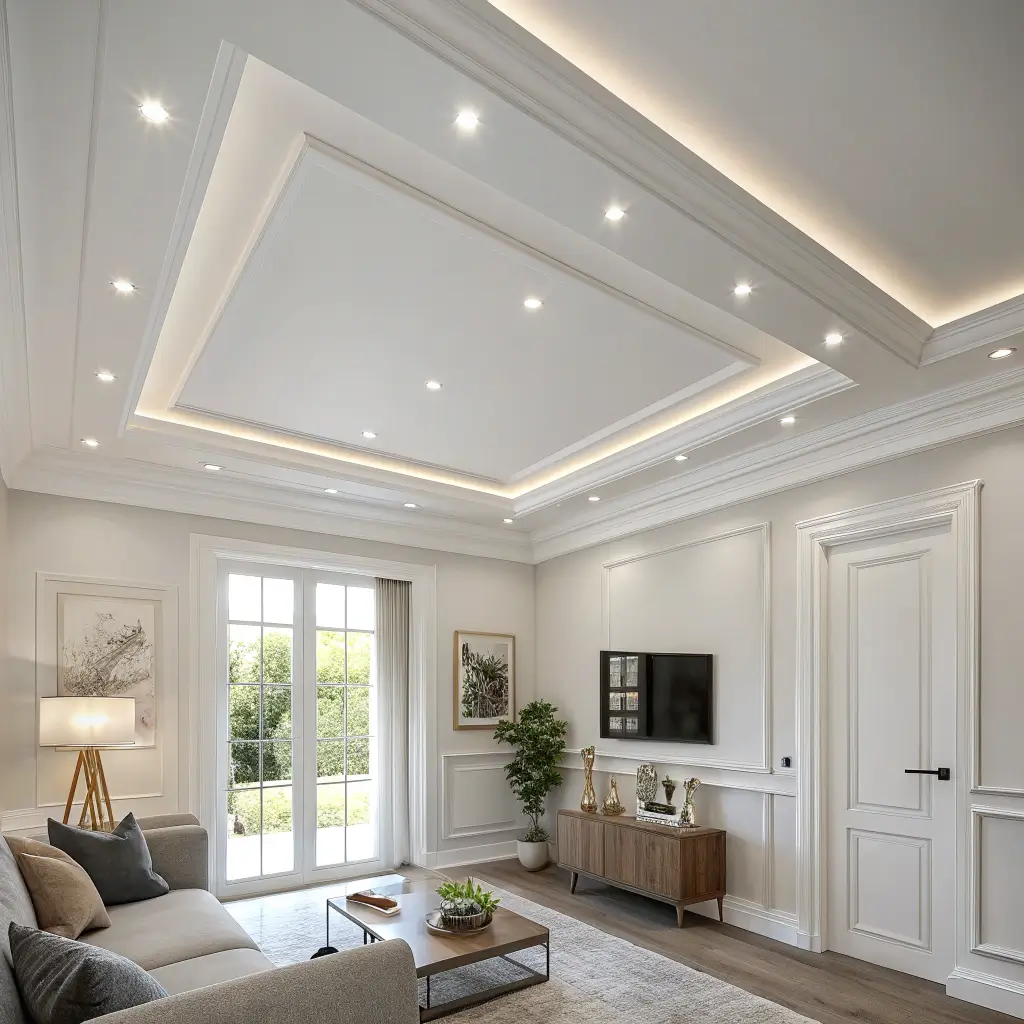
12. Classic White POP Ceilings with Crown Molding
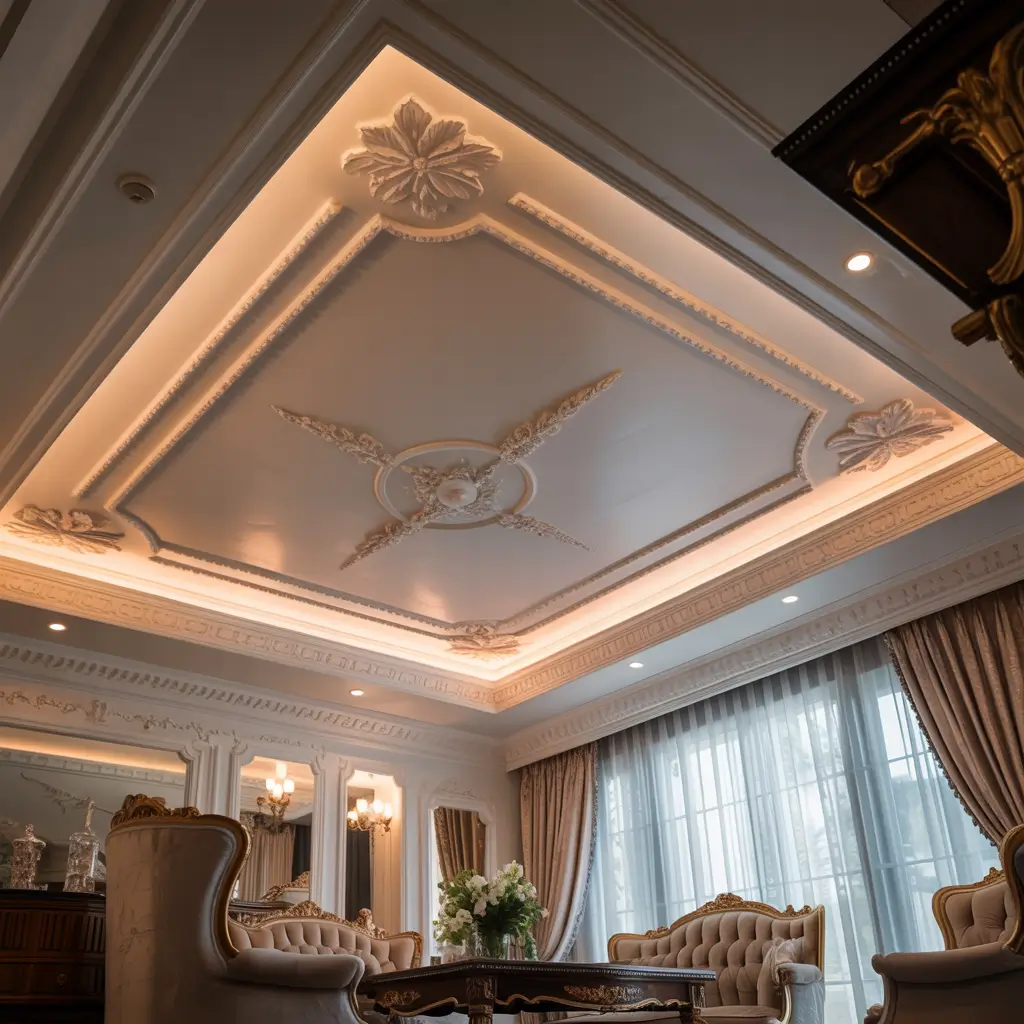
Sometimes classic is best. Traditional white POP with crown molding creates timeless elegance that never goes out of style. My parents’ home has exactly this, and fifteen years later, it still looks perfect.
Traditional Crown Molding
Crown molding in POP creates that classic, sophisticated look. My parents’ design features a subtle tray ceiling with beautiful crown molding, and the traditional elegance works with their classic furniture perfectly.
Classic designs endure because:
- They’re timeless (won’t look dated)
- They suit any decor style
- They’re universally appealing
- They add value to homes
- They’re easier to maintain
Coffered Grid with Molding
Combining coffered grids with crown molding details creates library or study elegance. My uncle’s home office features this design, and the classic sophistication makes Zoom calls look incredibly professional.
The grid provides structure, the molding provides detail, and together they create architectural beauty that’s stood the test of time.
Making Your POP Ceiling Dreams Reality
After exploring these twelve POP ceiling designs, here’s what I know: the right ceiling design transforms your entire space.
Whether you go minimalist and modern or classic and traditional, POP ceilings add architectural interest that flat ceilings simply can’t match.
The key is choosing designs that fit your space, style, and budget. Start by assessing your ceiling height—rooms under 9 feet need subtle designs that don’t reduce height further.
Consider your lighting needs—POP ceilings are perfect for integrating modern LED systems. Think about your style—your ceiling should complement, not compete with, your decor.
Don’t forget about contractors. IMO, POP ceiling installation isn’t a DIY project unless you’re experienced. I’ve seen botched installations, and fixing them costs more than hiring professionals initially.
Interview multiple contractors, check references, and review portfolios before committing.
Plan your lighting during the design phase, not after. I made this mistake once, and retrofitting lights into finished POP is frustrating and expensive.
Decide on light placement, choose fixtures, and integrate electrical planning into your POP design from day one.
Budget realistically. Basic POP designs start around $8-12 per square foot, while complex multi-layer designs with integrated lighting can run $25-40 per square foot. My living room’s luxurious design cost about $2,500 for 200 square feet, while my bedroom’s simple design cost $800 for 150 square feet.
Start small if you’re nervous. I began with my bedroom before tackling the living room, and the experience taught me what I liked and what to avoid. You can always add more POP ceilings later as budget allows.
Most importantly, choose designs you’ll love long-term. Trends come and go, but you’ll live with your ceiling for years. My advice? Lean slightly traditional rather than super trendy. Classic designs with modern lighting create timeless appeal that won’t feel dated in five years.
Your ceiling is the fifth wall—the one most people ignore. Don’t make that mistake. A well-designed POP ceiling elevates your entire space, adds value to your home, and gives you something beautiful to look at every single day. Whether you choose minimalist elegance, luxurious layers, or classic crown molding, you’re creating architecture that makes your house feel more like a thoughtfully designed home. And honestly? That’s worth looking up for 🙂


