12 Stylish Room Decor Ideas DIY Ideas to Try Today
- Bedroom Design
 Ben
Ben- 0
- 42 minutes read

Your room probably looks like a Pinterest board exploded and then gave up halfway through.
You know the feeling—you’ve saved 847 DIY room decor ideas, bought supplies for at least twelve projects, and somehow your space still looks like you’re camping indoors with a mattress on the floor and fairy lights you hung three years ago.
I’ve been there, trust me. I once spent an entire weekend trying to recreate a “simple” macrame wall hanging that looked like it took five minutes to make.
Four hours, three YouTube tutorials, and one minor breakdown later, I had something that resembled a fishing net having an identity crisis.
But here’s the thing—I learned from every disaster, and now I can actually tell you which DIY room decor projects work for real humans with real budgets and questionable crafting skills.
Whether you’re trying to transform your bedroom from “sad college dorm” to “actual adult lives here” or just want to add some personality without maxing out your credit card, these twelve DIY room decor ideas will actually work.
And yes, I’ve tried them all, so I can warn you about the pitfalls and share the shortcuts that’ll save your sanity.
Boho Wall Hanging DIY
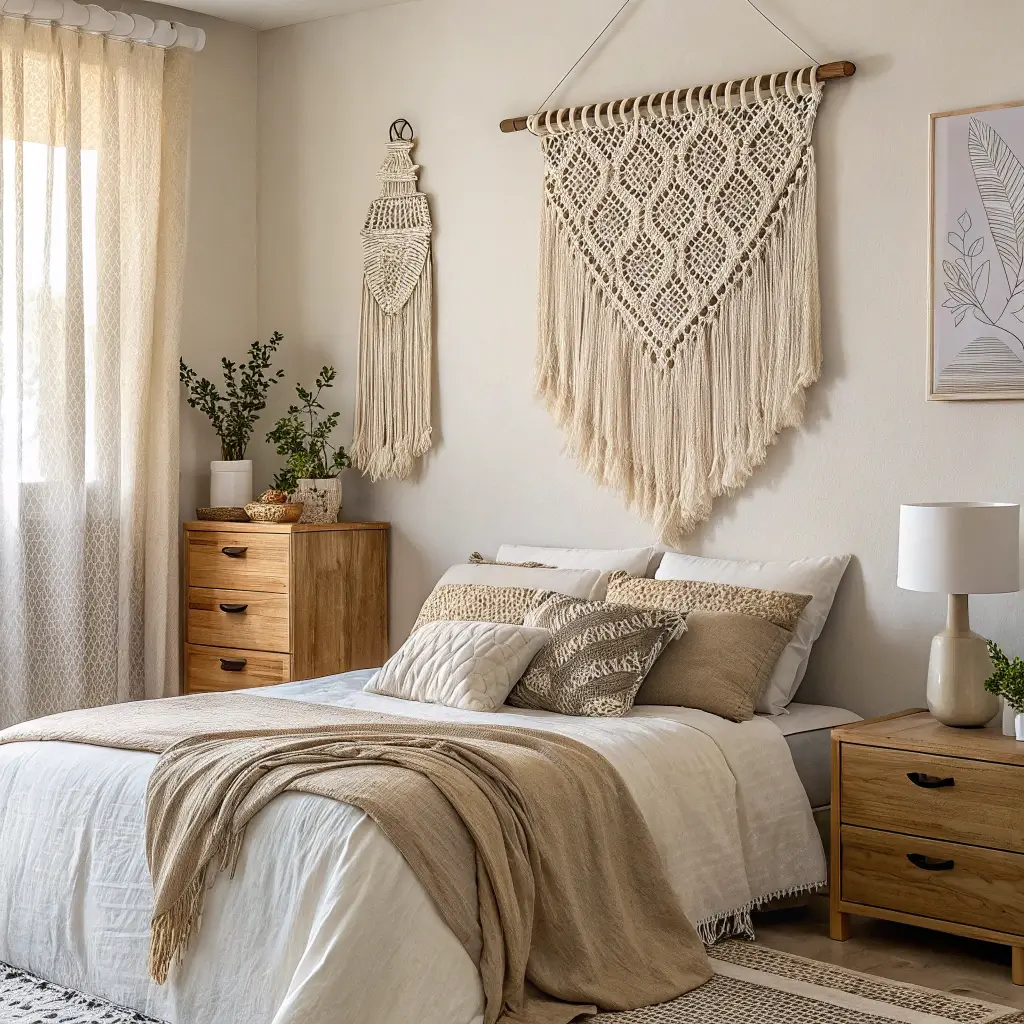
Boho wall hangings are basically the gateway drug of DIY room decor—they look impressive, cost almost nothing to make, and somehow make you feel like you have your life together even when you definitely don’t.
Why Boho Wall Hangings Work for Everyone
The beauty of boho wall hangings lies in their forgiving nature. Imperfections actually add character, which is perfect for those of us whose idea of “straight lines” is more like “gentle suggestions.” Plus, you can make them any size to fit your space and budget.
I started making these after realizing that buying similar pieces would cost me $80+ each. My first attempt looked like a macrame disaster, but I hung it up anyway and suddenly everyone thought I was this crafty, artistic person. Sometimes fake it till you make it actually works.
Materials You Actually Need
Forget those supply lists with 47 different items. Here’s what you really need:
- Cotton rope or yarn: Buy in bulk from hardware stores (way cheaper)
- Wooden dowel or branch: Free from your yard or $2 at craft stores
- Scissors: Sharp ones, not your kitchen scissors
- Measuring tape: If you’re feeling fancy
- Comb: For creating fringe
The Only Knots You Need to Know
Despite what those intimidating tutorials suggest, you only need three basic knots:
- Square knot (your bread and butter)
- Half hitch (for diagonal patterns)
- Gathering knot (to finish things off)
That’s literally it. I’ve made fifteen different wall hangings with just these three knots, and people think I’m some kind of fiber artist.
Aesthetic Photo Clip Wall
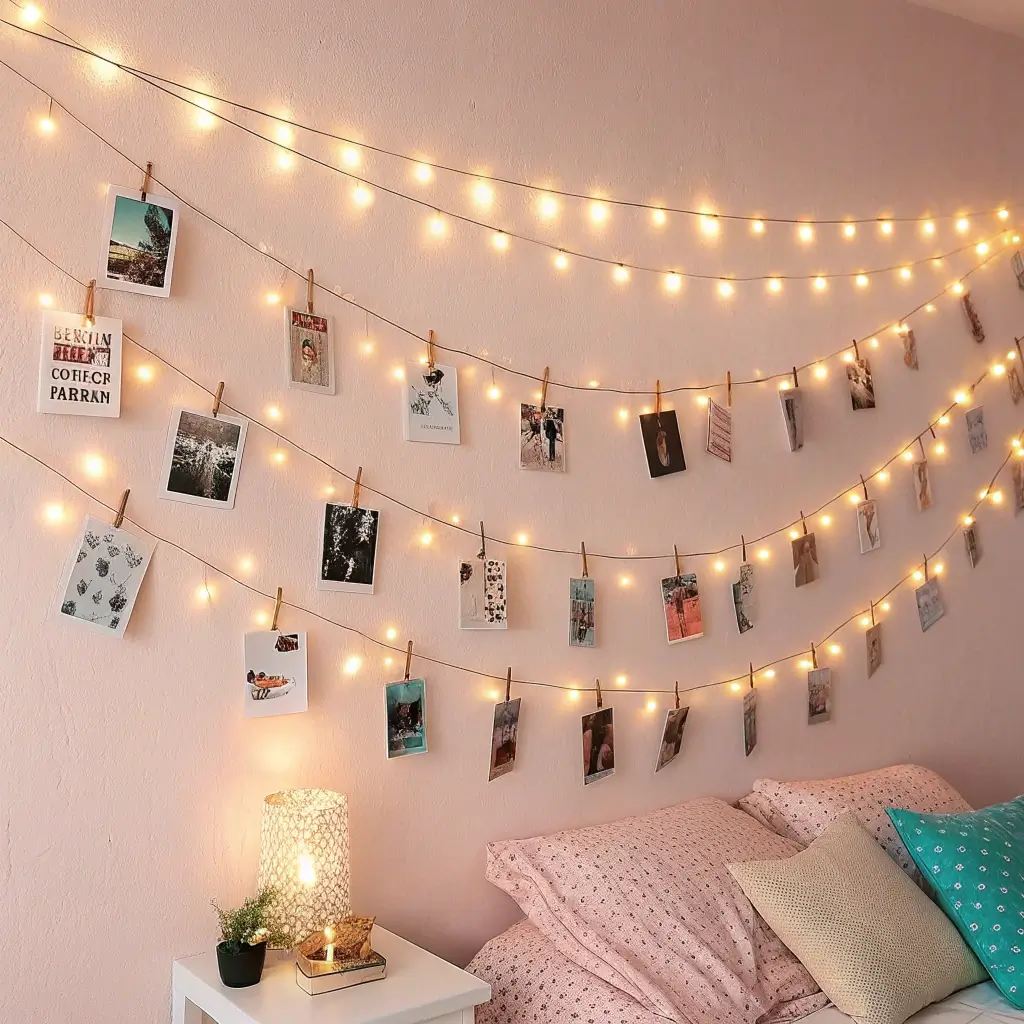
Photo clip walls are the perfect solution for people who want to display memories but can’t commit to permanent frames. Plus, you can change them whenever you get bored, which happens to me approximately every three weeks.
Creating Your Display Strategy
The key to a good photo clip wall is mixing different types of content. Don’t just use photos—throw in concert tickets, postcards, pressed flowers, or even fabric swatches. The variety creates visual interest and tells a story about your life.
I created mine using a grid of string lights with tiny clips, and it’s become my favorite feature in my bedroom. I change out the photos seasonally, and it’s like redecorating without actually redecorating.
Installation That Won’t Destroy Your Walls
Use removable adhesive hooks or small nails if you’re allowed. String fishing line or thin wire between the hooks, then add your clips. The whole setup takes maybe thirty minutes and costs under $20.
What to Display
Mix these elements for the best effect:
- Personal photos (obviously)
- Inspirational quotes (but please, good typography)
- Concert tickets and travel mementos
- Pressed flowers or leaves
- Fabric samples or wallpaper scraps
- Small artwork or postcards
The goal is creating a curated but personal gallery that changes with your mood and experiences.
Handmade LED Light Decor
LED lights aren’t just for college dorms anymore. When used thoughtfully, they can create amazing ambient lighting that makes your room feel like a cozy sanctuary instead of a fluorescent nightmare.
Beyond Basic String Lights
While string lights are great, you can do so much more with LED strips and creative placement. I’ve used them behind headboards, under floating shelves, and even inside glass jars to create custom lighting fixtures.
The key is hiding the actual LED strip while showcasing the light it creates. Nobody wants to see the mechanics—they want to see the magic.
Creative Placement Ideas
Try these unexpected locations:
- Behind mirrors for a backlit glow
- Under bed frames for floating effects
- Inside glass containers for custom lamps
- Along ceiling edges for ambient lighting
- Behind artwork for gallery-style illumination
Color Temperature Matters
Warm white LEDs (2700K-3000K) create cozy, relaxing vibes perfect for bedrooms. Cool white (4000K+) feels more energizing and works better for workspaces. Don’t mix temperatures in the same room unless you want it to feel like a hardware store.
Also Read: 10 Stylish DIY Room Decor Ideas for Trendy Interiorsc
DIY Floating Shelf Styling
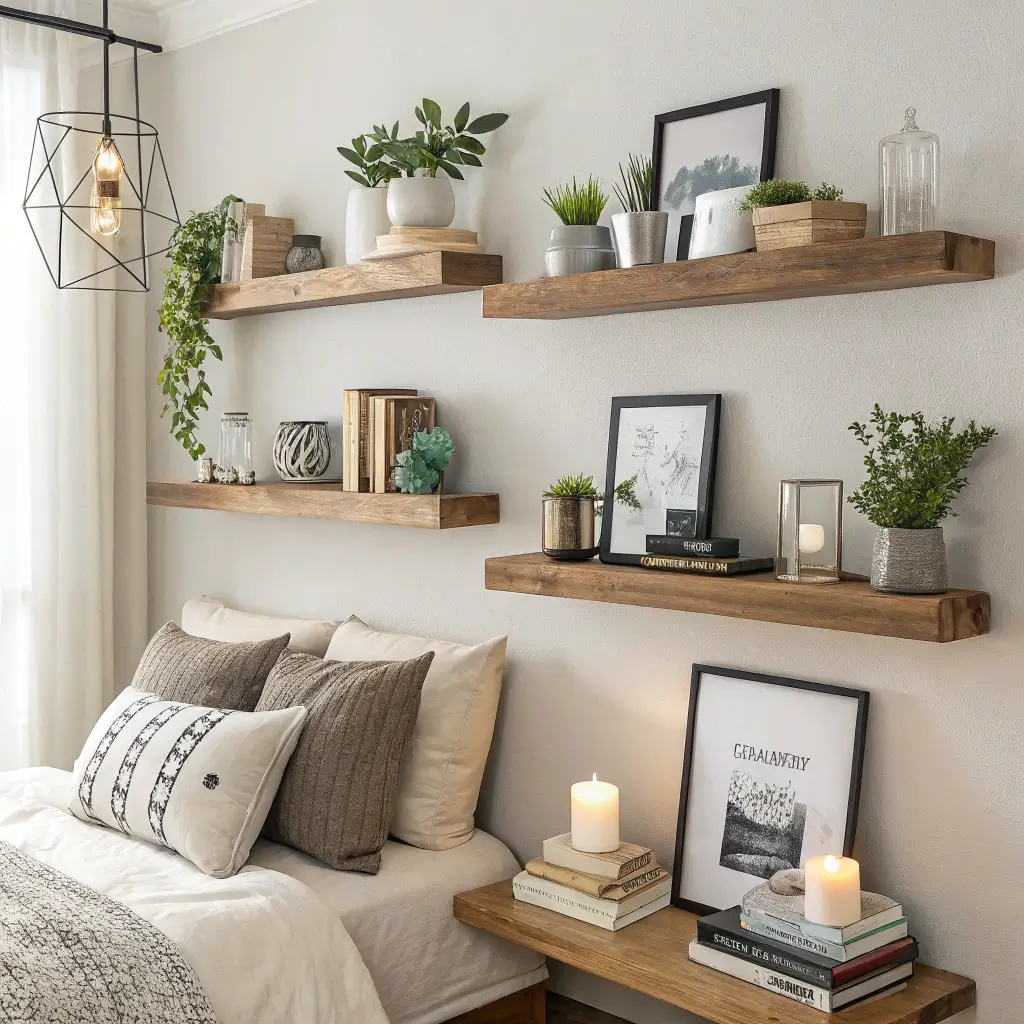
Floating shelves are the Swiss Army knives of room decor—they provide storage, display space, and architectural interest all while looking effortlessly chic. The trick is styling them so they look intentional rather than like you just dumped random objects on a shelf.
The Rule of Threes
Group items in odd numbers, especially threes. This creates visual balance that feels natural to our brains. I learned this after years of wondering why my shelves looked “off” even when they were perfectly organized.
Mixing Heights and Textures
Combine tall, medium, and short objects on each shelf. Mix smooth and textured items, matte and shiny finishes, organic and geometric shapes. The contrast creates interest while the grouping creates cohesion.
What Actually Looks Good
Skip the random clutter and focus on these categories:
- Books (but please, arrange them thoughtfully)
- Plants (real or convincingly fake)
- One meaningful object per shelf
- Small artwork or framed photos
- Candles or small lighting elements
The goal is curated, not cluttered. Each item should earn its place on the shelf.
Minimalist Frame Art DIY
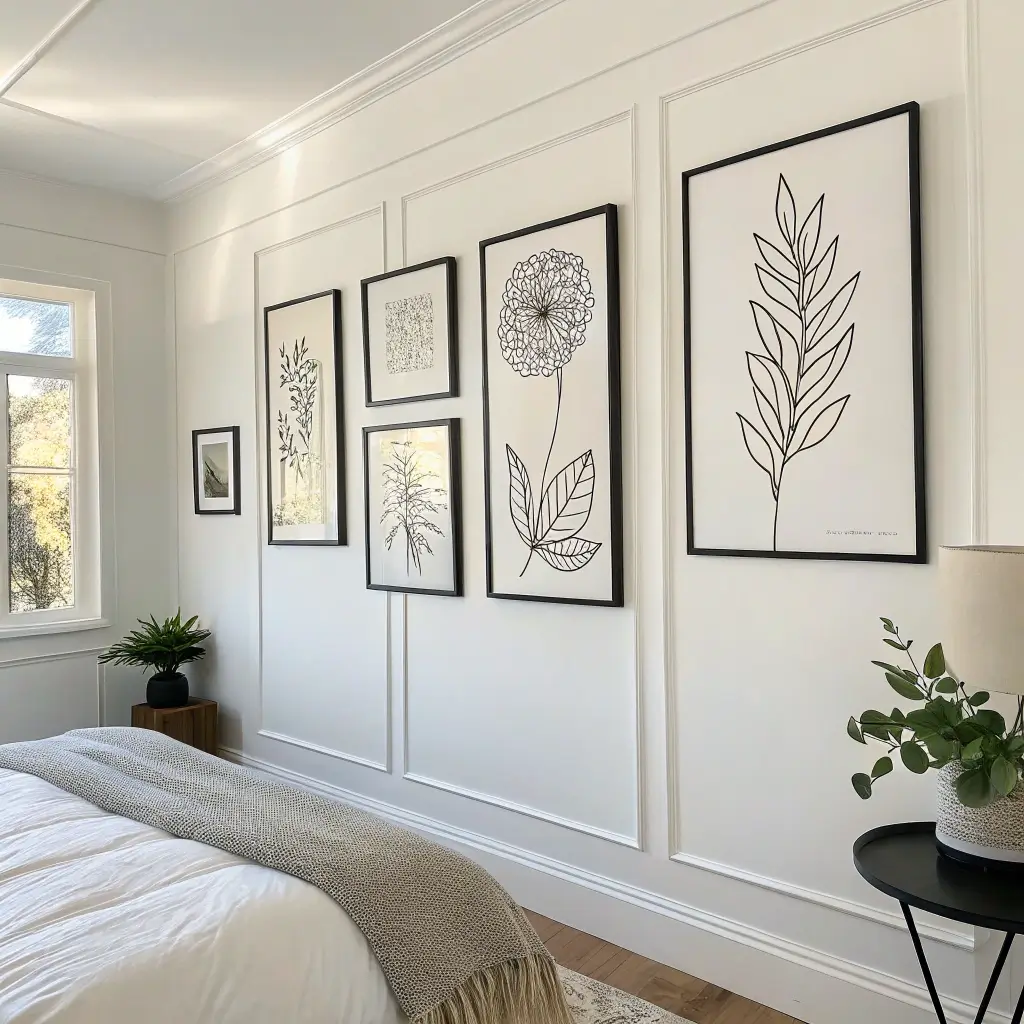
Minimalist frame art proves that sometimes the most impactful decor is the simplest. You can create gallery-worthy pieces with basic supplies and zero artistic talent—I’m living proof of this.
The Power of Simple Shapes
Geometric shapes, single lines, and basic patterns create sophisticated art when executed cleanly. Think circles, triangles, simple line drawings, or even just color blocks. The key is precision and intentionality.
I made a series of three frames with simple geometric shapes in black ink on white paper. Total cost: $15. Total compliments received: countless. Sometimes the simplest ideas are the most effective.
Materials for Success
You don’t need expensive art supplies:
- White or cream cardstock
- Black fine-tip markers or pens
- Ruler for straight lines
- Simple frames (thrift stores are goldmines)
- Spray paint if you want to unify frame colors
Design Ideas That Work
Try these foolproof approaches:
- Single geometric shapes in different sizes
- Simple line drawings of objects you love
- Abstract patterns using basic shapes
- Typography with meaningful words or phrases
- Color gradients using watercolors or markers
The beauty lies in the execution, not the complexity.
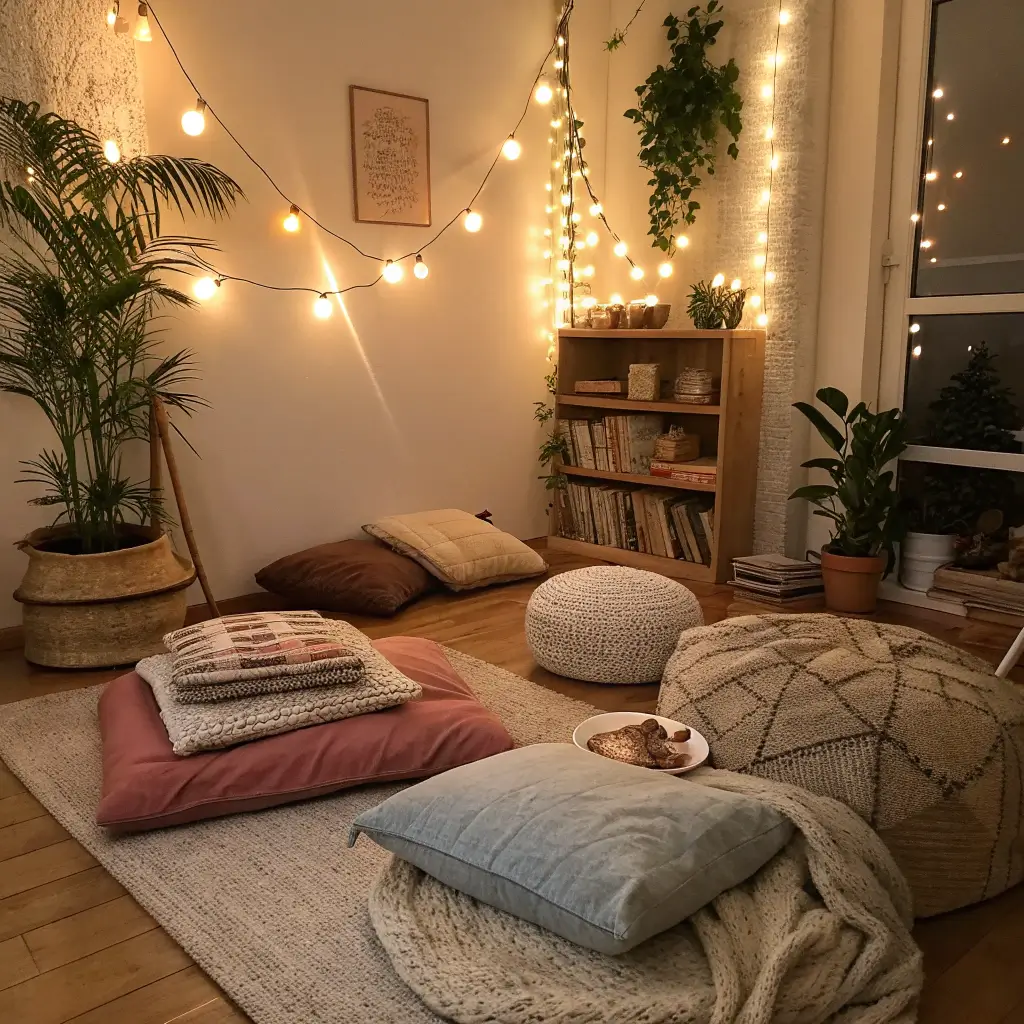
Cozy Corner Floor Seating
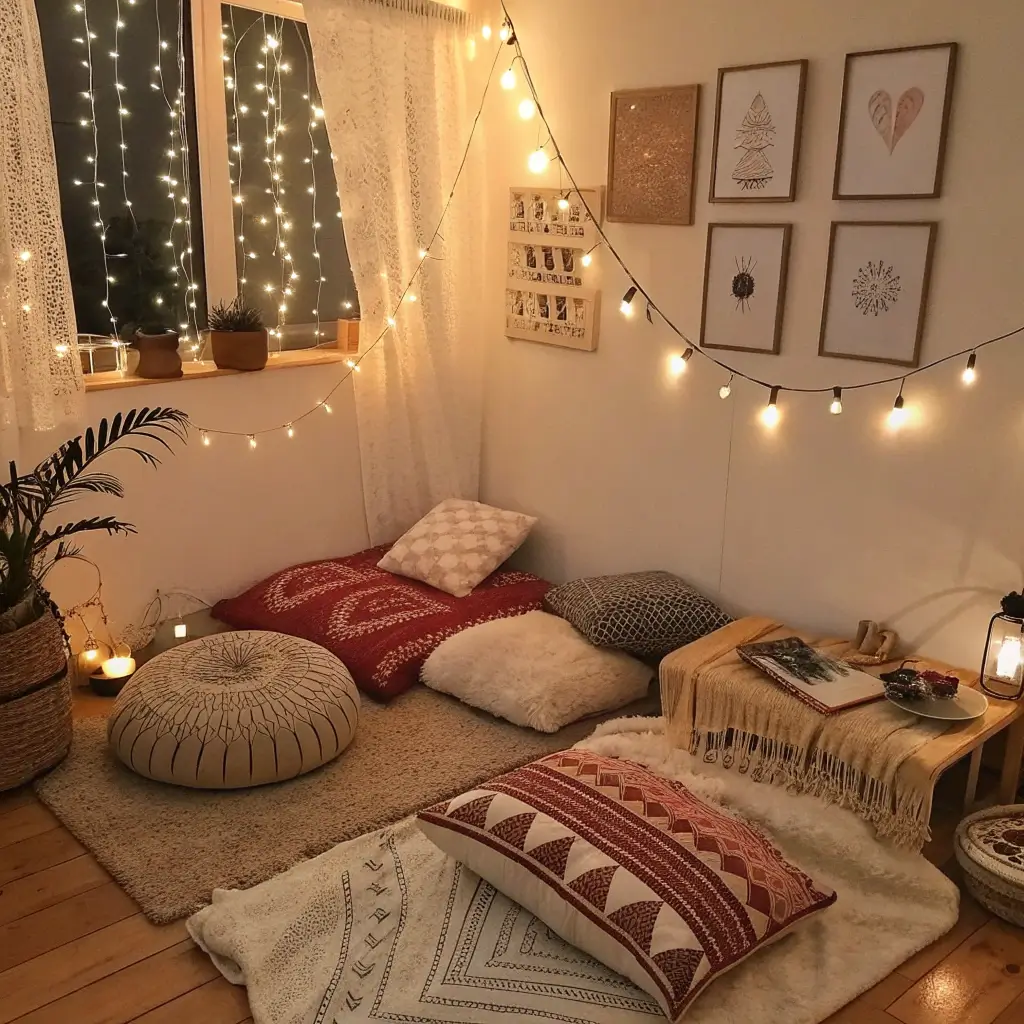
Floor seating creates intimate, relaxed spaces perfect for reading, meditation, or just escaping from the world. Plus, it’s way cheaper than buying another chair you don’t have room for.
Creating Comfort on the Floor
The secret to good floor seating is layering. Start with a base rug, add floor cushions or pillows, throw in some blankets, and create a back support system using larger pillows or a wall.
I created a reading nook in my bedroom corner using this method, and it’s become my favorite spot in the entire house. There’s something about being close to the ground that feels grounding (pun intended).
Essential Elements
Build your floor seating area with these components:
- Large area rug as your foundation
- Floor cushions or large pillows for seating
- Back support pillows or bolsters
- Soft throw blankets for coziness
- Small side table or tray for drinks/books
- Good lighting (floor lamp or string lights)
Making It Look Intentional
Arrange everything asymmetrically but balanced. Avoid perfect symmetry, which feels stiff. Instead, create visual weight balance—if you have a large pillow on one side, balance it with two smaller ones on the other.
Also Read: 10 Amazing Security Door Design Ideas for Elegant Interiors
DIY Mirror Wall Accent
Mirrors are basically magic for small spaces—they reflect light, create the illusion of more space, and add glamour without breaking the bank. A well-designed mirror wall can transform any room from cramped to spacious.
Planning Your Mirror Layout
Before hanging anything, cut paper templates of your mirrors and tape them to the wall. This lets you experiment with arrangements without putting holes in your wall. Trust me, this step saves so much frustration.
I learned this the hard way after creating a mirror wall that looked like a disco ball exploded. The second attempt, with proper planning, looked intentional and sophisticated.
Mirror Selection Strategy
Mix different sizes and shapes for visual interest:
- One large statement mirror as your anchor
- Several medium mirrors for balance
- Small accent mirrors to fill gaps
- Mix round and angular shapes
- Stick to similar frame styles or colors
Installation Tips
Use appropriate wall anchors for the weight of your mirrors. Mark all your holes before drilling anything. Start with your largest mirror and work outward. Leave consistent spacing between mirrors—usually 2-3 inches works well.
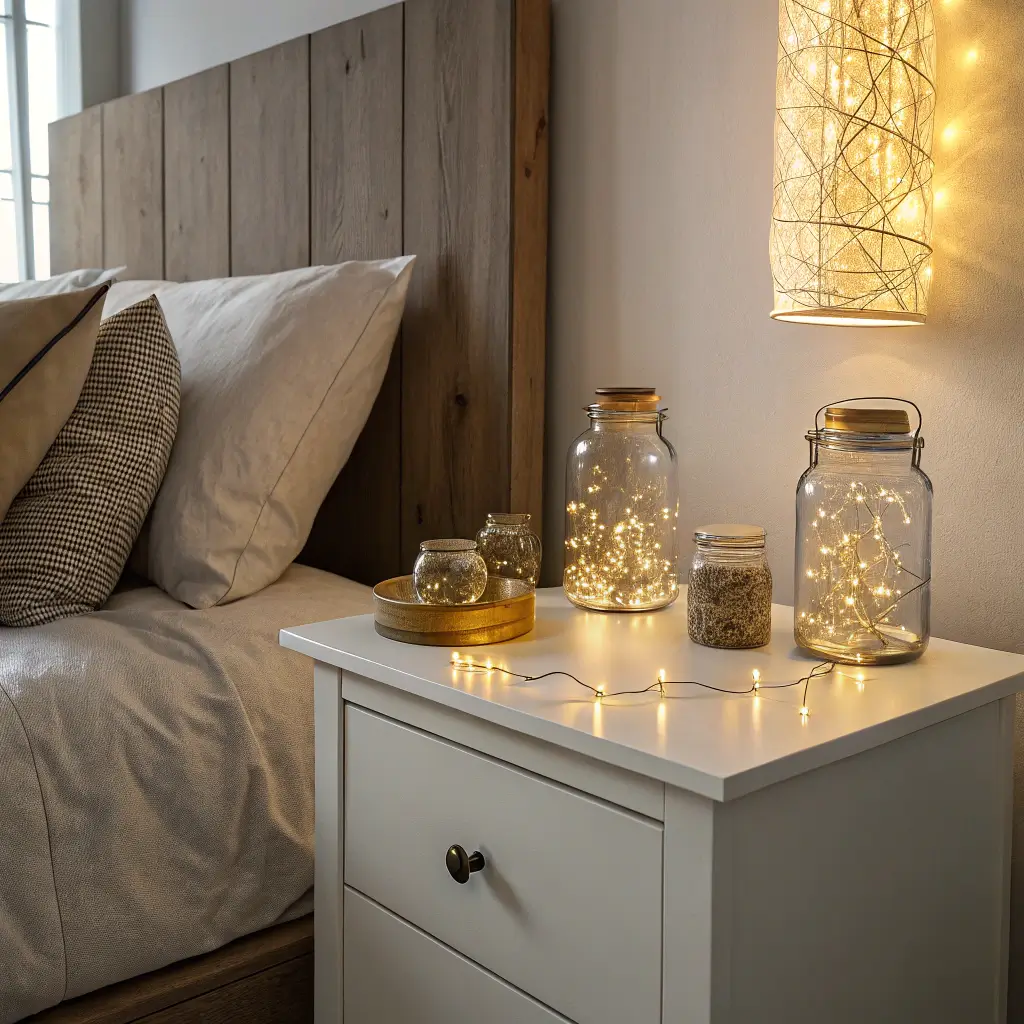
Upcycled Jar Decor Lights
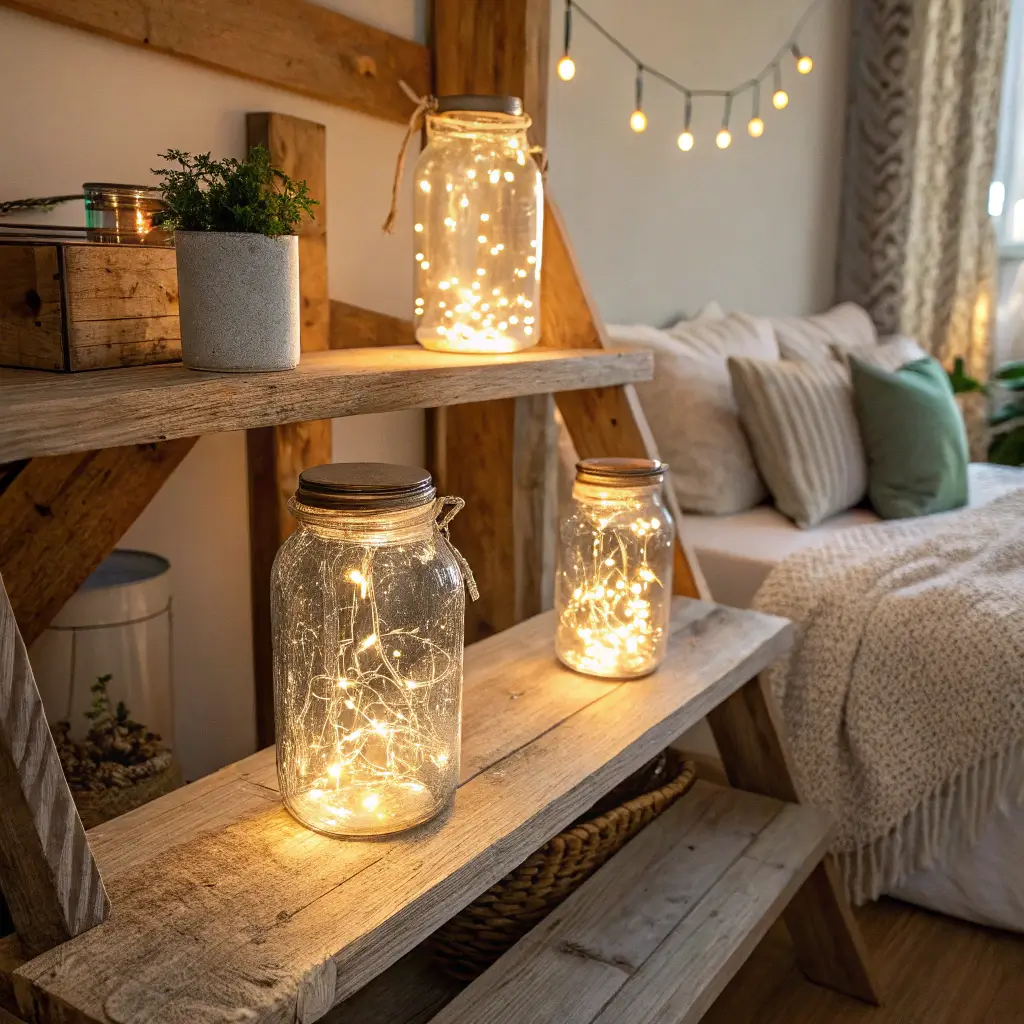
Mason jars aren’t just for Pinterest-perfect salads anymore. They make fantastic lighting fixtures that add warmth and character to any room while costing almost nothing to create.
Beyond Basic Mason Jars
While mason jars work great, don’t limit yourself. Old pickle jars, sauce jars, even large baby food jars can become beautiful lighting fixtures with the right treatment.
I’ve made lights from everything from wine bottles to old glass lampshades I found at thrift stores. The key is seeing the potential in everyday objects.
Creating the Lighting Effect
Battery-operated LED string lights are your best friend here. They’re safe, don’t generate heat, and you can control them with timers or remotes. Avoid anything that plugs into the wall unless you’re comfortable with electrical work.
Design Variations
Try these different approaches:
- Fairy lights inside clear jars for magical glow
- Colored lights for mood lighting
- Frosted spray paint for diffused light
- Decorative elements inside jars (fake snow, shells, etc.)
- Hanging arrangements at different heights
The possibilities are endless, and each jar costs maybe $3 to transform.
Fabric Wall Tapestry DIY
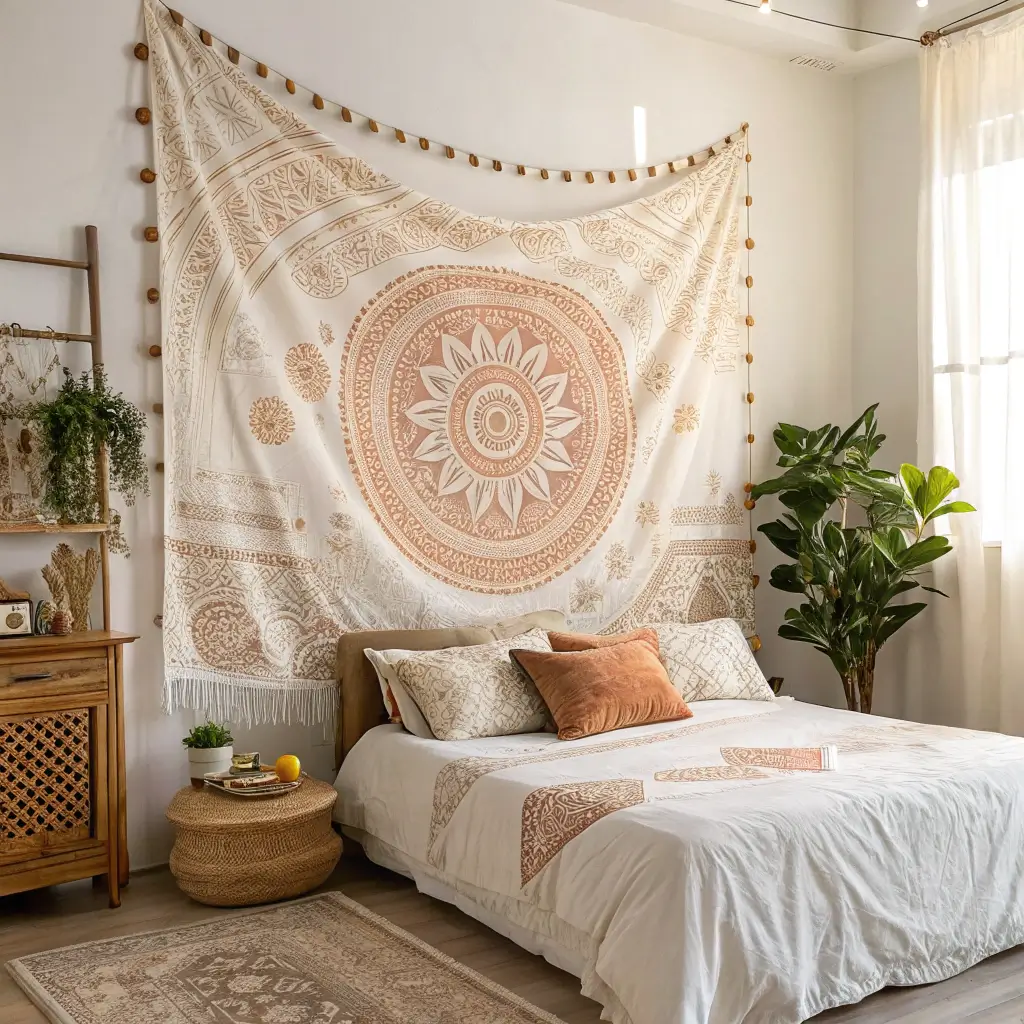
Fabric wall tapestries add color, texture, and warmth to rooms while being completely removable—perfect for renters or commitment-phobes like myself.
Choosing Your Fabric
Heavy fabrics work better than light ones. They hang better, hide wall imperfections, and create more dramatic impact. Tapestries, canvas drop cloths, vintage scarves, or even shower curtains can work.
I created a stunning wall feature using vintage scarves I collected from thrift stores. Each one cost under $5, and together they look like an expensive textile installation.
Hanging Methods That Work
Forget complicated hanging systems:
- Wooden dowels or curtain rods at top and bottom
- Command strips for lighter fabrics
- Velcro strips for easy removal
- Tension rods for temporary installations
- Simple nails if you’re allowed to make holes
Creating Cohesion
If using multiple pieces, stick to a color story. They don’t need to match perfectly, but they should have a conversation with each other. Think of it like coordinating an outfit—everything works together even if it doesn’t match exactly.
Also Read: 10 Unique Bathroom Door Design Ideas That Inspire Creativity
DIY Bedside Table Decor
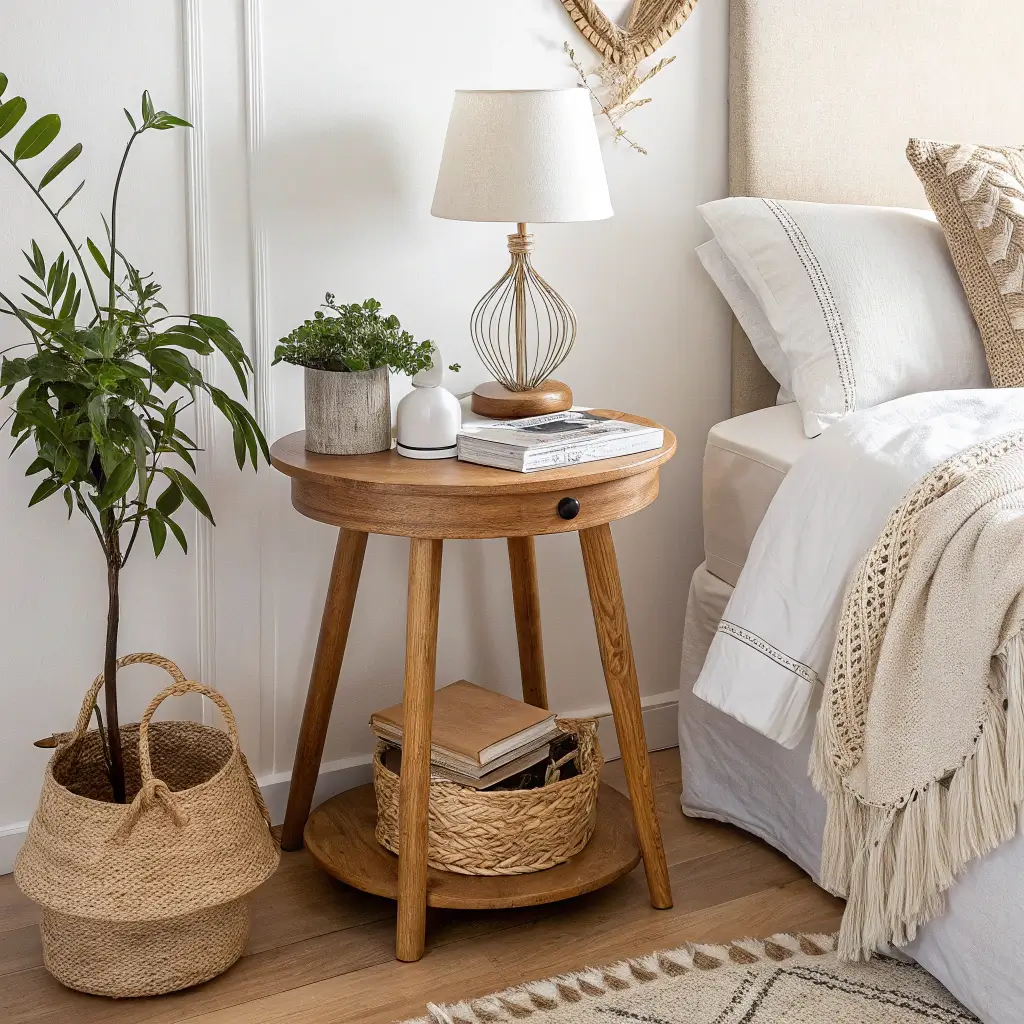
Your bedside table is prime real estate for personal style, but most people just dump random stuff there and call it decorated. A thoughtfully styled bedside table can elevate your entire bedroom.
The Essentials Formula
Every bedside table needs these functional elements:
- Good lighting (lamp or wall sconce)
- Place for your phone and charger
- Water glass or bottle
- Clock (if you don’t use your phone)
- Small dish for jewelry or daily items
Once you have the essentials, you can add decorative elements.
Adding Personality
Layer in these decorative touches:
- Small plant or fresh flowers
- One meaningful object or photo
- Stack of books (but actually books you might read)
- Candle for ambiance
- Small tray to corral smaller items
The key is editing ruthlessly. Your bedside table should be functional first, beautiful second.
Styling Tips
Use the triangle principle—arrange items in triangular groupings for visual balance. Vary heights and textures. Keep frequently used items easily accessible. And please, hide those charging cables somehow.
Painted Accent Wall Art
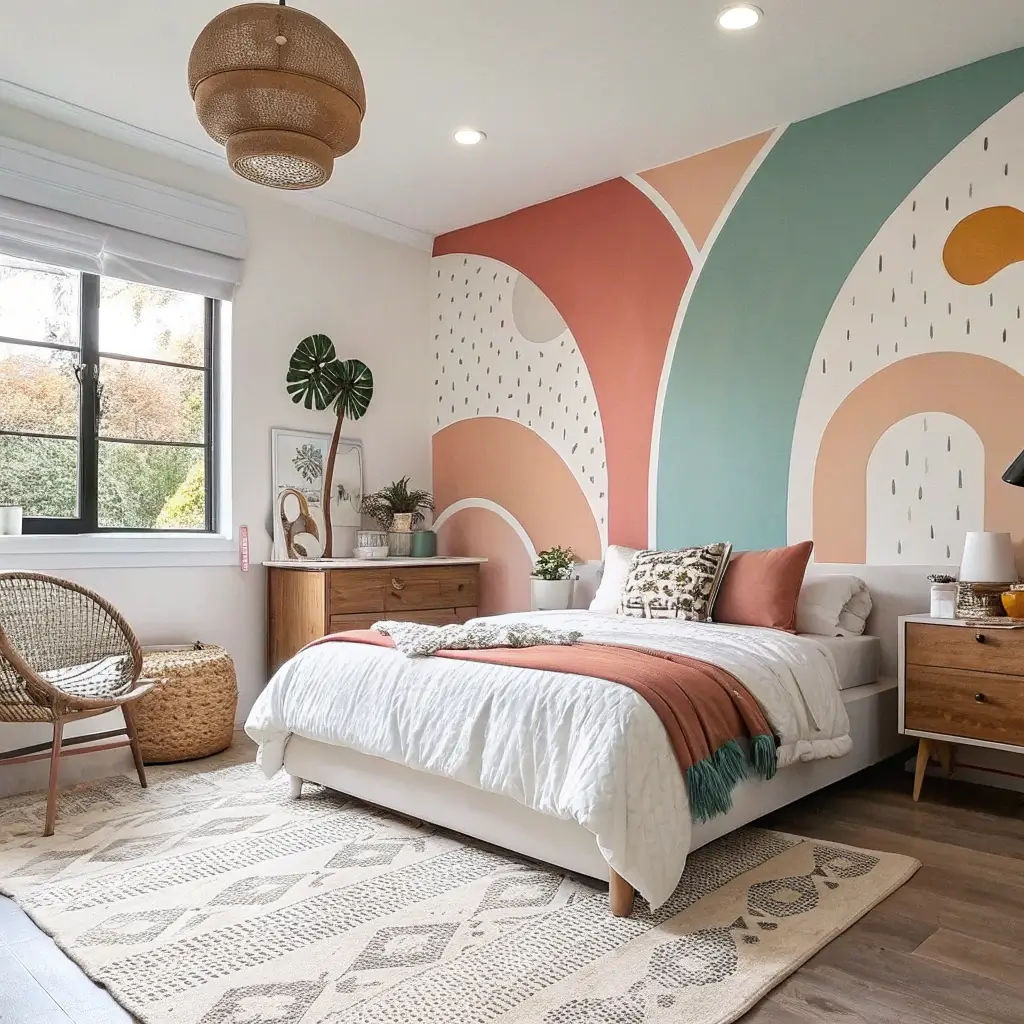
Accent walls are back, but we’re not talking about the feature walls of the 2000s. Modern accent walls use paint to create artistic statements that add personality without overwhelming the space.
Choosing Your Wall
Pick the wall that makes the most sense architecturally—usually the one behind your bed or the first wall you see when entering. Avoid walls with lots of windows or doors unless you enjoy painting around obstacles.
Design Ideas That Work
You don’t need to be an artist to create stunning painted wall art:
- Geometric shapes using painter’s tape
- Ombre or gradient effects
- Simple stripes in varying widths
- Abstract color blocking
- Stenciled patterns (but keep them large-scale)
I created a geometric mountain range on my bedroom wall using three shades of blue and some painter’s tape. It took one weekend and cost about $30 in paint, but it looks like custom wallpaper.
Execution Tips
Use high-quality painter’s tape and remove it while the paint is still slightly wet to avoid peeling. Start with lighter colors and work toward darker ones. Take your time with the prep work—it makes all the difference in the final result.
DIY Indoor Plant Display
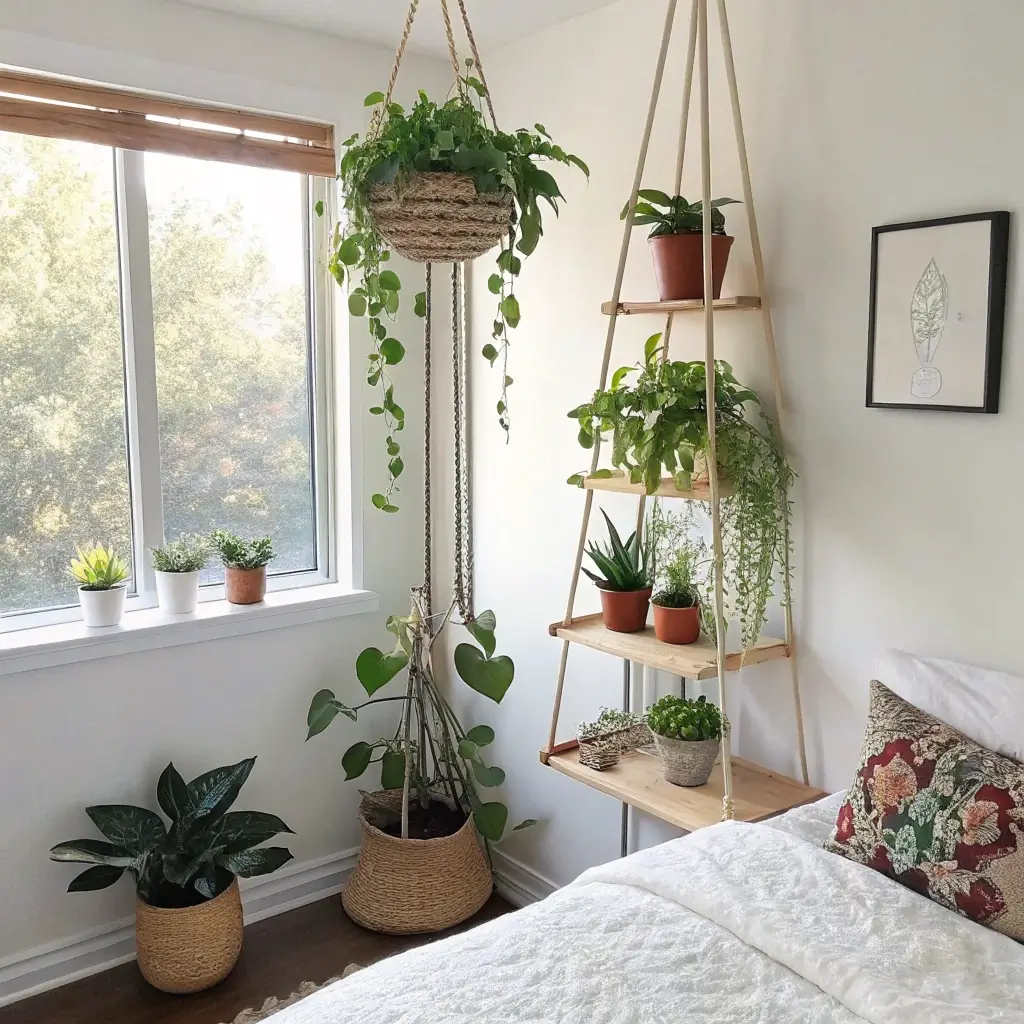
Plants are basically the easiest way to make any room look more alive and Instagram-worthy. But the way you display them can make the difference between “plant parent goals” and “I’m trying too hard.”
Creating Plant Groupings
Group plants in odd numbers and vary their heights. Use plant stands, books, or hanging planters to create different levels. The goal is creating a mini indoor garden, not a plant lineup.
I learned this after arranging all my plants in a sad little row on my windowsill like they were waiting for the bus. Now I have plants at different heights throughout my room, and it feels like a jungle (in the best way).
Display Methods
Mix these different display techniques:
- Floor plants in decorative pots
- Hanging plants at various heights
- Shelf plants creating green moments
- Wall-mounted planters for vertical interest
- Plant stands elevating smaller plants
Low-Maintenance Options
If you’re plant-challenged, start with these nearly indestructible options:
- Snake plants (seriously, they thrive on neglect)
- Pothos (grows in water or soil)
- ZZ plants (perfect for dark corners)
- Succulents (just don’t overwater)
- Air plants (no soil required)
The key is starting small and building confidence before investing in high-maintenance plants.
Making It All Work Together
The secret to great DIY room decor isn’t perfection—it’s personality and cohesion. Your room should tell your story, not look like a catalog page. Mix these projects, adapt them to your style, and don’t stress if things aren’t Pinterest-perfect.
Start with one project that excites you most. Success builds confidence, and suddenly you’ll find yourself seeing DIY potential everywhere. Before you know it, you’ll be that friend everyone texts for decorating advice.
Remember, the best room decor reflects who you are. These projects are just starting points—make them yours, learn from the mistakes, and enjoy the process. Because honestly, the disasters often make the best stories later.
Final Thoughts
DIY room decor isn’t about creating perfection—it’s about creating spaces that make you happy to be home.
Whether you start with a simple boho wall hanging or go all-out with a painted accent wall, each project adds a piece of your personality to your space.
I’ve learned that the most successful DIY projects are the ones that solve real problems while looking good. Need more storage? Floating shelves.
Want better lighting? LED accents. Missing personality? Photo walls or plant displays.
The key is starting somewhere and building from there. Your room won’t transform overnight, but each thoughtful addition makes it more yours.
And honestly, there’s something deeply satisfying about looking around your space and knowing you created most of what makes it special.


