10 Stunning Two Car Garage Organization Ideas for Perfect Order
- Garage Decor
 Ben
Ben- 0
- 53 minutes read
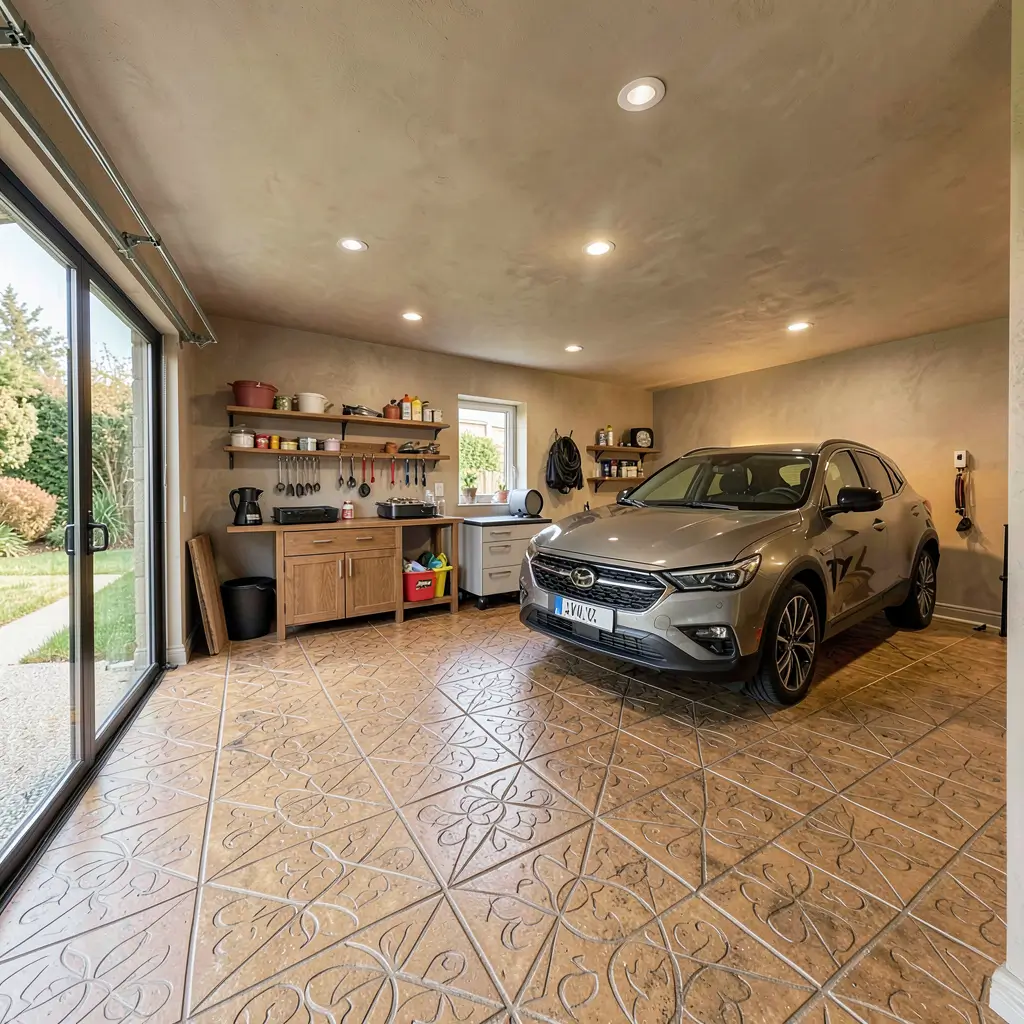
Raise your hand if you own a two-car garage but can barely fit one car inside. Both hands up if you’ve given up entirely and just park in the driveway like it’s totally normal. No judgment here – I lived that exact reality for four miserable years.
My two-car garage had become a 400-square-foot disaster zone. Somewhere under the mountain of holiday decorations, sports equipment, and mysterious boxes labeled “stuff” (helpful, right?), there was supposed to be room for two vehicles. Instead, my wife and I scraped ice off our windshields every winter morning while our garage stayed warm and cozy – protecting absolutely nothing of value.
The turning point hit when I tripped over a garden hose at midnight, crashed into a shelf, and triggered an avalanche of plastic bins that nearly buried me alive. Dramatic? Maybe. But that moment lit a fire under me to fix this mess once and for all.
After spending two years testing different two-car garage organization ideas, I’ve nailed down what actually works. These ten strategies transformed my garage from embarrassing catastrophe to organized showpiece. And yes, both cars actually fit inside now.
Wall-Mounted Storage Solutions
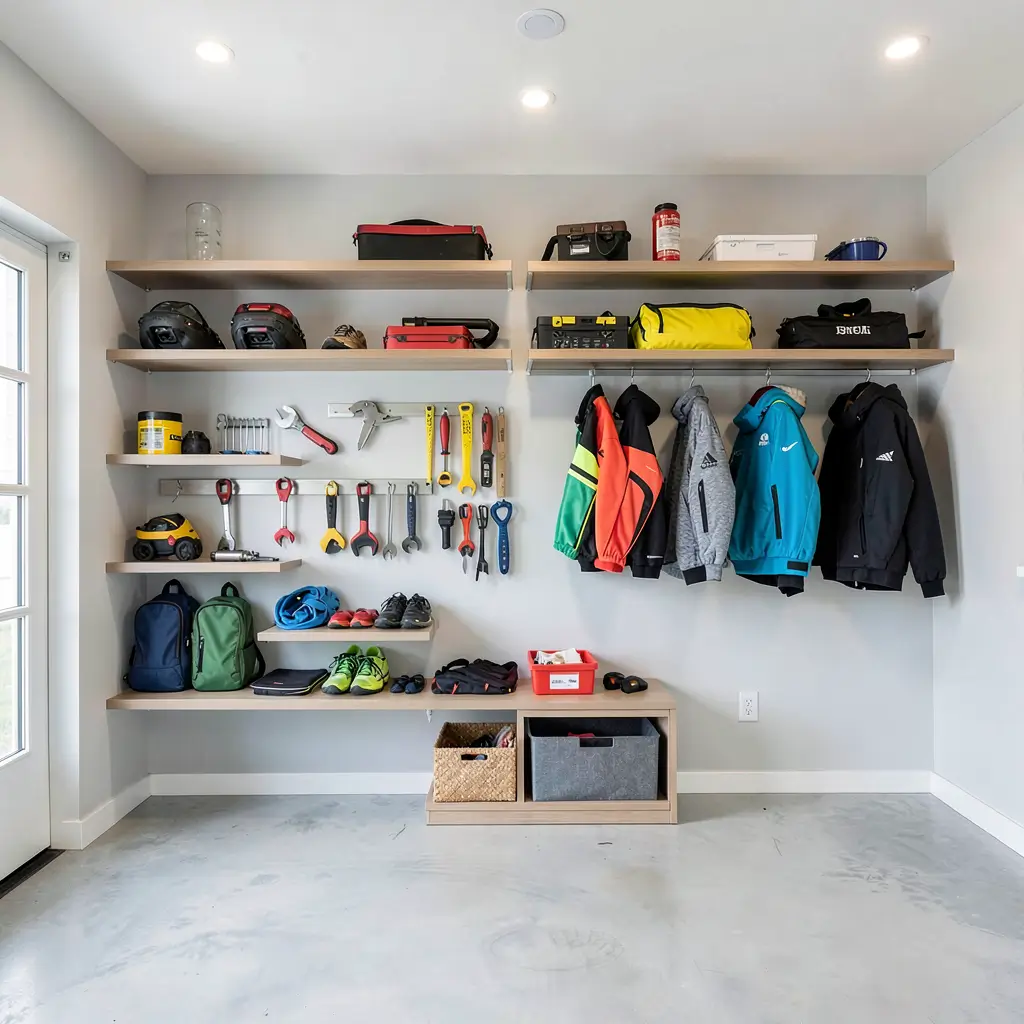
Let me start with the single biggest game-changer for any two-car garage: getting everything off the floor and onto the walls. Floor space in a two-car garage is precious real estate. Every bin, box, and bucket sitting on the ground steals inches from your parking area.
I started my organization journey by mounting a slatwall system across the entire back wall of my garage. The transformation happened almost instantly. Suddenly I could see my floor again – turns out it’s concrete, who knew?
Slatwall vs. Traditional Pegboard
You’ve got two main options for wall-mounted systems, and they offer very different experiences:
Slatwall panels:
- Hold significantly more weight per hook
- Look cleaner and more professional
- Cost more upfront ($30-50 per 4×8 panel)
- Accept dozens of specialized accessory types
- Resist moisture and temperature changes
Traditional pegboard:
- Much cheaper ($15-20 per 4×8 sheet)
- Lighter and easier to install solo
- Hooks sometimes slip out under heavy loads
- Fewer accessory options
- Can sag over time with heavy items
I went with PVC slatwall panels and haven’t looked back. The initial cost stung a little, but three years later everything still holds perfectly. My neighbor went with cheap pegboard and already replaced it twice. Sometimes spending more upfront saves money long-term.
Strategic Wall Placement
Not all wall space deserves the same treatment. Here’s how I divided my garage walls:
- Back wall: Primary storage zone with slatwall floor to ceiling
- Side walls (upper half): Seasonal items and rarely accessed gear
- Side walls (lower half): Frequently grabbed tools and supplies
- Between garage doors: Narrow shelving for car care products
- Behind door swing areas: Hooks for jackets and bags
The key? Put daily-use items at arm height and seasonal stuff up high. Sounds obvious, but you’d be amazed how many people store their snow shovel behind seven layers of summer gear.
Overhead Ceiling Storage Hacks
Look up right now. See all that wasted space between your garage door tracks and the ceiling? That’s prime storage territory, and most people completely ignore it.
I installed my first ceiling storage platform three years ago, and it immediately freed up an entire wall of floor space. Those bulky holiday decorations, camping gear, and luggage collections found a new home overhead.
Platform Systems vs. Motorized Lifts
Two main approaches exist for ceiling storage:
Static platforms:
- Cost $150-300 for a 4×8 platform
- Hold 300-600 pounds typically
- Require a ladder for access
- Simple installation with lag bolts
- Work great for rarely accessed items
Motorized lift systems:
- Cost $300-800 per unit
- Lower with a switch or remote
- No ladder needed
- More complex installation
- Perfect for frequently accessed items
I use both in my garage. Static platforms hold Christmas decorations and camping gear (stuff I touch maybe twice a year). A motorized lift handles my seasonal tire sets because I swap those quarterly and hate climbing ladders with heavy tires. FYI, dropping a winter tire on your head from eight feet up teaches you to invest in motorized systems real quick.
Weight Distribution Matters
Ceiling storage fails when people overload it. Follow these rules:
- Never exceed manufacturer weight limits (seriously, never)
- Distribute weight evenly across the platform
- Use lag bolts into joists, not drywall anchors
- Check connections annually for any loosening
- Store heaviest items closest to the mounting points
My buddy ignored the weight limit on his platform and came home to find it on top of his car’s hood. Don’t learn this lesson the expensive way.
Modular Garage Cabinet Systems
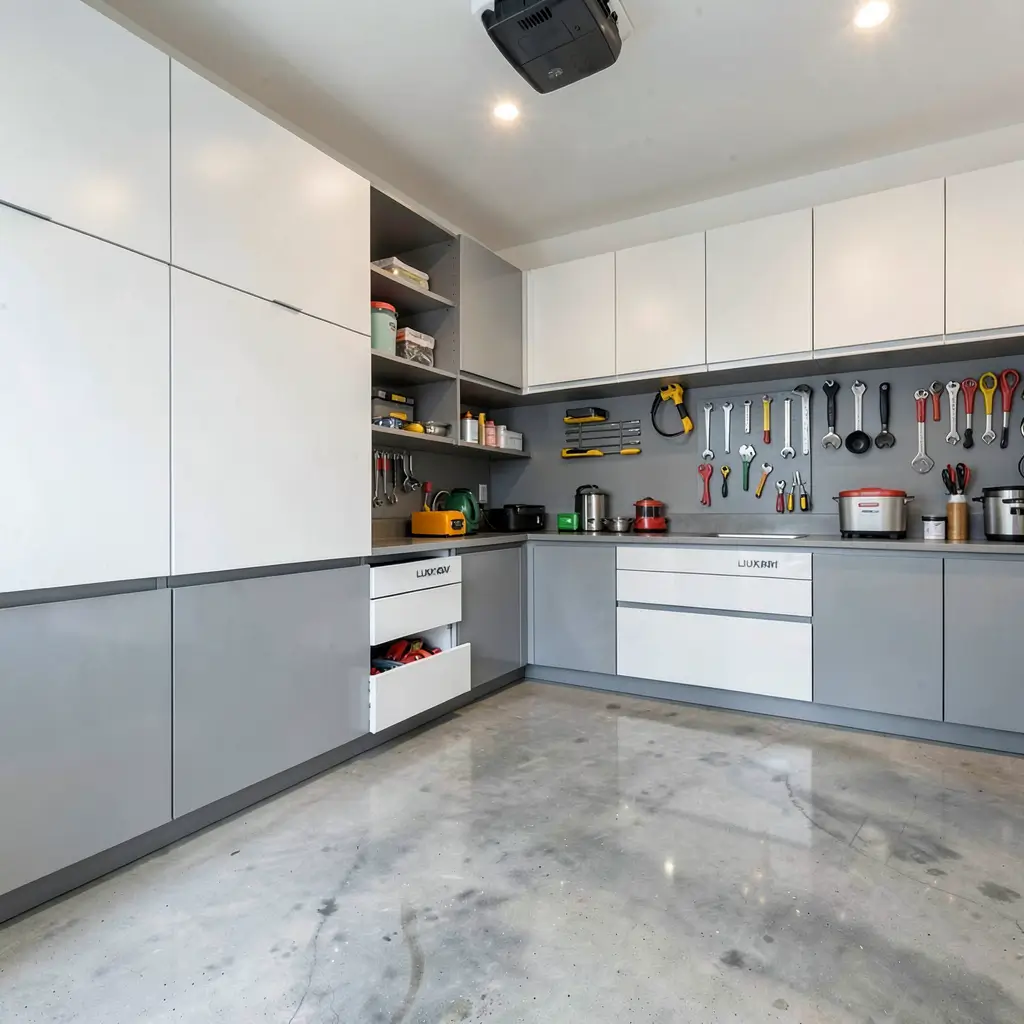
Cabinets transform a garage from chaotic storage dump to organized workspace faster than any other single upgrade. The right cabinet system hides all that ugly clutter while keeping everything accessible.
I tested three different cabinet systems before finding my perfect match. The differences between cheap and quality cabinets became painfully obvious within the first six months.
Comparing Cabinet Materials
Your main options break down like this:
- Pressed wood/MDF: Cheapest option, swells with moisture, short lifespan
- Plywood construction: Mid-range, handles humidity better, decent durability
- Steel cabinets: Pricier, completely moisture-proof, virtually indestructible
- Heavy-duty plastic/resin: Moderate cost, moisture-proof, lighter duty
I went with steel cabinets from Gladiator and they’ve survived everything my garage has thrown at them. Temperature swings, humidity, accidental impacts – nothing phases them. My first set of MDF cabinets literally fell apart after one humid summer.
Layout Strategy for Two-Car Garages
Cabinet placement in a two-car garage requires careful planning:
- Line the back wall with tall cabinets and a workbench section
- Use narrow base cabinets along side walls without blocking car doors
- Install upper cabinets above the workbench area
- Leave at least 36 inches between cabinet faces and parked vehicles
- Place frequently used cabinets on the driver’s side of each parking spot
The 36-inch clearance rule saves your car doors from dents and gives you room to actually open cabinet doors. I measured wrong the first time and couldn’t open my tool cabinet without moving my car. Learn from my mistakes.
Also Read: 8 Clever Garage Makeover Ideas for Maximum Storage
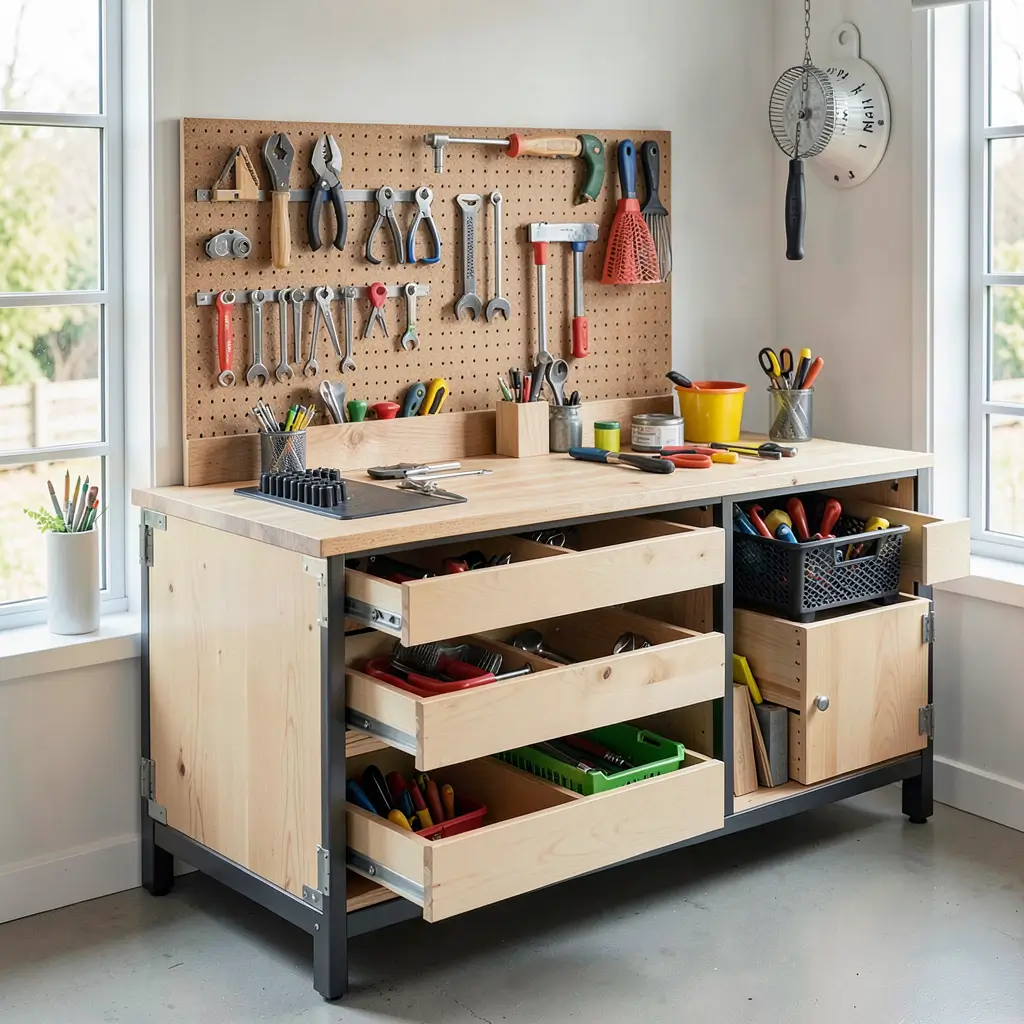
DIY Pegboard Tool Organizer
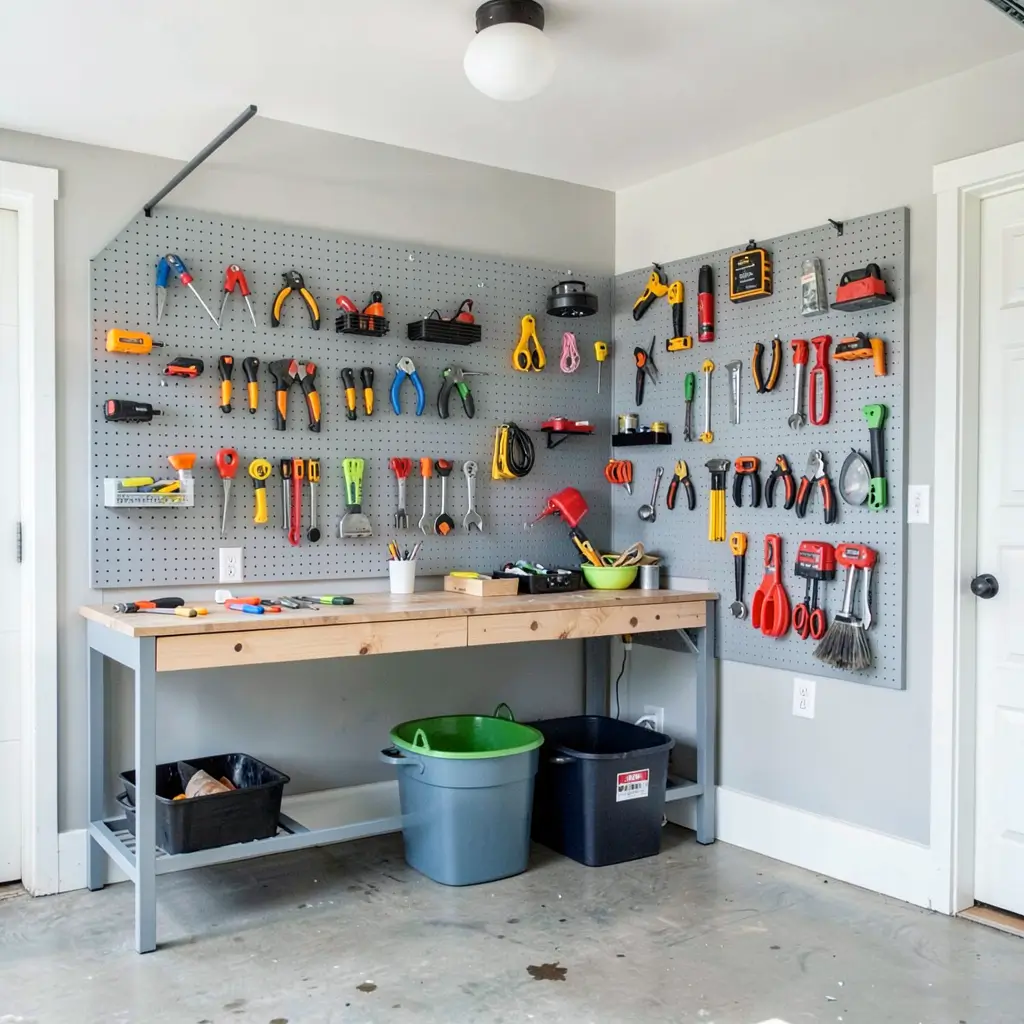
Every organized garage needs a dedicated tool zone, and pegboard remains the most versatile and affordable tool organization system you can build. Yes, I praised slatwall earlier – but for a dedicated tool area, pegboard still earns its spot.
I built a custom pegboard station above my workbench, and it handles every hand tool I own while keeping them all visible and within arm’s reach. No more digging through drawers looking for the right wrench.
Building a Better Pegboard
Standard pegboard from the hardware store works, but these upgrades make it significantly better:
- Use 1/4-inch thick board minimum (1/8-inch sags badly)
- Add 3/4-inch spacers between pegboard and wall for easy hook insertion
- Frame it with trim pieces for a professional finished look
- Paint or stain it to match your garage aesthetic
- Use locking hooks that won’t pop out when removing tools
Tool Shadow Organization
Here’s my favorite pegboard trick: outline every tool with a marker. Trace each tool’s shape directly on the board so you always know exactly where it belongs. This system does two things brilliantly. First, you spot missing tools instantly. Second, everyone who borrows tools (looking at you, neighbors) knows exactly where to return them.
Color-coding takes it further:
- Red outlines for electrical tools
- Blue outlines for plumbing tools
- Green outlines for garden tools
- Black outlines for general purpose
Pegboard Accessories Worth Buying
Not all pegboard accessories deserve your money. These actually work:
- J-hooks for hanging cords and hoses
- Multi-tool holders for screwdriver sets
- Small bins for loose hardware
- Magnetic strips mounted to pegboard for drill bits
- Power tool shelves with lips to prevent sliding
Skip the cheap variety packs. Buy individual accessories that match your specific tools, and your pegboard will actually stay organized.
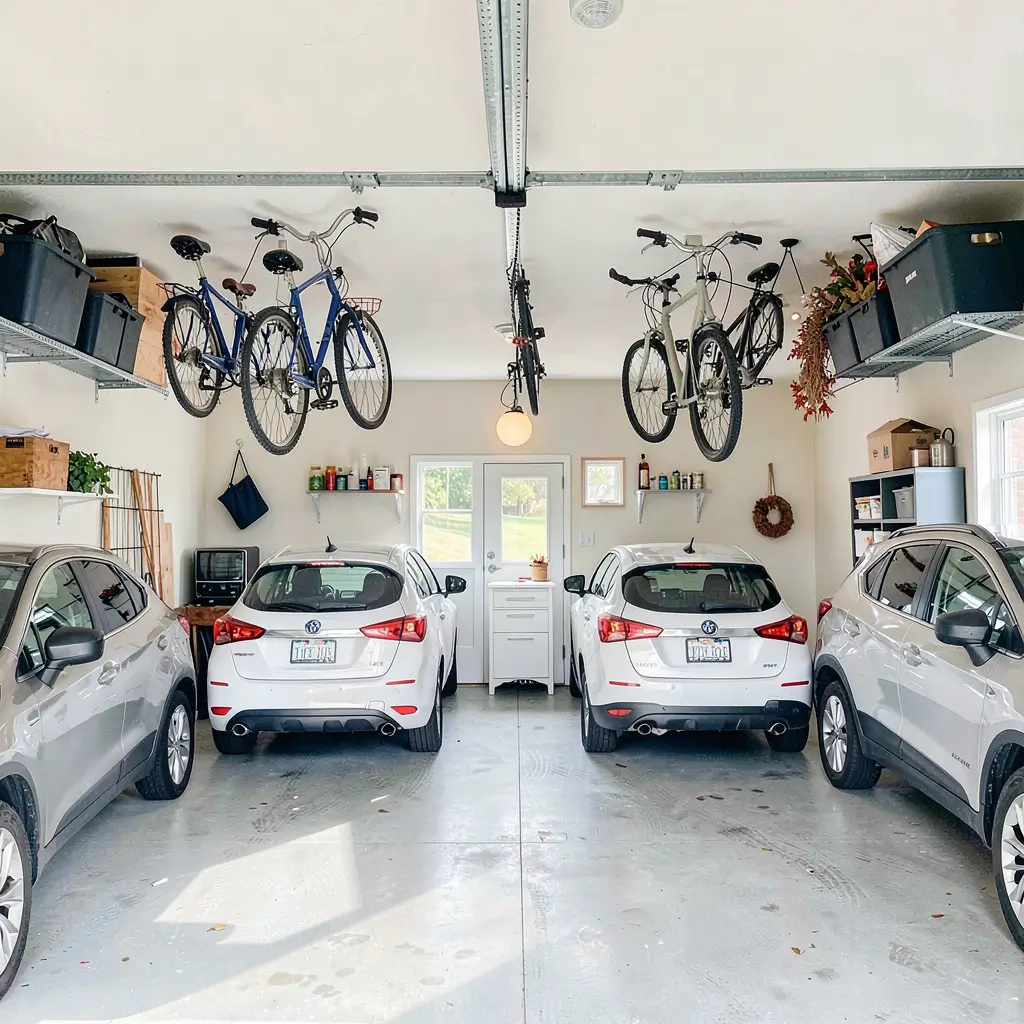
Sliding Bike Racks for Garages
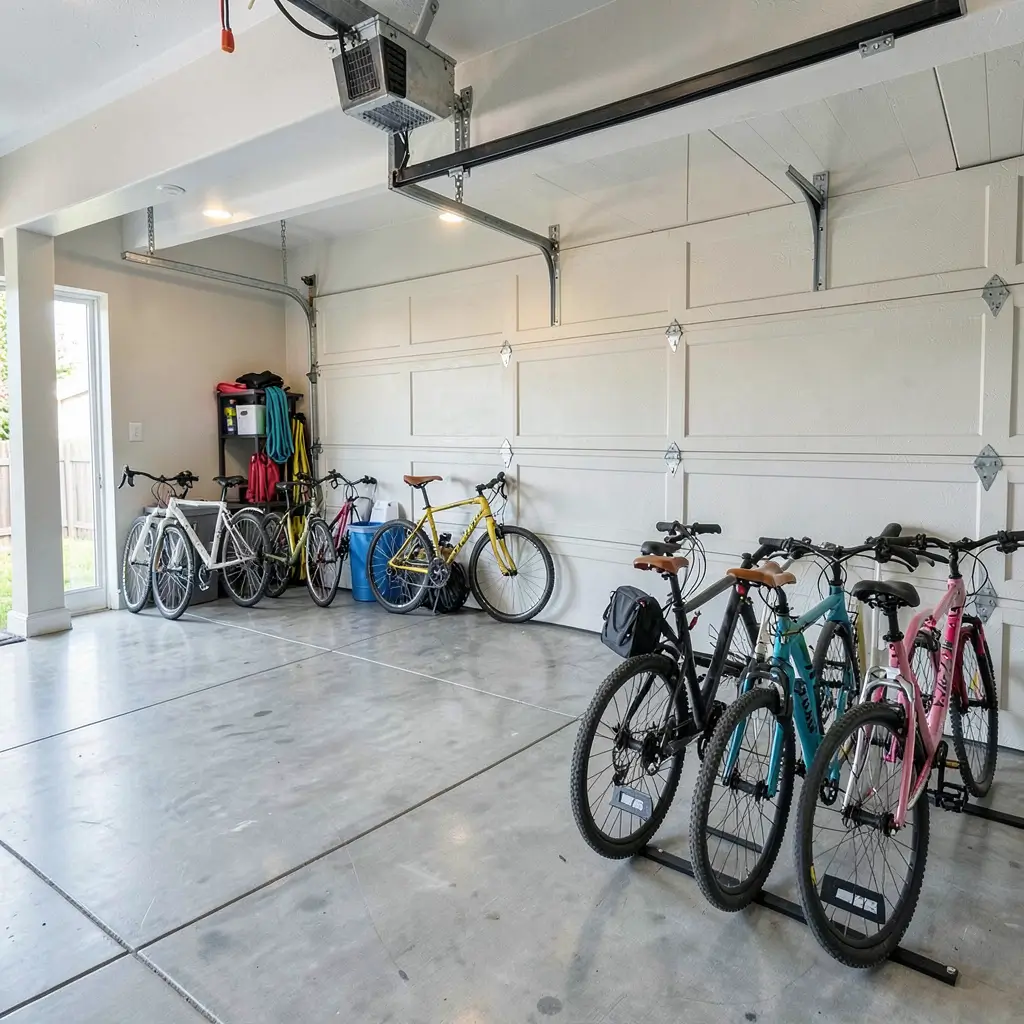
Bikes destroy garage organization faster than almost anything. One adult bike eats up roughly six square feet of floor space – multiply that by a family of four and you’ve lost an entire parking spot to bicycles.
Sliding bike racks solve this problem brilliantly. They mount to your wall or ceiling and slide bikes in and out like drawers, keeping them completely out of the way until needed.
Types of Sliding Bike Storage
Several systems compete for your money:
- Horizontal wall sliders: Bikes slide sideways along a track
- Vertical wall hooks: Simple but effective single-bike solution
- Ceiling-mounted hoists: Lift bikes completely overhead
- Freestanding vertical racks: No wall mounting required
- Motorized ceiling systems: Push-button convenience
I use horizontal wall sliders for the adults’ bikes and vertical wall hooks for the kids’ bikes. This combination stores four bikes using only about three feet of wall space. Before these racks, those same bikes consumed half my garage.
Installation Tips That Matter
Getting bike racks right requires attention to detail:
- Always mount into studs, not just drywall
- Measure your bikes first – handlebars and pedals need clearance
- Account for car door swing when choosing rack height
- Test the mechanism before loading heavy bikes
- Install hooks for helmets right next to each bike
The helmet hook tip sounds minor, but it prevents helmets from rolling around the garage floor. Every little organizational win compounds into major results.
Foldable Workbench Setup
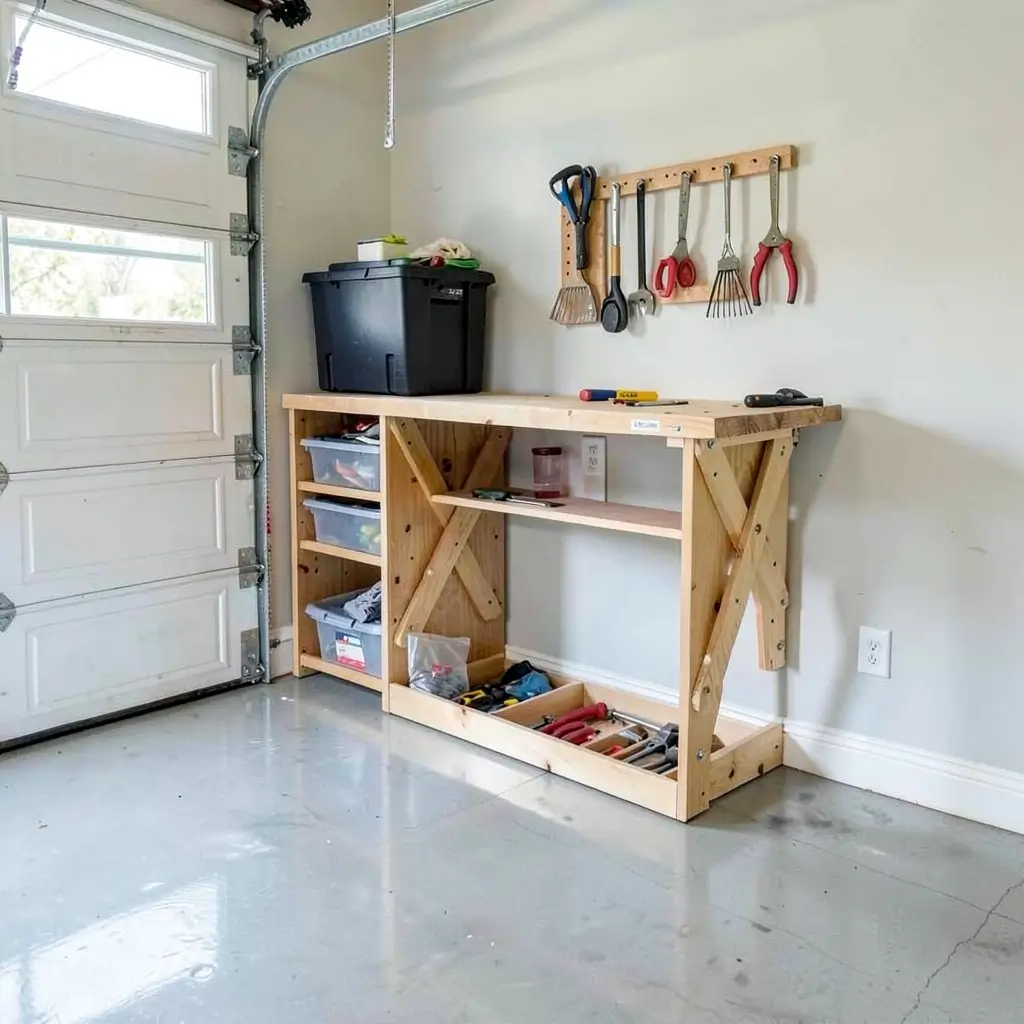
A workbench in a two-car garage creates a dilemma: you want workspace, but you also want parking space. Foldable workbenches eliminate this conflict entirely by giving you a full work surface that vanishes when you need to park.
I built my fold-down workbench for about $150 in materials, and it remains one of my proudest garage projects. When folded up, it adds only four inches of depth to the wall. When deployed, I get a solid 2×6-foot work surface.
DIY vs. Store-Bought Options
Both routes have merit:
DIY fold-down bench:
- Costs $100-200 in materials
- Custom dimensions for your exact space
- Requires basic woodworking skills
- Takes a weekend to build
- Unlimited customization options
Pre-made fold-down benches:
- Cost $200-500 typically
- Standard dimensions that may not fit perfectly
- Install in 1-2 hours
- Professional finish and hardware
- Weight ratings clearly specified
I chose DIY because my garage has a weird 57-inch gap between cabinets where no standard bench would fit. Custom sizing made the fold-down bench fill that space perfectly.
Essential Workbench Features
Whether building or buying, look for these features:
- Heavy-duty folding brackets rated for your expected loads
- Solid work surface (plywood minimum, butcher block ideal)
- Wall-mounted power strip accessible when bench deploys
- Pegboard above for immediate tool access
- Leg supports for heavy-duty projects
My workbench handles light to medium projects perfectly when folded down. For heavier work, I added a removable support leg that slides into a floor socket. Best of both worlds.
Also Read: 10 Modern Luxury Garage Ideas and Ultimate Car Showrooms
Corner Storage Optimization Ideas

Corners are the most wasted spaces in any two-car garage. People either ignore them completely or shove random junk into them until the pile reaches critical mass. Smart corner optimization can reclaim 20-30 square feet of usable storage in a standard two-car garage.
I used to treat my garage corners as dumping grounds. Rakes, brooms, and random long-handled tools just leaned against the walls and fell over constantly. Now every corner serves a specific purpose.
Corner Shelving Solutions
Custom corner storage beats standard solutions every time:
- Triangular shelving units maximize the awkward shape
- Lazy Susan turntables on corner shelves make everything accessible
- Floor-to-ceiling corner cabinets hide substantial amounts of stuff
- Corner pegboard panels wrap tools around the angle
- Hanging baskets in corner ceiling spaces
The lazy Susan trick changed my corner game completely. I placed one on each shelf of my corner unit, and now I can access items in the back by simply spinning the turntable. No more reaching blindly into dark corners.
Long-Item Corner Storage
Corners naturally accommodate long, awkward items:
- Vertical PVC tube clusters for fishing rods and dowels
- Bungee cord corrals for brooms and rakes
- Angled wall brackets for lumber and pipe storage
- Baseball bat and hockey stick racks mounted vertically
- Ski and snowboard holders using padded hooks
I built a PVC tube organizer from six-inch diameter pipes mounted vertically in one corner. It holds twelve fishing rods, five garden stakes, and various dowels in about two square feet of floor space. Probably cost me $30 in materials.
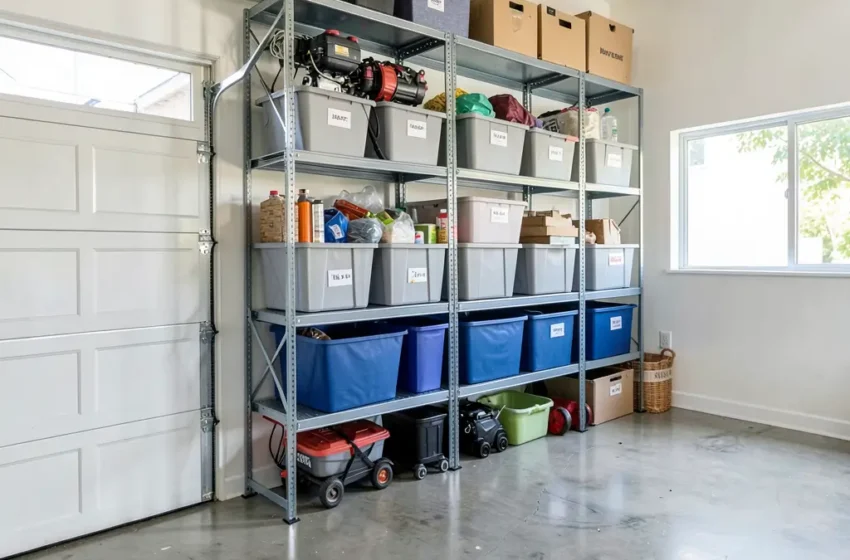
Multi-Tier Shelving Units
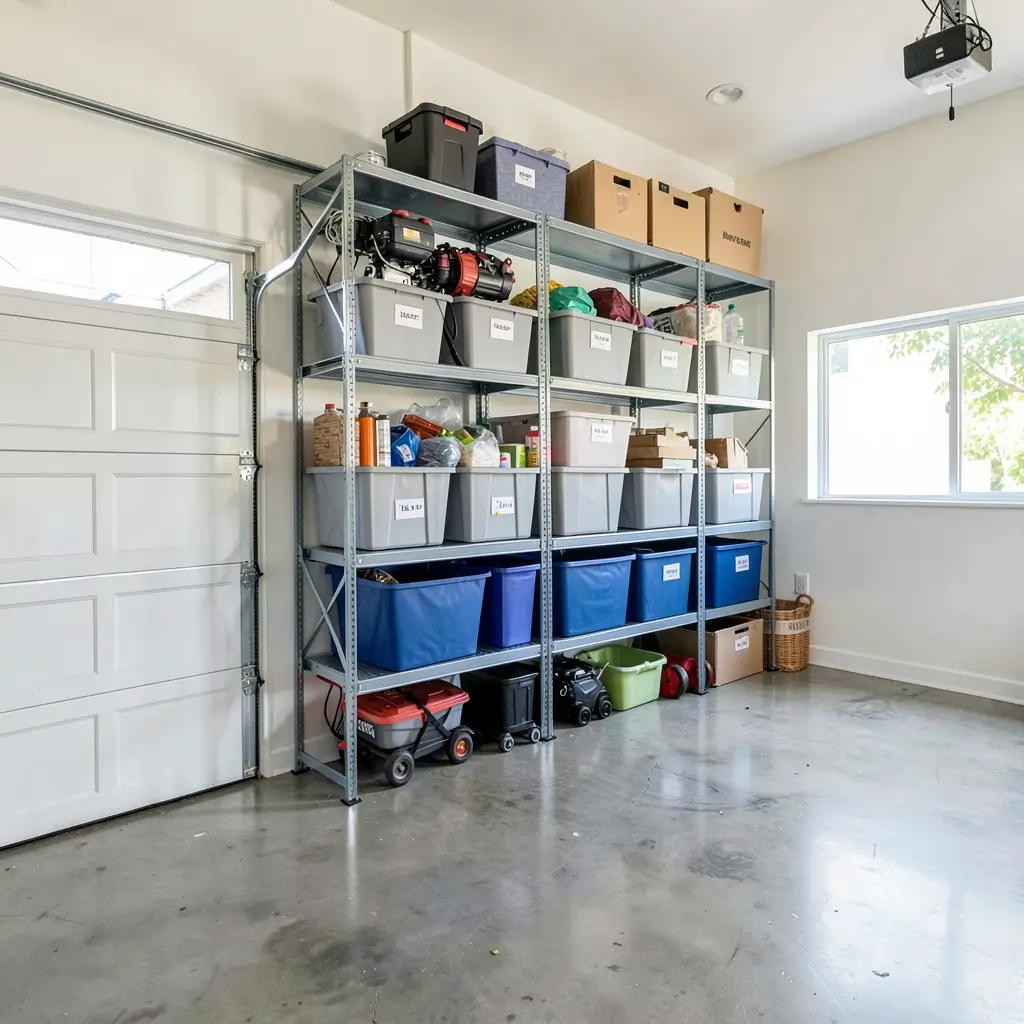
Shelving forms the backbone of any serious garage organization system. But throwing up random shelves won’t cut it in a two-car garage where every inch matters. You need strategic, multi-tier shelving that maximizes vertical space without encroaching on parking areas.
After trying wire shelving, wood shelving, and plastic shelving, I can definitively rank them for garage use.
Shelving Material Showdown
Here’s how the main options compare:
Wire shelving (like Metro racks):
- Great ventilation prevents moisture buildup
- Adjustable shelf heights
- Small items fall through gaps
- Looks industrial, not polished
- Excellent weight capacity
Heavy-duty plastic shelving:
- Resists moisture and rust completely
- Easy assembly with no tools
- Lower weight capacity than metal
- Can bow under heavy loads over time
- Budget-friendly option
Steel industrial shelving:
- Handles extreme weight loads
- Looks professional and clean
- Costs more than other options
- Virtually indestructible
- May rust without proper coating
I use wire Metro racks for my main storage and steel industrial shelving for heavy items like paint cans and power tools. The wire racks get shelf liners to prevent small items from falling through. :/
Optimal Shelf Placement
Maximize your shelving with these rules:
- Keep bottom shelf 4-6 inches off the floor for easy sweeping
- Space shelves based on content, not evenly
- Place heaviest items at waist height for ergonomic lifting
- Use narrower shelving (12-inch depth) along side walls
- Deploy deeper shelving (18-24 inch) against the back wall
The depth variation between side and back walls keeps your parking lanes clear while maximizing back-wall storage capacity.
Garage Closet Conversion Ideas
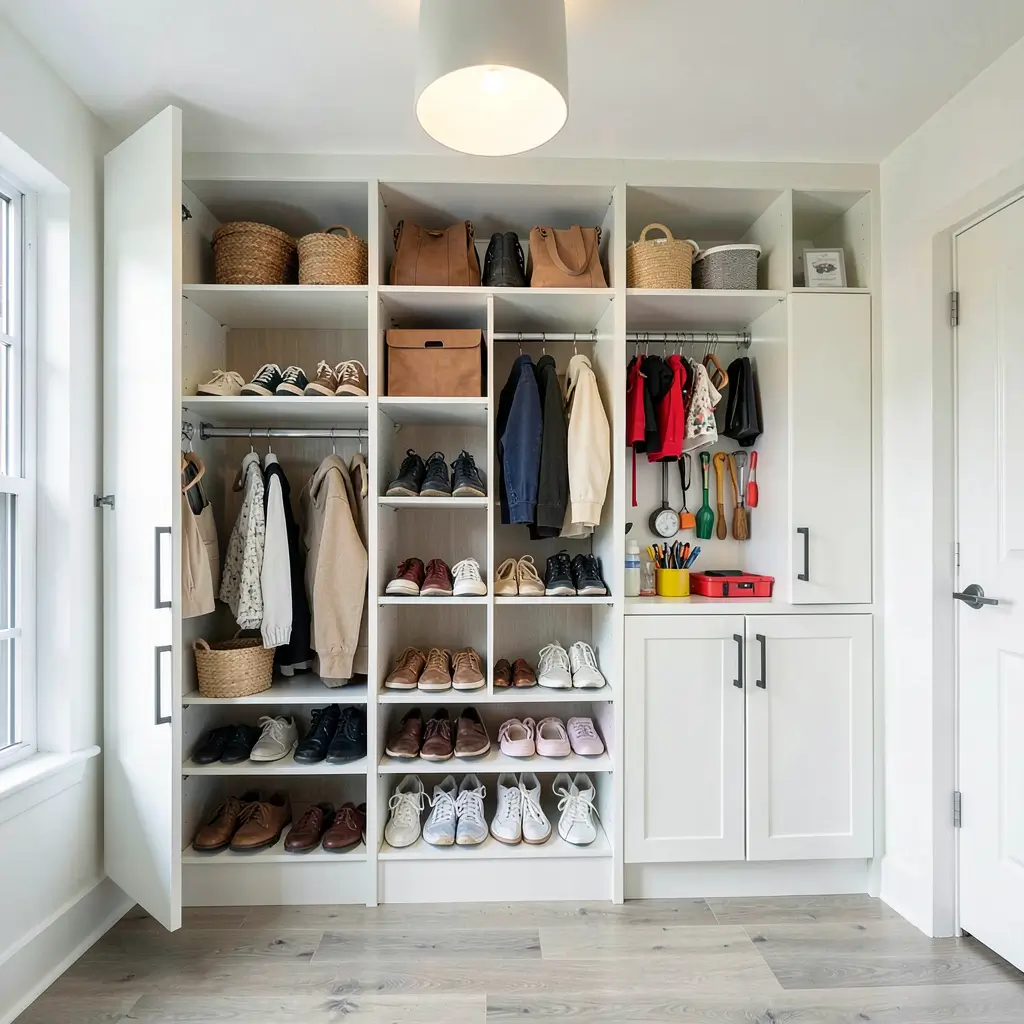
Here’s an idea most people never consider: build actual closets in your garage. Not open shelving, not cabinets – full closets with doors that hide everything behind them.
I converted one corner of my two-car garage into a 4×4-foot closet, and it holds an astonishing amount of stuff while looking completely clean from the outside. When the doors close, you’d never know there’s a mountain of organized chaos behind them.
Building a Garage Closet
Construction is simpler than you think:
- Frame with 2×4 studs attached to existing walls
- Add drywall or plywood for walls
- Install bifold or sliding doors to minimize door swing
- Include interior lighting (battery-operated works fine)
- Mount shelving inside at custom heights
Total cost for my 4×4 closet? About $250 in materials. It took one weekend to build and immediately improved the garage’s appearance.
Closet Organization Inside
Treat your garage closet like a bedroom closet:
- Adjustable shelving on all three interior walls
- Hooks on the door backs for frequently used items
- Clear bins so you can see contents without pulling them out
- Labeled sections for different categories
- Small drawers for hardware and small parts
Best Uses for Garage Closets
Certain items benefit most from enclosed closet storage:
- Seasonal decorations that only come out yearly
- Cleaning supplies that look messy on open shelves
- Hazardous materials you want to secure from kids
- Gardening supplies that attract dust
- Sports equipment for out-of-season activities
The closet approach works especially well for families because you can lock the doors and keep dangerous items away from curious children.
Also Read: 10 Gorgeous Garage Conversion Ideas and Trendy Designs
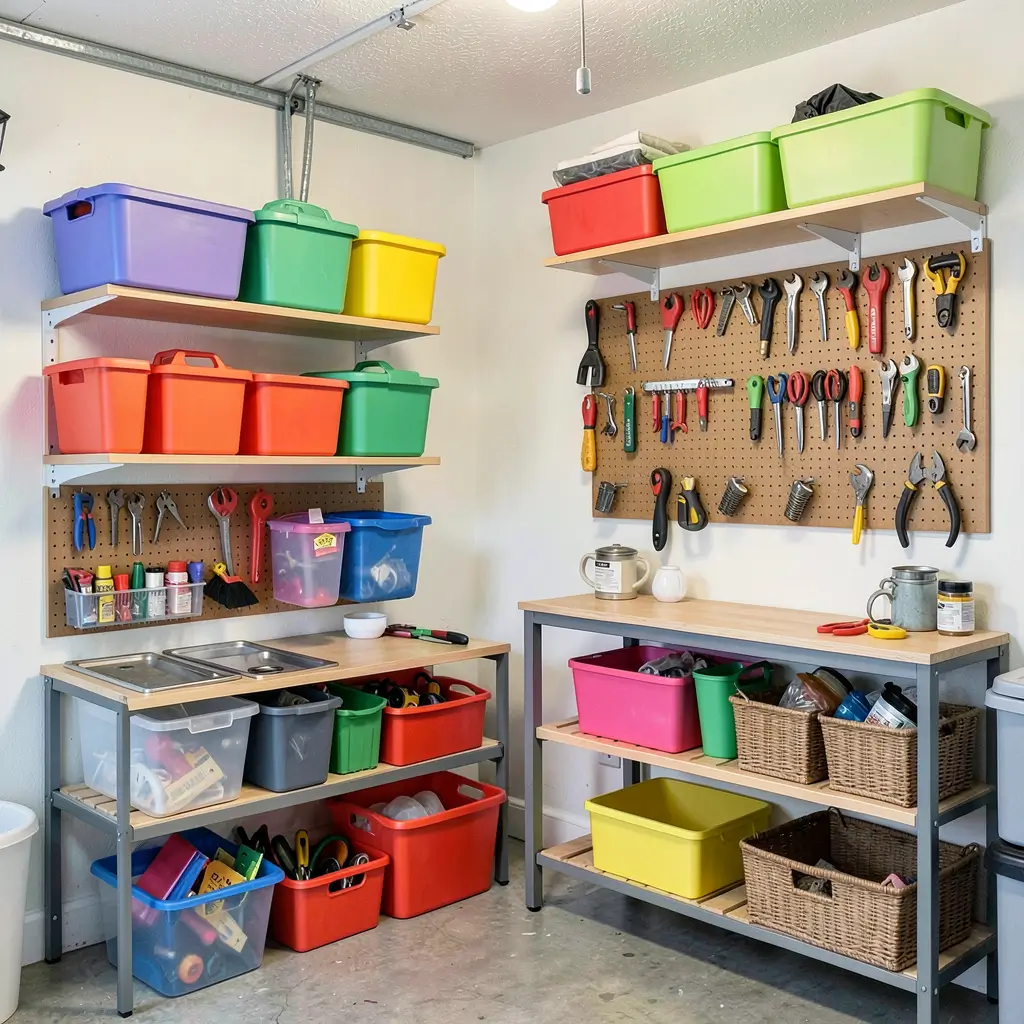
Stylish Storage Bins and Labels
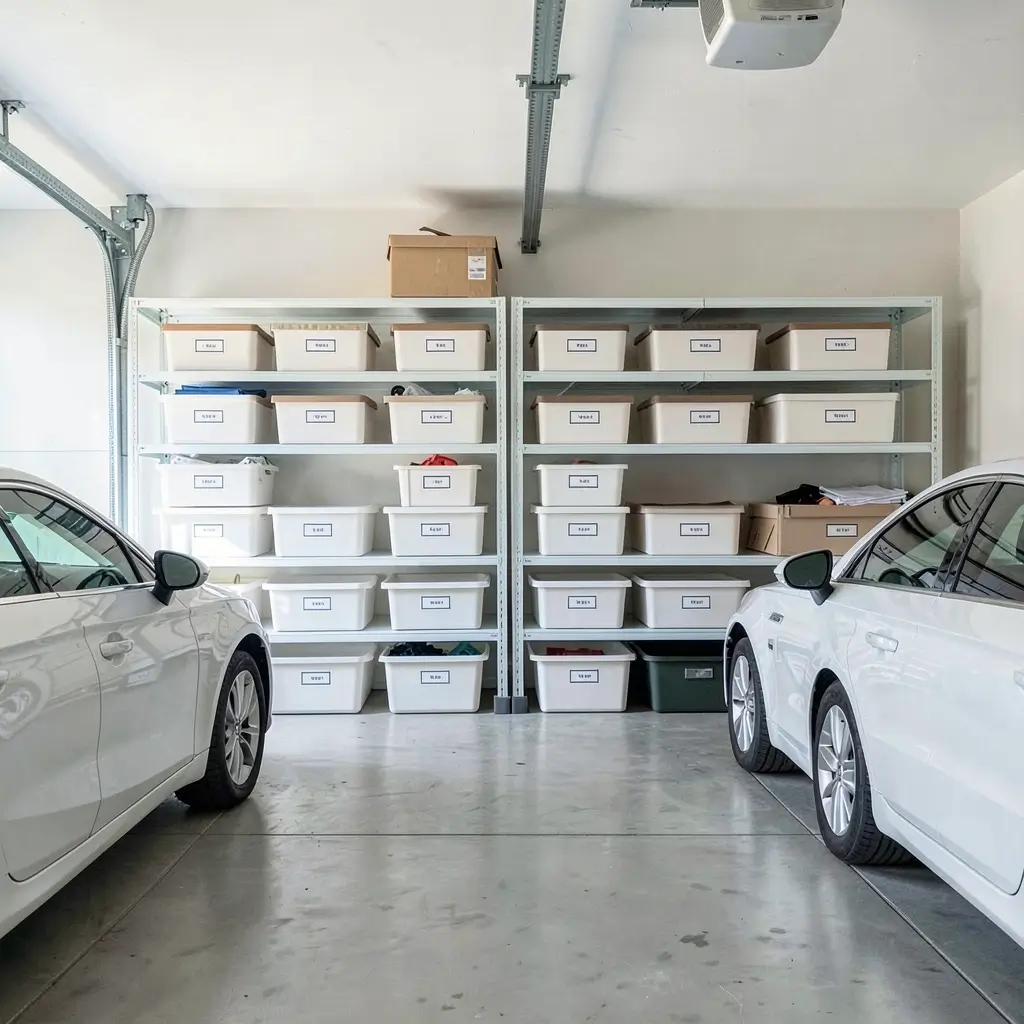
Organization without labeling is just neat-looking chaos. You might know what’s in every bin today, but will you remember six months from now? Spoiler: you absolutely will not.
I spent years using random mismatched containers and unlabeled boxes. Every time I needed something, I opened five wrong bins before finding it. Now every single container in my garage matches, and every single one has a clear label. The time I save finding things has literally changed my life. IMO, this is the most underrated organization strategy.
Choosing the Right Bins
Not all storage bins work equally well in garages:
Clear plastic bins:
- See contents without opening
- Show dirt and discoloration over time
- Stack well when same brand
- UV exposure can make them brittle
Opaque matching bins:
- Look cleaner and more uniform
- Hide messy contents
- Require good labeling
- Resist UV degradation better
Fabric bins:
- Look stylish and modern
- Don’t handle moisture well
- Work for climate-controlled garages only
- Soft sides prevent scratching
I use clear bins with colored lids – best of both worlds. I can see what’s inside while the colored lids create a neat, uniform appearance from across the garage.
Labeling Systems That Last
Garage labels need to survive temperature extremes and humidity:
- Brother P-Touch labels handle garage conditions well
- Chalkboard labels allow easy updates
- Laminated printed labels resist moisture
- Color-coded systems add visual organization
- QR code labels linking to digital inventory (for the tech-savvy)
My labeling system uses both text and color coding. Blue labels indicate winter items, green for spring/summer, orange for fall, and red for holiday decorations. Finding seasonal items takes seconds now instead of minutes.
Bin Placement Strategy
Where you place bins matters as much as what’s inside them:
- Most-used bins at eye level and arm’s reach
- Heavy bins on lower shelves only
- Seasonal rotation moving current season to accessible spots
- Stack no more than three high to prevent toppling
- Leave one empty bin for temporary project storage
That last tip about the empty bin sounds weird, but trust me – having one available container for active projects prevents you from leaving loose items all over the garage.
Bringing It All Together
There you have it – ten proven strategies to transform your two-car garage from chaotic wasteland into an organized masterpiece. Let me quickly recap the highlights:
Wall-mounted systems reclaim your floor space. Ceiling storage uses wasted overhead area. Modular cabinets hide the ugly stuff. Pegboard organizers keep tools visible and accessible. Bike racks eliminate the biggest space hogs. Foldable workbenches give you workspace without sacrificing parking. Corner optimization rescues dead zones. Multi-tier shelving maximizes vertical storage. Garage closets create hidden storage rooms. And stylish bins with labels make everything findable.
You don’t need to tackle all ten at once. Start with whatever causes your biggest daily frustration. For me, that meant getting the bikes off the floor first. That single change created enough momentum to keep going with the rest.
The best part? Most of these projects cost under $300 each and take a single weekend to complete. Compare that to the daily frustration of a disorganized garage, and the investment becomes a no-brainer.
So this weekend, take a good hard look at your two-car garage. Imagine actually parking both cars inside. Imagine finding your tools instantly. Imagine opening that garage door without cringing. Now stop imagining and start organizing – because that garage isn’t going to fix itself, and you’ve already read 2,500 words about how to do it. Time to put down the phone and pick up a drill.