15 Inspiring Outdoor Christmas Decorations Yard Ideas Cozy Nights
- Christmas Ideas
 Ben
Ben- 0
- 34 minutes read
Remember that house on your street that everyone slows down to look at during the holidays? You know, the one where kids press their faces against car windows and adults secretly take photos?
Yeah, that’s about to be YOUR house this year.
I’ve spent the last decade turning my yard into what my husband lovingly calls “Christmas explosion central,” and I’ve learned a thing or two about what works, what doesn’t, and what makes the electric bill worth crying over.
After testing countless outdoor Christmas decorations (and returning about half of them), I’m sharing the ideas that actually transform your yard from “meh” to magical.
Let’s talk about creating a winter wonderland that doesn’t require a second mortgage or an engineering degree.
Because honestly, who has time for complicated setups when you’re already juggling holiday shopping, cooking, and pretending to enjoy your office Christmas party?
Cozy Winter Lantern Pathway
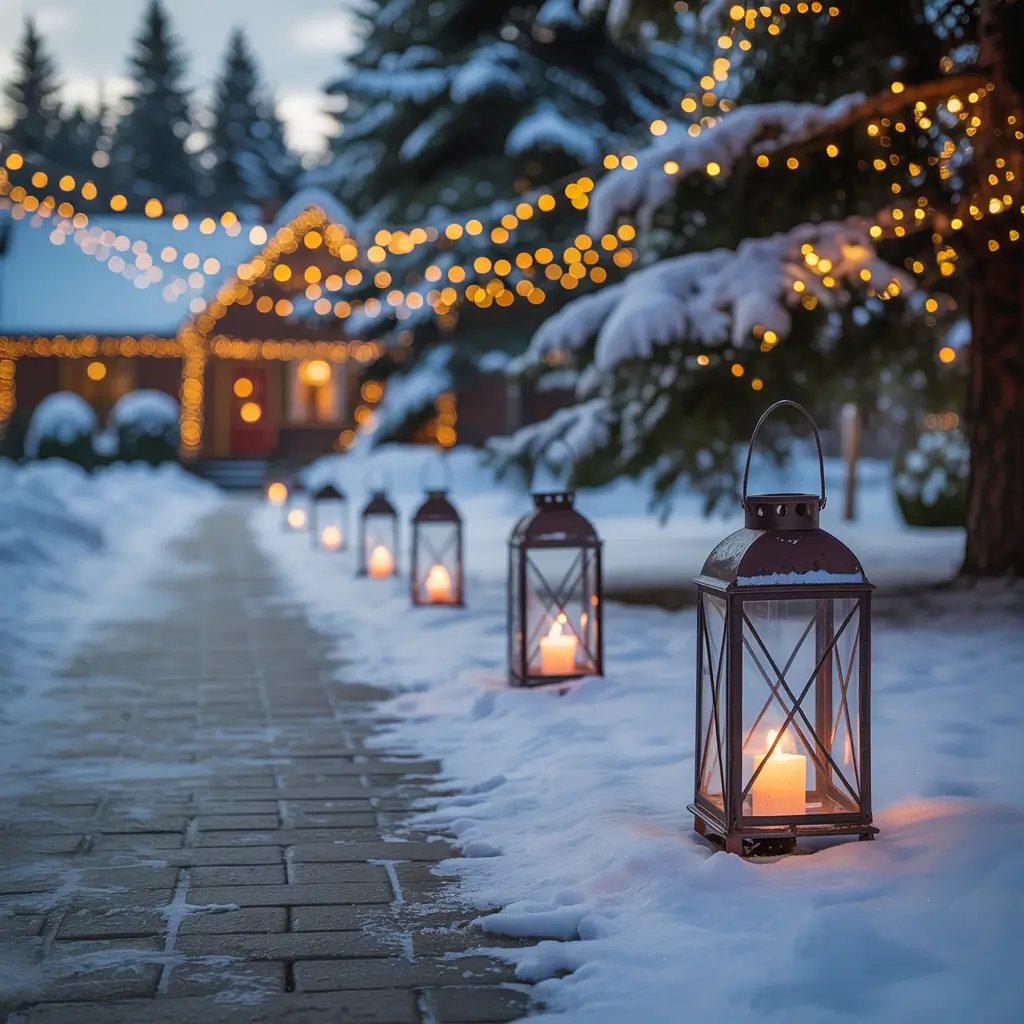
Nothing says “welcome to our festive home” quite like a beautifully lit pathway guiding guests to your door. I discovered the magic of lantern pathways three years ago when I nearly wiped out on my icy walkway carrying groceries. Safety meets style, people!
The key here is spacing. I learned the hard way that cramming lanterns too close together looks less “winter wonderland” and more “fire hazard waiting to happen.” Space them about 3-4 feet apart for that perfect glow that actually illuminates the path without blinding anyone.
I mix battery-operated LED lanterns with solar-powered ones because, let’s face it, running extension cords everywhere is a nightmare. The battery ones go near the door where solar panels won’t catch enough light, while the solar versions handle the rest of the pathway.
Choosing Your Lantern Style
Here’s what works best for different vibes:
- Traditional metal lanterns for that classic Christmas look
- Mason jar lanterns for rustic charm
- Modern geometric designs for contemporary homes
- Vintage-style coach lanterns for elegant estates
Pro tip: Fill your lanterns with battery-operated fairy lights, fake snow, and miniature ornaments for extra pizzazz. Takes five minutes per lantern and looks like you spent hours on it.
Candy Cane Front Yard Arch
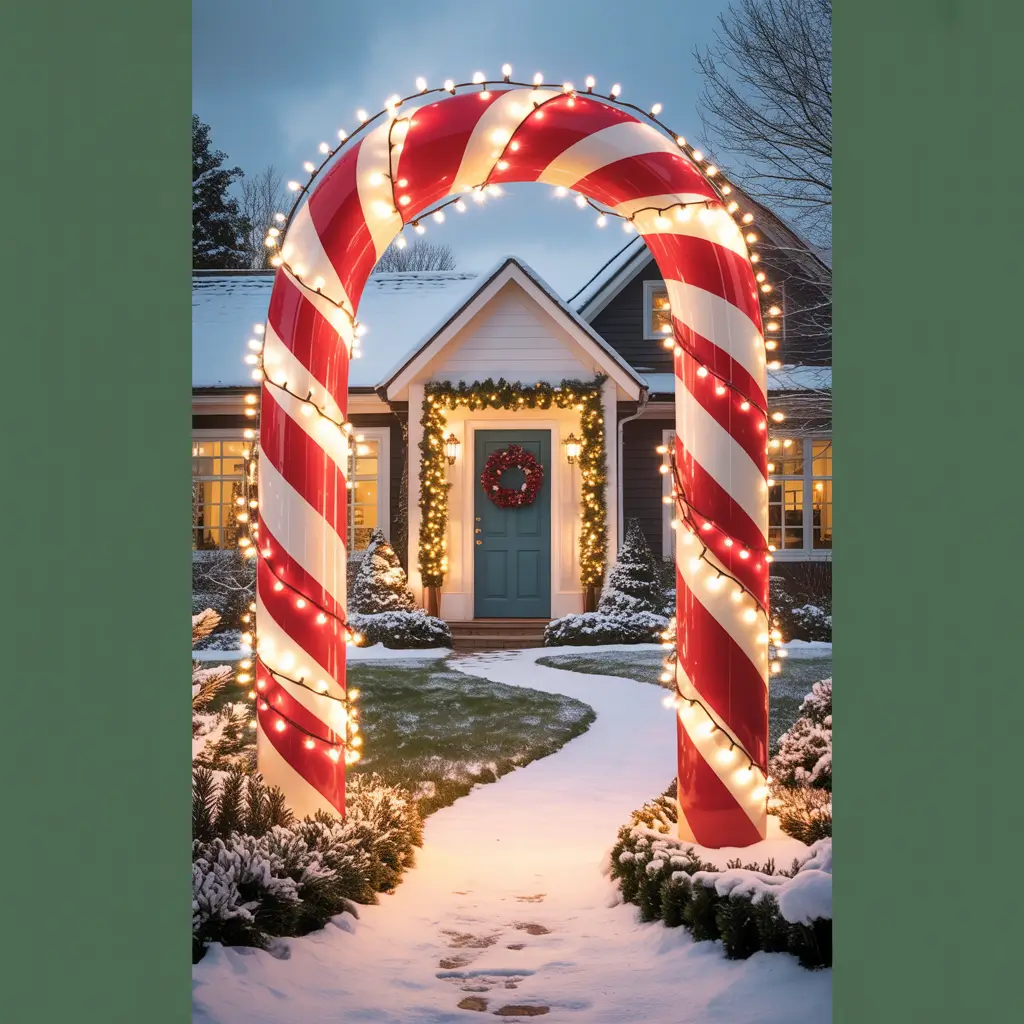
Want to know what makes every delivery person smile? A giant candy cane arch they have to walk through. I installed one last year, and my regular mail carrier actually thanked me for making his route more fun. That’s when you know you’ve nailed it.
Creating this sweet entrance doesn’t require professional installation skills. I used PVC pipes, red and white duct tape (the good stuff, not the cheap kind that peels off in the rain), and about two hours of my Saturday afternoon. The hardest part was getting the curve right – took three attempts before it stopped looking like a sad, droopy rainbow.
Anchor these babies properly, though. Nothing ruins the magic faster than watching your candy canes blow across the neighbor’s yard during a windstorm. Ask me how I know this. Actually, don’t – it’s still embarrassing.
DIY vs Store-Bought Options
Consider these factors when deciding:
- DIY costs about $30 vs $100+ for pre-made
- Store-bought versions include lights built-in
- DIY allows custom sizing for your specific space
- Pre-made options set up in minutes vs hours
Rustic Wooden Reindeer Display
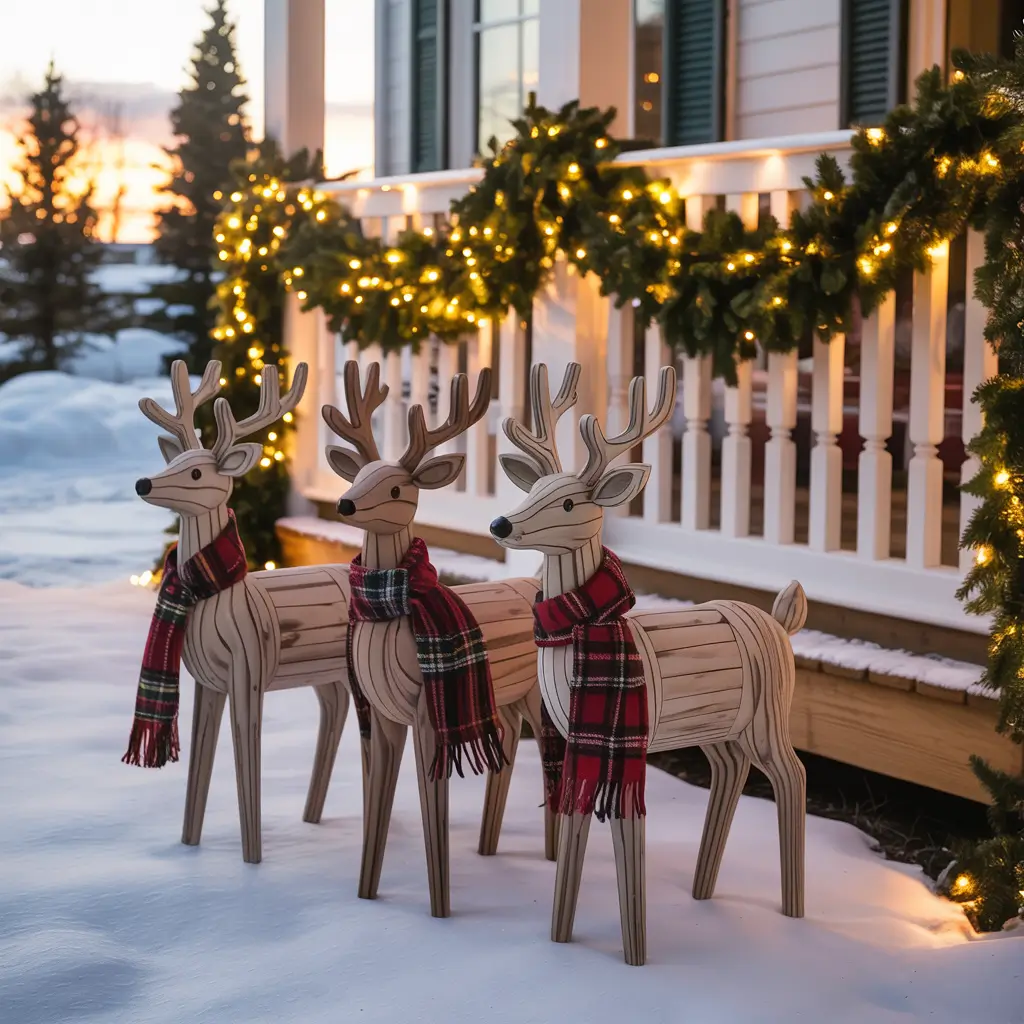
Wooden reindeer have this timeless charm that plastic decorations just can’t match. They weather beautifully, developing character over the years instead of fading into sad, sun-bleached versions of their former selves.
I started with one reindeer five years ago. Now I have a whole family, including a baby reindeer my kids named Gerald (don’t ask). The progression happened naturally – you buy one, love it, then suddenly you’re browsing Etsy at 2 AM looking for “rustic reindeer family sets.”
Position them strategically around your yard for maximum impact. I cluster mine near the birch trees, creating this magical forest scene that looks straight out of a Hallmark movie. The neighbors actually asked if I hired a decorator. Nope, just good old trial and error!
Also Read: 15 Fun Apartment Christmas Decor Ideas to Brighten Your Space
North Pole Direction Sign Corner
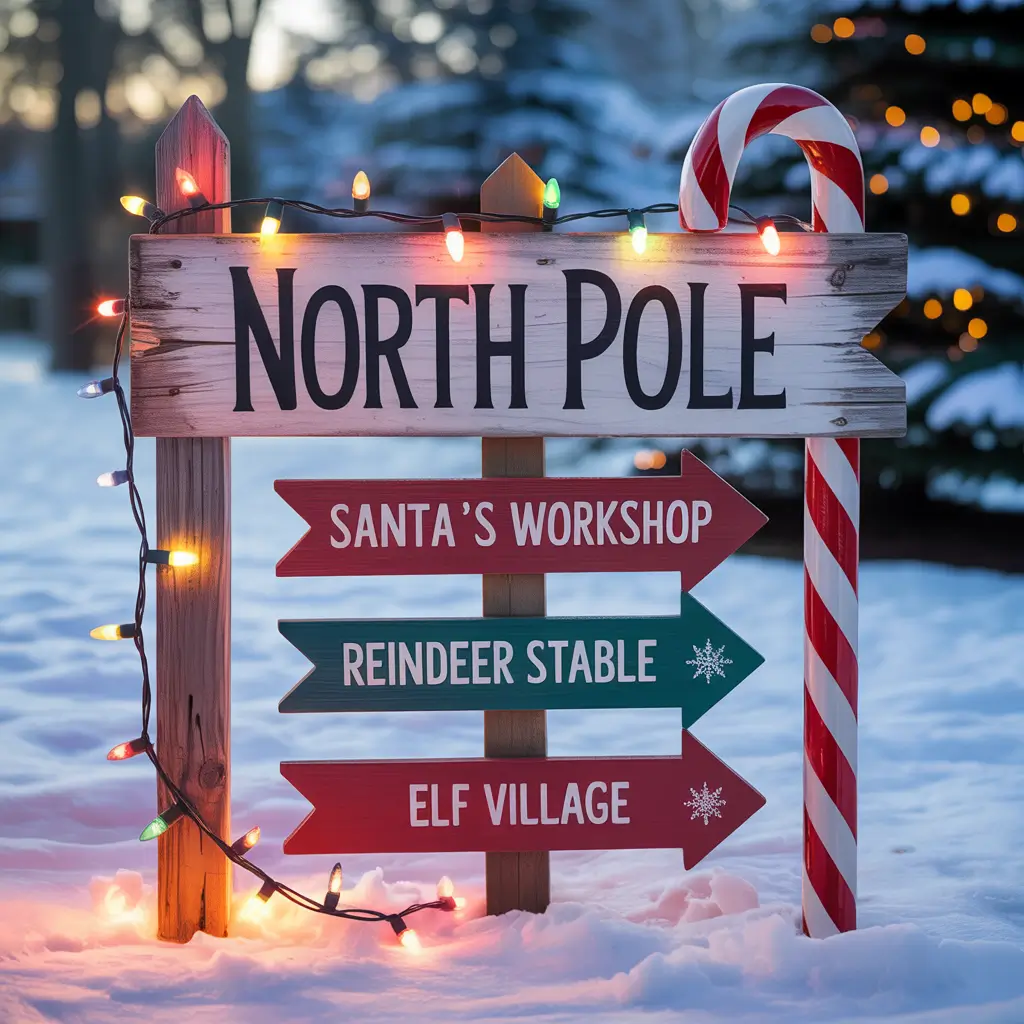
This decoration idea makes me ridiculously happy every time I look at it. A North Pole directional sign transforms any corner of your yard into instant Christmas magic while being surprisingly easy to create.
I made mine from old fence boards and paint I already had in the garage. Each arrow points to different Christmas destinations – “North Pole: 3,000 miles,” “Santa’s Workshop: 2,999 miles,” “Nice List Headquarters: Check your behavior.” That last one gets laughs from every parent who sees it.
The best part? You can customize it with your family’s inside jokes or favorite holiday movies. We added “Buddy’s Apartment: 2,000 miles” for all the Elf fans out there.
Sign Placement Strategy
Maximize your sign’s impact with smart positioning:
- Corner placement catches eyes from multiple angles
- Near the mailbox ensures everyone sees it
- By the driveway entrance creates an arrival moment
- Garden bed edges integrate with existing landscaping
Glowing Snowflake Lawn Stakes
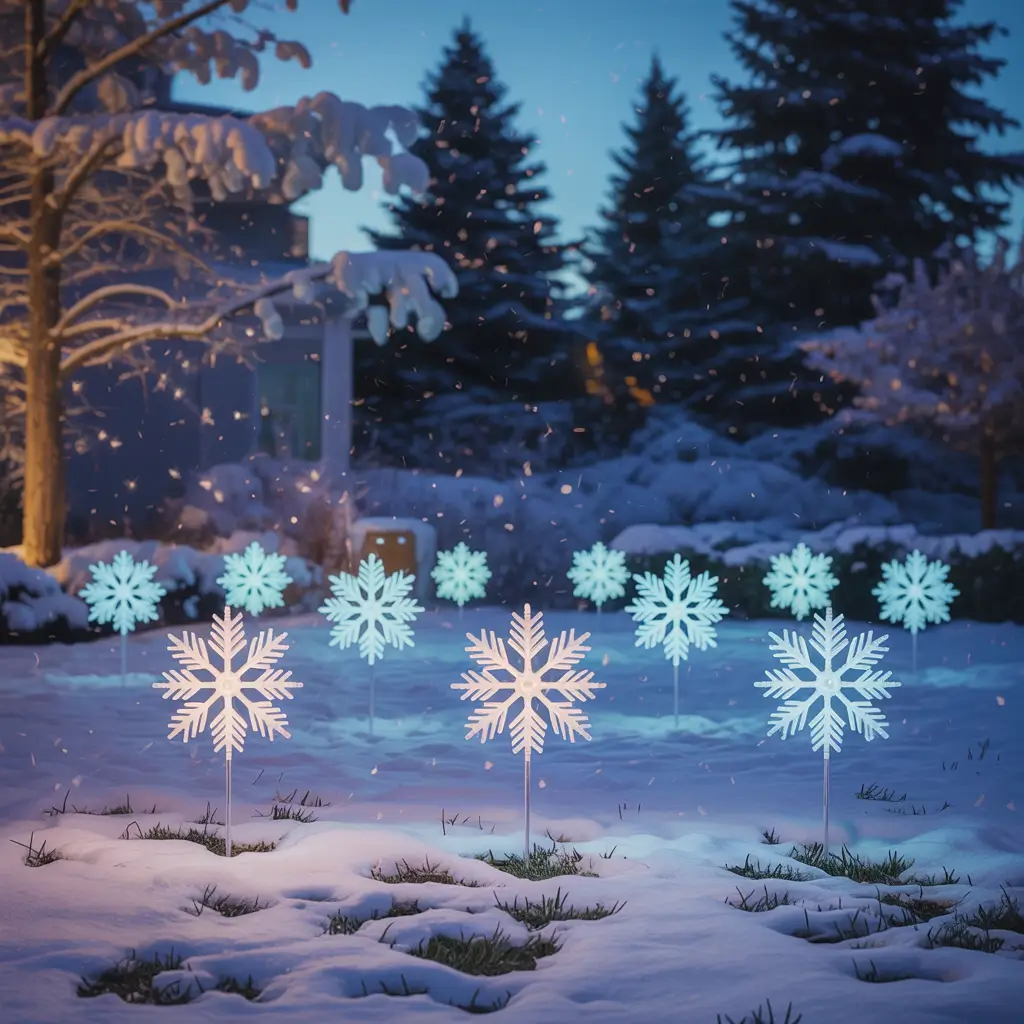
Scattered across your lawn, these glowing snowflakes create depth and magic that string lights alone can’t achieve. They’re like stars you can plant in your grass – how cool is that?
I went overboard my first year and bought 50 of them. FYI, that’s too many unless you have acreage. Now I use about 20, strategically placed to create pathways and highlight garden features. The trick is varying the heights and sizes for a more natural, snowfall-like effect.
Solar-powered versions save your sanity and your electric bill. Just remember to angle the panels correctly, or you’ll wonder why half your snowflakes look depressed by 8 PM.
Oversized Ornament Yard Cluster
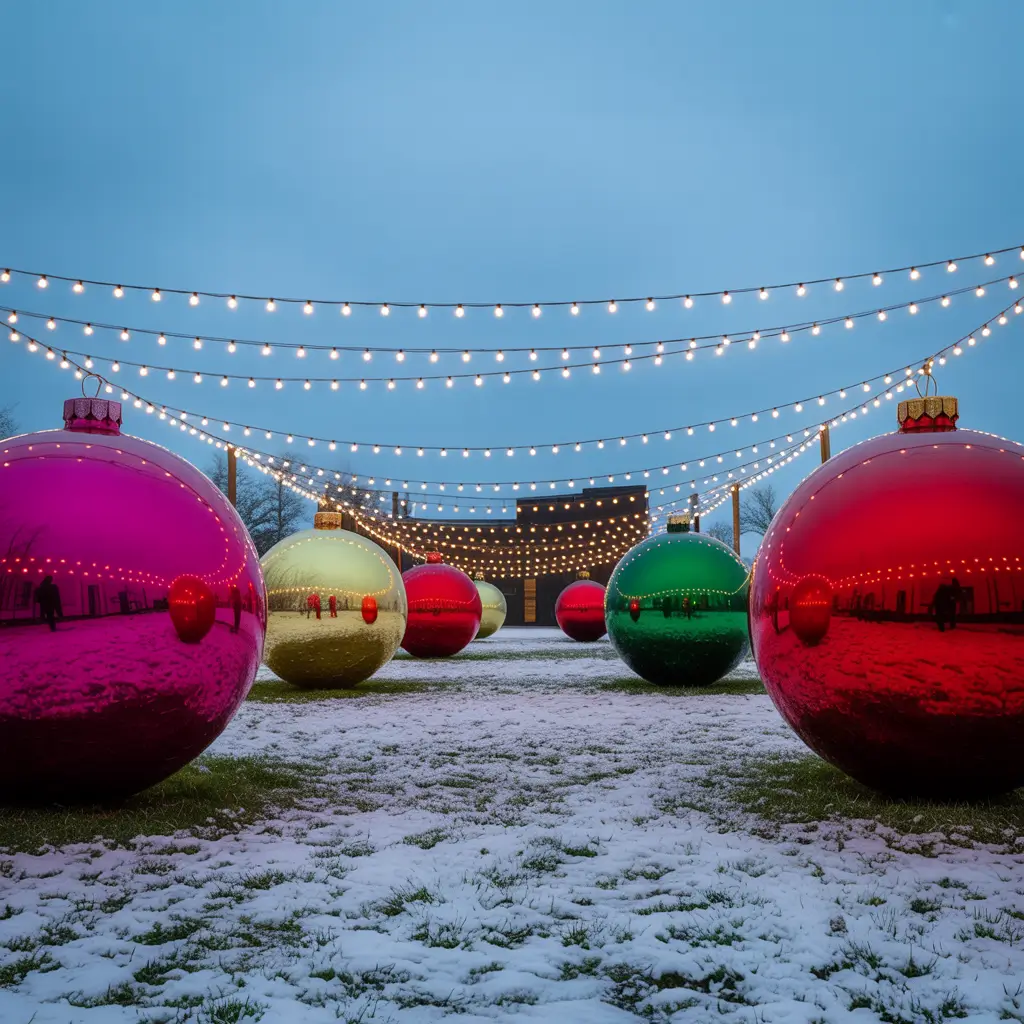
Giant ornaments in your yard make everything feel like you’ve shrunk down to elf size. I create clusters of three to five massive ornaments in different areas, and the visual impact never fails to impress.
Making these yourself costs pennies compared to store prices. Large rubber playground balls, metallic spray paint, and some creativity turn into stunning decorations. I made six last year for under $40 total. The same look at the fancy Christmas store? $50 per ornament. Hard pass.
Weather-resistant is key here. I learned that regular spray paint doesn’t survive December rain. Now I use paint specifically designed for outdoor use, and those ornaments still look fresh three seasons later.
Creating Visual Interest
Follow these grouping principles:
- Odd numbers look more natural (3, 5, 7)
- Vary sizes from basketball to beach ball dimensions
- Mix finishes – matte, glitter, and metallic
- Anchor properly with stakes or weighted bases
Also Read: 15 Shabby Chic Vintage Christmas Ornament Ideas
Vintage Sleigh and Gift Setup
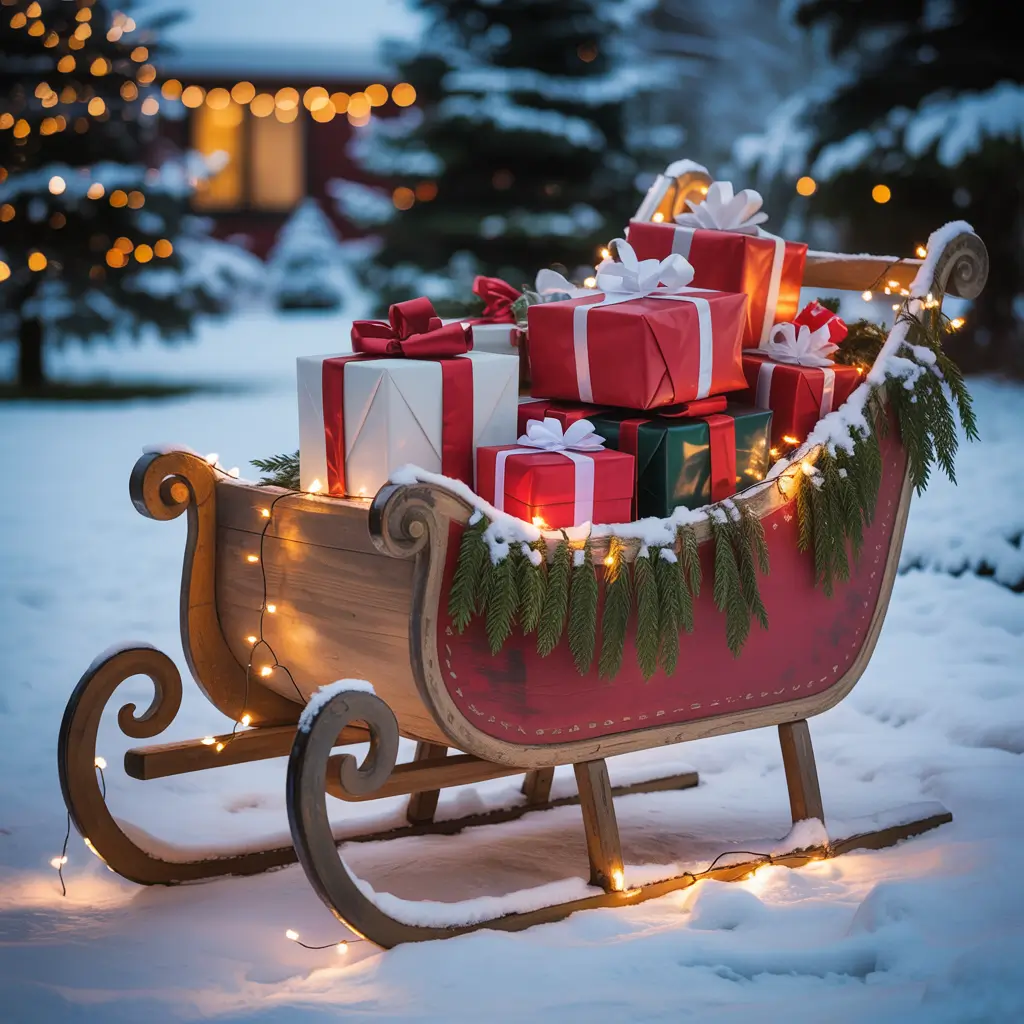
A vintage sleigh filled with wrapped packages creates the perfect photo opportunity in your yard. Every family with kids will stop for pictures, guaranteed. I position mine where the lighting is best for those inevitable Instagram moments.
Finding an actual vintage sleigh might seem impossible, but check Facebook Marketplace and estate sales. I scored mine for $75 from someone downsizing. Worth every penny for the yearly joy it brings. If vintage isn’t available, new reproduction sleighs work just as well – nobody’s checking authenticity certificates on Christmas decorations.
Fill it with wrapped boxes using weatherproof materials. Empty boxes wrapped in outdoor fabric or laminated paper survive the elements while looking picture-perfect.
Enchanted Forest Evergreen Trio
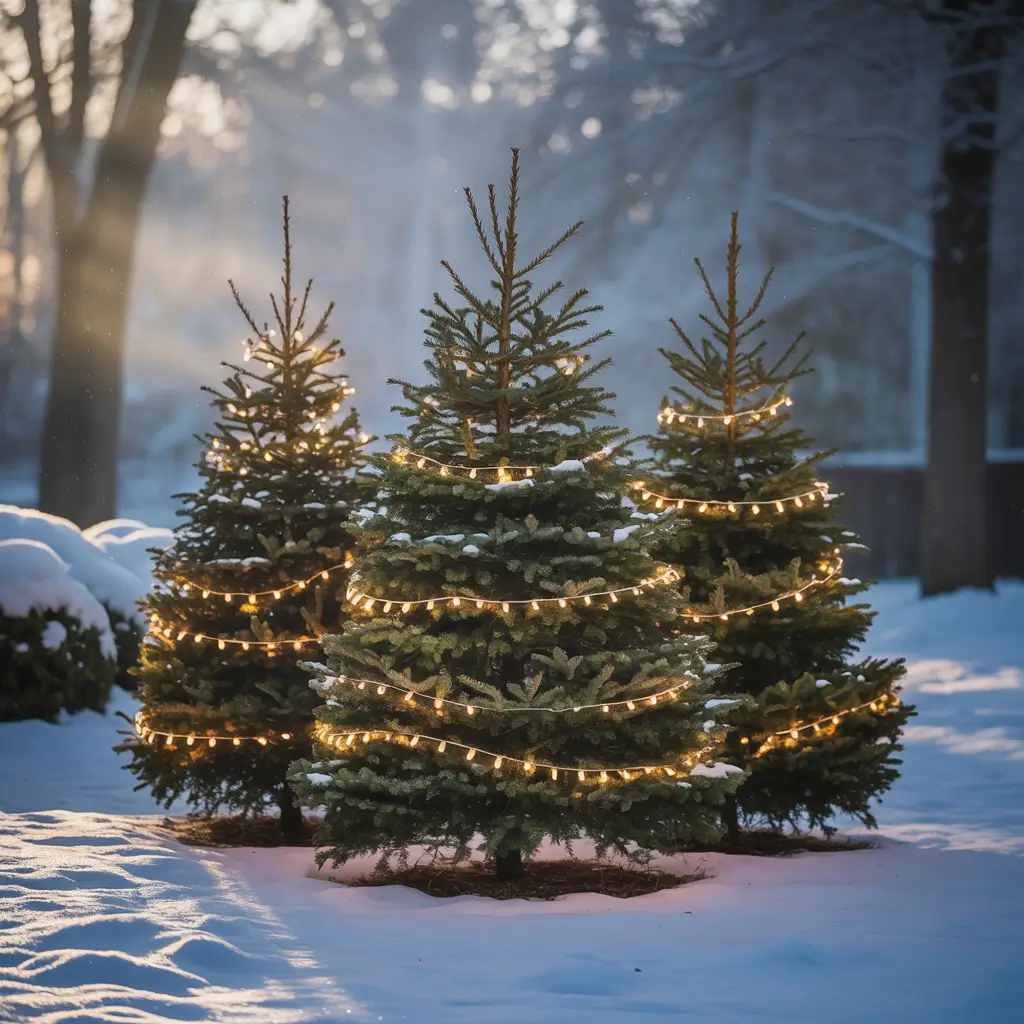
Three evergreen trees of varying heights, decorated differently but cohesively, create an enchanted forest vibe without the actual forest. This works especially well for yards lacking natural trees.
I use potted evergreens that I can plant after the holidays. Two birds, one stone – Christmas decorations now, landscaping later. Each tree gets its own theme: one with white lights only, one with colored lights and ornaments, and one with ribbon and natural decorations.
The triangle formation works best visually. Place the tallest in back, medium to one side, shortest completing the triangle. Basic design principle that makes everything look intentional rather than randomly scattered.
Decorating Each Tree
Create cohesion while maintaining individuality:
- Tree 1: Classic white lights and silver accents
- Tree 2: Multicolor lights with traditional ornaments
- Tree 3: Natural decorations with warm white lights
- Unifying element: Same tree topper style on all three
Frosted Garlands Fence Line
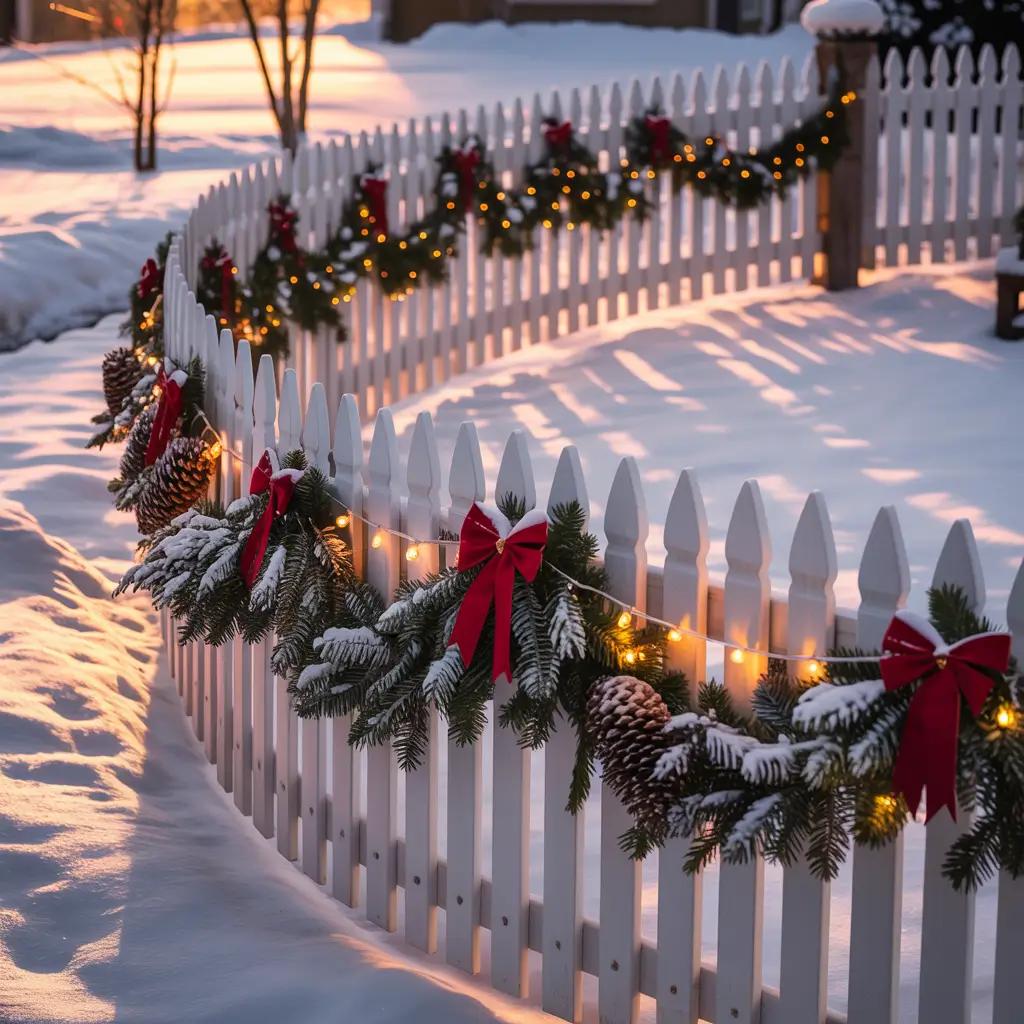
Your fence shouldn’t feel left out of the Christmas party. Frosted garland transformed my boring privacy fence into something that looks like it belongs in a snow globe. The frosted effect hides any imperfections in cheaper garland while adding that expensive look.
I attach garland using zip ties painted to match the fence. Way more secure than those terrible plastic clips that pop off every time someone sneezes. Space your attachment points every 2-3 feet for proper swooping without sagging.
Mix in battery-operated lights for nighttime magic. The timer function saves you from the nightly “did I turn off the fence lights?” panic at bedtime.
Also Read: 15 Easy DIY Outdoor Christmas Decorations Ideas for Beautiful Homes
LED Starry Night Tree Wrap
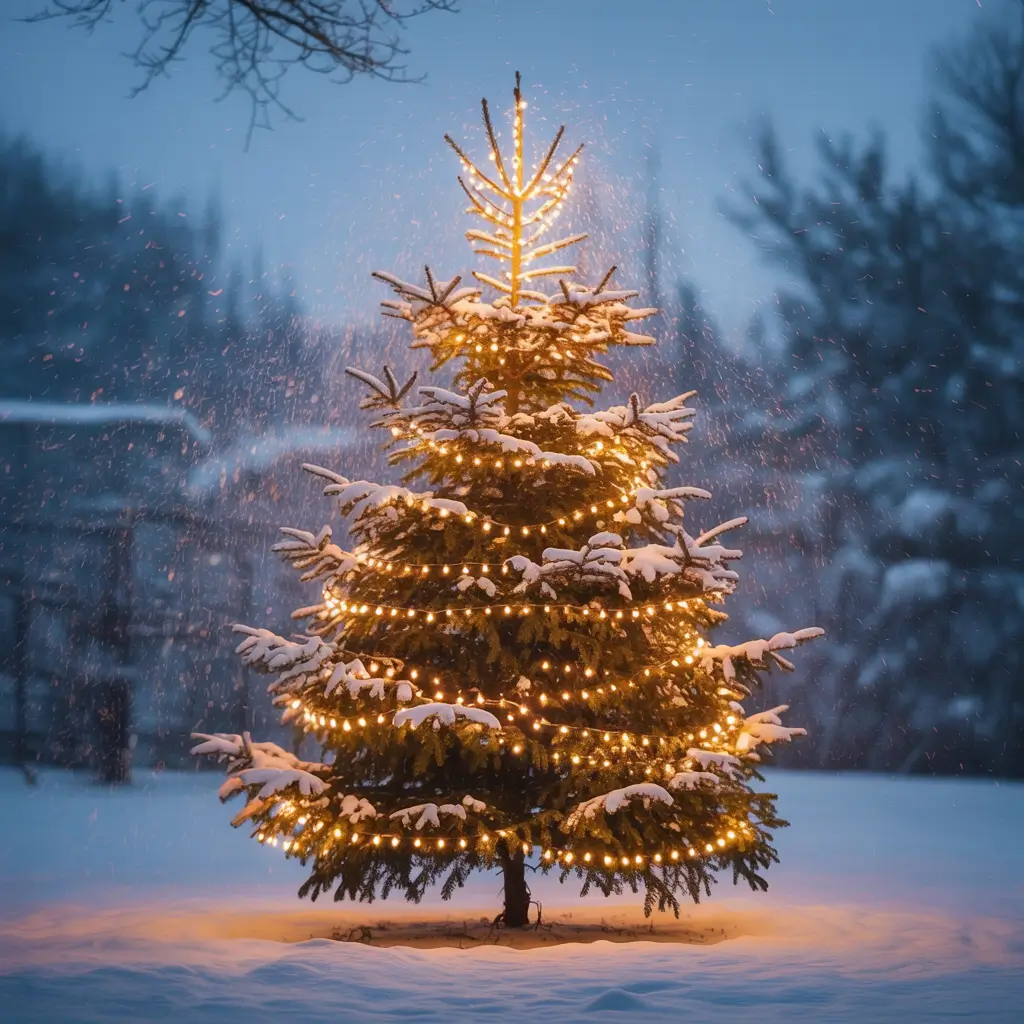
Wrapping trees with lights seems basic until you do it right. The starry night effect comes from using multiple types of lights at different depths within the branches. Not just wrapped around the trunk like a candy cane – that’s amateur hour.
I start with net lights deep in the branches for overall glow, then add string lights wrapped around major branches, finishing with hanging star-shaped lights at various heights. The layered approach creates incredible depth that flat wrapping never achieves.
My maple tree requires about 800 lights for full coverage. Yes, that’s a lot. No, you can’t skimp and get the same effect. Trust the process.
Light Selection Guide
Choose your lights wisely:
- Warm white for classic elegance
- Cool white for modern winter wonderland
- Multicolor for playful family fun
- Twinkle function adds magic (use sparingly)
Whimsical Gingerbread House Front
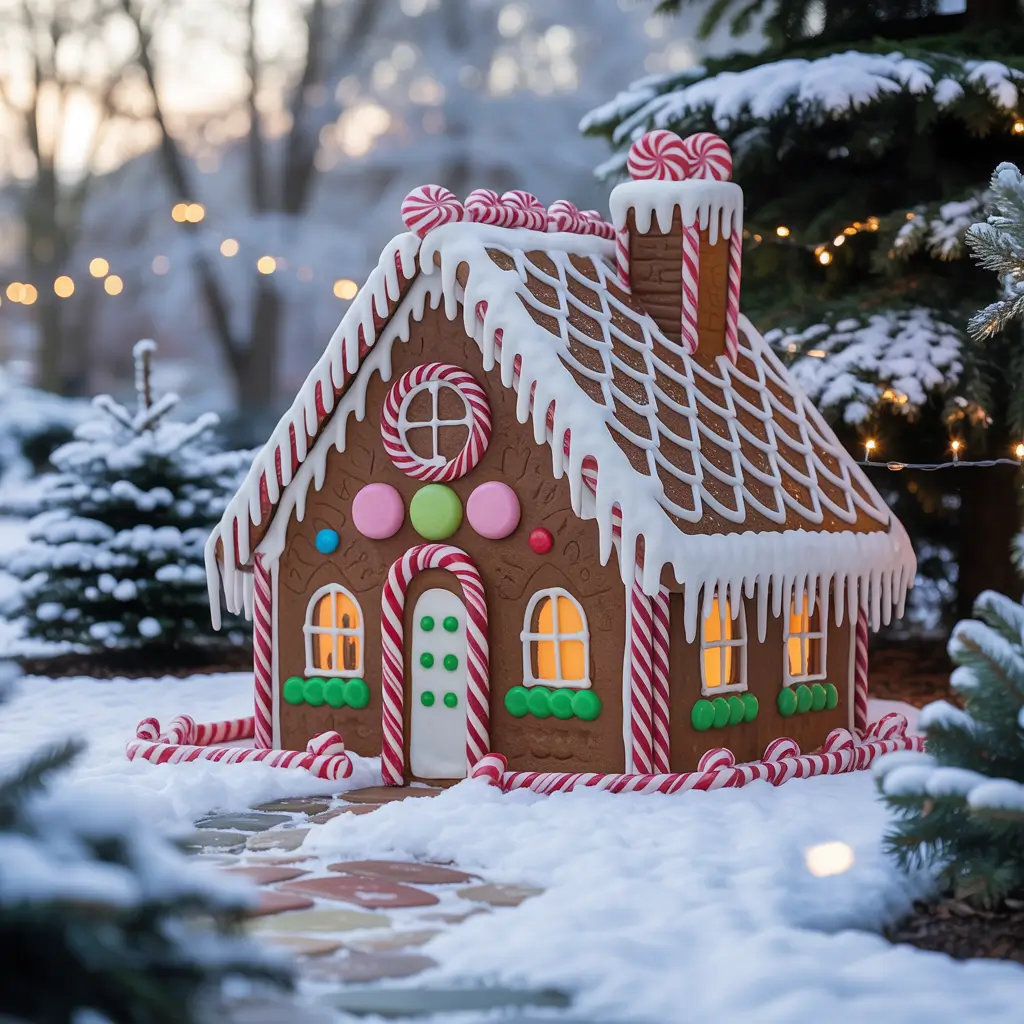
Creating a gingerbread house facade for your actual house might sound insane, but hear me out. Simple additions transform your entrance into a life-sized cookie cottage that delights everyone.
I use corrugated plastic sheets cut into candy shapes, painted and mounted around my door and windows. Add some white rope “icing” along the roofline, and boom – gingerbread house achieved. Takes a weekend to create, lasts for years with proper storage.
The key is committing to the theme. Half-hearted gingerbread decorating looks weird. Go all in with candy cane columns, gumdrop bushes, and icing trim everywhere.
Santa’s Workshop Yard Scene
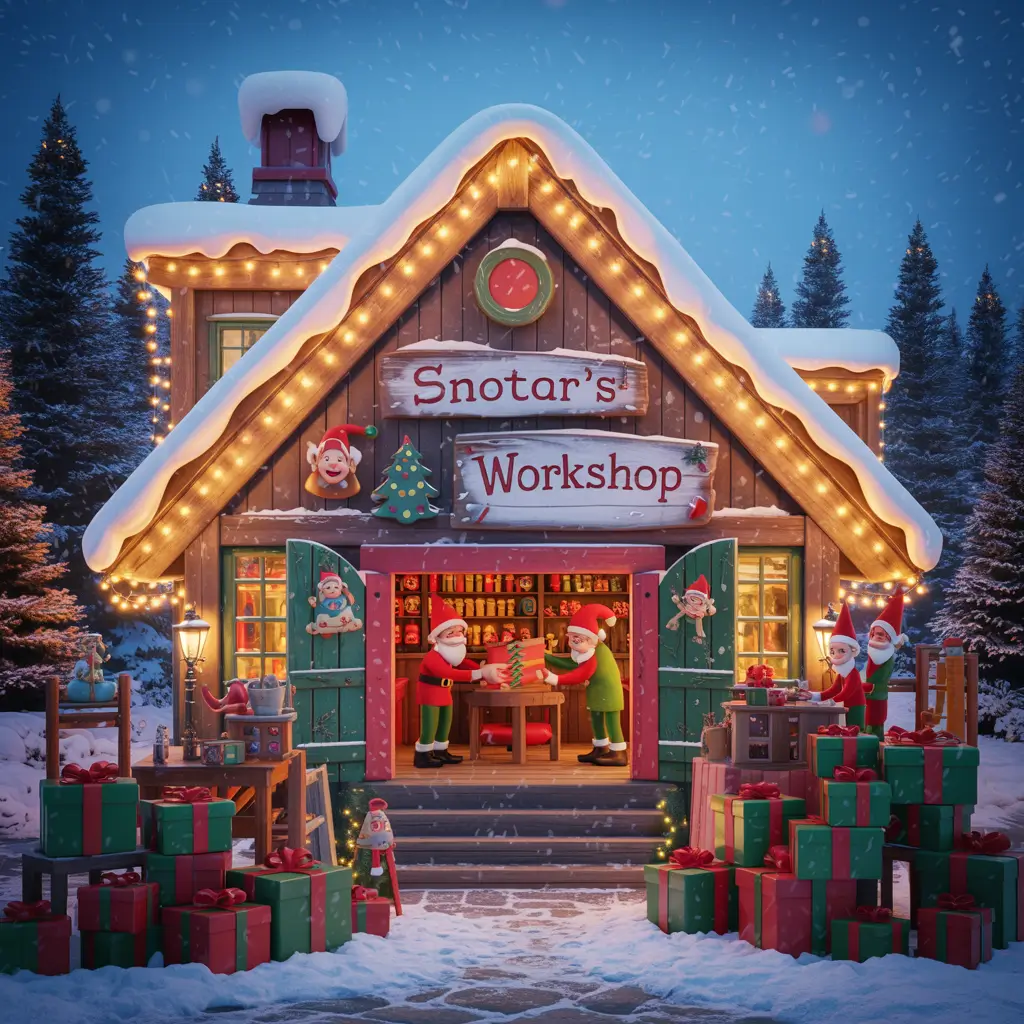
This elaborate setup becomes the neighborhood attraction. I build mine against the garage, creating a workshop facade with simple plywood and paint. Kids literally believe Santa might be inside.
The scene includes workbenches (sawhorses with plywood), wrapped presents, toy cutouts, and workshop signs. Adding mechanical elements like a spinning wheel or moving elf takes it next level, but static displays work great too.
Start small and build each year. My workshop began as a single workbench and now includes multiple stations, each with different toy-making activities in progress. It’s become a family tradition adding new elements annually.
Essential Workshop Elements
Include these for authenticity:
- “Nice List” and “Naughty List” scrolls
- Toy-making tools (painted cardboard works)
- Elf hats and boots positioned like workers just stepped away
- Workshop hours sign with clever times
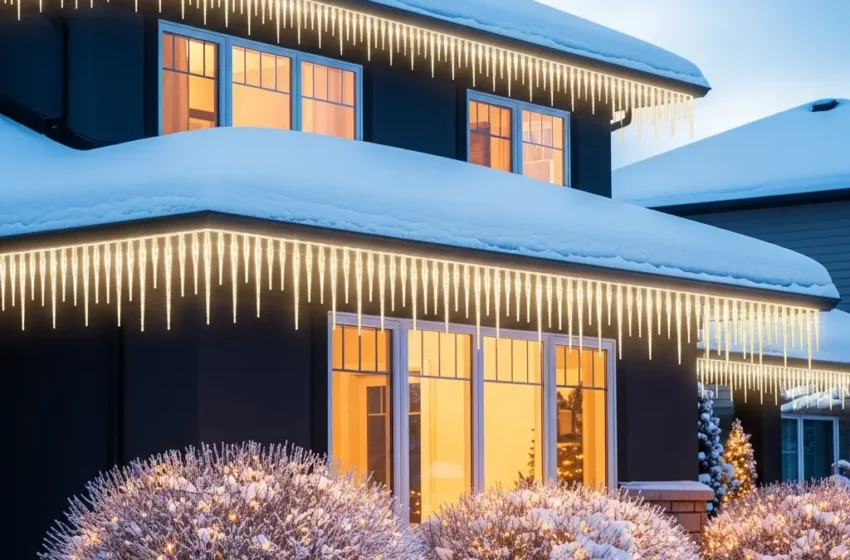
Twinkling Icicle Roofline Look
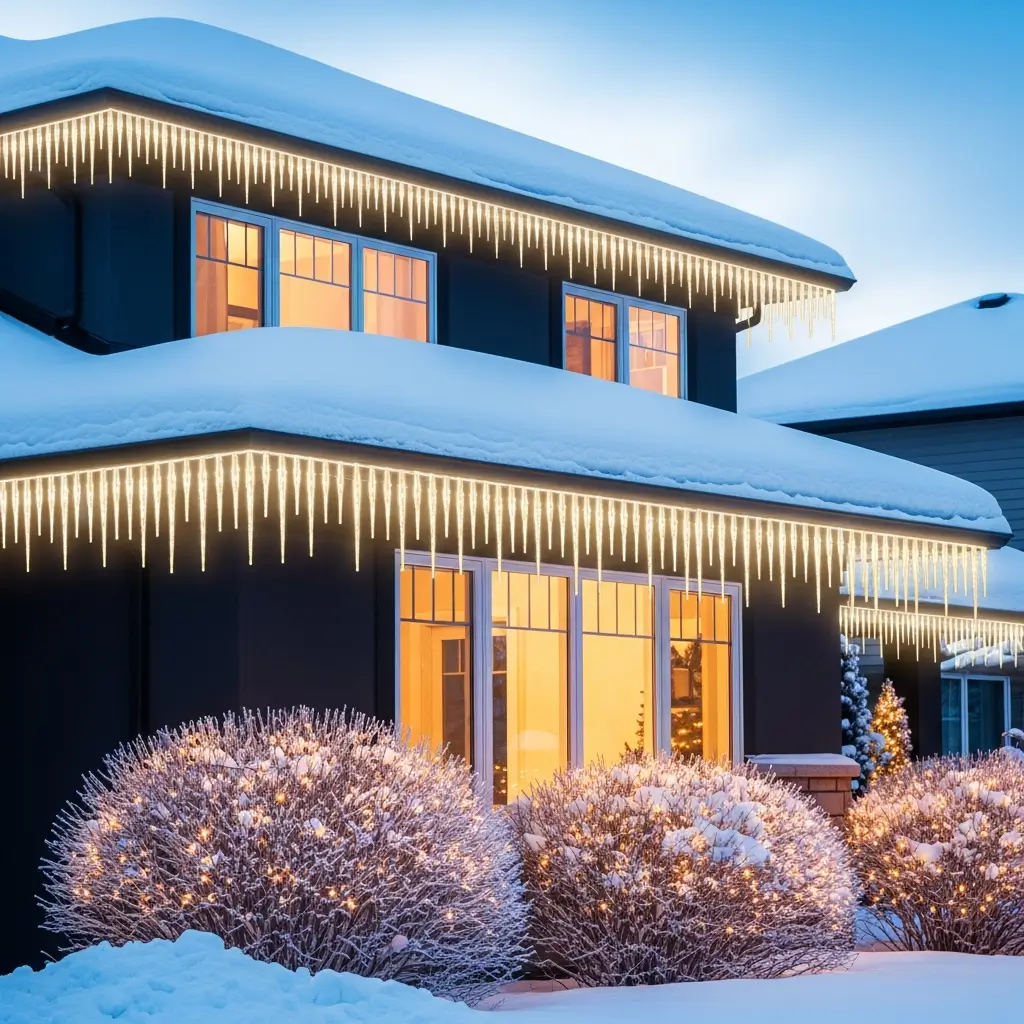
Icicle lights done right look like actual frozen cascades hanging from your roof. Done wrong, they look like you gave up halfway through decorating. The secret is consistent spacing and proper attachment.
I use gutter clips spaced exactly 6 inches apart. My slightly OCD neighbor taught me this, and while I mocked him initially, the uniform look beats my previous chaos. The measurement matters – too close looks bunched, too far looks sparse.
Mix static and twinkling bulbs for the most realistic effect. All twinkling gets overwhelming, all static looks flat. About 30% twinkling to 70% static creates perfect movement without inducing seizures.
Nutcracker Guard Entrance
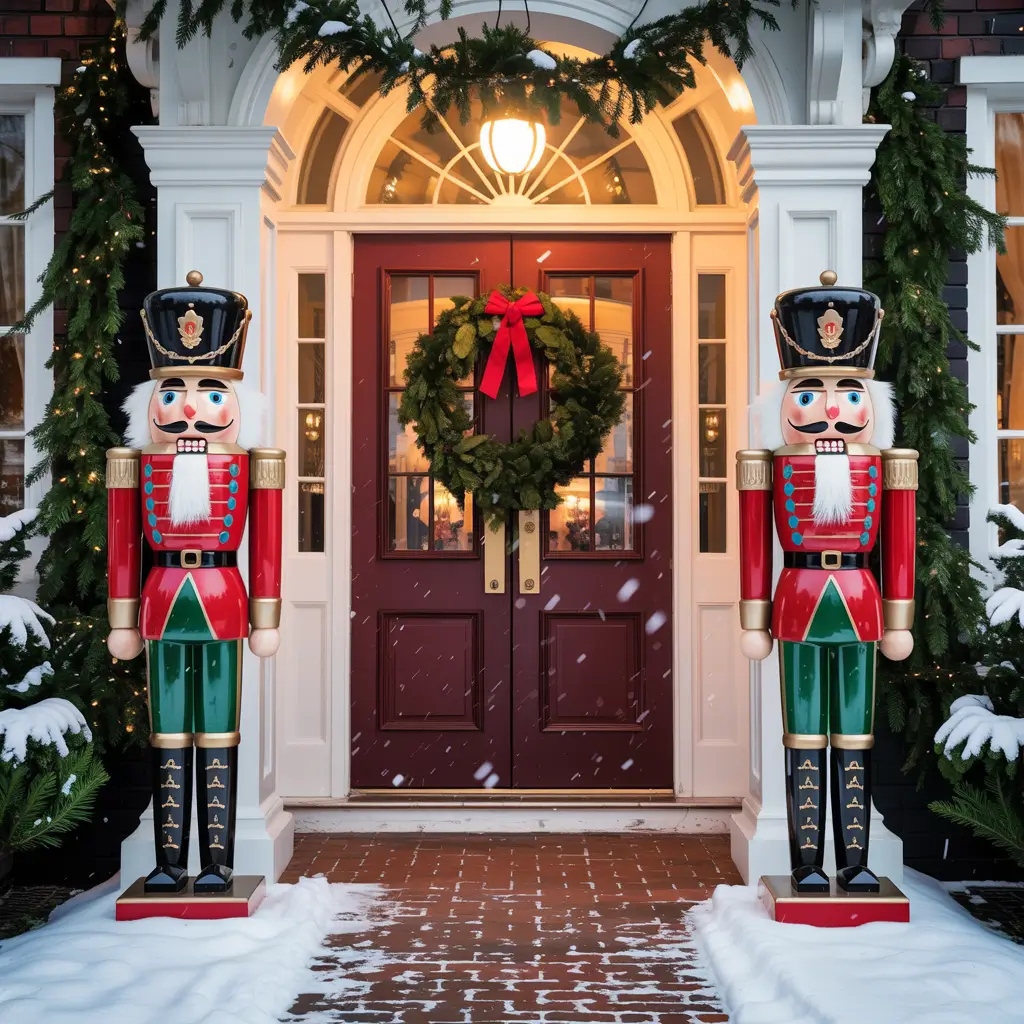
Flanking your entrance with nutcracker guards creates an impressive, formal welcome that says “we take Christmas seriously here.” I have two 4-foot nutcrackers that I bought on clearance three years ago – best January purchase ever.
Position them slightly angled toward each other rather than straight forward. Creates a more welcoming V-shape that guides guests to your door. Straight positioning looks militant and slightly unwelcoming, which isn’t really the Christmas vibe we’re going for :/
If you can’t find affordable large nutcrackers, make them from concrete form tubes, paint, and basic materials. Plenty of tutorials online, and honestly, the homemade ones often look better than mass-produced versions.
Festive Snowman Family Display
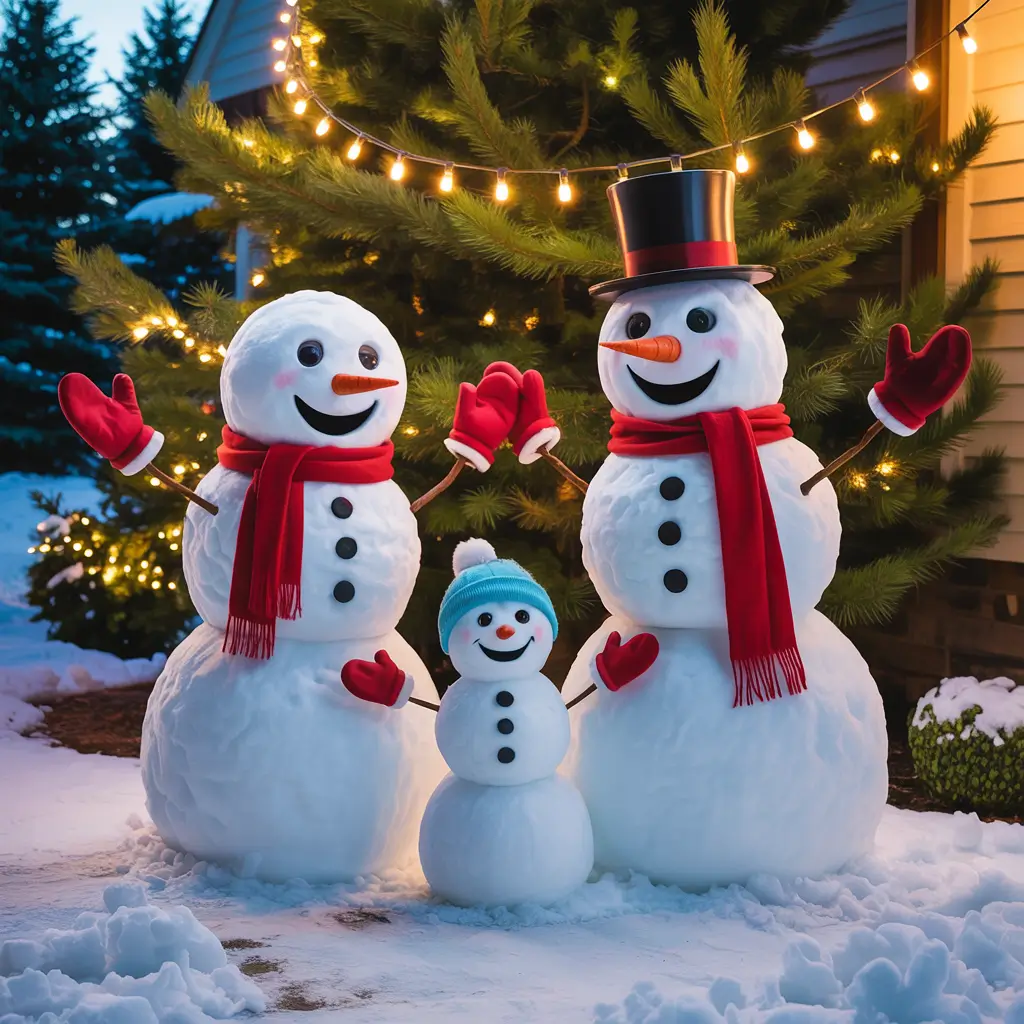
Every yard needs a snowman family, even where snow never falls. Creating personality for each snowman makes them memorable rather than generic. Our family has Dad Snowman with his coffee mug, Mom Snowman with her wine glass (keeping it real), and kid snowmen with various sports equipment.
I use white painted hay bales for bodies when real snow isn’t available. Cheaper than those inflatable monstrosities and way more charming. Stack different sizes, add stick arms, and dress them with real accessories for authenticity.
Weather-proof your snowmen properly. Nothing sadder than a melting foam snowman or deflated inflatable sprawled across your lawn like a crime scene.
Snowman Personality Ideas
Give each snowman character:
- Unique accessories (scarves, hats, props)
- Different facial expressions using various materials
- Varying heights for realistic family dynamic
- Interactive elements like a mailbox for letters to Santa
Making It All Work Together
The magic happens when all these elements work in harmony rather than competing for attention. I learned this after my first year looked like Christmas threw up in my yard.
Now I choose a color scheme and stick to it religiously. This year it’s red, gold, and warm white – classic but not boring.
Start your setup earlier than you think necessary. I begin the weekend before Thanksgiving, adding elements gradually.
This prevents the exhaustion-induced decorating rage that happens when you try to do everything in one day. Plus, you get to enjoy your handiwork longer!
Remember, the goal isn’t to blind pilots or bankrupt yourself with electric bills. The most magical displays I’ve seen balance spectacular with sensible.
Your yard should make people smile, not shield their eyes or wonder if you’ve lost your mind.
Test everything at night before calling it done. What looks good during daylight might create weird shadows or dark spots after sunset.
I spend at least one evening walking around the yard, viewing from different angles, and adjusting accordingly. My neighbors think I’m crazy, but their yards don’t make it onto the neighborhood Christmas lights tour, so who’s winning here?
Creating an unforgettable outdoor Christmas display takes planning, patience, and probably more extension cords than any reasonable person should own.
But when you see kids’ faces light up, when neighbors slow down to admire your work, when your own family wants to spend time outside despite the cold – that’s when you know you’ve created something special.
Now if you’ll excuse me, I need to go untangle approximately 97 strings of lights that somehow knotted themselves in storage.
How does that even happen? It’s like they party in the attic all summer. But hey, that’s part of the festive fun, right? 🙂