10 Functional Garage Storage Ideas and Organized Solutions
- Garage Decor
 Ben
Ben- 0
- 30 minutes read
Let me guess – you just tripped over that rake for the third time this week, right? Yeah, I’ve been there. My garage used to look like a tornado hit a hardware store, married a sporting goods shop, and had extremely messy children. But here’s the thing: organizing your garage doesn’t have to be some weekend-warrior nightmare that ends with you crying into a pile of old paint cans.
I spent the last two years transforming my disaster zone into something that actually makes sense. And no, you don’t need to drop thousands on fancy systems or hire a professional organizer who judges your collection of half-empty WD-40 cans. These ten storage solutions changed my garage game completely, and they’ll work for you whether you’re dealing with 100 square feet or a three-car luxury situation.
Wall-Mounted Pegboard Organizer

Remember those pegboards from your dad’s garage? Turns out, he was onto something. Wall-mounted pegboards are basically the Swiss Army knife of garage organization – versatile, efficient, and surprisingly satisfying to arrange.
I installed my first pegboard system last spring, and honestly, it felt like unlocking a cheat code. You mount these bad boys directly to your studs, and suddenly you’ve got vertical storage that adapts to whatever chaos you throw at it. Need to hang your hammers? Done. Want to display your drill collection like trophies? Go for it.
The beauty lies in the customizable hooks and accessories. You can rearrange everything whenever your storage needs change – which, let’s face it, happens every time you buy a new tool you definitely didn’t need. I use mine for everything from screwdrivers to extension cords, and I even rigged up a holder for my safety glasses collection.
Setting Up Your Pegboard System
Here’s what makes pegboard installation actually manageable:
- Choose metal over traditional hardboard – it handles more weight
- Space it at least 1 inch from the wall for hook clearance
- Paint it a contrasting color to your tools (trust me, finding stuff becomes way easier)
- Invest in quality hooks – the cheap ones bend faster than a politician’s promises
Pro tip: outline your most-used tools with a marker once you find their perfect spots. Yeah, it looks a bit obsessive, but you’ll always know what’s missing and where it belongs.
Overhead Ceiling Storage Racks
Look up. See all that wasted space? That’s where your seasonal decorations, camping gear, and those boxes labeled “miscellaneous” should live. Overhead storage racks transform dead air into prime real estate.
I installed ceiling racks three months ago, and my wife actually complimented my organizational skills – that’s when you know you’ve struck gold. These systems typically hold between 250 to 600 pounds when properly installed into ceiling joists. That’s enough for your Christmas village, Halloween graveyard, and that inflatable pool you use twice a summer.
The installation scared me at first (nobody wants storage crashing down on their car), but it’s surprisingly straightforward if you follow the rules. Find those joists with a stud finder, use proper lag bolts, and don’t exceed weight limits. Simple as that.
Smart Loading Strategies
When you’re loading overhead racks, think strategically:
- Keep seasonal items together in clearly labeled bins
- Place heavier items near the mounting points
- Leave frequently accessed stuff near the edges
- Use clear bins when possible – squinting at labels while on a ladder gets old fast
Rolling Tool Chest with Compartments
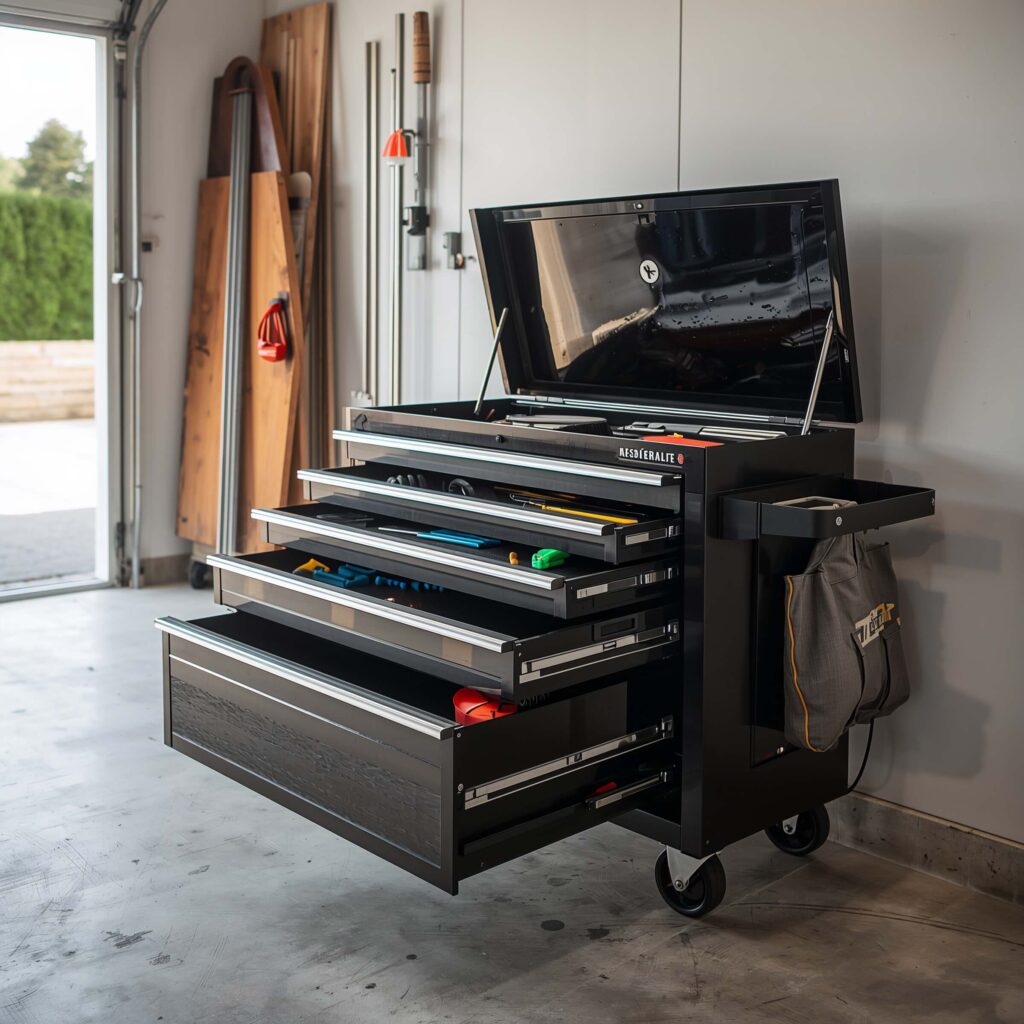
Want to feel like a professional mechanic without the professional mechanic prices? Get yourself a rolling tool chest. These mobile command centers bring organization directly to your projects instead of making you trek back and forth like some kind of tool-fetching robot.
My rolling chest has five drawers of varying depths, and each one serves a specific purpose. The shallow top drawer holds precision tools and small hardware. The deep bottom drawer? That’s where the heavy artillery lives – my impact driver, circular saw, and that reciprocating saw I bought for one project but keep finding excuses to use.
What really sells me on rolling storage is the workspace on top. Mine doubles as a portable workbench for smaller projects. Throw a cutting mat on top, and you’ve got yourself a mobile crafting station. Add a power strip to the side, and boom – you’re basically running a mobile workshop.
Drawer Organization Hacks
Keep your rolling chest from becoming a rolling mess:
- Use drawer liners to prevent tools from sliding around
- Invest in socket organizers (magnetic ones changed my life)
- Label drawer fronts with contents – your future self will thank you
- Keep a small parts organizer in one drawer for screws, washers, and those weird bits you’re sure you’ll need someday
Also Read: 10 Cool Garage Gym Ideas and Minimalist Setup Tips
Modular Cube Shelving Units
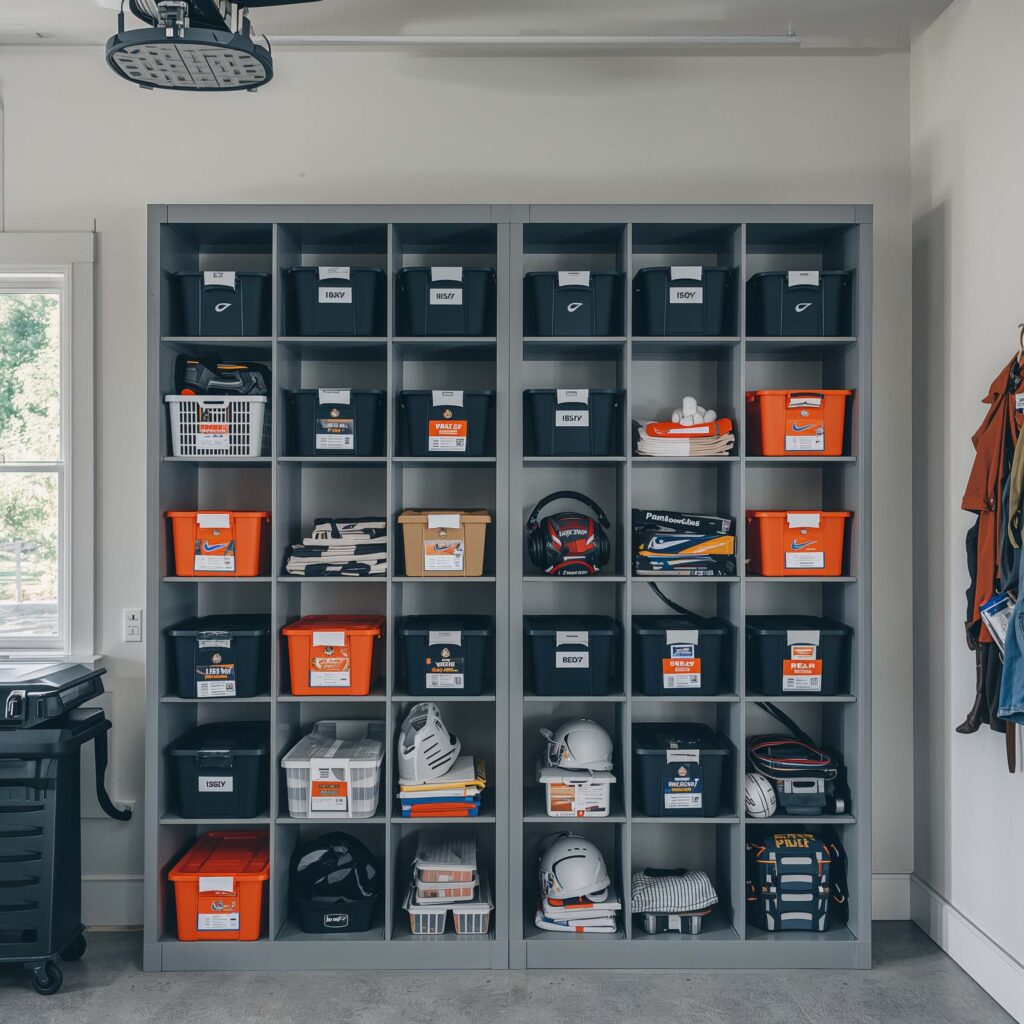
Here’s where things get interesting. Modular cube shelving is like adult LEGO for garage organization. You build exactly what you need, where you need it, and can reconfigure when your storage needs inevitably change.
I started with a basic 4×4 configuration and have since expanded to wrap around an entire corner. Each cube holds a fabric bin, plastic container, or sits empty for larger items. My power tools each get their own cube, making it stupid-easy to grab what I need and – more importantly – put it back.
The best part? These units come in different materials and price points. Want to go budget-friendly? Grab some wire cubes. Feeling fancy? Spring for the wood laminate versions that actually look presentable when your judgmental brother-in-law visits.
Maximizing Cube Storage
Make those cubes work harder:
- Color-code bins by category (blue for electrical, green for garden, etc.)
- Add LED strips inside for better visibility
- Use cube dividers for smaller items
- Leave some cubes open for quick-access tools
DIY Pallet Storage Wall
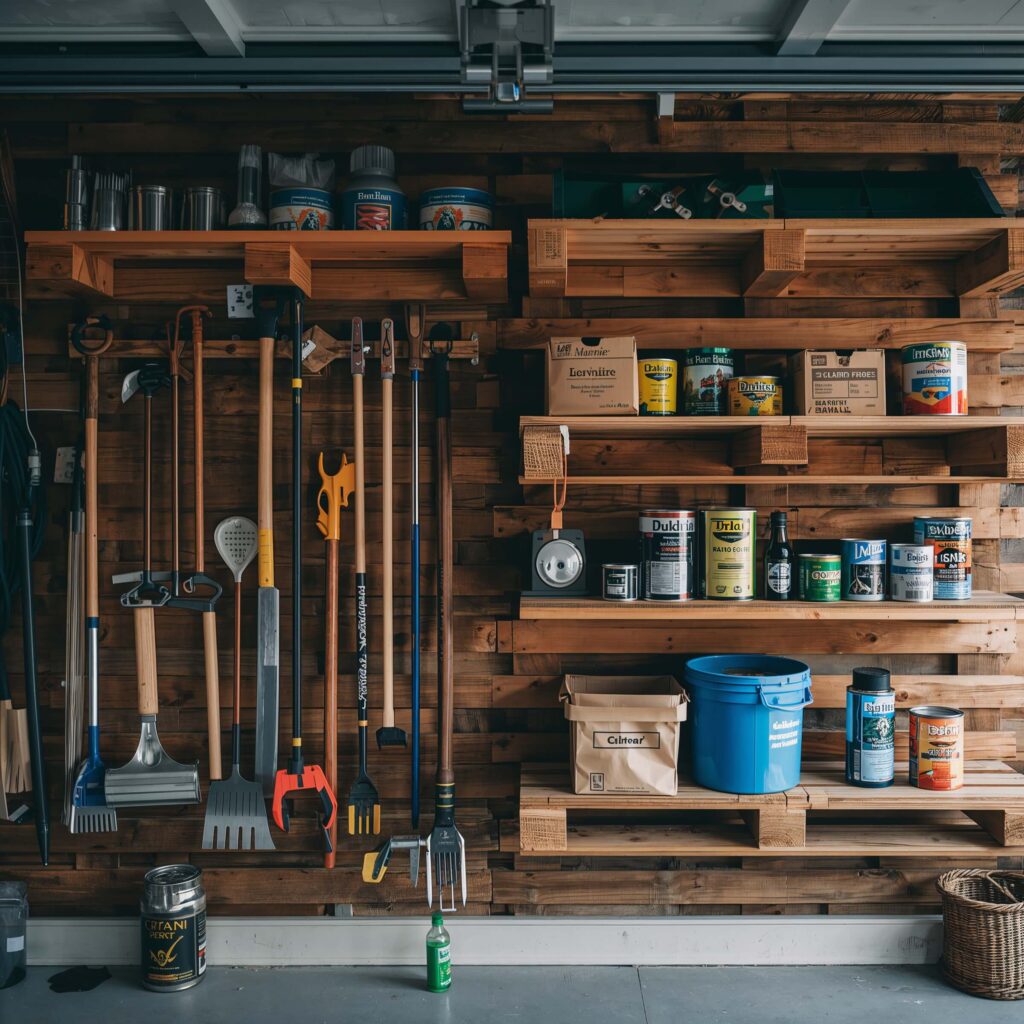
Okay, this one’s for my fellow cheap– I mean, resourceful organizers out there. Pallet walls cost almost nothing and provide surprisingly functional storage. Plus, you get that industrial-chic vibe that makes you look like you know what you’re doing 🙂
I scored five pallets from a local warehouse for free (FYI, always ask before taking – learned that the hard way). After a good sanding and some strategic mounting, I had myself a storage wall that holds everything from garden tools to spray paint cans. The natural slots in pallets work perfectly for hanging items or sliding in flat materials like plywood scraps.
The trick is treating the wood first. Those pallets have been places and seen things. A good cleaning, sanding, and sealant application prevents any unwanted garage guests from setting up shop in your new storage system.
Pallet Preparation Steps
Before mounting pallets:
- Inspect for damaged boards or protruding nails
- Sand thoroughly (splinters in garages = tetanus shot conversations)
- Apply wood sealant or paint for protection
- Mount to wall studs using heavy-duty brackets
- Consider adding hooks or small shelves between slats
Magnetic Tool Strip System
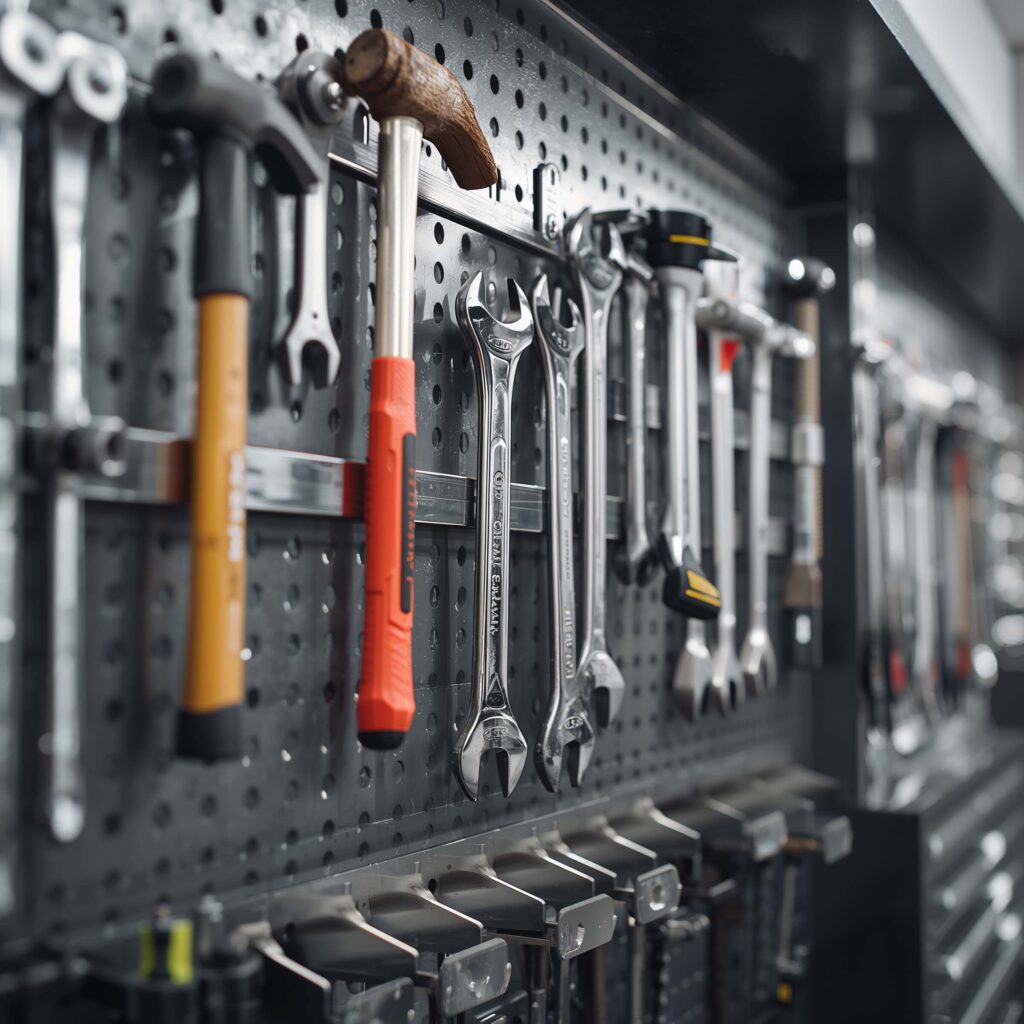
Ever notice how professional kitchens use magnetic knife strips? Well, magnetic strips in garages are basically the same idea, except way more satisfying. There’s something oddly therapeutic about slapping a wrench onto a magnet and having it just… stay there.
I’ve got three magnetic strips running along my workbench area. One holds screwdrivers, another manages wrenches, and the third catches all those random metal bits that usually disappear into the garage void. No more digging through drawers trying to find that one specific screwdriver – everything’s visible and grabbable.
The strength of these magnets still amazes me. My 24-inch strip holds my entire wrench set without breaking a sweat. Just make sure you buy strips rated for tool weight, not those wimpy kitchen ones. Nobody wants a hammer falling on their foot because they cheaped out on magnets.
Strategic Strip Placement
Position magnetic strips for maximum efficiency:
- Mount at comfortable reaching height (shoulder level works great)
- Space multiple strips at least 6 inches apart
- Install near your main work area
- Keep sensitive electronics away from strong magnetic fields
- Group similar tools together for visual organization
Also Read: 10 Smart Garage Design Ideas with Tech Upgrades
Bike and Sports Equipment Hooks
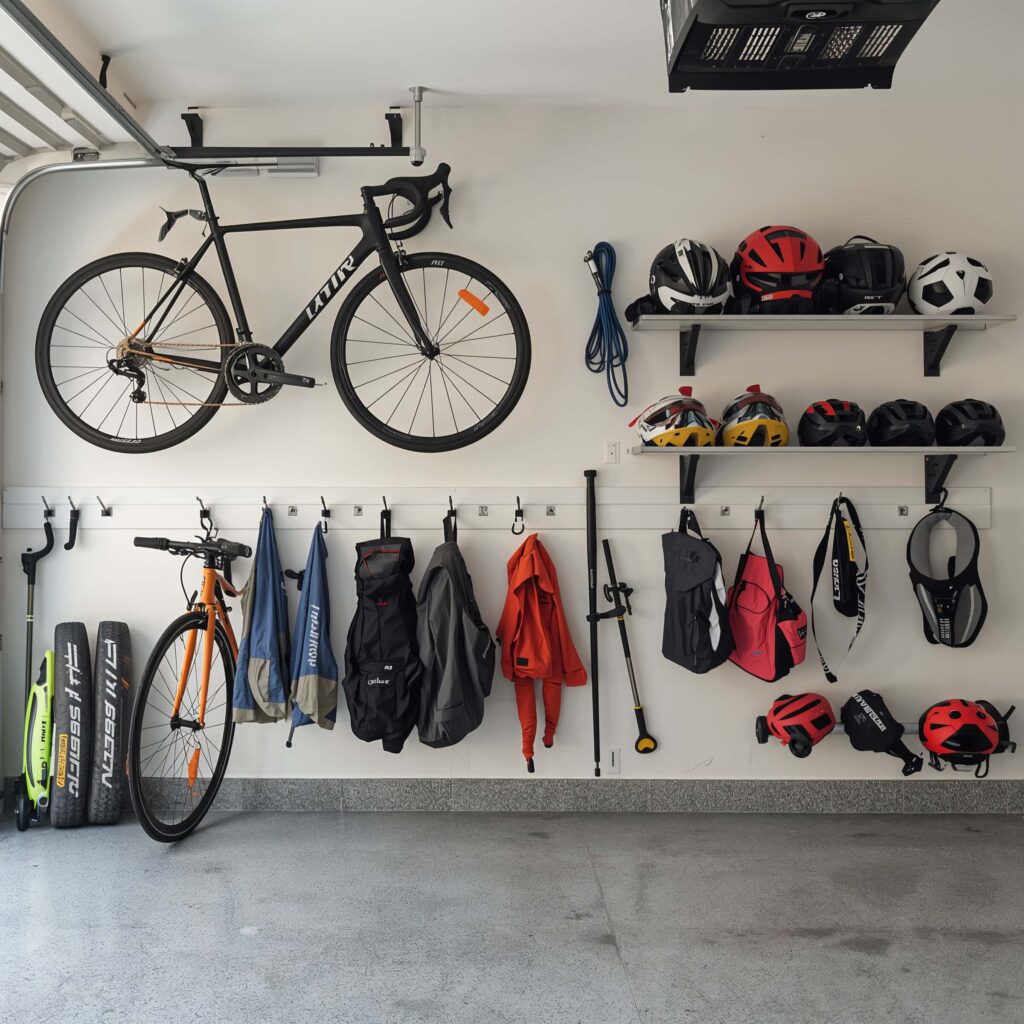
If your garage looks like a sporting goods store exploded, you need specialized hooks. Heavy-duty hooks designed for bikes and sports gear turn chaos into organized displays that actually make you want to use your equipment.
My garage used to be a bike graveyard where good intentions went to gather dust. Now? Six bikes hang from the ceiling on pulley systems, and every piece of sports equipment has its designated hook. The kids’ scooters hang on the wall, baseball bats rest in a corner rack, and even the basketball has its own little throne.
What really makes this system work is choosing the right hook for each item. Bikes need different support than tennis rackets. Skateboards require different mounting than golf bags. Match the hook to the equipment, and suddenly everything just makes sense.
Hook Selection Guide
Pick hooks that actually work:
- Rubber-coated hooks prevent scratches on bike frames
- Use ceiling pulleys for bikes you don’t use daily
- Install ladder hooks horizontally for long items
- Consider weight ratings (always overestimate)
- Group seasonal sports equipment together
Fold-Down Workbench with Storage
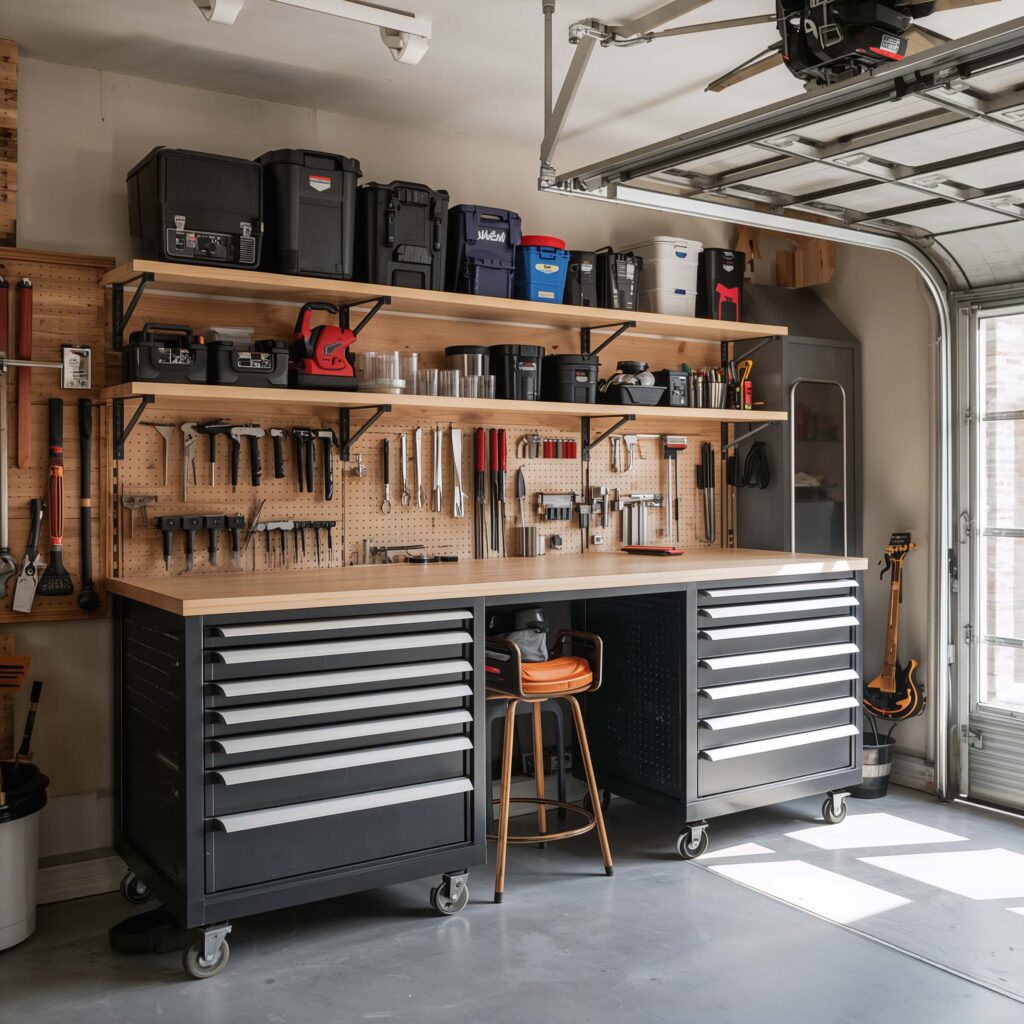
Space-challenged garage owners, this one’s for you. A fold-down workbench gives you a workspace when you need it and disappears when you don’t. It’s basically the garage equivalent of a Murphy bed, except actually useful.
I built mine from a solid-core door and heavy-duty hinges, and it’s been a game-changer. When folded up, it’s just 4 inches from the wall. Drop it down, and I’ve got a full workbench with pegboard backing for tools. The best part? Built-in storage underneath holds all my project supplies.
The key is making it sturdy enough to handle real work. Mine supports 200 pounds easily – enough for most projects that don’t involve engine blocks. Add some fold-down legs for extra support, and you’ve got a legitimate workspace that vanishes when the car needs to come in.
Building Your Fold-Down Station
Essential components for success:
- Use minimum 3/4-inch plywood or solid door
- Install into wall studs with heavy-duty hinges
- Add folding support chains or legs
- Include power strip mounting on the underside
- Create tool storage on the wall behind it
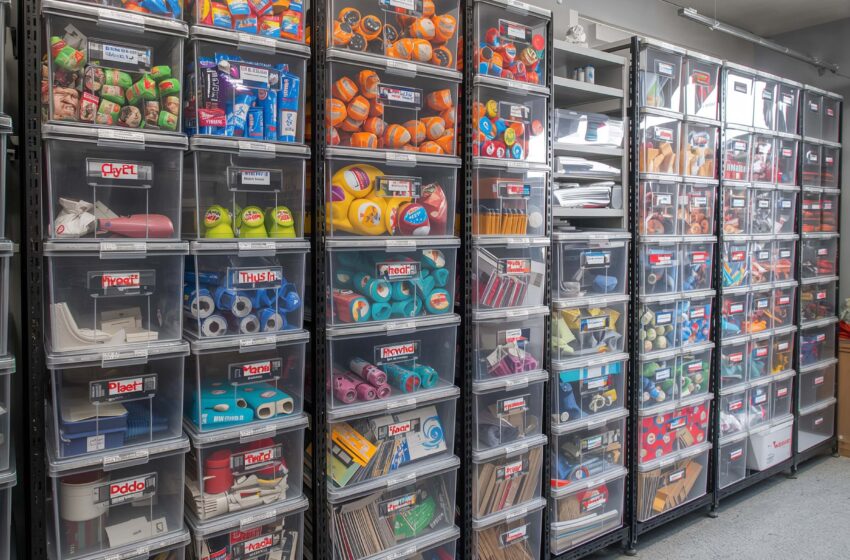
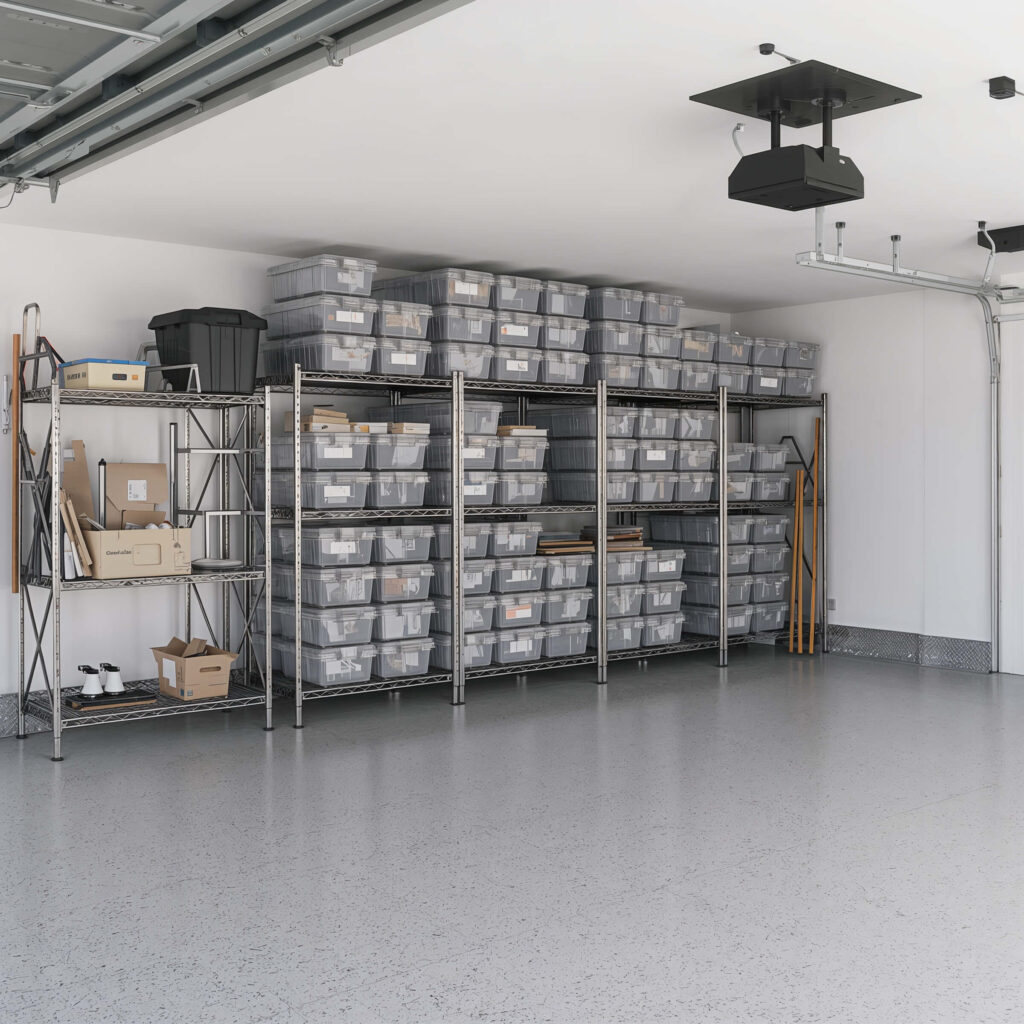
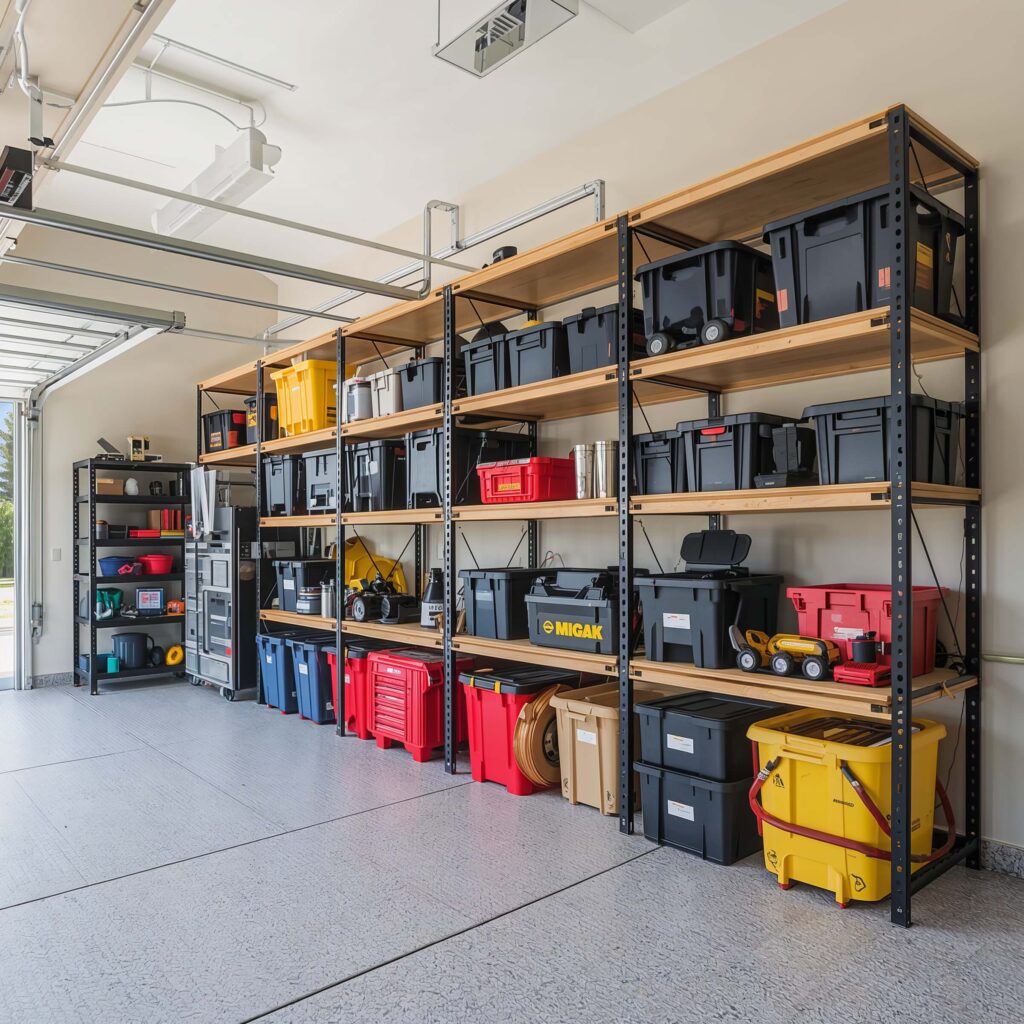
Clear Plastic Stackable Bins
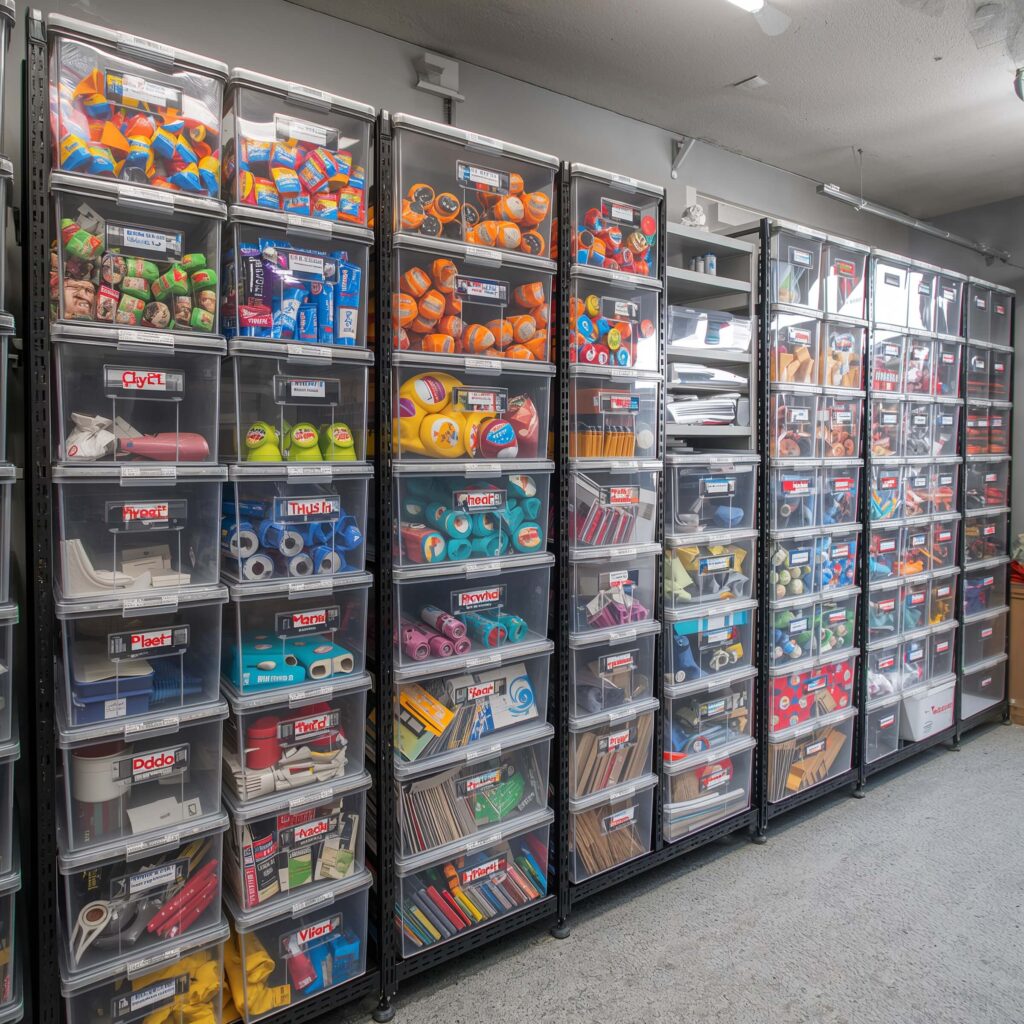
Let’s talk about the unsung heroes of garage organization: clear plastic bins. Not sexy, not Instagram-worthy, but absolutely essential for anyone who’s tired of playing “guess what’s in this box.”
I switched to clear bins two years ago, and the time I’ve saved not opening every container looking for one specific thing probably adds up to days by now. Holiday decorations? See them through the bin. Camping supplies? Visible at a glance. That collection of cables you’ll definitely need someday? Right there, judging you through the clear plastic.
The stackable part matters too. Uniform bin sizes mean stable stacks that actually utilize vertical space instead of creating leaning towers of storage anxiety. I use three sizes: small for hardware, medium for tools and supplies, and large for bulky seasonal items.
Bin Organization System
Maximize your bin game:
- Label both front and top of each bin
- Use same-brand bins for better stacking
- Keep heavier bins on bottom
- Create zones for different categories
- Leave 20% empty space in each bin for additions
Also Read: 10 Smart Garage Organization Ideas and Efficient Storage Ideas
Sliding Garage Door Storage Shelves
Here’s the ultimate space hack nobody talks about: the space beside your garage door tracks. Those narrow strips of wall usually go unused, but with sliding storage shelves, they become premium organization real estate.
I installed sliding shelves in those dead zones last month, and honestly, I’m mad I didn’t do it sooner. Each shelf slides out perpendicular to the wall, revealing multiple storage levels in a space that’s usually wasted. Mine hold everything from car care products to painting supplies – stuff I need regularly but doesn’t deserve prime garage real estate.
The installation requires some planning (you need to work around the door mechanism), but the payoff is huge. You’re literally creating storage from nothing, which feels like finding money in your pocket, except better because it’s organization.
Installation Considerations
Before installing sliding shelves:
- Measure clearance when garage door is open
- Check for interference with door tracks
- Use heavy-duty drawer slides rated for weight
- Consider shelf depth (12 inches usually works)
- Install at various heights for different items
Making It All Work Together
So there you have it – ten ways to transform your garage from a disaster zone into an organized paradise. Or at least a place where you can find your hammer without swearing.
The real secret? You don’t need to implement everything at once. I started with pegboard and bins, then gradually added systems as I figured out what I actually needed. Your garage is unique, your stuff is unique, and your solution should be too.
Pick one or two ideas that address your biggest pain points. Can’t find tools? Start with pegboard or magnetic strips. Drowning in seasonal decorations? Overhead racks are calling your name. No workspace? That fold-down bench will change your life.
Remember, the best organization system is the one you’ll actually use. If you’re not a label person, skip the label maker. If you hate climbing ladders, maybe overhead storage isn’t your thing. The goal isn’t to create a magazine-worthy garage (though if you do, more power to you). The goal is to stop tripping over rakes and actually find things when you need them.
IMO, a well-organized garage isn’t about perfection – it’s about function. It’s about spending less time searching and more time doing. It’s about finally having space to work on projects instead of just storing stuff you might use someday.
Your garage should work for you, not against you. These storage solutions helped me reclaim mine from the chaos, and they’ll help you too. Just promise me one thing: when you finally get it organized, actually park your car in there occasionally. You know, like garages were intended for. Wild concept, right?
Now stop reading and start organizing. That rake isn’t going to hang itself up, and you know you’re going to trip over it again tomorrow if you don’t do something about it today. Trust me – future you will be grateful you took action. Plus, there’s something weirdly satisfying about opening your garage door and not being embarrassed by what’s inside. Who knew organization could feel so good?