10 Clever Garage Workshop Layout Ideas for Compact Spaces
- Garage Decor
 Ben
Ben- 0
- 27 minutes read
Look, I get it. You’ve got dreams of a workshop that would make Tim “The Tool Man” Taylor weep with envy, but reality just handed you a garage that’s barely bigger than a walk-in closet. Been there, done that, bought the T-shirt (and then had nowhere to store it because my garage was too cramped).
Here’s the thing though – size doesn’t always matter. I’ve seen some absolutely brilliant workshops crammed into spaces so small you’d think they were designed by someone who specializes in ship-in-a-bottle construction. The secret? It’s all about working smarter, not harder, and making every square inch count.
Whether you’re dealing with a single-car garage that doubles as storage for your holiday decorations or a corner space that’s fighting for real estate with your spouse’s gardening supplies, I’ve got your back. These 15 layout ideas will transform your cramped quarters into a functional workspace that actually works.
Small One-Car Garage Workshop Layout
The Challenge: You’ve got one car’s worth of space, and guess what? You still need to park that car sometimes. Welcome to the ultimate Tetris game of workshop design.
The beauty of a small one-car garage workshop lies in strategic zoning. I learned this the hard way after spending six months playing musical chairs with my tools every time I needed to park. Here’s what actually works:
Create a perimeter workshop that hugs the walls while leaving the center clear for your vehicle. Install a workbench along one wall – preferably the back wall where you won’t accidentally ding your car door against it. Trust me on this one; I’ve got the scratches to prove it.
Your tool storage should go vertical immediately. Wall-mounted pegboards, magnetic strips, and overhead storage become your best friends. I use a simple rule: if it doesn’t get used weekly, it goes up high. Monthly tools get mid-level storage, and daily drivers stay within arm’s reach of the workbench.
Pro tip: Install retractable power cords from the ceiling. Nothing kills the vibe like tripping over extension cords while carrying a sheet of plywood. FYI, this also prevents that awkward dance you do trying to unplug everything when you need to move the car.
The key measurement here is 36 inches – that’s the minimum clearance you need around your car for comfortable access. Plan your layout around this, and you’ll never feel like you’re working in a sardine can.
Compact Corner Garage Workshop Setup
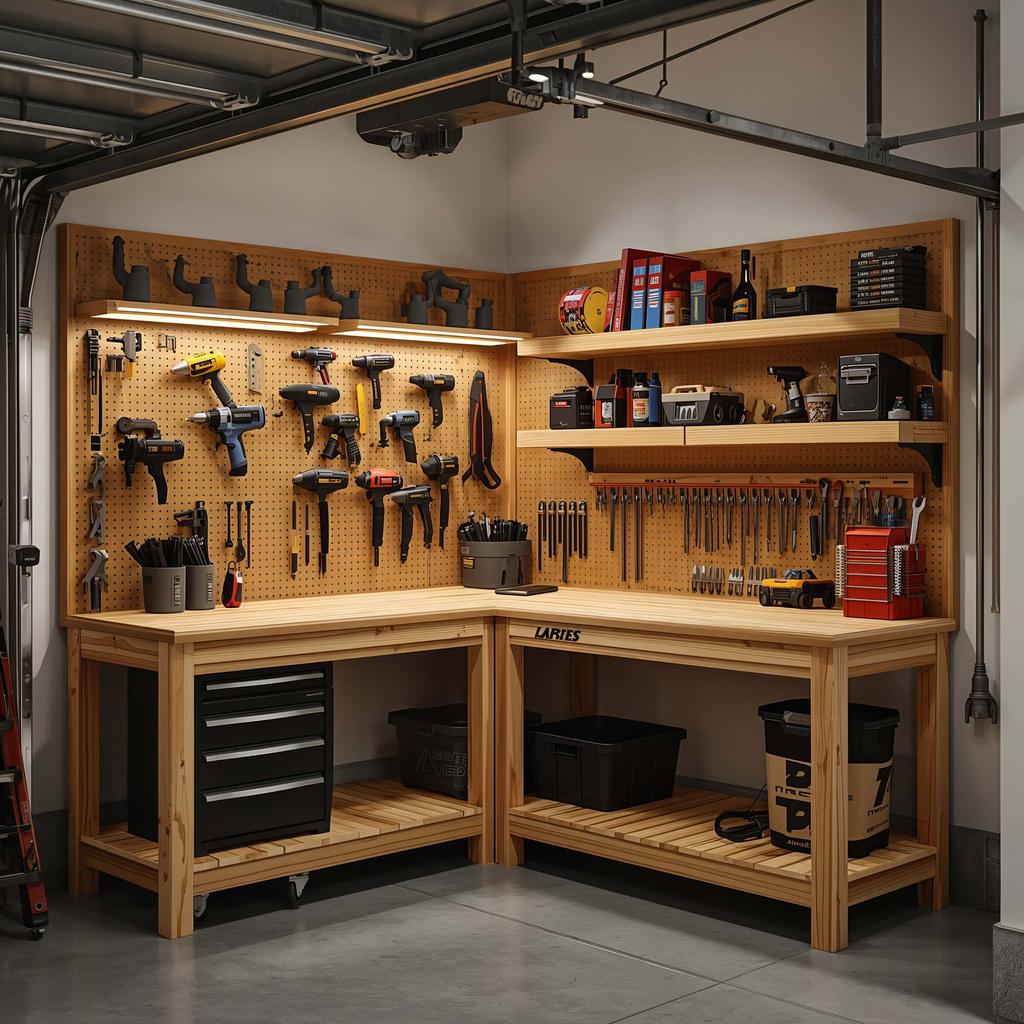
Corner workshops are like the Swiss Army knives of garage layouts – compact, efficient, and surprisingly versatile. I’ve seen people work miracles in spaces no bigger than a large closet.
L-shaped workbenches are your secret weapon here. They maximize surface area while fitting snugly into the corner’s natural flow. I recommend building or buying modular units that can adapt as your needs change. Because let’s face it, your workshop needs will evolve faster than your teenager’s music taste.
Corner storage gets tricky, though. Those 90-degree angles create dead zones that’ll swallow tools faster than a black hole. Combat this with rotating corner units or triangular shelving that actually makes use of that awkward space.
Lighting becomes critical in corner setups. You’re naturally working in the garage’s darkest spot, so invest in good task lighting. I use LED strip lights under the upper cabinets and a swing-arm lamp for detailed work. Your eyes will thank you, and you’ll stop accidentally drilling holes in the wrong spots.
Storage hack: Install a corner-mounted vise that swings out when needed. It saves precious workbench real estate while giving you serious clamping power when projects demand it.
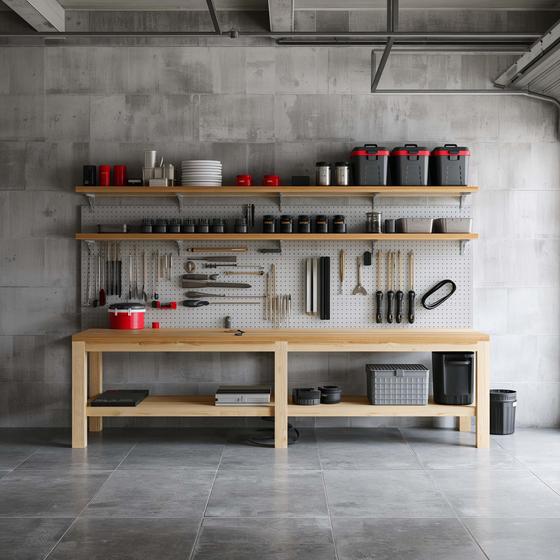
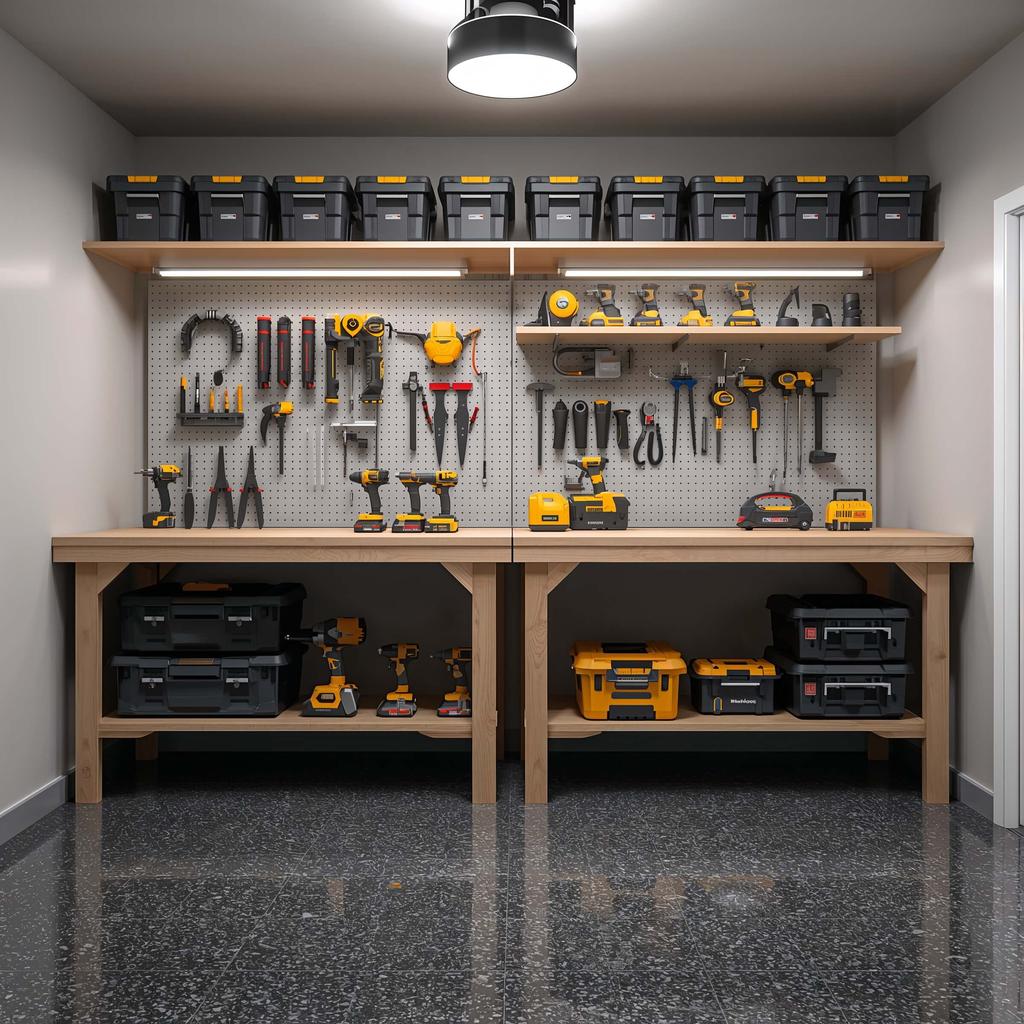
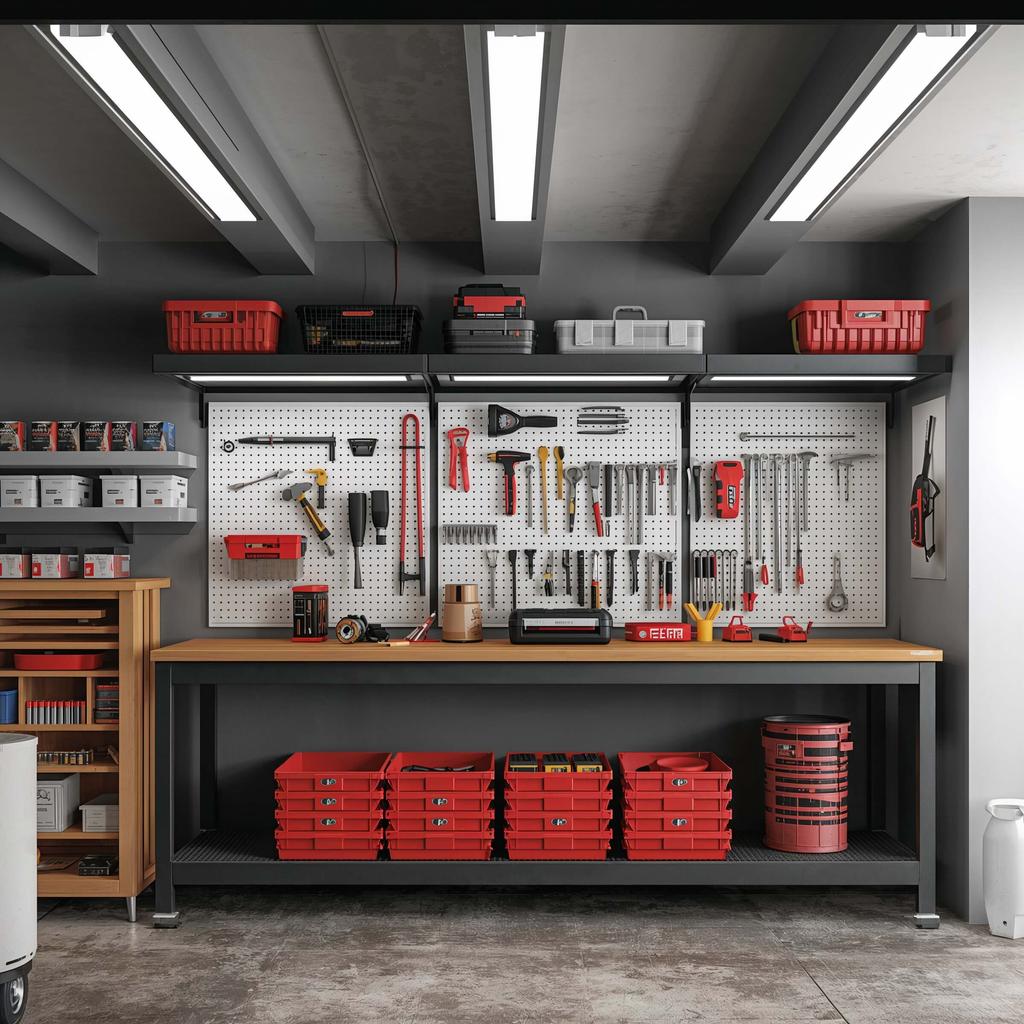
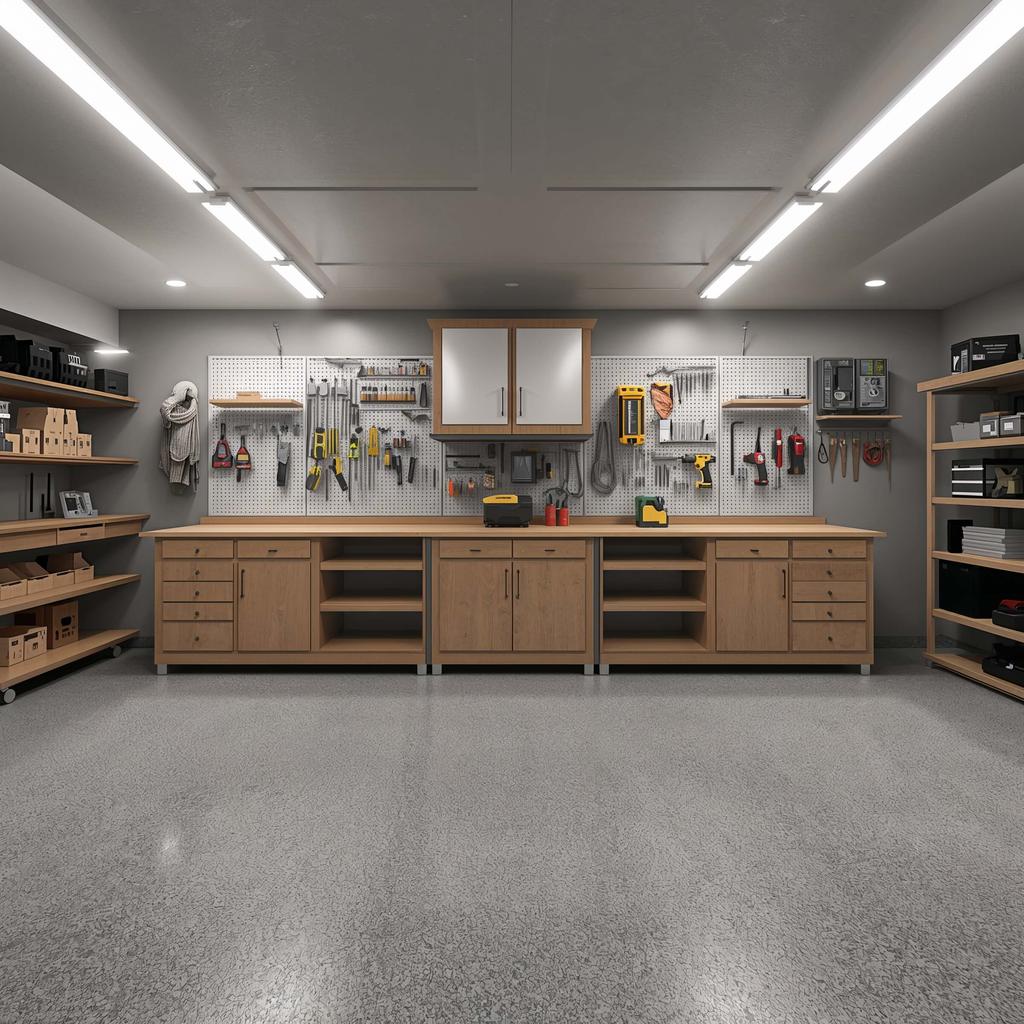
Wall-Mounted Tool Storage Workshop Layout
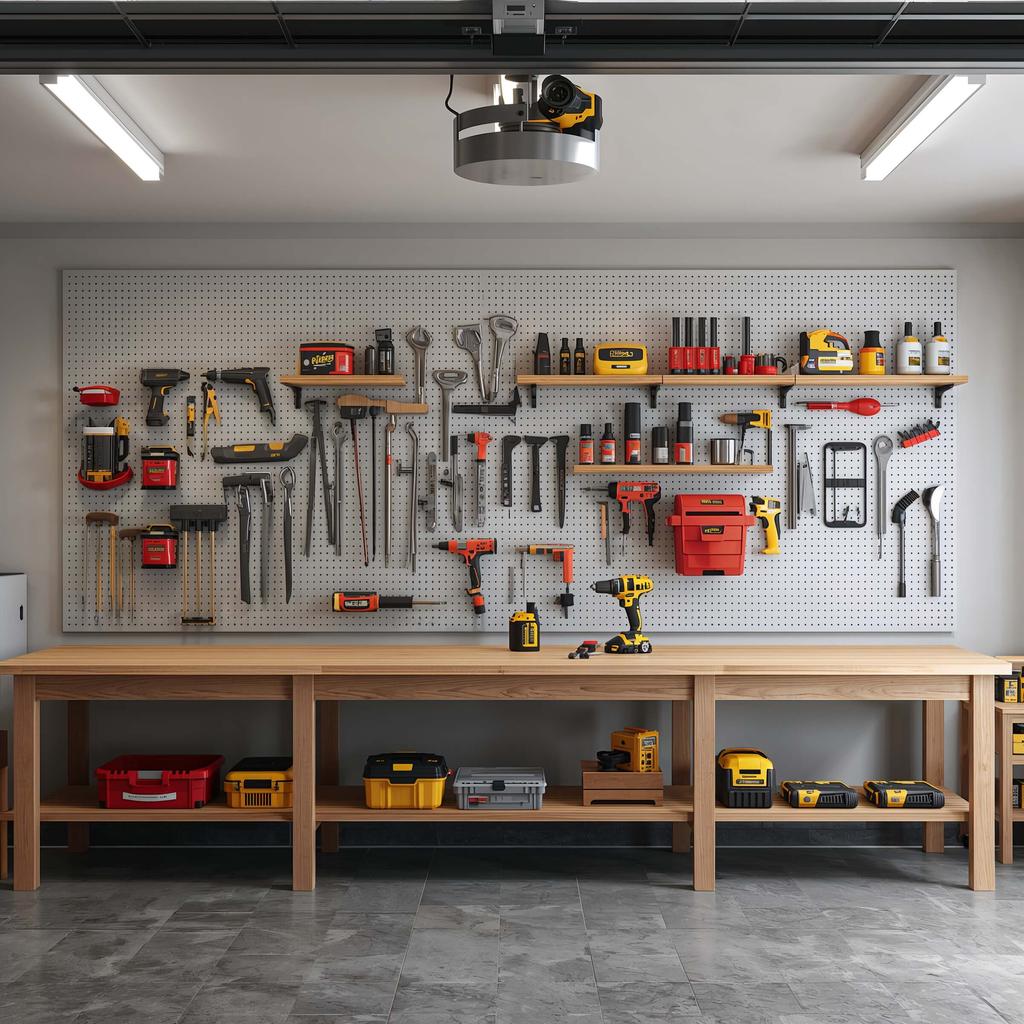
If floor space is at a premium (and when isn’t it?), going vertical isn’t just smart – it’s survival. Wall-mounted storage can literally double your workshop’s capacity without expanding its footprint.
Pegboard systems remain the gold standard, but don’t stop there. Magnetic tool strips work brilliantly for metal tools, and they look pretty slick too. I’ve got one running along my workbench that holds everything from screwdrivers to small wrenches.
French cleat systems deserve special mention here. These angled mounting strips let you hang custom tool holders that slide on and off easily. Want to reorganize? Just slide things around. Need to take tools to another location? Grab the whole holder. It’s like having a modular tool system that actually makes sense.
Overhead storage often gets overlooked, but it’s prime real estate for seasonal tools and bulk supplies. Install sturdy shelving or even a simple pulley system for heavier items. Just remember the golden rule: label everything. There’s nothing worse than playing “what’s in that box” while balanced on a ladder.
Consider shadow boards for frequently used tools. Outline each tool’s shape on the board so you instantly know what’s missing. It sounds obsessive, but it’ll save you countless minutes of hunting for that one screwdriver that somehow grew legs.
Also Read: 10 Ultimate Garage Workshop Layout Ideas for Tool Storage
Minimalist Garage Workshop Layout

Sometimes less really is more. A minimalist workshop isn’t about having fewer tools – it’s about intentional organization and multi-functional everything.
Start with a clean slate mentality. Every tool needs to earn its place through regular use. That specialty widget you bought for one project three years ago? It might be time to let it go. I know, I know – but what if you need it again? Here’s the thing: you probably won’t, and if you do, you can always borrow or rent.
Multi-functional furniture becomes essential. A workbench with built-in storage, rolling carts that serve as both storage and extra work surface, and fold-away elements that disappear when not needed. I use a rolling cart that holds my most-used tools and can wheel anywhere in the garage as needed.
The minimalist approach demands ruthless organization. Everything needs a designated home, and everything needs to return there after use. It sounds simple, but it requires discipline. The payoff? You’ll spend more time building and less time hunting for stuff.
Color coding helps maintain the minimalist aesthetic while keeping things organized. I use different colored bins for different categories – red for electrical, blue for plumbing, green for automotive. It looks clean and makes finding things intuitive.
Mobile Workbench Garage Workshop Layout

Flexibility is the name of the game when space is tight. A mobile workbench setup lets you adapt your workspace to whatever project you’re tackling.
Rolling workbenches come in all shapes and sizes, but the best ones offer multiple work surfaces at different heights. I’ve got one with a main work surface, a lower shelf for heavy tools, and even a small vise mounted on one end. When I’m not using it, it tucks neatly against the wall.
Tool carts become your mobile command centers. Load them up with everything you need for a specific project, and roll them wherever the work takes you. Working on the car? Roll it to the driveway. Building something large? Move to the center of the garage where you have room to maneuver.
The trick is strategic weight distribution. Keep heavier items on lower shelves to prevent tip-overs, and make sure your casters can handle the load. I learned this lesson when my overloaded cart decided to take a tumble, sending tools flying everywhere. Not my finest moment 🙂
Modular accessories make mobile setups even more versatile. Magnetic tool holders, clip-on lights, and removable storage bins let you customize your mobile workspace for different tasks.
Multi-Zone Garage Workshop Layout
Think of this as neighborhood planning for your garage. Different areas handle different types of work, creating an efficient workflow that minimizes the chaos of mixed-use spaces.
Zone planning starts with understanding your work patterns. I typically have a woodworking zone with dust collection, a metal/automotive zone with different ventilation needs, and an assembly zone with good lighting and flat surfaces. Each zone gets its own tool storage and specific equipment.
Traffic flow between zones matters more than you might think. You don’t want to carry a heavy project across three zones just to reach the finishing area. Plan logical progressions and keep frequently combined zones adjacent to each other.
Shared resources like power outlets, air compressors, and dust collection need strategic placement to serve multiple zones efficiently. I run overhead air lines and power drops to avoid cords snaking across the floor between zones.
Flexible boundaries work better than rigid divisions. Use rolling storage units or moveable partitions that can adapt as projects change. Sometimes you need one big zone for a large project, and sometimes you need everything separated for multiple concurrent tasks.
Also Read: 10 Unique Garage Shoe Storage Ideas and Stylish Solutions
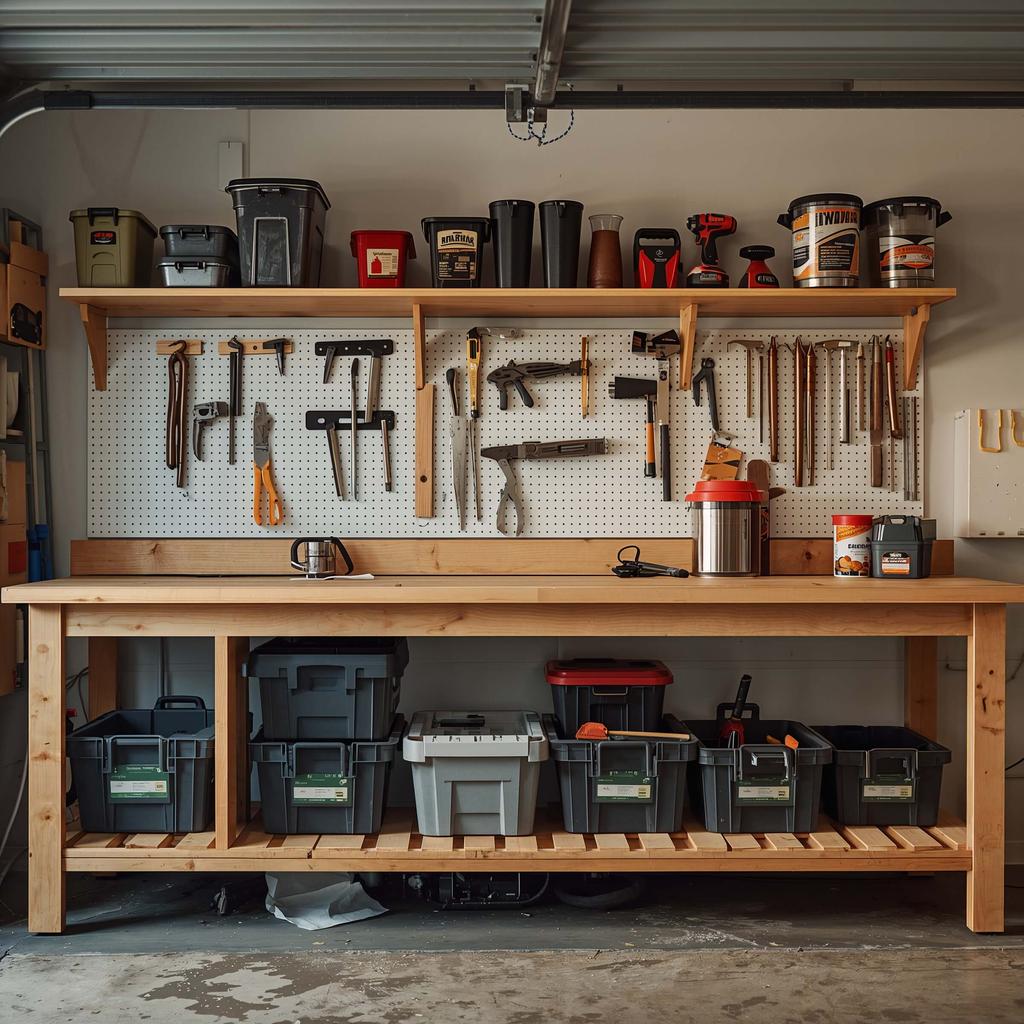
Vertical Storage Garage Workshop Layout
When you can’t go out, go up. Vertical storage can transform even the tiniest garage into a surprisingly capable workshop.
Floor-to-ceiling systems maximize every inch of wall space. I use a combination of fixed shelving for heavy items and adjustable systems for changing needs. The key is weight distribution – heavy stuff goes low, light stuff goes high, and frequently used items stay at eye level.
Ladder accessibility becomes crucial with vertical storage. A good step ladder or even a rolling library ladder makes high storage practical rather than just theoretical. I keep mine on wheels so it’s always ready when needed.
Safety considerations can’t be ignored when going vertical. Secure everything properly – a falling tool from eight feet up can ruin your day (and your head). I use safety cables on heavy items and always double-check mounting hardware.
Retrieval systems make vertical storage user-friendly. Pulleys for heavy items, sliding baskets for small parts, and clear containers so you can see what’s stored up high. Label everything clearly because squinting at labels while balanced on a ladder gets old fast.
Fold-Down Workbench Garage Workshop Layout
Space-saving genius at its finest. Fold-down workbenches give you a full-size work surface when you need it and disappear completely when you don’t.
Mounting strength is critical here. A fold-down bench needs to support not just the work but also the forces you’ll apply while working. I use heavy-duty hinges rated for twice the expected load and mount into solid framing, not just drywall.
Support mechanisms vary from simple folding legs to more complex systems with multiple support points. The best designs lock securely in both the up and down positions. There’s nothing worse than a workbench that decides to fold up while you’re using it.
Storage integration makes fold-down benches even more valuable. Many designs include tool storage in the bench itself or in the wall space behind it. When the bench folds up, you get access to stored tools and supplies.
Height considerations matter more with fold-down benches because you can’t easily adjust them later. Standard counter height (36 inches) works for most people, but consider your specific needs and build accordingly.
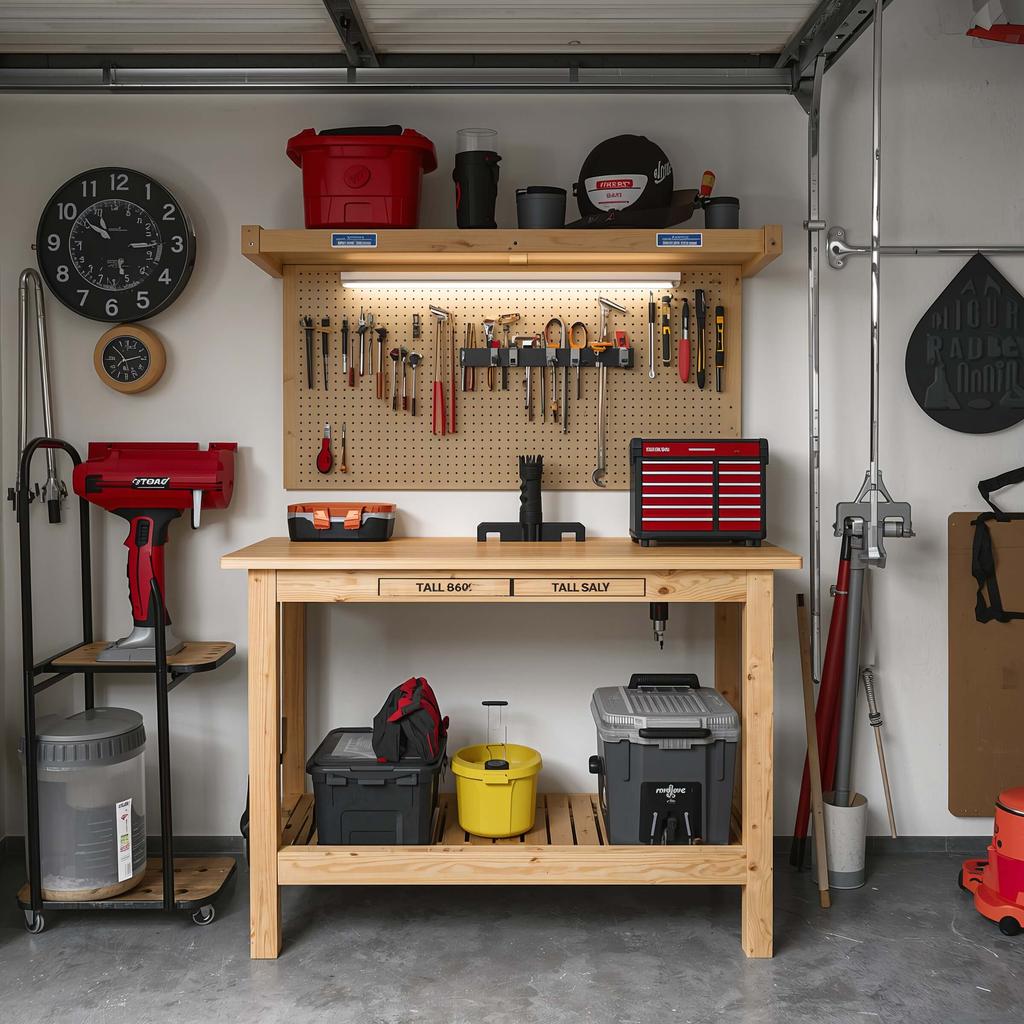
Budget DIY Garage Workshop Layout
Creativity trumps cash every time when building a workshop on a shoestring budget. Some of my favorite workshop solutions came from necessity and a nearly empty wallet.
Repurposed materials offer incredible value. Old kitchen cabinets make excellent workshop storage, discarded doors become workbench tops, and even cardboard can create surprisingly effective organization systems (though maybe not for the long term).
DIY workbenches cost a fraction of commercial units and can be customized exactly to your needs. A simple frame of 2x4s with a plywood top creates a solid work surface for under $50. Add a shelf underneath for storage, and you’ve got a complete workstation.
Free and cheap storage solutions abound if you know where to look. Coffee cans for small parts, baby food jars mounted under shelves, and even ice cream buckets with lids make excellent storage containers. IMO, some of the best workshop storage comes from creative repurposing.
Gradual building lets you spread costs over time while learning what you actually need. Start with basics and add specialized storage and features as your workshop use patterns become clear.
Also Read: 10 Practical Garage Shelving Ideas and Smart Space Layouts
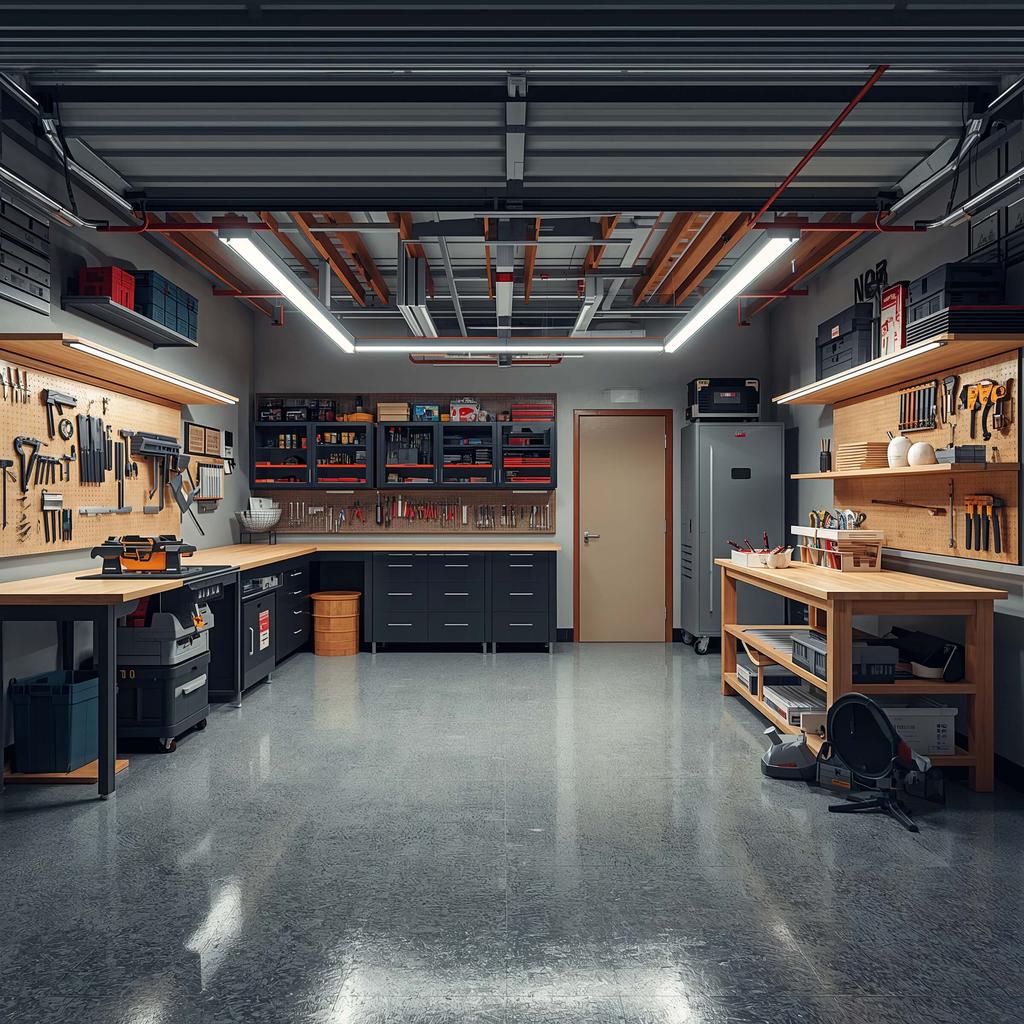
Ultimate Organized Garage Workshop Layout
This is the holy grail of garage workshops – everything in its place, efficient workflow, and enough organization to make a librarian weep with joy.
Systematic tool storage forms the foundation. Every tool category gets its designated area with clear visual organization. I use a combination of drawers for small items, pegboards for hand tools, and dedicated racks for larger equipment.
Inventory management might sound corporate, but it works. A simple list of what you have and where it lives saves countless hours of searching. I keep mine on my phone so it’s always accessible.
Workflow optimization considers how you actually work, not just how things look. Frequently used tools stay within arm’s reach of the primary work area. Related tools group together. Assembly areas have good lighting and flat surfaces nearby.
Maintenance systems keep the organization functional over time. Weekly cleanup routines, monthly reorganization sessions, and annual purges prevent the slow slide back into chaos that kills most organized workshops.
Visual management uses labels, color coding, and clear storage to make everything obvious at a glance. When you can see what you have and where it belongs, maintaining organization becomes almost automatic.
Advanced Layout Considerations
Power planning often gets overlooked until you’re trying to run three tools off one outlet. Plan for adequate electrical service with outlets positioned for actual use patterns, not just code compliance.
Ventilation requirements vary by the type of work you do. Woodworking creates dust, automotive work produces fumes, and painting needs serious air movement. Plan your layout around ventilation needs, not despite them.
Climate control in garages presents unique challenges. Insulation, heating, and humidity control affect both comfort and tool longevity. Factor these into your layout planning, especially for tool storage locations.
Future expansion should influence current decisions. Build systems that can grow and adapt rather than boxing yourself into a corner. Modular approaches cost more initially but save money and frustration long-term.
Making It All Work Together
The best garage workshop layout combines multiple strategies rather than relying on any single approach. You might use vertical storage for seasonal tools, mobile workbenches for flexibility, and zone planning for workflow efficiency.
Personal work style matters more than any generic layout advice. If you’re naturally organized, complex systems work great. If you tend toward chaos, simpler approaches with built-in forgiveness serve you better.
Evolution over time is natural and healthy. Your workshop needs will change as your skills develop and interests shift. Build flexibility into your initial layout to accommodate this growth.
The perfect garage workshop layout doesn’t exist in some magazine photo – it exists in the space that works for your specific needs, budget, and work style. Start with the basics, learn from experience, and gradually refine your setup into something that truly serves your creative ambitions.
Remember, the best workshop is the one you actually use, not the one that looks perfect in photos. Focus on functionality first, aesthetics second, and you’ll end up with a space that inspires rather than intimidates. Now get out there and start building something amazing – your perfectly imperfect garage workshop is waiting.