10 Genius Balcony Wall Decor Ideas for Budget Friendly Looks
- Balcony Decor
 Ben
Ben- 0
- 48 minutes read
Introduction
Look, I get it. You stand on your balcony, coffee in hand, staring at those boring, naked walls and think, “There’s gotta be something I can do here that doesn’t require selling a kidney.” Your balcony deserves better than being the forgotten stepchild of your apartment, right?
Here’s the thing—transforming your balcony walls doesn’t mean you need to drop serious cash or hire some fancy designer. I’ve been there, standing in my tiny balcony space, dreaming of an outdoor oasis while my bank account laughed at me. But guess what? I figured it out, and now I’m sharing these budget-friendly balcony wall decor ideas that actually look expensive but won’t drain your wallet.
These ten ideas aren’t just pretty—they’re practical, doable for anyone (yes, even if you think you’re not crafty), and most importantly, they work for small spaces. So grab that coffee, pull up a chair, and let’s transform those sad walls into something Instagram-worthy.
Vertical Garden Wall Decor
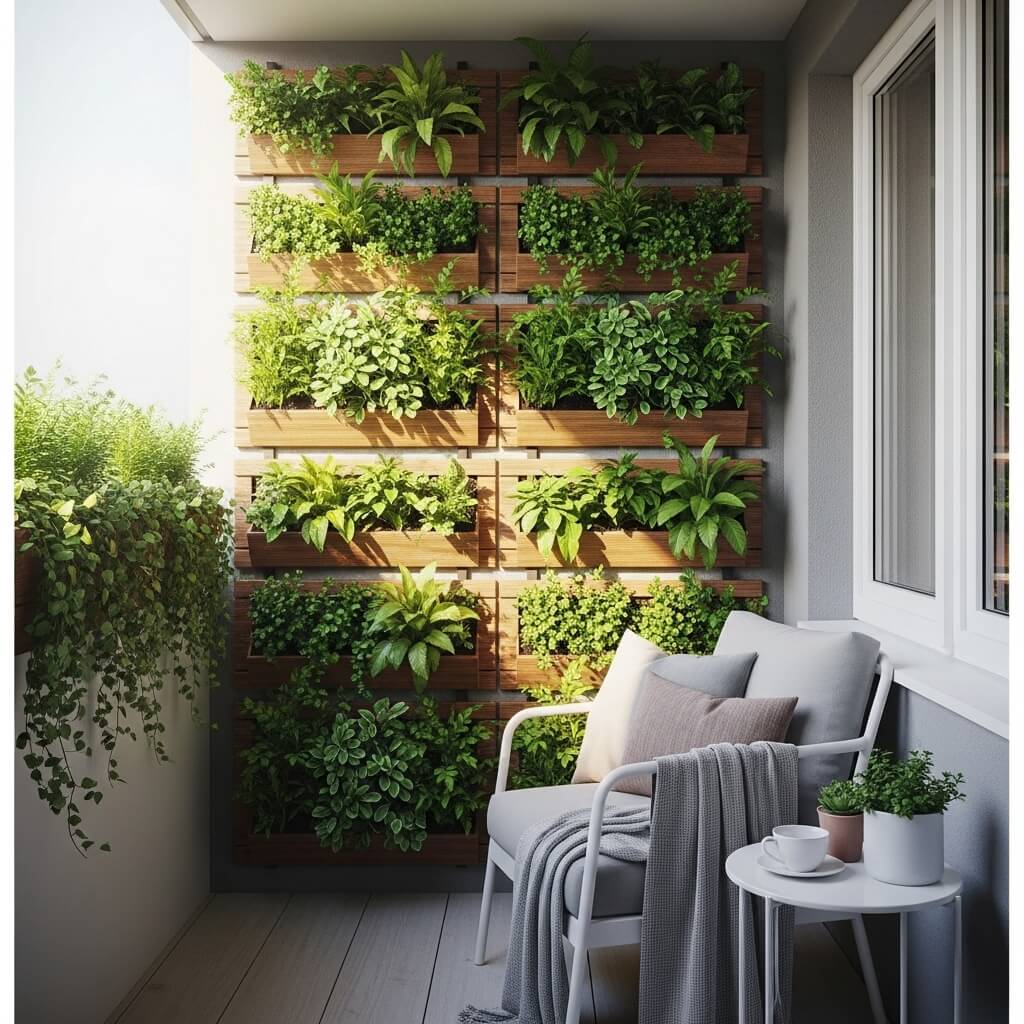
Ever walked past one of those lush green walls at a fancy restaurant and thought, “Yeah, that’s never happening in my space”? Well, think again, my friend.
Vertical gardens are the ultimate balcony wall hack, and they’re way easier than you’d think. I’m talking about mounting planters directly on your wall to create a living, breathing piece of art. You can grab some affordable pocket planters from any home improvement store or even repurpose old containers you already have lying around.
Why This Works
First off, vertical gardens maximize your space like nothing else. When you’re working with a small balcony (and who isn’t?), going vertical is a game-changer. You get all the greenery without sacrificing precious floor space for your chair or that tiny grill you barely use but refuse to get rid of.
Plus, plants naturally make any space feel more alive and welcoming. I started with just six small herb planters mounted on my wall, and honestly, the difference was immediate. My balcony went from “meh” to “hey, come check this out!” in an afternoon.
Budget Breakdown
Here’s what you’ll need:
- Pocket planters or wall-mounted containers: $15-30
- Potting soil: $5-10
- Plants or seeds: $10-20 (herbs are cheap and useful!)
- Mounting hardware: $5-10
Total? You’re looking at roughly $35-70 depending on how ambitious you get. FYI, starting small and adding more later is totally valid—Rome wasn’t built in a day, and neither is your dream balcony 🙂
Pro Tips
Choose plants that actually survive in your climate and light conditions. I learned this the hard way after killing three succulents (supposedly “impossible to kill”—yeah, right). Check if your balcony gets full sun, partial shade, or is basically a wind tunnel. Your plants will thank you.
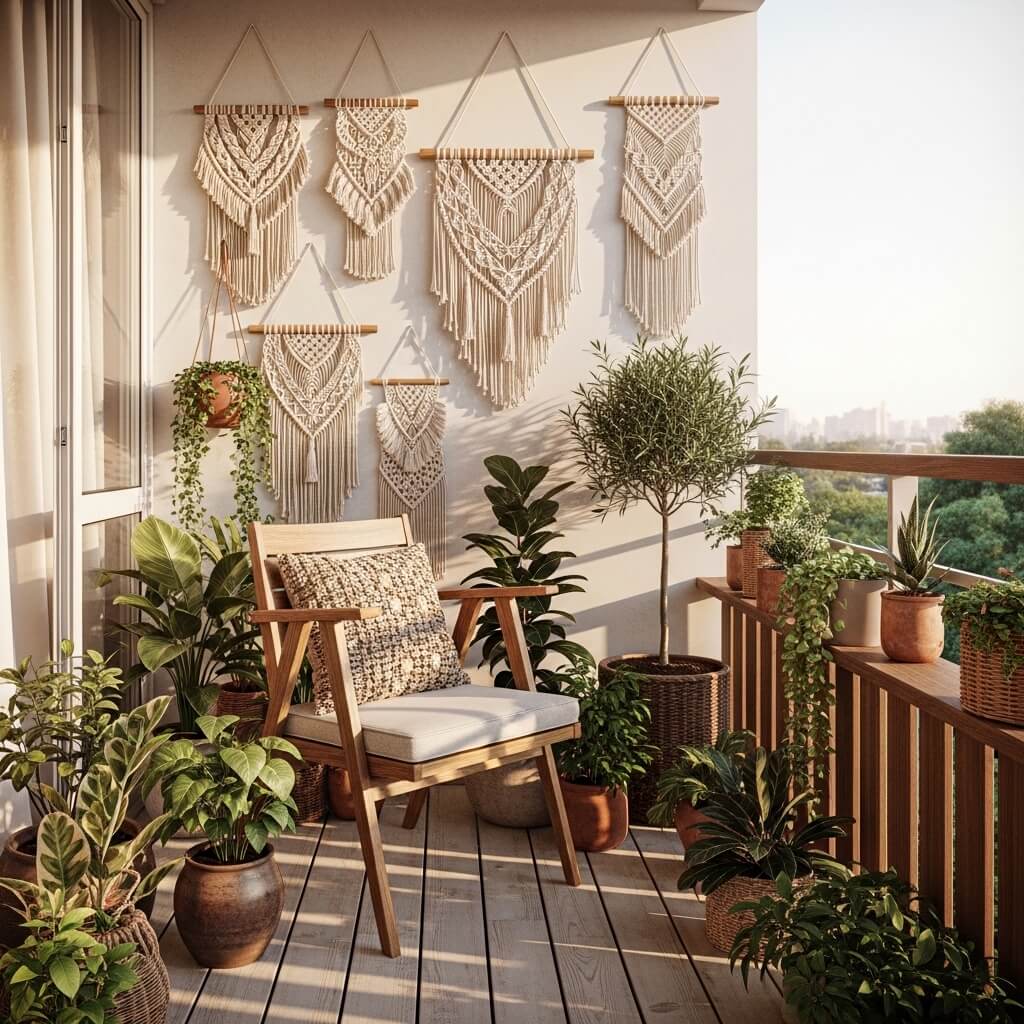
Boho Macrame Hanging Wall Setup
Okay, confession time: I used to think macrame was just for your aunt’s living room circa 1975. Boy, was I wrong.
Boho macrame hangings are having a major moment, and for good reason. They add texture, warmth, and that effortlessly cool vibe that makes your balcony look like you actually know what you’re doing with decor. The best part? You can find gorgeous pieces at thrift stores, craft markets, or online for next to nothing.
Creating Your Macrame Display
You don’t need to go full hippie commune here (unless that’s your vibe—no judgment). Even one or two macrame pieces can completely change the feel of your wall. I hung a medium-sized macrame wall hanging above my small bistro table, and it became an instant focal point.
Want to level it up? Combine macrame plant hangers with regular wall hangings. This creates depth and makes your wall look professionally styled. I paired mine with some trailing pothos plants, and the combination of the woven texture with living greenery? Chef’s kiss.
Where to Score Deals
- Thrift stores: Seriously, check these first. You’d be surprised what people donate.
- Etsy: Filter by price—lots of sellers offer budget-friendly options under $20
- Facebook Marketplace: Hit or miss, but I’ve found amazing deals here
- DIY it: YouTube tutorials make this way less intimidating than it looks
You can deck out an entire wall section for $20-50 depending on the size of pieces you choose. IMO, this is one of the best investments for the style impact you get.
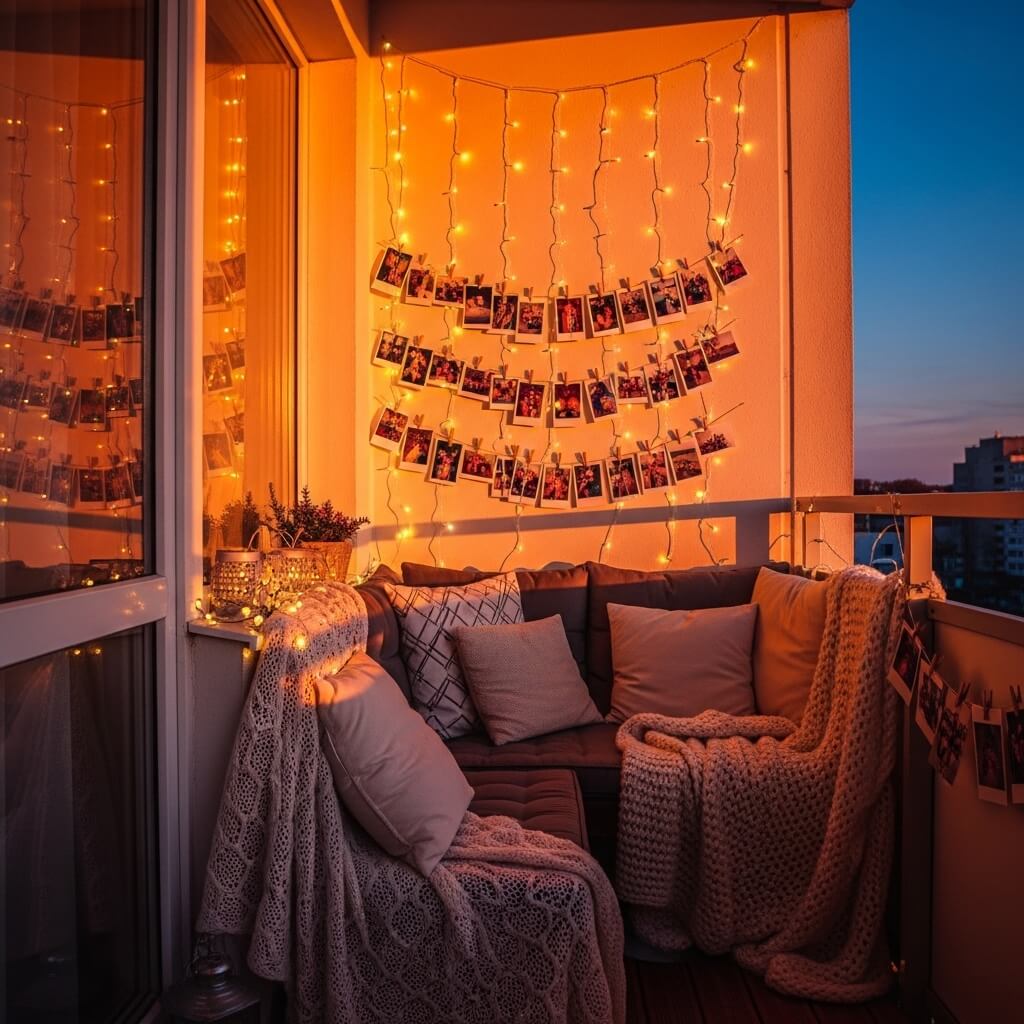
LED Fairy Light Photo Wall
Want to know the fastest way to make your balcony feel magical? Two words: fairy lights.
Now, before you roll your eyes thinking this is basic, hear me out. When you combine fairy lights with photos, postcards, or prints, you create something personal and enchanting. This isn’t just about stringing up lights and calling it a day—though honestly, even that looks pretty good.
Setting It Up
Grab some battery-operated or solar LED fairy lights (we’re keeping this budget-friendly, remember?). String them across your wall in whatever pattern makes you happy—zigzag, straight lines, or random chaos. Then use small clips or clothespins to attach photos, travel memories, inspirational quotes, or whatever speaks to you.
I created mine using photos from trips I’ve taken, and every time I’m out there at night with those lights twinkling, it’s like having my favorite memories displayed in the coolest way possible. It’s personal, it’s unique, and guests always comment on it.
The Magic Hours
Here’s where this idea really shines (pun absolutely intended): evenings. During the day, it’s a cute photo display. But when the sun goes down and those lights come on? Your balcony transforms into this cozy, intimate space that makes you never want to go inside.
Cost Breakdown
- LED fairy lights: $10-20 (solar ones save on batteries)
- Clips or mini clothespins: $5-8
- Prints/photos: Free if you print at home, or $10-15 at a print shop
- Mounting hooks or tape: $3-5
You’re talking about $30-50 total for something that looks way more expensive and thoughtful than it actually cost. Plus, you can easily swap out photos whenever you want a refresh.
Also Read: 10 Lovely Very Small Balcony Decor Ideas Small Space Magic
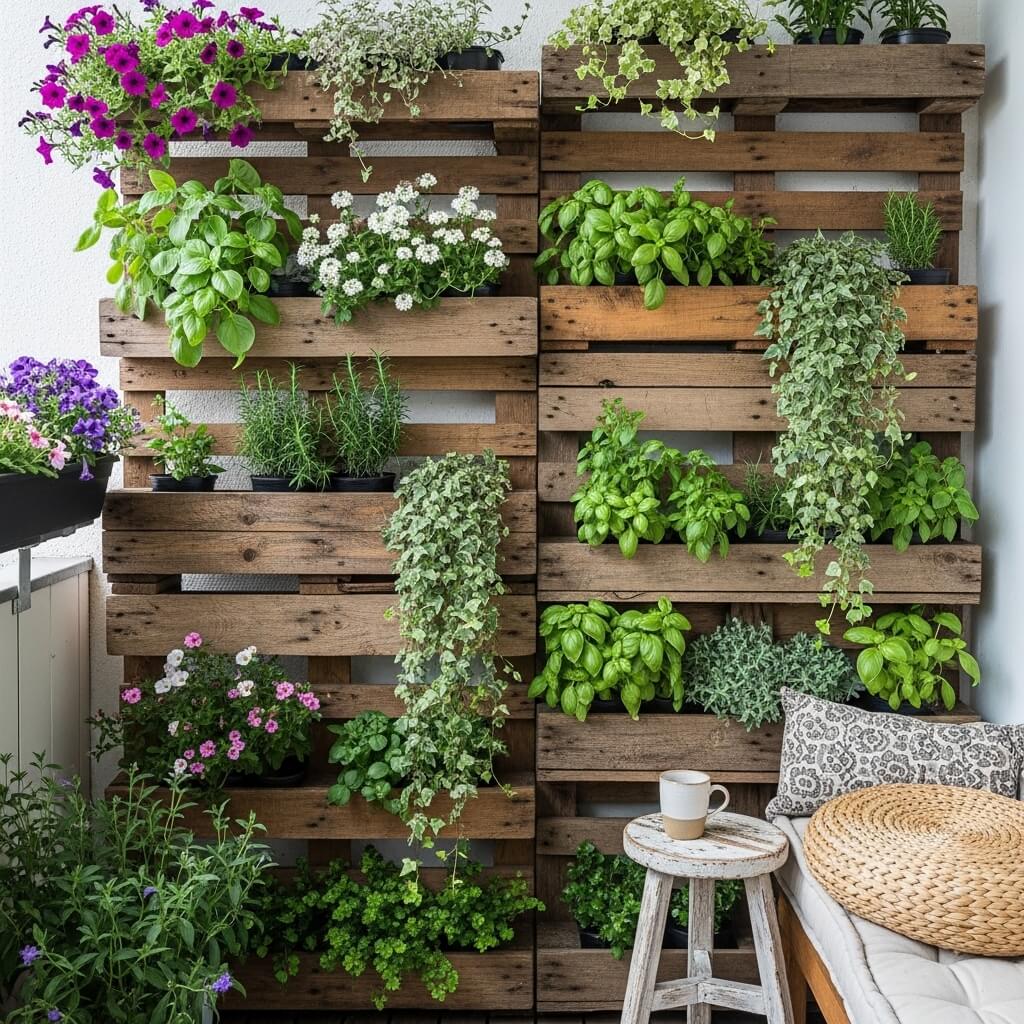
Wooden Pallet Plant Wall
Okay, wooden pallets are like the Swiss Army knife of budget decor. You can do SO much with them, and for balcony walls, they’re absolute gold.
Pallet walls give you that rustic, farmhouse-chic look without the farmhouse prices. You can often snag pallets for free (seriously, free!) from businesses that just throw them away. A quick sand-down, maybe some weatherproof stain if you’re feeling fancy, and you’ve got yourself a stunning plant display system.
How to Make It Happen
Mount the pallet horizontally on your wall—make sure it’s secure because we’re putting plants on this baby. The slats create natural shelves where you can place potted plants, candles, or small decor items. Some people like to keep the rustic, weathered look, while others prefer to paint or stain them. Both look great, so it’s really about your personal style.
I went the natural route, kept the weathered wood look, and just sealed it to protect against rain. Then I arranged different sized terracotta pots with herbs and small flowering plants. The height variation creates visual interest, and the wood adds warmth that you just don’t get with plastic or metal.
Finding Free Pallets
Ever wondered where to score free pallets? Try these spots:
- Behind grocery stores: Just ask first—they usually have extras
- Construction sites: Again, ask permission
- Facebook “free” groups: People give these away all the time
- Small businesses: Manufacturing or shipping companies often have extras
Budget Reality
If you get the pallet for free, you’re looking at:
- Sandpaper: $5
- Weatherproof sealant or stain: $10-20
- Mounting hardware: $10-15
- Plants and pots: $15-30
Total investment: $40-70, and you’ve got a feature wall that looks like it came straight out of a home decor magazine. Not too shabby, right?
Minimalist Floating Shelf Wall Decor
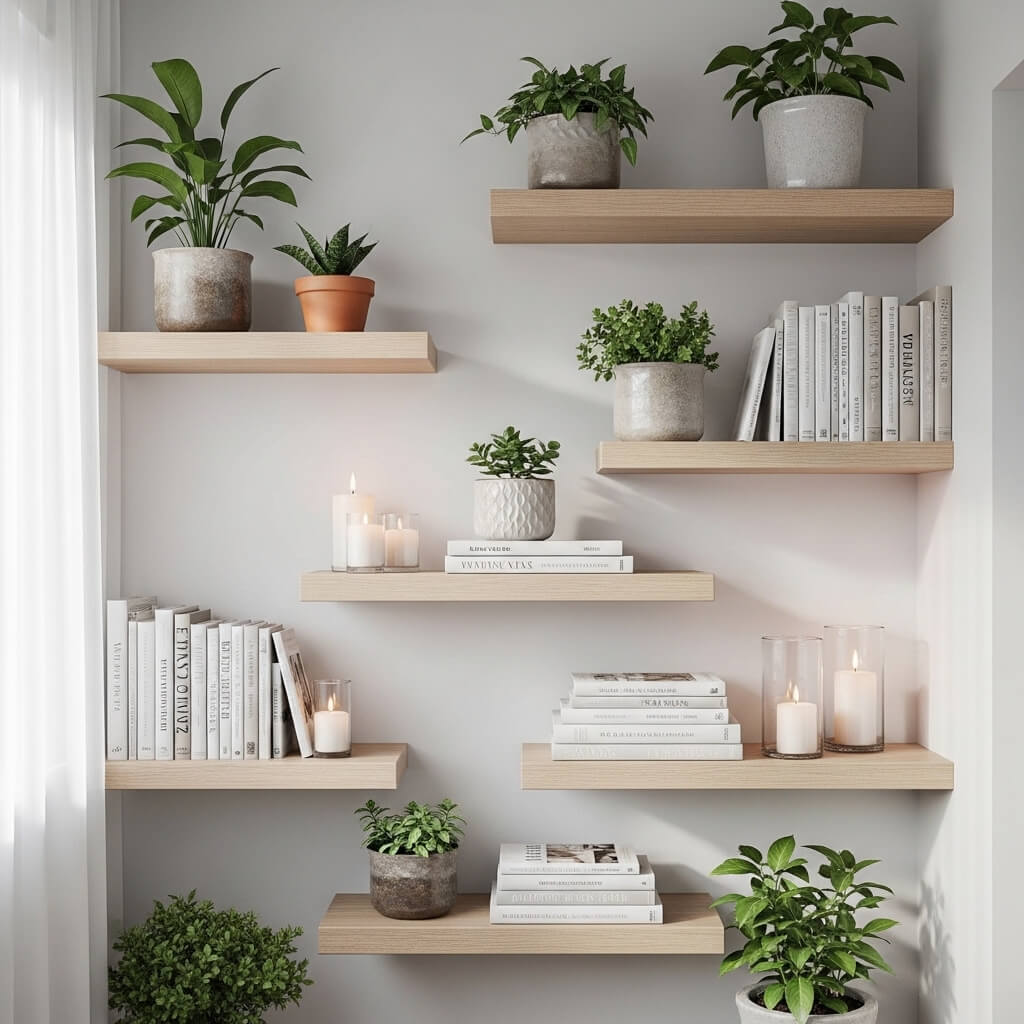
Not everyone wants their balcony looking like a jungle or a craft fair exploded on it. Some of us prefer clean, simple lines—and that’s where floating shelves come in clutch.
The beauty of minimalist floating shelf decor is that it’s versatile as heck. You control exactly what goes on those shelves, and you can change it up whenever the mood strikes. Plus, it works with literally any style because minimalism plays well with others.
Styling Your Shelves
I installed three simple white floating shelves in a staggered arrangement on one wall of my balcony. The cost? About $30 for all three shelves. Then I styled them with a mix of small potted succulents, a couple of white candles, and one small decorative object per shelf. The rule I follow: less is more.
The trick with minimalist decor is to be intentional about what you display. Every item should either be beautiful, functional, or both. I rotate items seasonally—small pumpkins in fall, string lights in winter, fresh flowers in spring. It keeps the space feeling fresh without requiring a complete overhaul.
Installation Tips
Make sure you’re using the right hardware for your wall type. I learned this the hard way when my first shelf crashed down at 2 AM (my neighbors loved that). For outdoor spaces, consider:
- Weather-resistant shelves: Wood needs sealing, or go with composite materials
- Proper anchors: Use wall anchors rated for the weight you’re planning
- Balance: Stagger heights for visual interest but keep it balanced
The Numbers
- Floating shelves: $20-40 for a set of 2-3
- Mounting hardware: $5-10
- Decor items: $15-30 (shop your house first!)
You’re looking at about $40-80 total, and you’ve got a flexible display system that grows with your style.
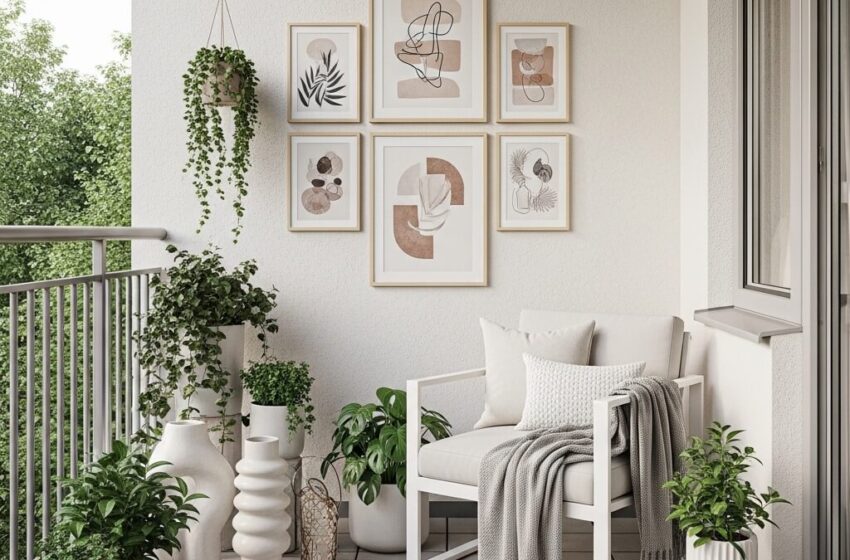
Outdoor Wall Art Frame Gallery
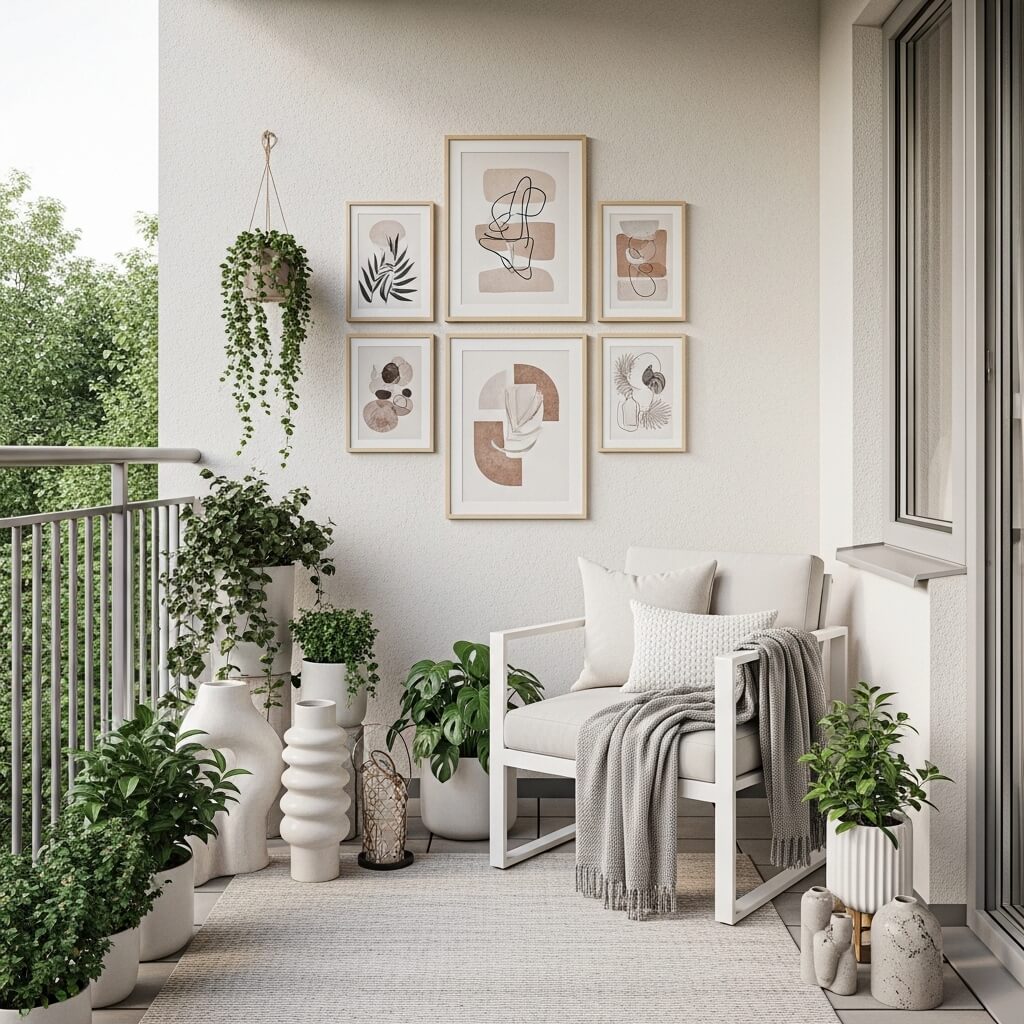
Who says art galleries are only for inside? Your balcony wall is prime real estate for a curated art display that adds personality and color without taking up any floor space.
Here’s what I love about this idea: you can make it as eclectic or cohesive as you want. Mix vintage prints with modern photography, add some botanical illustrations, throw in a motivational quote—whatever makes you happy when you’re sipping your morning coffee out there.
Creating Your Gallery
The key to a good gallery wall is planning before you start hammering nails everywhere. I cut out paper templates the size of each frame and taped them to the wall first. Game changer. You can play around with the arrangement until it feels right without creating a million holes in your wall.
For outdoor spaces, you’ll want to consider weather protection. I used inexpensive frames with plexiglass fronts instead of regular glass (safer and lighter), and I made sure everything was sealed around the edges. My gallery has survived rain, heat, and wind for two years now with zero issues.
Budget-Friendly Art Sources
You don’t need original paintings here, folks. Some of my favorite pieces in my balcony gallery came from:
- Free printables online: Tons of websites offer gorgeous, free downloadable art
- Your own photos: Print your best shots—instant personal art
- Thrift store frames: Buy for the frame, swap out the art
- Magazine pages: Frame interesting pages from old magazines
- Kids’ artwork: If you have little ones, this is adorable
What You’ll Spend
- Frames: $3-8 each (thrift stores or discount stores)
- Prints: Free to $15 total if printing at home
- Mounting supplies: $5-10
- Weather sealant: $8-12
For a gallery of 5-7 frames, expect to spend $40-70. The impact? Way beyond the price tag.
Also Read: 10 Beautiful Small Balcony Decor Ideas Dreamy Urban Escape
Hanging Basket Green Wall
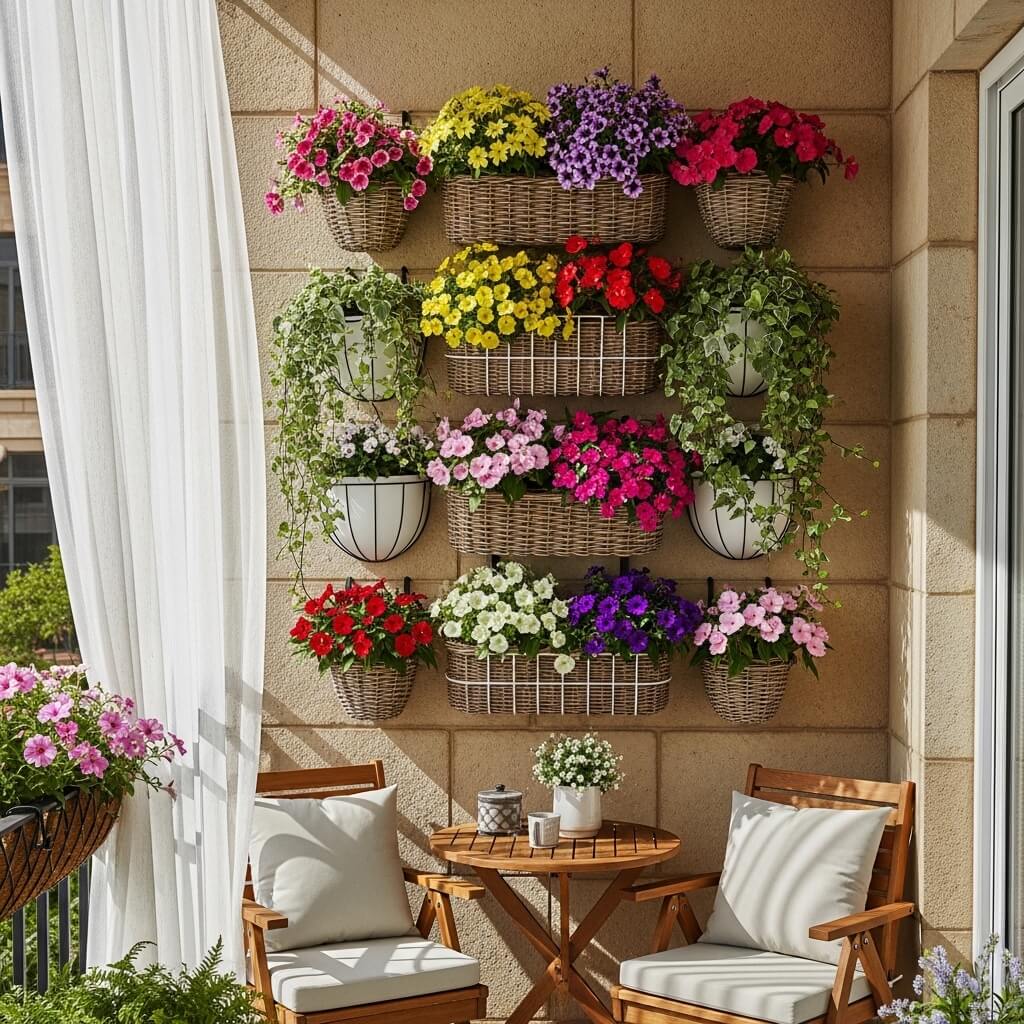
If you’re obsessed with plants (guilty as charged) but don’t want to commit to a full vertical garden installation, hanging baskets offer the perfect middle ground.
I’m talking about creating a green wall using multiple hanging baskets at different heights. The cascading effect of trailing plants against your wall creates this lush, layered look that seriously elevates your balcony game. Plus, hanging baskets are easy to switch out, water, and rearrange when you feel like changing things up.
Choosing Your Baskets
You’ve got options here, and they all create different vibes:
- Wire baskets with coco liners: Classic, affordable, drainage-friendly
- Woven baskets: Boho vibes, more protected root systems
- Recycled containers: Tin buckets, old colanders—get creative!
- Macrame hangers with pots: Combines two trends in one
I mixed wire baskets with a couple of woven ones for texture variety. The total cost for five baskets was about $40, and I got them from a discount garden center at the end of summer (timing is everything for deals, people).
Plant Selection
Choose plants that trail or cascade for maximum impact:
- Pothos: Nearly impossible to kill, gorgeous trailing vines
- String of pearls: Unique texture, conversation starter
- Petunias: If you want flowers and color
- Ferns: For shadier balconies, create that forest vibe
- Ivy: Classic, hardy, lots of varieties
Mix different textures and colors for visual interest. I have two pothos, one fern, and two flowering baskets, and the combination creates depth and keeps it interesting throughout the seasons.
The Investment
- Hanging baskets: $5-10 each
- Plants: $5-10 each
- Wall hooks or hanging system: $10-15
- Potting soil: $8-12
For 4-6 hanging baskets, you’re looking at roughly $60-90. Yeah, it’s one of the pricier options on this list, but the impact is seriously impressive, and plants are an investment that grows and gets better over time.
Mirror Accent Balcony Wall
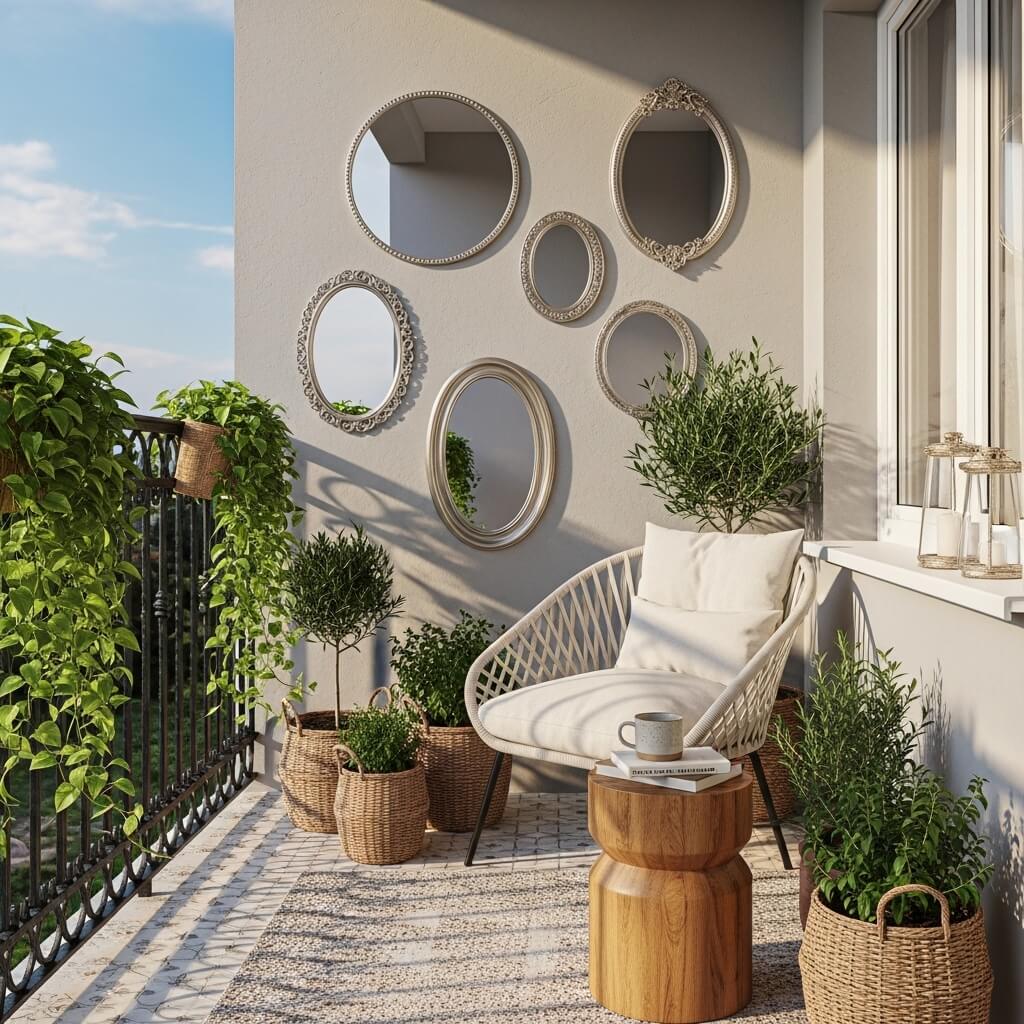
Here’s a trick interior designers use all the time: mirrors make spaces feel bigger and brighter. Why should your balcony miss out on this magic?
Adding mirrors to your balcony wall isn’t just about functionality (though checking your hair before that video call is nice). Strategic mirror placement can double the perceived size of your space and reflect natural light into shadier corners. Plus, they reflect your greenery and decor, creating this layered, dimensional effect that’s honestly kind of addictive to look at.
Selecting Outdoor-Friendly Mirrors
Not all mirrors are created equal, especially when dealing with outdoor conditions. I learned this when my first decorative mirror got weird spots and corrosion after just one rainy season :/
Look for:
- Weather-resistant frames: Sealed wood, metal with rust-proof coating, or plastic/resin
- Shatterproof options: Acrylic mirrors for safety and durability
- Proper backing: Sealed edges prevent moisture damage
- Secure mounting: These need to withstand wind
I found a gorgeous round mirror with a rope frame at a home goods store for $25, and it’s been perfect for my coastal-boho vibe. Round mirrors feel softer and more intentional than basic rectangular ones, but rectangular works great too if that fits your style better.
Placement Strategy
Think about what your mirror will reflect. Position it to catch:
- Your plants: Doubles the greenery effect
- The sky: Brings more light into the space
- Your seating area: Makes the space feel more open
- Architectural details: If your building has nice features
Avoid placing mirrors where they’ll get constant direct sunlight—you’re not trying to start fires or blind your neighbors. Ask me how I know this is a consideration (spoiler: angry neighbor note).
Cost Expectations
- Outdoor-safe mirror: $20-50 depending on size
- Mounting hardware: $5-10
- Optional: additional decorative mirrors for a cluster: $15-30
You can create a stunning mirror accent for $30-60, or go bigger with a mirror cluster for under $100. Either way, the space-expanding effect is worth every penny.
Rustic Ladder Wall Display
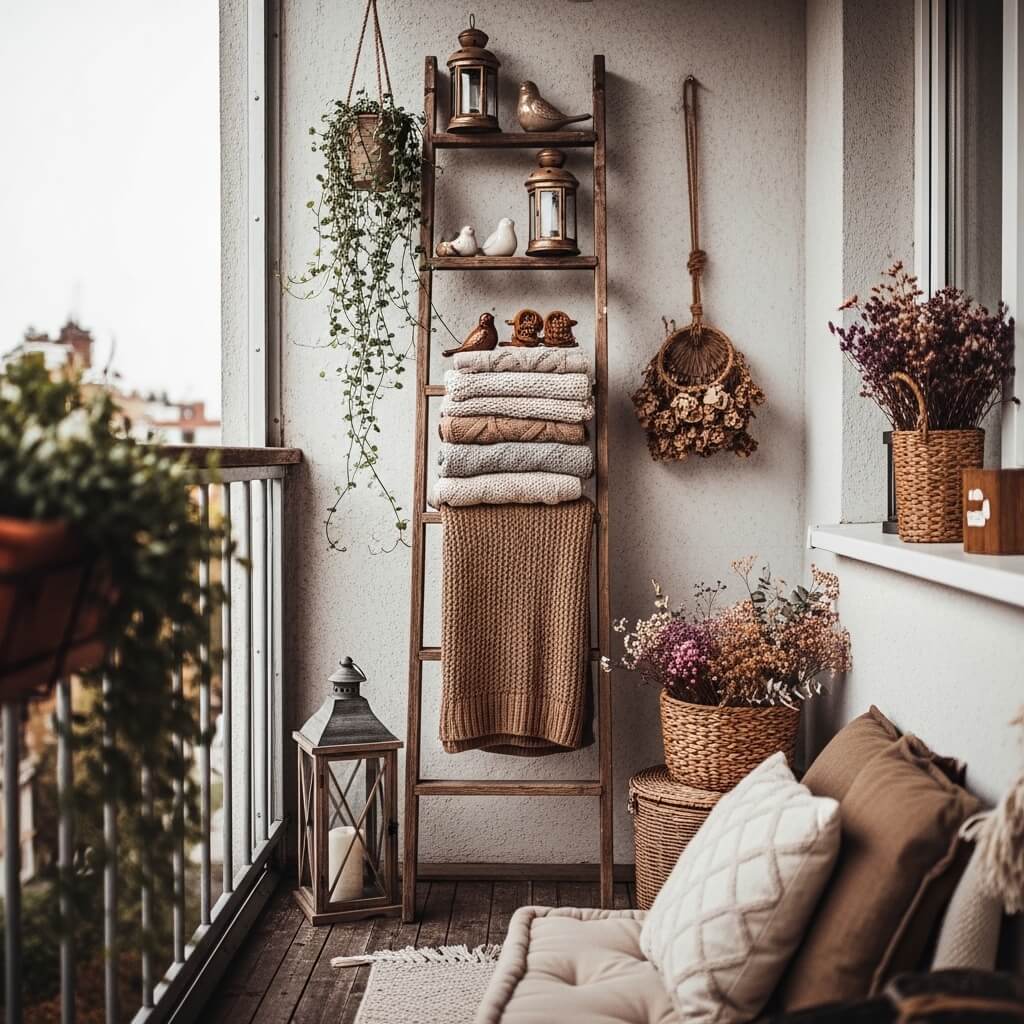
Old ladders leaning against walls have been trending forever, and you know what? There’s a reason for that. They work.
A rustic ladder mounted on your balcony wall creates an instant display system that’s both functional and decorative. You can hang plants from the rungs, drape string lights over it, clip photos to it, hang small baskets—the versatility is unreal.
Finding Your Ladder
You definitely don’t need to buy a new ladder for this. In fact, the more weathered and vintage-looking, the better. I found mine at a yard sale for $10, and it was already perfectly distressed (read: old and beat up, but in a charming way).
Check these spots:
- Yard sales and estate sales: Gold mines for old ladders
- Antique stores: Might be pricier but usually unique
- Family attic or garage: Seriously, ask around
- Facebook Marketplace: Search “old wooden ladder”
If you do buy new, small decorative ladders run about $25-40 at craft or home stores.
Styling Your Ladder
I secured my ladder to the wall with two heavy-duty hooks at the top and let it lean at a slight angle for that casual, lived-in look. Then I got creative with the styling:
- Hung small potted plants from the rungs using S-hooks
- Draped fairy lights over the top and woven through the rungs
- Clipped photos and postcards to twine wrapped around various rungs
- Added a small basket with gardening tools on one rung
The beauty of this setup is that you can easily change it up. Seasonal? Absolutely. I switch out the plants and decorations with the seasons, and it takes maybe ten minutes.
Budget Breakdown
- Ladder: Free to $40 depending on your source
- Mounting hooks: $5-10
- S-hooks for hanging plants: $5-8
- Plants/decor items: $15-25
Total investment: $25-83, with the ladder being the variable cost. If you score a free or cheap one, you’re golden.
Also Read: 10 Dreamy Balcony Decor Ideas for Cozy Green Retreat
Geometric Wall Panel Decor
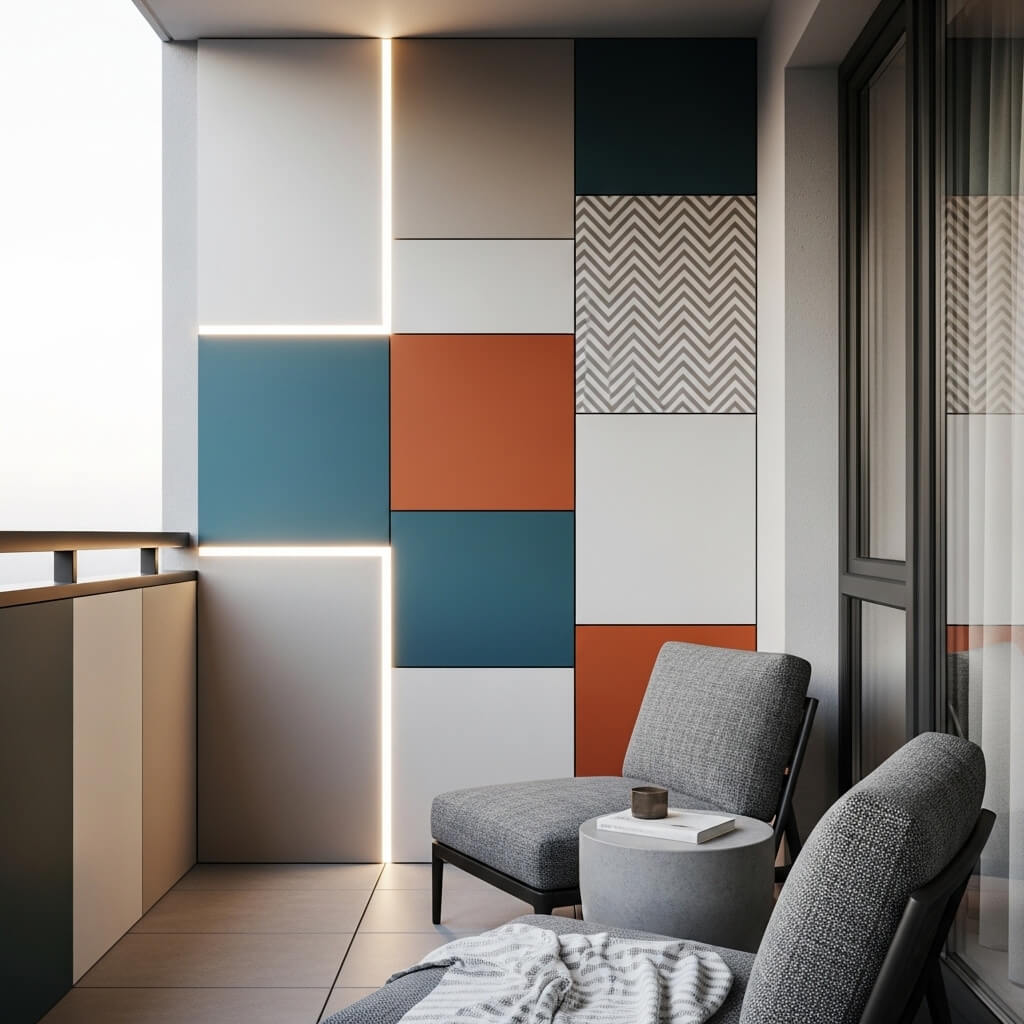
Okay, last one, and it’s for those of you who want something a bit more modern and architectural. Geometric wall panels are like art for people who love clean lines and contemporary style.
These panels create shadow and depth on your wall, adding serious visual interest without being busy or cluttered. You can buy them pre-made, or if you’re even slightly handy, you can DIY them with some wood strips and a weekend afternoon.
The DIY Route
I made mine using thin wood strips arranged in a hexagon pattern. Total cost? About $30 for materials. I cut the strips to size (or had the hardware store do it because power tools intimidate me), arranged them in the pattern I wanted, glued them to a backing board, and mounted the whole thing on my balcony wall.
The project took me maybe three hours including painting, and it looks like I spent hundreds on custom wall art. People always ask where I bought it, and I get to feel smug about making it myself.
Buying Pre-Made
Not feeling the DIY vibes? No problem. You can find geometric wall panels at:
- Home decor stores: Usually $40-80
- Online retailers: Often cheaper, wider selection
- Etsy: Support small makers, find unique designs
Look for outdoor-rated materials or plan to seal wood panels properly. Metal geometric designs work great too and tend to be more weather-resistant without extra work.
Finishing Touches
Paint or stain your panels to match your balcony’s color scheme. I went with a weathered gray stain that complements my other wood elements but contrasts nicely with the white wall behind it. You could also go bold with a pop of color—a deep blue or emerald green geometric panel against a neutral wall would be stunning.
Investment Required
DIY option:
- Wood strips or materials: $20-35
- Paint or stain: $8-15
- Backing board: $5-10
- Mounting hardware: $5-8
DIY total: $38-68
Store-bought option:
- Pre-made panel: $40-80
- Mounting hardware: $5-8
Purchased total: $45-88
Either way, you’re getting a high-impact, modern design element that makes your balcony look professionally designed without breaking the bank.
Conclusion
So there you have it—ten genuinely doable, budget-friendly balcony wall decor ideas that won’t require you to win the lottery or possess magical DIY skills. The best part? You can mix and match these ideas to create something totally unique to your space and style.
I started with just the fairy light photo wall and some hanging baskets, and over time, I’ve added different elements as my budget allowed. Your balcony transformation doesn’t have to happen overnight. Start with one idea that speaks to you, master it, then add another when you’re ready.
The thing about decorating outdoor spaces is that it forces you to actually use them. Once I started making my balcony look good, I found myself spending way more time out there—morning coffee, evening wine, weekend reading sessions. It became an extension of my living space rather than just a storage spot for plants I sometimes remembered to water.
What’s your balcony vibe? Are you going for lush botanical garden, minimalist zen retreat, or eclectic bohemian hangout? Whatever it is, you can make it happen without spending a fortune. Your walls are basically blank canvases waiting for you to work your magic.
Now get out there and give those boring walls the glow-up they deserve. Trust me, your future self (and your Instagram followers) will thank you.
Word Count: ~3,500 words