10 Wonderful Rooftop Terrace Design Ideas for Budget Makeovers
- Terrace Design
 Ben
Ben- 0
- 42 minutes read
Look, I get it. You stand on your rooftop, staring at that sad, empty concrete slab, and you think, “This could be amazing… if only I had a designer’s budget.” Here’s the thing though—you don’t need to drop thousands to transform your rooftop into something Instagram-worthy. I’ve spent the better part of three years experimenting with my own rooftop space, making mistakes, scoring wins, and learning what actually works without breaking the bank.
Your rooftop holds ridiculous potential. It’s basically free square footage that most people ignore. So let’s fix that, shall we? I’m sharing ten rooftop terrace design ideas that’ll make your neighbors wonder if you secretly won the lottery. Spoiler alert: you didn’t. You just got smart about your makeover.
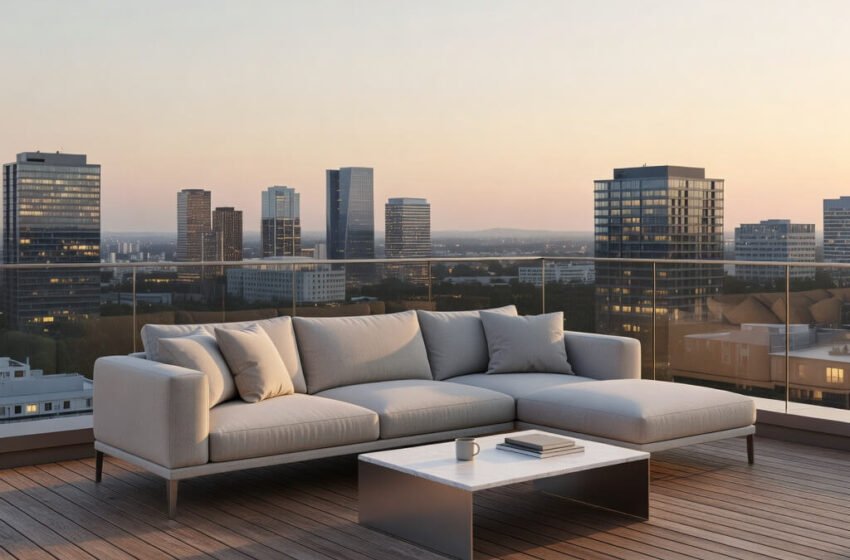
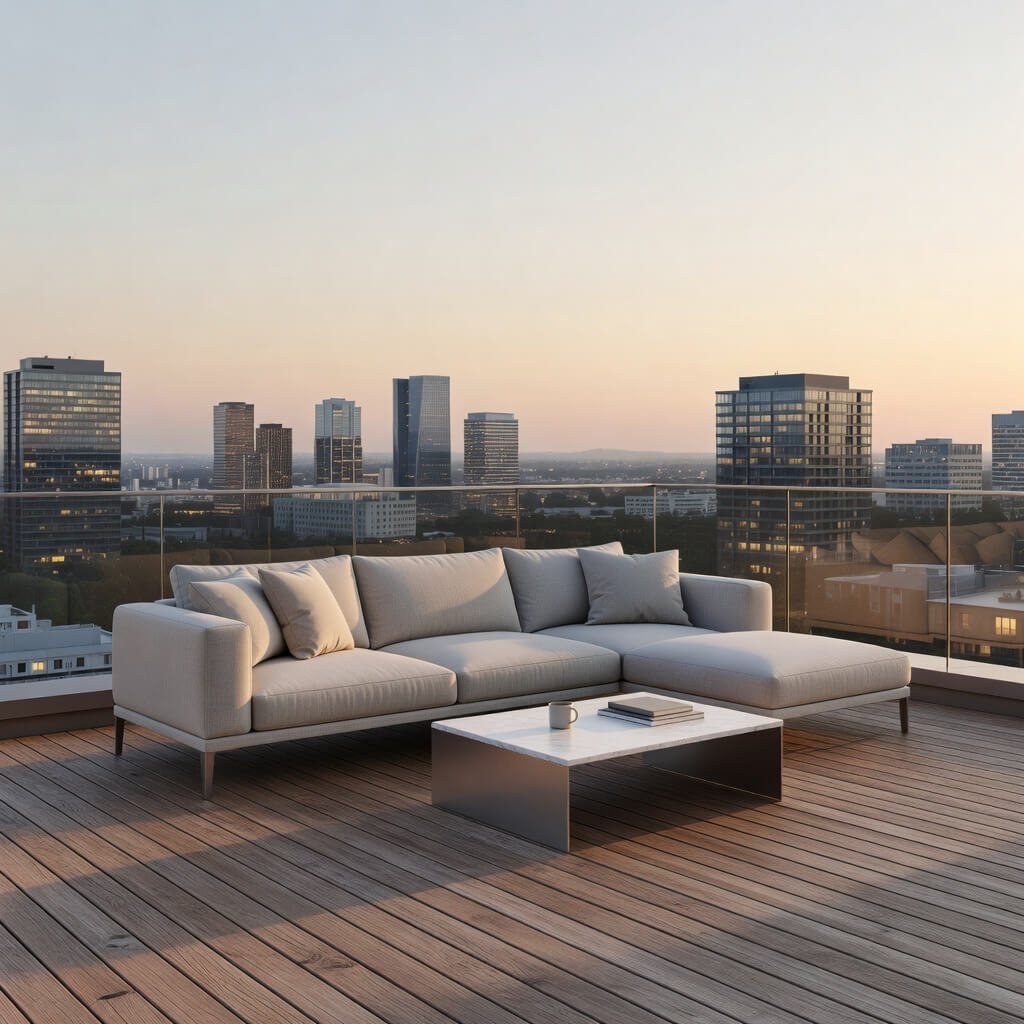
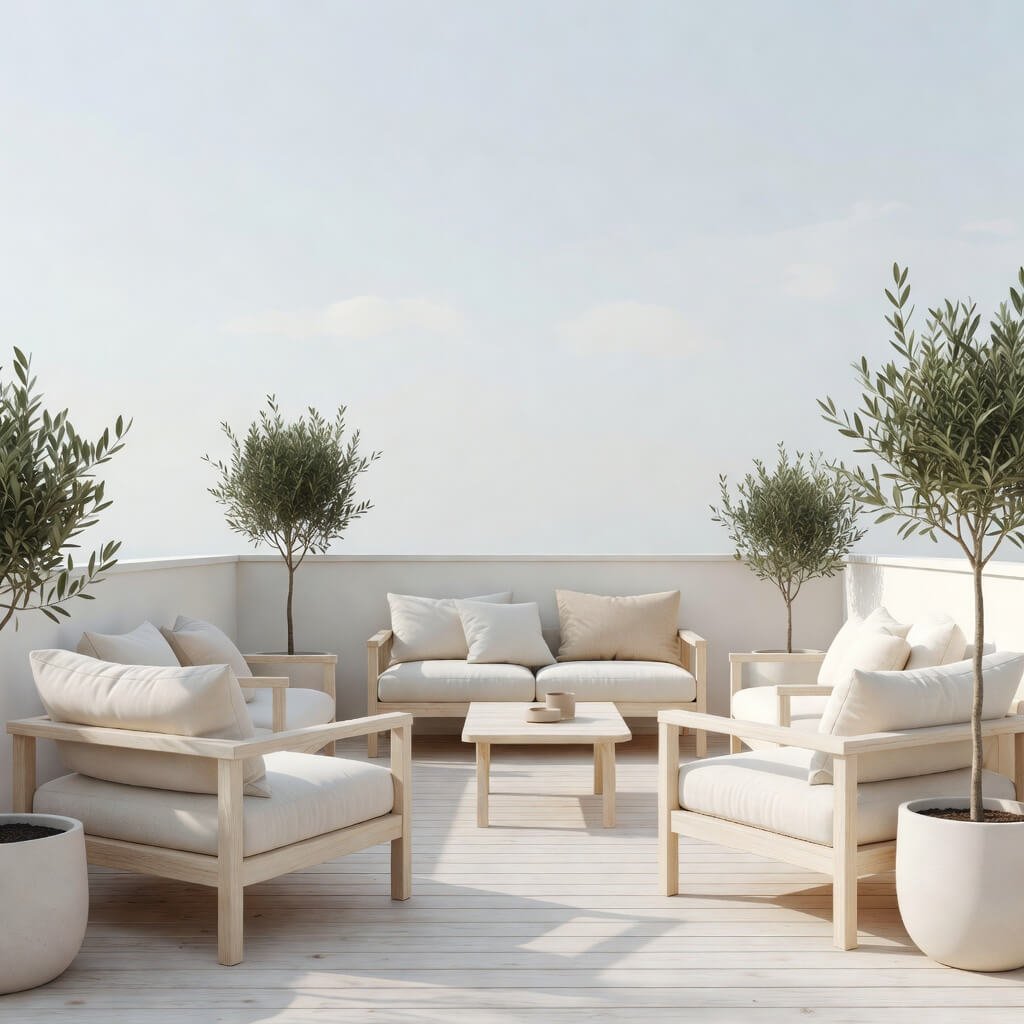
1. Minimalist Urban Rooftop Lounge Setup
Ever notice how some of the coolest spaces have the least stuff in them? That’s minimalism working its magic, and trust me, it’s your wallet’s best friend.
I started my rooftop journey trying to cram everything up there—plants, furniture, decorations, you name it. The result? A cluttered mess that looked like a yard sale exploded. Then I stripped it all back, and honestly, that’s when the real transformation happened.
Here’s what you actually need for a minimalist urban lounge:
- Two or three sleek outdoor chairs (IKEA has some surprisingly decent options for under $50 each)
- One low-profile coffee table (I literally made mine from repurposed wooden pallets and hairpin legs from Amazon)
- A single statement piece like a large planter or sculptural element
- Neutral color palette focusing on grays, whites, blacks, and natural wood tones
The beauty of minimalism? You spend less money and less time maintaining everything. I picked up weatherproof cushions in solid gray from a clearance sale, and they’ve lasted two years without looking dated.
Keep your flooring simple too. Instead of expensive outdoor tiles, I used interlocking deck tiles that cost about $2 per square foot. They snap together in minutes, and suddenly your concrete jungle looks intentional. The clean lines create this zen vibe that makes you feel like you’re at some fancy rooftop bar, not your regular old building.
Want to add warmth without cluttering things up? One textured outdoor rug does wonders. I snagged mine from an end-of-season sale for $40, and it totally changed the space.
2. Cozy Boho Rooftop Garden Retreat

Now, if minimalism sounds too sterile for your vibe, let me introduce you to bohemian rooftop magic. This style basically says, “I traveled to Morocco once, and I’m making it everyone’s problem” (in the best way possible).
The boho look thrives on texture, patterns, and that collected-over-time aesthetic. Here’s the secret: thrift stores are your goldmine. I’m talking vintage lanterns, colorful textiles, macramé everything, and mismatched furniture that somehow works together.
Budget-friendly boho essentials:
- Floor cushions and poufs (Look for sales on sites like Wayfair or check out TJ Maxx—I scored four floor cushions for $60 total)
- Lots of plants in terracotta pots (terracotta is cheap, classic, and screams boho)
- Patterned outdoor rugs layered together (yes, layered—it’s intentionally extra)
- Macramé plant hangers (or make them yourself; YouTube taught me how in literally 15 minutes)
- String lights or paper lanterns for that dreamy evening vibe
I built my boho retreat over several months, hunting deals and scoring hand-me-downs from friends who were redecorating. One friend gave me an old wooden bench that I sanded down and stained for about $12 in materials. Now it’s my favorite seating piece, draped with colorful throw pillows I found at a flea market.
The plants are crucial here. You don’t need exotic specimens—honestly, pothos, spider plants, and succulents are indestructible and dirt cheap. I propagated most of mine from clippings, which means they cost me exactly zero dollars. Cluster them at different heights, and suddenly you’ve got this lush, layered garden situation happening.
Pro tip: fabric matters. Look for outdoor fabrics with bold prints at fabric stores’ clearance sections and make your own cushion covers. I can’t sew to save my life, but even I managed simple envelope-style covers that transformed basic cushions into boho showpieces.
3. Luxury Rooftop Dining Space with Ambient Lighting
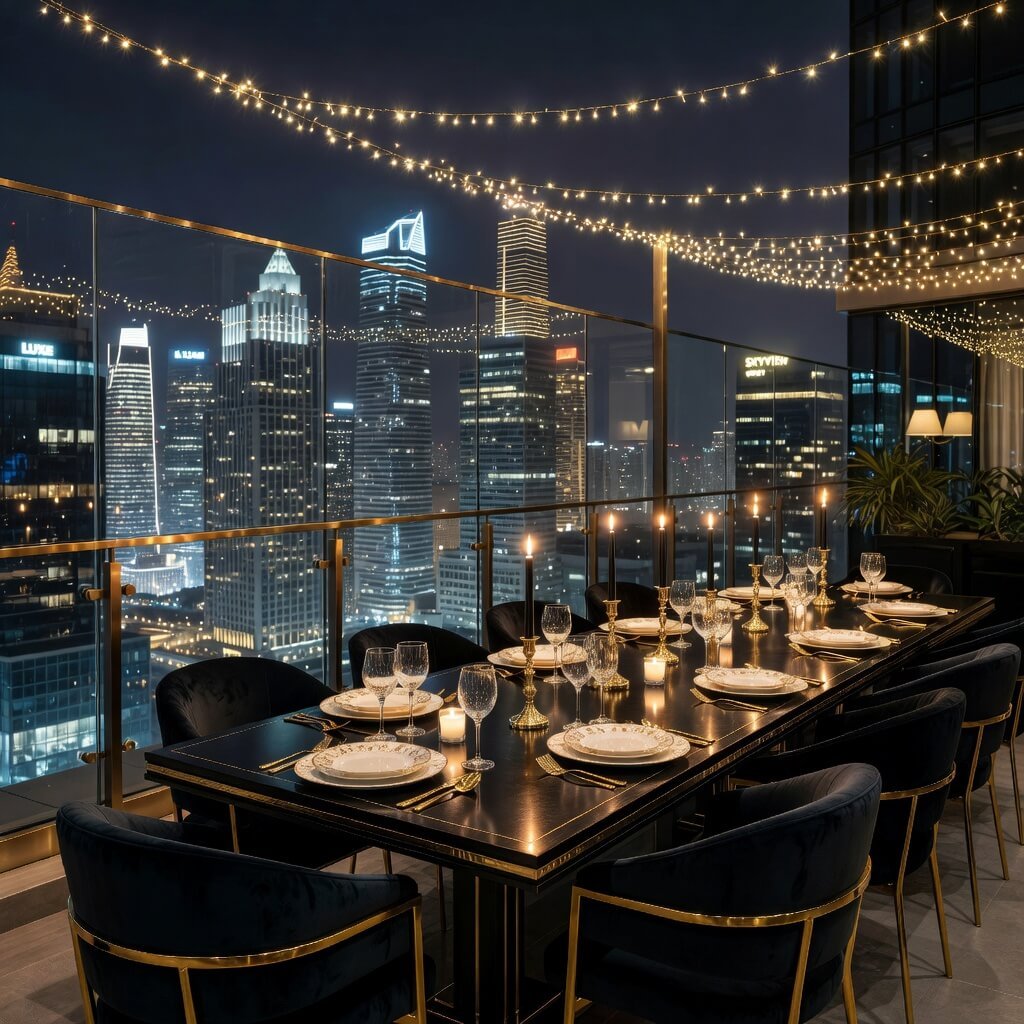
Okay, hear me out—”luxury” and “budget” can absolutely coexist. You just need to understand what creates that upscale feeling, and spoiler: it’s mostly about lighting and intentional placement.
I wanted a proper dining area where I could host dinner parties and feel fancy. The goal was “rooftop restaurant” energy without the actual restaurant prices. Turns out, you can totally fake it till you make it.
Creating luxury on a budget:
- One solid dining table (I found a weatherproof one on Facebook Marketplace for $80—people sell these all the time)
- Comfortable chairs (mismatched vintage chairs painted the same color look intentionally chic, not cheap)
- Ambient lighting is non-negotiable (this is where the magic happens)
- Simple place settings (white plates always look elegant, and you probably already own some)
- A few elevated touches like cloth napkins and a centerpiece
The lighting deserves its own paragraph because it’s THAT important. I installed solar-powered spotlights ($30 for a set of four) to uplight a couple of plants, creating drama and depth. Then I added Edison-bulb string lights overhead ($25), and friends, that’s when my rooftop became a destination.
Here’s what nobody tells you: luxury is about the details. A table runner from the dollar store looks expensive if you pair it with real candles (not those sad fake ones). I keep a collection of varying-height candles and light them whenever we eat outside. The flickering light makes everything feel special, plus it’s basically free atmosphere.
Want to feel extra bougie? Add an outdoor bar cart. I made mine from a $20 thrifted cart spray-painted gold. Stock it with some nice glassware (thrift stores again—I see a pattern here :)), and you’ve got yourself a cocktail hour setup that suggests you have your life together way more than you actually do.
Also Read: 10 Relaxing Terrace Garden Ideas for Peaceful Living Space
4. Small Space Rooftop Vertical Garden Design
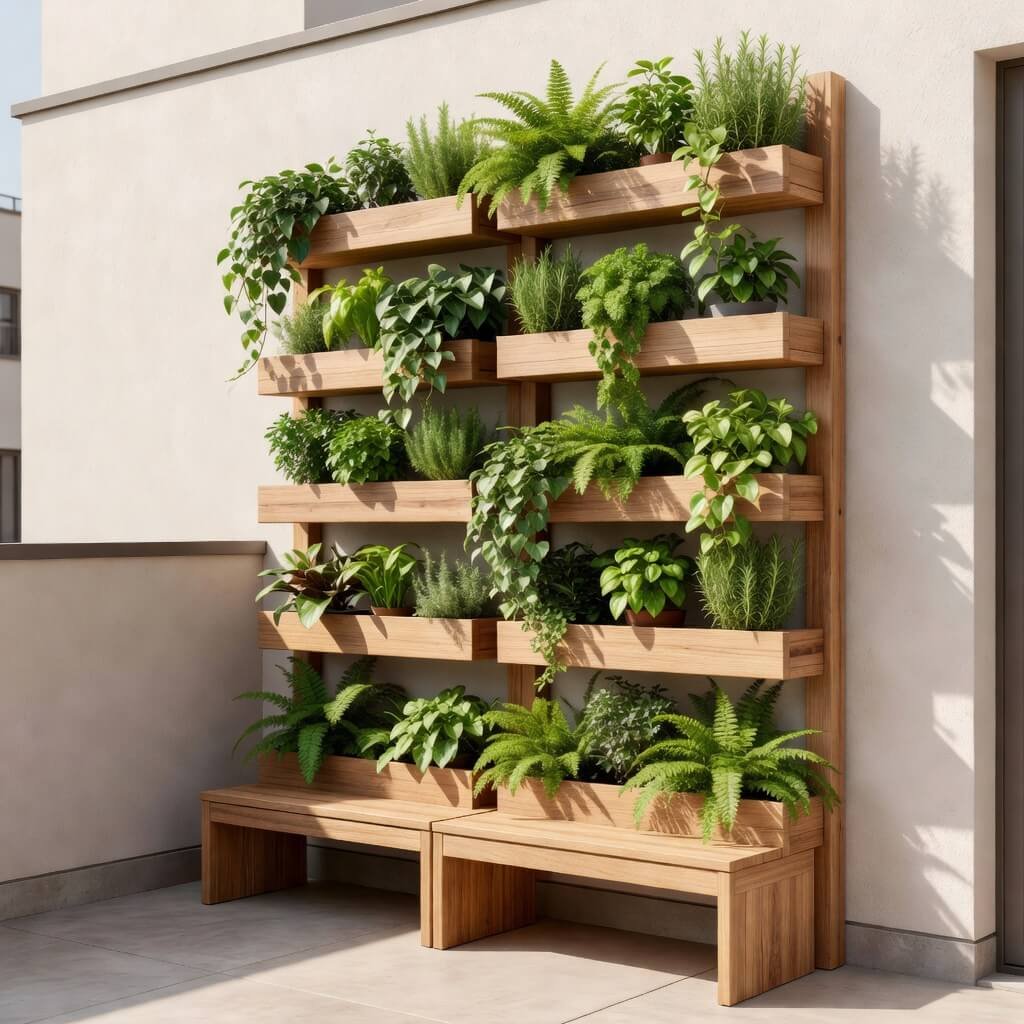
Got a tiny rooftop? Yeah, me too—well, I did before I moved. My first rooftop was embarrassingly small, like “Can three people fit up here?” small. That’s when I discovered the power of going vertical.
When you can’t expand outward, you expand upward. It sounds obvious, but most people don’t think about using their wall space. Vertical gardens aren’t just practical—they look absolutely incredible and cost way less than you’d think.
Small space vertical solutions:
- Wall-mounted planters (I used $3 terracotta pots mounted on a wooden pallet—total cost: about $25)
- Hanging gutters or pipes filled with herbs and flowers (DIY this with actual gutters from a hardware store)
- Tiered plant stands (creates levels without eating floor space)
- Trellis panels for climbing plants (mine cost $15 each from the hardware store)
- Pocket planters made from fabric or felt (you can even use an old shoe organizer—I’m serious)
I mounted a simple wooden ladder against my rooftop wall and hung potted plants from each rung. Cost? Twenty bucks for the ladder at a garage sale, and I already had the S-hooks. It became this amazing vertical garden that took up maybe six inches of floor space but added huge visual impact.
The productivity aspect surprised me too. I grew cherry tomatoes, basil, mint, and strawberries in my vertical setup. Ever eaten a tomato you just picked from your rooftop? It hits different. Plus, you’re saving money on groceries while making your space gorgeous—that’s what I call a win-win.
FYI, drainage matters when you’re going vertical. I learned this the hard way when water dripped onto my neighbor’s balcony. Use saucers under everything, or get creative with rain chain systems that look intentional while managing runoff.
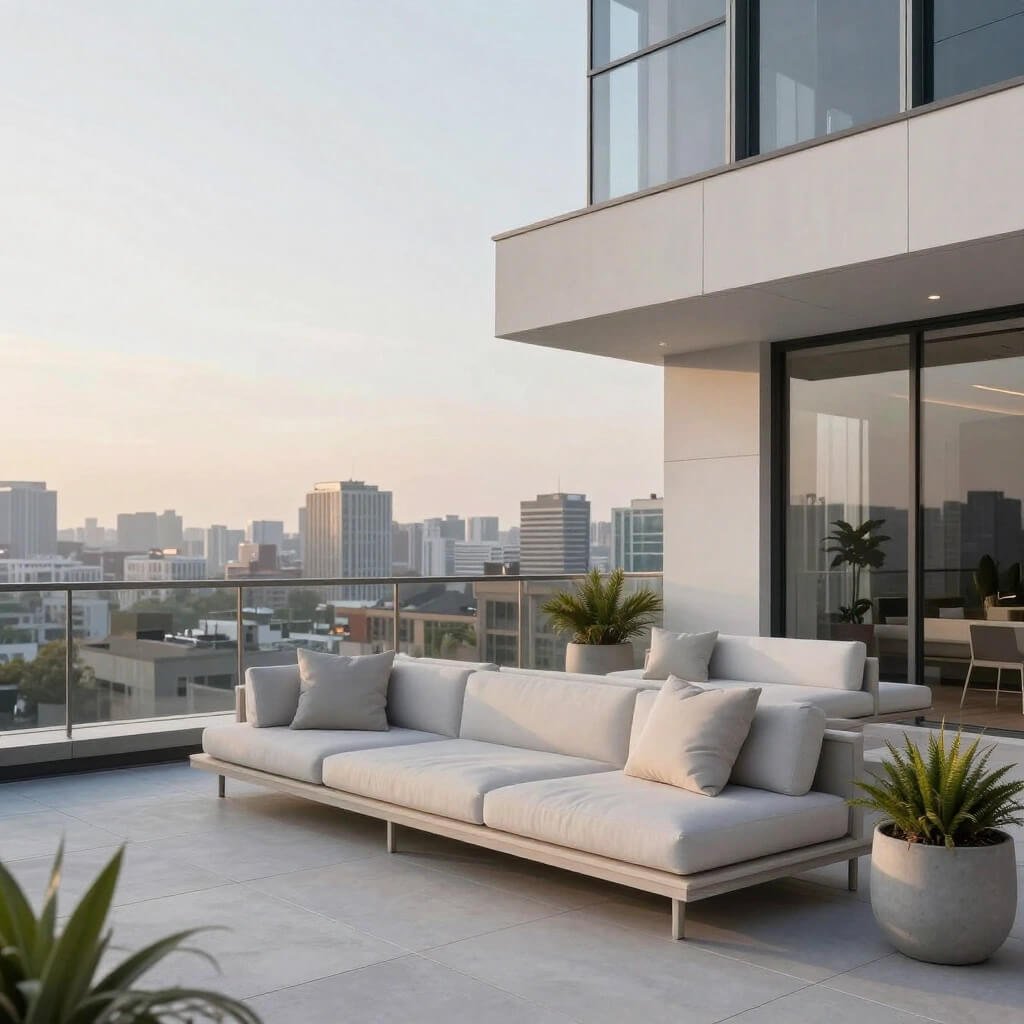
5. Modern Glass & Wood Rooftop Sitting Area
Want that sleek, contemporary look without the contemporary price tag? The glass-and-wood combo creates this sophisticated modern aesthetic that photographs beautifully and actually isn’t that hard to pull off.
I’ll be honest—I was intimidated by this style at first. It seemed too polished, too expensive, too “I hired a designer.” But then I realized modern design is really about clean lines, quality materials, and restraint. You can achieve that without premium pricing.
Modern rooftop essentials:
- Wooden deck tiles or composite decking (I found composite seconds—slightly imperfect pieces—at 40% off)
- Glass panel railing or barriers if applicable (or use clear plexiglass as a budget alternative)
- Simple, geometric furniture in neutral tones
- Metal planters in black or brushed metal finishes
- Frameless glass table (or a clear acrylic one that gives the same effect for less)
The wood I used was actually reclaimed from a construction site where my friend worked. I spent three weekends cutting, sanding, and sealing it, but the material itself cost me nothing except the sealant ($30). It created this warm, organic contrast against the urban backdrop.
For the glass elements, I got creative. Real glass railings would’ve cost thousands, so I used clear corrugated roofing panels instead. From a distance? Looks totally intentional. Up close? Still looks good, just less expensive. The panels cost about $15 each, and I needed six.
The furniture was the bigger investment, but I stalked Craigslist for weeks until someone posted a modern sectional set for $200. The cushions were stained, so I made new covers from outdoor canvas fabric on sale. Suddenly I had a $1000-looking setup for a quarter of the price.
Keep accessories minimal—that’s the modern way. I have exactly three planters, all matching black metal, with structural plants like snake plants and agave. Simple, sculptural, and they require basically zero maintenance.
6. Budget-Friendly DIY Rooftop Makeover Idea
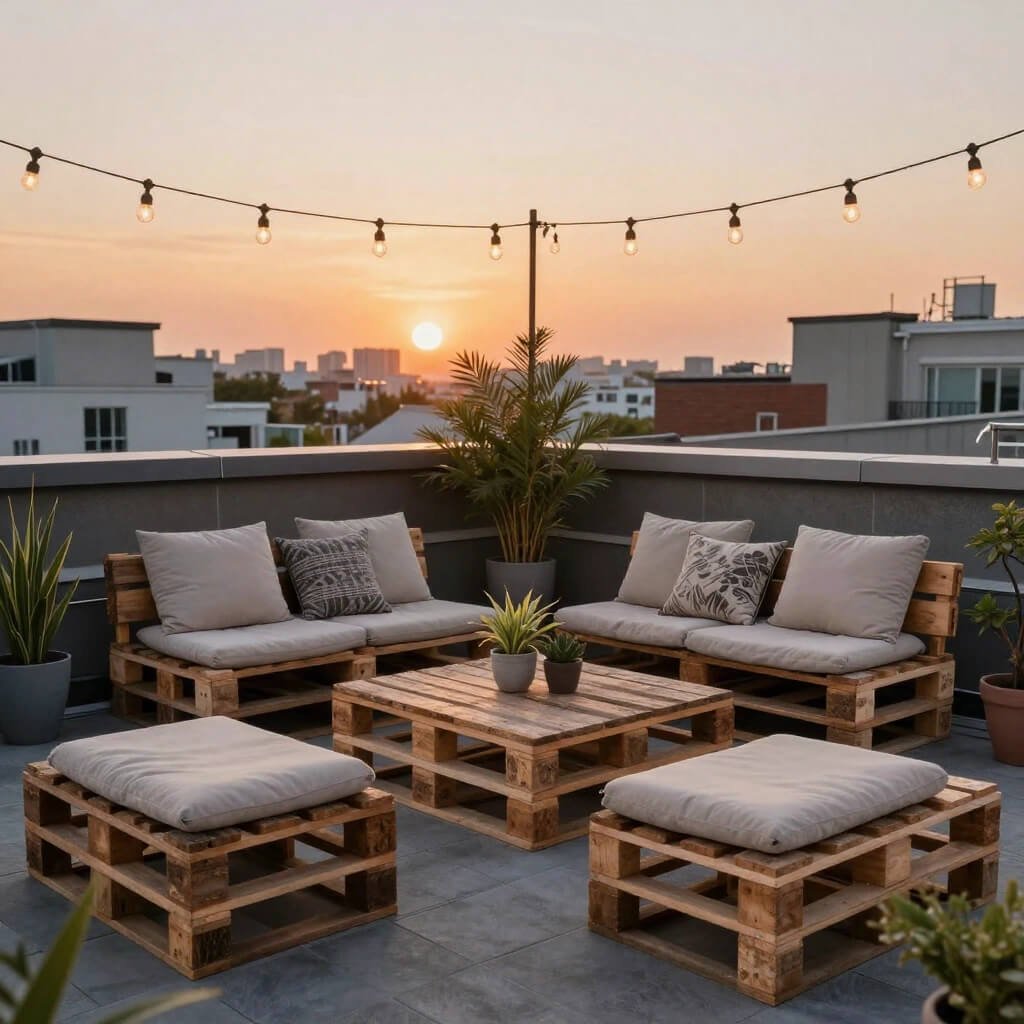
Okay, let’s talk about the ultimate penny-pincher approach. What if your budget is really, truly tight? Can you still create something amazing? Absolutely, but you’ll need to embrace your inner DIY warrior.
My first rooftop makeover happened when I was broke—and I mean eating-ramen-for-dinner broke. I gave myself a $150 budget for the entire space. People thought I was crazy, but challenge accepted.
Ultra-budget DIY strategies:
- Pallet furniture (pallets are often free from businesses—just ask; I built two benches, a table, and a planter box)
- Cinder block seating and planters ($2 per block, and you can arrange them however you want)
- Paint everything (a few cans of exterior paint unified mismatched furniture for $40)
- DIY shade solutions using canvas drop cloths (way cheaper than actual shade sails)
- Propagate plants instead of buying them (patience is free, friends)
I collected six pallets, watched a bunch of YouTube tutorials, and built an L-shaped bench with storage underneath. Was it perfect? Nope. Did it look handmade? Definitely. But it was also functional, cost about $30 in screws and sandpaper, and I was genuinely proud of it.
The cinder blocks became my favorite hack. I stacked them to create a bench frame, dropped in cushions (made from outdoor foam I found on clearance for $20), and suddenly I had seating that also provided storage inside the blocks. I painted the blocks white, and honestly, they looked intentionally industrial-chic.
For shade, I rigged up a drop cloth canopy using rope and hooks screwed into the wall. The whole setup cost maybe $25 and made the space usable even during midday sun. Was it fancy? Not particularly. Did it work? Absolutely.
The key to DIY success is embracing imperfection. Your rooftop doesn’t need to look professionally designed. It needs to be comfortable, functional, and reflect your personality. Some of my favorite comments from friends were about my obviously handmade pieces—they added character that you literally cannot buy.
Also Read: 10 Unique Terrace Design Ideas for a Peaceful Outdoor Corner
7. Rooftop Terrace with String Lights and Fire Pit
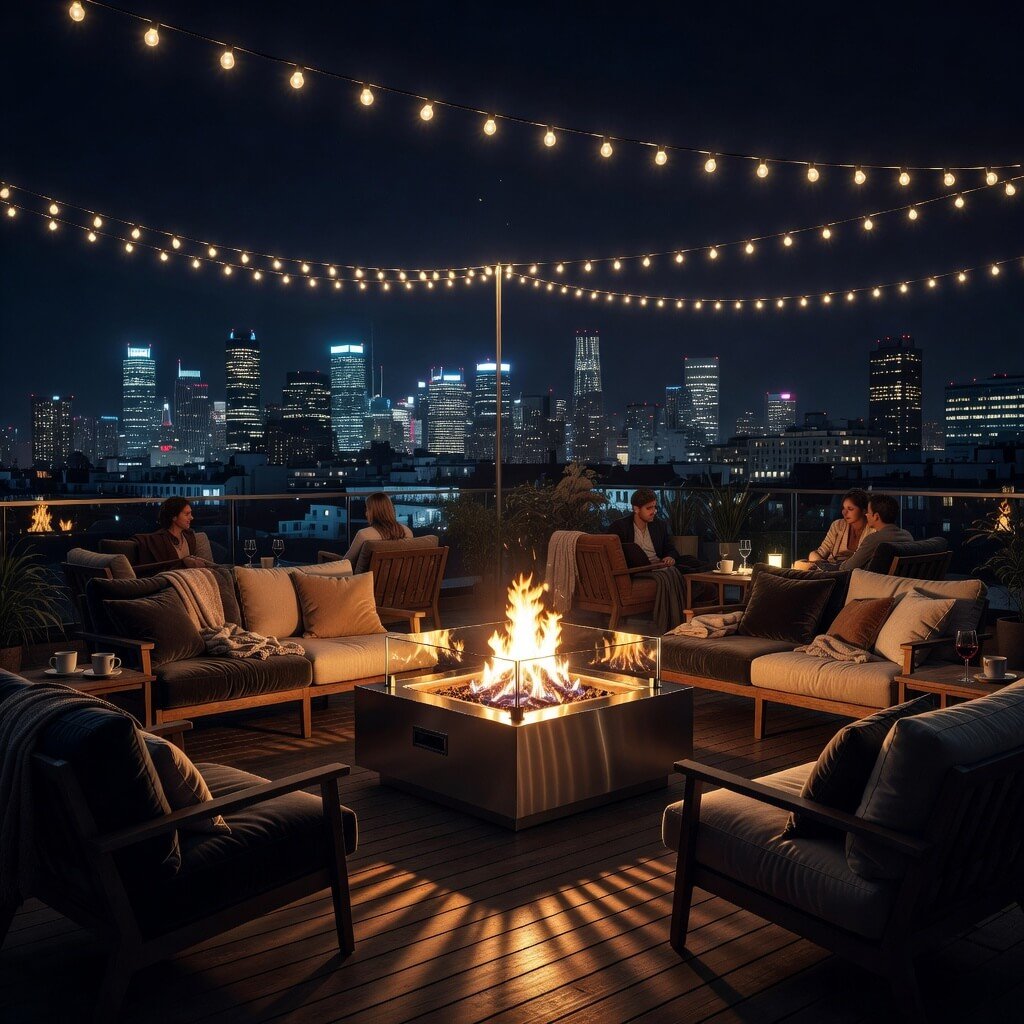
Let me tell you about the evening I finally added a fire pit to my rooftop. My friends came over, we lit it up, added some string lights overhead, and suddenly my mediocre rooftop transformed into everyone’s favorite hangout spot. The power of fire and light, people—it’s primal, it’s cozy, and it’s surprisingly affordable.
Creating a rooftop gathering space centered around warmth and ambiance doesn’t require much. You’re basically tapping into humans’ ancient love of sitting around fire together. IMO, this is the easiest way to make your rooftop feel special.
Fire pit and lighting essentials:
- Portable propane fire pit (I got mine for $120 during an off-season sale—much cheaper than built-in options)
- Outdoor seating in a circle arrangement (thrifted chairs work great; it’s all about the configuration)
- Multiple strands of string lights crisscrossed overhead ($20-40 depending on length)
- Weatherproof outdoor rug to define the space (helps with the cozy factor)
- Side tables or stools for setting down drinks (DIY these from stumps or crates)
First, check your building’s regulations about fire pits—mine allows propane but not wood-burning, which is pretty common. The propane version gives you all the ambiance without the smoke annoying your neighbors (you’re welcome, neighbors).
I arranged seating in a horseshoe shape facing the fire pit, which naturally encourages conversation. The chairs were all different—some metal, some plastic, some wood—but I unified them by adding matching outdoor cushions in a warm terracotta color. Seven cushions from Target’s clearance section: $65 total.
Now, the string lights are where you get to have fun. I crisscrossed three strands overhead, creating this canopy of light. You know that magical evening glow that makes everyone look good and feel relaxed? That’s what we’re after. I used solar-powered LED string lights ($35 for two strands) so I don’t even worry about electricity costs.
The combination of fire and overhead lighting creates layered illumination that’s way more interesting than a single overhead light source. Plus, on cooler evenings, that fire pit extends your rooftop season by months. I’ve had October gatherings where people were perfectly comfortable thanks to the fire’s warmth.
Add some outdoor throw blankets ($10 each from TJ Maxx), and you’ve got a space that people genuinely don’t want to leave. I’ve hosted everything from quiet evenings alone with a book to parties with fifteen people, and this setup handles it all.
8. Green Jungle Style Rooftop Oasis Design
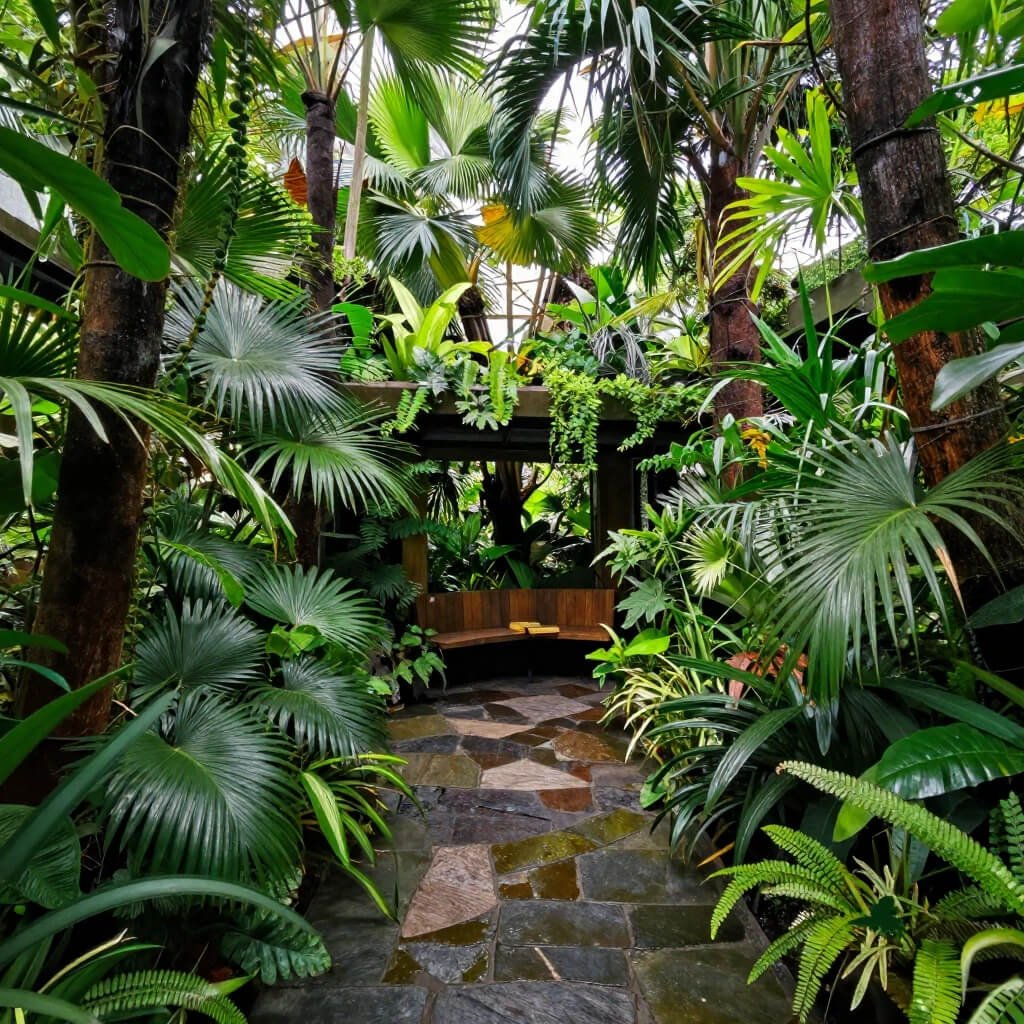
Alright, plant lovers, this one’s for you. What if your rooftop could feel like you’re escaping to a tropical paradise instead of just stepping outside your urban apartment? The jungle style is all about abundance, lushness, and embracing maximum greenery.
I went full jungle-mode on my rooftop one summer, and it genuinely changed my relationship with the space. Instead of just going up there occasionally, I found myself spending hours reading, working, and just existing among the plants. There’s something deeply calming about being surrounded by green life.
Creating your jungle rooftop:
- Lots and lots of plants in varying sizes (start with easy, hardy options like pothos, monstera, ferns, and palms)
- Layered heights using plant stands, hanging baskets, and floor planters
- Mix of containers in terracotta, ceramic, and wicker for that collected-over-time vibe
- Vining plants on trellises or walls (they grow fast and fill space quickly)
- Natural materials like bamboo, rattan, and wood furniture
Here’s my secret: I didn’t buy most of these plants. I started with maybe ten small plants (under $50 total), and over eight months, I propagated them like crazy. One pothos became six. One spider plant gave me twenty babies. YouTube taught me how to propagate monstera and other tropicals, and suddenly I had a jungle without the jungle-level spending.
I grouped plants in clusters of odd numbers—three here, five there—which creates a more natural, organic look. Some sat on DIY plant stands I made from scrap wood and hairpin legs. Others hung from the ceiling using macramé hangers. I mounted old wooden crates on the wall as shelves for smaller plants.
The furniture got buried (in a good way) among the greenery. I used natural rattan chairs I found at a estate sale for $40 total, and they fit perfectly with the jungle vibe. A small bistro table gave me somewhere to set my coffee while I was surrounded by green.
Watering this many plants sounds like a nightmare, but I set up a simple drip irrigation system using a timer and basic supplies from the hardware store (total cost: about $60). Best investment ever—it waters everything automatically, and I just refine which plants need more or less water by adjusting their position in the system.
The jungle style works especially well in hot climates because all those plants actually cool the space through transpiration. My rooftop stays several degrees cooler than it did when it was just concrete and minimal furniture. Plus, it attracts butterflies and birds, which is honestly just bonus entertainment.
9. Scandinavian Style Clean Rooftop Patio Setup
If the jungle aesthetic makes you anxious just thinking about all those plants, let me introduce you to the Scandinavian approach. This style is basically “minimalism’s cozier cousin,” and it’s perfect for rooftops where you want calm, clean, and comfortable.
The Scandinavian look focuses on functionality, natural materials, and a muted color palette. It’s unfussy but warm, simple but inviting. I converted my rooftop to this style one winter, and the transformation was remarkable—suddenly everything felt intentional and peaceful.
Scandinavian rooftop elements:
- Light wood furniture (pine and birch are affordable and quintessentially Scandi)
- White, gray, and natural color palette with maybe one accent color
- Clean lines and functional design (no unnecessary decorative stuff)
- Cozy textiles like sheepskin throws and simple cushions
- Candles and lanterns for hygge-approved ambiance
- A few carefully chosen plants (not a lot, just a few perfect ones)
I found an unfinished pine bench at IKEA for $60 and kept it unstained—just sealed it with a clear protective coat ($15). That light wood became the foundation for the whole aesthetic. I added simple white outdoor cushions with gray throw pillows, and suddenly it looked like something from a Copenhagen design blog.
The color restraint is key here. I limited myself to white, gray, natural wood, and one accent color (I chose a muted sage green). Every new item had to fit this palette, which actually made shopping easier because it narrowed my options.
For lighting, I used white paper lanterns ($3 each from IKEA, because where else?) and classic glass lanterns with candles ($8 each from Target). The soft, warm light creates that hygge feeling that Scandinavians have perfected. I light them every evening, and it’s become this ritual that marks the transition from day to night.
The Scandinavian style is surprisingly budget-friendly because it embraces simplicity. You’re not buying a ton of stuff—you’re buying a few good things and letting negative space do some of the work. My entire setup cost under $300, but it looks way more expensive because of the cohesive aesthetic.
I added exactly three plants: a fiddle leaf fig in a white pot, some lavender in a gray ceramic planter, and a small herb garden in a wooden box. That’s it. The restraint makes each plant feel special rather than just part of a collection.
Also Read: 10 Dreamy Long Corridor Design Ideas Soft & Bright
10. Rooftop Chill Zone with Hammocks and Planters
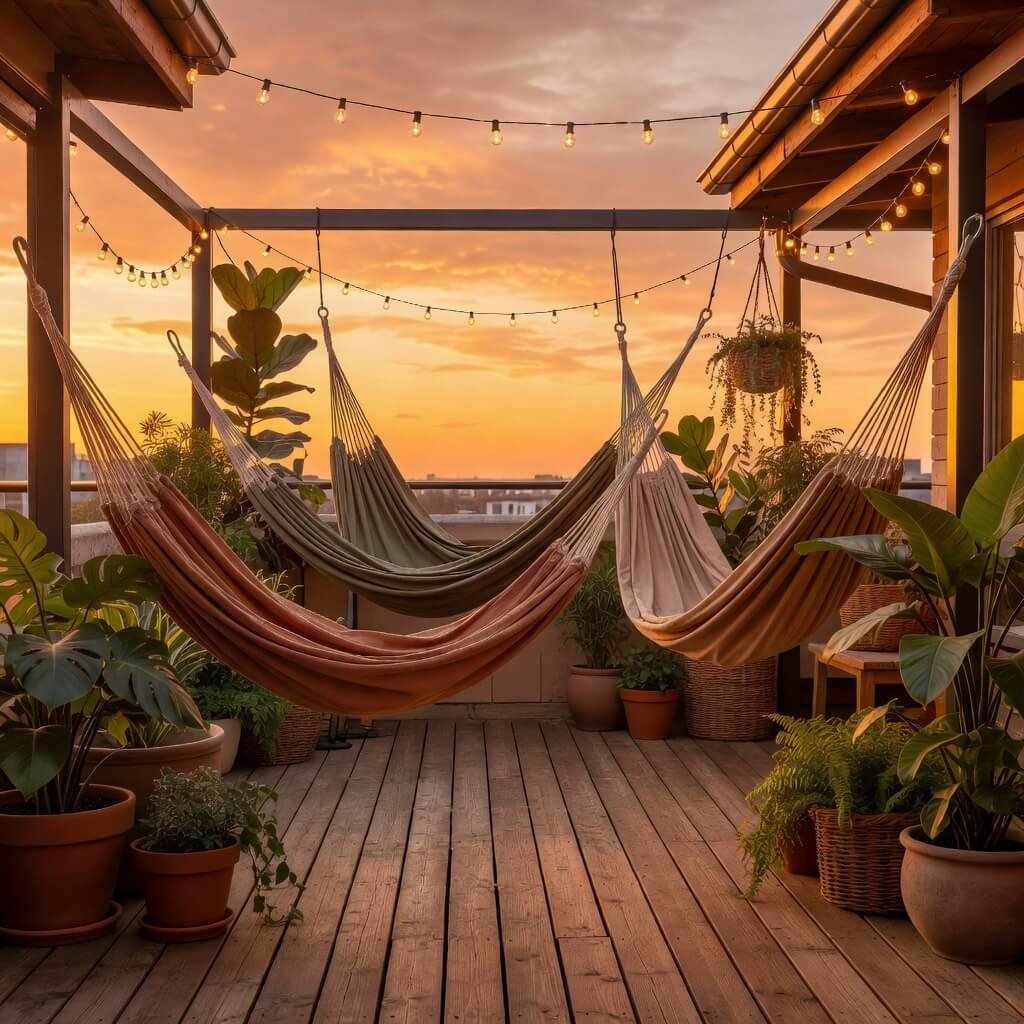
Let’s end with possibly the most fun option: the ultimate rooftop chill zone. What if your rooftop’s primary purpose was just… relaxing? Like, aggressively relaxing? Enter: hammocks, planters, and a general vibe of “I might take a nap up here and nobody can stop me.”
I added a hammock to my rooftop on a whim, and it completely changed how I used the space. Suddenly, I had a destination for reading, napping, or just swaying gently while contemplating life’s mysteries (or scrolling through my phone, let’s be real).
Chill zone essentials:
- A hammock or hammock chair (I got a Brazilian-style hammock for $40 on Amazon)
- Sturdy mounting points (I used heavy-duty wall-mounted hooks rated for hammock use)
- Lots of planters creating a sense of enclosure and privacy
- Low-maintenance plants (you’re here to chill, not garden intensively)
- Outdoor poufs or floor cushions for additional casual seating
- A small side table for books and drinks
The hammock installation intimidated me at first. Would my walls support it? Would I fall and embarrass myself? But I followed the manufacturer’s instructions, used wall studs and proper hardware, and tested it gradually. Now it’s the most-used feature of my rooftop—friends literally request “hammock time” when they visit.
I surrounded the hammock area with planters to create a sense of enclosure. It makes the space feel private and cozy rather than exposed. I used a mix of tall planters with ornamental grasses and shorter ones with colorful flowers, creating living walls that also provide some wind protection.
The planters themselves were a mix of everything—terracotta, plastic spray-painted to look like concrete, and a few ceramic ones I found on sale. I didn’t stress about matching because the plants themselves create visual cohesion. I spent maybe $80 on all the planters by shopping sales and thrift stores.
For additional seating, I added three Moroccan-style poufs ($25 each during a World Market sale) in complementary colors. They’re lightweight, weather-resistant, and perfect for moving around depending on whether people want sun or shade.
The genius of the chill zone approach is that it prioritizes experience over appearance. Sure, it looks good, but more importantly, it feels amazing to use. I’ve read more books, taken more restorative naps, and had more genuine conversations up there than in any other space I’ve created.
I keep a small cooler stocked with cold drinks in the summer and a basket with blankets in the spring and fall. These tiny touches make the space actually functional rather than just decorative. The goal is to remove barriers to actually using your rooftop—if you need to gather supplies from inside, you’re less likely to go up there.
Making Your Rooftop Dreams Actually Happen
Here’s what I’ve learned after years of rooftop experimentation: your perfect rooftop terrace doesn’t happen overnight, and that’s okay. Every space I’ve created evolved over time, with additions, subtractions, and plenty of “what was I thinking?” moments.
Start with one idea that genuinely excites you. Maybe it’s the fire pit setup because you love hosting friends, or the jungle style because you’ve been hoarding plant clippings. Pick your favorite, commit to a small budget (even $100 can make a difference), and just start.
You don’t need to transform the entire rooftop in one weekend. I typically picked one corner or one concept and built it out over a few months. This approach has two advantages: it spreads out the cost, and it lets you actually enjoy each phase of the transformation.
Watch for sales—seriously, this matters. I bought most of my outdoor furniture and accessories during end-of-season clearances when stores desperately want to move summer inventory. September and October are goldmines for deals. Sign up for store emails (yes, they’re annoying, but they announce sales first), and pounce when prices drop.
Don’t underestimate the power of borrowing ideas from other spaces. I’ve stolen concepts from restaurant patios, hotel rooftops, and friends’ gardens. That’s not copying—that’s being inspired and adapting ideas to fit your budget and space.
Remember that your rooftop terrace should reflect your actual lifestyle, not some idealized version of yourself. If you’re not going to maintain thirty plants, don’t create a jungle. If you never host dinner parties, skip the formal dining setup. Be honest about how you’ll actually use the space, and design for that reality.
The best budget makeovers embrace limitations as creative challenges. You can’t afford expensive outdoor furniture? Make it from pallets and make that DIY aesthetic intentional. You’ve got a tiny rooftop? Go vertical and make it a feature. These constraints often lead to more interesting, personalized results than unlimited budgets ever could.
Your rooftop is literally just sitting there, waiting. It doesn’t judge your budget or your DIY skills. It just wants you to make it into something that brings you joy, whether that’s a minimalist lounge, a plant-filled jungle, or a hammock-centric nap zone. Pick your favorite idea from this list, adapt it to your space and budget, and actually do it.
Trust me, the first evening you spend on your transformed rooftop—whether you’re sipping coffee in your Scandinavian patio or swaying in your hammock surrounded by plants—you’ll wonder why you didn’t do this sooner. Your rooftop terrace is waiting. Now go make it wonderful 🙂


