10 Easy DIY Dining Table Ideas to Transform Your Room
- Dining Table
 Ben
Ben- 0
- 36 minutes read
So you’re staring at dining table prices online and your jaw just hit the floor. I know that feeling. I nearly choked on my coffee when I saw a basic wooden table priced at $2,400.
That’s when I decided to build my own, and honestly? Best decision ever. Not only did I save roughly $2,000, but I also ended up with a table that actually fits my weird dining space perfectly.
Building your own dining table sounds intimidating, but here’s the truth: if you can follow a recipe, you can build a table. These 10 DIY dining table ideas range from weekend-warrior simple to “maybe watch a few YouTube videos first” challenging.
Each one costs a fraction of store-bought options and gives you something money can’t buy — the satisfaction of eating dinner on something you created with your own hands.
Whether you’re a complete beginner with a drill and a dream, or you’ve got a garage full of tools collecting dust, there’s a DIY table project here that’ll work for you. Let’s build something awesome.
1. Rustic Reclaimed Wood Dining Table
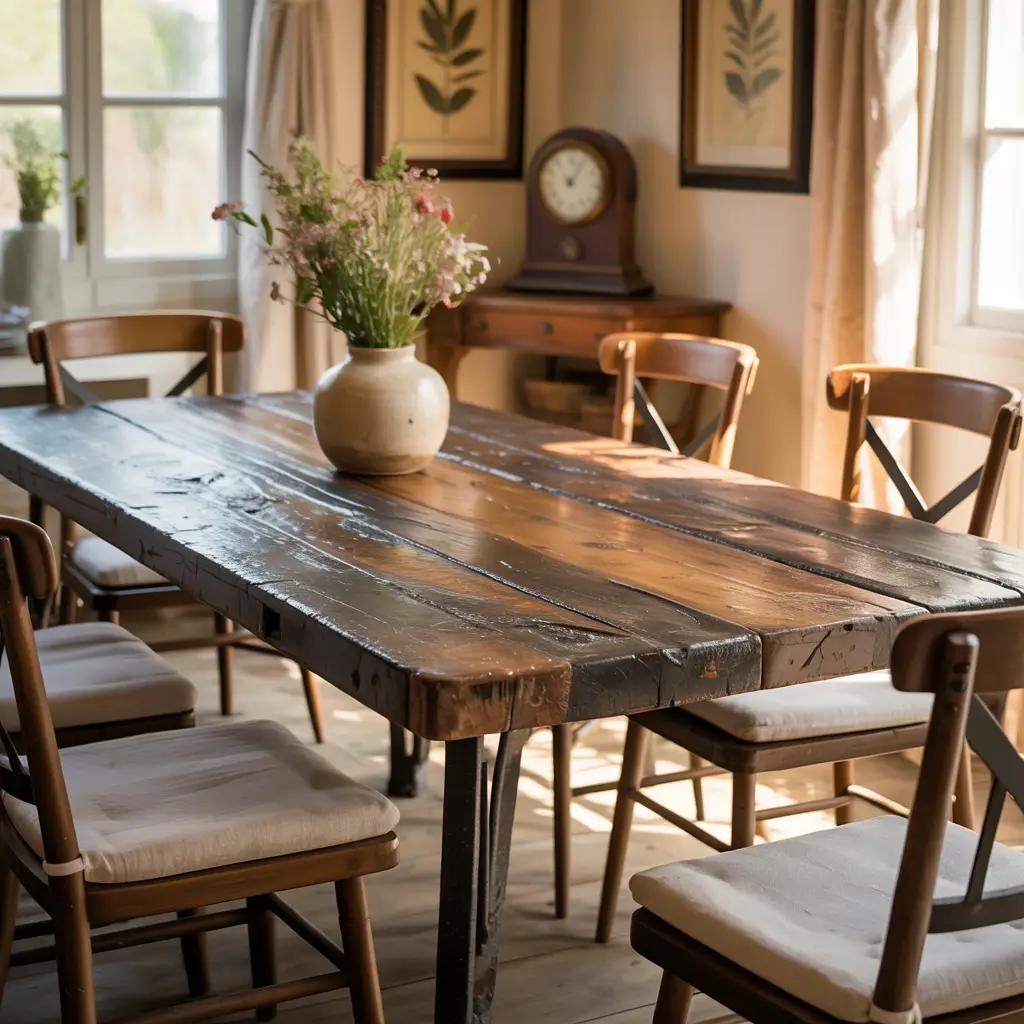
Nothing beats the character of reclaimed wood. Every scratch, nail hole, and weathered patch tells a story that new lumber just can’t fake. Plus, you get to feel smugly environmental every time someone compliments your table.
Finding Your Wood Goldmine
The secret to affordable reclaimed wood? Know where to look. I scored beautiful barn wood from a farmer who was tearing down an old shed. Cost me a case of beer and an afternoon of labor. Check demolition sites, old barns, warehouses being renovated, or even shipping companies dumping pallets.
Here’s what makes great reclaimed wood:
- Old barn beams with gorgeous weathering
- Warehouse flooring that’s already tongue-and-groove
- Defunct bowling alley lanes (seriously, these make incredible tables)
- Old deck boards that just need serious sanding
- Shipping crates from international deliveries
Building Your Rustic Masterpiece
The beauty of rustic tables lies in their imperfection. That gap between boards? Character. The slightly uneven surface? Charm. This style forgives mistakes better than any other DIY approach.
Start with a simple frame using 2x4s or 4x4s for legs. Create the tabletop by arranging your reclaimed boards, leaving small gaps for that authentic rustic look. Sand enough to prevent splinters but not so much you lose the patina. Finish with a food-safe sealant that enhances the wood grain without hiding it.
My first reclaimed wood table looked like something from a magazine, and it cost me under $150. The same style at West Elm? $1,800. Do the math on that satisfaction.
2. Minimalist Floating Table Design
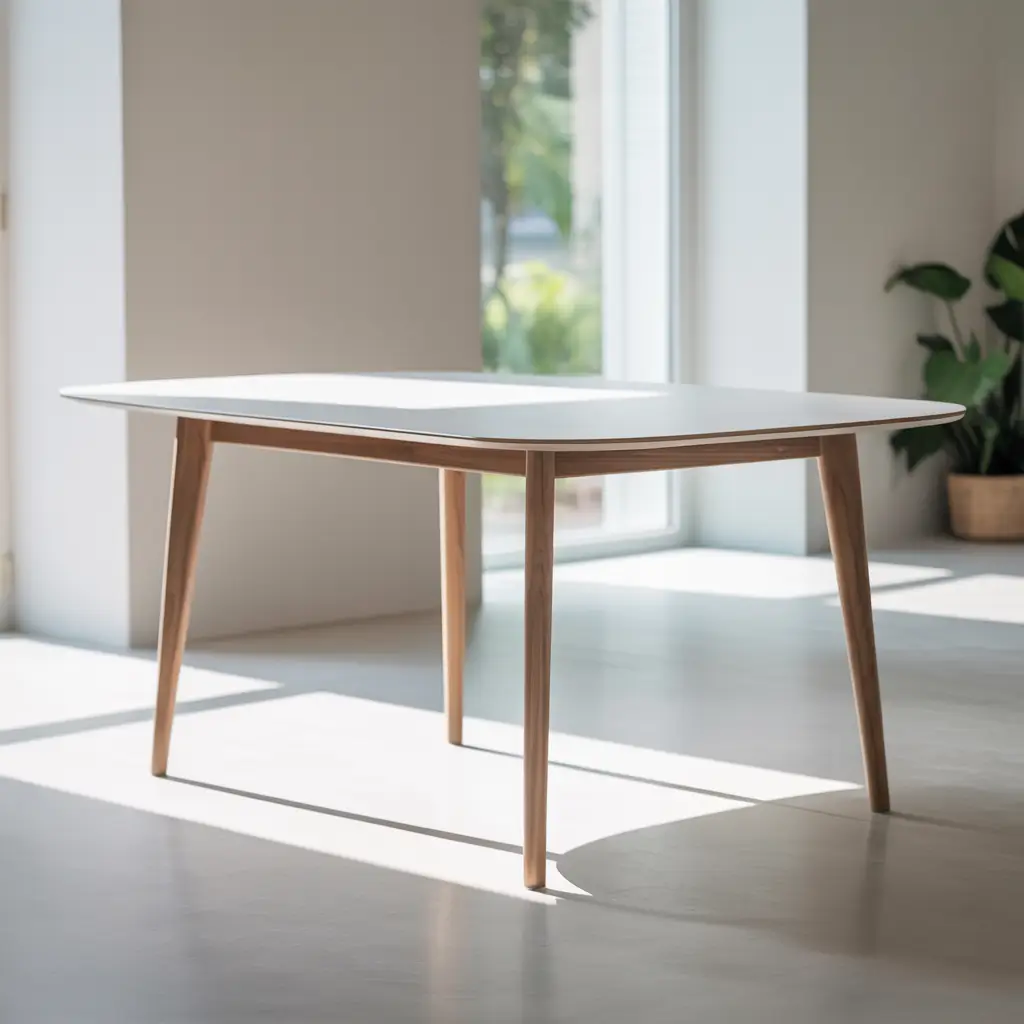
A floating dining table attached to your wall saves floor space and creates this incredible illusion of weightlessness. Perfect for small spaces or anyone who loves that clean, modern aesthetic.
The Engineering Behind the Magic
Don’t worry, your table won’t actually float (physics hasn’t changed). The trick involves heavy-duty brackets or a cleat system hidden underneath. The wall bears most of the weight, which means less material cost and more open floor space.
I built my floating breakfast nook table using a solid wood slab and industrial shelf brackets rated for 500 pounds. The whole thing cost me $75 and transformed my tiny kitchen corner into a legitimate dining space.
Installation That Won’t End in Disaster
Here’s what you absolutely need for a secure floating table:
- Wall studs (not just drywall anchors, please)
- Heavy-duty brackets rated for at least 3x your expected load
- A level (crooked floating tables look extra wrong)
- Quality wall anchors if you must go between studs
- A friend to hold things while you drill
The minimalist aesthetic means any mistakes show, so measure seventeen times and cut once. But when you nail it? Your dining room looks like it belongs in an architecture magazine.
3. Industrial Pipe Frame Table
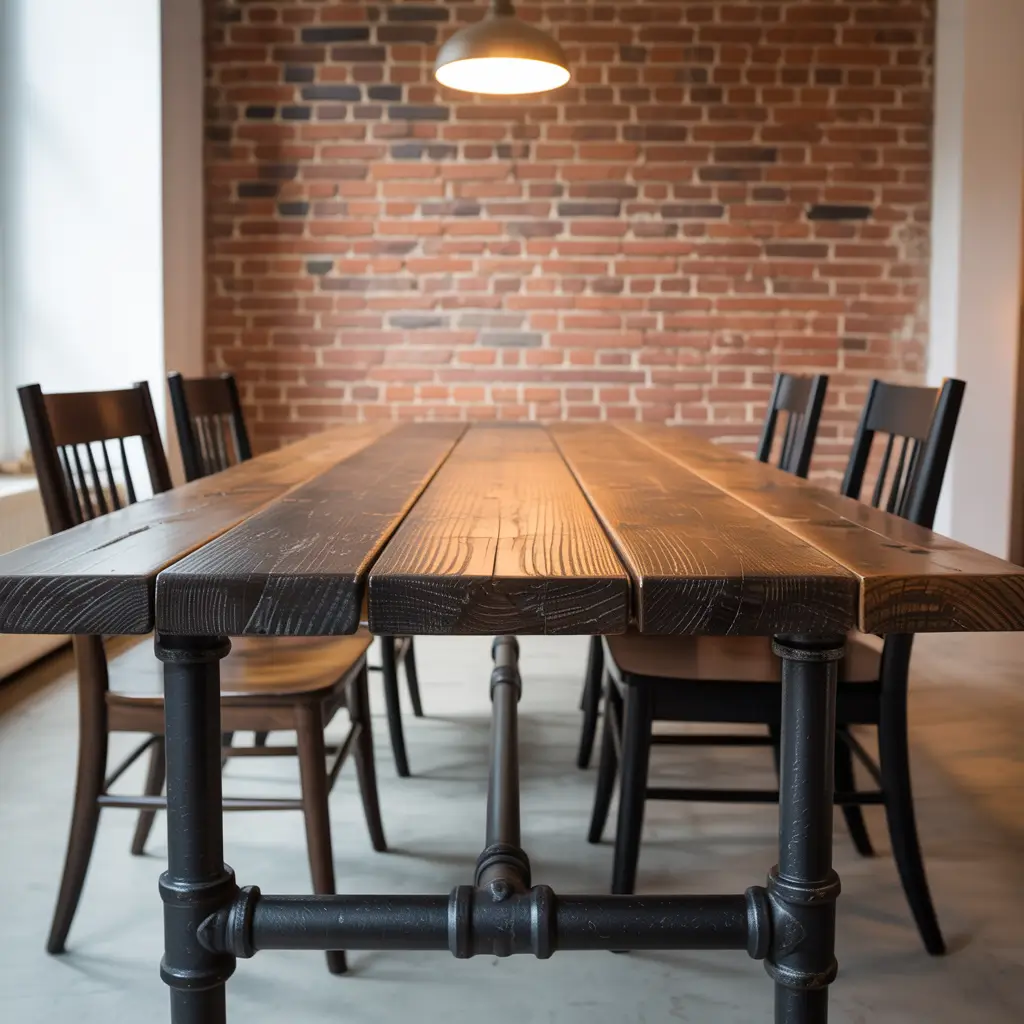
Industrial style brings that perfect mix of rough and refined. Pipe frame tables look expensive and complicated but actually rank among the easier DIY projects. Plus, working with pipes makes you feel ridiculously handy.
Why Pipes Make Perfect Table Legs
Galvanized steel pipes create incredibly strong frames without welding skills. They thread together like expensive Legos, and if you mess up? Just unscrew and try again. No tears, no wasted materials.
My industrial table uses 3/4-inch pipes for the frame and reclaimed wood for the top. The pipes cost about $120 at the hardware store, and I spent an embarrassing amount of time just screwing pieces together to see what looked cool. Final design seats eight and could probably support a small car.
Pipe Table Design Tips
What makes an industrial pipe table actually work:
- Black pipes look more expensive than galvanized
- Floor flanges create stable feet and attachment points
- Cross-bracing prevents wobbling
- Adjustable feet compensate for uneven floors
- Pre-drill your wood before attaching to pipes
FYI, the hardware store will cut and thread pipes to your specifications. This service changes everything — no special tools needed, just your measurements and a credit card.
Also Read: 12 Beautiful 6 Seater Dining Table Ideas for Family Dining
4. Farmhouse Style Farm Table
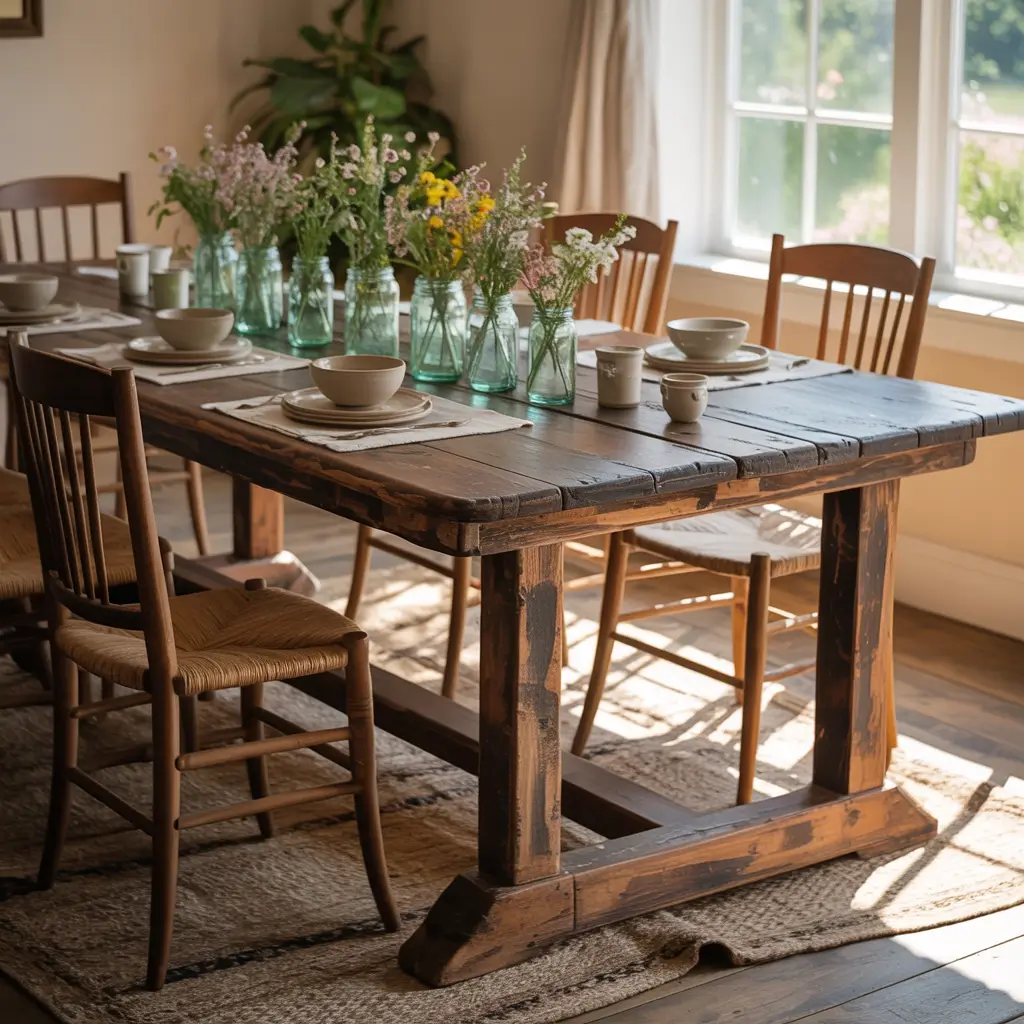
The farmhouse table remains popular because it works everywhere. Fancy dining room? Check. Outdoor patio? Perfect. Kids’ craft station that occasionally hosts Thanksgiving? Absolutely.
Building Something That Lasts Generations
Real farmhouse tables were built to survive decades of family life. Your DIY version should follow that philosophy. Use thick lumber (at least 2 inches), proper joinery, and finishes that improve with age.
I built my farmhouse table following Ana White’s free plans (seriously, check her site). Used construction-grade lumber from Home Depot, borrowed a friend’s pocket hole jig, and created something that looks professionally made. Total cost: $180. Time invested: one weekend. Compliments received: countless.
Farmhouse Details That Matter
Key elements that sell the farmhouse look:
- Chunky legs (4×4 minimum, 6×6 for drama)
- Visible joinery like mortise and tenon or decorative bolts
- Breadboard ends to prevent warping
- Distressed finish that hides future damage
- Matching bench instead of chairs on one side
The best part about farmhouse style? Imperfections add character. That measurement you got slightly wrong? Now it’s “handcrafted charm.”
5. Foldable Space-Saving Dining Table

Living in a small space doesn’t mean eating dinner on your couch forever. Foldable DIY dining tables disappear when you need room for activities and appear when you need room for plates. It’s basically furniture magic.
Smart Hinges, Smarter Design
The secret to a great folding table lies in choosing quality hinges and lightweight materials. Heavy tables become wall hazards. Cheap hinges become safety hazards. Invest in the hardware, save on everything else.
My studio apartment has a wall-mounted drop-leaf table that folds completely flat. Daily, it’s invisible. During dinner parties, it seats four comfortably. The whole project cost $65 and took one Saturday afternoon. My friends think I’m a space-saving genius. 🙂
Folding Mechanisms That Actually Work
Options for your foldable table:
- Drop-leaf design for partial folding flexibility
- Gate-leg construction for free-standing options
- Wall-mounted flip-down for maximum space saving
- Butterfly leaf storage within the table itself
- Accordion-style expansion for serious engineering points
Remember, folding tables get way more mechanical stress than regular tables. Reinforce every connection point, and don’t cheap out on the moving parts.
6. Glass Top DIY Modern Table
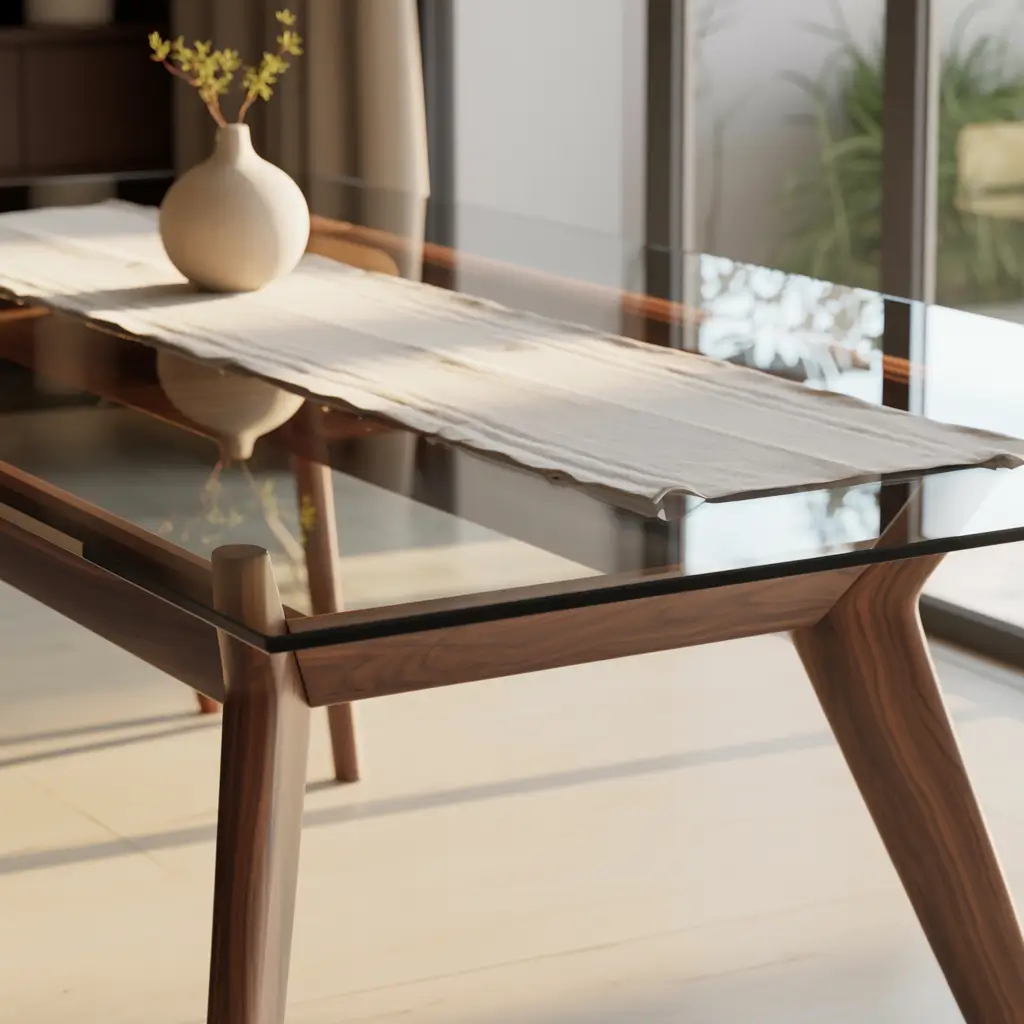
Glass-top tables scream sophistication, and building one yourself isn’t nearly as terrifying as it sounds. DIY glass dining tables let you showcase interesting bases while maintaining that airy, modern feel.
Glass Isn’t as Scary as You Think
Here’s the secret: you don’t cut the glass yourself. Order tempered glass cut to size from a local glass shop. They’ll even polish the edges and drill any holes you need. Your job? Build an awesome base and carefully place the glass on top.
I created a glass-top table using an old Singer sewing machine base I found at an estate sale. Had 1/2-inch tempered glass cut to fit, added some rubber bumpers, and boom — a $2,000-looking table for under $300.
Glass Table Considerations
Important things about DIY glass tables:
- Tempered glass is non-negotiable for safety
- Thicker glass (at least 3/8 inch) prevents flexing
- Rubber bumpers prevent sliding and protect glass
- Interesting bases show through beautifully
- Round edges cost more but prevent injuries
Ever notice how glass tables make rooms feel bigger? That transparency trick works even better when you’ve designed the perfect base to show off underneath.
Also Read: 10 Stunning Dining Table Design Modern Luxury Ideas for Elegant
7. Live Edge Wooden Slab Table
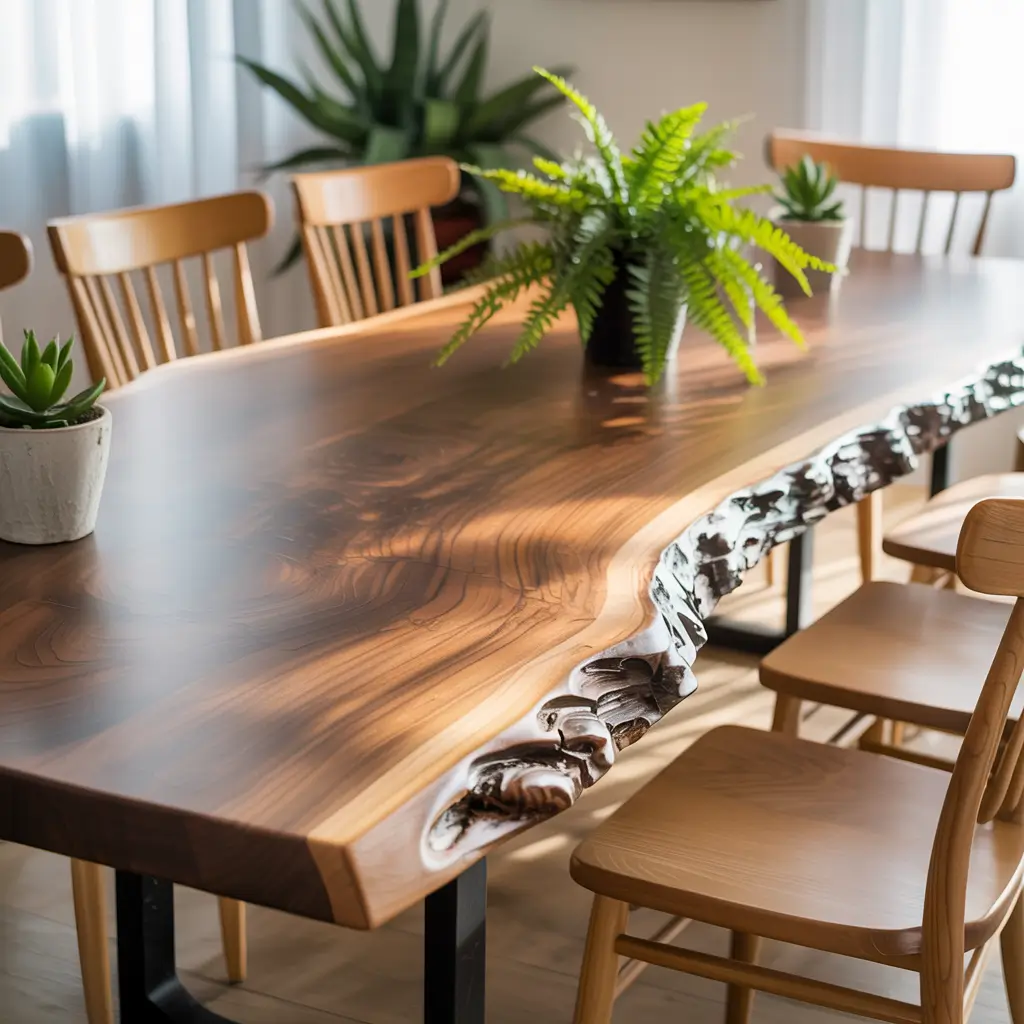
Live edge tables celebrate wood in its natural form, bark and all. They’re simultaneously rustic and modern, casual and sophisticated. Building one yourself means getting exactly the slab you fall in love with.
Finding Your Perfect Slab
Local sawmills and lumber yards often have stunning slabs that furniture makers passed over for minor flaws. That “flaw” becomes your conversation piece. Check Facebook Marketplace, Craigslist, or urban lumber suppliers who save trees from city removal.
My live edge table started with a walnut slab that had too much sapwood for professional furniture makers. I loved the contrast between the dark heartwood and light edges. Paid $200 for the slab, spent another $50 on legs, and created something that would retail for $2,000+.
Working With Natural Edges
Live edge challenges and solutions:
- Bark removal requires patience and a wire brush
- Bow ties or resin fill natural cracks
- Router sleds flatten uneven slabs
- Multiple coats of finish protect raw edges
- Metal legs provide modern contrast
The imperfections make these tables perfect. That crack you filled with turquoise resin? That’s not a flaw; that’s a feature that makes your table one-of-a-kind.
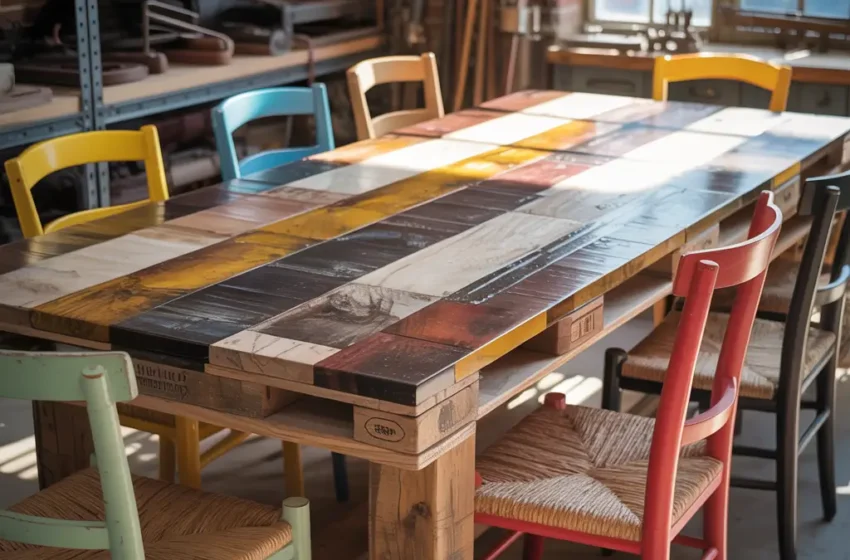
8. Pallet Wood DIY Dining Table
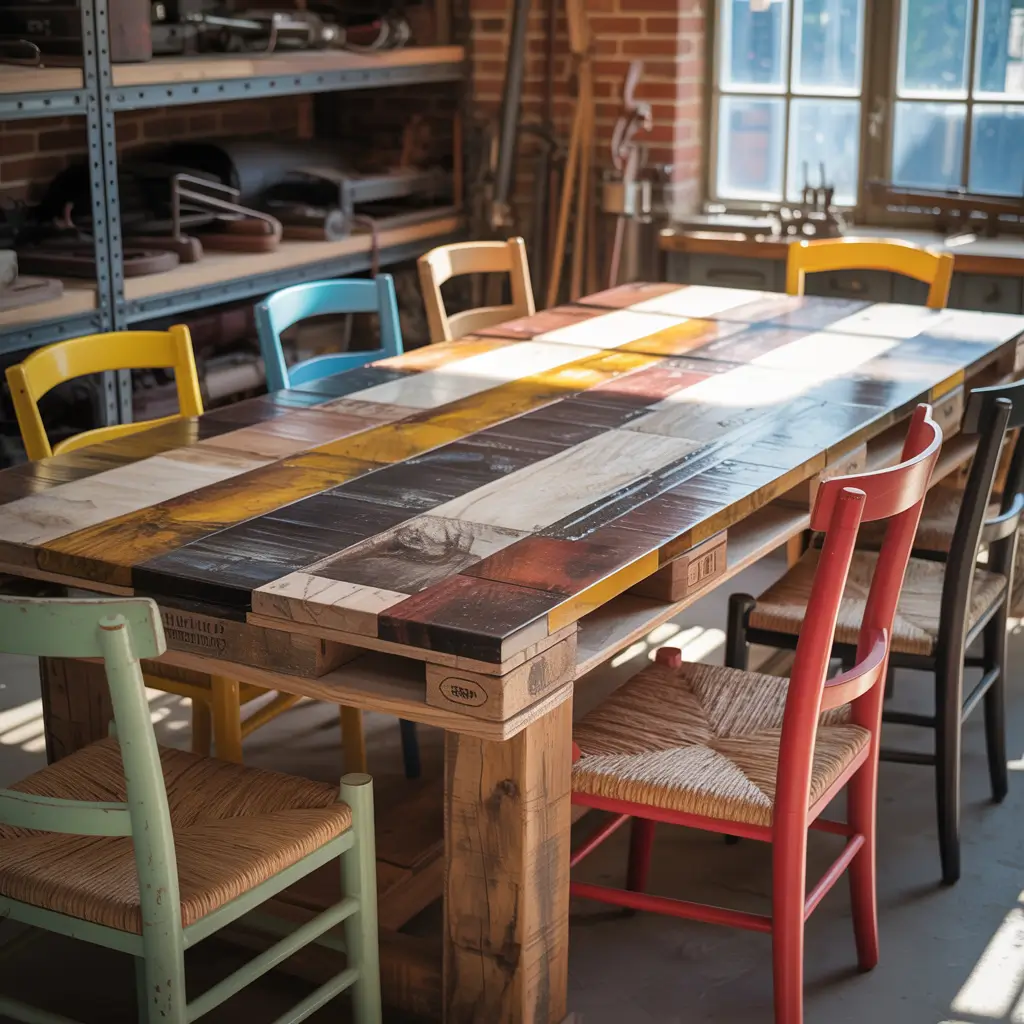
Before you roll your eyes at another pallet project, hear me out. Pallet wood tables done right look nothing like Pinterest fails. The key lies in proper preparation and not trying to maintain that “pallet look.”
Pallet Selection Matters More Than You Think
Not all pallets deserve a second life as furniture. Look for heat-treated pallets (marked HT) rather than chemically treated ones. Hardwood pallets from heavy equipment shipping create better tables than soft pine pallets from lightweight goods.
I built a pallet table that nobody believes came from pallets. The secret? I completely disassembled them, removed all nails, planed the boards smooth, and arranged them by color gradation. Looked like expensive reclaimed wood once finished.
Transforming Pallets Into Presentable Tables
The pallet table process that works:
- Disassemble completely (reciprocating saw saves time)
- Remove every nail and staple (metal detector helps)
- Sand thoroughly (start rough, finish fine)
- Sort by color and grain for intentional patterns
- Join properly with glue and biscuits or dowels
- Finish professionally to hide the pallet origins
Free materials don’t mean free pass on craftsmanship. Put in the prep work, and pallet wood transforms into something special.
9. Concrete and Wood Hybrid Table
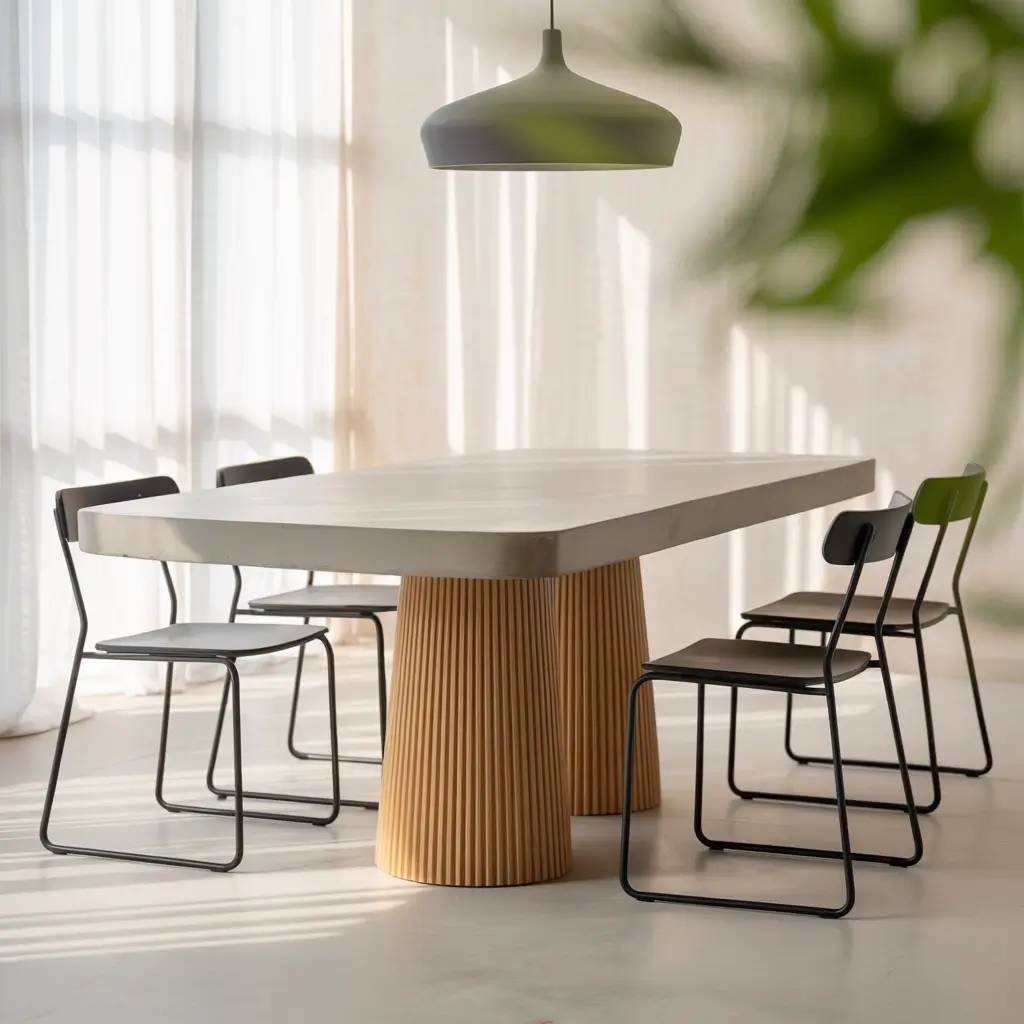
Concrete and wood combinations create this industrial-meets-organic vibe that looks incredibly expensive but costs surprisingly little to DIY. Plus, working with concrete makes you feel like a legitimate craftsperson.
Concrete Isn’t Just for Sidewalks Anymore
Modern concrete mixes designed for countertops work perfectly for tabletops. They’re lighter, stronger, and easier to work with than traditional concrete. You can add color, embed objects, or create patterns that make your table truly unique.
My hybrid table features a concrete top with a live edge wood stripe running through the middle. Created the form from melamine, poured the concrete in two stages with the wood sandwiched between, and polished it smooth. Total materials cost: $125. Professional equivalent: $3,000+.
Concrete Success Secrets
What you need to know about concrete tables:
- Reinforcement mesh or rebar prevents cracking
- Vibration removes air bubbles (orbital sander works)
- Proper curing takes patience but prevents problems
- Food-safe sealers are essential for dining use
- Start small to learn the material’s quirks
IMO, concrete tables offer the most design flexibility of any DIY option. Want to embed LED lights? Go for it. Prefer terrazzo-style aggregate showing? Easy. The only limit is your imagination.
Also Read: 12 Amazing Foldable Dining Table Ideas and Modern Setups
10. Painted Colorful Statement Table
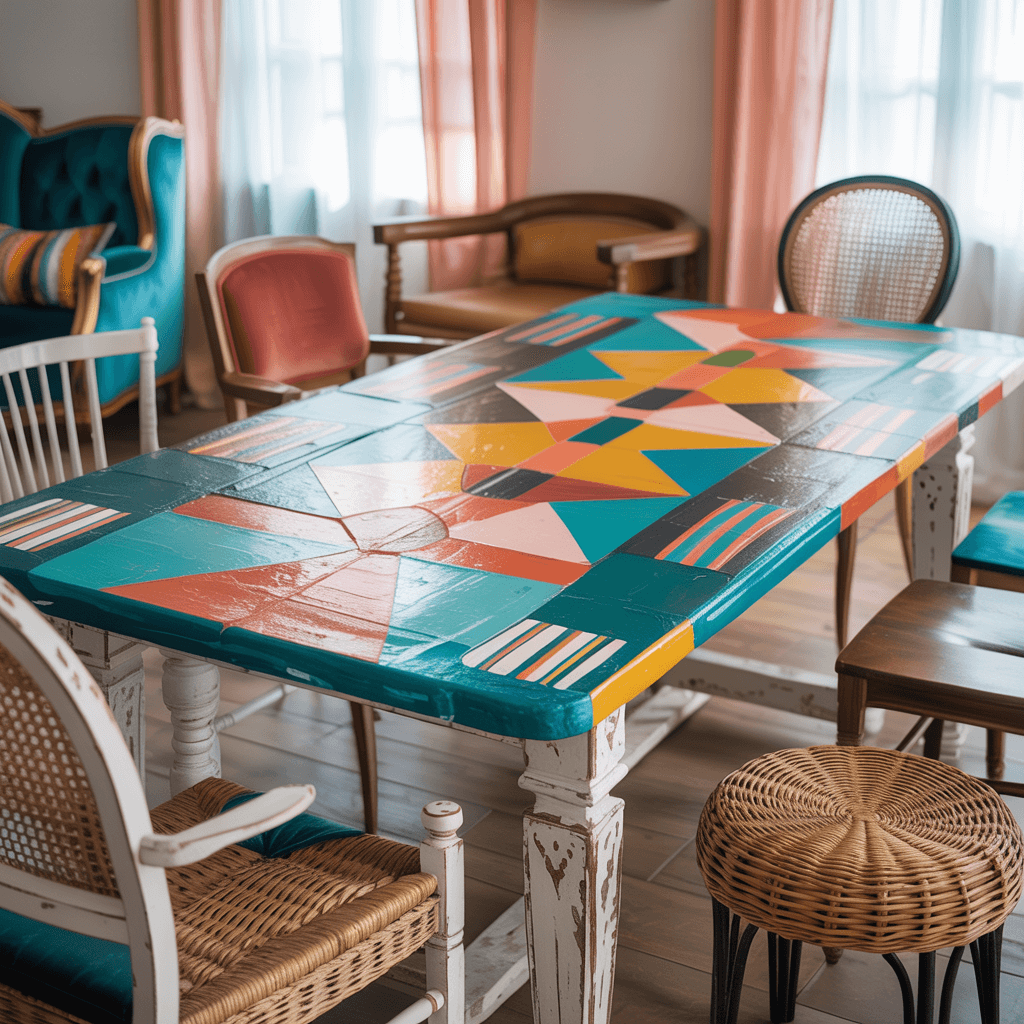
Sometimes you want a dining table that refuses to behave. Painted statement tables bring personality and joy to dining rooms tired of playing it safe. This is your chance to go absolutely wild with color.
Color Therapy Through Furniture
That boring oak table from Craigslist? Prime candidate for transformation. Bold paint jobs turn forgotten furniture into conversation pieces. The best part? If you hate it in six months, just repaint it.
I transformed a $40 thrift store table into a gradient masterpiece — deep blue fading to pale sky. Took five different blues, lots of blending, and more patience than I usually possess. Now it’s the first thing people notice in my apartment, and everyone wants to know where I bought it. :/
Paint Techniques Worth Trying
Ways to make your painted table pop:
- Gradient or ombre effects for subtle drama
- Geometric patterns using painter’s tape
- Milk paint for authentic vintage looks
- Metallic accents on edges or legs
- Chalkboard paint on top for ultimate functionality
- Multiple colors on different components
Don’t forget proper prep work — sand, prime, paint, seal. Skip steps and your masterpiece becomes a mess piece real quick.
Making Your DIY Dreams Reality
There you have it — 10 DIY dining table ideas that prove you don’t need a trust fund to have a stunning dining room.
Each project offers different challenges and rewards, but they all share one thing: they cost way less than buying retail and give you way more satisfaction.
Start with your skill level and available tools. If you’ve never held a drill, maybe begin with the painted table or simple farmhouse design. Already comfortable with power tools? Challenge yourself with the concrete hybrid or floating table.
Remember these universal DIY truths:
- Measure twice, cut once (then measure again because anxiety)
- Quality hardware makes everything easier
- YouTube University teaches everything
- Mistakes become design features with the right attitude
- The first project is never the last (DIY is addictive)
The perfect dining table isn’t sitting in a showroom waiting for your credit card. It’s hiding in reclaimed lumber, concrete mix, steel pipes, or that boring table at the thrift store.
All it needs is your vision, some elbow grease, and probably several trips to the hardware store because you forgot something. Again.
But when you’re sitting at your completed table, eating dinner and feeling ridiculously proud of what you built? That feeling beats any store-bought satisfaction. Your table has a story, and you’re the author.
Now stop reading and start building. Your DIY dining table awaits, and trust me — you’ve got this!