10 Modern Vegetable Garden Design Ideas for Stylish Gardens
- Garden Design
 Ben
Ben- 0
- 37 minutes read
Look, I get it. You want fresh tomatoes that actually taste like tomatoes, not those sad grocery store imposters. You crave the satisfaction of growing your own food, but you also want your outdoor space to look absolutely stunning—not like some chaotic farm experiment gone wrong. The good news? You can totally have both.
I’ve spent years experimenting with vegetable garden designs, and I’ve made every mistake you can imagine (trust me, I once planted mint next to everything and… well, let’s just say it got aggressive). But through all those trials and errors, I’ve discovered that modern vegetable gardens can be gorgeous, productive, and surprisingly easy to maintain. Whether you’re working with a tiny balcony or a sprawling backyard, these ten design ideas will transform your veggie-growing dreams into reality.
Small Space Vegetable Garden Layout for Beginners
Starting small isn’t settling—it’s actually the smartest move you can make. When you’re new to growing vegetables, a compact garden lets you learn without getting overwhelmed by weeds, watering schedules, and the sheer exhaustion that comes with maintaining too much space.
Focus on High-Value Crops
Here’s the thing about small space gardening: you need to be strategic. You’re not running a commercial farm, so forget about growing acres of potatoes. Instead, focus on vegetables that give you the biggest bang for your buck (and square footage).
Choose these winners:
- Cherry tomatoes (one plant produces hundreds of fruits)
- Lettuce and salad greens (harvest repeatedly)
- Herbs like basil, cilantro, and parsley (expensive to buy, easy to grow)
- Peppers (compact plants with serious yield)
- Bush beans (no trellising needed)
I started with a 4×4 foot space in my first apartment, and honestly? I got more vegetables than I could eat. The key was planting intensively rather than spreading things out like traditional row gardening.
Design for Easy Access
Nobody wants to step on their seedlings while reaching for that perfect pepper. Plan your small garden so you can reach every part without actually stepping into the growing area. I learned this the hard way after crushing an entire row of lettuce. Oops.
Keep your beds no wider than 3-4 feet if you’re accessing from one side, or 5-6 feet if you can reach from both sides. Your back will thank you, and your plants won’t get trampled.
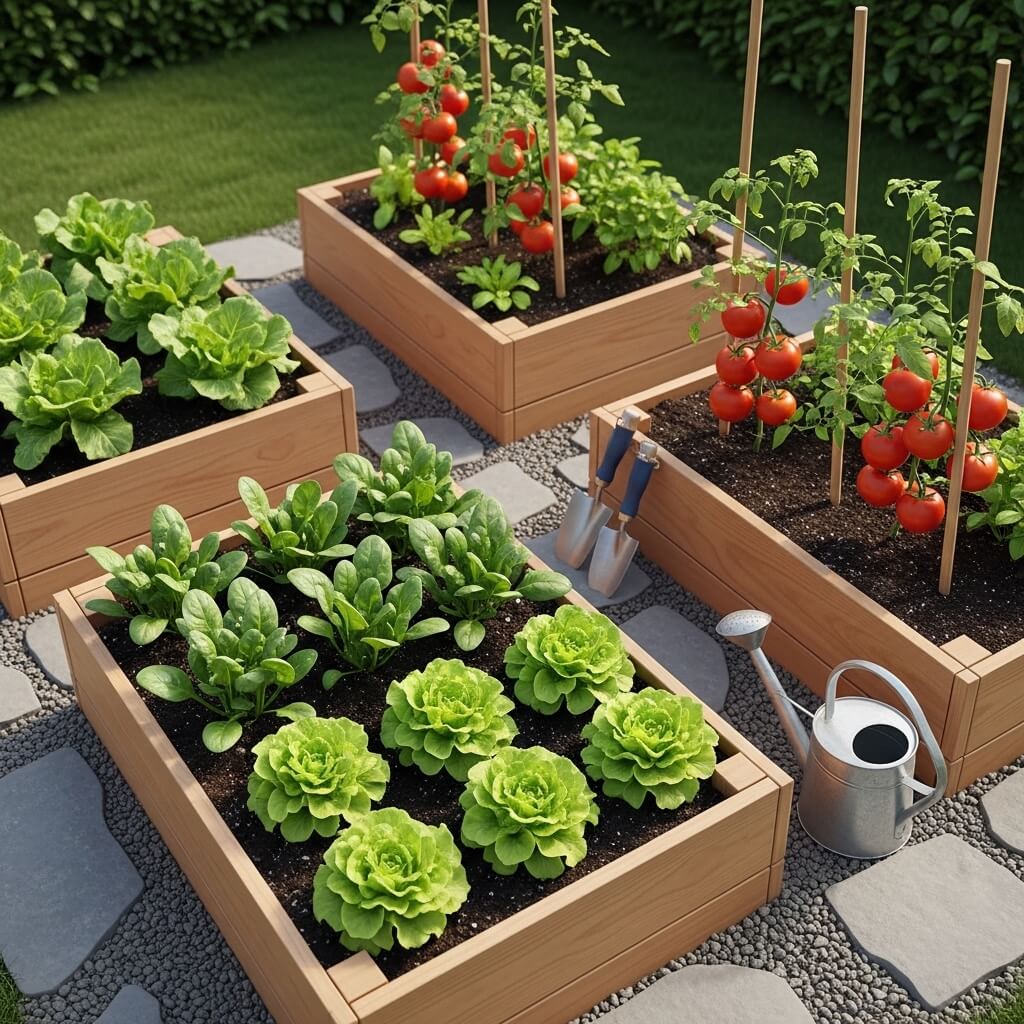
Raised Bed Vegetable Garden Design Ideas for Maximum Yield
Raised beds changed my gardening game completely. They warm up faster in spring, drain better, and you fill them with perfect soil instead of dealing with whatever clay-heavy nightmare exists in your yard. Plus, they look intentional and organized—very Pinterest-worthy, if you care about that sort of thing.
Optimal Bed Dimensions
The standard recommendation is 4 feet wide by 8 feet long, but honestly? Build them to fit your space and needs. I have one bed that’s 3×10 feet because that’s what fit along my fence line, and it works perfectly.
Height matters more than you think:
- 6-12 inches: Works for shallow-rooted crops like lettuce
- 12-18 inches: Perfect all-purpose height for most vegetables
- 24+ inches: Ideal for root vegetables and if you want to avoid bending
IMO, going at least 12 inches deep makes a huge difference in plant health and your harvest size. Skimping here means you’ll fight with limited root space all season.
Material Choices That Actually Last
I’ve used everything from cheap pine boards (rotted in two years) to fancy composite lumber (still going strong after six years). Cedar or redwood naturally resist rot and look beautiful, but they cost more upfront. Composite materials cost even more but literally last decades.
Quick comparison from my experience:
- Untreated pine: Cheap but replace every 2-3 years
- Cedar: Mid-price, lasts 7-10 years, gorgeous natural look
- Composite: Expensive but virtually indestructible
- Concrete blocks: Budget-friendly, permanent, industrial aesthetic
Whatever you choose, avoid treated lumber unless it’s specifically rated for vegetable gardens. You don’t want chemicals leaching into your food. That defeats the entire purpose, right?
Vertical Vegetable Garden Ideas for Tiny Backyards
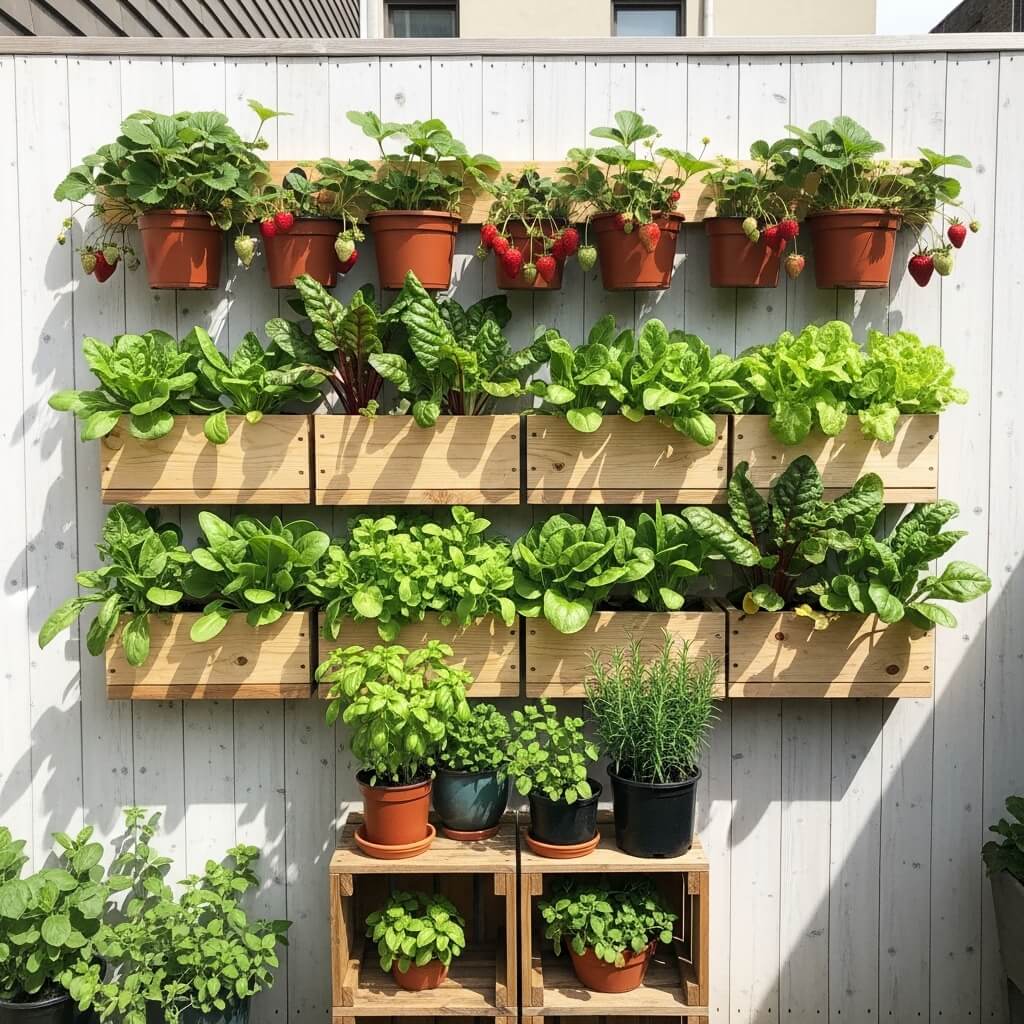
When you’re short on ground space, look up. Vertical gardening isn’t just trendy Instagram content—it’s a legitimate way to triple your growing capacity without expanding your footprint.
Trellises and Climbing Structures
Cucumbers, pole beans, peas, and vining tomatoes all love climbing. I installed a simple cattle panel arch in my garden, and it became both a productive growing space and an actual architectural feature. People compliment it constantly, not realizing it’s literally just a $20 metal panel bent into an arch.
Vertical structures that work:
- Cattle panel arches (cheap, strong, versatile)
- A-frame trellises (great for beans and peas)
- Wall-mounted wire grids (perfect for small spaces)
- Bamboo teepees (inexpensive and charming)
- String trellises (minimal material, maximum plants)
Train your plants as they grow by gently weaving them through or tying them with soft garden twine. Check them every few days because vining plants grow shockingly fast during peak season.
Wall Gardens and Pocket Planters
Got a boring fence or wall? Turn it into a vertical salad bar. Wall-mounted pocket planters work amazingly well for shallow-rooted crops like lettuce, strawberries, and herbs. I use fabric pocket planters on my garage wall, and they’re productive from spring through fall.
Just remember: vertical gardens dry out faster than ground-level beds. You’ll need to water more frequently, especially during hot weather. Set up a simple drip irrigation system, and you’ll save yourself daily watering marathons.
Also Read: 10 Relaxing Small Garden Design Ideas for Outdoor Oasis
Kitchen Garden Design Ideas for Fresh Herbs and Veggies
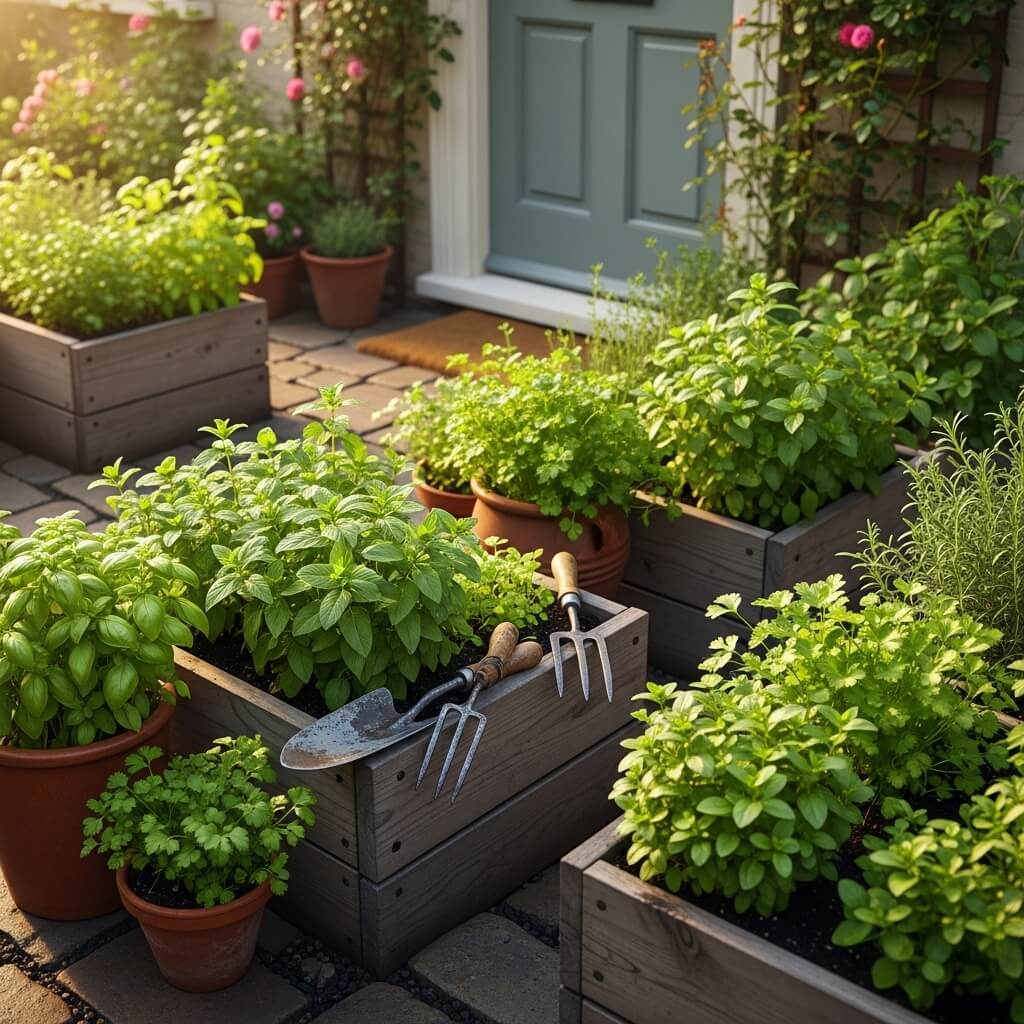
There’s something incredibly satisfying about walking five steps from your kitchen door and snipping fresh basil for your pasta sauce. A kitchen garden puts the most-used herbs and vegetables right where you need them.
Location Is Everything
I placed my kitchen garden literally right outside my back door—close enough that I’ll actually use it when I’m cooking instead of thinking “eh, dried oregano is fine.” That proximity makes all the difference between a garden you use constantly and one you forget about.
Plan for these practical elements:
- Full sun exposure (at least 6 hours daily)
- Easy path from kitchen door (no obstacle course required)
- Water source nearby (dragging hoses gets old fast)
- Good drainage (standing water kills herbs quickly)
Essential Kitchen Garden Plants
Focus on herbs and vegetables you actually buy regularly. There’s no point growing radicchio if you never eat it, no matter how trendy it is.
My never-fail kitchen garden lineup:
- Basil (multiple varieties because one is never enough)
- Parsley (flat-leaf for cooking, curly for garnish)
- Rosemary (perennial in most climates, one plant lasts forever)
- Thyme (low-maintenance and productive)
- Cherry tomatoes (for salads and snacking)
- Hot peppers (if you like heat)
- Chives (indestructible and useful)
I organize mine in a combination of raised beds and large containers, grouped by water needs. Herbs like rosemary and thyme prefer drier soil, while basil drinks like it’s at an all-you-can-hydrate buffet.
Aesthetic Vegetable Garden Layout for Modern Homes
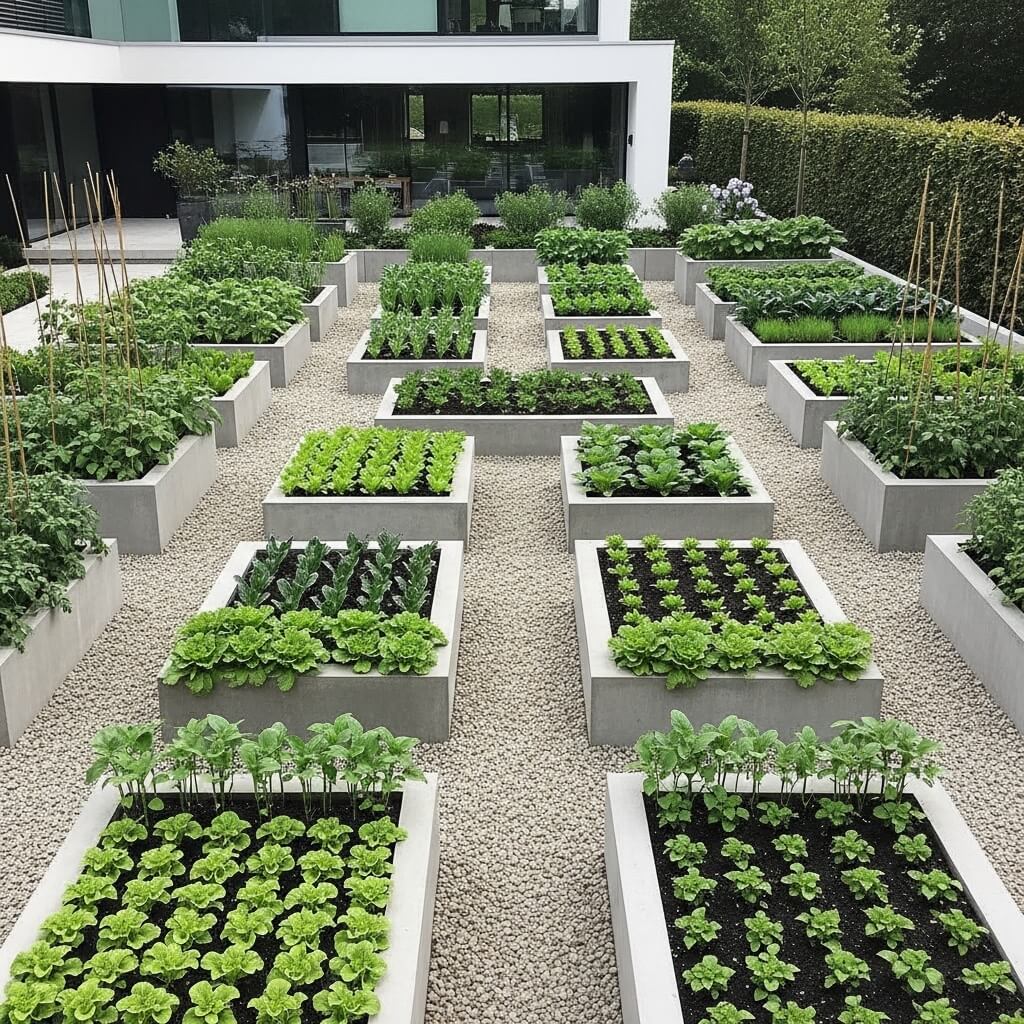
Who says vegetable gardens have to look utilitarian and messy? Your veggie patch can absolutely complement your home’s modern aesthetic with thoughtful design choices.
Geometric Precision and Clean Lines
Modern design loves geometry. Instead of random, wandering garden beds, create structured rectangular or square beds with defined edges. Use materials like steel edging, concrete borders, or composite lumber in dark colors for that sleek contemporary vibe.
I recently redesigned my front yard vegetable garden (yes, front yard—the HOA wasn’t thrilled, but it’s legal 🙂 with four symmetrical raised beds arranged in a grid pattern. The repetition and structure make it look intentional and stylish rather than haphazard.
Color Coordination Matters
You might think I’m crazy, but choosing vegetables with complementary colors creates serious visual impact. Deep purple eggplants next to silvery-green kale and bright red Swiss chard? That’s not just food—that’s a living art installation.
Color combinations I love:
- Purple basil, green lettuce, and orange marigolds
- Red cabbage, blue-green kale, and white cauliflower
- Rainbow chard varieties planted in color-gradation rows
- Dark green zucchini foliage with bright yellow squash blossoms
Mix in ornamental elements like decorative grasses, edible flowers, or even sleek metal plant markers. The goal is creating a space that looks designed, not just planted.
Container Vegetable Garden Ideas for Apartments
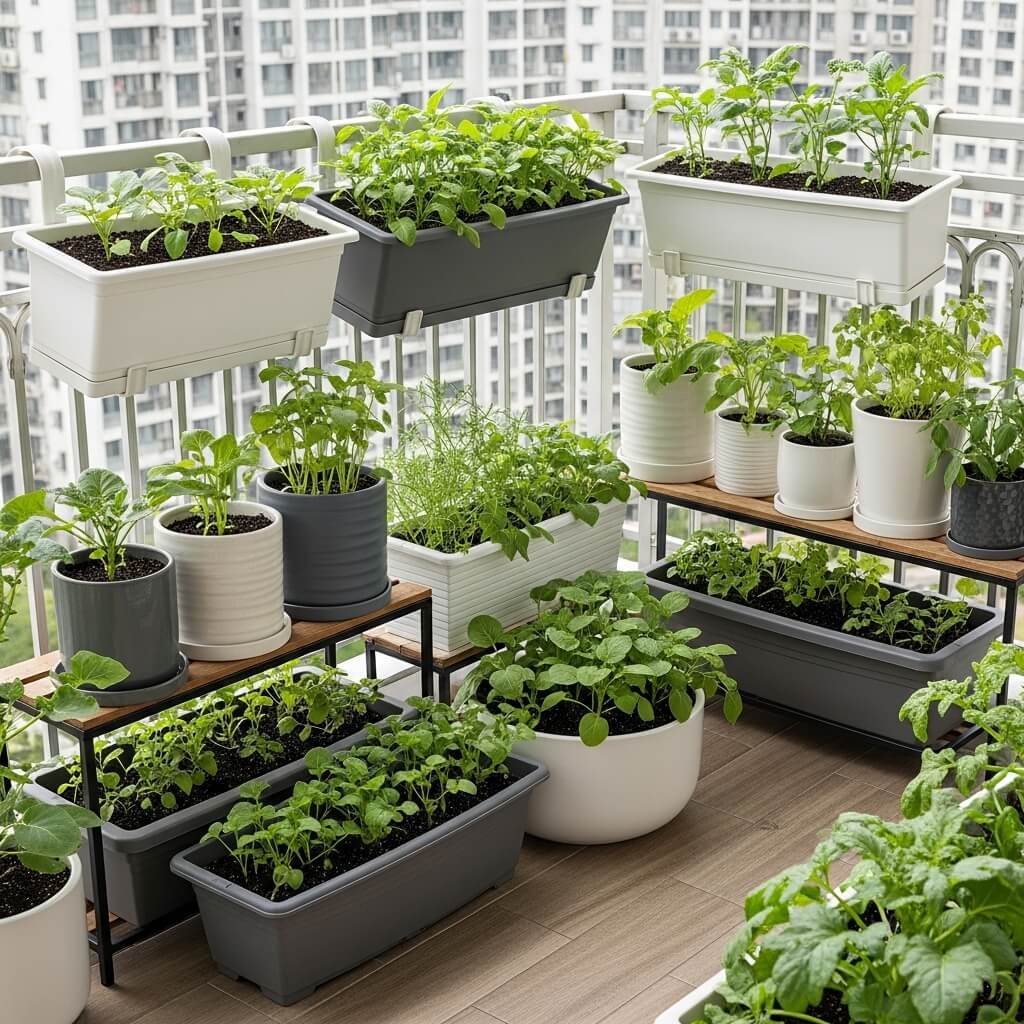
No yard? No problem. Container gardening lets apartment dwellers and renters grow fresh vegetables without needing actual ground to plant in. I gardened exclusively in containers for three years in a small apartment, and I still harvested bushels of produce.
Choosing the Right Containers
Size matters enormously in container gardening. Those cute little pots you see at craft stores? Useless for most vegetables. You need volume for root development and water retention.
Minimum container sizes:
- Lettuce and greens: 6-8 inches deep
- Herbs: 8-10 inches deep
- Tomatoes and peppers: 5-gallon minimum (bigger is better)
- Root vegetables: 12+ inches deep
- Cucumbers and squash: 5-gallon minimum
I’ve used everything from traditional terracotta pots to fabric grow bags to repurposed storage containers. Fabric grow bags are my favorite because they’re lightweight, prevent root circling, and air-prune the roots for healthier plants. Plus, they’re cheap and store flat when not in use.
Balcony and Patio Arrangements
Weight becomes a real concern when you’re gardening on a balcony. Wet soil is heavy—a large container can easily weigh 100+ pounds. Check your balcony’s weight limits before going crazy with containers.
Arrange your containers strategically to maximize sun exposure while keeping weight distributed safely. I placed my heaviest pots along the balcony edges near support beams and used lightweight containers in the center areas. Vertical space is your friend here—use hanging baskets, tiered plant stands, and wall-mounted containers to grow more without increasing floor weight.
Also Read: 10 Brilliant Garden Design Ideas for a Serene Nature Corner
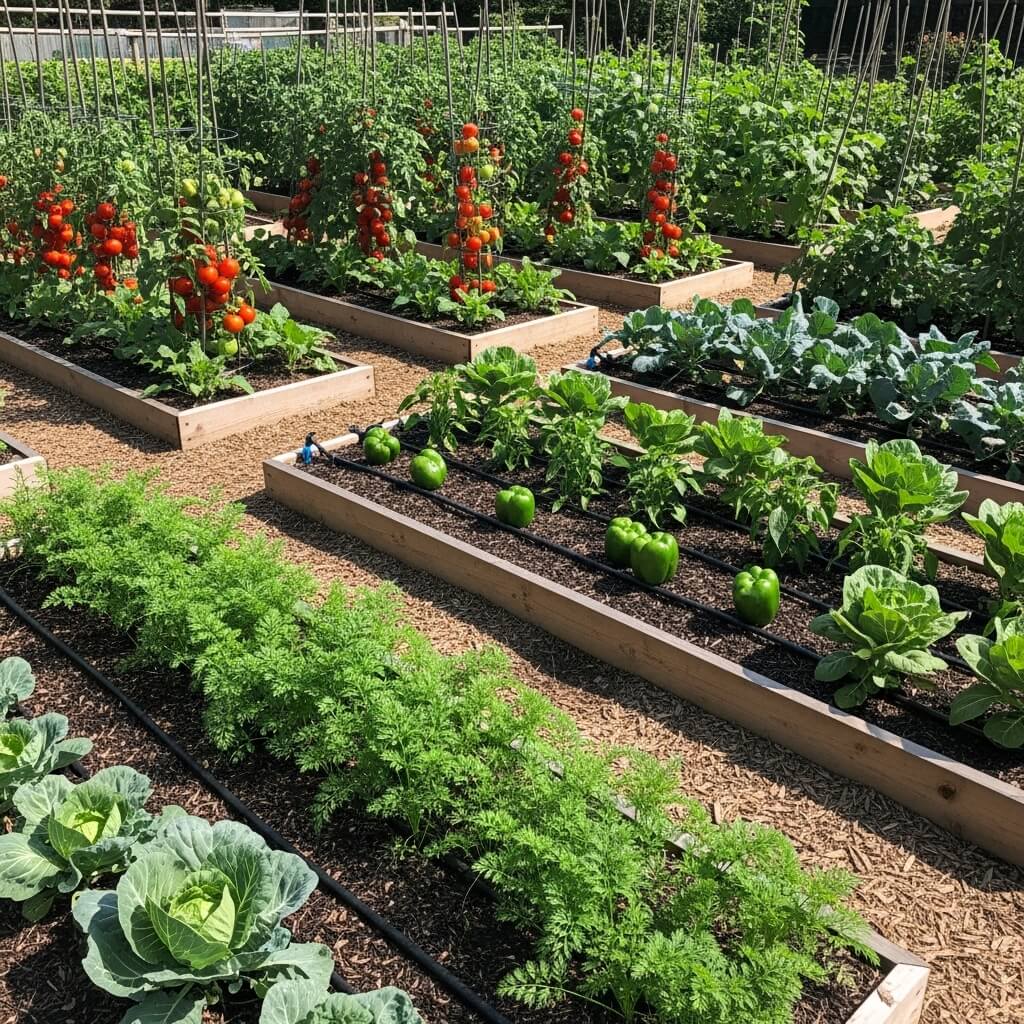
Backyard Vegetable Garden Design with Pathways
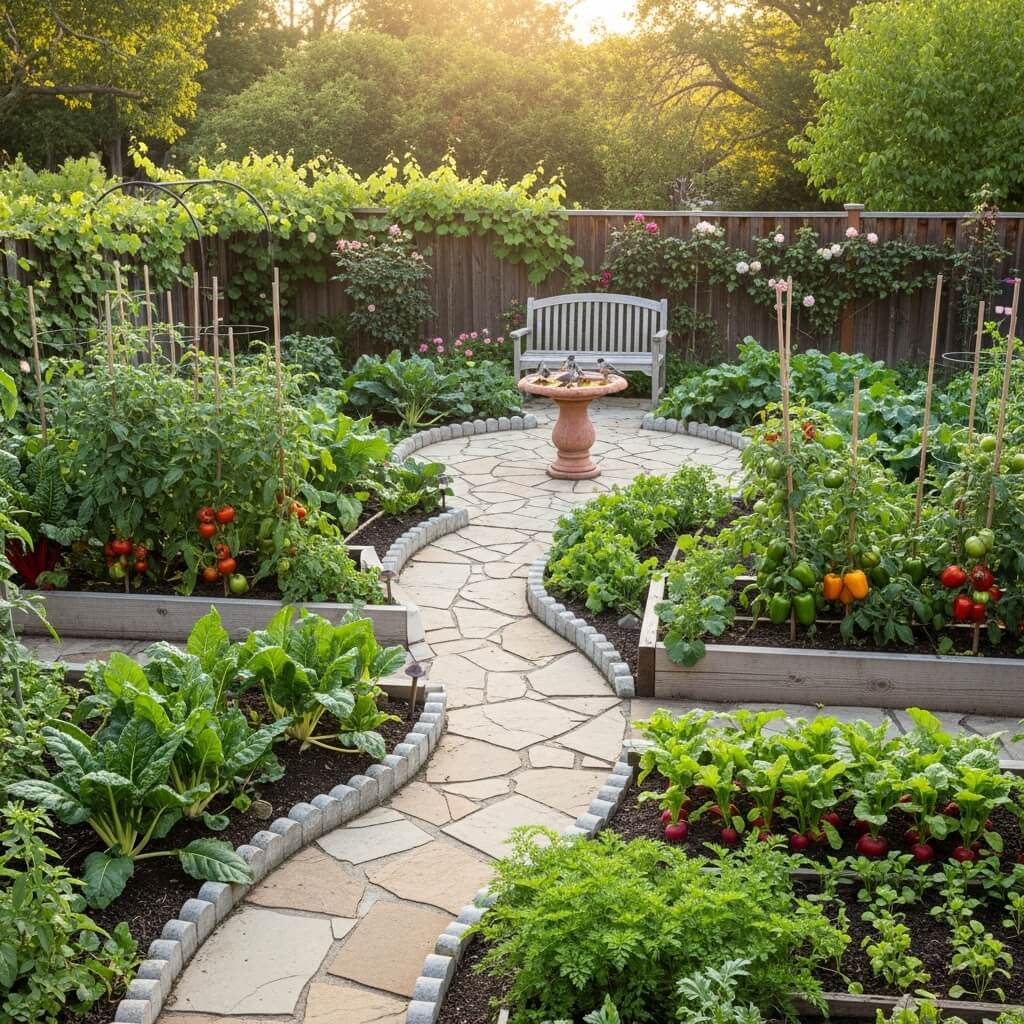
Ever tried harvesting vegetables after a rain and ended up with mud up to your ankles? Yeah, pathways solve that problem. They also make your garden look professionally designed rather than chaotic.
Pathway Materials That Work
I’ve experimented with different pathway materials, and each has pros and cons. Wood chips look natural but decompose and need replacing. Gravel drains perfectly but can be annoying to walk on barefoot. Stepping stones create a casual, cottage-garden feel.
My pathway material rankings:
- Compacted crushed stone: Durable, drains well, looks polished
- Wood mulch: Natural, affordable, good drainage (needs refreshing)
- Pavers or flagstone: Permanent, attractive, higher cost
- Straw: Temporary, cheap, decomposes into mulch
- Grass: Free but requires mowing and edges get messy
FYI, pathway width matters too. Make them at least 2-3 feet wide for comfortable walking and wheelbarrow access. My original 18-inch paths looked cute but were functionally useless when I needed to move harvest baskets or soil amendments.
Designing Functional Traffic Flow
Think about how you’ll actually move through your garden. Where’s your water source? Where do you enter the garden? Where will you stage harvested vegetables?
I designed my garden with a main central pathway that’s 3 feet wide, with narrower 2-foot paths branching to individual beds. The main path handles my wheelbarrow and harvesting cart, while the smaller paths are just for accessing plants. This creates good flow without wasting growing space on unnecessarily wide paths everywhere.
Square Foot Vegetable Garden Layout for High Productivity
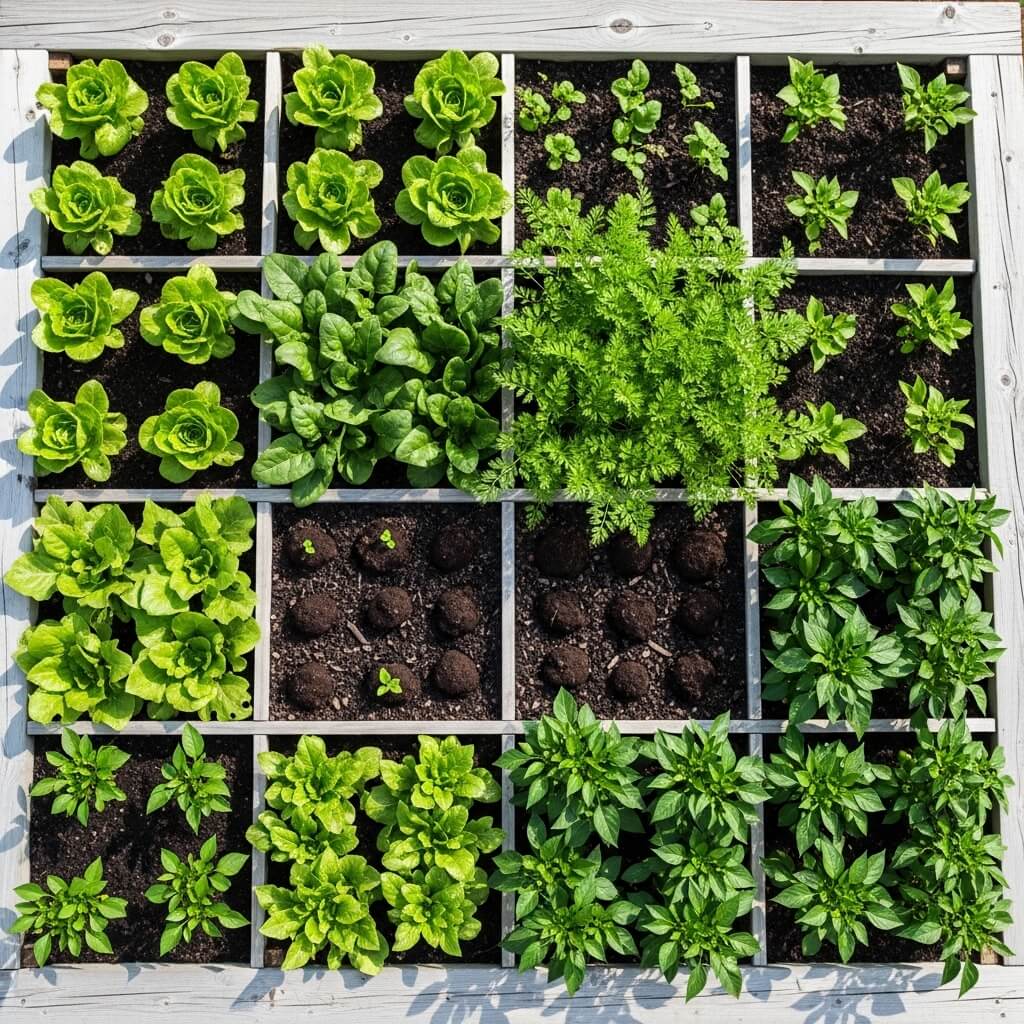
Mel Bartholomew’s square foot gardening method revolutionized small-space growing, and honestly, it’s still one of the best systems for maximizing productivity. The concept is brilliantly simple: divide your garden bed into 1-foot squares and plant each square according to the plant’s size needs.
The Perfect Soil Mix
Square foot gardening uses a specific soil blend called “Mel’s Mix,” and I’ve got to admit—it works incredibly well. The formula is equal parts compost, peat moss (or coconut coir), and vermiculite. This creates perfect drainage, nutrition, and water retention.
Is it more expensive than garden soil? Yes. Does it produce better results? Absolutely. I’ve grown the same vegetables in both Mel’s Mix and regular garden soil, and the difference in vigor and yield is noticeable. The investment pays off in productivity.
Plant Spacing by the Numbers
The genius of square foot gardening is the simplified spacing guide. Each square foot holds a specific number of plants based on their mature size:
Plants per square foot:
- Large plants (tomatoes, peppers, cabbage): 1 per square
- Medium plants (lettuce, chard, marigolds): 4 per square
- Small plants (radishes, carrots, beets): 16 per square
- Tiny plants (onions, garlic): 9-16 per square
This intensive planting method eliminates wasted space while preventing overcrowding. I use a simple PVC grid laid on top of my beds to mark the squares, though you can also use string, wooden slats, or just eyeball it once you get experienced.
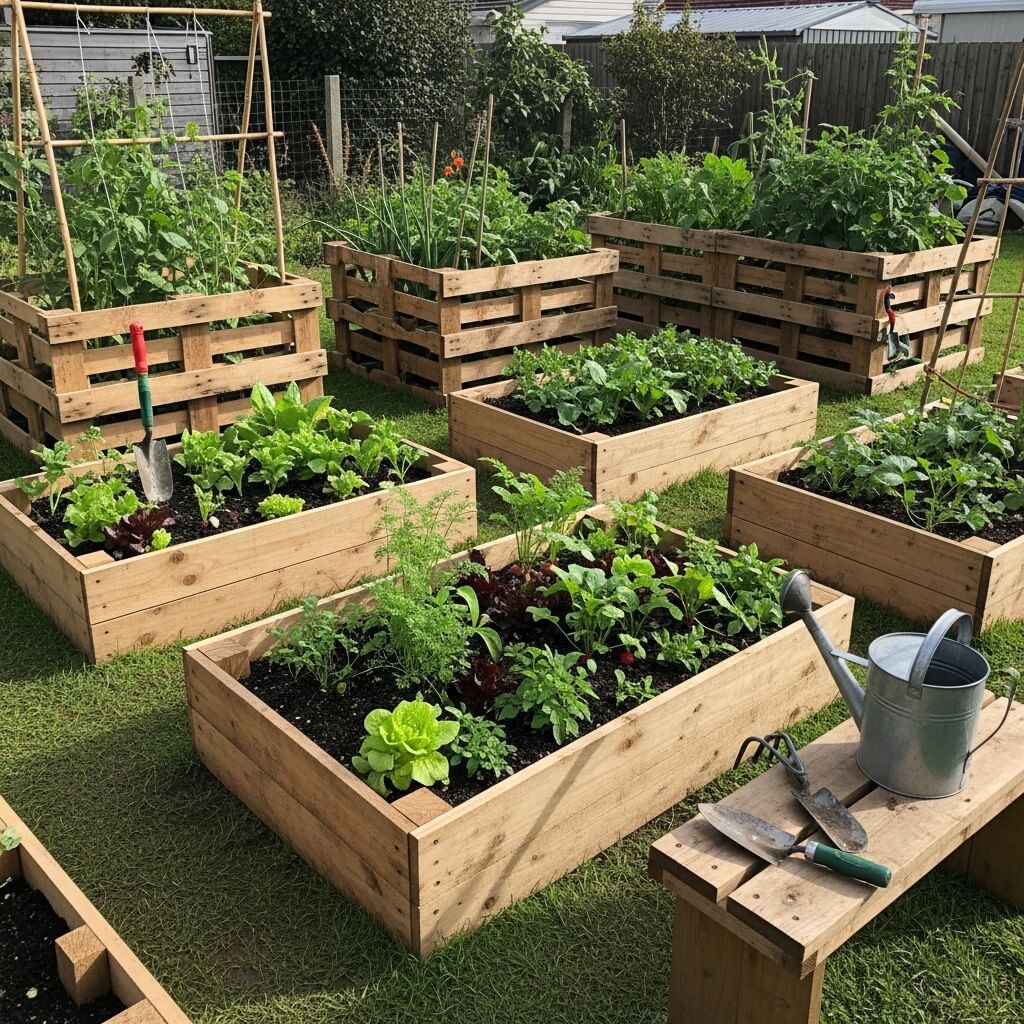
DIY Vegetable Garden Design on a Budget
Look, gardening can get expensive fast if you let it. But you absolutely don’t need fancy raised beds, expensive tools, or designer plant markers to grow amazing vegetables. Some of my most productive gardens cost almost nothing to establish.
Free and Cheap Materials
I’ve built raised beds from free wooden pallets (just make sure they’re heat-treated, not chemically treated—look for the “HT” stamp). I’ve used cardboard boxes as temporary raised beds for a single season. I’ve made trellises from branches pruned from trees.
Budget-friendly garden materials:
- Cardboard and mulch for no-till bed preparation (literally free)
- Cinder blocks arranged as bed borders ($1-2 each)
- Wooden pallets broken down for bed sides (free from many businesses)
- PVC pipe and netting for trellises ($10-15 total)
- Straw bales as temporary raised beds ($5-8 per bale)
Seeds cost pennies compared to buying transplants. One $3 seed packet gives you dozens or hundreds of plants. I only buy transplants for tomatoes and peppers because I’m impatient with their long growing season—everything else gets direct-seeded.
Recycling and Repurposing
My most creative garden containers cost nothing because I repurposed items heading to the trash. Old storage bins with drainage holes drilled in the bottom work perfectly. Five-gallon buckets from restaurants or construction sites (cleaned thoroughly) are ideal for tomatoes. I even grow lettuce in plastic storage drawers.
Get creative with plant markers too. Painted rocks, cut-up plastic containers, or popsicle sticks work just as well as those fancy slate markers. Your plants don’t care what their labels look like, and neither does your harvest.
Also Read: 10 Beautiful Glass Wall Partition Design Ideas for Elegant Homes
Companion Planting Vegetable Garden Layout Ideas
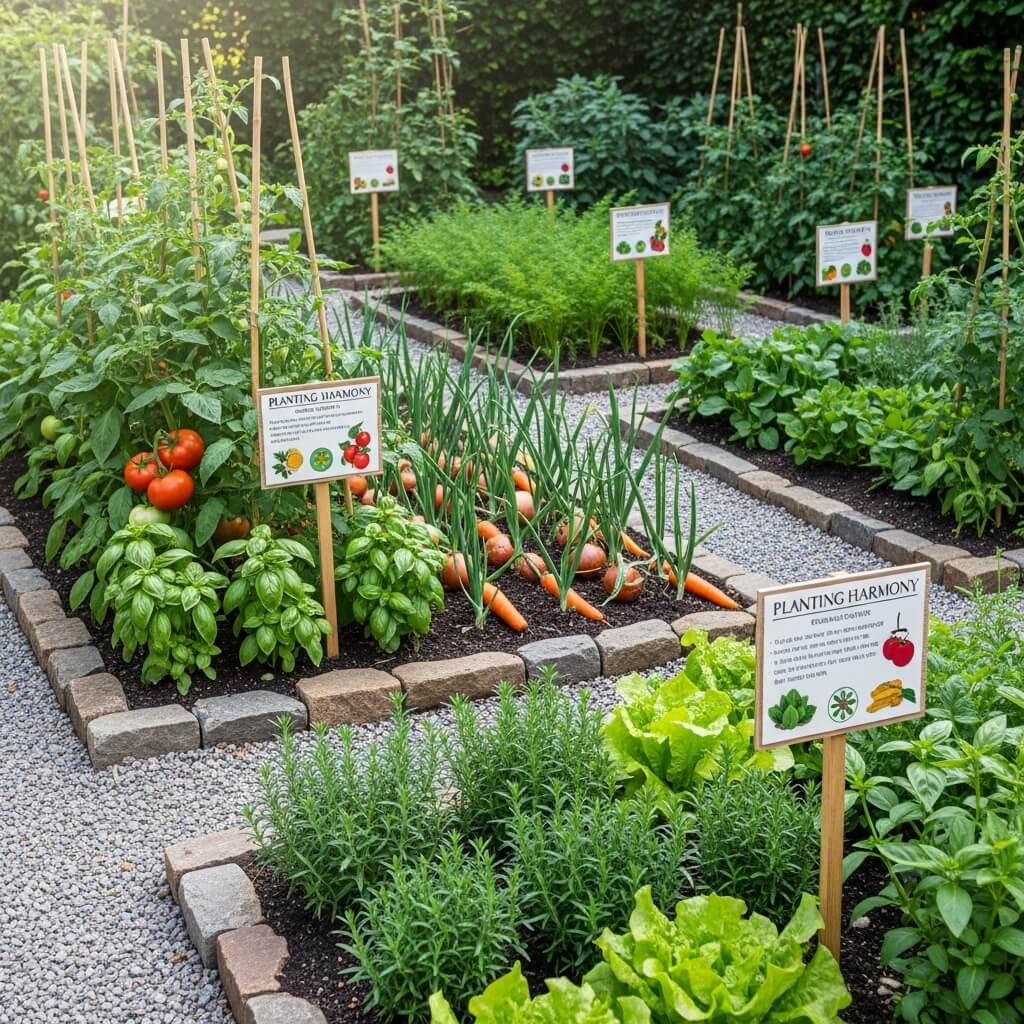
Companion planting sounds mystical and complicated, but it’s really just strategic neighbor selection for your vegetables. Some plants help each other out by repelling pests, improving soil, or providing physical support.
Classic Companion Combinations
The “Three Sisters” method (corn, beans, and squash planted together) gets mentioned constantly because it actually works. The corn provides structure for beans to climb, the beans fix nitrogen in the soil, and the squash shades the ground to retain moisture and suppress weeds. It’s like the perfect roommate situation.
Other proven companion combinations:
- Tomatoes + basil: Basil repels aphids and supposedly improves tomato flavor
- Carrots + onions: Onions repel carrot flies
- Lettuce + tall plants: Use lettuce as living mulch under taller crops
- Marigolds + everything: They repel various pests (though effectiveness is debated)
- Cucumbers + nasturtiums: Nasturtiums repel cucumber beetles
I always plant basil liberally throughout my tomato beds, not because I’m convinced it scientifically improves flavor, but because I use tons of both ingredients together anyway. Convenient harvesting is its own reward.
Plants to Keep Separated
Just as some plants help each other, others are terrible neighbors. Beans and onions hate each other. Fennel is basically the antisocial loner of the garden—it inhibits most other plants. Brassicas (cabbage family) and tomatoes don’t play well together.
I learned about incompatible plants the hard way when I interplanted dill and carrots one year. Turns out dill can stunt carrot growth. My carrots were pathetically small that season, and I blamed everything except my planting choices until I finally researched it. Live and learn, right?
Designing Your Companion Planting Layout
Start with your heavy feeders (tomatoes, peppers, squash) as anchor plants, then fill in around them with compatible companions. I use a notebook to sketch my garden layout each season, marking which plants go where and noting good and bad pairings.
Create functional polycultures rather than monoculture rows. Instead of an entire bed of just lettuce, interplant lettuce between slower-growing plants like broccoli or cabbage. The lettuce matures and gets harvested before the larger plants need that space. You’re essentially harvesting two crops from the same square footage in one season.
Wrapping This Up
Here’s the truth: the “perfect” vegetable garden design is the one you’ll actually maintain and harvest from. I’ve seen elaborate, gorgeous gardens that their owners abandoned by July because they were too complicated. I’ve also seen incredibly simple gardens that produced abundantly because they matched the gardener’s lifestyle and commitment level.
Start with one or two of these design ideas that genuinely excite you. Don’t try to implement all ten approaches at once unless you have unlimited time and energy (in which case, can I borrow some?). Maybe you begin with a simple container garden this year, add a raised bed next season, and experiment with companion planting the year after that.
Your garden will evolve as you learn what works in your specific climate, soil, and schedule. Mine looks completely different now than it did five years ago, and it’ll probably look different again in another five years. That’s not failure—that’s growth, both literally and figuratively.
Now get out there and plant something. Your future self standing in the kitchen eating sun-warmed tomatoes straight from the vine will thank you. And if you make mistakes? Welcome to gardening. We’ve all killed plants, misplaced entire crops, and wondered why our cucumbers taste bitter. You learn more from those disasters than from the easy successes anyway.
Happy gardening! :/