10 Inspiring Tiny Garden Design Ideas for Modern Homes
- Garden Design
 Ben
Ben- 0
- 44 minutes read
Look, I get it. You’re staring at your cramped balcony or that awkward corner of your patio, thinking there’s absolutely no way you can create a garden oasis. But here’s the thing—some of the most stunning gardens I’ve seen fit into spaces smaller than my living room couch. Seriously!
Small spaces force you to get creative, and honestly? That’s where the magic happens. I’ve experimented with tiny gardens for years now, and I’m absolutely buzzing to share the ideas that actually work. No theoretical fluff here—just real solutions that transform those “meh” spaces into something you’ll actually want to Instagram. Ready to turn your tiny outdoor (or indoor!) area into something extraordinary? Let’s get into it.
Vertical Wall Garden with Hanging Planters
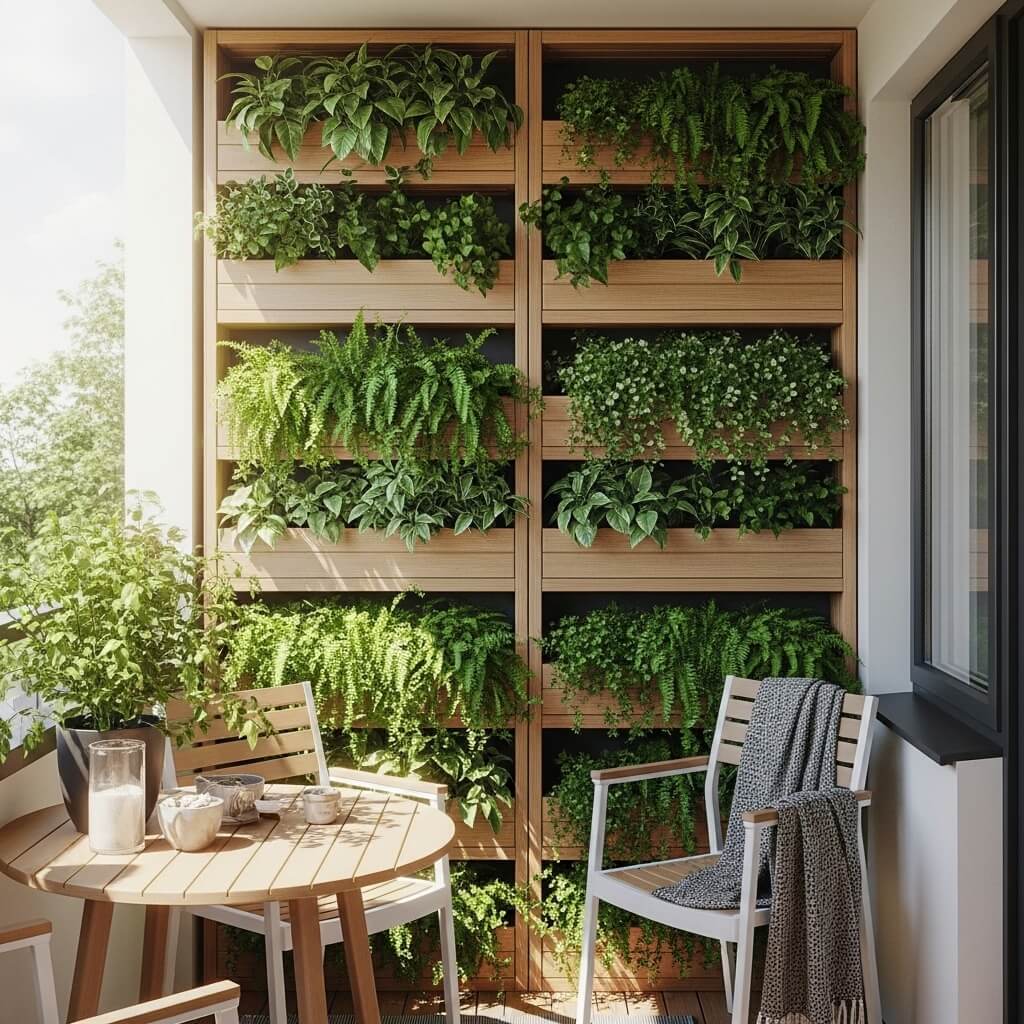
You know what blows my mind? People complain about not having floor space for plants, yet they’ve got entire walls just sitting there doing absolutely nothing. Your walls are prime real estate, my friend!
I installed my first vertical garden three years ago, and it completely changed how I think about gardening. You take your plants upward instead of outward, and suddenly you’ve got this lush, living wall that makes everyone who visits go “Wait, how did you do that?”
Getting Started with Vertical Gardens
Here’s what you’ll need to pull this off:
- Wall-mounted planters or modular pocket systems (I personally love the felt pocket organizers)
- Proper wall anchors (seriously, don’t cheap out here—nobody wants plants crashing down at 3 AM)
- Lightweight potting soil (heavy soil = disaster waiting to happen)
- Plants that thrive vertically like pothos, ferns, succulents, or trailing herbs
The installation takes maybe an afternoon, depending on how handy you are. I’m not exactly Bob the Builder, and I managed just fine with a drill and some YouTube tutorials 🙂
Plant Selection Tips
Choose plants with similar water and light needs for the same wall section. Mixing a cactus with a fern? Yeah, that’s a recipe for killing one or both. I learned this the hard way when I lost three gorgeous string-of-pearls plants because I stuck them next to moisture-loving ferns.
Also, trailing plants work absolute wonders for vertical setups. They cascade down beautifully and create that waterfall effect that photographs like a dream. Pothos, string-of-hearts, and ivy are your best friends here.
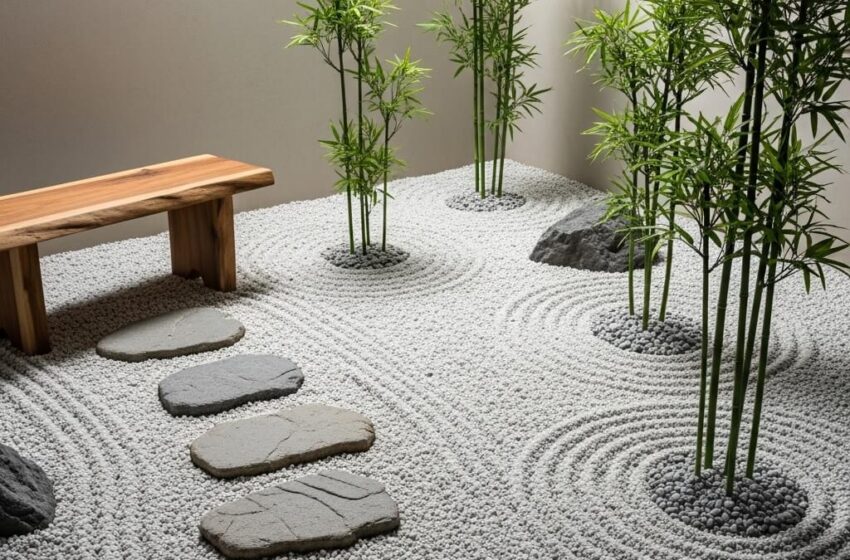
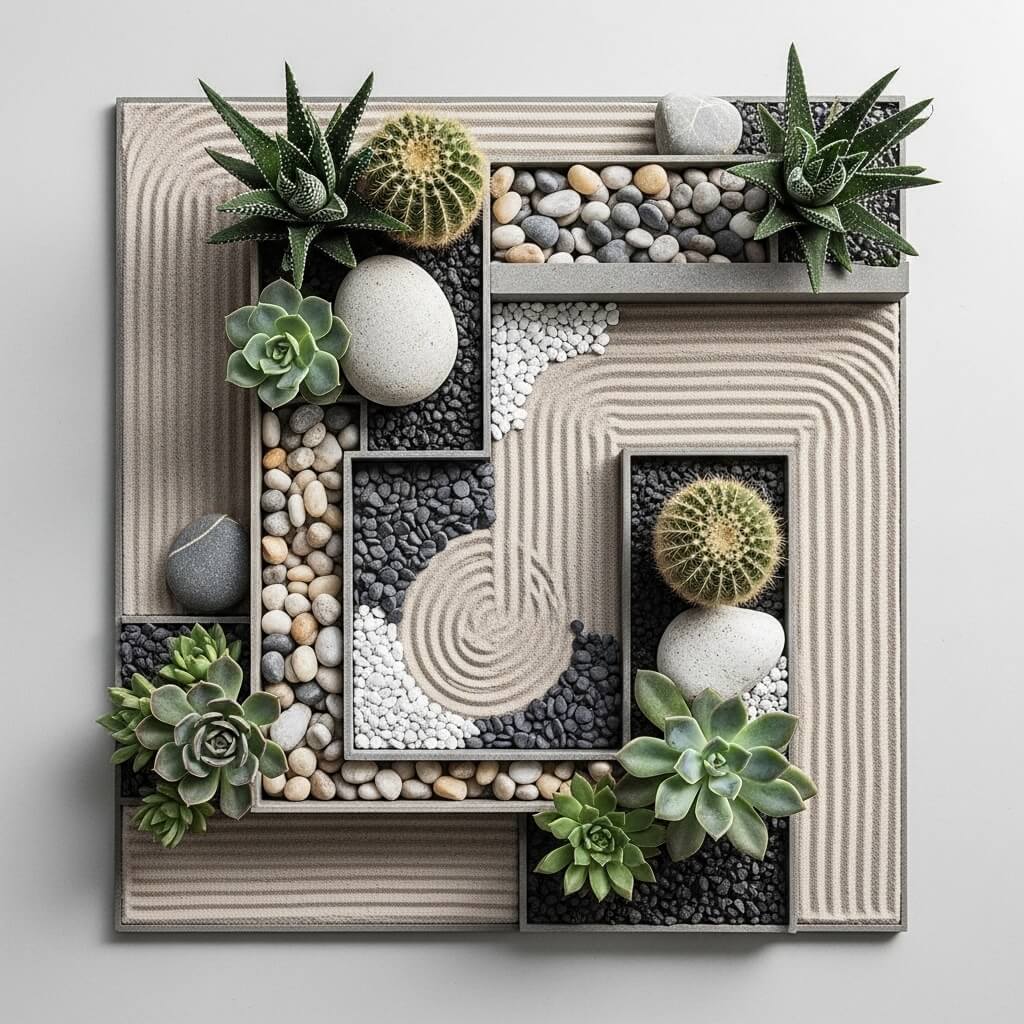
Mini Zen Corner Garden with Pebbles and Bamboo
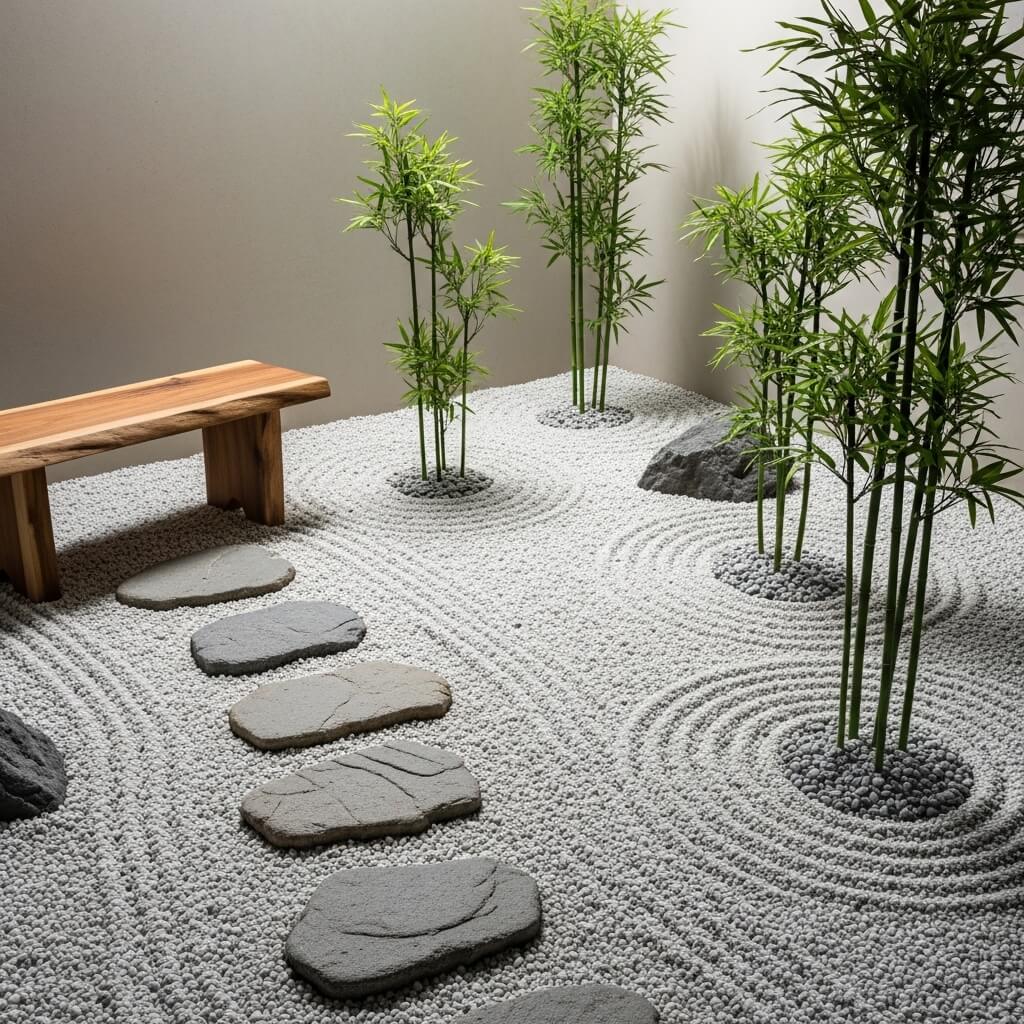
Ever feel like your brain needs a reset button? That’s exactly what a Zen corner garden does for me. I carved out a tiny 2×2 foot spot on my balcony for this, and it’s become my favorite meditation space.
The beauty of Zen gardens lies in their simplicity. You’re not trying to cram fifty plants into one corner. Instead, you’re creating a peaceful, minimalist setup that calms your mind just by looking at it.
Essential Elements for Your Zen Space
Here’s what makes a Zen corner actually Zen:
- Clean white or grey pebbles as your base layer
- One or two bamboo plants in simple containers (lucky bamboo works great)
- A small rake for creating those meditative patterns in sand or fine gravel
- Maybe one sculptural rock or a small Buddha statue if that’s your vibe
- Subtle lighting for evening ambiance
I spent around $50 setting mine up, and that included a bamboo water feature (more on water features later!). The maintenance? Basically zero. You rake the pebbles when you’re stressed, water the bamboo occasionally, and that’s it.
The Therapeutic Benefits
Look, I’m not going to pretend I’m some meditation guru, but spending ten minutes raking patterns into my mini Zen garden genuinely helps when work gets overwhelming. There’s something deeply satisfying about creating those little swirls and waves. It’s like adult coloring books, but cooler.
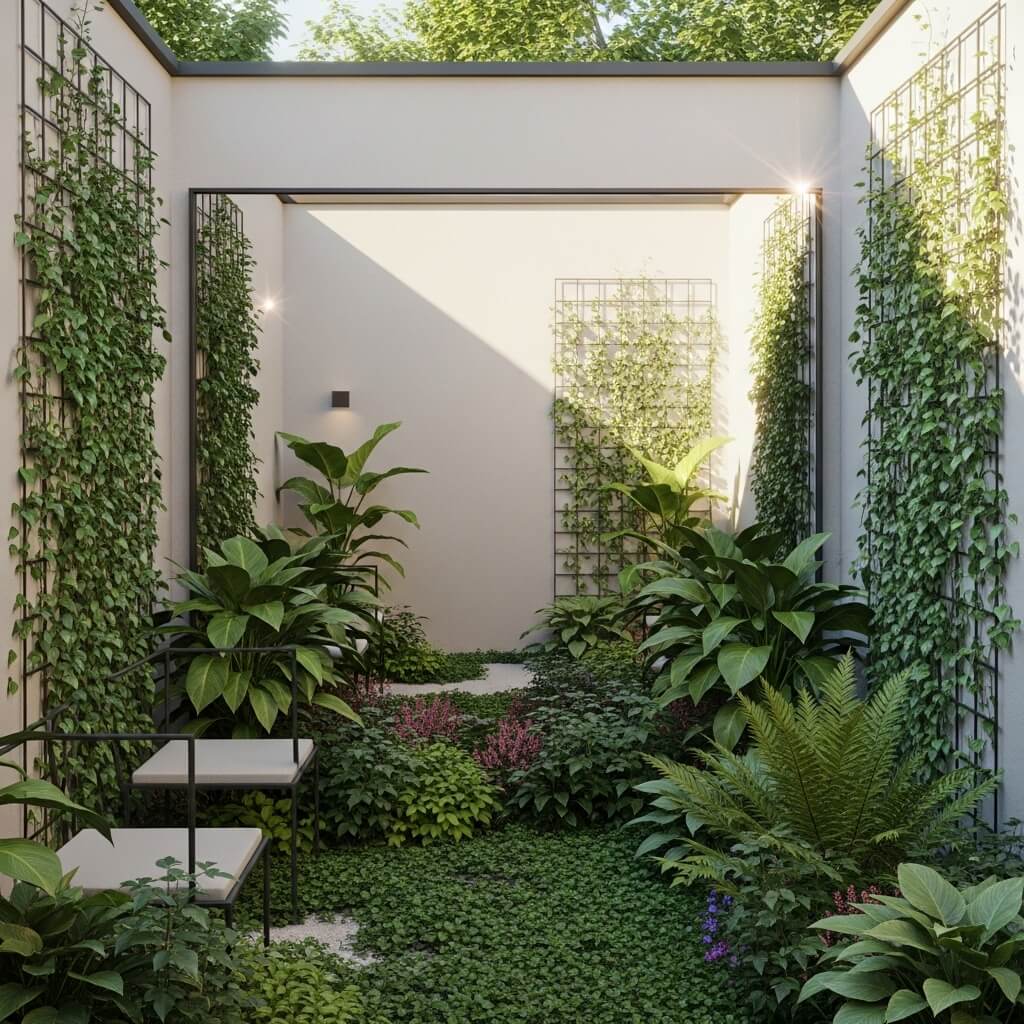
Balcony Jungle Garden with Layered Greenery
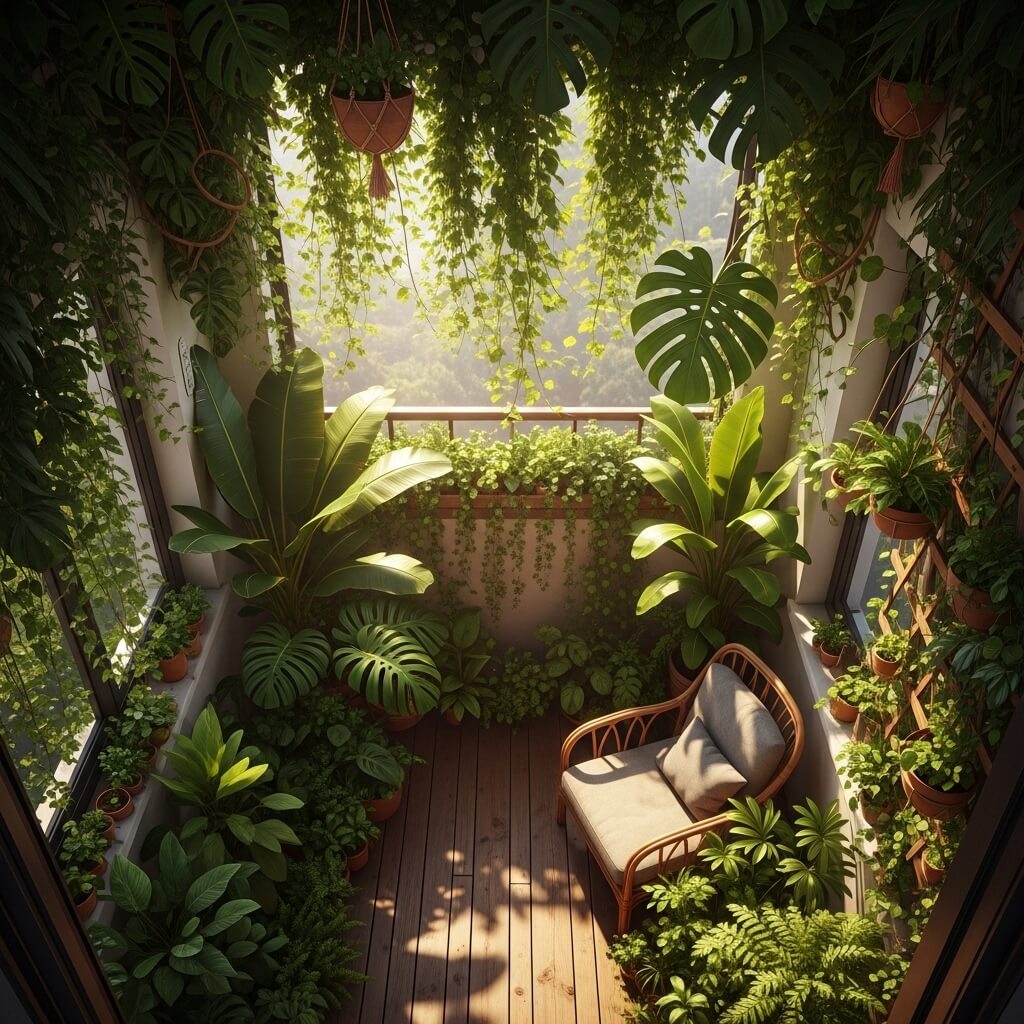
Want to know my absolute favorite transformation project? Turning boring balconies into literal jungles. I’m talking full-on tropical vibes that make you forget you’re in an apartment building.
The secret lies in layering your greenery at different heights. You create depth and dimension that tricks the eye into thinking the space is way bigger than it actually is. Pretty clever, right?
Creating Layers That Work
Think of your balcony in three zones:
Ground Level:
- Large planters with statement plants (I use monstera and bird of paradise)
- Groupings of medium pots for visual interest
- Maybe a small rug to define the space
Mid Level:
- Hanging planters from the ceiling or railing
- Wall-mounted shelves with cascading plants
- Plant stands at varying heights
Upper Level:
- Tall trellises with climbing vines
- Suspended macramé hangers
- Wall-mounted brackets with trailing plants
I currently have about 30 plants on my 6×4 foot balcony, and it doesn’t feel cramped at all. The layering makes everything flow together instead of competing for attention.
Plant Choices for Jungle Vibes
You want big, bold leaves that scream “tropical paradise.” Here are my go-to plants:
- Monstera deliciosa (those Instagram-famous split leaves)
- Ferns of literally any variety
- Philodendrons for that lush cascading effect
- Snake plants for vertical interest
- Peace lilies if you’ve got some shade
FYI, you don’t need full sun for a jungle garden. Most tropical plants actually prefer partial shade, which makes this perfect for balconies that don’t get blasted with direct sunlight all day.
Also Read: 10 Smart Garden Design Layout Ideas for Easy Planning
Small Raised Bed Kitchen Garden Setup
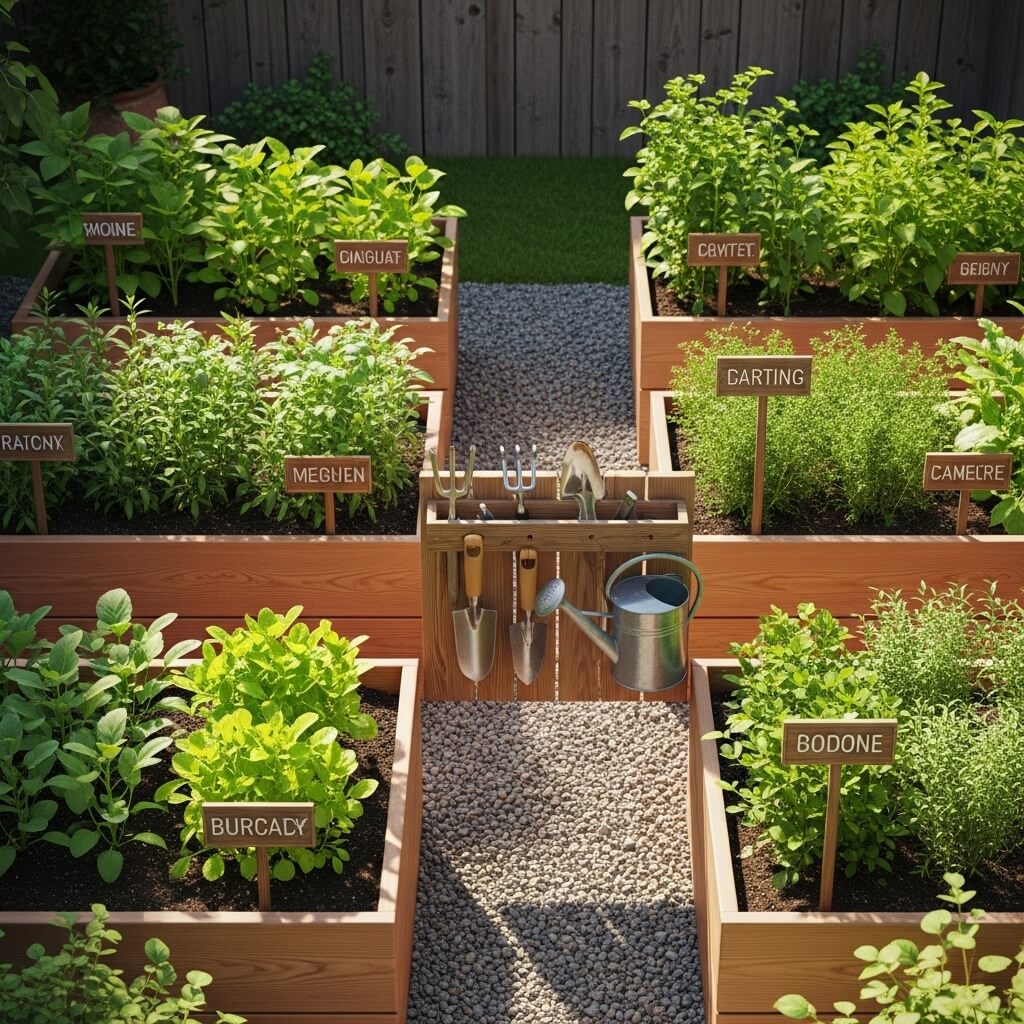
Let me be real with you—nothing beats the satisfaction of cooking with herbs and veggies you grew yourself. Even if that “garden” is just a small raised bed on your patio.
I built my first raised bed from leftover fence boards (seriously, it cost me like $20), and I’ve been harvesting fresh produce ever since. We’re not talking about feeding your entire family here, but you’ll definitely have enough for salads, garnishes, and bragging rights.
Building Your Raised Bed
You’ve got options here:
DIY Route:
- Grab some untreated wood boards
- Create a simple rectangular frame (2×4 feet works great for small spaces)
- Line the bottom with landscape fabric
- Fill with quality potting mix and compost
Pre-Made Route:
- Buy a ready-made raised bed kit
- Assemble according to instructions
- Done in like 30 minutes
I’ve done both, and honestly? The pre-made kits are worth it if you’re not into woodworking. They look cleaner and last longer than my amateur carpentry attempts.
What to Grow in Limited Space
Best high-yield plants for small beds:
- Lettuce and salad greens (harvest in weeks, not months!)
- Cherry tomatoes (go vertical with a trellis)
- Herbs like basil, cilantro, and parsley
- Radishes (fastest vegetable ever—ready in 30 days)
- Bush beans instead of pole beans
Avoid these space hogs:
- Pumpkins or winter squash (unless you want them taking over your entire patio)
- Corn (not worth it for the yield)
- Large cabbage varieties
The trick is succession planting. You harvest lettuce, immediately plant new seeds in that spot, and keep the production going. I’ve gotten three lettuce harvests from the same 2-square-foot area in one growing season.
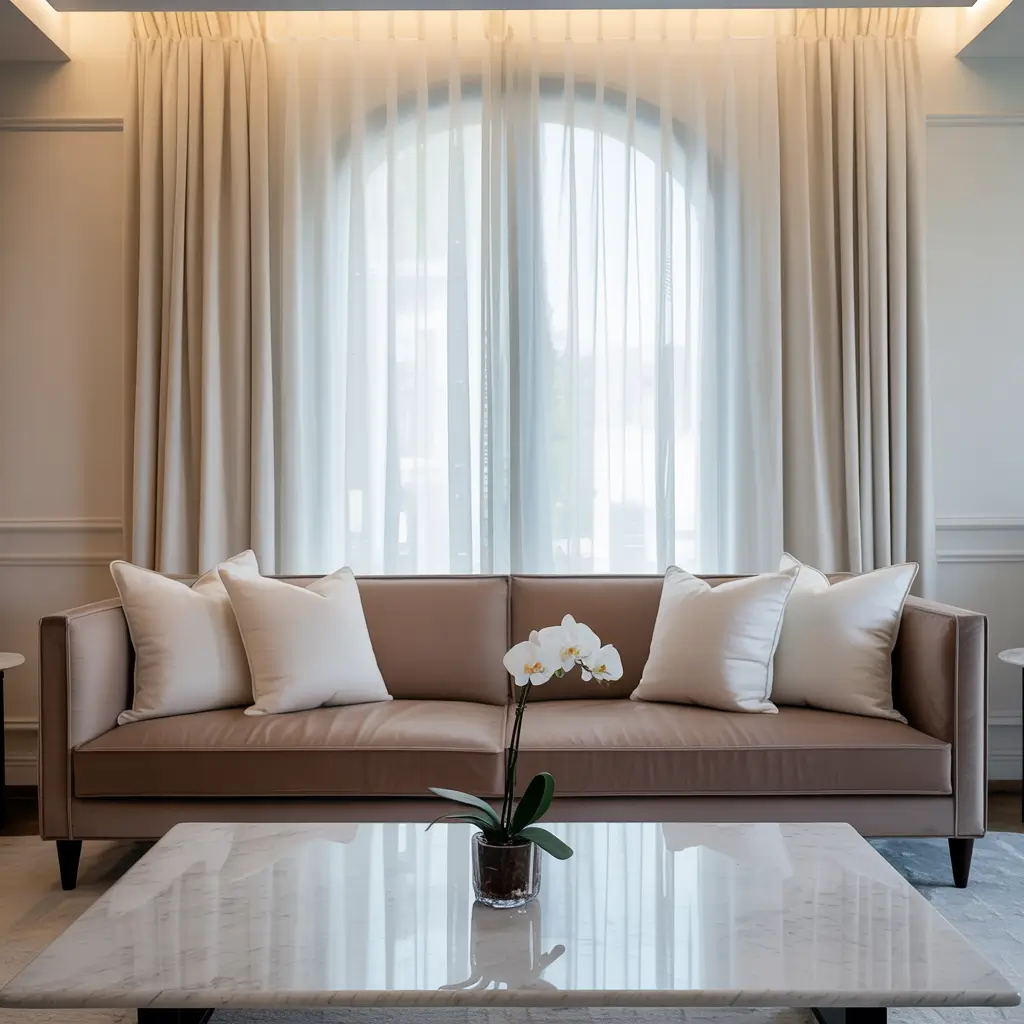
Fairy Light Cozy Patio Garden Nook
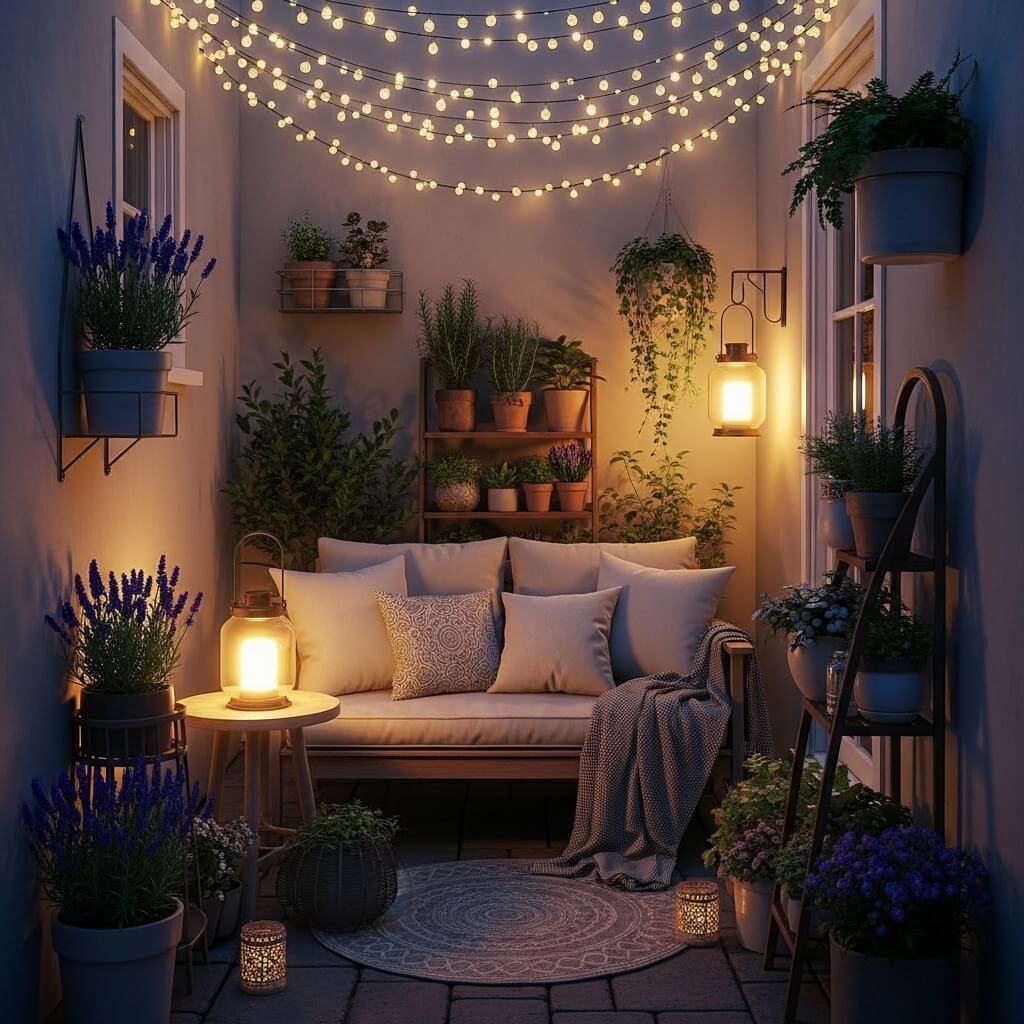
Okay, confession time: I’m absolutely obsessed with fairy lights. Maybe it’s basic, but I don’t care—they transform any outdoor space into pure magic after sunset.
Creating a cozy patio nook combines comfortable seating, strategic plant placement, and (obviously) gorgeous lighting. This is where you’ll actually want to spend your evenings with a book and a glass of wine.
Setting the Scene
Here’s my formula for the perfect cozy nook:
Seating:
- A comfortable chair or small bench (I use a weather-resistant papasan chair)
- Outdoor cushions in colors that complement your plants
- Maybe a small side table for your drinks
Plants:
- Fragrant options like jasmine, lavender, or night-blooming flowers
- Potted plants clustered around your seating area
- One larger statement plant as a backdrop
Lighting:
- Warm white fairy lights strung overhead or around railings
- Solar-powered stake lights among your plants
- Maybe a lantern or two for that extra ambiance
I spent one Saturday afternoon setting this up, and now it’s genuinely my favorite spot in my entire home. IMO, the lighting makes or breaks this setup—go warm white, not cool white, unless you want your cozy nook feeling like a hospital waiting room.
Creating Privacy
If you’re on a balcony or visible patio, you’ll want some screening. I use a combination of tall potted bamboo and a lattice panel with climbing jasmine. Gives you privacy without feeling boxed in, and the jasmine smells absolutely incredible on summer evenings.
Tiered Pot Stand Garden Arrangement
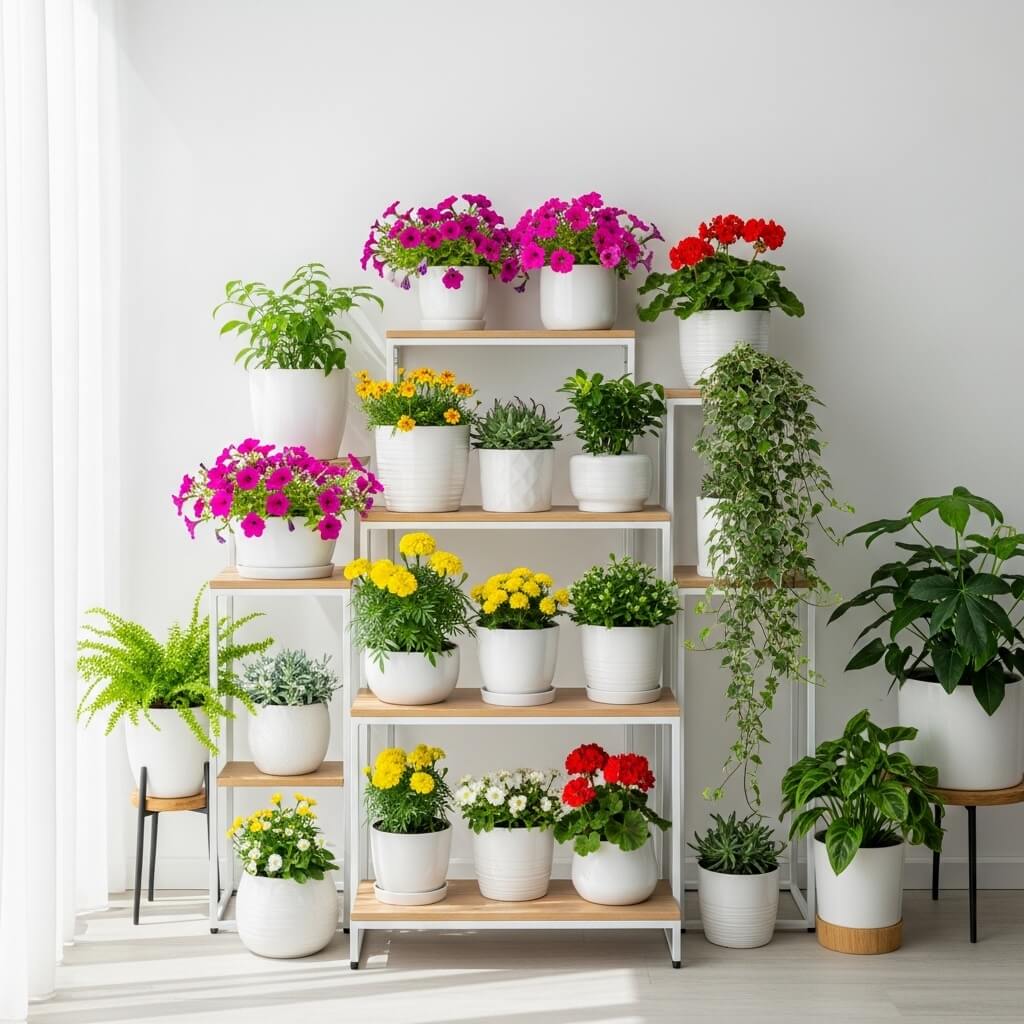
Limited floor space? Go vertical with tiered pot stands! This is probably the easiest hack for small-space gardening, and you can find these stands everywhere from garden centers to IKEA.
I use a three-tier corner stand on my patio, and it holds nine pots in the space that would normally fit maybe three. The math just makes sense, you know?
Choosing the Right Stand
Look for these features:
- Weather-resistant materials (metal, treated wood, or resin)
- Stable base (lightweight stands blow over in wind, and that’s a disaster)
- Adequate drainage (water needs to drip through without creating puddles)
- Right size for your space (measure before buying—I learned this after ordering a stand that definitely did not fit)
You can find decent stands from $30 to $150, depending on size and material. I’ve got a powder-coated metal one that’s survived three years of weather and still looks great.
Arranging Plants by Height and Needs
Here’s where people mess up: they put plants randomly without thinking about their needs. Sun-loving plants go on top tiers where they get maximum light. Shade-tolerant or smaller plants work better on lower tiers where they’re partially shaded by upper plants.
I arrange mine like this:
- Top tier: Herbs that need full sun (basil, thyme, oregano)
- Middle tier: Flowering plants with moderate needs (petunias, marigolds)
- Bottom tier: Shade-tolerant plants or trailing varieties (ivy, begonias)
This creates a gorgeous cascading effect while keeping everyone happy with their light requirements.
Also Read: 10 Luxury Zen Garden Design Ideas for Dreamy Calm Landscapes
Minimalist Modern Succulent Rock Garden
If you’re into that sleek, modern aesthetic (or you’re kind of forgetful about watering—no judgment), a succulent rock garden is your answer. These babies are practically indestructible, and they look ridiculously chic.
I set up a long, shallow planter on my window ledge with various succulents and decorative rocks, and people constantly ask where I bought it. When I tell them I threw it together in 20 minutes, they never believe me.
Creating Your Succulent Garden
What you’ll need:
- Shallow container with drainage holes (super important—succulents hate wet feet)
- Cactus/succulent soil mix (regular potting soil holds too much moisture)
- Variety of succulent plants in different shapes, sizes, and colors
- Decorative rocks or pebbles (white, black, or mixed colors)
- Optional: small decorative elements like driftwood or crystals
The assembly process is stupid simple. Add soil to your container, arrange your succulents (leaving space for growth), fill gaps with decorative rocks, and you’re done. Seriously, that’s it.
Succulent Care Basics
People kill succulents by overwatering, not underwatering. I water mine maybe once every 2-3 weeks, and that’s in summer. In winter? Once a month, tops.
Pro tips for succulent success:
- Let soil dry completely between waterings
- Provide bright, indirect light (direct sun can scorch some varieties)
- Don’t mist them (they’re not tropical plants!)
- Rotate the container occasionally for even growth
My succulent rock garden has survived two vacations where I forgot to arrange plant-sitting. These plants truly don’t care if you neglect them a little 🙂
Mirror Wall Illusion Small Garden Design
Want to know the sneakiest trick in small garden design? Mirrors. They literally double the visual space of your garden while adding this gorgeous, reflective quality that makes everything feel more open.
I mounted a large outdoor mirror on my garden wall last year, and the transformation was wild. My tiny 8×6 foot space suddenly felt twice as big, and the way it reflects the plants creates this almost kaleidoscope effect.
Choosing and Installing Garden Mirrors
What to look for:
- Outdoor-rated mirrors (interior mirrors deteriorate quickly outside)
- Acrylic or polycarbonate mirrors for safety (real glass can be dangerous)
- Weatherproof frames (I like the vintage window-style frames)
- Appropriate size for your wall (bigger is usually better for the illusion)
Hang your mirror strategically to reflect the most attractive part of your garden. I positioned mine to reflect my flowering plants and hanging baskets, essentially doubling their visual impact. Pretty genius, right?
Creating Depth with Reflection
The placement makes all the difference. Angle your mirror slightly downward to reflect plants rather than sky (unless you’ve got a boring fence view you’re trying to mask). I experimented with different positions before permanently mounting mine—totally recommend doing a test run first.
You can also create a “window” effect by surrounding your mirror with climbing vines or mounting it within a trellis. This makes it look like you’re peeking into another secret garden section.
Corner Water Fountain Peace Garden Setup
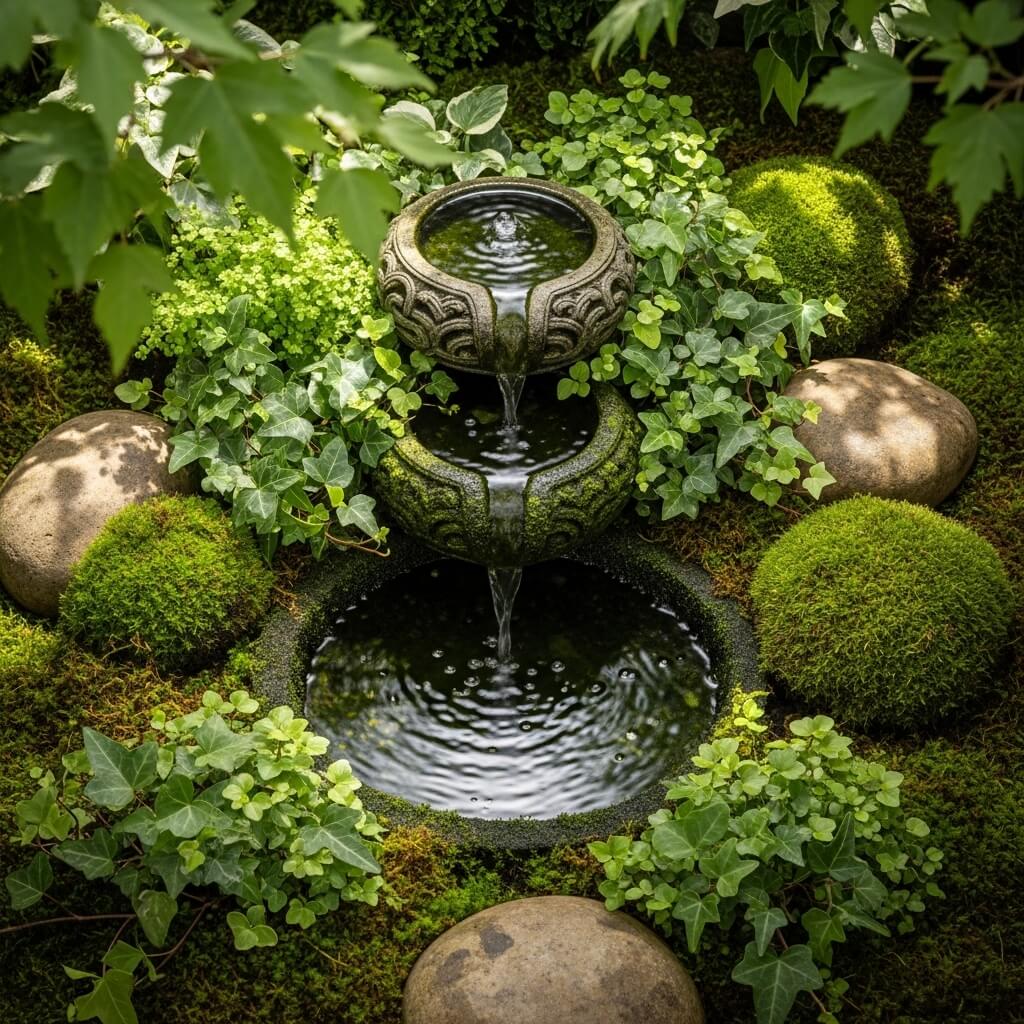
There’s something magical about the sound of trickling water. It drowns out traffic noise, creates instant ambiance, and turns any corner into a peaceful retreat. Plus, the sound attracts birds, which is honestly just a bonus entertainment feature.
I added a small corner fountain to my garden two years ago, and I’m slightly obsessed with it. Like, I might be that person who sits outside specifically to listen to fountain sounds when I’m stressed.
Selecting Your Fountain
Types that work great in small spaces:
- Wall-mounted fountains (save floor space entirely)
- Corner cascading fountains (designed specifically for corner placement)
- Tabletop fountains (if you’ve got extremely limited space)
- Self-contained bowl fountains (no plumbing needed)
I use a self-contained corner fountain that runs on a small electric pump. Setup took literally 15 minutes—you fill it with water, plug it in, and you’re done. Mine cost around $120, but you can find smaller options for $40-60.
Surrounding Your Fountain
Make your fountain the centerpiece of a dedicated peace corner:
- Shade-loving plants around the base (ferns, hostas, peace lilies)
- Smooth river rocks or pebbles around the perimeter
- Maybe a small bench or chair positioned to enjoy the view
- Subtle solar lights that illuminate the fountain at night
The plants you choose should appreciate the extra humidity from the fountain. I’ve got ferns and a spider plant thriving next to mine because they love the moisture in the air.
Maintenance Reality Check
You’ll need to refill the water regularly (I top mine off weekly) and clean the pump every few months to prevent algae buildup. It’s not difficult, just something to remember. I add a bit of fountain cleaner to the water monthly, and that keeps things running smoothly.
Also Read: 10 Elegant Mediterranean Garden Design Ideas for Luxury Homes
DIY Wooden Crate Vertical Herb Garden
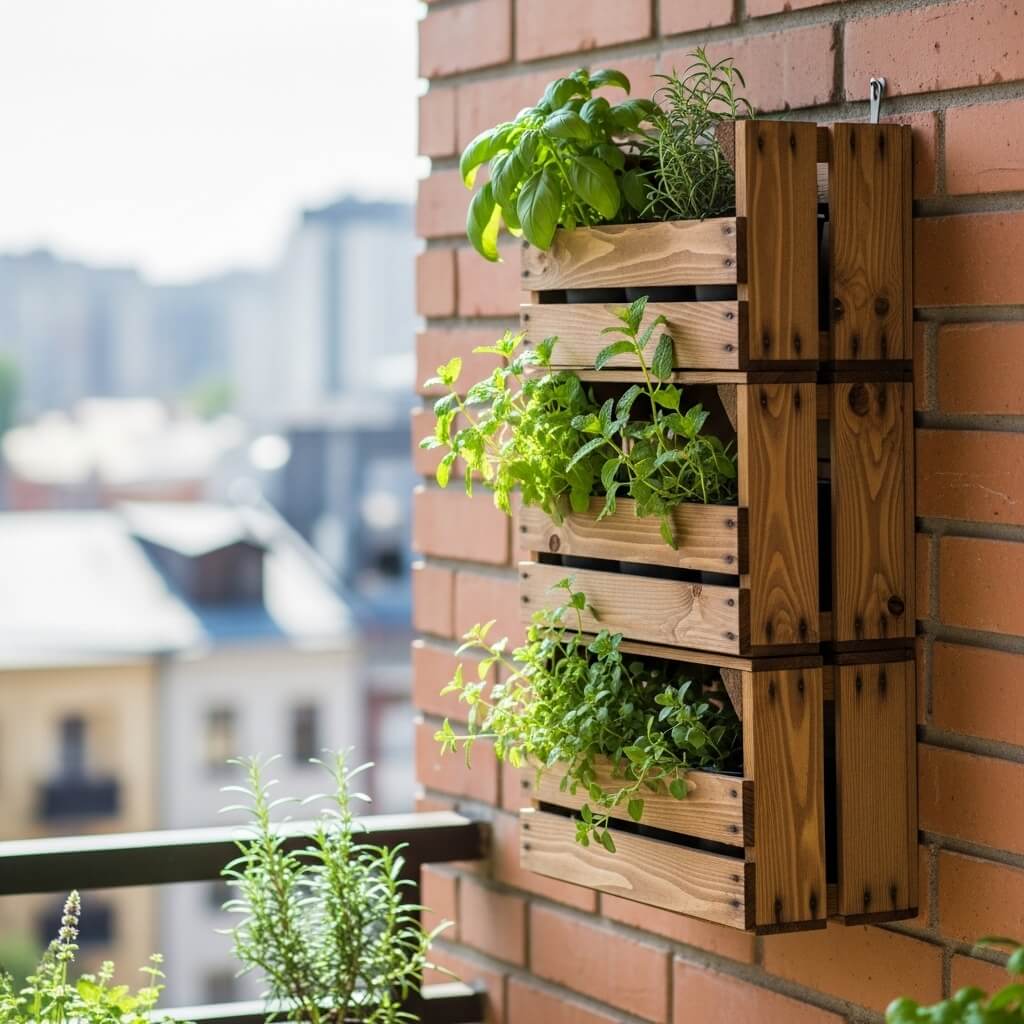
Last but definitely not least, let’s talk about the project that started my entire tiny garden obsession: the wooden crate herb garden. This is perfect for renters because you can take it with you, and it’s so cheap to make that you’ll feel like you’re getting away with something.
I built my first one from discarded wooden crates I found behind a grocery store (they were giving them away for free). A couple hours of work, and I had a vertical herb garden that looks like it came from a trendy garden shop.
Building Your Crate Garden
What you’ll need:
- 3-5 wooden crates (find them at craft stores, online, or ask grocery stores)
- Wood stain or paint (optional, for aesthetics)
- Landscape fabric or burlap to line the crates
- Screws or brackets to secure crates together
- Potting soil and herbs
Assembly steps:
- Clean and sand your crates if needed
- Stain or paint them (I used a weathered grey stain)
- Line each crate with landscape fabric (staple it in place)
- Stack and secure crates vertically against a wall
- Fill with soil and plant your herbs
The whole project cost me maybe $35, and that included buying fancy organic herb seedlings. If you score free crates, you’re looking at even less.
Best Herbs for Vertical Crate Gardens
Top performers in my crate garden:
- Basil (I grow three varieties because I’m obsessed)
- Mint (contained in the crate so it doesn’t take over your yard)
- Thyme (cascades beautifully over crate edges)
- Parsley (curly or flat-leaf, both work great)
- Oregano (drought-tolerant and productive)
- Chives (basically impossible to kill)
I harvest herbs constantly from this setup—enough to supply my cooking and give away to friends. The vertical arrangement means you can reach everything easily, and the herbs get good air circulation which prevents disease.
Positioning for Success
Place your crate garden where it gets at least 6 hours of sun daily. Most herbs are Mediterranean plants that love sunshine. I mounted mine against a south-facing wall, and the herbs are ridiculously happy there.
You’ll need to water more frequently than in-ground plants since the soil volume is smaller. I check mine daily during summer and water when the top inch of soil feels dry. Takes maybe two minutes with a watering can.
Wrapping This Up
So there you have it—ten tiny garden ideas that actually work in real, limited spaces. I’ve personally tried every single one of these (my patio is basically a testing ground at this point), and they’ve all delivered results.
The beauty of small-space gardening is that you’re forced to be intentional. You can’t just throw plants everywhere and hope for the best. You plan, you maximize vertical space, you choose plants carefully, and you create something genuinely special in the process.
My final advice? Start with one idea that excites you most. Don’t try to implement all ten at once unless you want to overwhelm yourself into giving up. I started with the wooden crate herb garden, fell in love with the process, and gradually added the other elements over time.
Your tiny space has way more potential than you think. Whether you’ve got a cramped balcony, a small patio corner, or even just a sunny wall inside your apartment, you can create a garden that brings you joy every single day.
Now stop reading and go measure that space you’ve been eyeing. Your tiny garden transformation starts today! ✨