10 Creative Floating Vanity Bathroom Ideas for Luxury Bathrooms
- Bathroom Design
 Ben
Ben- 0
- 33 minutes read
So you’re tired of looking at those stubby vanity legs collecting dust bunnies and making your bathroom feel cramped?
Welcome to the floating vanity club where bathrooms look bigger, cleaning gets easier, and suddenly you feel like you’re living in a luxury hotel instead of a builder-grade box.
I made the switch four years ago and literally cannot imagine going back to traditional vanities (the thought of cleaning around those legs again makes me shudder).
Floating vanities are basically the magic trick of bathroom design – they create the illusion of more space by showing off your floor, make small bathrooms feel significantly larger, and add that contemporary edge that screams “I know what I’m doing with design.”
After installing floating vanities in three bathrooms and helping friends plan theirs, I’ve learned what actually works versus what just looks good in photos.
These ten floating vanity ideas cover everything from tiny powder rooms to spacious master baths, budget DIY projects to luxury marble installations.
Whether you’re renovating or just dreaming, one of these ideas will make you want to rip out your floor-standing vanity immediately.
Minimalist Floating Vanity Bathroom Ideas
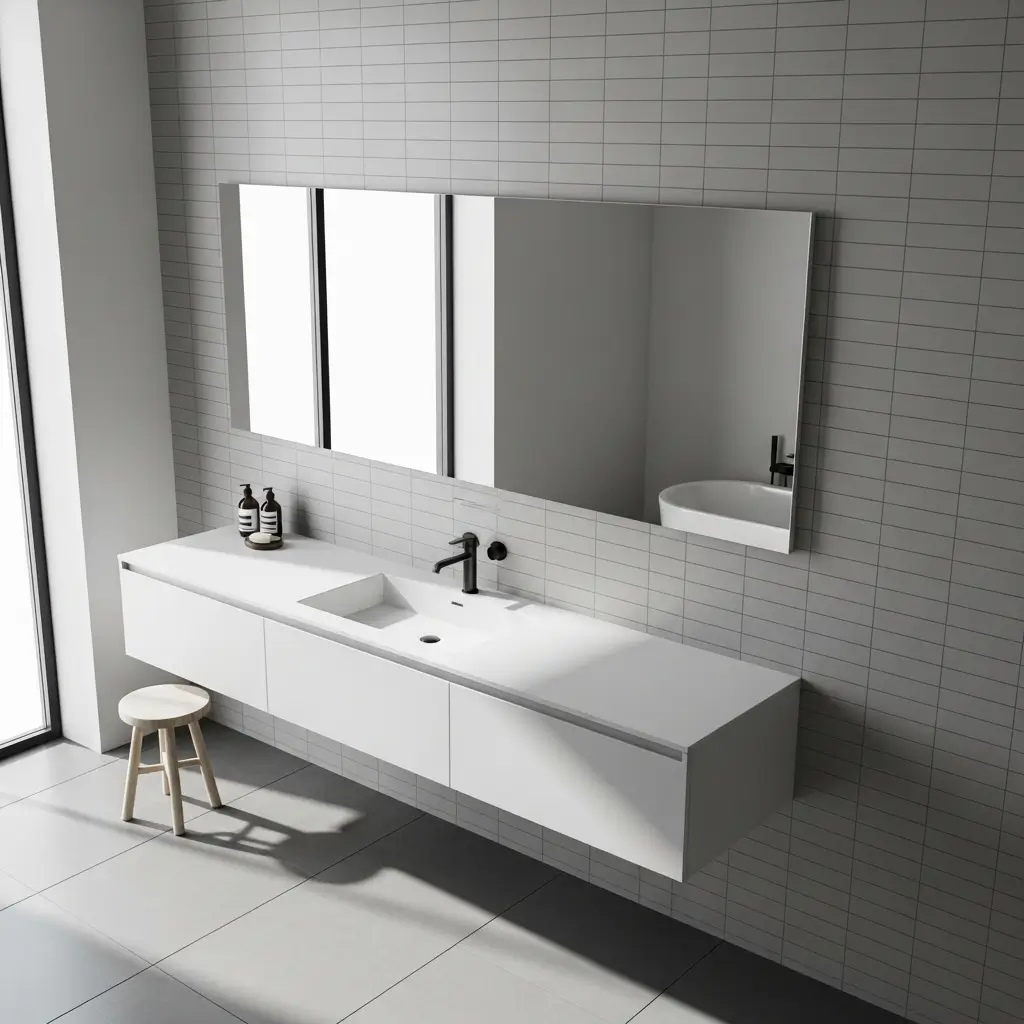
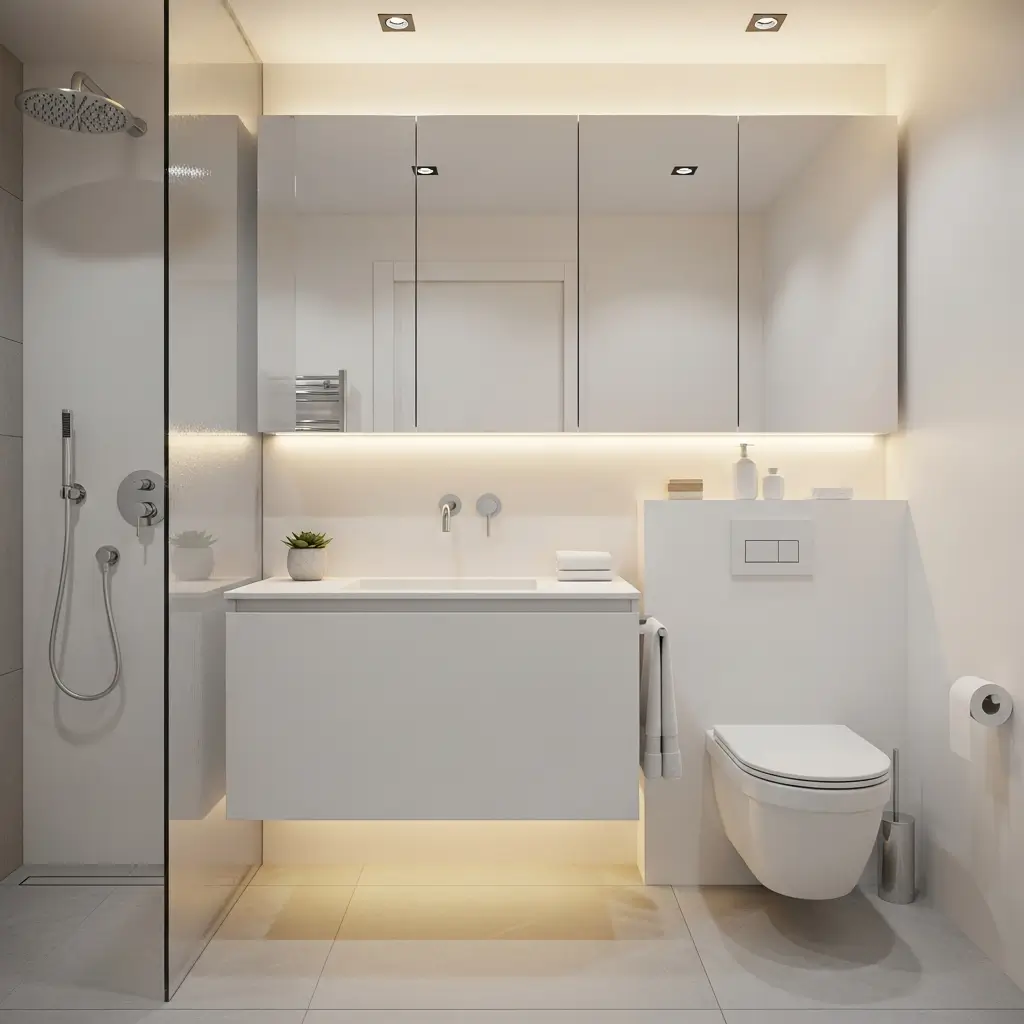
The minimalist floating vanity is pure architectural poetry – clean lines, zero clutter, and that gorgeous shadow gap between vanity and floor that makes everything feel weightless. This is floating vanity design at its most refined.
I installed a minimalist white floating vanity in my powder room, and the transformation was ridiculous. The seamless drawer fronts with push-to-open mechanisms mean absolutely no hardware to interrupt those clean lines. Paired with an integrated sink and wall-mounted faucet, the whole thing looks like it materialized from a design magazine.
Minimalist floating vanities eliminate every unnecessary element. We’re talking flat-panel fronts, hidden storage, and monochromatic colors. Materials lean toward high-gloss acrylics, matte laminates, or sleek wood veneers in whites, grays, or blacks.
Achieving Minimalist Floating Perfection
Essential elements for minimalist success:
- Choose handleless designs – push-to-open or integrated edge pulls
- Keep the profile slim – 16-18 inches deep maximum
- Mount at precise height – typically 30-34 inches for optimal proportions
- Add under-vanity lighting – LED strips create that floating effect
- Eliminate visible plumbing – wall-mounted everything
The beauty of minimalist floating vanities is their timelessness. While other styles date themselves, this approach stays relevant because it’s about pure form rather than trendy details.
Small Bathroom Floating Vanity Solutions
Small bathrooms need floating vanities like fish need water. The visible floor space genuinely tricks your brain into perceiving more room, making tiny bathrooms feel significantly less claustrophobic. It’s basically optical illusion furniture.
My first apartment bathroom was 35 square feet of sadness until I installed a 24-inch floating vanity. Suddenly I could see actual floor, the room felt twice as large, and my robot vacuum could finally clean the entire space. The visual breathing room changed everything about how that bathroom felt.
Floating vanities work magic in small spaces because they eliminate that heavy, furniture-blocking-the-floor feeling. Even a small floating vanity creates airiness that traditional vanities can’t match.
Small Space Floating Strategies
Maximizing tiny bathrooms with floating vanities:
- Choose light colors – white or pale gray reflects maximum light
- Go shallow – 14-16 inch depths work for tight spaces
- Mount higher – 34-36 inches creates more visible floor
- Add a large mirror – amplifies the spacious feeling
- Include wall-mounted faucets – saves precious counter depth
FYI, the smaller your bathroom, the more dramatic the floating vanity impact. This is one design element that actually works better in challenging spaces.
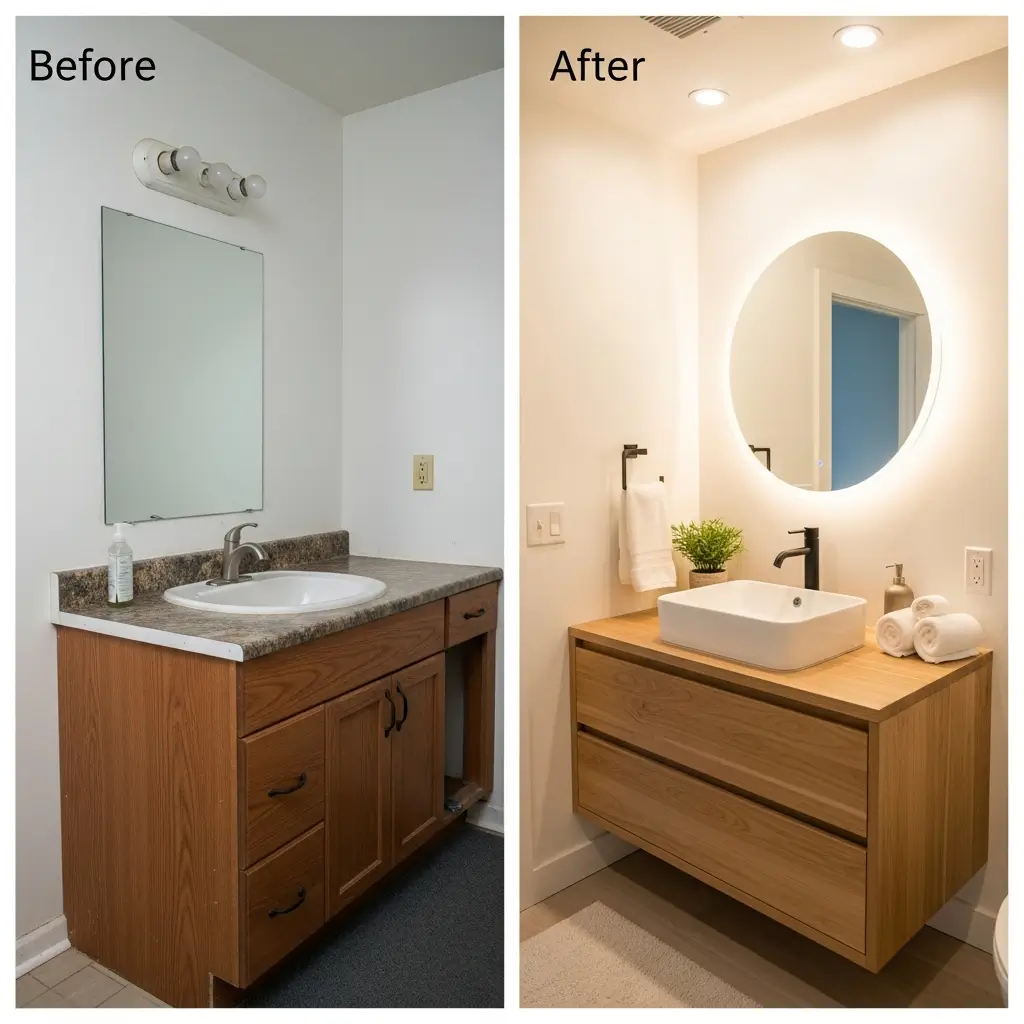
Modern Wood Floating Vanity Designs
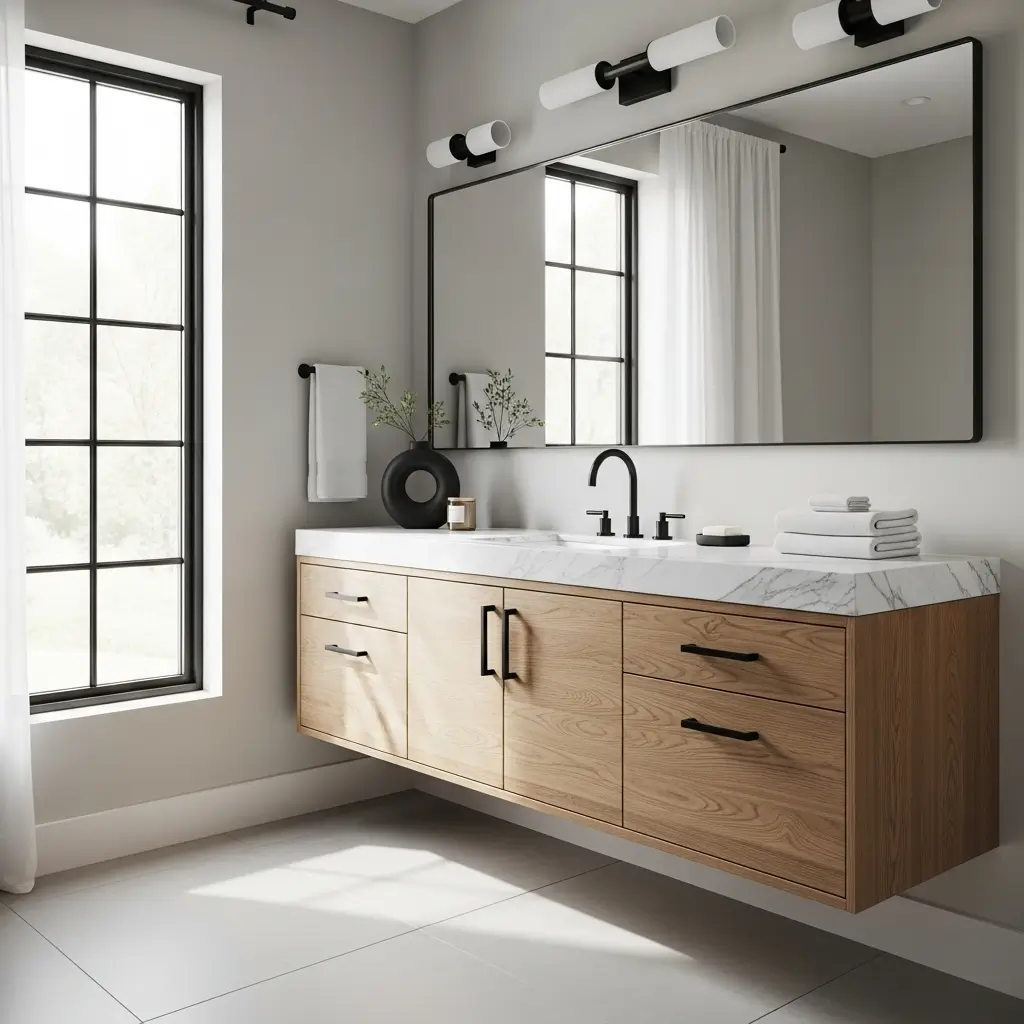
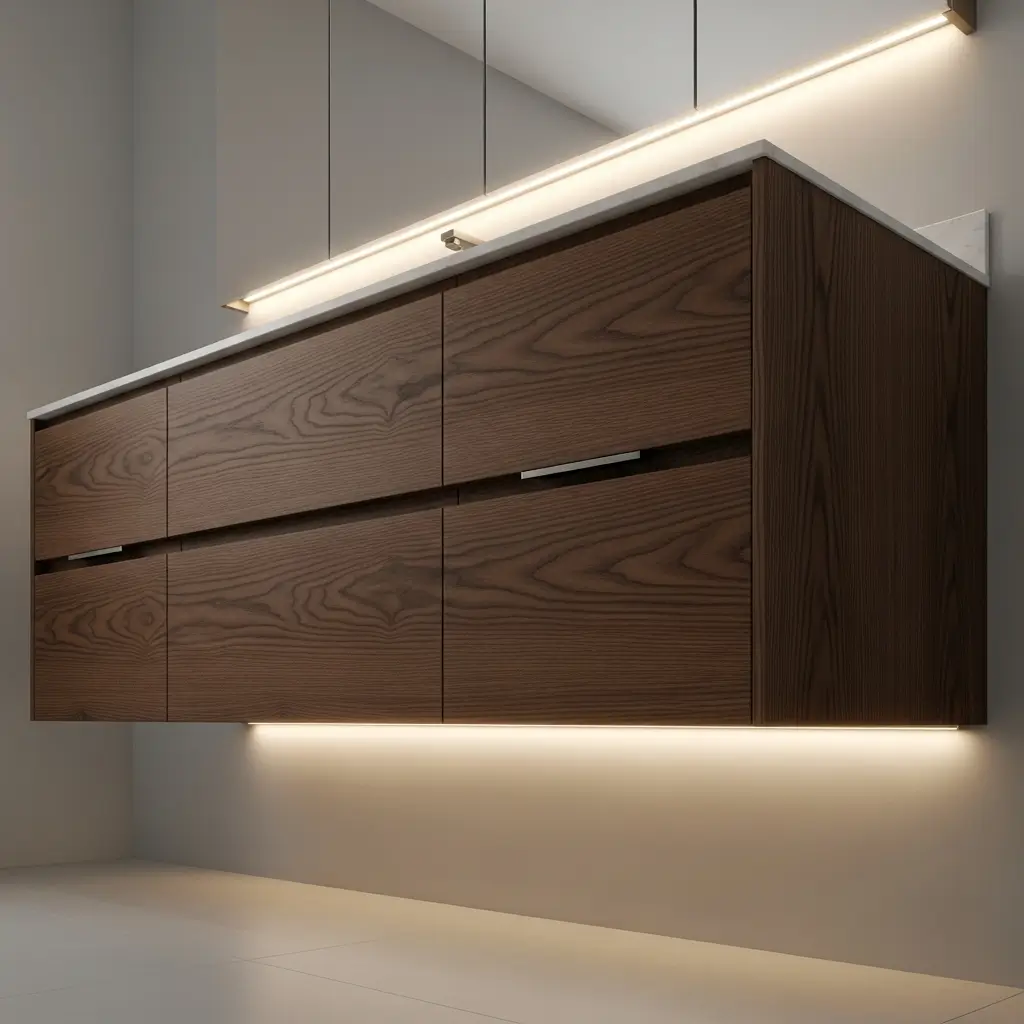
Wood floating vanities bring warmth to contemporary bathrooms without sacrificing that sleek, modern aesthetic. The combination of natural material with wall-mounted design creates this perfect balance of organic and architectural.
I built a walnut floating vanity for our master bath, and it’s genuinely my favorite thing in the house. The rich wood grain against white walls provides visual warmth while the floating design keeps everything feeling light and modern. Everyone who visits asks where we bought it (cue smug “I made it” response).
Modern wood floating vanities showcase natural grain patterns rather than hiding them. Popular choices include walnut, white oak, and teak – woods with character and water-resistant properties. Finishes stay natural or lightly stained to emphasize the wood’s inherent beauty.
Wood Floating Vanity Considerations
Making wood work in humid bathrooms:
- Choose water-resistant species – teak, white oak, walnut
- Seal thoroughly – multiple coats of marine-grade finish
- Ensure proper ventilation – wood hates constant humidity
- Mount with heavy-duty brackets – wood is heavier than manufactured materials
- Plan for expansion – wood moves with humidity changes
The investment in real wood pays off through durability and timeless appeal. Twenty years from now, that wood vanity will still look current while laminate trends come and go.
Also Read: 10 Trendy Blue Bathroom Vanity Ideas and Elegant Details
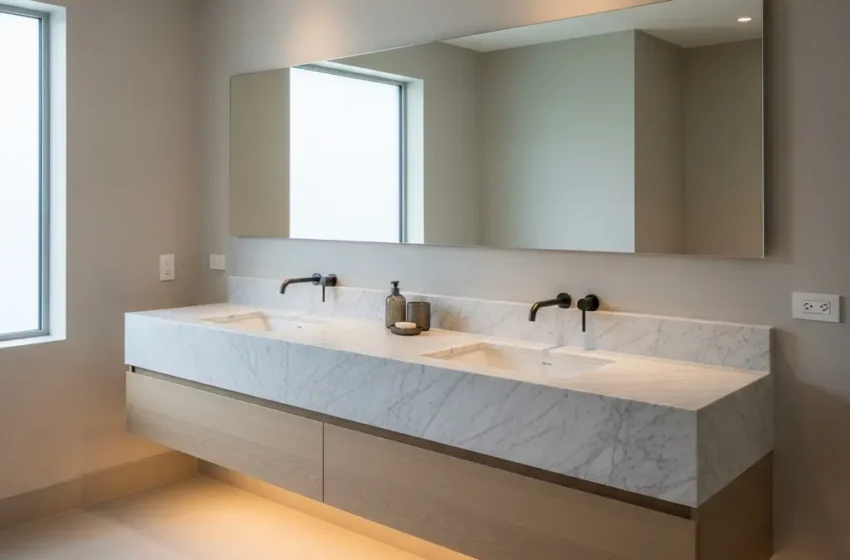
Luxury Marble Floating Vanity Inspiration
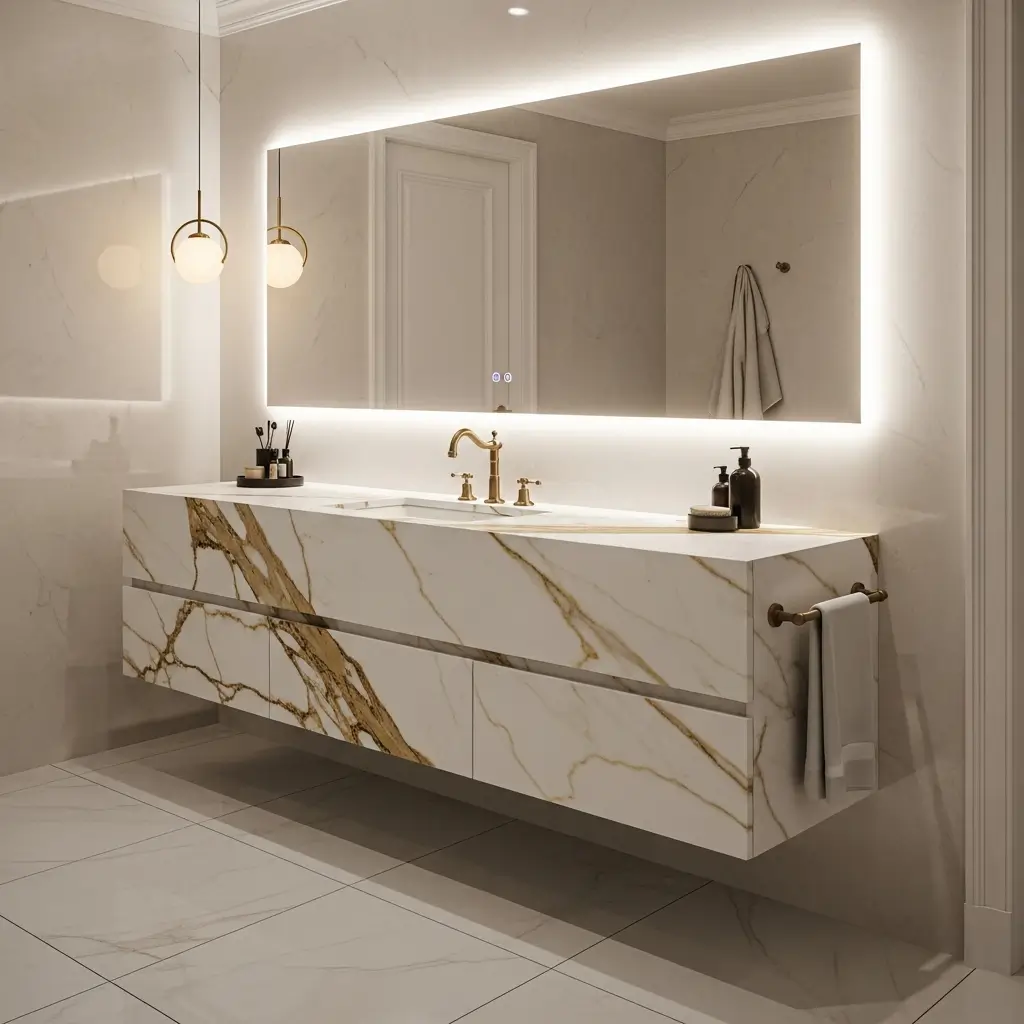
Combining a floating vanity with marble countertop creates this incredible juxtaposition – the weightless vanity paired with substantial natural stone. It’s contemporary design meets timeless luxury.
My friend’s bathroom features a floating vanity with Calacatta marble top, and walking in there feels like entering a spa. The dramatic white veining against the floating base creates a focal point that makes the entire bathroom feel expensive. The floating design actually makes the marble look even more impressive because you see the full slab edge.
Luxury marble floating vanities work because the wall-mounted design showcases the countertop more dramatically than traditional installations. You notice the beautiful stone first, making it the star of the show.
Marble Floating Vanity Execution
Creating high-end marble installations:
- Invest in quality marble – this is where you splurge
- Consider waterfall edges – showcases the marble beautifully
- Ensure robust wall support – marble is HEAVY
- Plan lighting carefully – marble deserves dramatic illumination
- Hire professional installers – stone and floating combo needs experts
The combination of floating vanity and marble countertop might be expensive, but it creates a luxury bathroom aesthetic that’s hard to match with any other approach.
DIY Floating Vanity Bathroom Makeovers
Building your own floating vanity is totally doable and saves serious money while giving you complete customization. Plus, the bragging rights are incredible when guests compliment your “custom” vanity.
I built my first floating vanity from a single sheet of plywood, some edge banding, and hidden wall brackets. Total cost: $180. Comparable store-bought version: $800+. The satisfaction of creating something perfect for my space beat any off-the-shelf option.
DIY floating vanities work best when you keep the design simple. Basic rectangular shapes, straightforward mounting, and minimal complicated joinery make the project manageable for intermediate DIYers.
DIY Floating Vanity Success
Essential tips for building your own:
- Locate studs accurately – your vanity depends on solid mounting
- Use quality plywood – cabinet-grade or better
- Invest in proper mounting hardware – this isn’t where you save money
- Plan plumbing carefully – measure three times, cut once
- Finish properly – bathrooms demand moisture-resistant finishes
The DIY approach lets you create exactly what you want in precisely the size and style you need. Custom without the custom price tag 🙂
Colorful Floating Vanity Accent Ideas
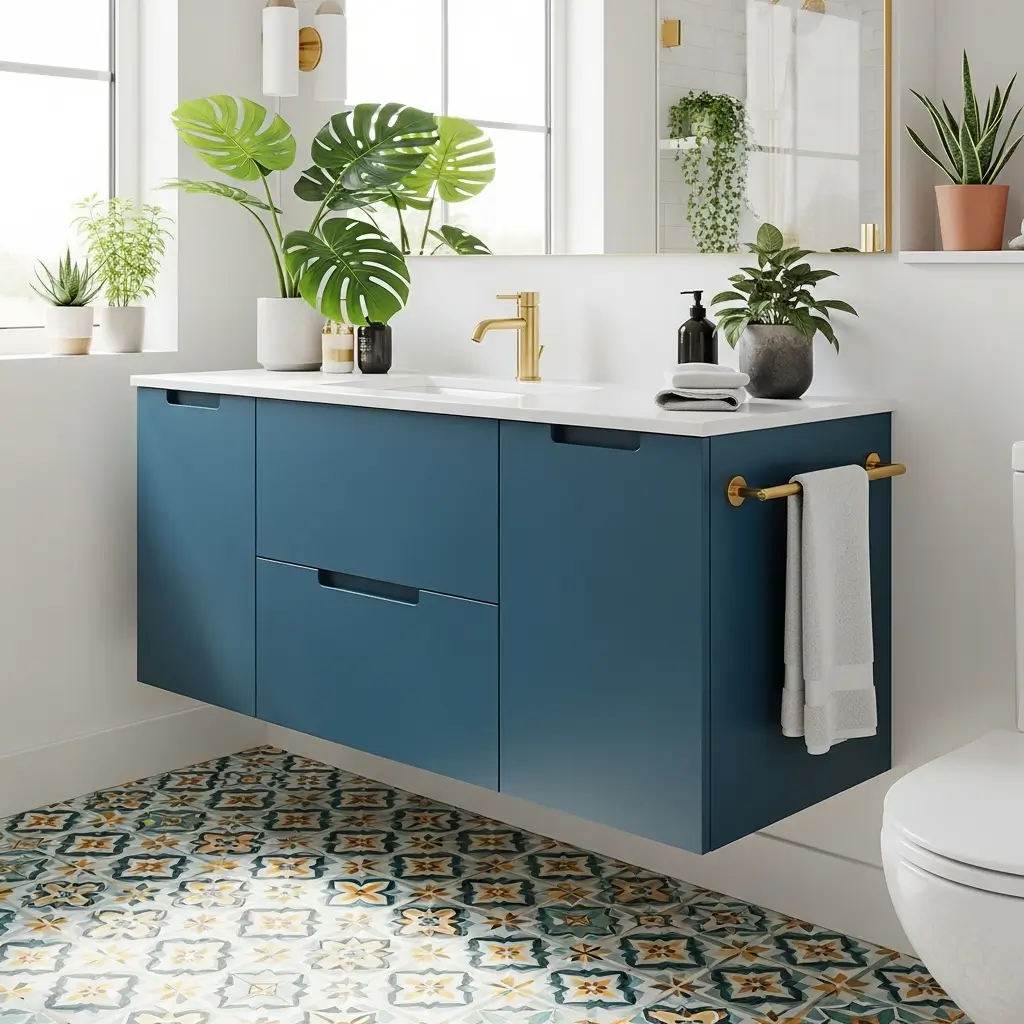
Who says floating vanities have to be white or wood? Bold colored floating vanities create instant focal points while maintaining all the space-saving benefits of wall-mounted design. It’s personality meets practicality.
I painted my powder room floating vanity emerald green, and it completely transformed the space. The rich color floating against white walls creates this stunning contrast that makes everyone remember that bathroom. The floating design actually makes the bold color work better – there’s less visual weight than a floor-standing vanity would have.
Colorful floating vanities work because the wall-mounted design prevents color overwhelm. You get personality without the heaviness that colored traditional vanities can create.
Bold Color Floating Strategies
Making colorful floating vanities work:
- Choose colors you genuinely love – you’ll see it daily
- Keep walls neutral – white or light gray
- Add complementary hardware – brass with green, chrome with blue
- Consider the undertone – test samples in your lighting
- Balance with simple surroundings – let the vanity be the star
Bold colored floating vanities prove that functional design doesn’t have to be boring. Sometimes your bathroom needs a shot of personality more than another white vanity.
Also Read: 10 Beautiful Bathroom Vanity Makeover Ideas on a Budget
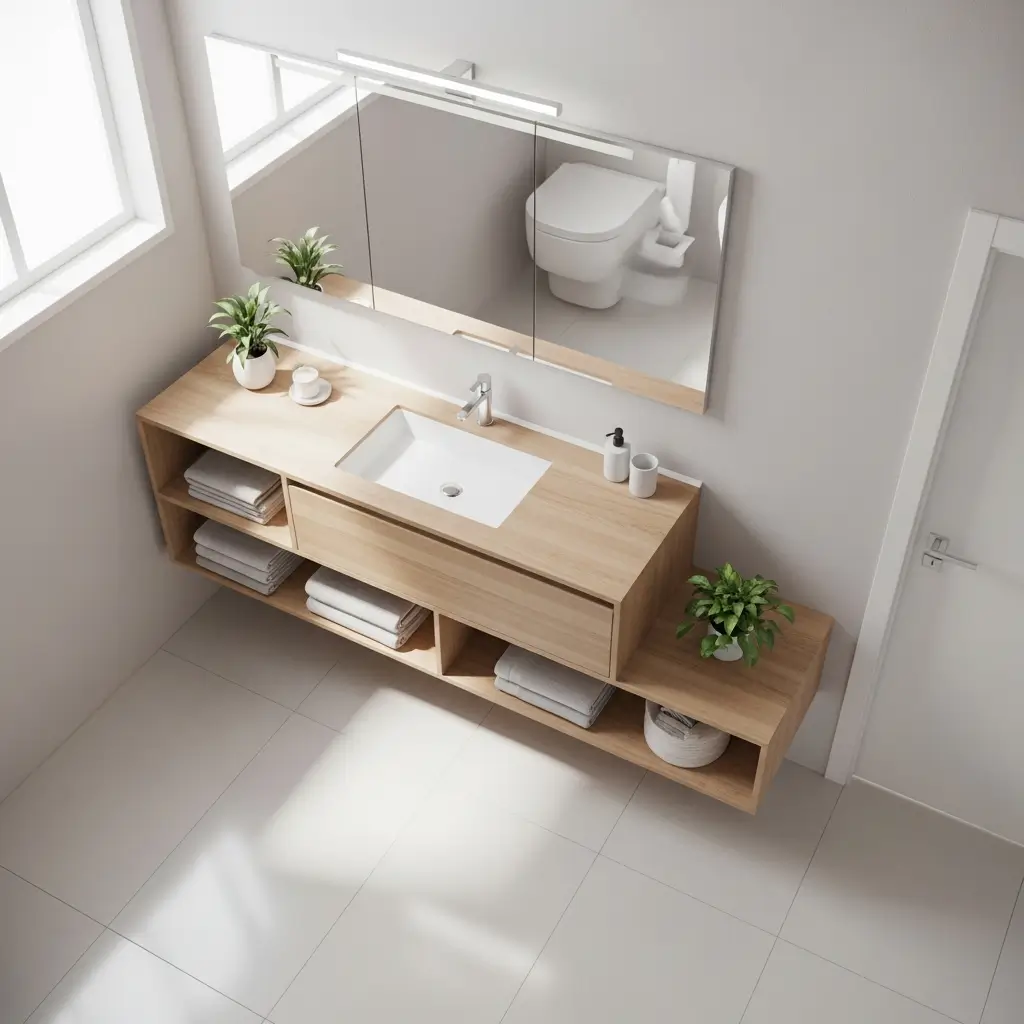
Floating Vanity with Open Shelves Designs

Floating vanities with open shelving below combine the airy feeling of wall-mounting with accessible storage. You get that floating aesthetic plus practical storage that doesn’t require opening doors.
My guest bathroom has a floating vanity with two open shelves below for rolled towels and pretty baskets. The visible storage actually enhances the floating effect rather than diminishing it. Everything feels intentional and curated rather than hidden away.
Open shelf floating vanities work especially well in small or minimalist bathrooms where you want maximum visual lightness. The see-through quality makes the floating effect even more dramatic.
Open Shelf Floating Design
Making open shelving work beautifully:
- Curate what’s visible – only attractive items on display
- Use matching containers – baskets or boxes in coordinating styles
- Keep it minimal – resist the urge to fill every inch
- Consider shelf material – wood, glass, or matching vanity material
- Plan for easy cleaning – open shelves collect dust
Open shelf floating vanities require organization commitment, but they create bathrooms with serious visual appeal. Just be honest about your tidiness level before committing.
Compact Floating Vanity for Tiny Spaces
Truly tiny bathrooms need seriously compact floating vanities – we’re talking 18-24 inches wide and super shallow. These mini miracles prove you can have a real vanity even in the tightest spaces.
I helped my sister install a 20-inch floating vanity in her impossibly small half bath. The narrow profile and floating design made a bathroom that felt like a phone booth suddenly functional. We chose a vessel sink to maximize counter space and wall-mounted the faucet to save depth.
Compact floating vanities maximize every millimeter through strategic design choices. Every element must be carefully considered because there’s zero room for waste.
Tiny Floating Vanity Solutions
Maximizing minimal vanities:
- Choose vessel sinks – sits on top, saves interior space
- Wall-mount faucets – frees up precious counter depth
- Go shallow – 14-16 inches deep works
- Include towel bar on side – utilize vertical space
- Add medicine cabinet above – vertical storage is crucial
Compact floating vanities prove that even the tiniest bathrooms can have proper vanities. You just need to get creative with every dimension.
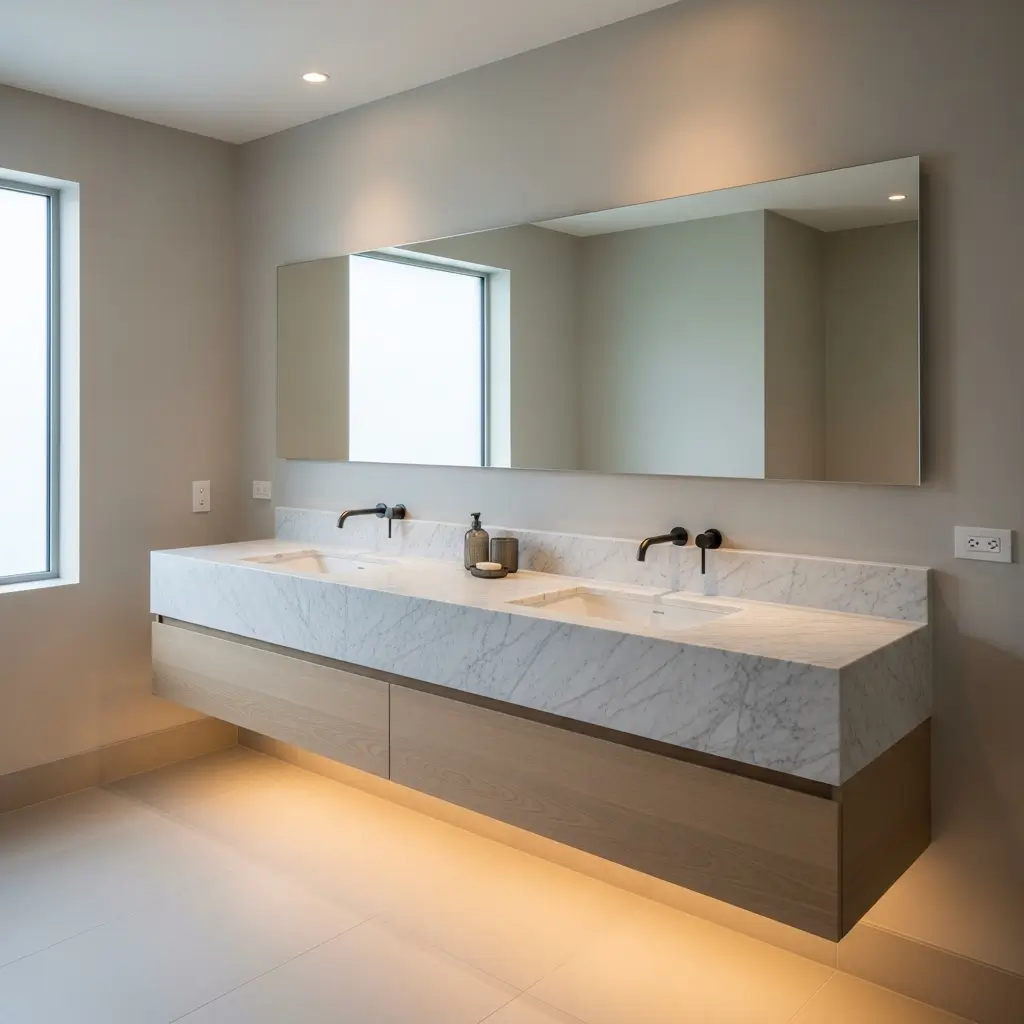
Double Sink Floating Vanity Layouts
Double sink floating vanities combine the relationship-saving benefits of two sinks with the space-enhancing magic of floating design. It’s functional luxury that makes your bathroom feel like a hotel suite.
We installed a 72-inch floating double vanity in our master bath, and it changed our entire morning routine. The generous size floating off the floor creates this perfect balance of substantial and airy. We both get our sink space while the bathroom still feels open and spacious.
Double sink floating vanities work best in medium to large bathrooms where you have the wall space to properly support the width. The floating design actually makes large vanities feel less imposing.
Double Sink Floating Considerations
Making dual sinks float successfully:
- Ensure serious wall reinforcement – double sinks mean double weight
- Plan adequate spacing – minimum 30 inches between sink centers
- Include separate storage zones – his and hers organization
- Add multiple mounting points – distribute weight properly
- Consider the counter material – lightweight but durable
IMO, double sink floating vanities deliver the best of everything – functionality for two people, space-saving design, and contemporary aesthetics that make your bathroom feel truly special.
Also Read: 12 Stylish Green Bathroom Vanity Ideas and Trendy Layouts
Floating Vanity with Hidden Storage Ideas
Floating vanities with hidden storage prove you can have clean minimalist lines and still store all your stuff. The trick is clever interior organization that maximizes every cubic inch.
My current floating vanity looks like a simple box from outside, but inside it’s an organizational masterpiece. Pull-out drawers with dividers, hidden electrical outlets, and custom compartments keep everything organized and accessible while maintaining that clean exterior.
Hidden storage floating vanities focus on interior sophistication rather than exterior ornamentation. The outside stays simple and sleek while the inside works incredibly hard.
Hidden Storage Solutions
Maximizing interior organization:
- Add drawer dividers – prevents the junk drawer situation
- Include pull-out organizers – access back areas easily
- Install interior outlets – charge hair tools hidden away
- Use vertical space fully – stackable organizers
- Plan for plumbing obstacles – work around pipes creatively
The best floating vanities look simple but function complexly. Strategic hidden storage delivers both aesthetic appeal and practical utility.
Making Your Floating Vanity Decision
After living with floating vanities for years and installing multiple versions, here’s what I know for sure: once you go floating, traditional vanities feel claustrophobic and outdated.
The visible floor space changes how your entire bathroom feels and functions.
Start by honestly assessing your wall structure. Floating vanities require proper blocking and support – this isn’t negotiable. If you’re in an older home, you might need to reinforce walls. If you’re renovating anyway, plan the blocking during framing.
The extra effort during installation pays off daily through easier cleaning and better aesthetics.
Consider your storage needs carefully too. Floating vanities can include tons of storage, but they require more planning than traditional cabinets.
Think vertically, use wall space above and beside the vanity, and get creative with interior organization. The sleek exterior is worth the interior planning effort.
Whether you choose minimalist white, warm wood, bold color, or luxury marble, floating vanities bring contemporary style and practical benefits to any bathroom.
My bathroom cleaning time literally dropped by 30% after switching to floating vanities – no more getting on hands and knees to clean around vanity legs. Plus, every single person who visits comments on how spacious and modern the bathroom feels.
That visible floor space creates impact that’s hard to achieve any other way. Now stop reading about floating vanities and go find your studs – your bathroom renovation is calling, and trust me, you won’t regret going floating.


