10 Affordable Shop Design Ideas for Budget Friendly Stores
- Shop Design
 Ben
Ben- 0
- 39 minutes read
Look, I get it. You’ve got a shop to design, but your budget screams “thrift store” while your Pinterest board screams “luxury boutique.” Been there, pinned that. Here’s the thing though—creating a killer shop design doesn’t mean you need to sell a kidney or max out every credit card you own. I’ve watched friends transform their retail spaces on budgets smaller than what some people spend on coffee in a month, and honestly? Some of those budget stores look way better than their high-end competitors.
So let’s talk real solutions. I’m going to walk you through ten design ideas that’ll make your shop look like a million bucks without actually spending anywhere close to that. These aren’t just theoretical concepts some design snob came up with—these are battle-tested, wallet-friendly approaches that actually work in the real world.
Modern Minimalist Boutique Shop Layout
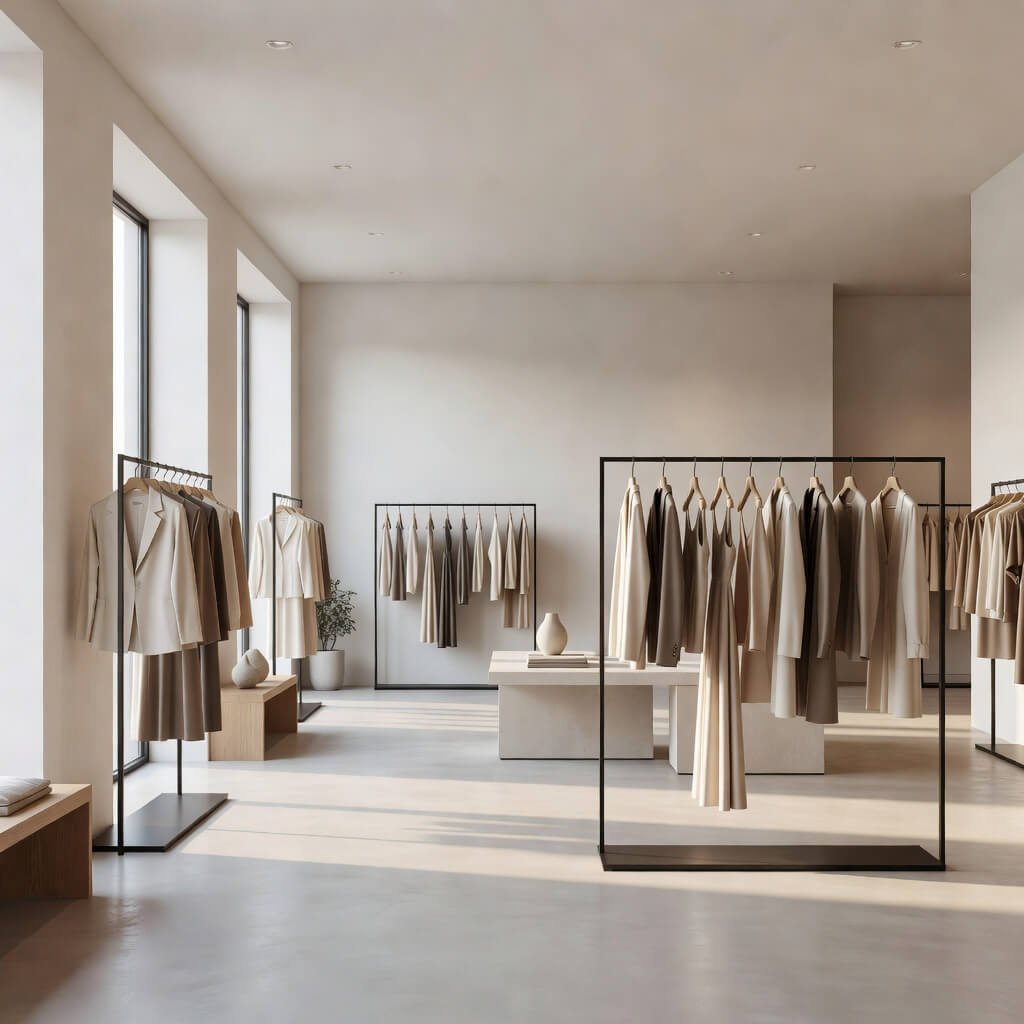
Remember when everyone thought minimalism meant “boring white box with nothing in it”? Yeah, that’s not what we’re doing here. A modern minimalist layout is actually one of the most budget-friendly approaches you can take, and I’ll tell you why.
Less stuff equals less money spent. Mind-blowing, right? When you strip away all the unnecessary decorative elements, you’re left with clean lines, open space, and your products taking center stage. I helped my cousin redesign her clothing boutique last year using this approach, and she spent maybe $800 total. The secret? She focused on three key elements:
Key Elements of Minimalist Design
- Neutral color palette: White walls, concrete floors, maybe some grey accents. Paint is cheap, people. A couple gallons of quality white paint will run you less than $100.
- Strategic product placement: Instead of cramming every inch with merchandise, display fewer items with more breathing room. This actually makes each product look more valuable.
- Simple fixtures: Ditch the ornate displays. Metal clothing racks, floating shelves, and basic geometric tables cost a fraction of fancy furniture.
The beauty of minimalism is that your “limitations” become your aesthetic. Can’t afford elaborate decorations? That’s not a bug; that’s a feature! The clean, uncluttered space becomes the whole vibe. Plus, maintenance is stupidly easy when there’s less stuff to clean and organize.
Want to know the real trick? Invest your limited budget into one or two statement pieces rather than spreading it thin across a dozen mediocre items. Maybe that’s a sculptural clothing rack or a striking counter design. Everything else can be basic and affordable.
Small Space Smart Shop Design Ideas
Alright, so you’ve got a shop the size of a walk-in closet. Join the club! Small retail spaces are actually where creativity shines brightest, mostly because you literally have no choice but to get clever. 🙂
I’ve seen 200-square-foot shops that feel more spacious than stores three times their size. How? Vertical thinking, my friend. When you can’t expand outward, you expand upward. Floor-to-ceiling shelving doesn’t just give you more display space—it draws the eye up and makes the ceiling feel higher.
Making Small Spaces Work
Here’s what actually works in tight quarters:
- Mirrors, mirrors, everywhere: A large mirror can visually double your space. I’m not even exaggerating. A $50 floor-length mirror from a discount store creates the illusion of depth and makes customers feel less claustrophobic.
- Multi-functional furniture: That display table? Make sure it has storage underneath. Your checkout counter? Build in shelving on the customer-facing side.
- Light colors dominate: Dark walls in a small space make it feel like a cave. Stick with whites, creams, and pastels to maximize the sense of openness.
One boutique owner I know turned her 150-square-foot space into what customers constantly describe as “surprisingly roomy.” Her secret weapon? She removed the traditional checkout counter entirely and used a slim iPad setup with a small floating shelf for transactions. That freed up probably 15 square feet, which is huge when you’re working with limited real estate.
Pro tip: Rolling displays are your best friend. You can reconfigure your entire layout weekly without breaking your back or your budget. Plus, the flexibility means you never get bored with your own space.
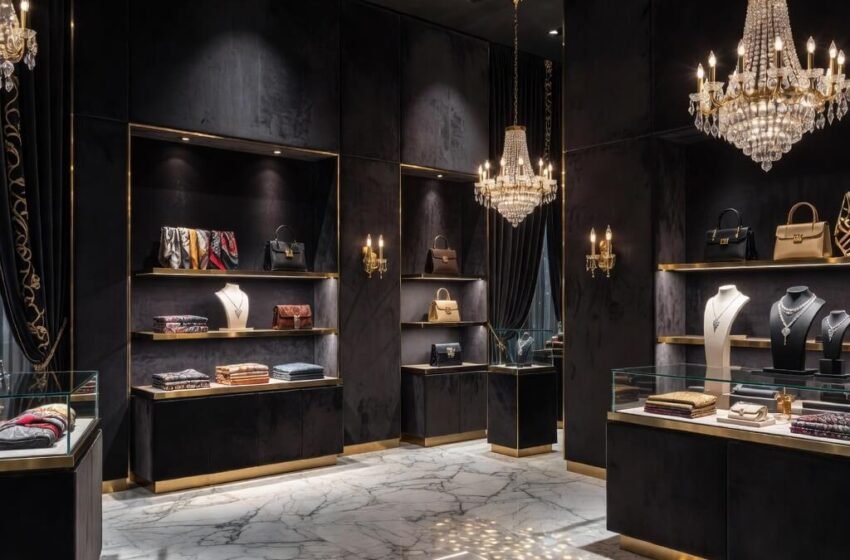
Luxury High-End Retail Store Interior Style (On a Budget)
Wait, didn’t the article title say “affordable”? Hear me out. You absolutely can create a luxury feel without luxury spending. It’s all about understanding what makes high-end stores look expensive and then faking it ’til you make it.
Luxury retail design relies on a few psychological tricks: quality materials (or things that look like quality materials), thoughtful lighting, excellent merchandising, and lots of negative space. Notice I didn’t say “solid gold fixtures” or “Italian marble imported by unicorns.”
Creating Luxury Vibes Affordably
Lighting is everything. I cannot stress this enough. A luxury store with bad lighting looks cheap. A budget store with excellent lighting looks upscale. Invest in:
- LED strip lights for shelving (ridiculously cheap on Amazon, FYI)
- Track lighting to spotlight key products (you can find affordable kits at home improvement stores)
- Dimmer switches to control ambiance (literally $15 per switch)
The material palette matters too. You don’t need real marble—luxury vinyl planks can mimic high-end materials for a fraction of the cost. Same goes for wall treatments. Textured wallpaper or even DIY concrete-effect paint can create visual interest without the contractor bills.
Ever noticed how luxury stores never cram products together? They create that aspirational feeling partly through restraint and curation. You can do this too—just display less at once. Rotate inventory rather than showing everything simultaneously. Customers perceive carefully curated displays as more upscale than cluttered ones.
One shop owner I know created a “luxury” jewelry display using black velvet fabric ($20 for a few yards), simple wooden risers she made herself ($30 in materials), and strategic spotlighting ($80 for a couple of clip-on lights). Total cost? Under $150. Customer perception? “This place looks expensive.”
Also Read: 10 Unique Shop Interior Design Ideas for Modern Brand Look
Budget-Friendly Small Shop Makeover Ideas
Let’s get practical. You’ve already got a shop, but it’s looking tired, dated, or just plain blah. You need a makeover, but your budget makes you want to cry into your calculator. I’ve got you.
Start with a deep clean and declutter. I know, I know—that sounds like your mom’s advice, not design wisdom. But seriously, you’d be shocked how much better any space looks when it’s spotless and organized. This costs you nothing but elbow grease and maybe some cleaning supplies.
Quick Makeover Wins
Once you’ve got a blank(ish) canvas, prioritize these high-impact, low-cost changes:
- Paint everything: Walls, definitely. But also consider painting old fixtures, shelving units, or even the floor if appropriate. Paint is the best ROI in retail design.
- Update your signage: Faded, amateur-looking signs scream “struggling business.” Clean, professional signage (which you can create yourself with free tools like Canva and a local print shop) suggests success.
- Add plants: Real or really good fakes (no one wants dusty plastic ferns from 1987). Greenery makes spaces feel fresh and alive for minimal cost.
- Rearrange your layout: This costs literally nothing and can completely transform the customer experience. Move your checkout counter, rotate product displays, create a new traffic flow.
- Upgrade your lighting: I’m repeating this because it matters. Swap out old fluorescent tubes for modern LED panels. Change outdated fixtures for contemporary options.
My friend Sarah gave her gift shop a complete makeover for under $600. She painted ($150), bought new LED bulbs and two affordable pendant lights ($180), added a dozen plants ($100), created new signage using Canva and an online printer ($75), and spent the rest on decorative accents from thrift stores. Customers thought she’d hired a professional designer and spent thousands. :/
Industrial Style Urban Shop Design Concept
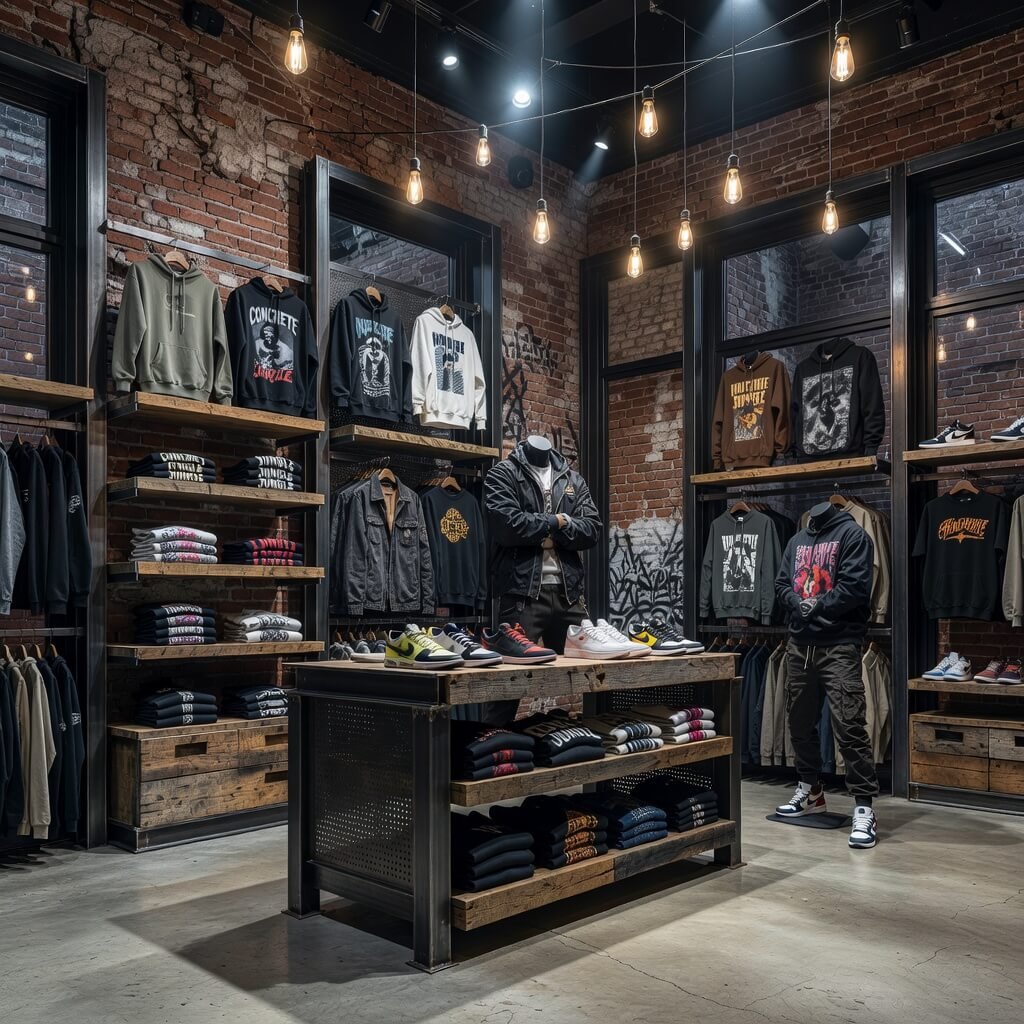
Okay, industrial design is basically cheating when you’re on a budget, and I mean that in the best possible way. The aesthetic literally celebrates exposed elements that you’d normally spend money to hide. Exposed brick? Feature it. Visible pipes? Make them a design element. Concrete floors? Perfect, that’s the whole vibe.
I love industrial design for retail because it feels current, urban, and cool without requiring a massive investment. Plus, it works for so many different product types—clothing, coffee, books, homewares, you name it.
Nailing the Industrial Look
Embrace what you’ve got. If your space has existing industrial elements (exposed ceilings, brick walls, concrete floors), congratulations—you just saved thousands. Don’t cover them up; highlight them.
For elements you need to add or modify:
- Metal fixtures: Look for simple black metal shelving, clothing racks, or tables. These are often cheaper than wooden equivalents and fit the aesthetic perfectly.
- Edison bulbs: Yeah, they’re kind of trendy-cliché at this point, but they’re also affordable and immediately say “industrial chic.”
- Reclaimed wood: Check salvage yards, Craigslist, or Facebook Marketplace for old wood pallets, barn wood, or industrial shelving units. People practically give this stuff away.
- Minimalist signage: Hand-painted or simple metal letters work beautifully and cost way less than elaborate signs.
The color palette is inherently budget-friendly too: blacks, greys, whites, with maybe some natural wood tones and metal accents. No need for expensive wallpapers or elaborate paint techniques.
Pro move: Hit up restaurant supply stores for fixtures. Those simple metal shelving units and industrial carts? Way cheaper at a restaurant supply shop than at a boutique furniture store, and they’re built to withstand commercial use.
Bright Lighting Product Display Shop Ideas

Let’s talk about lighting again because honestly, it’s the most underrated element of shop design. You could have the most beautiful products in the world, but if they’re sitting in dingy, dim lighting, customers won’t even notice them.
Think about it—when was the last time you enjoyed shopping in a cave? Exactly. Bright, well-planned lighting makes products look better, colors appear more vibrant, and the whole space feel more welcoming. It also happens to be one of the most cost-effective ways to upgrade your shop.
Lighting Strategies That Work
Layer your lighting. This means combining three types:
- Ambient lighting: Your general, overall illumination. LED panel lights or track lighting systems work great and have dropped dramatically in price.
- Task lighting: Focused light for specific areas like checkout counters or fitting rooms.
- Accent lighting: Spotlights that highlight featured products or displays.
You don’t need to install everything at once. Start with excellent ambient lighting (your foundation), then add accent lighting to key areas as budget allows.
Color temperature matters. Without getting too technical, bulbs labeled “daylight” or around 5000K show colors most accurately and create an energizing atmosphere. “Warm white” (2700-3000K) creates a cozier vibe. For product-focused retail, I usually recommend daylight temperature—you want customers seeing accurate colors.
I watched a cosmetics shop owner completely transform her space just by replacing old fluorescent tubes with bright LED panels and adding some inexpensive LED strip lighting under shelves. The cost? Maybe $300. The impact? Customers literally commented on how much “better” and “more professional” the shop looked, even though she hadn’t changed anything else.
Budget hack: Battery-operated LED puck lights are your secret weapon for highlighting products. You can stick them anywhere, they’re super cheap, and you don’t need an electrician.
Also Read: 10 Unique Shop Front Design Ideas for Attractive Storefronts
Wooden Natural Theme Cozy Shop Interior
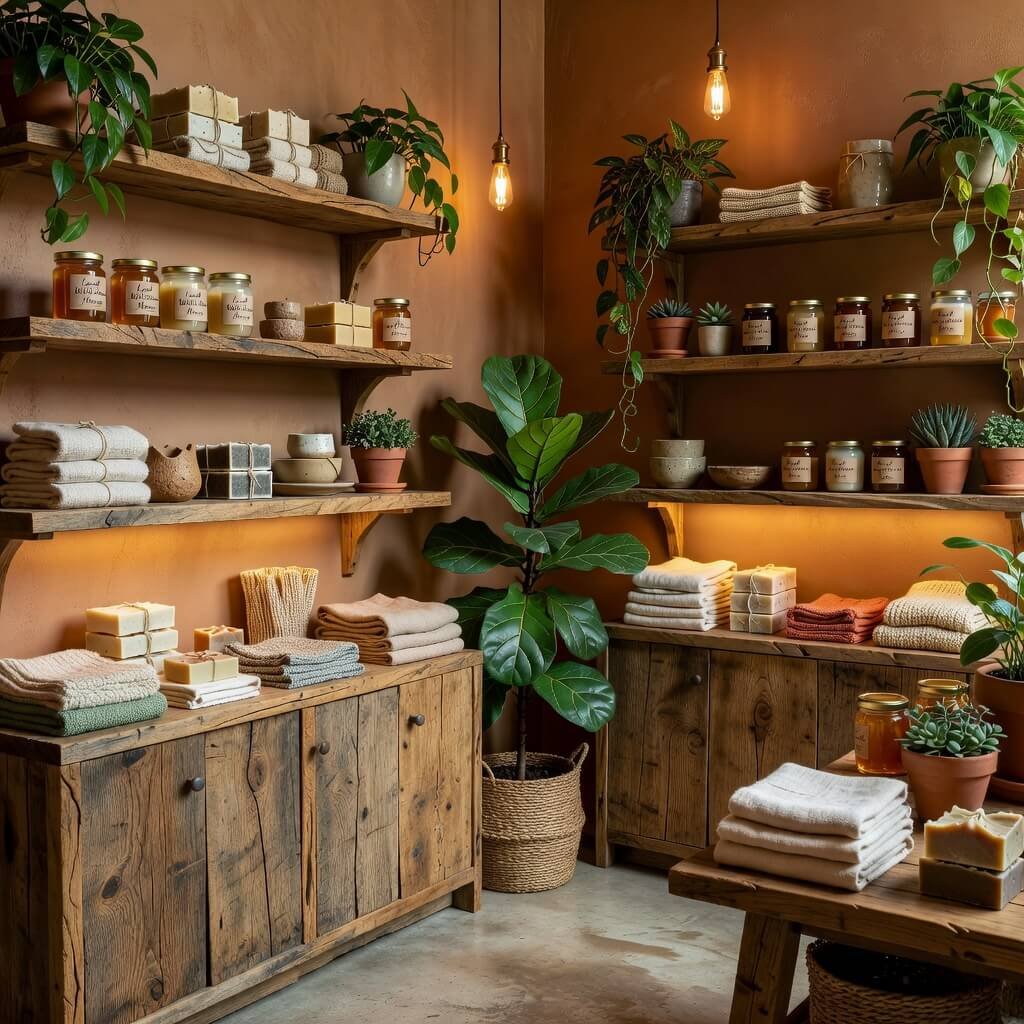
There’s something universally appealing about natural wood tones and organic materials. They make spaces feel warm, inviting, and somehow more trustworthy. IMO, this is the perfect aesthetic for shops selling anything from handmade goods to eco-friendly products to coffee.
The good news? Wood doesn’t have to be expensive. You just need to know where to look and get a little DIY-happy.
Creating Natural Warmth
Reclaimed and repurposed wood is everywhere. Seriously, people are constantly getting rid of old wooden pallets, crates, furniture, and building materials. I’ve built entire display systems from free pallet wood—it just required some sanding, maybe some staining, and time.
Key elements for a natural, cozy aesthetic:
- Wood shelving: Simple pine boards from the hardware store cost very little. Stain them to your preferred tone, add some basic metal brackets, and you’ve got beautiful shelving.
- Natural fiber textiles: Burlap, linen, cotton—these materials add texture and warmth without costing a fortune.
- Plants (again!): They’re basically mandatory for the natural theme. Mix real and high-quality fake ones if maintenance is a concern.
- Warm lighting: Remember that color temperature thing? Go warmer here (2700-3000K) to complement the wood tones.
Color palette: Think creams, warm whites, natural wood tones, sage greens, and earthy terracottas. Paint is cheap, and these colors create instant coziness.
One coffee shop I frequent created their entire aesthetic around unpainted wooden crates (free from a local warehouse), simple wood plank shelving (DIY), lots of plants (affordable from local nurseries), and warm Edison-style bulbs. The space feels like a hygge dream and probably cost less than $1000 to furnish.
The natural theme also ages well. Unlike trendy aesthetics that can start looking dated quickly, wood and natural materials have a timeless quality that’ll serve you for years.
Glass Front Modern Storefront Design Ideas

Your storefront is basically your shop’s face, and first impressions are everything. A glass front is ideal because it invites people in visually before they even open the door. They can see your products, your aesthetic, and gauge whether it’s worth their time to enter.
Now, you might be thinking, “Glass fronts sound expensive!” And yeah, replacing an entire storefront with glass probably is. But if you’re lucky enough to already have windows, or if you’re choosing between spaces and one has better window frontage, that glass becomes one of your most valuable design assets.
Maximizing Your Glass Front
Window displays are free advertising. This is where you can flex your creativity without spending much money. Change them regularly (monthly is good, weekly is better if you have the energy) to keep things fresh and give regulars a reason to check out what’s new.
Display tips that won’t break the bank:
- Keep it simple: A cluttered window display is overwhelming. Feature one key product or cohesive collection.
- Use height variation: Create visual interest with risers, boxes, or stands at different levels.
- Lighting is critical: (Are you sensing a theme here?) Light your window display well, especially for evening passersby.
- Clear sightlines: People should be able to see into your shop, not just at your window. The goal is to make them curious about what’s inside.
Make sure your glass is clean. I know this sounds stupidly obvious, but you’d be amazed how many shops have grimy windows that immediately make the business look neglected. Clean windows cost nothing but some Windex and effort.
For privacy or sun control without blocking your glass front entirely, consider window films or decals with your branding. These are surprisingly affordable and can be DIY-installed. You get privacy where you need it while maintaining that open, modern glass aesthetic.
I’ve seen shop owners use everything from vintage ladders to stacked books to seasonal props in their window displays, all sourced from thrift stores or their own basements. Creativity matters way more than budget here.
Colorful Creative Boutique Shop Layout Ideas
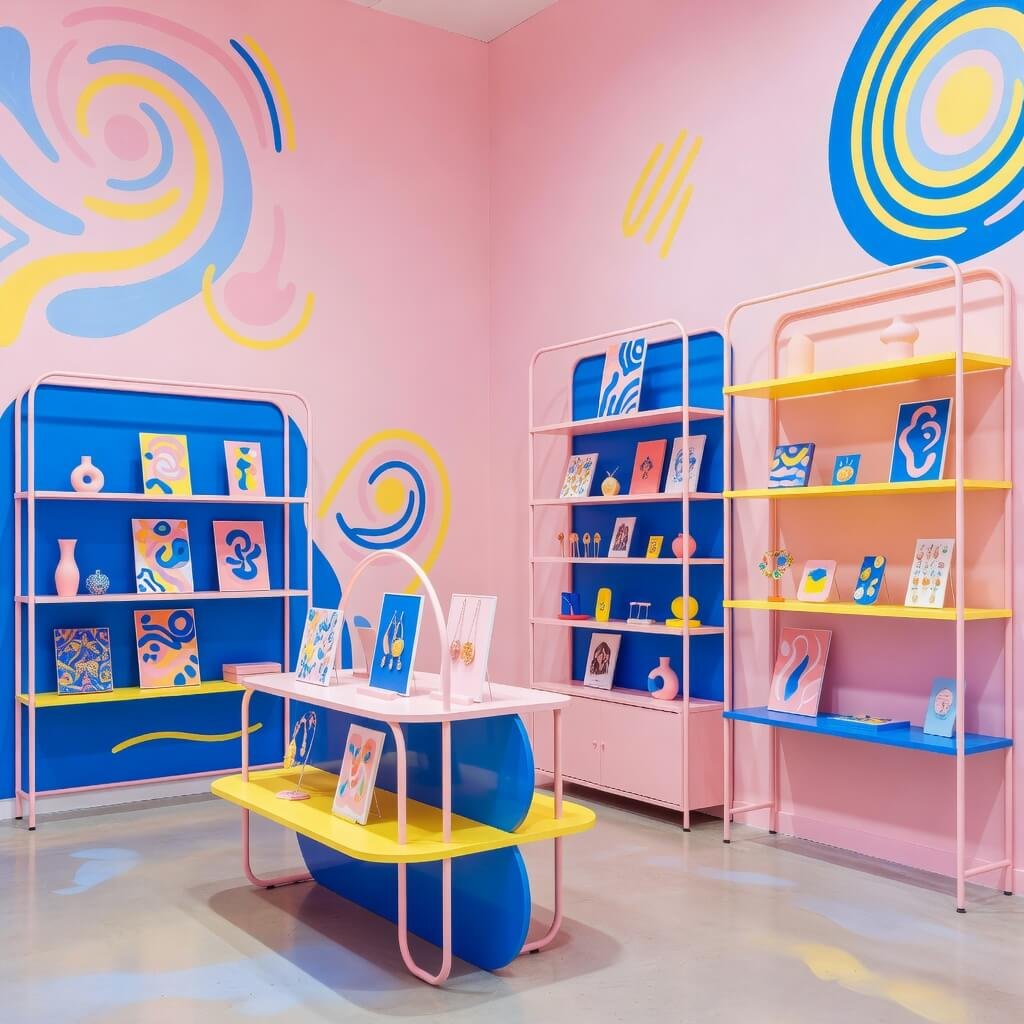
Not every shop needs to be minimalist and neutral. If your brand personality is bold, playful, and creative, lean into color! A colorful shop stands out, creates memorable experiences, and photographs beautifully for social media (free marketing, anyone?).
The trick is using color intentionally rather than randomly. You want “vibrant and cohesive,” not “rainbow threw up in here.”
Working With Bold Colors
Choose a color scheme and commit to it. This could be:
- Complementary colors: Opposites on the color wheel (like blue and orange)
- Analogous colors: Colors next to each other (like blue, teal, and green)
- Monochromatic: Different shades and tints of one color
- Triadic: Three colors evenly spaced on the color wheel
Paint is still your cheapest tool for transformation. One brightly painted accent wall can completely change a space’s energy for maybe $50 in materials.
Colorful fixtures and displays don’t have to be expensive. Thrift stores are goldmines for furniture you can paint. That old wooden shelf unit that’s kind of ugly in its natural state? Paint it coral or turquoise and suddenly it’s a design element.
Other affordable ways to inject color:
- Textiles: Colorful throws, cushions, or curtains add pops of color for relatively little money
- Artwork: DIY canvas art, local artist prints, or even well-curated posters in affordable frames
- Product display: Use your colorful products themselves as decorative elements
- Accessories: Vases, baskets, storage boxes in your color scheme
I know someone who created the most Instagram-worthy boutique using paint ($100), colorful thrifted furniture ($200), some DIY artwork ($50), and strategic product styling. She gets tagged in customer photos constantly, which drives more business. The colorful aesthetic basically markets itself.
Word of caution: If you go bold with color, keep your fixtures and backgrounds relatively simple. You want the colors to pop, not compete with busy patterns or complicated shapes.
Also Read: 10 Stylish Pharmacy Counter Design Ideas for Modern Pharmacies
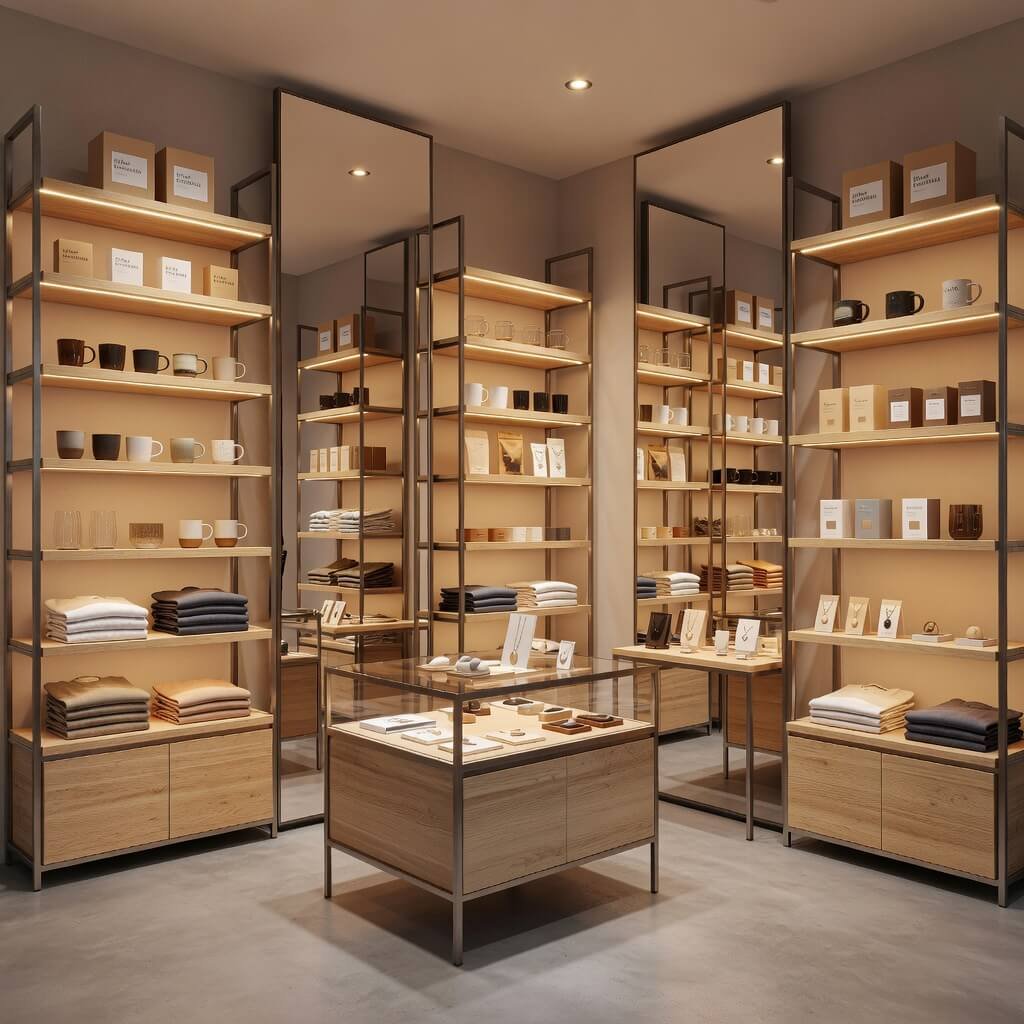
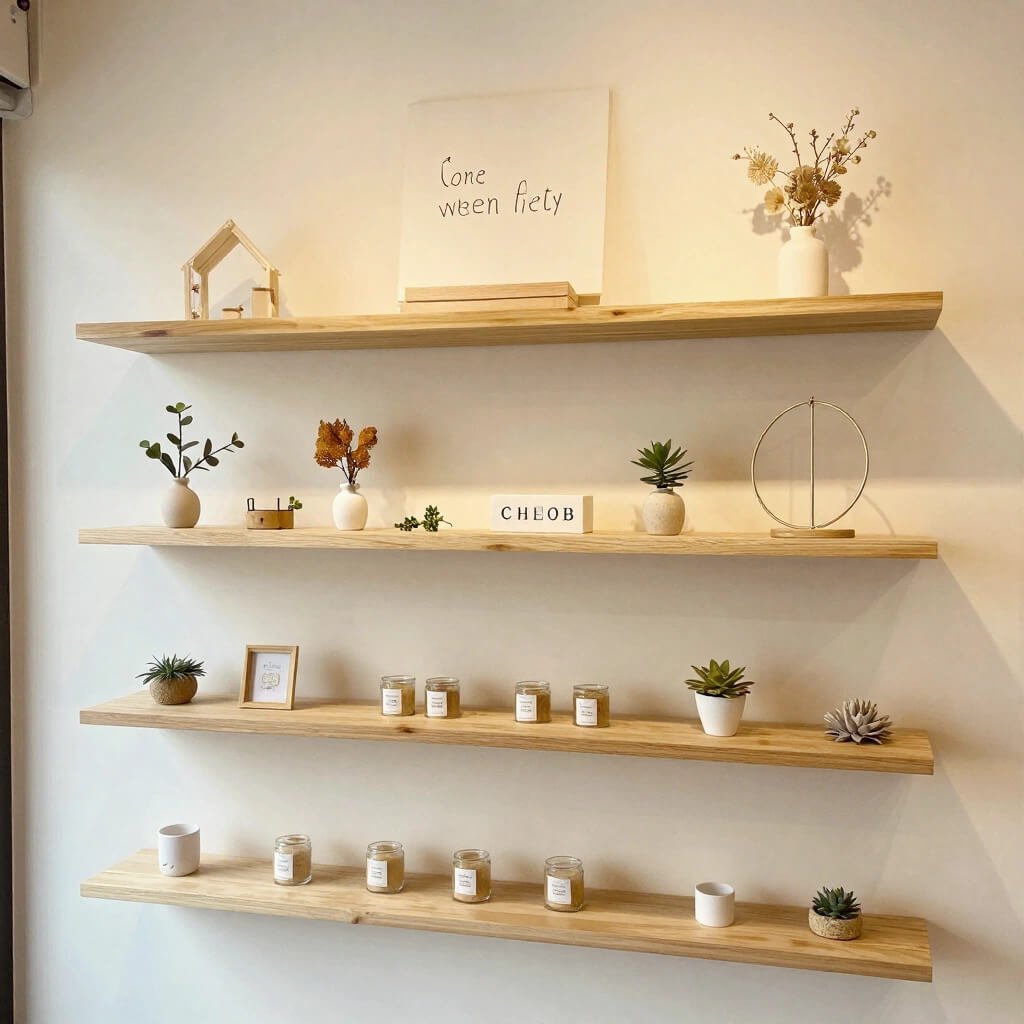
Open Shelf Organized Retail Shop Design
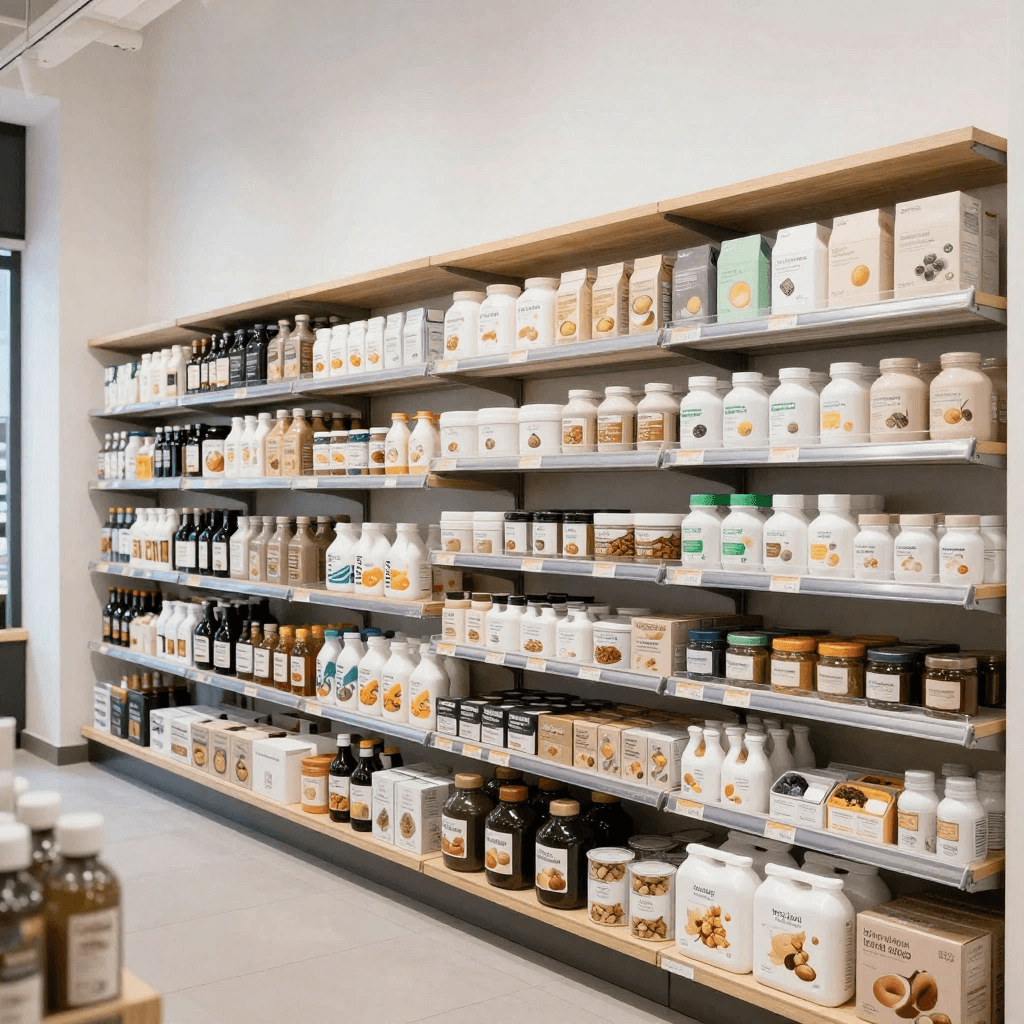
Here’s where I get a little preachy: organization isn’t just practical; it’s aesthetic. Open shelving might seem basic or cheap, but when executed well, it creates an accessible, modern retail environment that customers actually prefer.
Think about why stores like MUJI or The Container Store feel so satisfying to shop in. Everything is visible, accessible, and neatly organized. You can achieve this same feeling without spending Container Store money.
Making Open Shelving Work
Simple, sturdy shelving is all you need. You don’t need fancy enclosed cabinets or elaborate fixtures. Basic wall-mounted shelves or freestanding shelf units from IKEA or hardware stores work perfectly fine.
The real magic happens in how you organize and style them:
- Group similar items together: Create visual cohesion by clustering products by color, size, or type
- Use uniform containers: If you’re selling small items, put them in matching baskets, bins, or boxes. This creates order out of potential chaos.
- Leave breathing room: Don’t pack every inch of shelf space. Empty space makes everything look more intentional and upscale.
- Vary heights and depths: Mix tall items with short ones, create layers with risers or boxes behind front-row products
Labels are your friends. Whether it’s handwritten tags, printed labels, or small chalkboard signs, clear labeling makes open shelving functional and adds a polished touch. You can create beautiful labels for free using Canva and a home printer.
The financial beauty of open shelving? It’s the cheapest display option that exists. Basic pine boards and brackets from the hardware store cost pennies compared to enclosed fixtures or custom displays. Plus, the open accessibility often encourages more browsing and impulse purchases.
I helped a friend organize her gift shop using this approach—we spent maybe $200 on shelving materials and containers from IKEA and the dollar store. The before-and-after was dramatic. Customers went from feeling overwhelmed by clutter to easily finding what they wanted. Sales actually increased because people could see and reach products easily.
Maintenance tip: Open shelving requires more regular dusting and tidying than enclosed displays, but honestly, that forces you to keep your shop looking fresh, which is a good thing.
Bringing It All Together
So there you have it—ten solid approaches to shop design that won’t require you to take out a small business loan just to make your space presentable. The common threads running through all of these ideas? Intentionality, creativity, and smart resource allocation.
You don’t need unlimited funds to create a shop that attracts customers and showcases your products beautifully. You just need to understand which elements deliver the most impact (lighting, color, organization) and which you can achieve affordably with some effort and creativity.
My best advice? Pick the approach that aligns with your brand and products, then commit to it fully. A well-executed budget industrial shop will always outperform a half-hearted attempt at luxury. Authenticity resonates with customers way more than expensive finishes ever will.
Start with the basics: clean space, good lighting, thoughtful organization. Then layer in your aesthetic choices as budget allows. Rome wasn’t built in a day, and neither is the perfect retail space. You can always evolve and improve over time.
Remember that some of the most beloved shops I’ve encountered weren’t the ones with the biggest budgets—they were the ones where you could feel the owner’s personality and care in every detail. That’s what you’re actually selling: not just products, but an experience and a vibe that people want to be part of.
Now stop overthinking it and start creating. Your future customers are waiting, and trust me, they care way more about whether you’ve got what they need than whether your shelving came from a high-end design catalog or a hardware store clearance section. Go make something great! 🙂


