10 Affordable Backyard Ideas on a Budget Cozy Setup
- Outdoor Ideas
 Ben
Ben- 0
- 50 minutes read
Look, I get it. You scroll through Pinterest or Instagram, and everyone’s backyard looks like it came straight out of a luxury resort catalog. Meanwhile, you’re staring at your sad patch of grass wondering if you need to sell a kidney to afford one of those fancy outdoor sectionals. Spoiler alert: you don’t.
Here’s the truth—creating a cozy backyard vibe doesn’t require maxing out your credit cards or hiring some bougie landscape designer. I’ve transformed my own boring outdoor space using stuff I found at hardware stores, garage sales, and yes, sometimes even the side of the road (don’t judge me). And honestly? It looks pretty dang good.
So grab your coffee (or wine, no judgment on timing here), and let’s talk about 10 affordable backyard ideas that’ll make your outdoor space feel like your new favorite room. Your wallet will thank me later.
DIY Pallet Lounge Seating Setup
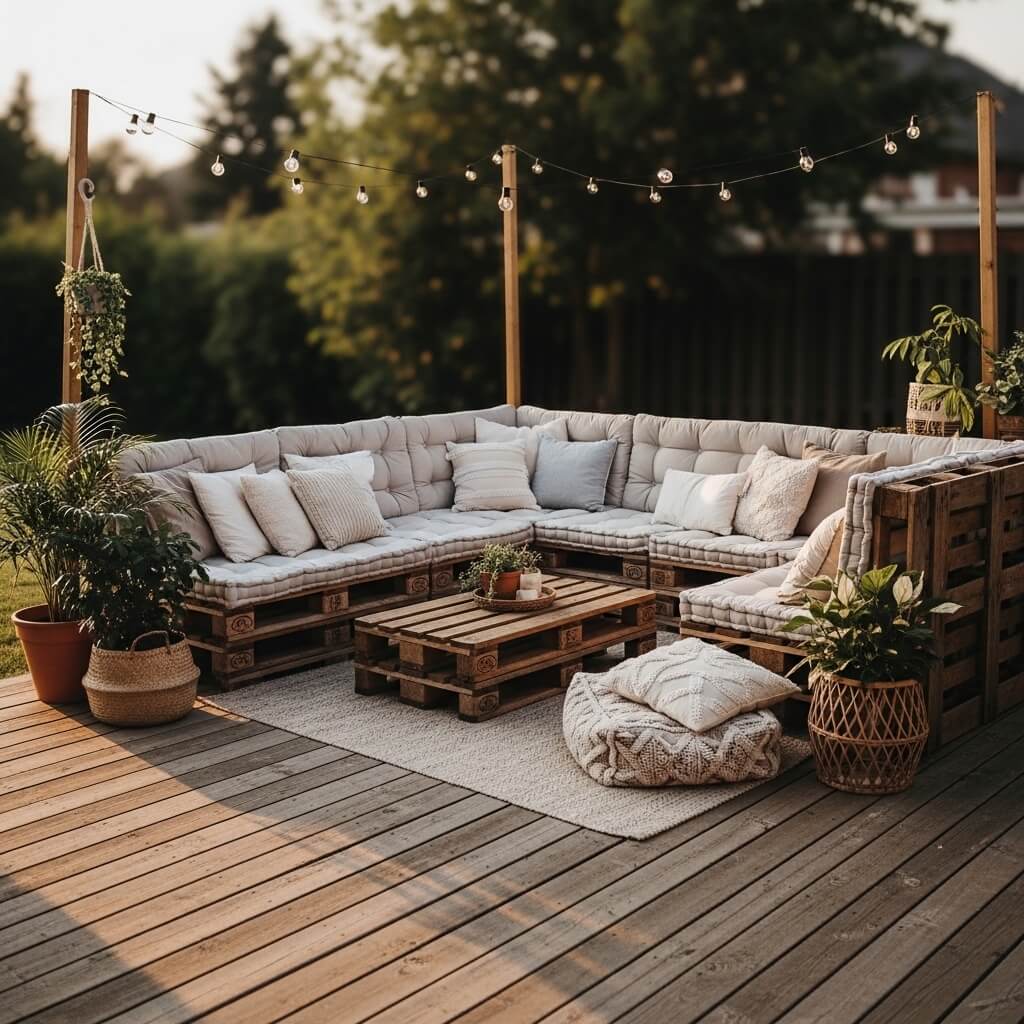
Ever wonder why pallets are literally everywhere? Because businesses can’t wait to get rid of them, and honestly, they’re goldmines for DIY projects.
I stumbled onto this idea after seeing wooden pallets stacked behind my local grocery store. A quick “Can I have these?” later, and I had the foundation for outdoor seating that cost me basically nothing. Wooden pallets make incredible lounge seating when you stack them, sand them down, and throw some cushions on top.
Here’s what you’ll need:
- 4-6 wooden pallets (check behind stores, warehouses, or Facebook Marketplace)
- Sandpaper or an electric sander
- Wood stain or outdoor paint (optional but recommended)
- Outdoor cushions or foam pads
- Waterproof fabric if you’re feeling crafty
Start by inspecting your pallets for any gross stuff or broken boards. Give them a good cleaning and sand down any rough edges—nobody wants splinters in unfortunate places, trust me. Stack two pallets for the base and use one as a backrest. Secure everything with wood screws or L-brackets.
The beauty of this setup? You can configure it however you want. Make an L-shaped sectional, a straight sofa, or even individual chairs. Paint them white for a coastal vibe, or go with natural wood stain for that rustic look everyone’s obsessed with.
I found cushions at a discount home store for like $15 each during their end-of-summer sale. FYI, always shop outdoor stuff at the end of the season—that’s when the deals get ridiculous. You can also make cushion covers from outdoor fabric if you’ve got basic sewing skills (or a patient friend who does).
The whole setup cost me under $80, and it’s been my favorite spot for morning coffee for two years now. Guests always ask where I bought it, and the look on their faces when I say “I made it from garbage pallets” never gets old.
String Light Cozy Backyard Corner
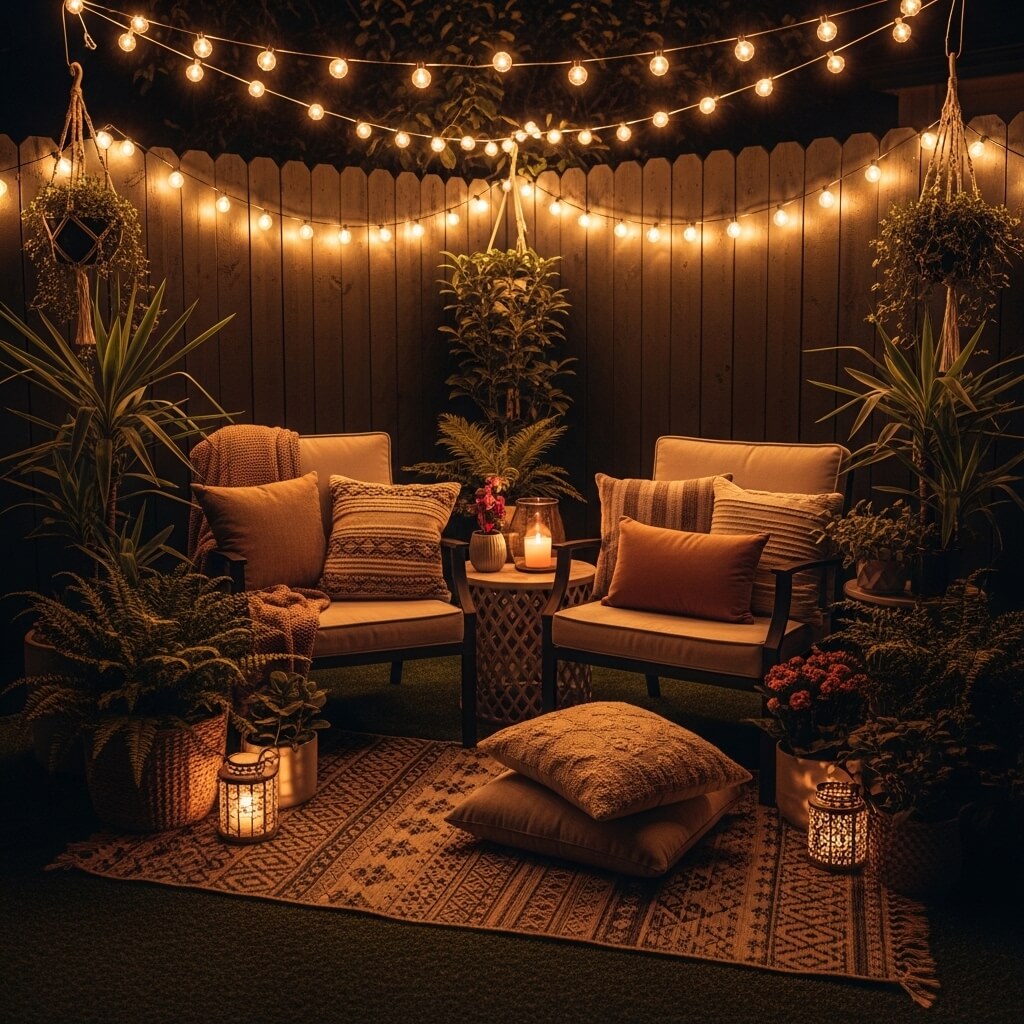
Want to know the fastest way to make any outdoor space look magical? String lights. Seriously, these things are like Instagram filters for your backyard.
I was skeptical at first because, yeah, everyone does string lights. But there’s a reason they’re popular—they work. The warm glow instantly transforms even the most basic corner into somewhere you actually want to hang out after sunset.
Here’s how to do it right without breaking the bank:
Choose the right lights: Don’t cheap out on the super flimsy ones that’ll die after one rainstorm. Spend a bit more ($25-40) on weatherproof Edison bulb string lights or globe lights. They last way longer and look ten times better than those tiny fairy lights.
Installation options:
- String them between existing structures (house to fence, tree to tree)
- Install cup hooks into wood surfaces for easy hanging
- Use shepherd’s hooks planted in the ground if you don’t have overhead options
- Wrap them around pergola beams or deck railings
I created my string light corner by running lights from my back porch to a sturdy fence post, then adding a second strand perpendicular to create a canopy effect. Total cost? About $65 for two strands of lights and the hardware.
Pro tip: Get lights with a timer or smart plug so they automatically turn on at dusk. Nothing kills the vibe like having to remember to flip a switch every evening. Plus, coming home to an already-lit backyard feels fancy as hell.
The ambiance factor is unmatched. I’ve hosted dinner parties, date nights, and solo reading sessions under these lights, and the atmosphere is always chef’s kiss. My neighbors probably think I’m way more sophisticated than I actually am 🙂
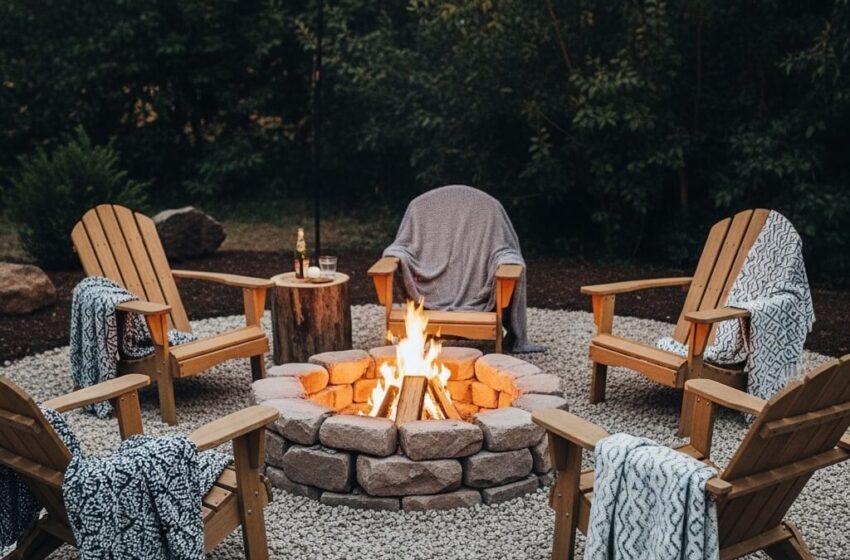
Budget Fire Pit Hangout Area
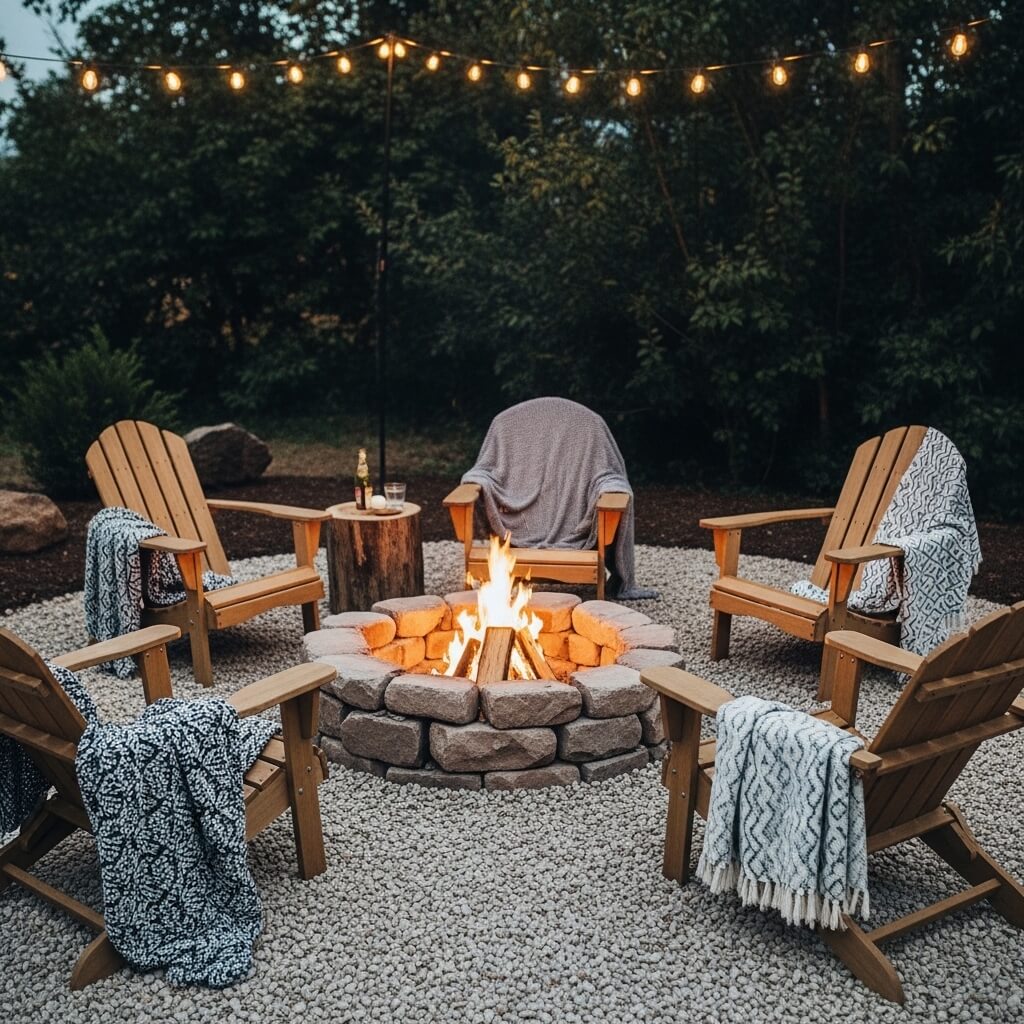
Let me paint you a picture: cool evening, crackling fire, friends gathered around, marshmallows getting perfectly toasted. Sounds expensive, right? Wrong.
You can build a legit fire pit area for under $100. I did it, and I’m barely handy enough to assemble IKEA furniture without crying.
The Simple Fire Pit Build
Option one is buying a pre-made fire pit bowl. These range from $50-150 depending on size and material. I snagged mine at a big-box hardware store for $79 during a spring sale.
Option two (the really budget-friendly route) is building one with retaining wall blocks or concrete pavers. Seriously, you just arrange them in a circle. It’s not rocket science.
Here’s the basic method:
- Clear and level a circular area (at least 10 feet diameter for safety)
- Lay down a gravel base or sand
- Arrange concrete retaining wall blocks in a circle (about 3 feet diameter)
- Stack 2-3 rows high, staggering the seams
- Fill the bottom with a few inches of pea gravel for drainage
The blocks cost about $2-3 each, so you’re looking at $30-50 for the fire pit itself.
The Seating Situation
Now you need somewhere to sit, and this is where it gets fun. I used a combination of tree stumps (free from a neighbor who cut down a tree), a couple of those basic folding camp chairs ($10 each), and one wooden bench I grabbed at a yard sale for $15.
Budget seating ideas:
- Large rocks or boulders (free if you’ve got them on your property)
- Tree stumps or logs
- Cinder blocks with cushions on top
- Cheap folding chairs jazzed up with outdoor pillows
- That pallet furniture we talked about earlier
Space everything at least 3 feet from the fire pit edge for safety. Add some citronella candles or tiki torches around the perimeter to keep mosquitoes from treating you like an all-you-can-eat buffet.
My total fire pit area cost about $120, and it’s become the neighborhood gathering spot. There’s something primal about sitting around a fire that makes everyone chill out and actually have real conversations instead of staring at their phones. Well, mostly.
Also Read: 10 Budget Dorm Room Ideas for Cheap Cozy Setup
Gravel Patio with Simple Seating
Grass is overrated. There, I said it. Know what’s better? A low-maintenance gravel patio that looks clean, modern, and costs a fraction of what concrete or pavers would run you.
I got sick of dealing with a patchy, sad-looking lawn in my backyard corner, so I ripped it out and went with gravel. Best decision ever, and ridiculously affordable.
Building Your Gravel Patio
Materials you’ll need:
- Landscape fabric or weed barrier
- Edging material (plastic landscape edging, stones, or wood)
- Pea gravel or crushed stone (calculate about 2-3 inches deep)
- Basic tools: shovel, rake, wheelbarrow
First, mark out your patio area. I went with a 10×12 foot space, which was perfect for a small seating arrangement. Remove the grass and dig down about 3-4 inches. Lay down your landscape fabric to prevent weeds from crashing your party later.
Install your edging to keep the gravel contained—this step is crucial unless you want gravel migrating into your lawn like it’s got somewhere important to be. I used simple plastic landscape edging that cost about $20 for the whole perimeter.
Here’s where you calculate gravel needs: Measure your area in square feet, then use an online gravel calculator to figure out how many bags or how much bulk gravel you need. For my 120 square foot patio at 3 inches deep, I needed about 1 cubic yard of gravel.
Bulk gravel from a landscape supply place is WAY cheaper than bags from home improvement stores. I paid $35 for delivery of a cubic yard versus what would’ve been $150+ in bags. IMO, the delivery fee is totally worth not loading and unloading a million heavy bags.
Spread your gravel evenly with a rake, and boom—instant patio.
The Seating Setup
Keep it simple here. I grabbed two Adirondack chairs from a discount store ($40 each) and a small side table from a yard sale ($5). Added some outdoor pillows and a small outdoor rug, and suddenly my gravel pit looked like something from a design magazine.
Simple gravel patio seating ideas:
- Two chairs and a small table
- A bench along one edge
- Floor cushions and poufs for a boho vibe
- Folding bistro set for a café feel
Total cost for my gravel patio including seating? About $180. It drains perfectly when it rains, requires zero maintenance beyond the occasional rake to smooth things out, and looks intentionally minimalist rather than “I couldn’t afford anything better.”
Plus, that satisfying crunch sound when you walk on it? Chef’s kiss again.
Hanging Planter Fence Wall Decor
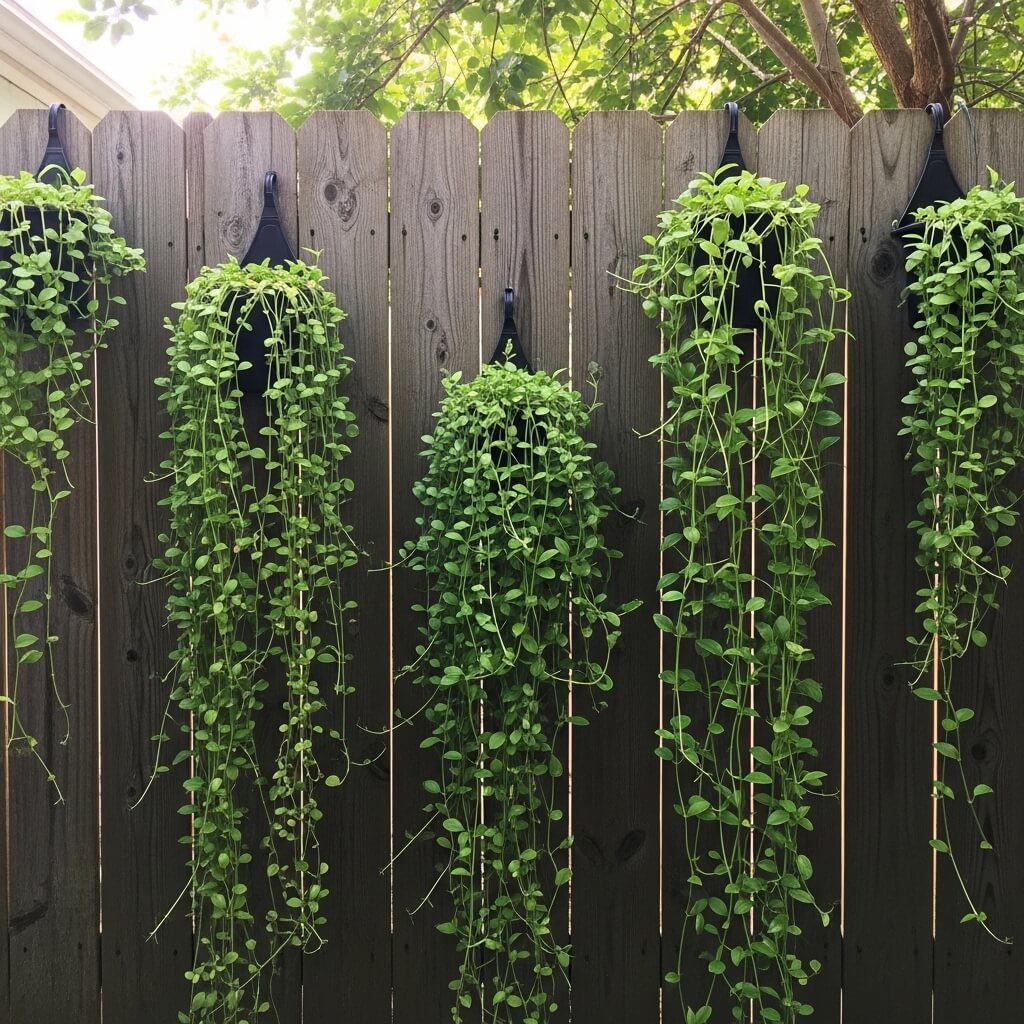
Got a boring fence staring at you every time you go outside? Let’s fix that without spending a fortune on those expensive vertical garden systems that cost more than your actual rent.
Hanging planters turn any ugly fence into a living wall, and you can do it for under $50 if you’re smart about it.
The Budget-Friendly Approach
Hit up dollar stores, thrift shops, and discount home stores for containers. I’ve used everything from plastic pots to metal buckets to those wire hanging baskets lined with coconut fiber. Variety actually looks better than everything matching perfectly—it gives it that collected-over-time vibe instead of “I bought a set.”
Mounting methods:
- Screw-in hooks directly into wooden fences
- S-hooks if you have a chain-link fence
- Over-the-fence hooks that slide onto the top edge
- Command outdoor hooks for non-permanent solutions
I arranged mine at different heights to create visual interest. Some hang solo, some in groups of three, and I staggered them across the fence rather than lining them up like soldiers. Asymmetry is your friend here.
What to Plant
Stick with easy, low-maintenance plants unless you’re really into gardening (no judgment if you’re not). Herbs are perfect because they look good, smell amazing, and you can actually use them. I’ve got basil, mint, oregano, and rosemary hanging on my fence, and I feel fancy AF when I literally just walk outside to grab fresh herbs for dinner.
Other great options:
- Petunias or other trailing flowers for color
- Succulents in smaller containers
- Cherry tomatoes (they love hanging baskets)
- Trailing ivy for a lush look with zero effort
Water them regularly, and that’s pretty much it. My fence went from “prison yard chic” to “urban garden goals” for about $45 total. Guests always comment on it, and I smile knowingly while thinking about how little it actually cost me.
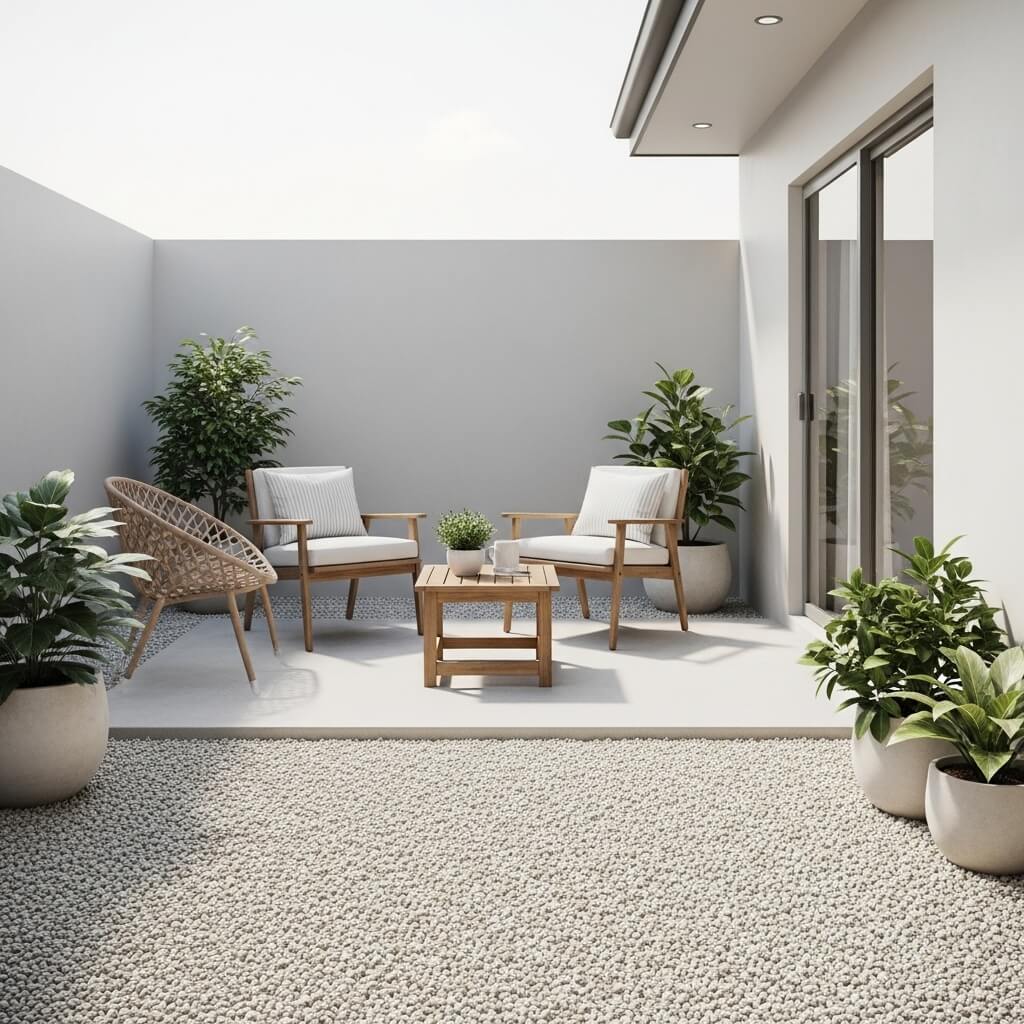
Outdoor Rug Picnic Style Setup
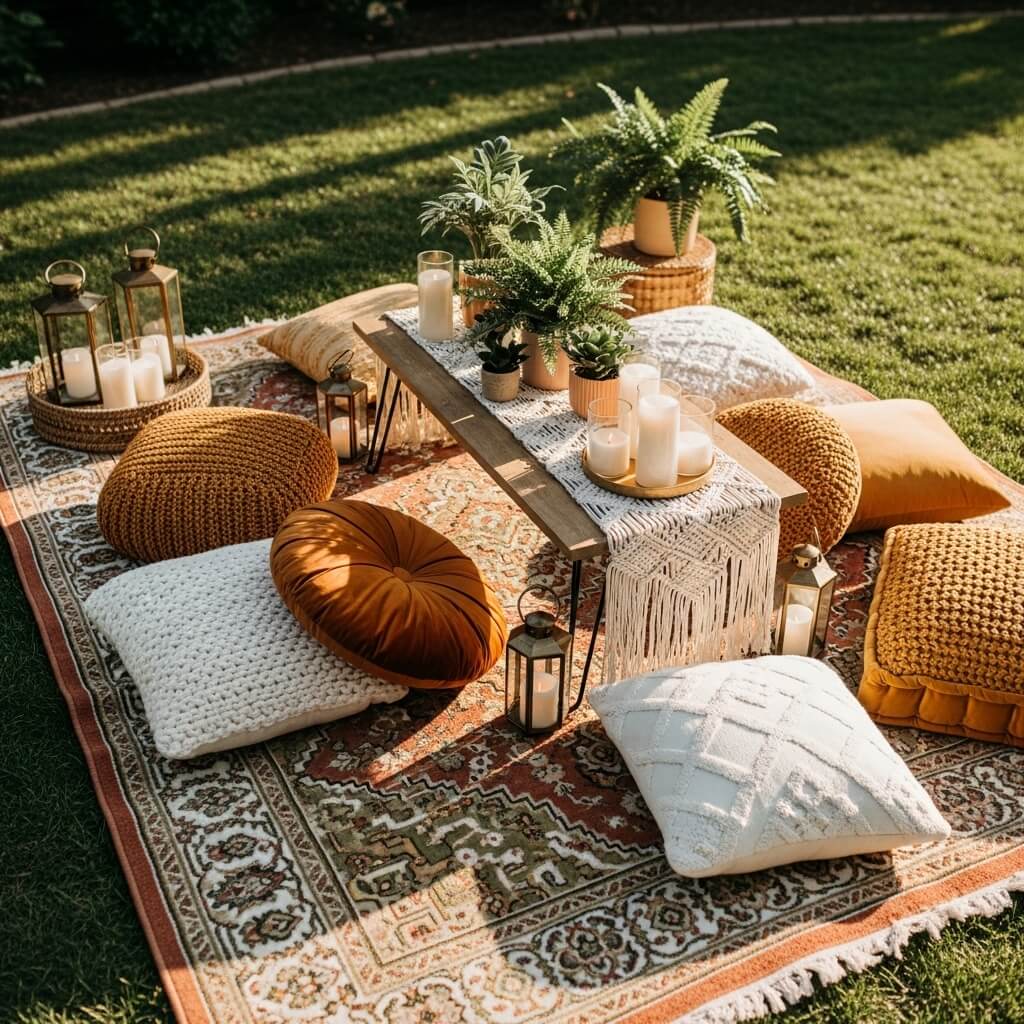
Here’s something nobody tells you: an outdoor rug changes everything. It defines a space, adds color and texture, and makes even the plainest patio or grass area feel intentionally designed.
I resisted outdoor rugs for the longest time because I thought they were unnecessary. Then I tried one, and now I’m that person who tells everyone they need outdoor rugs. Sorry not sorry.
Finding Affordable Outdoor Rugs
Department stores and home goods stores have outdoor rugs ranging from $30-100 depending on size. Wait for sales—I’ve scored 8×10 rugs for $40 during clearance events. Online retailers also have great options, though you can’t feel the texture before buying, which is a gamble.
What to look for:
- Polypropylene or recycled plastic materials (weather-resistant)
- Flat weave construction (drains better than shag)
- Patterns that hide dirt (because they will get dirty)
- Grommets or weighted corners to prevent them from blowing away
I’ve got a 5×7 outdoor rug with a colorful geometric pattern that cost me $35. It lives on my gravel patio during warm months and gets hosed off occasionally when it’s looking grimy.
Creating the Picnic Setup
Layer your outdoor rug with floor cushions, throw pillows, and maybe a low coffee table or tray for drinks and snacks. This creates a casual, laid-back hangout spot that’s perfect for everything from morning yoga to evening wine sessions with friends.
Budget picnic setup components:
- Outdoor rug as the foundation
- Floor cushions or outdoor pillows ($10-20 each)
- Low table or large wooden tray (thrift stores are gold for these)
- Lanterns or candles for evening ambiance
- Lightweight throw blankets for cooler evenings
Total investment? About $80-120 depending on how many cushions you go with. The vibe is relaxed, bohemian, and perfect for people who like sitting on the ground (if that’s not you, stick with chairs—no point being uncomfortable in your own backyard).
I use mine constantly. It’s become my go-to spot for reading, catching up on podcasts, or just lying back and pretending I’ve got my life together while staring at clouds.
Also Read: 10 Dreamy Backyard Ideas Relaxing Outdoor Oasis
DIY Cinder Block Garden Bench
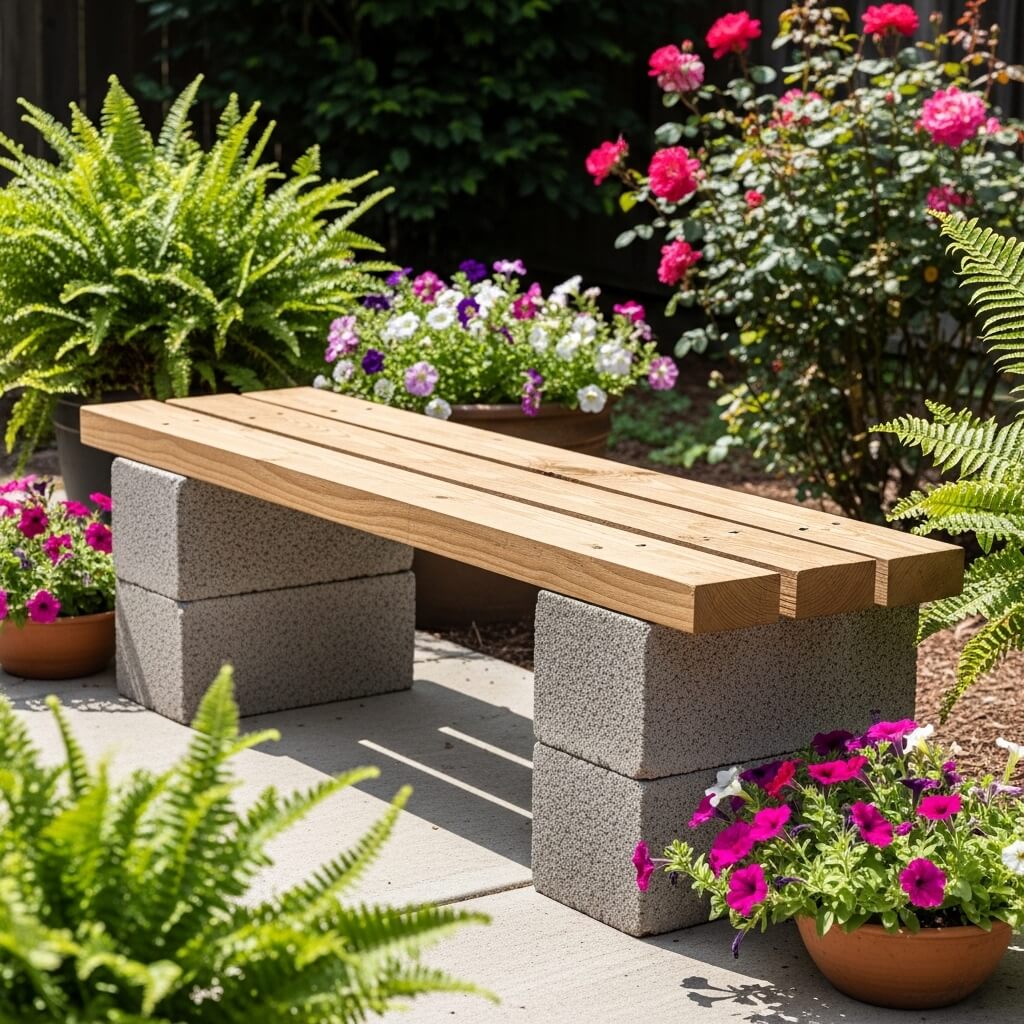
Cinder blocks are ugly. That’s just facts. But here’s the plot twist: you can turn those ugly blocks into surprisingly decent outdoor furniture for next to nothing.
I was doubtful about this one until I actually tried it. Now I’ve got a sturdy garden bench that cost me less than $30 and gets compliments regularly.
Building Your Cinder Block Bench
What you’ll need:
- 6-10 cinder blocks (about $1.50-3 each)
- 2-3 wooden boards or a solid wood plank for the seat (either 2x10s or a single thicker piece)
- Sandpaper
- Wood stain or outdoor paint
- Cushions or outdoor pillows (optional but recommended)
Arrange your cinder blocks in two or three stacks (depending on how long you want your bench) with the holes facing up. For a 4-6 foot bench, I used eight blocks—four stacks of two blocks each.
Sand down your wooden seat boards until they’re smooth. This is important unless you want splinters in places splinters should never be. Stain or paint them to match your backyard vibe. I went with a dark walnut stain that looked way more expensive than it was.
Once the wood is dry, simply rest it across the top of your cinder block stacks. The weight of the wood keeps everything in place, but you can use construction adhesive if you want it more permanent.
Styling options:
- Paint the cinder blocks for a pop of color
- Fill the block holes with small plants or succulents
- Add outdoor cushions along the seat for comfort
- Place it against a fence or wall as a backrest
The whole bench took me about two hours to make (including drying time for the stain), and it’s been sitting in my garden for over a year without issues. I’ve got potted plants flanking each end, and it’s become my favorite spot for morning coffee while I pretend to care about what’s happening in my garden.
Cost breakdown: $24 for cinder blocks, $15 for wood, $8 for stain, and $20 for a couple of outdoor cushions. Total: $67 for a custom bench that would’ve cost $200+ at a store.
Backyard Movie Night Setup on a Budget
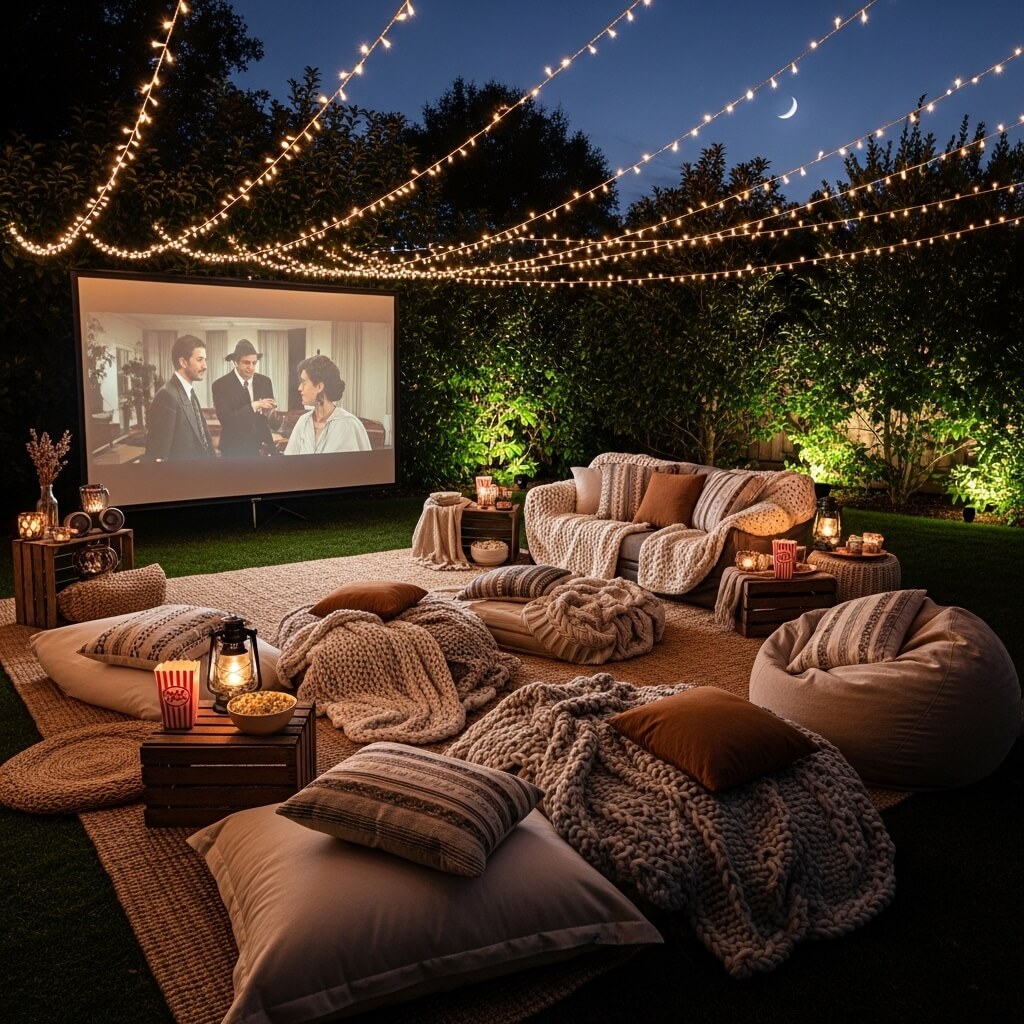
Want to feel like you’re living your best life? Set up a backyard movie theater. It’s easier and cheaper than you think, and it’s guaranteed to make you the coolest house on the block.
I’ll be honest—I thought this would be complicated and expensive. Turns out, you can create a totally functional outdoor movie setup for under $150 if you’re resourceful.
The Screen Solution
You don’t need a fancy inflatable movie screen. Here’s what actually works:
Option 1: Hang a white sheet between two trees, posts, or on a fence. Use grommets and rope, or even just clip it with binder clips. A white flat sheet works surprisingly well, and you probably already have one.
Option 2: Paint a section of your fence or exterior wall with white paint to create a permanent screen. I did this on my garage wall, and now I have a movie screen whenever I want one.
Option 3: Buy an actual projection screen. The portable ones run about $40-60 for a 100-inch screen, which sounds huge but is perfect for outdoor viewing.
I went with the painted wall option because I’m lazy and didn’t want to set up and take down a screen every time. Cost? One quart of white exterior paint for about $12.
The Projector Situation
This is where most of your budget goes, but prices have dropped significantly. You can find budget projectors for $60-100 that work perfectly fine for backyard use. They’re not cinema quality, but honestly, who cares when you’re sitting outside under the stars?
I grabbed one from Amazon for $80. It connects to my phone, laptop, or streaming stick via HDMI, and it’s bright enough for decent viewing after sunset. During the day it’s pretty much useless, but nighttime is when movie magic happens anyway.
Sound setup:
- Bluetooth speaker ($20-40 for a decent one)
- Connect it to your projector or streaming device
- Place it centrally for better audio distribution
The Seating and Snacks
Use whatever seating you already have—those pallet loungers, camping chairs, blankets on the ground, whatever works. The point is comfort and vibe, not perfection.
Set up a small table with movie snacks. I usually do popcorn (homemade in a large bowl), some candy, and drinks in a cooler nearby. Total snack investment: maybe $15-20 depending on how fancy you want to get.
Pro tips for backyard movie success:
- Start after dark for best picture quality
- Have bug spray and citronella candles handy
- Provide blankets because it gets cooler than you think
- Test your setup beforehand so you’re not troubleshooting during the movie
My total setup cost about $130 (projector, speaker, paint, and some decorative touches), and I’ve used it at least once a week all summer. Kids go absolutely bonkers for it, and adults secretly love it just as much. There’s something ridiculously fun about watching movies outside that makes even mediocre films more enjoyable.
Mini Garden Pathway with Stepping Stones
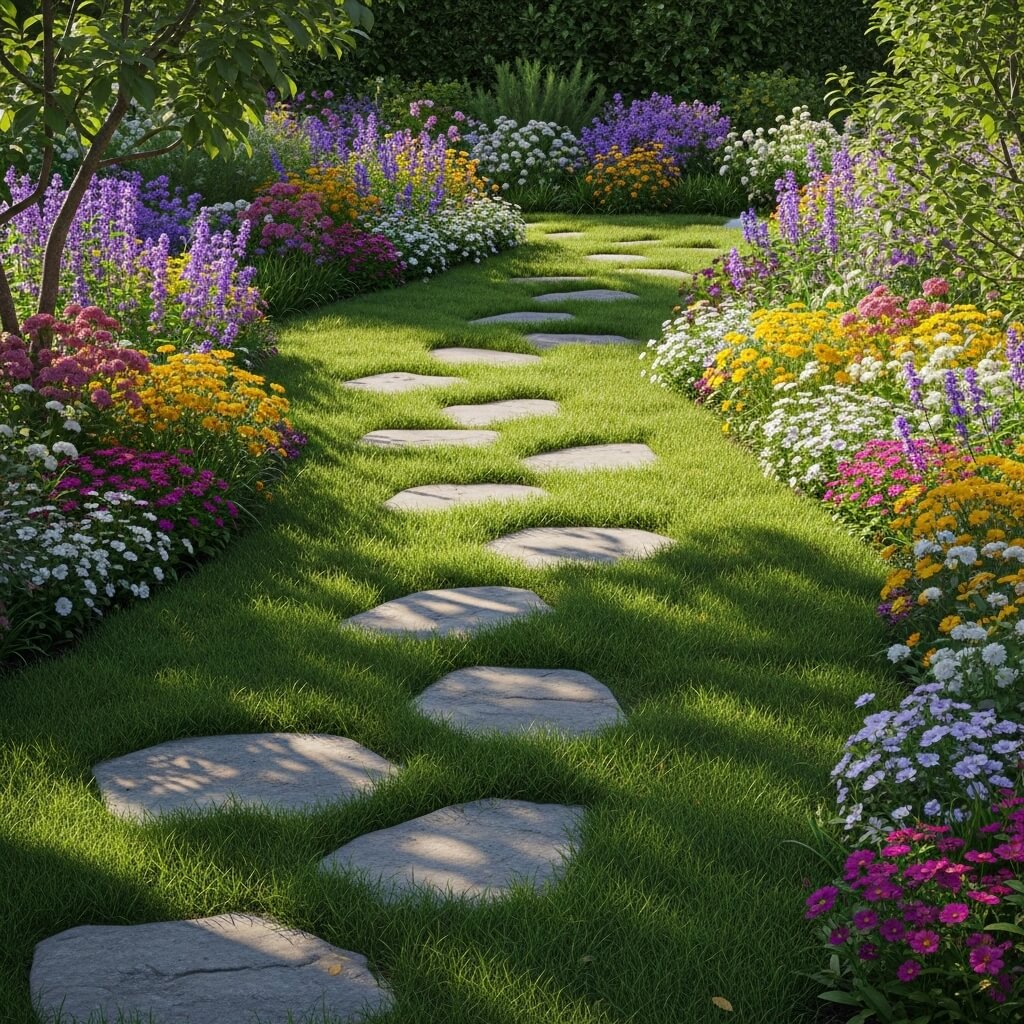
Got a muddy or worn path where everyone naturally walks through your yard? Turn it into an actual feature instead of an eyesore with a simple stepping stone pathway.
This is one of those projects that looks way more complicated than it actually is. I avoided it for months thinking I’d need to hire someone or rent equipment. Nope. Just needed a shovel, some stones, and a free afternoon.
Choosing Your Stones
Budget stepping stone options:
- Concrete pavers from home improvement stores ($1-4 each)
- Flat natural stones (check landscaping suppliers or even Craigslist)
- DIY concrete stones using molds and quickcrete (cheapest option)
- Recycled materials like thick pieces of slate or flagstone
I went with basic concrete pavers because they were having a sale—50 cents each. I bought 24 of them for $12, which was enough for a 15-foot pathway.
Installing Your Pathway
Mark out where people naturally walk. Don’t fight the natural flow; work with it. Your pathway should follow the desire path that’s probably already worn into your grass.
Lay out your stones first without installing them. Space them at a comfortable walking stride—usually about 18-24 inches apart. Walk the path to make sure the spacing feels natural before you commit.
Installation steps:
- Use the stone as a template and trace around it
- Dig out grass and soil about 2-3 inches deep
- Add a thin layer of sand for leveling
- Place the stone and press it down firmly
- Make sure it’s level or slightly below ground level (prevents tripping and makes mowing easier)
- Fill gaps with soil or sand
The whole process took me about three hours for my pathway, and most of that was the digging part. Not gonna lie, it’s a bit of a workout, but the results are so worth it.
I planted low-growing ground cover plants between some of the stones for a softer look. Creeping thyme works great and smells amazing when you step on it. The plants cost about $15 for a flat of six, and they’ve filled in nicely over the growing season.
Total pathway cost: $27 for stones and plants. It turned a muddy mess into a charming garden feature that actually adds value to my property (or so I tell myself).
Also Read: 10 Inspiring Room Divider Ideas for Dream Home Setup
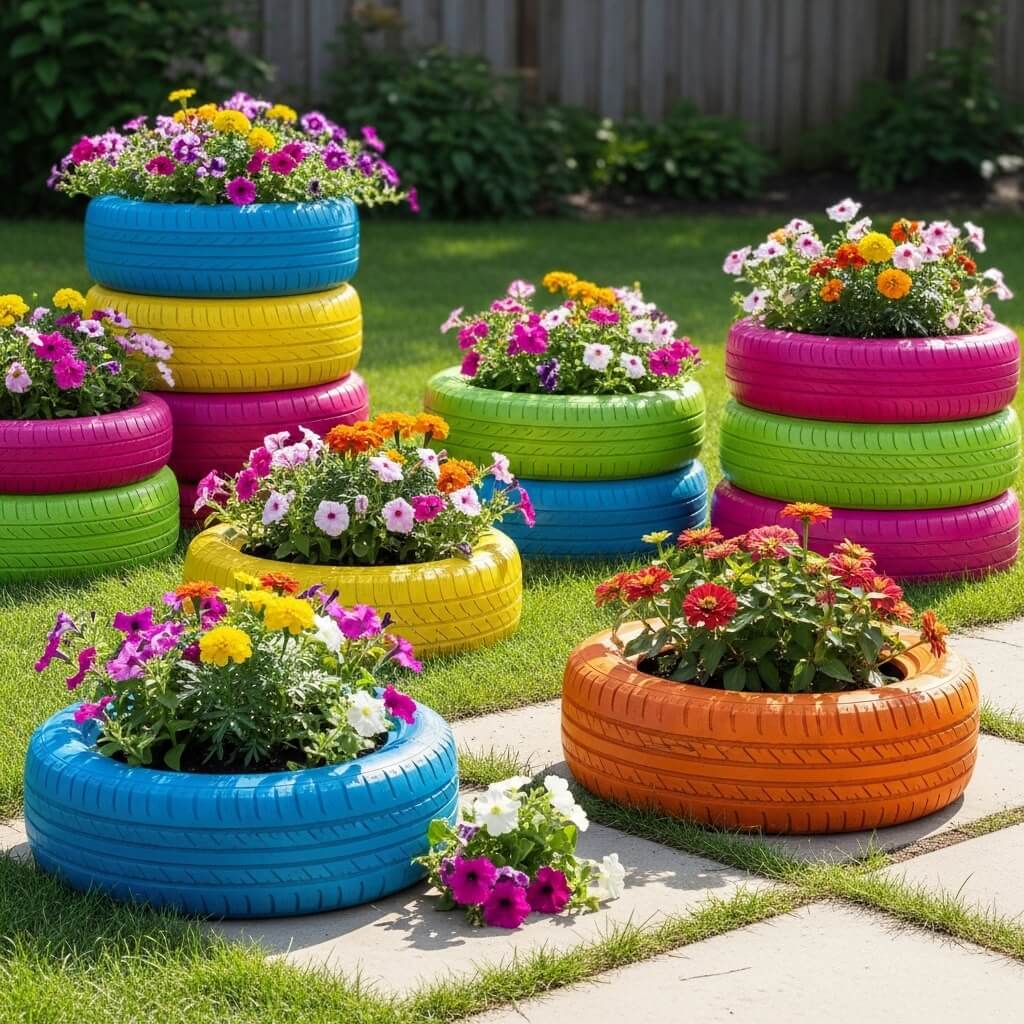
Upcycled Tire Planters Backyard Design
Okay, hear me out on this one. I know what you’re thinking: “Tire planters? What is this, 1987?” But stick with me because painted tire planters can actually look really cool when done right, and they’re basically free.
I was skeptical too until I saw some really well-executed tire planter setups that looked intentional and artistic rather than trashy. The key is in how you paint and arrange them.
Sourcing Free Tires
Call local tire shops and ask if you can have some used tires. They usually have to pay to dispose of them, so they’re often happy to hand them over. Make sure you get ones without steel belts showing or major damage.
I called three places before I found one that had a stack of perfect used tires. Walked away with five tires for exactly zero dollars.
Transforming Tires into Planters
Basic method:
- Clean tires thoroughly with soap and water
- Let them dry completely
- Apply primer designed for rubber/plastic
- Paint with outdoor spray paint in colors that match your theme
- Let dry for 24 hours
I went with bright colors—turquoise, yellow, and coral—to create a fun, tropical vibe. Used about $20 worth of spray paint total.
Arrangement ideas:
- Stack tires pyramid-style for a vertical garden
- Line them along a fence or wall
- Create a rainbow effect with different colored tires
- Cut tires to create different shapes (requires more effort but looks cool)
Fill your tires with potting soil and plant flowers, herbs, or even small vegetables. The rubber actually retains heat well, which some plants love.
Making It Look Intentional
The difference between “cute upcycled planters” and “trash in the yard” is all in the execution. Make it look deliberate:
- Keep color schemes cohesive
- Group them in odd numbers (three or five looks better than four)
- Plant them with lush, overflowing plants
- Place them in areas where they make sense (near fences, in corners, bordering patios)
I’ve got three tire planters stacked in a corner of my yard with trailing petunias spilling out of each level. The bright paint colors pop against my green fence, and honestly, nobody would guess they’re old tires unless I told them.
Total cost? $20 for paint and about $30 for potting soil and plants. That’s $50 for unique planters that would’ve cost way more if I’d bought fancy decorative pots.
FYI, I’ve also seen people use tires as bases for ottomans (wrap them in rope) or cut them into edging for garden beds. The possibilities are pretty endless if you’re willing to get creative.
Wrapping It All Up
So there you have it—ten backyard ideas that won’t drain your bank account but will absolutely transform your outdoor space into somewhere you actually want to spend time.
The truth is, creating a cozy backyard setup has way less to do with how much money you throw at it and way more to do with thoughtful design, resourcefulness, and a willingness to get a little DIY with it. I’ve spent less than $800 total on my entire backyard transformation (and that’s being generous), and it’s gone from a sad patch of dirt to my favorite part of my house.
Key takeaways here:
- Shop secondhand and salvage whenever possible—pallets, tires, and reclaimed materials are everywhere if you look
- DIY saves massive amounts of money on projects that are actually easier than you think
- Ambiance matters more than expensive furniture—string lights and a fire pit create more atmosphere than a $2000 sectional
- Work with what you’ve got instead of completely overhauling everything
- Start small and add elements over time as budget allows
Your backyard doesn’t need to look like it belongs in a magazine to be awesome. It just needs to reflect your style and provide a comfortable space where you’ll actually use it. Whether that’s movie nights, fire pit hangouts, or morning coffee on a pallet sofa, these budget ideas prove you can create something special without going broke.
Now get out there and start transforming that outdoor space. Your future self (and your wallet) will thank you. And hey, when your neighbors start asking where you got all your cool backyard stuff, feel free to send them this article. Or just smile mysteriously and let them think you’re way more put-together than you actually are. Either works 🙂


